Author: Evidence

  • M4 Mac Mini vs M4 MacBook Air: Which Should You Buy?

    M4 Mac Mini vs M4 MacBook Air: Which Should You Buy?

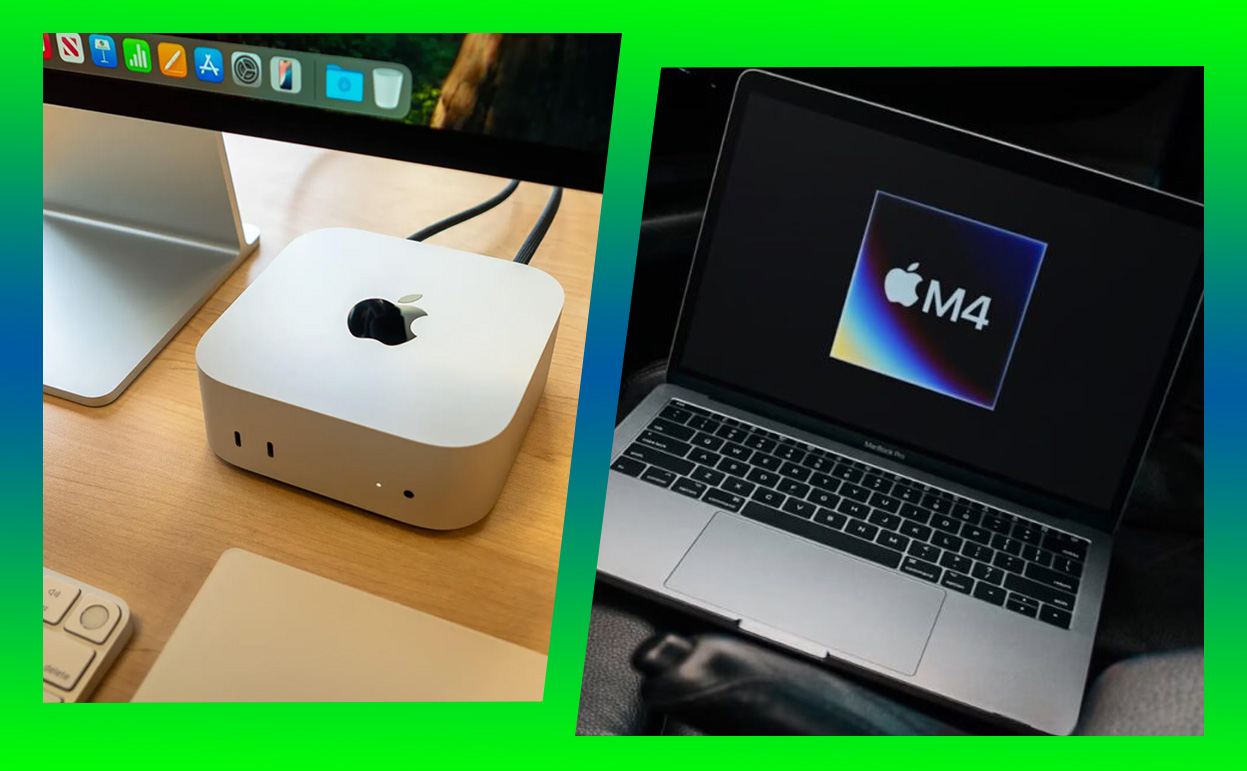
    Apple has upped the ante with its latest M4 chip lineup, bringing the M4 Mac Mini and M4 MacBook Air into the spotlight. Both devices promise exceptional performance and value, but they cater to slightly different audiences. If you’re trying to decide between the two, you’ve come to the right place. Let’s dive into the details to see which M4-powered machine is better for your needs.

    M4 Mac Mini vs M4 MacBook Air

    Whether you’re looking for a portable workhorse or a desktop powerhouse, this comparison will cover everything: performance, design, connectivity, price, and user experience.


    Design: Sleek vs. Compact

    M4 MacBook Air

    The M4 MacBook Air retains its iconic ultrathin design, making it one of the most portable laptops on the market. At just 11.3mm thick and weighing 2.7 pounds, it’s ideal for on-the-go professionals, students, and anyone who values mobility. The unibody aluminum chassis comes in four finishes: Midnight, Starlight, Space Gray, and Silver.

    • Strengths: Lightweight, elegant, and built for portability.
    • Drawbacks: The thin design limits ports, which might require adapters for connectivity.

    M4 Mac Mini

    The M4 Mac Mini is a desktop computer that prioritizes compactness without sacrificing power. It’s a square block of understated aluminum, measuring just 7.7 inches on each side and standing 1.4 inches tall. While it’s not portable like the MacBook Air, it can easily fit on any desk or entertainment center.

    • Strengths: Minimalistic design, small footprint, and customizable setup.
    • Drawbacks: Requires external peripherals like a monitor, keyboard, and mouse.

    Verdict:
    Choose the M4 MacBook Air for mobility and all-in-one convenience. Opt for the M4 Mac Mini if you prefer a powerful stationary setup.


    Performance: How Does the M4 Chip Shine?

    The M4 chip is Apple’s latest processor, offering unparalleled efficiency and speed. Both devices feature the base M4 chip, but the M4 Mac Mini also comes in M4 Pro and M4 Max variants, making it more scalable for demanding workloads.

    CPU and GPU Performance

    • Base M4 (Both): The 8-core CPU and 10-core GPU deliver a balanced performance for everyday tasks, light video editing, and multitasking.
    • M4 Pro/Max (Mac Mini Only): The Pro version features a 12-core CPU and 18-core GPU, while the Max pushes it further with a 14-core CPU and 32-core GPU—ideal for professionals working on 3D rendering, video production, and machine learning tasks.

    Thermal Management

    • M4 MacBook Air: Fanless design means silent operation, but the passive cooling can throttle performance under sustained heavy loads.
    • M4 Mac Mini: Includes active cooling, which ensures consistent performance even during demanding tasks.

    Verdict:
    For everyday users, both devices perform similarly. Professionals and power users, however, will benefit from the M4 Pro or M4 Max options on the Mac Mini.


    Display and Portability

    M4 MacBook Air

    • Comes with a 15.3-inch Liquid Retina display boasting 500 nits of brightness, True Tone, and P3 wide color.
    • The all-in-one design means you don’t need an external monitor.

    M4 Mac Mini

    • No built-in display, but it supports up to two monitors in the base model and up to four monitors in the M4 Max configuration.
    • Display capabilities include 6K resolution via Thunderbolt and 8K via HDMI 2.1, offering flexibility for multi-monitor setups.

    Verdict:
    The MacBook Air wins for simplicity and portability, while the Mac Mini is unbeatable for multi-monitor setups and customizable workstations.


    Connectivity and Ports

    M4 MacBook Air

    • Ports: Two Thunderbolt 4 ports, a MagSafe charging port, and a headphone jack.
    • Limitations: Requires dongles or hubs for additional connectivity.

    M4 Mac Mini

    • Ports:
      • Base model: Two Thunderbolt 4 ports, two USB-A ports, HDMI 2.1, Ethernet, and a headphone jack.
      • Pro/Max models: Four Thunderbolt 4 ports, making it a true connectivity hub.
    • Flexibility: The Mac Mini’s broader port selection supports a wide range of peripherals, including legacy devices.

    Verdict:
    The Mac Mini is far superior for connectivity. The MacBook Air suffices for minimalistic setups but lacks the versatility of the Mini.


    Battery Life vs. Energy Efficiency

    M4 MacBook Air

    The 18-hour battery life makes it a standout for mobile users. Whether you’re working remotely, traveling, or attending lectures, the MacBook Air ensures all-day productivity.

    M4 Mac Mini

    As a desktop computer, the Mac Mini doesn’t have a battery. However, its energy efficiency is excellent, consuming significantly less power than traditional desktops.

    Verdict:
    If portability and battery life are priorities, the MacBook Air is the clear winner.


    Price and Value

    M4 MacBook Air

    • Starts at $1,199 for the base model.
    • Includes a display, keyboard, and trackpad, so no additional purchases are required.

    M4 Mac Mini

    • Starts at $699, making it Apple’s most affordable M4-powered device.
    • Requires peripherals, which can add to the overall cost if you don’t already own them.

    Verdict:
    The Mac Mini offers incredible value for desktop users. The MacBook Air is more expensive upfront but includes everything you need for mobile productivity.


    Use Cases: Which One is Right for You?

    Choose the M4 MacBook Air If:

    • You’re always on the move and need a lightweight laptop.
    • You prioritize battery life and an all-in-one solution.
    • Your workflow involves web browsing, word processing, and light creative tasks.

    Choose the M4 Mac Mini If:

    • You need a powerful, customizable desktop for creative or professional workloads.
    • You already own or prefer external monitors and peripherals.
    • You want access to higher performance tiers (M4 Pro/Max).

    Head-to-Head Comparison Table

    Feature M4 Mac Mini M4 MacBook Air
    Starting Price $699 $1,199
    Portability Stationary Highly portable
    Display External (up to 6K) Built-in (15.3-inch)
    Battery Life N/A 18 hours
    Performance Options M4, M4 Pro, M4 Max M4 only
    Ports Extensive Minimal

    Conclusion: The Final Verdict

    Both the M4 Mac Mini and M4 MacBook Air are excellent choices, but the right one depends on your priorities.

    • Pick the MacBook Air if you need portability, long battery life, and an all-in-one device for casual to moderate use.
    • Pick the Mac Mini if you value performance, expandability, and a robust desktop setup for heavy workloads.

    In the end, both devices showcase Apple’s mastery of combining power and efficiency. Whether you go Mini or Air, you’re getting an M4-powered device that’s sure to impress.

    Also Check:

  • How to Fix iPads: My iPad Was Unresponsive Before Trying this Fixes

    How to Fix iPads: My iPad Was Unresponsive Before Trying this Fixes

    When your iPad starts acting up, your first thought might be to head to the nearest Apple Genius Bar. While Apple’s expert technicians provide fantastic service, you may not need them for every iPad problem. Many common issues can be fixed quickly, right from the comfort of your home. By understanding some easy troubleshooting techniques, you’ll not only save time and money but also gain confidence in managing your tech.

    How to Fix iPads

    This guide will cover the most common iPad issues and provide step-by-step solutions, from battery and connectivity problems to screen issues and app crashes. Each solution is crafted to be simple and effective, giving you the tools to resolve issues on your own.


    Step 1: Diagnosing the Issue

    The first step in any troubleshooting process is diagnosing the issue. Here’s how to pinpoint what’s wrong with your iPad.

    1.1 Look for Patterns in the Problem

    Does the screen freeze when you use certain apps, or does the battery drain unusually fast when you’re connected to Wi-Fi? Identifying patterns can help isolate the issue and streamline your troubleshooting process.

    1.2 Restart Your iPad

    The simplest fixes are often the most effective. Restarting your device is a great first step to resolve minor software glitches.

    • How to restart: Press and hold the power button until the slider appears, then drag the slider to turn off the device. After it turns off, press the power button again to restart.
    • Why it works: Restarting closes all running applications and refreshes the operating system, often resolving glitches.

    1.3 Check for iPadOS Updates

    Apple frequently releases updates for iPadOS, which may include fixes for bugs and performance improvements.

    • How to check for updates: Go to Settings > General > Software Update.
    • Tip: Make sure your device is connected to Wi-Fi and has a full charge before updating, as this can prevent interruptions during the installation.

    Section 2: Resolving Performance Issues

    If your iPad is running slow or freezing, there are several effective ways to restore it to peak performance.

    2.1 Free Up Storage Space

    When an iPad runs low on storage, it may slow down significantly. Check your storage usage to see if any files, apps, or media are taking up unnecessary space.

    • How to free up storage: Go to Settings > General > iPad Storage. You’ll see a breakdown of what’s using your space. Delete unused apps, large media files, or old documents.

    2.2 Clear Cache and Temporary Files

    Over time, cache and temporary files can accumulate, causing performance issues.

    • For Safari: Go to Settings > Safari > Clear History and Website Data.
    • For other apps: Some apps have an internal cache-clearing option; otherwise, uninstalling and reinstalling an app can clear its cache.

    2.3 Turn Off Background App Refresh

    Background App Refresh allows apps to update content even when they’re not in use, but it can slow down your iPad.

    • How to disable it: Go to Settings > General > Background App Refresh, and either turn it off completely or selectively disable it for apps you don’t use frequently.

    2.4 Restart or Force Restart Your iPad

    A regular restart can resolve many issues, but sometimes you may need to force restart your iPad.

    • How to force restart: Quickly press and release the volume up button, then the volume down button, and finally hold down the power button until the Apple logo appears.

    Step 3: Fixing Battery Issues

    Battery life is a common concern for iPad users. If your battery drains quickly or isn’t holding a charge, try these solutions.

    3.1 Check Battery Usage by App

    Some apps consume more power than others, especially those with frequent background activity.

    • How to check usage: Go to Settings > Battery and scroll down to see which apps are using the most battery.

    3.2 Reduce Screen Brightness

    Keeping your screen brightness at a high level drains the battery quickly.

    • How to reduce brightness: Go to Settings > Display & Brightness and adjust the brightness slider to a comfortable level.

    3.3 Enable Low Power Mode

    While iPads don’t have an official “Low Power Mode” like iPhones, you can manually disable certain features to conserve battery life.

    • Tips: Turn off Wi-Fi and Bluetooth when not in use, reduce screen brightness, and limit background app activity.

    3.4 Check for Battery Health

    If your iPad is still not holding a charge well, it might be due to battery health degradation. While iPadOS doesn’t have a built-in battery health feature, you can check battery health using third-party apps or consult Apple Support if the battery appears faulty.


    Step 4: Fixing Wi-Fi and Bluetooth Issues

    Connectivity issues are common but can be frustrating. Here’s how to resolve them quickly.

    4.1 Toggle Wi-Fi and Bluetooth

    Sometimes simply turning Wi-Fi or Bluetooth off and back on can resolve connectivity problems.

    • How to toggle: Swipe down to open the Control Center and toggle the Wi-Fi and Bluetooth icons off and on.

    4.2 Forget and Reconnect to Wi-Fi Networks

    If toggling Wi-Fi doesn’t work, try forgetting the network and reconnecting.

    • How to forget a network: Go to Settings > Wi-Fi, tap the (i) icon next to your network, and select Forget This Network.

    4.3 Reset Network Settings

    This is a more comprehensive solution that resets all Wi-Fi, Bluetooth, and VPN settings.

    • How to reset network settings: Go to Settings > General > Reset > Reset Network Settings. Note that you’ll need to re-enter Wi-Fi passwords afterward.

    Step 5: Screen Issues—Flickering, Unresponsiveness, and Cracks

    Screen issues, such as flickering or an unresponsive display, can disrupt usability. Here’s how to fix these problems.

    5.1 Restart the iPad

    A restart is often the simplest way to resolve minor screen glitches.

    5.2 Check for Physical Damage

    If your screen has visible cracks or damage, it may require professional repair. You can try a temporary fix by placing a screen protector over cracks to prevent them from spreading.

    5.3 Adjust Display Settings

    Certain settings can cause flickering, especially in low-light conditions.

    • True Tone: Go to Settings > Display & Brightness > True Tone and toggle it off if flickering continues.
    • Auto-Brightness: Disable auto-brightness to control brightness manually, which may help in some cases.

    5.4 Clean the Screen and Charging Port

    Dirt or debris can interfere with touch sensitivity, especially around the edges of the screen or in the charging port. Use a microfiber cloth to clean the screen, and a soft brush or compressed air for the charging port.


    Step 6: App Crashes and Freezing

    If your iPad’s apps keep crashing, try these methods to fix the problem.

    6.1 Update the App

    App updates often fix bugs and improve performance. Make sure all your apps are up to date by visiting the App Store.

    6.2 Clear Cache (if supported)

    Some apps allow you to clear cache data directly within the app settings. For others, you may need to reinstall the app to reset its cache.

    6.3 Delete and Reinstall the App

    If an app continues to crash, delete it and reinstall it from the App Store.

    6.4 Restart Your iPad

    A simple restart can refresh app functionality and resolve conflicts causing crashes.


    Step 7: Fixing Charging Issues

    If your iPad won’t charge, these steps should help.

    7.1 Check the Cable and Adapter

    Examine your charging cable and adapter for signs of wear. Try using a different Apple-certified cable or adapter to see if that solves the issue.

    7.2 Clean the Charging Port

    Debris in the charging port can prevent proper contact. Use compressed air or a soft brush to gently clean the port.

    7.3 Restart Your iPad

    Restarting can help in cases where software issues are preventing charging.

    7.4 Update to the Latest iPadOS

    Sometimes charging issues stem from software glitches. Updating to the latest iPadOS version can fix these problems.


    Step 8: When All Else Fails—Resetting Your iPad

    If none of the above solutions work, resetting your iPad can be a last-resort fix.

    8.1 Soft Reset

    A soft reset won’t delete your data but will reset all your settings to default.

    • How to soft reset: Go to Settings > General > Reset > Reset All Settings.

    8.2 Hard Reset

    A hard reset will erase all your data, so only use it if you’ve backed up your iPad.

    • How to hard reset: Go to Settings > General > Reset > Erase All Content and Settings.

    Conclusion: Fix Your iPad Without the Genius Bar

    Most iPad issues can be solved at home with the right approach. By following these tips, you’ll become a pro at diagnosing and fixing iPad issues, from screen glitches to connectivity problems. With this guide, there’s no need to make a trip to the Genius Bar—you’ve got the skills to keep your iPad in top shape right at home.

    Also Check:

  • iPad 10th Generation: Why Is It Still a Smart Buy?

    iPad 10th Generation: Why Is It Still a Smart Buy?

    The iPad 10th Generation Is Apple’s Best Entry-Level Tablet Yet, But How Is It a Smart Buy

    The iPad 10th generation has carved out a unique spot in Apple’s product lineup, standing as a bridge between premium and entry-level options. It’s been hailed as a capable device for students, professionals, and casual users who want the iPad experience without splurging on the Pro line.

    iPad 10th Generation Why Is It Still a Smart Buy

    With a modern design, robust performance, and great versatility, the iPad 10th generation continues to make a strong case as a smart buy, even as newer models emerge. In this article, we’ll dive deep into what makes the iPad 10th generation a compelling choice and whether it truly lives up to the “smart buy” label.


    1. Sleek and Modern Design: A Look That Feels Premium

    The iPad 10th generation brings a modern design reminiscent of the iPad Air and Pro models, which sets it apart from previous entry-level iPads. With flat edges, a slim form factor, and a sleek, industrial look, this iPad exudes a premium feel. The Home button is gone, replaced by Touch ID on the side, offering users more screen real estate and an uninterrupted display.

    • Why It’s a Smart Design: The redesign makes the iPad look like a much more expensive device. The flat edges are not only stylish but also functional, providing a better grip and a more compact profile.
    • Room for Improvement: While the design is modern, an OLED or mini-LED display would make it even more competitive by offering deeper blacks and richer colors.

    Display Quality

    With a 10.9-inch Liquid Retina display, the iPad 10th generation is a joy to use for browsing, reading, and media consumption. The 2360 x 1640 resolution and True Tone technology make colors vibrant and text sharp, which enhances the overall user experience.

    • Why It’s Still Relevant: The display is well-suited for most tasks, from streaming videos to editing photos. It strikes a good balance between quality and affordability, making it a practical option for most users.
    • What Could Be Better: A 120Hz refresh rate would make scrolling and gaming smoother. However, this feature is generally reserved for higher-end models, so it’s understandable at this price point.

    2. Processing Power: Smooth Performance Without the Premium Price

    Powering the iPad 10th generation is Apple’s A14 Bionic chip. While it’s not the newest processor in Apple’s lineup, it’s more than capable of handling daily tasks, light gaming, and multitasking. The A14 ensures the iPad can run iPadOS smoothly, supporting productivity apps, photo editing, and even some light video editing.

    • A Well-Rounded Performer: The A14 strikes a good balance between power and efficiency. Most users won’t notice a difference compared to newer chips unless they’re working with very intensive applications.
    • Potential for More Power: An upgrade to the M1 chip or the latest A-series chip would make the iPad 10th generation even more future-proof, especially with iPadOS updates continuing to push multitasking capabilities.

    Real-World Performance

    For students, professionals, and casual users, the iPad 10th generation is more than capable of managing daily tasks. Apps open quickly, animations are smooth, and multitasking is responsive. Even when using split-screen mode, this iPad keeps up without noticeable lag.

    • Why It’s Still a Smart Choice: The A14 Bionic chip delivers excellent performance for typical use cases without a premium price tag, making it ideal for those who need a reliable tablet without overpaying for power they won’t fully utilize.

    3. iPadOS and Software Experience

    One of the main reasons why the iPad 10th generation remains a great buy is the software experience. Apple’s iPadOS has made strides in offering a desktop-like experience on a tablet, bringing features like multitasking, Stage Manager, and improved Files app functionality.

    Enhanced Productivity with iPadOS

    The iPad 10th generation runs iPadOS 16, providing a suite of tools that make it ideal for work, education, and entertainment.

    • Multitasking: The ability to use Split View and Slide Over, along with a variety of widgets, allows users to stay productive. While it may not support the full Stage Manager experience like the M1 iPad models, it still offers a high level of multitasking for an entry-level device.
    • Apple Ecosystem Benefits: The seamless integration with other Apple devices, like MacBooks and iPhones, makes this iPad a smart buy for those already within the Apple ecosystem.

    What Could Be Better in the Software Department?

    While iPadOS brings a lot of features, the iPad 10th generation doesn’t support all multitasking capabilities. A stronger processor could allow for a more robust multitasking experience in future models, making this iPad even better suited for power users.


    4. Battery Life: All-Day Usage with Ease

    The battery life on the iPad 10th generation is commendable, often providing up to 10 hours on a single charge with moderate usage. This makes it ideal for students, remote workers, and anyone on the go who wants a device that can keep up throughout the day.

    • Why It’s a Smart Buy: The iPad 10th generation’s battery life ensures you don’t have to worry about frequent charging, making it dependable for travel and everyday use.
    • Where It Could Improve: Faster charging would be a nice addition, especially since the iPad has now adopted USB-C charging. A battery that can reach 50% in 30 minutes would further enhance its appeal.

    5. Camera Quality: Decent for a Tablet

    While the camera setup on the iPad 10th generation isn’t groundbreaking, it’s solid for a tablet. It has a 12MP rear camera and a 12MP ultra-wide front camera, making it sufficient for video calls, document scanning, and occasional photos.

    • Smart Choice for Casual Photography: The camera isn’t meant to replace a smartphone but works well enough for casual use, which is often all that’s needed on a tablet.
    • Room for Growth: Improved low-light performance would be a welcome addition. Adding a LiDAR scanner, like in the Pro models, would make it more versatile for AR applications and enhanced photography.

    6. Accessories and Versatility

    One of the strengths of the iPad 10th generation is its compatibility with a range of accessories, making it a highly versatile device for different user needs.

    Apple Pencil and Keyboard Compatibility

    The iPad 10th generation is compatible with the 1st-gen Apple Pencil, allowing users to draw, take notes, and engage with creative apps. Additionally, it works well with Bluetooth keyboards, which transforms it into a quasi-laptop for productivity tasks.

    • Why It’s a Smart Buy for Creatives and Students: The Apple Pencil expands the iPad’s capabilities, turning it into a drawing tablet for creatives or a note-taking device for students. The USB-C port also means that users can connect a range of peripherals.
    • Future Potential: Support for the 2nd-gen Apple Pencil would eliminate the need for adapters, making it more convenient. Also, offering a more robust typing experience with an official Apple keyboard case would be a game-changer.

    7. iPad 10th Generation for Entertainment and Gaming

    The iPad 10th generation shines as an entertainment hub. Its bright display, robust speakers, and impressive app ecosystem make it ideal for streaming, gaming, and more.

    Streaming and Content Consumption

    Thanks to the large 10.9-inch screen, watching movies, TV shows, or YouTube videos on the iPad 10th generation is an enjoyable experience. The stereo speakers provide good sound quality for a tablet, and the display quality brings visuals to life.

    • Why It’s a Smart Buy for Entertainment: This iPad is priced reasonably for a device that delivers a great content consumption experience. It’s a go-to choice for those who want a versatile device for reading, streaming, and gaming.

    Gaming Performance

    The A14 chip is capable of handling many popular games, and the App Store offers a wide selection. Whether it’s Apple Arcade games or graphics-intensive titles, the iPad 10th generation holds up well.

    • Room for Improvement: A higher refresh rate would make gaming smoother, especially for action-packed games. The 11th-generation iPad could benefit from ProMotion or similar technology.

    8. Price and Value Proposition

    One of the biggest selling points of the iPad 10th generation is its value for money. It’s priced below Apple’s Pro and Air models but still offers a lot of the same functionality. For users who need a capable tablet without breaking the bank, it’s hard to beat this balance of price and performance.

    Why It’s a Smart Investment

    For those looking for a device that can handle work, school, and play, the iPad 10th generation offers a compelling package. It’s a solid investment that can be expected to perform well for several years, even as Apple continues to release software updates.


    9. What Could Be Better in Future Models?

    While the iPad 10th generation is a well-rounded device, a few enhancements could elevate the user experience further. Here’s what would make it even more appealing:

    • Faster Processor: An A16 or M1 chip would make it more future-proof and enable better multitasking.
    • Better Accessory Support: Support for the 2nd-gen Apple Pencil and more advanced keyboards would add convenience.
    • Improved Display: A higher refresh rate and OLED options would enhance viewing and gaming experiences.

    Conclusion: A Smart Buy for Today and Beyond

    The iPad 10th generation remains a standout choice for anyone seeking a tablet that delivers high performance without the premium price tag. From its design to its multitasking capabilities, it offers a solid user experience that meets the needs of students, professionals, and casual users alike. While there are areas for improvement, it’s clear that the iPad 10th generation is a smart buy, with a balance of features and affordability that’s hard to beat.

    Also Check:

  • How to Turn On Noise Cancelling on Beats Studio Pro

    How to Turn On Noise Cancelling on Beats Studio Pro

    Beats Studio Pro headphones deliver powerful sound quality and Active Noise Cancelling (ANC) technology that helps you enjoy your music, podcasts, or calls without interruptions. ANC works by analyzing ambient noise and generating sound waves to counteract it, allowing you to block out everything from the hum of public transport to bustling street sounds.

    How to Turn On Noise Cancelling on Beats Studio Pro

    Here’s a step-by-step guide to help you turn on noise cancelling on your Beats Studio Pro headphones and make the most out of this immersive feature.


    1. Power On Your Beats Studio Pro Headphones

    To begin, make sure your headphones are turned on:

    • Locate the Power Button: You’ll find the power button on the right earcup of your Beats Studio Pro.
    • Press and Hold: Press and hold the power button until the LED light turns on, which signals that your headphones are now powered up.

    Quick Tip: It’s a good idea to check that your headphones are charged, as ANC can drain the battery faster than regular listening mode.


    2. Activate Noise Cancelling Mode

    Once your headphones are powered on, you’re ready to turn on noise cancelling:

    • Press the ‘b’ Button on the Left Earcup: The Beats Studio Pro has a multifunction button with the Beats logo on the left earcup. Press and hold this ‘b’ button to toggle between Active Noise Cancelling (ANC) and Transparency Mode.
    • Listen for the Audio Cue: You’ll hear a soft chime when ANC is activated, letting you know that you’re now in Noise Cancelling Mode. This audio cue confirms that ANC is turned on.

    Note: Pressing the ‘b’ button again will switch to Transparency Mode, which allows outside sounds to pass through. This is useful for situations where you need to hear what’s going on around you, like in airports or while walking outdoors.


    3. Check ANC Status with the Beats App (Optional)

    If you’re using an Android device, you can manage your Beats Studio Pro settings with the Beats app:

    • Open the Beats App: Download and open the Beats app from the Google Play Store if you haven’t done so already.
    • Find Your Device: Once your Beats Studio Pro is connected, locate it within the app.
    • Toggle Noise Cancelling: Within the app, you’ll have the option to toggle Noise Cancelling on or off, as well as check the battery life and update firmware. This app provides an easy interface to manage your ANC settings.

    4. Adjusting ANC Levels with Apple Devices

    For iOS devices, you can adjust ANC settings directly from the Bluetooth menu, especially if you’re using Beats headphones with an Apple device like an iPhone, iPad, or MacBook:

    • Open Settings: On your iPhone or iPad, go to the Settings app.
    • Bluetooth Menu: Tap on Bluetooth, then find your Beats Studio Pro in the list of paired devices.
    • Tap ‘i’ Icon: Tap the small ‘i’ icon next to your Beats Studio Pro to open its settings.
    • Noise Control: You’ll see options for Noise Cancelling and Transparency Mode. Select Noise Cancelling to activate ANC on your headphones.

    This method is convenient for Apple users who want to manage their noise-cancelling settings without touching the headphones directly.


    5. Use Transparency Mode as an ANC Alternative (When Needed)

    There may be times when you need to hear your surroundings, even while wearing headphones:

    • Switch to Transparency Mode: By pressing and holding the ‘b’ button on the left earcup again, you can activate Transparency Mode, allowing external sounds to pass through so you’re more aware of your environment.
    • Ideal for Situations Requiring Awareness: Transparency Mode is perfect for environments where you need to stay alert, like crossing busy streets, walking through crowded areas, or listening for boarding announcements at the airport.

    Switching between ANC and Transparency Mode ensures that you have full control over your listening experience in any environment.


    6. Troubleshooting Noise Cancelling Issues

    If you find that ANC doesn’t seem to work properly, try these troubleshooting tips:

    • Check the Battery: ANC can be battery-intensive, and if your Beats Studio Pro has a low battery, ANC may not perform optimally. Ensure your headphones are adequately charged.
    • Reset Your Beats Studio Pro: If ANC isn’t working or you experience audio issues, try resetting your headphones by pressing and holding the power and volume down buttons for about 10 seconds.
    • Clean the Ear Cushions: Sometimes, sound quality and ANC performance are impacted by dirty or obstructed ear cushions. Gently clean them to ensure there are no obstructions.

    7. Maximize Your ANC Experience

    To get the most out of ANC on your Beats Studio Pro, follow these best practices:

    • Wear the Headphones Correctly: Ensure a snug fit with the earcups fully covering your ears, as this will enhance the effectiveness of noise cancelling.
    • Use ANC in Noisy Environments: ANC shines in environments with consistent background noise, like planes, trains, or busy offices. Experiment with using ANC in these settings to see just how much background noise it can cut out.
    • Take Breaks: While ANC is fantastic for immersive listening, using it continuously can cause ear fatigue. Taking brief breaks helps maintain audio clarity and comfort over longer listening sessions.

    Final Thoughts: Enjoy Uninterrupted Sound with Beats Studio Pro Noise Cancelling

    Activating noise cancelling on the Beats Studio Pro can significantly elevate your audio experience, creating an oasis of sound by blocking out distractions. With simple controls and the option to manage ANC settings on both Android and iOS, you can enjoy a fully immersive listening experience whether you’re in a bustling city or a quiet room. Follow these steps, and get ready to enjoy audio in its purest form, free from the noise of the world around you.

    Also Check:

  • How to Pair Beats Studio Pro: A Step-by-Step Guide for Seamless Connectivity

    How to Pair Beats Studio Pro: A Step-by-Step Guide for Seamless Connectivity

    Pairing your Beats Studio Pro headphones is a simple yet essential process to ensure the best audio experience across all your devices. Whether you’re connecting to an iPhone, Android phone, Mac, Windows PC, or another device, here’s everything you need to know to get your Beats Studio Pro paired and ready to go.

    How to Pair Beats Studio Pro


    Step 1: Charge Your Beats Studio Pro

    Before pairing, make sure your Beats Studio Pro headphones have enough charge. This step ensures that your headphones won’t shut down mid-setup, giving you a smooth pairing experience.

    • How to Check Battery: Power on your headphones and look for the LED indicators. A full charge is ideal, but a partially charged battery should suffice for initial pairing.

    Step 2: Put Your Beats Studio Pro into Pairing Mode

    To pair your Beats Studio Pro with any device, you’ll need to put the headphones into pairing mode.

    1. Power On: Press and hold the power button on your Beats Studio Pro until the LED starts blinking.
    2. Enter Pairing Mode: The LED light will flash, indicating that your Beats Studio Pro is now in pairing mode and ready to connect.

    Step 3: Pairing Beats Studio Pro with an iPhone or iPad

    Apple users benefit from seamless pairing, thanks to the Beats Studio Pro’s compatibility with the Apple ecosystem.

    1. Unlock your iPhone or iPad and ensure Bluetooth is enabled (Settings > Bluetooth).
    2. Bring your Beats Studio Pro close to your iPhone/iPad. A prompt should appear automatically on the screen.
    3. Tap “Connect” on the prompt.
    4. Once connected, you’ll see a confirmation screen showing the battery status of your Beats Studio Pro.

    Tip: If the prompt doesn’t appear, you can manually connect via Settings > Bluetooth and selecting “Beats Studio Pro” from the list of available devices.


    Step 4: Pairing Beats Studio Pro with an Android Device

    Pairing with Android is easy, and you can also download the Beats app from the Google Play Store to enhance the experience.

    1. Open the Settings on your Android device, then navigate to Bluetooth.
    2. Make sure Bluetooth is enabled.
    3. Select “Pair New Device”.
    4. Your Beats Studio Pro should appear in the list. Tap “Beats Studio Pro” to connect.

    If you use the Beats app, simply follow the on-screen instructions after opening the app, which will guide you through the pairing process and allow you to adjust additional settings.


    Step 5: Pairing Beats Studio Pro with a Mac

    To connect your Beats Studio Pro with a Mac computer, you’ll go through the Bluetooth settings in macOS.

    1. Open System Preferences by clicking on the Apple logo at the top left corner of your screen.
    2. Select Bluetooth and ensure it’s turned on.
    3. With your Beats Studio Pro in pairing mode, it should appear in the list of devices. Click on “Beats Studio Pro.”
    4. When prompted, select Connect.

    Troubleshooting Tip: If your Beats Studio Pro doesn’t appear, try turning Bluetooth off and back on again, and ensure your headphones are in pairing mode.


    Step 6: Pairing Beats Studio Pro with a Windows PC

    Connecting your Beats Studio Pro to a Windows PC is straightforward with the Bluetooth settings in Windows.

    1. Open the Start Menu and go to Settings.
    2. Select Devices, then Bluetooth & Other Devices.
    3. Toggle Bluetooth on if it’s not already enabled, then click on Add Bluetooth or Other Device.
    4. Choose Bluetooth from the options.
    5. With your Beats Studio Pro in pairing mode, select it from the list of available devices, and follow any additional prompts to connect.

    Step 7: Pairing with Additional Devices

    The Beats Studio Pro can connect to multiple devices but will prioritize the last device it was actively paired with. To connect to a new device:

    1. Repeat the pairing process for each device.
    2. If switching frequently, it can help to disconnect from one device before connecting to another for a quicker switch.

    Managing and Switching Connections

    With multipoint Bluetooth, the Beats Studio Pro can switch between devices more smoothly. Here’s how to manage it:

    • On an iPhone or iPad: Go to Control Center, tap on the audio output selector, and choose your Beats Studio Pro from the list.
    • On Android: Access the Bluetooth menu under Settings and select Beats Studio Pro to make them the active audio device.
    • On Mac and Windows: Go to Sound Settings or Bluetooth Settings, depending on the device, and make sure Beats Studio Pro is selected as your primary output.

    Troubleshooting Pairing Issues

    If you’re having trouble pairing your Beats Studio Pro with any device, here are a few tips to try:

    • Restart your headphones by powering them off and on again.
    • Forget the device on your smartphone or computer’s Bluetooth settings, then re-pair.
    • Reset your Beats Studio Pro by pressing and holding the power and volume-down buttons until the LED flashes.

    Final Thoughts: Enjoying Your Beats Studio Pro

    Now that your Beats Studio Pro is successfully paired, you’re ready to enjoy high-quality sound across all your devices. Remember to take advantage of features like the Beats app on Android for extra customization and the easy switching on Apple devices.

    Also Check:

  • How to Fold Beats Studio Pro: The Right Way to Keep Your Headphones Safe

    How to Fold Beats Studio Pro: The Right Way to Keep Your Headphones Safe

    When it comes to premium headphones like the Beats Studio Pro, it’s not just about enjoying incredible sound; it’s also about proper care and maintenance. Learning how to fold your Beats Studio Pro correctly can make a huge difference in keeping them secure and extending their lifespan. Here’s your guide on how to fold these headphones the right way and some tips on storage to make sure your Beats stay in top shape.

    How to Fold Beats Studio Pro


    Step 1: Power Off Your Beats Studio Pro

    Before you fold your Beats Studio Pro, turn them off to conserve battery. This also helps prevent accidental button presses while you’re folding and storing them.

    1. Locate the power button on the right earcup and press and hold it for about one second until you hear the power-down chime.
    2. Confirm the LED light is off – this means your headphones are now turned off and ready for folding.

    Step 2: Find the Rotation Point of Each Earcup

    The Beats Studio Pro’s design includes a swivel point for each earcup, allowing for a smooth, compact fold.

    1. Grip Each Earcup Gently: Hold one earcup at a time without pressing too hard on the speaker mesh or buttons.
    2. Locate the Hinge: Each earcup can pivot towards the headband. Find this hinge point on each side of the headphones.

    Step 3: Fold the Earcups Inward

    With each earcup securely in hand, it’s time to start the fold:

    1. Rotate Each Earcup Inward: Swivel the earcups toward the inner part of the headband. The Beats Studio Pro’s earcups will align neatly against each other, creating a compact shape.
    2. Avoid Excess Pressure: Don’t force the earcups beyond the swivel point. The fold should feel smooth, and the earcups should rest comfortably against each other without straining the hinge.

    Step 4: Place the Folded Headphones in Their Case

    Once you’ve folded your Beats Studio Pro, it’s time to place them in the included case to keep them safe from damage and dust.

    1. Open the Case Fully: Unzip the Beats Studio Pro case entirely to make sure you’re not squeezing the headphones while placing them inside.
    2. Place the Headphones Gently: Position the folded Beats with the headband resting against the back of the case and the earcups securely fitted inside.
    3. Zip Up the Case: Close the case securely. This protects your Beats Studio Pro from external impacts, moisture, and dust while not in use.

    Tips for Storing and Transporting Your Beats Studio Pro

    To keep your Beats Studio Pro in optimal condition, follow these additional tips on storage and transport:

    1. Avoid Excess Heat: Store your headphones in a cool, dry place. High temperatures can damage both the battery and earcup materials.
    2. Don’t Stuff the Case: The Beats Studio Pro case is designed to fit just the headphones and, if necessary, the charging cable. Avoid adding bulky items inside the case, as this can put pressure on the headphones.
    3. Store in a Safe Spot: Place your case somewhere safe, like a drawer or backpack pocket, where it won’t be squashed or crushed by other items.

    Why Folding Your Beats Studio Pro Correctly Matters

    Properly folding and storing your Beats Studio Pro doesn’t just keep them organized—it actually helps extend their lifespan. Folding the headphones the right way reduces the strain on the earcup hinges, keeps the materials in better condition, and protects the headphone internals from damage.

    With regular practice, folding your Beats Studio Pro will become second nature, and you’ll have the peace of mind that comes with knowing your headphones are well-cared-for. Now, you’re all set to fold, store, and protect your Beats Studio Pro like a pro!

    Also Check:

  • How Long Do Beats Studio Pro Take to Charge: Get the Full Breakdown on Charging Times

    How Long Do Beats Studio Pro Take to Charge: Get the Full Breakdown on Charging Times

    Beats Studio Pro headphones bring a great mix of sound quality, comfort, and modern features, including a powerful battery life that can last through multiple listening sessions. But how long do they take to charge? Let’s dive into the details, breaking down charging times, methods, and tips for maximizing battery life.

    How Long Do Beats Studio Pro Take to Charge


    Quick Overview: Charging Time for Beats Studio Pro

    The Beats Studio Pro headphones come equipped with a fast-charging feature, making it easy to get back to your playlist in no time. Here’s a breakdown:

    • Full Charge: 2 hours
    • Fast Fuel Quick Charge: 10 minutes for up to 4 hours of playback

    Let’s explore each of these options in detail so you can decide which charging method best suits your routine.


    Full Charge: 2 Hours to Max Capacity

    If your Beats Studio Pro headphones are completely drained, a full charge will take about 2 hours. This is ideal for anyone who likes to charge their headphones at the end of the day or before a long trip. When fully charged, the Beats Studio Pro offers up to 40 hours of playback time without noise cancelling or up to 24 hours with active noise cancellation (ANC) on.

    • Tip: Charge your headphones overnight or while you’re working to ensure they’re at full capacity when you’re ready to use them.

    Fast Fuel Quick Charge: 10 Minutes for 4 Hours of Playback

    One of the most convenient features of the Beats Studio Pro is Fast Fuel, a quick-charge option that can be a lifesaver when you’re low on time. Just 10 minutes of charging gives you up to 4 hours of playback.

    Fast Fuel is perfect if you’re about to head out and realize your battery is low. It allows you to get enough charge to last through workouts, commutes, or a few episodes of your favorite podcast without waiting for a full charge.


    Charging Methods: USB-C for Fast, Efficient Power

    The Beats Studio Pro headphones now charge via USB-C, which is compatible with most modern devices. This universal charging option makes it easy to charge your headphones with the same cable you might use for other devices, including many smartphones and laptops. USB-C offers efficient, fast charging, making it possible to reach full capacity faster than older charging methods.

    • Recommendation: Always use a high-quality USB-C cable and a compatible charging block to ensure that you’re getting the most efficient charge. This can help prevent overheating and optimize charging speed.

    Monitoring Battery Life: Keep Track of When It’s Time to Charge

    To avoid running out of battery unexpectedly, keep an eye on your Beats Studio Pro’s battery level:

    • Using Apple Devices: When paired with an iPhone, iPad, or Mac, your Beats Studio Pro battery level will appear automatically in the device’s battery widget, keeping you informed about when it’s time to charge.
    • Beats App for Android: If you’re using Android, the Beats app allows you to view your battery status, among other features, so you always know how much listening time is left.
    • Audio Alerts: The Beats Studio Pro also provides low-battery warnings when it’s time to plug in. You’ll hear a chime as a reminder that your battery is getting low, so you’re not caught off guard.

    Tips to Extend Battery Life on Beats Studio Pro

    While charging is easy, it’s always helpful to extend battery life between charges. Here are some tips for maximizing playback time:

    1. Use ANC Sparingly: Active Noise Cancelling (ANC) can significantly reduce battery life. If you’re in a quiet place, consider turning ANC off to get more listening hours.
    2. Enable Auto-Off: The Beats Studio Pro headphones have an auto-off feature that powers them down when not in use. Activating this setting helps save battery when you’re not actively listening.
    3. Monitor Volume Levels: Higher volume settings drain the battery faster. Try to listen at a moderate volume for longer playback.
    4. Charge Regularly: Rather than letting the battery drain completely, try to keep it above 20%. Regular, short charges can help maintain the battery’s health over time.

    How Does Charging Compare to Other High-End Headphones?

    When compared with other top-tier headphones, the Beats Studio Pro holds its own in terms of charging efficiency and playback time. Here’s a quick look:

    • Sony WH-1000XM5: Full charge takes about 3 hours, with a quick charge offering 3 hours of playback in 10 minutes.
    • AirPods Max: Roughly 2 hours for a full charge; however, they don’t offer a quick charge mode.
    • Bose QuietComfort 45: Full charge takes about 2.5 hours, and a 15-minute quick charge provides up to 3 hours of playback.

    With a full charge time of just 2 hours and 4 hours of playback from a quick 10-minute charge, Beats Studio Pro matches up well against its competitors, giving you a solid balance of convenience and battery life.


    Final Thoughts: Charging Made Simple and Efficient

    The Beats Studio Pro headphones have you covered with a fast, convenient charging setup that adapts to your lifestyle. Whether you’re looking for a quick top-up before heading out the door or a full charge to last through a full day, these headphones make it easy to stay powered up.

    Also Check:

  • The Sceptre New 27-inch Gaming Monitor is Now Available at a Budget Friendly Price (with 25% off) this Black Friday

    The Sceptre New 27-inch Gaming Monitor is Now Available at a Budget Friendly Price (with 25% off) this Black Friday

    Upgrade your gaming setup with the Sceptre 27-inch Gaming Monitor this Black Friday—now only $89.97 with 25% off!

    If you’ve been searching for a gaming monitor that delivers incredible performance without breaking the bank, the Sceptre New 27-inch Gaming Monitor (E275W-FW100T) might be the answer. With its impressive specs, sleek design, and budget-friendly price, this Black Friday deal is too good to miss. Here’s a detailed look at why this monitor stands out in the crowded gaming market.

    Sceptre New 27-inch Gaming Monitor


    Key Features at a Glance

    • Screen Size: 27 inches
    • Resolution: Full HD 1080p
    • Refresh Rate: 100Hz
    • Response Time: 1ms
    • Color Gamut: 100% sRGB
    • Ports: 2 HDMI, 1 DisplayPort
    • Additional Features: Built-in speakers, Eye Care technology, VESA mount compatibility

    Design and Build Quality: Sleek and Frameless

    The first thing you’ll notice about the Sceptre E275W-FW100T is its frameless design, which gives it a modern and premium look. Its glossy black finish complements any gaming or work setup. The monitor is sturdy yet lightweight, making it easy to move around or mount using the VESA wall mount compatibility.


    Display Performance: Stunning Visuals at Full HD

    Equipped with 100% sRGB color gamut, this monitor produces vibrant, true-to-life colors. Whether you’re gaming, designing, or streaming, the 16:9 aspect ratio and 1080p resolution ensure crisp and clear visuals.

    The 100Hz refresh rate provides smoother motion, making it perfect for fast-paced gaming. Paired with a 1ms response time, the monitor minimizes motion blur, ensuring every frame is sharp and responsive.


    Gaming Features: Tailored for Immersive Gameplay

    Gamers will appreciate the built-in FPS and RTS modes, which are optimized for First Person Shooters and Real-Time Strategy games. These presets enhance visibility and contrast, giving you a competitive edge.

    The AMD FreeSync technology eliminates screen tearing and stuttering, making your gaming experience seamless. Whether you’re playing intense battle royales or exploring open-world adventures, this monitor keeps up with every move.


    Connectivity: Versatile and Convenient

    With two HDMI ports and a DisplayPort, this monitor offers flexibility for multiple devices. Switch between your gaming console, PC, and streaming device with ease. The audio-in and headphone jack provide additional audio options, catering to both casual and immersive setups.


    Eye Care Technology: Gaming Without Strain

    Long hours in front of a screen can strain your eyes, but the Blue Light Shift feature on the Sceptre monitor helps reduce fatigue. Whether you’re working late or pulling an all-night gaming session, this technology keeps your eyes comfortable.


    Built-in Speakers: Space-Saving Audio Solution

    The built-in speakers provide decent audio output for casual use. While audiophiles or competitive gamers may still prefer external speakers or headphones, these built-in options save desk space and eliminate the need for additional accessories.


    Setup and Ergonomics: Customizable Viewing Experience

    The monitor’s VESA mount compatibility allows you to mount it on a wall or arm, optimizing your viewing position. Combined with its frameless design, it offers a clutter-free and ergonomic setup, perfect for both work and play.


    Who Should Buy the Sceptre 27-inch Gaming Monitor?

    • Budget-Conscious Gamers: At just $89.97 (25% off for Black Friday), this monitor offers incredible value.
    • Casual and Competitive Gamers: Features like 1ms response time and 100Hz refresh rate cater to a variety of gaming needs.
    • Content Creators: The 100% sRGB color gamut ensures accurate color representation, making it a great choice for photo and video editing.
    • Office Workers: Blue Light Shift and built-in speakers make it ideal for long workdays.

    Comparison: How Does It Stack Up?

    Feature Sceptre 27” 100Hz Sceptre 27” 75Hz Competitor: ASUS VG27A
    Refresh Rate 100Hz 75Hz 75Hz
    Response Time 1ms 5ms 4ms
    Price (Black Friday) $89.97 $88.55 $199.99
    AMD FreeSync Yes No Yes

    For just a slight price difference, the Sceptre 27” 100Hz Gaming Monitor offers significantly better performance than its 75Hz counterpart, making it the clear winner.


    Pros and Cons

    Pros:

    • Affordable pricing, especially during Black Friday.
    • Exceptional display performance with vibrant colors and smooth motion.
    • Features tailored for gamers, including AMD FreeSync and gaming presets.
    • Ergonomic and space-saving design.

    Cons:


    Verdict: A Must-Buy This Black Friday

    The Sceptre New 27-inch Gaming Monitor is an unbeatable deal at just $89.97. It combines sleek design, excellent performance, and gamer-centric features at a budget-friendly price. Whether you’re upgrading your gaming rig or setting up a dual-monitor workstation, this monitor is a fantastic choice.

    This Black Friday, don’t miss the chance to snag this high-performance monitor at a steep discount. Your gaming and productivity setup will thank you!

  • If You’re Looking for a Compact and Versatile Tablet, the iPad Mini 6 Display Features Still Hold Up

    If You’re Looking for a Compact and Versatile Tablet, the iPad Mini 6 Display Features Still Hold Up

    In the world of tablets, the iPad Mini 6 stands out as a unique offering. It’s compact, lightweight, and packs a punch with performance. But what truly makes this pint-sized powerhouse shine is its display. While newer iPads have entered the market, the iPad Mini 6’s screen remains one of its most impressive features, blending advanced technology with a user-friendly experience.

    If You’re Looking for a Compact and Versatile Tablet, the iPad Mini 6 Display Features Still Hold Up

    In this review, we’ll take an in-depth look at the display features of the iPad Mini 6 and why they continue to make it a great choice in 2024 for anyone seeking a compact and versatile tablet.


    An Overview of the iPad Mini 6

    Released in 2021, the iPad Mini 6 was a game-changer for the iPad Mini lineup. It brought a modern design overhaul with thinner bezels, a larger screen, and a more refined look. Powered by the A15 Bionic chip, it delivered exceptional performance, but the display was the star of the show.

    Key features of the iPad Mini 6 include:

    • 8.3-inch Liquid Retina Display
    • True Tone and P3 Wide Color Gamut
    • Apple Pencil (2nd Gen) support
    • Ultra-portable design weighing just 0.65 pounds

    While newer models like the iPad Mini 7 have been released, the display technology of the Mini 6 still holds its ground, offering a premium experience at a lower cost.


    The iPad Mini 6 Display: Features That Shine

    Let’s break down the key display features that make the iPad Mini 6 a standout option even today.

    1. Liquid Retina Display: A Vibrant Viewing Experience

    The Liquid Retina Display on the iPad Mini 6 delivers stunning visuals. At 2266 x 1488 resolution, it offers a crisp, vibrant image quality that rivals much larger tablets.

    • Sharpness and Clarity: Text appears razor-sharp, making it ideal for reading eBooks, editing documents, or browsing websites.
    • Color Accuracy: With the P3 Wide Color Gamut, colors are vivid and true to life, whether you’re watching a movie or viewing photos.
    • Anti-Reflective Coating: The display performs well in various lighting conditions, reducing glare and making it easy to use outdoors.

    For casual users and professionals alike, this screen provides a viewing experience that feels premium, even by today’s standards.


    2. Compact Size, Big Impact

    The iPad Mini 6’s 8.3-inch screen strikes a perfect balance between portability and functionality. Unlike larger iPads, which can feel unwieldy, the Mini 6 is compact enough to fit in one hand while still offering ample screen real estate for productivity or entertainment.

    • Great for Multitasking: Split View and Slide Over work seamlessly, allowing you to run two apps side by side on a screen that doesn’t feel cramped.
    • Perfect for Travel: Its small size and light weight make it an excellent companion for trips, whether you’re reading on a plane or catching up on work at a coffee shop.

    This compact size makes the Mini 6 uniquely versatile, appealing to users who want both portability and functionality.


    3. True Tone Technology: Easy on the Eyes

    One of the most underrated features of the iPad Mini 6’s display is True Tone Technology. This adjusts the screen’s color temperature based on ambient lighting conditions, ensuring a comfortable viewing experience.

    • Reading at Night: True Tone makes the display easier on your eyes in low light, reducing harsh blue light.
    • Outdoor Use: In bright sunlight, the screen adapts to maintain visibility without straining your eyes.

    Whether you’re binge-watching Netflix or reading an eBook, True Tone ensures the display looks great and feels natural.


    4. Smooth Scrolling and Responsiveness

    While the iPad Mini 6 lacks ProMotion’s 120Hz refresh rate, its 60Hz refresh rate still delivers smooth scrolling and responsive touch performance. Whether you’re navigating through apps or playing casual games, the experience feels fluid and enjoyable.

    • Apple Pencil Support: The display pairs seamlessly with the 2nd Gen Apple Pencil, offering low latency and high precision for drawing or note-taking.
    • Gaming: Casual and even some high-performance games look and feel great on the Mini 6’s display.

    For most users, the display’s performance strikes the right balance between smoothness and energy efficiency.


    5. P3 Wide Color Gamut: A Treat for Creators

    The inclusion of the P3 Wide Color Gamut makes the iPad Mini 6 a fantastic tool for creators. It delivers richer, more accurate colors, which is crucial for tasks like photo editing or graphic design.

    • Photo Editing: Apps like Adobe Lightroom take full advantage of the color accuracy, making the Mini 6 a portable photo editing powerhouse.
    • Video Playback: Streaming content on platforms like Disney+ or YouTube is a joy, with vibrant visuals that enhance the viewing experience.

    Even if you’re not a professional creator, the P3 Wide Color Gamut elevates the quality of everything you see on the screen.


    6. Anti-Reflective Coating: Visibility Anywhere

    Unlike many budget tablets, the iPad Mini 6 comes with an anti-reflective coating. This enhances visibility in bright environments, making it an excellent choice for outdoor use.

    • Reading in Sunlight: The coating minimizes reflections, making it easier to read articles, eBooks, or notes in bright conditions.
    • Work on the Go: For professionals who use the Mini 6 for work, this feature ensures a consistent experience, whether you’re indoors or outdoors.

    How the iPad Mini 6 Display Compares to Newer Models

    While the iPad Mini 7 offers incremental improvements, the iPad Mini 6’s display remains highly competitive. The lack of ProMotion and other advanced features may be noticeable to power users, but for the majority of casual and even professional users, the Mini 6’s display delivers more than enough quality and versatility.


    Who Is the iPad Mini 6 Display Best For?

    1. Students and Professionals

    • The compact size and Apple Pencil support make the Mini 6 perfect for taking notes or managing tasks.
    • True Tone and anti-reflective coating ensure a comfortable experience in various environments.

    2. Creatives

    • The P3 Wide Color Gamut and color accuracy make it a great tool for photo editing, sketching, and design.

    3. Casual Users

    • If you’re primarily streaming, reading, or browsing, the vibrant display elevates the experience.

    Drawbacks of the iPad Mini 6 Display

    While the iPad Mini 6 excels in many areas, it’s not without its limitations:

    1. 60Hz Refresh Rate: The absence of ProMotion means it lacks the ultra-smooth scrolling of higher-end iPads.
    2. Larger Bezels: Though smaller than older models, the bezels are still more noticeable compared to the all-screen designs of newer iPads.

    Final Thoughts: Why the iPad Mini 6 Display Still Holds Up

    In 2024, the iPad Mini 6 remains a compelling option for anyone looking for a compact, versatile tablet. Its display, with its vibrant colors, True Tone technology, and compact size, continues to impress despite newer models on the market.

    Whether you’re a student, creative, or casual user, the iPad Mini 6 offers a display experience that punches well above its weight. If you’re looking for a tablet that combines portability, performance, and visual excellence, the iPad Mini 6 is still worth your attention.

    Also Check:

  • iPad Mini 6 vs 7: What is the Same and What Has Changed

    iPad Mini 6 vs 7: What is the Same and What Has Changed

    The iPad Mini has been Apple’s answer to those who crave portability without sacrificing power or functionality. With the release of the iPad Mini 7, it’s natural to wonder: what’s truly new, and what remains unchanged from the beloved iPad Mini 6? Both models aim to deliver a compact, yet powerful experience, but with different focuses in refinement and innovation.

    iPad Mini 6 vs 7

    In this detailed comparison, we’ll break down everything you need to know about the iPad Mini 6 vs. iPad Mini 7. Whether you’re considering an upgrade or purchasing your first Mini, this guide will help you decide which tablet fits your needs.


    Design: Subtle Refinements or Sticking to the Classic

    What’s Old

    Both the iPad Mini 6 and 7 retain the same design language Apple introduced with the Mini 6 in 2021. The slim bezels, flat edges, and no home button create a modern, compact aesthetic that’s visually appealing and highly portable.

    Key shared design features:

    • 8.3-inch Liquid Retina Display
    • Flat-edged chassis with rounded corners
    • Touch ID in the top button
    • Compatible with the Apple Pencil (2nd Generation) that magnetically attaches to the side
    • A lightweight build weighing around 0.65 pounds

    In terms of dimensions and physical feel, the two models are nearly indistinguishable, making it easy to mistake one for the other at first glance.

    What’s New

    While the physical design hasn’t changed drastically, Apple has introduced subtle improvements in the iPad Mini 7 to refine the user experience:

    • Improved durability: Apple claims the chassis material is slightly more robust, offering better resistance to everyday wear and tear.
    • Color options: The Mini 7 introduces new shades, giving users a refreshed color palette to choose from.

    For those hoping for a radical redesign, the Mini 7’s updates might feel incremental. However, if you value minor refinements in durability and aesthetics, these changes are a welcome touch.


    Display: Incremental or Revolutionary?

    What’s Old

    Both models share the same 8.3-inch Liquid Retina Display, offering:

    • 2266 x 1488 resolution for sharp and vibrant visuals
    • True Tone technology to adjust the screen’s color temperature based on ambient lighting
    • P3 Wide Color Gamut for vivid and accurate colors
    • 500 nits of brightness, sufficient for most indoor and outdoor usage scenarios
    • An anti-reflective coating for improved visibility under bright conditions

    What’s New

    The iPad Mini 7 takes the display a step further with:

    • Higher refresh rate support: While still capped at 60Hz for most apps, Apple has implemented optimizations for smoother animations, particularly noticeable in supported games and scrolling.
    • Slightly better color accuracy: Creatives may notice a marginal improvement in how true-to-life colors appear, thanks to a refined calibration process.
    • HDR content optimization: Streaming platforms like Netflix and Apple TV+ now look better on the Mini 7 due to subtle enhancements in HDR performance.

    If you’re a casual user, the differences may be hard to spot. However, creatives and gamers will likely appreciate the improved responsiveness and visual fidelity.


    Performance: Powering Up With the A16 Bionic

    What’s Old

    The iPad Mini 6 is powered by the A15 Bionic chip, which has proven to be a powerhouse for everyday tasks, gaming, and even light video editing. It remains fast and reliable in 2024, easily handling multitasking and demanding applications.

    Key A15 specs:

    • 6-core CPU for snappy performance
    • 5-core GPU for smooth graphics rendering
    • Neural Engine for AI-powered tasks and machine learning

    What’s New

    The iPad Mini 7 introduces the A16 Bionic chip, a notable upgrade in power and efficiency. This is the same chip found in the iPhone 14 Pro models, bringing more headroom for intensive tasks and future-proofing.

    A16 highlights:

    • Faster CPU and GPU: Expect around a 15–20% performance boost in both single-core and multi-core tasks.
    • Enhanced Neural Engine: Machine learning tasks like photo editing, augmented reality, and AI-based features are now quicker and more seamless.
    • Improved thermal management: The Mini 7 runs cooler under heavy workloads, making it ideal for gaming or prolonged use.

    While the A15 in the Mini 6 remains competent, the A16 in the Mini 7 ensures faster app loading times, smoother multitasking, and better support for upcoming apps and software updates.


    Camera: Evolution, Not Revolution

    What’s Old

    Both models feature:

    • A 12MP rear camera capable of capturing sharp photos and 4K video recording.
    • A 12MP ultra-wide front camera with Center Stage, keeping you perfectly framed during video calls.

    These cameras are excellent for casual photography, video calls, and document scanning but won’t replace a dedicated camera for serious photography.

    What’s New

    The iPad Mini 7 introduces:

    • Improved low-light performance: Apple has refined the sensors and image processing to capture clearer photos in dim environments.
    • Enhanced HDR processing: Expect better dynamic range when capturing scenes with varying light levels.
    • ProRes video support: Professionals can now record higher-quality video, a feature previously limited to higher-end devices.

    While the camera upgrades may not be groundbreaking, they provide a noticeable improvement for users who frequently use their iPad for photography or video recording.


    Battery Life: Small but Mighty

    What’s Old

    Both the iPad Mini 6 and 7 promise up to 10 hours of web browsing or video playback, a figure that holds true in real-world usage. Both models charge via USB-C, supporting fast charging for minimal downtime.

    What’s New

    The iPad Mini 7 benefits from the efficiency improvements of the A16 Bionic chip, offering:

    • Slightly longer battery life: Expect an additional hour or so during light use.
    • Faster charging speeds: With a compatible charger, the Mini 7 charges around 20% faster than its predecessor.

    These improvements, while subtle, enhance the overall convenience of the device.


    Software: iPadOS at Its Best

    What’s Old

    Both models run the latest version of iPadOS, offering features like:

    • Multitasking with Split View and Slide Over
    • Universal Control for seamless integration with Macs
    • Stage Manager for desktop-like multitasking

    What’s New

    The iPad Mini 7’s A16 Bionic chip ensures smoother performance for:

    • AI-powered features: Enhanced capabilities in apps like Photos, Notes, and Safari.
    • Gaming: Graphics-intensive titles now perform better, with fewer frame drops.
    • Future updates: The Mini 7 will likely receive software support for a year or two longer than the Mini 6, making it a better long-term investment.

    Pricing and Value: Which One Should You Buy?

    iPad Mini 6

    • Starting price: Often discounted below its original launch price of $499.
    • Best for: Budget-conscious buyers who want a compact tablet for everyday use without breaking the bank.

    iPad Mini 7

    • Starting price: Likely around $549, reflecting the new features and upgrades.
    • Best for: Users who need the latest performance and display improvements or plan to use the tablet for demanding tasks.

    Final Verdict: What is New and What is Old

    The iPad Mini 6 remains a solid choice for users who value portability and don’t need the absolute latest features. Its performance, display, and design are still highly capable in 2024.

    The iPad Mini 7, on the other hand, refines the experience with a more powerful chip, improved display responsiveness, and subtle camera enhancements. If you’re a power user, creative professional, or someone who wants a future-proof device, the Mini 7 is the better choice.

    In the end, the decision boils down to your priorities. Are you looking for a budget-friendly tablet with reliable performance? Go for the Mini 6. Need cutting-edge features and the best performance in a small package? The Mini 7 is the way to go.

    Also Check: