Author: Evidence

  • Roku Error 014.50 and How to Fix It

    Roku Error 014.50 and How to Fix It

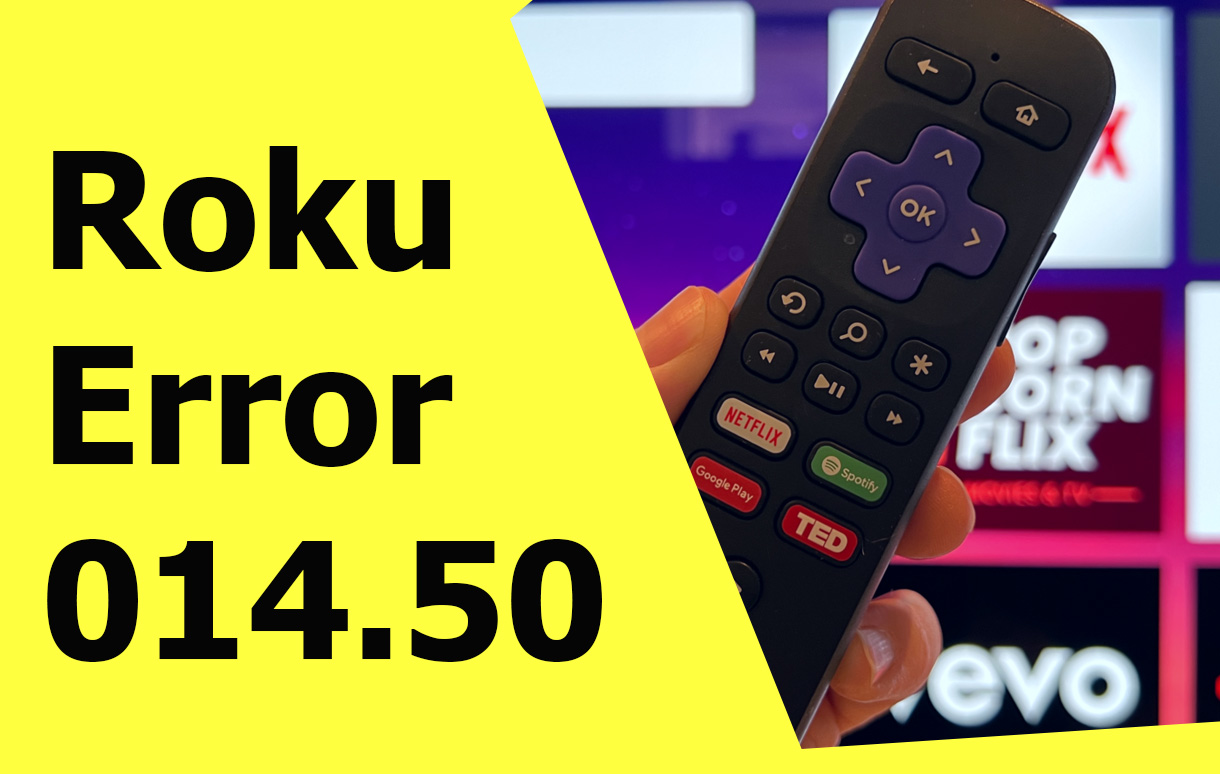
    When streaming devices like Roku promise seamless entertainment, encountering errors can be frustrating, especially ones like Roku Error 014.50. This error primarily relates to network connectivity issues, specifically your Roku’s inability to establish a stable connection with the Wi-Fi network. If you’ve come across this issue, you’re not alone—it’s a common problem that can often be resolved with a few simple steps.
    Roku Error 014.50 and How to Fix It

    Error 014.50 tends to pop up during initial setup or after a network change, such as switching routers or updating Wi-Fi credentials. Understanding the root causes of this error can save you time and effort, allowing you to return to streaming your favorite content without delay.

    What Causes Roku Error 014.50?

    At its core, Roku Error 014.50 indicates that your Roku device is struggling to connect to your wireless network. This can happen for several reasons, ranging from incorrect Wi-Fi passwords to more complex issues like signal interference or router settings. Here’s a breakdown of the typical causes:

    Cause Explanation
    Incorrect Wi-Fi Credentials Entering an incorrect password prevents Roku from authenticating your network.
    Weak Signal Strength Physical obstructions or distance between the router and Roku can weaken the signal.
    Router Configuration Security protocols, firewalls, or outdated firmware might block the connection.
    ISP Issues Temporary outages or DNS problems can disrupt internet connectivity.
    Roku Software Bugs Outdated firmware or software glitches may contribute to the issue.

    Diagnosing Roku Error 014.50

    The first step to resolving any error is diagnosing the problem. Begin by checking your network’s status on another device. Can your smartphone or laptop connect to the same Wi-Fi network without issues? If not, the problem might lie with your internet service provider or router settings rather than Roku itself.

    If other devices are working fine, focus your troubleshooting efforts on the Roku device. Attempt to reconnect it to the network and observe the error message details for clues.

    Fixing Roku Error 014.50

    One of the simplest solutions to this problem is verifying your Wi-Fi credentials. It’s surprisingly easy to enter the wrong password, especially with the Roku on-screen keyboard. Re-enter the password carefully, ensuring you’ve chosen the correct wireless network.

    If the credentials are correct, consider the strength of your Wi-Fi signal. Weak signals can cause intermittent connectivity issues, leading to Error 014.50. Relocating your Roku closer to the router or using a Wi-Fi extender can help improve the signal. Additionally, try restarting your router and Roku device. This step often clears temporary glitches that may be blocking connectivity.

    Sometimes, the issue lies in your router’s security settings. Access the router’s admin panel via a web browser and ensure that it’s not set to block new devices. You can also temporarily disable firewalls or security protocols to test if these settings are causing the issue. If this resolves the problem, reconfigure your settings to allow the Roku device without compromising security.

    Advanced Troubleshooting

    For persistent errors, more advanced troubleshooting may be required. Updating your Roku’s firmware can resolve compatibility issues with your network. Navigate to the settings menu on your Roku, select “System Update,” and follow the prompts to ensure your device is running the latest software version.

    Resetting your network settings on Roku can also be an effective solution. This action clears stored Wi-Fi credentials and forces the device to perform a fresh connection setup. To reset the network settings, go to “Settings,” then “System,” and choose “Advanced System Settings.”

    If none of these solutions work, perform a factory reset on your Roku device. This action will erase all settings and installed apps, returning the device to its out-of-the-box state. After resetting, set up your Roku from scratch and reconnect to the Wi-Fi network.

    Preventing Roku Error 014.50 in the Future

    To avoid encountering this error in the future, consider implementing the following best practices:

    • Position your router centrally in your home to maximize signal strength.
    • Regularly update both your Roku device and router firmware.
    • Use a strong, unique Wi-Fi password to prevent unauthorized access while ensuring it’s easy to enter correctly.
    • Limit the number of connected devices to avoid network congestion.

    Why Roku Remains a Top Choice

    While errors like 014.50 can be inconvenient, they don’t detract from Roku’s overall reliability as a streaming platform. Its user-friendly interface, affordability, and vast library of apps make it a popular choice among users worldwide. Additionally, most errors can be resolved with straightforward troubleshooting steps, requiring no professional assistance.

    Conclusion

    Roku Error 014.50 is a network-related issue that can often be resolved with simple fixes, such as checking Wi-Fi credentials, improving signal strength, or restarting your router. By understanding the root causes and following the steps outlined above, you can quickly overcome this error and return to enjoying uninterrupted streaming.

    If the problem persists despite your efforts, reaching out to Roku’s customer support or your ISP may be necessary. Technical issues are a part of the streaming experience, but with a bit of patience and persistence, they can be easily managed. After resolving the issue, Roku continues to deliver a seamless and enjoyable streaming experience for users of all levels.

    Also Check:
  • Roku is Not Connecting to Wifi: Why and How You Can Fix It

    Roku is Not Connecting to Wifi: Why and How You Can Fix It

    Streaming has revolutionized how we consume content, and Roku has been at the forefront of this transformation. With its vast library of channels and user-friendly interface, Roku is a favorite for millions. However, like any tech device, it’s not immune to occasional hiccups. One of the most common issues users face is Roku not connecting to Wi-Fi. While frustrating, this problem is almost always solvable with a bit of troubleshooting.

    Roku is Not Connecting to Wifi: Why and How You Can Fix It

    When your Roku refuses to connect to Wi-Fi, it’s more than just a technical glitch. It can disrupt movie nights, binge-watching sessions, or even your ability to access live TV. The good news is that this issue typically doesn’t require advanced technical skills to resolve. Let’s delve into why this problem occurs and, more importantly, how to fix it.

    Why Roku May Fail to Connect to Wi-Fi

    Wi-Fi connectivity issues with Roku can stem from several factors, ranging from network problems to device-related glitches. Here are some common culprits:

    1. Weak Signal Strength

    If your Roku is far from your router, it may struggle to maintain a stable connection. Walls, furniture, and other obstacles can further weaken the signal.

    2. Network Congestion

    Too many devices connected to your Wi-Fi network can cause interference, leading to connectivity issues.

    3. Software Bugs or Outdated Firmware

    Like all devices, Roku relies on regular updates to fix bugs and improve performance. Outdated software can sometimes cause connectivity issues.

    4. Router Issues

    Problems with your router, such as incorrect settings or outdated firmware, can also disrupt your Roku’s connection.

    5. Hardware Problems

    While rare, hardware malfunctions—either in the Roku device or the router—can also cause connectivity issues.

    Troubleshooting Steps

    Step 1: Check Your Internet Connection

    Before diving into Roku-specific fixes, ensure your internet is working correctly. Test other devices like your smartphone or laptop to see if they can connect to Wi-Fi. If all devices are experiencing issues, the problem likely lies with your internet service provider (ISP) or router.

    Step 2: Restart Roku and Your Router

    A simple restart can work wonders for resolving connectivity problems. Power off your Roku and unplug your router for about five minutes. Then, reconnect everything and try again.

    Step 3: Verify Your Wi-Fi Credentials

    If your Wi-Fi network name (SSID) or password has changed recently, you’ll need to update these details on your Roku. Go to the settings menu, select “Network,” and follow the prompts to reconnect.

    Step 4: Check Signal Strength

    Roku has a built-in feature to check signal strength. Navigate to the “Network” section in the settings menu and select “Check Connection.” This will give you a signal strength reading. If it’s weak, consider moving your router closer to your Roku or using a Wi-Fi extender.

    Common Error Messages and What They Mean

    When Roku fails to connect, you might encounter error messages. Understanding these can help you diagnose the problem faster.

    Error Message Possible Cause Solution
    “Unable to Connect to Network” Incorrect password or weak signal Re-enter credentials, move closer to router
    “Not Connected to Internet” Internet service disruption Check ISP status, restart router
    “Low Signal Strength” Router too far from Roku Use a Wi-Fi extender or reposition devices

    Advanced Fixes

    Update Your Roku Software

    Outdated firmware can often cause connectivity issues. If your Roku is still functioning enough to access settings, check for updates manually by navigating to “Settings > System > System Update.”

    Factory Reset

    As a last resort, consider performing a factory reset. This will erase all customizations and return your Roku to its original settings. Go to “Settings > System > Advanced System Settings > Factory Reset.”

    Preventing Future Wi-Fi Issues

    To avoid future connectivity problems, ensure your Roku and router are in optimal locations with minimal interference. Regularly update your Roku software and router firmware to benefit from the latest performance enhancements.

    Additionally, investing in a dual-band router can help manage network congestion, particularly if you have multiple devices connected.

    When to Call for Help

    If you’ve tried all the troubleshooting steps and your Roku still won’t connect, it might be time to contact Roku support or your ISP. Persistent issues could indicate a hardware problem that requires professional assistance.

    Conclusion

    Wi-Fi issues can be incredibly frustrating, especially when they interrupt your streaming experience. But with a bit of patience and the right approach, you can quickly get your Roku back online. From checking your internet connection to updating your device, the solutions are straightforward and effective.

    Roku has revolutionized how we watch TV, and ensuring it works seamlessly is worth the effort. The next time you encounter a Wi-Fi connectivity issue, remember that you can fix it—and now, you know exactly how to do it.

    Also Check:

  • Roku Says Not Connected: Why and How to Fix It

    Roku Says Not Connected: Why and How to Fix It

    Streaming has become an essential part of our daily lives, and Roku has positioned itself as one of the leading platforms for on-demand entertainment. With a plethora of streaming options, an easy-to-use interface, and a reputation for reliability, Roku devices have become a household staple. However, nothing disrupts a relaxing evening of streaming like seeing the dreaded message: “Not Connected.”

    Roku Says Not Connected

    This notification can leave you frustrated and scrambling for answers, but rest assured, it’s a problem with solutions. The “Not Connected” message on Roku can arise from various reasons, including network issues, incorrect settings, or even device malfunctions. Understanding the cause is the first step toward resolving it, and this article will guide you through every aspect of fixing this issue and ensuring a smoother streaming experience in the future.

    What Does “Not Connected” Mean?

    When Roku displays “Not Connected,” it signifies that the device is not currently connected to the internet. Without an active connection, Roku cannot access streaming services, download updates, or provide a seamless user experience. This disconnection doesn’t necessarily mean your internet is down; it often points to a communication problem between your Roku device and your Wi-Fi network.

    There are a variety of reasons why this happens, from interference in your home network to outdated firmware or router issues. Each of these possibilities requires a different troubleshooting approach.

    Common Reasons Roku Says “Not Connected”

    The “Not Connected” error isn’t as random as it seems. Here’s a breakdown of the most common causes:

    1. Weak Wi-Fi Signal

    If your Roku is positioned far from the router, the signal strength may be insufficient to maintain a stable connection. Objects like walls, furniture, or electronic devices can interfere with signal quality.

    2. Network Configuration Issues

    Incorrect network settings, such as entering the wrong password or selecting the wrong Wi-Fi network, can cause your Roku to lose connectivity.

    3. Overcrowded Network

    In homes with multiple devices connected to the same network, bandwidth can become strained, leading to intermittent connectivity issues for devices like Roku.

    4. Software and Firmware Problems

    Both the Roku device and your router rely on regular updates to function optimally. If either is running outdated software, compatibility issues may arise.

    5. ISP or Router Downtime

    Sometimes, the problem isn’t with Roku at all. Internet service provider outages or router malfunctions can result in connectivity problems.

    Troubleshooting the Problem

    Understanding the root of the issue is only half the battle; fixing it is where the challenge begins. Below, we’ll explore detailed steps to address the “Not Connected” message and get your Roku back online.

    Step 1: Checking Your Network Connection

    The first step is to ensure your internet connection is active. Test your Wi-Fi on other devices such as a smartphone or laptop. If these devices are also struggling to connect, the problem lies with your internet service or router.

    If other devices are working fine, move on to verifying the connection specifically for your Roku. Use the “Check Connection” option in the Roku settings menu. This feature will test your signal strength and confirm whether the device is detecting your network.

    Step 2: Restarting Devices

    Sometimes, a simple restart can resolve the issue. Begin by restarting your Roku device. Navigate to “Settings,” then “System,” and select “System Restart.”

    For your router, unplug it from the power source, wait about five minutes, and then plug it back in. Once both devices are restarted, attempt to reconnect your Roku to Wi-Fi.

    Step 3: Updating Software

    Outdated firmware can cause compatibility issues, leading to connection problems. To check for updates on your Roku device, navigate to “Settings > System > System Update.” Ensure your router’s firmware is also up-to-date by logging into its admin panel (consult your router’s manual for specific instructions).

    Advanced Fixes

    If the basic troubleshooting steps don’t resolve the issue, it’s time to explore more advanced solutions.

    Factory Resetting Your Roku

    A factory reset should be used as a last resort, but it’s highly effective for resolving persistent issues. Keep in mind that this will erase all settings and data on your Roku, requiring you to set it up from scratch. To perform a factory reset, go to “Settings > System > Advanced System Settings > Factory Reset.”

    Optimizing Your Network

    Position your router in a central location to ensure even signal distribution throughout your home. If this isn’t feasible, consider investing in a Wi-Fi extender to boost signal strength.

    Additionally, upgrading to a dual-band or tri-band router can help manage network traffic, especially in homes with multiple devices.

    Switching to a Wired Connection

    For a more stable and reliable connection, consider using an Ethernet cable to connect your Roku directly to your router. While this isn’t an option for all Roku devices, it eliminates the variability of Wi-Fi signals.

    Error Messages and What They Mean

    When facing connectivity issues, Roku may display specific error codes or messages. Understanding these can help streamline the troubleshooting process.

    Error Code/Message Cause Solution
    009: Cannot Connect to Internet Weak signal or incorrect credentials Re-enter Wi-Fi password, check signal strength
    014: Network Not Found Router or ISP issues Restart router, verify network status
    “Unable to Connect” Outdated firmware or interference Update firmware, reduce interference

    Avoiding Future Connectivity Problems

    To minimize the chances of encountering the “Not Connected” message again, consider implementing these tips:

    • Regularly update both your Roku and router firmware.
    • Place your router in a central, elevated location for optimal signal distribution.
    • Reduce network congestion by disconnecting devices that aren’t in use.
    • Periodically check for ISP outages in your area to stay informed.

    When to Seek Help

    If all else fails, it may be time to contact Roku support or your internet service provider. Persistent issues could indicate a hardware problem that requires professional assistance.

    Final Thought

    The “Not Connected” error can be a frustrating roadblock to your streaming experience, but it’s rarely insurmountable. By identifying the cause and following the appropriate troubleshooting steps, you can quickly get your Roku back online.

    In the world of streaming, a seamless connection is key to enjoying your favorite shows and movies. Whether it’s a simple Wi-Fi password update or a full factory reset, the solutions are within reach. Now that you know why Roku says “Not Connected” and how to fix it, you’re better prepared to handle any connectivity issues that come your way.

    Also Check:

  • You Can Watch Live TV on Roku and This is How

    You Can Watch Live TV on Roku and This is How

    Roku has long been a favorite for cord-cutters looking to replace traditional cable subscriptions with streaming services. But did you know that Roku also allows you to watch live TV? Whether it’s breaking news, sports, or your favorite network shows airing in real-time, Roku’s live TV options make it possible to enjoy the traditional TV experience alongside on-demand streaming. Here’s an in-depth guide on how you can watch live TV on Roku and everything you need to know about getting started.

    You Can Watch Live TV on Roku and This is How


    How You Can Watch Live TV on Roku

    Roku’s ecosystem supports various live TV options, ranging from free channels to paid subscriptions. It’s designed to replicate and enhance the experience of traditional television while leveraging the convenience and flexibility of streaming technology. The platform integrates live TV seamlessly through the Roku Channel, dedicated live TV apps, and even external hardware like antennas and cable boxes.

    The core benefit of Roku’s live TV capabilities is the variety. Users can access content through free services like The Roku Channel, subscription-based apps like Hulu + Live TV, and even integrate local channels via an HDTV antenna. All of this is made possible with a user-friendly interface and universal search capabilities, ensuring that live TV becomes just as accessible as your favorite on-demand shows.

    Free Live TV Options on Roku

    Roku offers an impressive array of free live TV channels accessible directly through The Roku Channel. This hub includes over 350 live streaming options covering categories such as news, sports, entertainment, and children’s programming. Examples include ABC News Live, WeatherNation, and channels dedicated to niche interests like food, travel, and DIY.

    One standout feature is Roku’s live TV guide, which mimics the familiar grid-style layout of cable TV guides. This interface allows you to browse through channels, check program schedules, and jump into a live stream seamlessly. The free offerings cater to users who want to keep costs low while still enjoying a robust live TV lineup.

    Subscription-Based Live TV Services on Roku

    If you’re looking for a more comprehensive live TV experience, Roku supports a wide range of subscription-based services. These apps provide access to popular cable channels, local networks, and premium content. Here are some of the most notable options:

    • Hulu + Live TV: This service combines Hulu’s vast on-demand library with live TV channels, including ABC, NBC, CBS, and ESPN. It’s perfect for users who want a one-stop shop for both live and on-demand content.
    • YouTube TV: Known for its user-friendly interface and unlimited DVR storage, YouTube TV offers access to over 85 live channels, including sports networks like ESPN and Fox Sports.
    • Sling TV: Sling provides customizable packages, allowing users to choose channels based on their interests. It’s one of the most flexible live TV options available on Roku.
    • fuboTV: Catering specifically to sports fans, fuboTV includes live streams of major sports leagues alongside entertainment and news channels.
    • Philo: Focused on affordability, Philo offers a curated selection of entertainment and lifestyle channels without breaking the bank.

    Watching Local Channels on Roku

    For viewers who want access to local news, weather, and sports, Roku has several solutions. The easiest method is to use a live TV app that includes local channels, such as Hulu + Live TV or YouTube TV. Alternatively, you can integrate an HDTV antenna with your Roku device using a compatible tuner like the Tablo OTA DVR or the Roku Smart Soundbar with built-in TV tuners.

    These solutions allow you to stream live broadcasts from local stations, ensuring you don’t miss out on regional content. Some apps, like NewsON and Haystack News, also aggregate local news streams, making it easy to stay updated on events in your area.

    External Hardware for Live TV on Roku

    If you’re transitioning from traditional cable, Roku supports external hardware integration for live TV. Devices like cable boxes or satellite receivers can be connected to your TV and used alongside your Roku device. This setup is ideal for users who still rely on traditional broadcast services but want to enjoy Roku’s streaming capabilities.

    Additionally, DVR solutions like TiVo and Plex allow you to record live TV content and watch it later through your Roku device. This feature is especially useful for those who want to time-shift their viewing schedules.

    Comparing Live TV Options: Free vs. Paid

    Feature Free Live TV (e.g., Roku Channel) Subscription-Based Live TV (e.g., Hulu + Live TV)
    Cost Free Starts at $35/month
    Channel Variety Limited Comprehensive
    Local Channels Limited Available
    DVR Functionality Not Available Included
    Premium Channels Not Available Add-ons Available

    Setting Up Live TV on Roku

    Getting started with live TV on Roku is straightforward. Begin by connecting your Roku device to your TV and ensuring it’s connected to the internet. From there, explore the Roku Channel Store to download the necessary live TV apps. For antenna integration, connect your HDTV antenna to a compatible tuner and follow the on-screen setup instructions.

    Roku’s interface makes it easy to switch between apps and live TV channels, ensuring a seamless experience. The platform’s search functionality also allows you to look up specific shows or channels, providing a unified browsing experience across all your live TV options.

    Final Thoughts

    Roku has redefined what it means to watch live TV, offering a diverse range of options that cater to every type of viewer. Whether you’re a cord-cutter looking for free live streams, a sports enthusiast subscribing to fuboTV, or someone seeking local news through an antenna, Roku delivers a flexible and comprehensive live TV solution.

    The combination of affordability, ease of use, and variety makes Roku a top choice for anyone looking to enhance their television experience. By exploring the live TV features and experimenting with different apps and hardware setups, you can create a personalized viewing experience that meets all your needs. Live TV on Roku isn’t just an alternative to cable; it’s a step forward into the future of television.

    Also Check:

    Is Chromecast with Google TV Worth It? Everything You Need to Know

    Black Friday 2024: The Best Smart Home Device Deals to Watch For

    Roku Wireless Speakers Manual: A Beginner’s Guide to Superior Sound

    Will Roku Work on a Non Smart TV: Everything You Need to Know

    2024’s Most Popular Streaming Platforms: What to Watch and Why


  • Will Roku Work on a Non Smart TV: Everything You Need to Know

    Will Roku Work on a Non Smart TV: Everything You Need to Know

    Streaming has revolutionized how we consume entertainment, and devices like Roku have become synonymous with this digital shift. But while most of us associate Roku with smart TVs, the question often arises: will Roku work on a non-smart TV? The answer is a resounding yes.

    Will Roku Work on a Non Smart TV: Everything You Need to Know

    In fact, Roku was initially designed to add streaming functionality to standard televisions. However, there are some nuances to consider when setting up and using Roku on a non-smart TV. Here, we’ll delve into every detail, explaining how it works, what you need, and why Roku might just be the perfect solution for your entertainment needs, even if your TV lacks built-in smarts.

    Roku Serves As an Upgrade For Non-smart TVs

    Roku is a streaming device that connects to your television to provide access to various online services like Netflix, Hulu, Amazon Prime Video, and countless others. Essentially, it’s a bridge between your TV and the internet, transforming even the most basic television into a modern entertainment hub. For non-smart TVs, Roku serves as an upgrade, offering a user-friendly interface and a wide array of streaming options.

    The device comes in several forms, including streaming sticks, standalone boxes, and even Roku-enabled soundbars. Regardless of the form factor, the core functionality remains the same: giving you access to streaming content without requiring a smart TV.

    How Does Roku Work on a Non-Smart TV?

    Non-smart TVs lack built-in internet connectivity and apps, which is where Roku shines. The device connects to your TV via an HDMI port, delivering a full suite of streaming capabilities. Here’s a step-by-step overview of how Roku integrates with a non-smart TV:

    Physical Connection:

    Roku devices require an HDMI port to connect to your TV. If your television is older and only has RCA composite inputs, you can still use Roku with the help of an HDMI-to-RCA adapter.

    Power Source:

    Roku devices need a power source, which is typically provided through a USB port on your TV or an external adapter plugged into an electrical outlet.

    Internet Connectivity:

    Once connected, Roku relies on your home Wi-Fi or an Ethernet connection (for models with an Ethernet port) to stream content. Internet speed and stability are crucial for seamless viewing.

    Setup Process:

    The initial setup involves creating or logging into a Roku account, connecting to Wi-Fi, and downloading the apps or channels you wish to use.

    What You Need to Use Roku on a Non-Smart TV

    To use Roku on a non-smart TV, you’ll need the following:

    • A Roku device (stick or box) compatible with your TV’s input ports.
    • A stable internet connection, either via Wi-Fi or Ethernet.
    • An HDMI port or an HDMI-to-RCA adapter if your TV only supports older inputs.
    • A Roku account to access the Roku Channel Store and manage your subscriptions.

    Compatibility with Older TVs

    One common concern is whether Roku can function on older televisions. While most Roku devices are designed with HDMI compatibility in mind, some models, like the Roku Express+, include composite cable options for older TVs without HDMI ports. This ensures that even decades-old TVs can join the streaming revolution with a little extra effort.

    For televisions with limited resolutions, such as 480p or 720p, Roku will adjust its output to match the TV’s capabilities. While you won’t get high-definition quality, the viewing experience is still vastly improved compared to traditional cable or satellite options.

    Using Roku on a Non-Smart TV

    Using Roku on a non-smart TV brings several advantages. First, it’s a cost-effective way to modernize your entertainment setup without investing in a new television. Roku devices are affordable and offer access to thousands of free and paid channels.

    Another benefit is the intuitive interface. Roku’s simplicity makes it easy to navigate, even for those who aren’t tech-savvy. The device’s remote is straightforward, and the on-screen menus are designed with user-friendliness in mind.

    Additionally, Roku devices receive regular software updates, ensuring compatibility with the latest apps and streaming services. This longevity makes Roku a smart investment for anyone looking to future-proof their entertainment options.

    Roku Models for Non-Smart TVs

    Different Roku models cater to various needs, but some are better suited for non-smart TVs:

    • Roku Express: Compact and affordable, this model is ideal for basic streaming needs. It’s perfect for TVs with HDMI ports but doesn’t include advanced features like 4K streaming.
    • Roku Express+: Designed with composite input compatibility, this model works seamlessly with older TVs lacking HDMI ports.
    • Roku Ultra: A premium option for those who want advanced features like 4K streaming and Ethernet connectivity, provided your non-smart TV supports higher resolutions.

    Buy Roku Devices Here at Amazon

    Common Issues and Solutions

    Using Roku on a non-smart TV isn’t without its challenges. Here are some common issues you might encounter and how to resolve them:

    Issue Cause Solution
    No Signal on TV Incorrect input selection Ensure your TV is set to the correct HDMI input.
    Poor Video Quality Weak internet connection Upgrade your Wi-Fi speed or use an Ethernet connection.
    Remote Not Working Dead batteries or signal obstruction Replace batteries and ensure there’s no obstruction.
    Apps Not Loading Outdated software or connection issues Update your Roku software and check your internet connection.

    Streaming Without Limits

    One of Roku’s standout features is its vast content library. From major streaming platforms like Netflix, Disney+, and Amazon Prime Video to niche services and free channels like The Roku Channel, there’s something for everyone. Adding a Roku device to your non-smart TV unlocks these options, giving you the freedom to customize your viewing experience.

    For sports fans, Roku offers apps for ESPN, Fox Sports, and more. Movie enthusiasts can access classics and blockbusters through platforms like HBO Max and Criterion Channel. Meanwhile, kids and families can enjoy child-friendly content through apps like PBS Kids and Disney+.

    Conclusion

    Roku is not just compatible with non-smart TVs; it’s the ideal solution for transforming a basic television into a versatile streaming powerhouse. Whether you have an older model with composite inputs or a newer non-smart TV with HDMI, Roku’s flexibility ensures a seamless setup and an unparalleled entertainment experience.

    By investing in a Roku device, you’re not just adding streaming capabilities to your TV—you’re future-proofing your entertainment setup. With its affordability, user-friendly interface, and extensive content library, Roku proves that you don’t need a smart TV to enjoy smart entertainment. So, if you’ve been wondering whether Roku will work on your non-smart TV, the answer is clear: it will, and it will elevate your viewing experience to a whole new level.

    Also Check:

  • Why Google’s Latest Laptop Stands Out in a Sea of Generic Chromebooks

    Why Google’s Latest Laptop Stands Out in a Sea of Generic Chromebooks

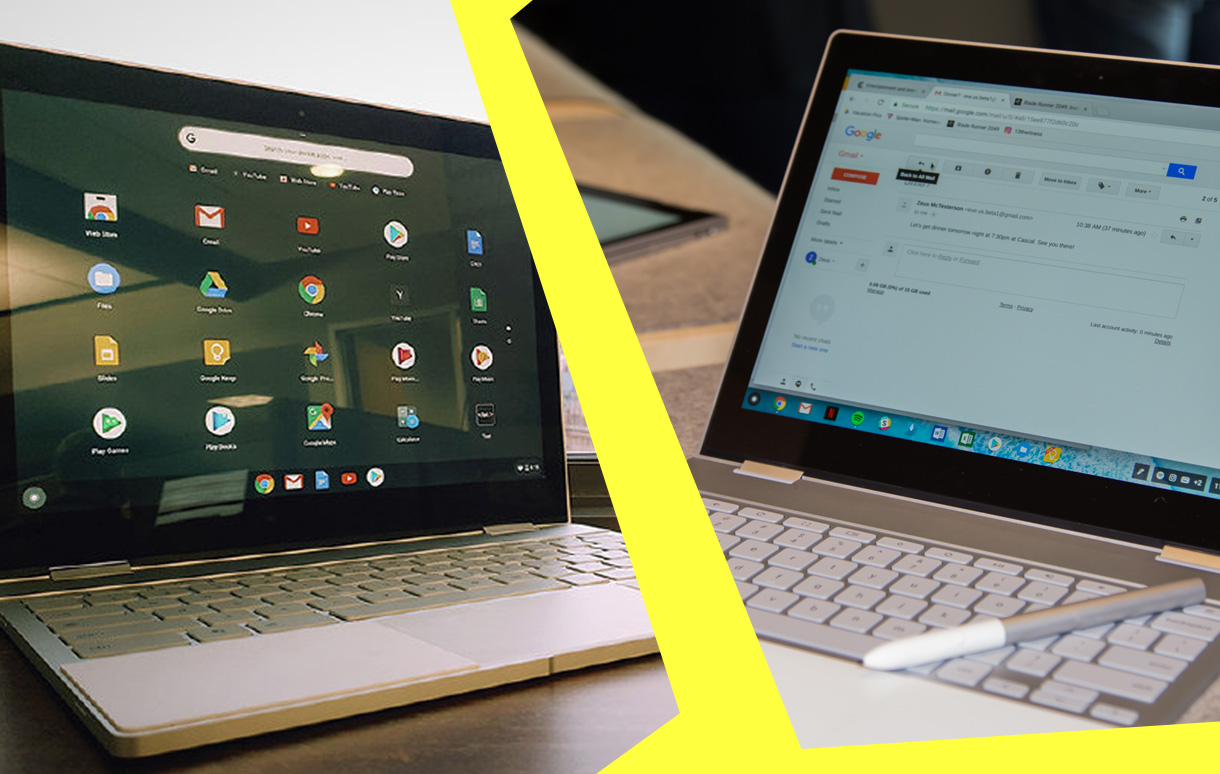
    When it comes to Chromebooks, the market is crowded with models that offer similar designs, features, and performance benchmarks. Many serve their purpose well—providing a simple, affordable laptop experience—but few truly break the mold. Enter Google’s latest Chromebook: a device that redefines what’s possible in this category.

    Why Google’s Latest Laptop Stands Out in a Sea of Generic Chromebooks

    With an innovative approach to design, powerful hardware, and unique software enhancements, Google’s newest offering is a breath of fresh air in a sea of mediocrity.

    A Design That Commands Attention

    One glance at Google’s latest Chromebook, and it’s clear that this isn’t just another generic laptop. The sleek, minimalist chassis feels unmistakably premium, a testament to Google’s attention to detail. The anodized aluminum body is both lightweight and durable, striking a perfect balance between portability and sturdiness. Available in an elegant range of colors—from deep matte black to a subtle pearlescent silver—the laptop exudes sophistication.

    The thin bezels around the display elevate the aesthetic, making the screen feel expansive and immersive. Google has also integrated a slightly curved keyboard deck, providing a more ergonomic typing experience. Every aspect of the design feels intentional, crafted to provide both form and function in equal measure.

    Display: A Feast for the Eyes

    Google’s latest Chromebook doesn’t skimp when it comes to the display. Featuring a 14-inch high-resolution touchscreen with an impressive pixel density, the visuals are crisp, vibrant, and true to life. The inclusion of advanced color calibration ensures that the display is equally suited for creative tasks like photo editing and for binge-watching your favorite series.

    Perhaps the most striking feature of the display is its adaptive brightness technology. This AI-driven feature dynamically adjusts the screen’s brightness based on ambient lighting conditions, ensuring an optimal viewing experience whether you’re working under the sun or in a dimly lit room. Combined with a 120Hz refresh rate, scrolling and animations feel buttery smooth, making this one of the best displays in its class.

    Under the Hood: Power Meets Efficiency

    Chromebooks have traditionally been known for their modest hardware, optimized to run Chrome OS efficiently. However, Google’s latest laptop takes a different approach, packing some serious power under the hood. The device is powered by an Intel Core i7 processor, paired with up to 16GB of RAM and a speedy SSD with storage options starting at 256GB.

    This hardware configuration ensures that the laptop is more than capable of handling demanding tasks like video editing, coding, or running Linux applications. Google’s proprietary AI accelerator chip further sets this Chromebook apart, enabling lightning-fast machine learning processes for tasks like real-time transcription and advanced photo editing.

    Despite the high-performance hardware, battery life is where this laptop truly shines. Google claims up to 12 hours of usage on a single charge, thanks to its intelligent power management system. And with fast-charging capabilities, you can get back to 50% battery in just 30 minutes.

    Chrome OS, But Smarter

    While the hardware is impressive, the software experience is where Google’s latest Chromebook truly shines. Chrome OS has come a long way since its inception, and this device showcases the operating system at its very best. Google has introduced several exclusive features that are currently only available on this model.

    One such feature is the enhanced multitasking interface, which makes it easier than ever to juggle multiple apps and browser tabs. The addition of native support for Android apps and Linux applications ensures unparalleled versatility, transforming the laptop into a productivity powerhouse.

    Google Assistant integration is deeper than ever, allowing you to control various aspects of the laptop and your smart home ecosystem using voice commands. Moreover, the AI-enhanced features extend to security as well, with real-time threat detection and automatic updates ensuring that your device is always protected.

    Audio and Video: More Than Just Functional

    In a market where laptop speakers are often an afterthought, Google’s latest Chromebook delivers an audio experience that’s anything but average. The dual speakers, tuned by Google’s audio engineers, produce rich, full-bodied sound with surprising depth and clarity. Whether you’re listening to music, watching movies, or attending virtual meetings, the audio quality is top-notch.

    The webcam and microphone array also deserve special mention. The 1080p webcam captures sharp, well-lit images even in low-light conditions, making it ideal for video conferencing. Meanwhile, the microphone setup includes advanced noise-cancellation technology, ensuring crystal-clear audio whether you’re presenting in a virtual meeting or catching up with friends.

    Connectivity: Future-Proofed

    Google has future-proofed its latest Chromebook with a generous array of connectivity options. The device features two Thunderbolt 4 ports, a USB-A port, a headphone jack, and a microSD card slot, offering plenty of flexibility. Additionally, the inclusion of Wi-Fi 6E ensures ultra-fast and stable internet connectivity, while Bluetooth 5.3 provides seamless pairing with peripherals.

    A New Benchmark for Chromebooks

    What sets Google’s latest Chromebook apart isn’t just its impressive specs or innovative features—it’s the cohesive experience that these elements create. Every aspect of this laptop feels polished and purposeful, from the ergonomic design to the AI-enhanced software.

    In a market where many Chromebooks feel like iterative updates of the same formula, Google’s latest offering is a bold statement. It challenges the notion that Chromebooks are only for budget-conscious consumers and proves that these devices can compete with the best in terms of design, performance, and functionality.

    For anyone in the market for a new laptop, Google’s latest Chromebook is worth serious consideration. It’s not just another Chromebook; it’s a glimpse into the future of what laptops can and should be.

    Also Check:

  • I Tried the Google Pixelbook, and Its Display Is a Game-Changer for Creative Work

    I Tried the Google Pixelbook, and Its Display Is a Game-Changer for Creative Work

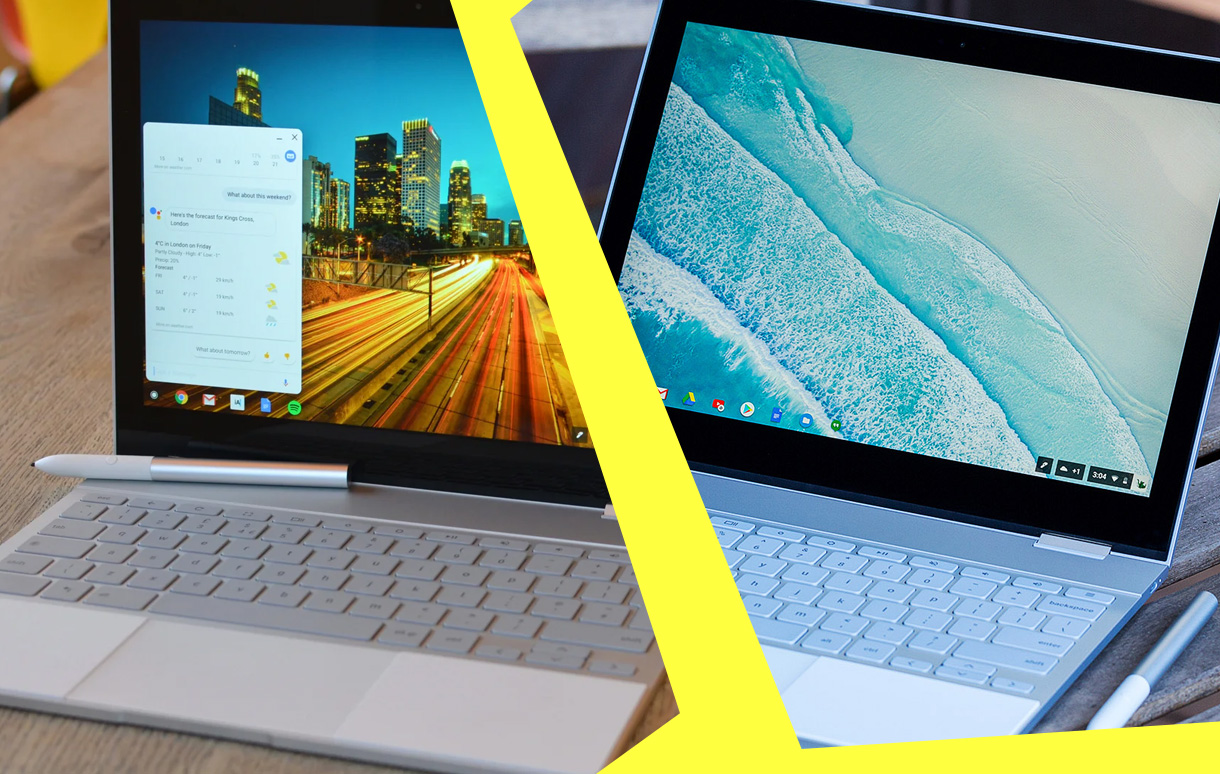
    When it comes to laptops, the display is often treated as just another feature. But for those of us who rely on precision and clarity—designers, editors, illustrators, or even just content enthusiasts—the screen is more than a component; it’s a canvas. That’s why the Google Pixelbook’s display caught my attention and ultimately won me over.

    I Tried the Google Pixelbook, and Its Display Is a Game-Changer for Creative Work

    I set out to test the Pixelbook not just as a Chromebook but as a creative companion, and what I discovered left me thoroughly impressed. This isn’t just another laptop; it’s a tool that transforms how we engage with our work.

    A Screen Built for Excellence

    From the moment I opened the Pixelbook, the display demanded my attention. It features a 12.3-inch Quad HD touchscreen with a resolution of 2400 x 1600 pixels. The colors are incredibly vibrant, the contrast is striking, and the sharpness is unparalleled in its class. Whether I was editing high-resolution images or streaming a visually stunning film, every detail leapt off the screen with startling clarity. For creatives, this level of precision makes the difference between good enough and professional-grade.

    What sets this display apart isn’t just its raw specs but the way it enhances workflow. As someone who often switches between photo editing and writing, I noticed how the Pixelbook’s screen adapted seamlessly. The colors remained true to life, a critical factor when fine-tuning visuals, and the touchscreen’s responsiveness made it feel natural to manipulate images directly on the display. Paired with the optional Pixelbook Pen, it becomes an intuitive extension of your hand—ideal for sketching, annotating, or navigating complex projects.

    Design That Complements the Display

    Of course, a great display needs the right hardware to shine, and the Pixelbook’s overall design complements its screen perfectly. The laptop’s slim, lightweight profile—weighing just 2.4 pounds—makes it easy to carry anywhere. The 360-degree hinge allows for versatile modes: laptop, tablet, tent, and stand. While testing the Pixelbook in tablet mode, I found it to be particularly suited for creative tasks like drawing or brainstorming. The hinge felt sturdy yet smooth, ensuring that the device’s adaptability didn’t come at the expense of durability.

    The build quality is premium, with a blend of aluminum and soft-touch accents that make it comfortable to hold for extended periods. The attention to detail extends to the keyboard and trackpad, both of which feel tailored for precision and ease of use. However, it’s the display that remains the crown jewel, elevating every task to a new level of engagement.

    A Creative Powerhouse

    While the display might be the highlight, the Pixelbook’s performance ensures it’s a suitable partner for creative work. Powered by Intel Core processors and running ChromeOS, the laptop delivers fast, seamless performance across a range of tasks. I pushed it to its limits with multiple Chrome tabs, Adobe Lightroom, and Android apps like Canva—and it didn’t miss a beat. The synergy between hardware and software ensures that the display’s brilliance is matched by the system’s capability.

    The ability to run Android apps further expands the Pixelbook’s creative potential. Apps designed for touchscreens felt right at home, making use of the display’s sensitivity and precision. Whether it was sketching out concepts in Infinite Painter or fine-tuning details in Lightroom, the experience felt fluid and intuitive.

    Battery life also plays a significant role in maintaining creative momentum, and the Pixelbook doesn’t disappoint. With up to 10 hours of usage on a single charge, it’s more than capable of handling a full day of work. Even better, fast charging means you can gain two hours of battery life from just 15 minutes of charging, ensuring minimal downtime.

    The Pixelbook Pen: A Worthy Companion

    The Pixelbook Pen isn’t included with the laptop, but for creatives, it’s an investment worth considering. During my tests, the Pen’s pressure sensitivity and precision added a new dimension to my workflow. Drawing felt natural, and the Pen’s integration with Google Assistant provided quick access to tools and answers. While it does add to the overall cost, its functionality paired with the Pixelbook’s display makes it an invaluable tool for designers, illustrators, and note-takers.

    A Display That Elevates Creativity

    Ultimately, the Pixelbook’s display stands out not just for its technical prowess but for how it enhances the creative process. It’s not just about sharp visuals or vibrant colors—it’s about creating an environment that inspires and facilitates creativity. Whether you’re sketching out a new concept, editing a portfolio, or simply enjoying visually rich media, the Pixelbook transforms these activities into immersive experiences.

    The Pixelbook isn’t without competition, and its price point places it firmly in the premium category. However, for those who value intuitive design, seamless integration with the Google ecosystem, and a display that sets a new standard for creative work, it’s a worthy investment. After spending time with the device, I can confidently say that its display isn’t just a feature—it’s a game-changer.

    Also Check:

  • Google Pixelbook: The Google Laptop That’s So Intuitive, It Practically Adapts to You

    Google Pixelbook: The Google Laptop That’s So Intuitive, It Practically Adapts to You

    In a world inundated with laptops, each boasting its own blend of features, the Google Pixelbook stands out as a beacon of innovation and effortless usability. This isn’t merely a Chromebook—it’s a bold statement in the realm of portable computing. Crafted with precision and designed to integrate seamlessly with Google’s ecosystem, the Pixelbook offers an experience that is as close to effortless as you can imagine.

    Google Pixelbook: The Google Laptop That’s So Intuitive, It Practically Adapts to You

    From the moment I powered it on, it felt as though the device was anticipating my every move, streamlining the setup process and adapting to my needs as if it had been custom-built for me.

    A Design That Blends Elegance with Functionality

    The Pixelbook’s design is a study in modern minimalism, blending sophistication with practicality. Its aluminum body, accented by elegant glass inlays, exudes a premium aesthetic while maintaining a functional edge. At a mere 10.3 millimeters thick and weighing just 2.4 pounds, the Pixelbook is incredibly portable. Its lightweight nature, however, does not detract from its durability, as it feels sturdy and well-constructed in hand. The 360-degree hinge adds versatility, enabling seamless transitions between laptop, tablet, and tent modes. This adaptability makes it perfect for various tasks—whether it’s typing out reports, sketching ideas, or enjoying a movie night.

    The keyboard, with its thoughtfully spaced keys, offers a delightful typing experience. Each keystroke is satisfying, thanks to the perfect travel distance and the soft backlighting that ensures usability in dim environments. Complementing the keyboard is a glass trackpad that responds with precision and fluidity, making navigation a breeze. Every design element feels meticulously thought out, underscoring Google’s commitment to a cohesive user experience.

    A Setup Experience That Redefines Simplicity

    Setting up the Pixelbook is akin to unwrapping a gift that has been perfectly tailored for you. From the moment you open the lid and see the Chromebook logo glow softly, you’re guided through an intuitive process. Logging in with your Google account instantly pulls in your preferences, files, and apps from the cloud. Within moments, the Pixelbook feels like an extension of your digital self, ready to pick up where your previous device left off.

    This seamless setup process is a testament to the integration between the Pixelbook and Google’s suite of services. Whether syncing your Google Drive files, accessing Gmail, or continuing work on Chrome tabs from another device, the experience is fluid and frictionless. Unlike traditional laptops that often require manual updates and software installations, the Pixelbook eliminates these hurdles, offering a streamlined, ready-to-use platform.

    Performance That Surprises and Delights

    Despite its slim profile, the Pixelbook packs a surprising amount of power. Powered by Intel Core processors, it breezes through tasks with remarkable speed and efficiency. During my time with the device, I pushed it to its limits—running multiple Chrome tabs, streaming high-definition videos, and even dabbling in photo editing. Not once did it falter. The performance was consistently smooth, making it a reliable companion for both casual users and professionals.

    A standout feature of the Pixelbook is its compatibility with Android apps from the Google Play Store. This extends its functionality far beyond that of a standard Chromebook. Apps like Adobe Lightroom, Microsoft Office, and popular mobile games work seamlessly, bridging the gap between mobile and desktop experiences. The synergy between ChromeOS and Android creates a unique ecosystem that feels fresh and innovative.

    Battery life is another feather in the Pixelbook’s cap. Google promises up to 10 hours on a single charge, and real-world usage aligns closely with this claim. Even if you find yourself in a pinch, the fast-charging capability ensures you’re back in action quickly—just 15 minutes of charging provides up to two hours of use. For those constantly on the move, this reliability is invaluable.

    A Display That Draws You In

    The Pixelbook’s 12.3-inch touchscreen display is nothing short of breathtaking. Boasting a resolution of 2400 x 1600 and a pixel density of 235 PPI, it renders images and text with exceptional clarity. Colors are vivid, contrasts are sharp, and the overall visual experience is immersive. Whether streaming your favorite shows, fine-tuning creative projects, or simply scrolling through web pages, the display never disappoints.

    The responsiveness of the touchscreen is equally impressive, making interactions feel natural and precise. Paired with the Pixelbook Pen (sold separately), the display transforms into a versatile canvas for drawing, note-taking, and navigating with pinpoint accuracy. While the Pen is an additional expense, it elevates the device’s utility for creatives and professionals alike, offering features such as pressure sensitivity and seamless Google Assistant integration.

    Google Assistant: Your Always-Available Helper

    One of the Pixelbook’s most distinctive features is its integration with Google Assistant. With a dedicated key on the keyboard and voice activation capabilities, accessing Google Assistant is effortless. During my time with the device, I found myself relying on it frequently—for setting reminders, searching for quick answers, and even controlling smart home devices. Its responsiveness and accuracy are impressive, making it a valuable addition to the overall user experience.

    Google Assistant goes beyond basic tasks. It adds a layer of intelligence to the Pixelbook, helping you find documents, translate text, and manage your schedule with ease. This integration blurs the line between a traditional laptop and a smart assistant, enhancing productivity and convenience in ways few other devices can match.

    Security and Updates You Can Rely On

    Security is a cornerstone of the Pixelbook’s design. ChromeOS, with its built-in virus protection and automatic updates, ensures your device stays secure without requiring manual intervention. The inclusion of the Titan C security chip adds an additional layer of protection, safeguarding sensitive information and bolstering user trust.

    Regular software updates are handled seamlessly in the background, introducing new features and security enhancements without disrupting your workflow. This proactive approach to maintenance sets the Pixelbook apart from traditional laptops, where updates can often be a tedious and time-consuming process.

    Pricing and Value: A Premium Investment

    The Pixelbook’s price tag places it firmly in the premium category, but it justifies this cost with its exceptional quality and features. Starting at a higher price point than most Chromebooks, it targets users who demand more from their devices—be it performance, design, or integration with Google’s ecosystem.

    For students, professionals, and creatives who live within the Google ecosystem, the Pixelbook represents an investment that delivers significant returns. It’s not just a tool; it’s a gateway to a more connected and productive digital life. While there are cheaper alternatives, none offer the same combination of polish, functionality, and innovation.

    Conclusion: A Vision of Effortless Computing

    The Google Pixelbook isn’t merely a laptop; it’s a reimagining of what personal computing can be. By prioritizing simplicity, performance, and integration, it offers a user experience that feels refreshingly effortless. From its intuitive setup and robust performance to its stunning display and innovative features, the Pixelbook sets a new benchmark for Chromebooks and laptops alike.

    Whether you’re a student seeking a dependable companion, a professional in need of a versatile powerhouse, or simply someone who values thoughtful design, the Pixelbook is a device that delivers on every front. It’s more than just a piece of technology—it’s a testament to how seamless and enjoyable computing can be when hardware and software come together in perfect harmony. The Pixelbook isn’t just a laptop; it’s the future of personal computing, available today.

    Also Check:

  • I Thought the iPad Air Was Just Another Tablet—But After Testing, It Feel Like a Mini Powerhouse in Your Hands

    I Thought the iPad Air Was Just Another Tablet—But After Testing, It Feel Like a Mini Powerhouse in Your Hands


    When it comes to tablets, the iPad Air often sits in an odd place. It’s not quite as affordable as the entry-level iPad, nor does it have the raw power and premium appeal of the iPad Pro. So, what’s the big deal? Before testing it myself, I assumed the iPad Air was just another middle-of-the-road device—a solid but uninspired option. But after spending a few weeks with it, I quickly realized that the iPad Air is much more than a generic tablet. It’s a mini powerhouse that punches well above its weight class.

    I Thought the iPad Air Was Just Another Tablet—But After Testing, It Feel Like a Mini Powerhouse in Your Hands

    With its sleek design, robust M1 chip, and seamless integration with Apple’s ecosystem, the iPad Air is a masterclass in balancing portability, performance, and affordability. Whether you’re a student, creative professional, or casual user, this tablet has something to offer—and it’s not just a “middle ground” device. It’s a genuine contender in the world of tablets.


    First Impressions: More Than Meets the Eye

    From the moment you unbox the iPad Air, it’s clear that Apple knows how to make a product feel premium. The packaging is minimalist yet sleek, and the tablet itself feels sturdy yet lightweight in your hands. At first glance, it’s easy to mistake it for an iPad Pro thanks to its modern, all-screen design and thin bezels. But as I began using it, I discovered it’s more than just a pretty face.


    Design and Build: Thin, Light, and Gorgeous

    The iPad Air’s design screams sophistication. It borrows heavily from the iPad Pro lineup, with flat edges, a uniform bezel, and a slim profile that’s just 6.1mm thick. Weighing just over a pound, it’s incredibly portable and comfortable to hold, even during extended use.

    Color Options That Stand Out

    Apple has given the iPad Air a splash of personality with vibrant color options like Pink, Blue, and Purple, alongside the more classic Space Gray and Starlight. These finishes are subtle yet stylish, making it easy to find a version that matches your vibe.

    Build Quality

    Despite its light weight, the iPad Air feels incredibly sturdy. The aluminum body is well-constructed, and the attention to detail is evident in every aspect of the design, from the button placement to the seamless integration of the Touch ID sensor into the power button.


    Display: A Visual Delight

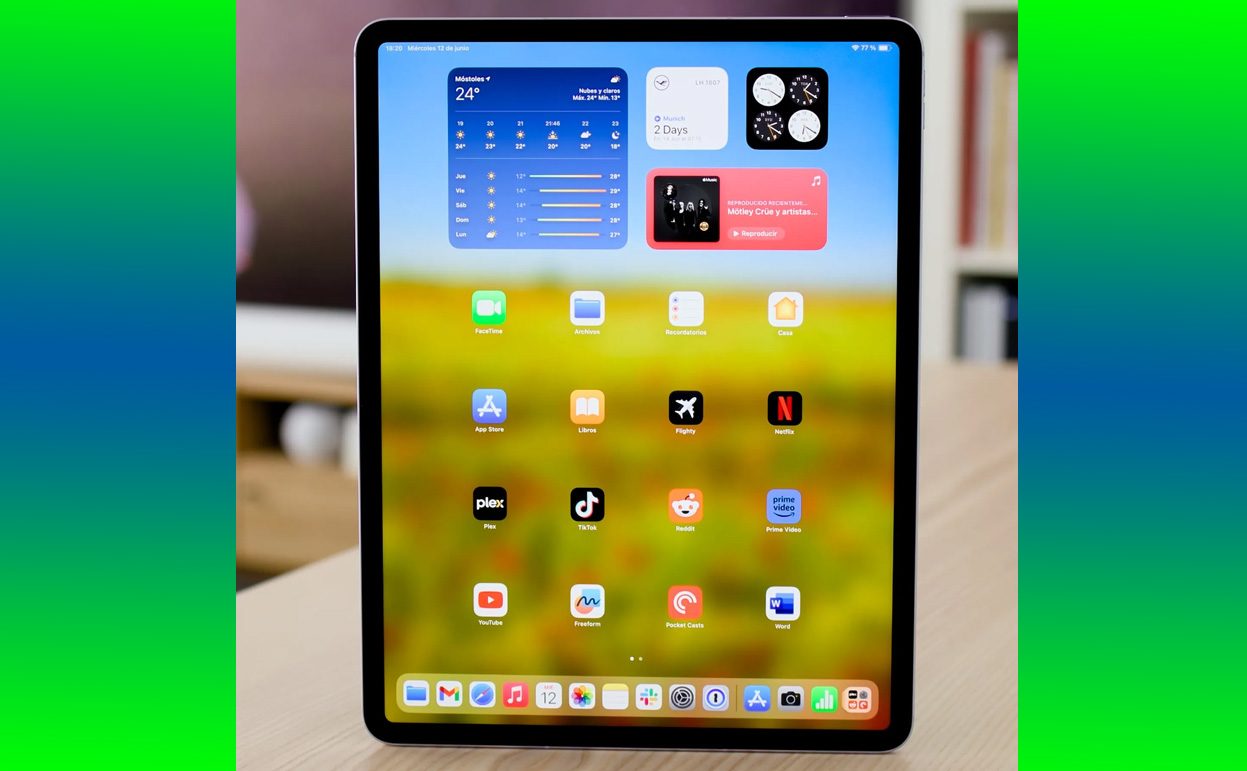
    One of the standout features of the iPad Air is its 10.9-inch Liquid Retina display. Whether you’re streaming Netflix, sketching with the Apple Pencil, or simply browsing the web, the display delivers stunning visuals.

    Sharp and Vivid

    The screen resolution of 2360 x 1640 ensures sharp text and vibrant colors. True Tone technology dynamically adjusts the display’s color temperature to match your environment, making it easy on the eyes whether you’re indoors or outdoors.

    Not Quite ProMotion, But Still Excellent

    While the iPad Air lacks the 120Hz ProMotion display found on the iPad Pro, its 60Hz refresh rate is still smooth enough for most tasks. Unless you’re a hardcore gamer or video editor, you’re unlikely to notice the difference.


    Performance: The M1 Chip Steals the Show

    The biggest surprise with the iPad Air is its M1 chip—the same processor found in the MacBook Air and iPad Pro. This isn’t just a tablet processor; it’s a full-blown powerhouse that can handle anything you throw at it.

    Everyday Tasks

    From web browsing and video calls to multitasking with apps like Microsoft Office and Slack, the iPad Air handles it all effortlessly. I found no lag or slowdown, even when juggling multiple apps in Split View.

    Creative Work

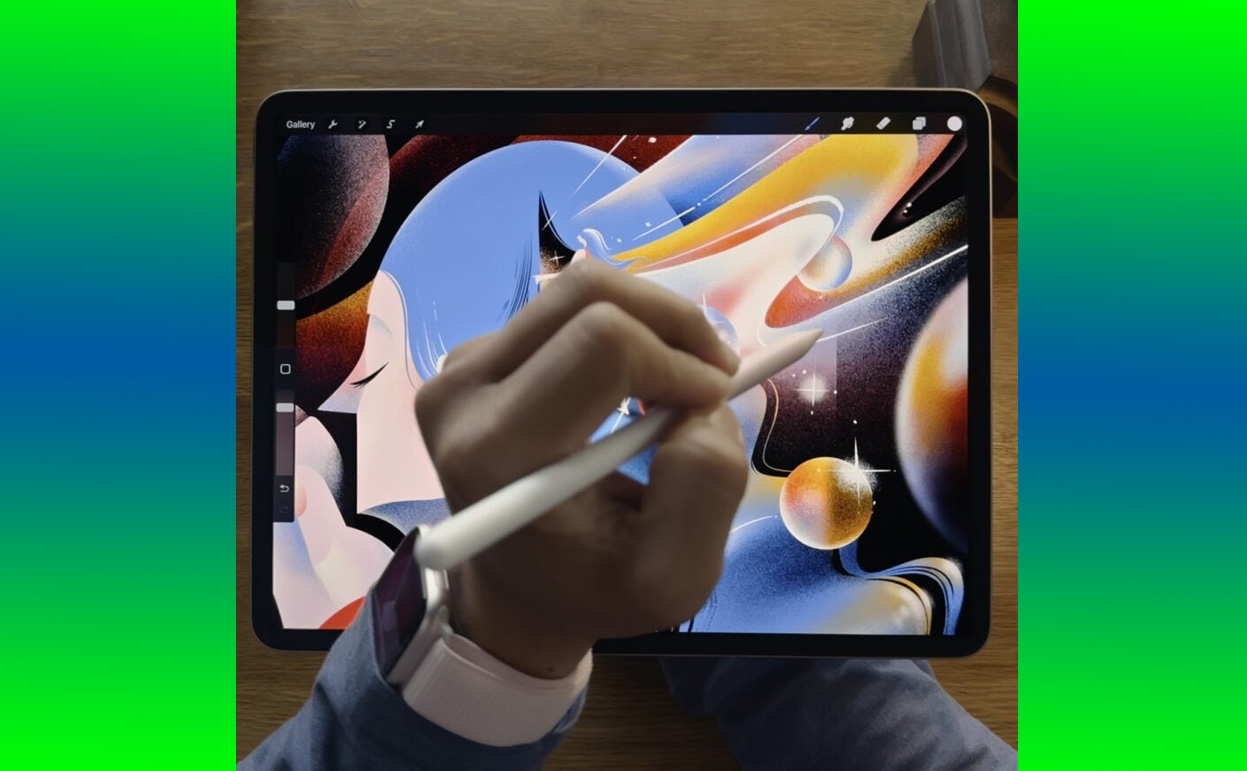
    For creatives, the M1 chip unlocks a world of possibilities. Apps like Procreate, Affinity Photo, and Adobe Lightroom run flawlessly, with no stuttering or delays. The iPad Air handles complex tasks like photo editing and digital illustration with ease, making it a great option for artists and designers.

    Gaming Performance

    Gaming on the iPad Air is a joy. Whether it’s fast-paced games like Genshin Impact or casual favorites like Monument Valley, the performance is buttery smooth. Paired with the crisp display and excellent speakers, the gaming experience feels immersive.


    Battery Life: All-Day Power

    Apple promises up to 10 hours of battery life for web browsing or video playback, and in my testing, the iPad Air delivered on that promise.

    • Light Use: With casual browsing, checking emails, and some light streaming, the battery easily lasted a full day.
    • Heavy Use: Even during demanding tasks like photo editing or gaming, the battery life held up admirably.

    The iPad Air also features USB-C charging, which makes it more versatile and allows for faster charging when paired with the right adapter.


    Apple Pencil and Magic Keyboard: Accessories That Elevate the Experience

    The iPad Air supports the Apple Pencil (2nd Generation) and the Magic Keyboard, both of which transform it into a productivity and creative powerhouse.

    Apple Pencil

    The Apple Pencil is incredibly responsive, making it perfect for note-taking, drawing, or annotating documents. The magnetic attachment for charging and storage is a thoughtful touch that ensures it’s always ready to go.

    Magic Keyboard

    The Magic Keyboard essentially turns the iPad Air into a compact laptop. The keys are tactile and comfortable, and the built-in trackpad makes navigating iPadOS a breeze. While the keyboard is pricey, it’s a worthwhile investment if you plan to use the iPad Air for work or school.


    iPadOS: The Software That Ties It All Together

    Running on iPadOS 17, the iPad Air benefits from Apple’s continued focus on making its tablets more versatile.

    Multitasking Features

    With Split View and Slide Over, you can easily work with multiple apps at once. I often found myself writing notes in one window while referencing research in another, and the process felt seamless.

    Stage Manager

    For those who want a more desktop-like experience, Stage Manager is a game-changer. It allows you to organize multiple windows on the screen, making multitasking more intuitive.


    Why It Feels Like a Mini Powerhouse

    The iPad Air excels because it doesn’t compromise. It offers nearly the same performance and features as the iPad Pro at a significantly lower price point, all while maintaining portability and ease of use.

    Who Is It For?

    • Students: Lightweight, powerful, and compatible with tools like the Apple Pencil and Magic Keyboard, it’s perfect for schoolwork and note-taking.
    • Professionals: From email to presentations, the iPad Air handles it all.
    • Creatives: Artists and designers will love its performance with creative apps.
    • Casual Users: If you just want a tablet for streaming, browsing, and light gaming, the iPad Air is more than capable.

    The Competition: How It Stacks Up

    The iPad Air sits in a competitive space, but it holds its own against alternatives like the Samsung Galaxy Tab S9 and Microsoft Surface Go 4.

    • Samsung Galaxy Tab S9: The AMOLED display on the Tab S9 is gorgeous, but it can’t match the iPad Air’s seamless integration with its ecosystem.
    • Microsoft Surface Go 4: While it’s a decent option for Windows users, the Surface Go’s performance falls short compared to the iPad Air.

    Final Thoughts: More Than Just Another Tablet

    After weeks of using the iPad Air, I can confidently say it’s not just another tablet—it’s a mini powerhouse that redefines what a mid-tier tablet can be. From its stunning design and vibrant display to its exceptional performance and versatility, the iPad Air proves that you don’t need to spend a fortune to get a premium experience.

    If you’re looking for a tablet that balances power, portability, and value, the iPad Air is hard to beat. It’s a device that can adapt to your needs, whether you’re working, creating, or relaxing—and it does

    Also Check:

  • Why the iPad Air Stands Out as One of the Best Value Tablet of 2024

    Why the iPad Air Stands Out as One of the Best Value Tablet of 2024


    In the vast sea of tablets available in 2024, one model continues to rise above the rest as a champion of value, versatility, and performance: the iPad Air. Combining the sleek design and advanced features of Apple’s high-end tablets with an accessible price point, the iPad Air manages to strike a balance that few other devices in its category achieve.

    Why the iPad Air Stands Out as One of the Best Value Tablet of 2024

    I spent weeks with the iPad Air, pushing its capabilities in everything from productivity tasks to entertainment. By the end, it became clear why this device is celebrated as one of the best value tablets of 2024. It isn’t just about specs or price—it’s about delivering an experience that feels premium, functional, and worth every penny.


    The iPad Air in 2024: What Makes It Special?

    Apple’s iPad Air has long been considered a sweet spot between the entry-level iPad and the powerhouse iPad Pro. In 2024, the current iteration of the iPad Air brings an impressive array of features powered by Apple’s M1 chip, borrowed from its Pro lineup, making it a standout in the mid-tier tablet market. But what really sets it apart is how effortlessly it blends premium performance with affordability.


    Design: Sleek and Modern Without Compromises

    One of the first things you notice about the iPad Air is its design. It exudes the kind of premium craftsmanship you’d expect from a much more expensive device.

    Slim and Lightweight

    At 6.1mm thick and weighing just over a pound, the iPad Air is incredibly portable. Whether you’re tossing it in a backpack or carrying it by hand, it’s light enough that you’ll barely notice it.

    All-Screen Appeal

    The iPad Air features a 10.9-inch Liquid Retina display, framed by slim, uniform bezels. This all-screen design is striking and immediately gives it a modern look that feels more in line with the iPad Pro than the budget iPad.

    Color Options That Pop

    Apple continues its tradition of offering fun yet sophisticated color options for the iPad Air. With shades like Pink, Blue, Purple, Space Gray, and Starlight, there’s something for every aesthetic preference.


    Display: Vibrant, Crisp, and Perfect for Any Task

    The Liquid Retina display on the iPad Air is another area where it punches above its weight. Whether you’re streaming your favorite shows, sketching with the Apple Pencil, or working on a project, the display consistently delivers sharp and vibrant visuals.

    True Tone Technology

    True Tone adjusts the display’s color temperature based on the surrounding light, ensuring a comfortable viewing experience no matter where you are. This feature makes a noticeable difference, especially during extended use.

    Anti-Reflective Coating

    While it lacks the mini-LED or ProMotion technology found on the iPad Pro, the iPad Air’s display holds its own with an anti-reflective coating. This makes it easier to use outdoors or under bright lights without straining your eyes.


    Performance: The Power of the M1 Chip

    The inclusion of Apple’s M1 chip is arguably the iPad Air’s biggest selling point. This is the same processor that powers the MacBook Air and iPad Pro, and its presence in a mid-tier tablet is a game-changer.

    Everyday Tasks Made Effortless

    From browsing the web and sending emails to running apps like Microsoft Office and Slack, the iPad Air is a productivity beast. Apps launch instantly, multitasking is seamless, and there’s no sign of lag—even when juggling multiple tabs and apps.

    Perfect for Creatives

    I tested the iPad Air with apps like Procreate and Adobe Lightroom, and the performance was nothing short of stellar. The M1 chip ensures that even resource-intensive tasks like photo editing and digital illustration run smoothly.

    Gaming Performance

    For casual and serious gamers alike, the iPad Air doesn’t disappoint. Games like Genshin Impact and Call of Duty: Mobile ran at high settings with zero hiccups. Coupled with the vibrant display, it’s an excellent choice for gaming on the go.


    Apple Pencil and Magic Keyboard: Enhancing Productivity

    The iPad Air supports the Apple Pencil (2nd Generation) and Magic Keyboard, turning it into a versatile tool for students, professionals, and creatives.

    Apple Pencil (2nd Gen)

    Whether you’re jotting down notes or sketching out designs, the Apple Pencil is a joy to use. Its precision and responsiveness make it feel like a natural extension of your hand. Plus, the magnetic attachment and wireless charging make it incredibly convenient.

    Magic Keyboard

    The Magic Keyboard transforms the iPad Air into a legitimate laptop alternative. With tactile keys, a built-in trackpad, and a floating design, it’s perfect for writing documents, editing spreadsheets, or simply navigating iPadOS.

    While these accessories are optional (and admittedly pricey), they unlock the full potential of the iPad Air, making it a productivity powerhouse.


    Battery Life: All-Day Usage

    One of the most impressive aspects of the iPad Air is its battery life. Apple promises up to 10 hours of web browsing or video playback, and my real-world usage aligned with these claims.

    • Streaming and Browsing: Watching Netflix and YouTube for hours barely put a dent in the battery.
    • Work Sessions: Even after a full day of emails, note-taking, and light photo editing, there was plenty of charge left.
    • Standby: The iPad Air sips power when not in use, making it perfect for those who use their tablet intermittently.

    iPadOS 17: The Software That Completes the Package

    The iPad Air runs on iPadOS 17, Apple’s latest tablet operating system. It’s packed with features that make the iPad Air more versatile and user-friendly than ever.

    Multitasking Features

    With Split View and Slide Over, you can run multiple apps simultaneously, which is perfect for productivity. I often found myself researching in Safari while taking notes in the Notes app, and the experience was seamless.

    Stage Manager

    Stage Manager, Apple’s multitasking interface, shines on the iPad Air. It allows you to organize multiple windows, giving the tablet a more desktop-like feel.

    Compatibility with macOS

    With features like Universal Control, I was able to drag and drop files between my MacBook and iPad Air effortlessly. It’s a small but significant feature that enhances workflow.


    Why the iPad Air Offers the Best Value in 2024

    When evaluating the iPad Air’s value, it’s important to consider what you’re getting for its $599 starting price. Compared to other tablets in its price range, the iPad Air offers unmatched performance, build quality, and ecosystem integration.

    Premium Features at a Mid-Range Price

    While it doesn’t have all the bells and whistles of the iPad Pro, the iPad Air delivers nearly 90% of the experience for a fraction of the cost. From its M1 chip to its Apple Pencil and Magic Keyboard support, it offers features typically reserved for high-end devices.

    Apple Ecosystem

    Being part of the Apple ecosystem is another significant advantage. Features like AirDrop, Handoff, and iCloud make it incredibly easy to integrate the iPad Air with other Apple devices.


    The Competition: How Does It Stack Up?

    The tablet market in 2024 is crowded, but the iPad Air holds its ground against competitors like the Samsung Galaxy Tab S9 and Microsoft Surface Go 4.

    • Galaxy Tab S9: While the Tab S9 offers a gorgeous AMOLED display and S Pen included, its software experience isn’t as refined as iPadOS.
    • Surface Go 4: The Surface Go is a solid choice for Windows users, but its performance and battery life don’t quite match the iPad Air.

    Final Verdict: The Best Value Tablet of 2024

    After weeks of testing, it’s clear why the iPad Air is celebrated as one of the best value tablets of 2024. It strikes a perfect balance between affordability and performance, offering features that cater to a wide range of users—from students and professionals to casual users.

    If you’re looking for a tablet that can handle everyday tasks, creative projects, and everything in between, the iPad Air is the way to go. It’s not just a great tablet; it’s an investment in a device that will continue to impress for years to come.

    Also Check: