Author: Evidence

  • I Tested the New Dell XPS 13: Here’s Why This Snapdragon-Powered Ultrabook Left Me Wanting More

    I Tested the New Dell XPS 13: Here’s Why This Snapdragon-Powered Ultrabook Left Me Wanting More

    As a tech enthusiast and longtime follower of Dell’s XPS lineup, I was excited to get my hands on the latest Dell XPS 13 (9345). This ultrabook marks a significant shift for the series, as it’s one of the first to feature Qualcomm’s new Snapdragon X Elite processor. I spent over a week putting this sleek machine through its paces, eager to see if it could live up to the XPS legacy while embracing ARM-based architecture.

    I Tested the New Dell XPS 13: Here's Why This Snapdragon-Powered Ultrabook Left Me Wanting More

    What I discovered was a mix of impressive features and unfortunate compromises that left me with mixed feelings about this Snapdragon-powered ultrabook.

    Key Takeaways:

    Pros Cons
    Sleek, lightweight design Limited port selection
    Excellent battery life Performance lags behind Intel/AMD competitors
    Gorgeous display options Cramped keyboard layout
    Impressive speakers Inconsistent x86 app performance
    AI-enhanced features High starting price

    Dell XPS 13 (9345) Review: A Familiar Face with Some Compromises

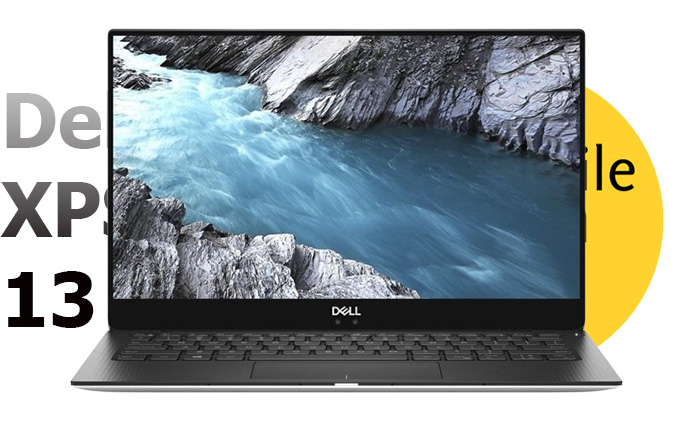
    When I first unboxed the Dell XPS 13 (9345), I was immediately struck by its gorgeous design. The laptop maintains the series’ reputation for premium build quality, featuring a CNC-machined aluminum chassis that feels incredibly solid in hand. At just 2.7 pounds (1.18 kg) and 14.8mm thick, it’s one of the most portable 13-inch laptops I’ve ever used.

    The matte Graphite finish on my review unit looked stunning and did an admirable job of resisting fingerprints. Dell also offers a Platinum color option for those who prefer a lighter aesthetic. The minimal branding – just a small Dell logo on the lid and an XPS logo on the bottom – contributes to the overall sleek appearance.

    However, this pursuit of thinness comes at a cost. The XPS 13 (9345) features only two USB-C ports – one on each side. While these are USB4 ports with DisplayPort and Power Delivery capabilities, the lack of additional connectivity options is disappointing. I found myself constantly reaching for dongles and adapters during my testing period.

    Display: A Visual Feast with Some Caveats

    My review unit came equipped with the high-end 3K Tandem OLED touch display, and it’s undoubtedly one of the laptop’s standout features. The colors are vibrant, blacks are deep, and HDR content looks fantastic. With 400 nits of brightness, it was more than adequate for indoor use, though I did find myself wishing for a bit more punch in brightly lit environments.

    The anti-reflective coating works well to minimize glare, and the Corning Gorilla Glass Victus provides peace of mind regarding durability. However, I did notice some significant shifts in color and perceived contrast when viewing the display at off-angles – something to keep in mind if you frequently share your screen with others.

    It’s worth noting that Dell also offers a more affordable Full HD+ IPS panel option, which boasts a higher 120Hz refresh rate compared to the OLED’s 60Hz. While I didn’t test this configuration, it might be a better choice for users prioritizing smooth scrolling over color accuracy.

    Keyboard and Touchpad: Form Over Function

    The XPS 13’s keyboard and touchpad are areas where I felt the pursuit of aesthetics somewhat hampered usability. The keyboard itself offers a decent typing experience with good key travel and feedback. However, the compact layout led to more typing errors than I’m used to, especially when reaching for keys near the edges.

    The capacitive touch function row looks sleek but proved frustrating in practice. The lack of tactile feedback made it easy to accidentally trigger functions, and I missed having physical keys for essential shortcuts. Additionally, these touch keys don’t function when the laptop is in sleep mode, which can be inconvenient.

    The invisible glass touchpad is a visual marvel, seamlessly blending into the palm rest. While it offers smooth tracking and good palm rejection, I found its undefined boundaries led to occasional misclicks and difficulty with precise cursor control.

    Performance: Snapdragon’s Growing Pains

    The heart of this XPS 13 is the Qualcomm Snapdragon X Elite X1E-80-100 processor, paired with integrated Adreno graphics. This marks a significant departure from the Intel chips typically found in the XPS line, and the results are mixed.

    For everyday tasks like web browsing, document editing, and light photo editing, the XPS 13 (9345) performed admirably. The system felt snappy and responsive, with quick app launches and smooth multitasking. However, when pushing the system harder, I noticed some limitations:

    1. Inconsistent x86 app performance: While many programs ran well through emulation, I experienced occasional hitches and slowdowns, particularly with more demanding software.
    2. Graphics performance: The integrated Adreno GPU struggled with anything beyond basic gaming or 3D tasks.
    3. Benchmark results: In synthetic tests, the XPS 13 (9345) often fell behind similarly priced Intel and AMD-powered ultrabooks.

    Here’s a quick look at some benchmark results:

    Benchmark Score
    Geekbench 6 Single Core 2,795
    Geekbench 6 Multi Core 14,478
    Cinebench 2024 Single 121
    Cinebench 2024 Multi 997
    3DMark Night Raid 25,732

    While these numbers aren’t bad, they don’t quite justify the XPS 13’s premium price tag when compared to the competition.

    Battery Life and Charging: A True All-Day Performer

    One area where the Snapdragon processor truly shines is battery life. The XPS 13 (9345) consistently lasted through full workdays with juice to spare. In my video playback test, it managed an impressive 16 hours of runtime – though it’s worth noting this falls short of Dell’s ambitious 35-hour claim for the Full HD+ model.

    The included 60W charger topped up the battery quickly, getting me from 10% to 50% in about 30 minutes. This fast-charging capability is a welcome feature for those times when you need a quick boost before heading out.

    Audio and Webcam: Punching Above Its Weight

    I was pleasantly surprised by the XPS 13’s quad-speaker setup. The two 2W woofers and two 2W tweeters delivered clear, full-bodied sound with decent bass response – impressive for such a thin laptop. While they won’t replace dedicated external speakers, they’re more than adequate for casual media consumption and video calls.

    The 1080p webcam is a step up from previous XPS models, offering improved low-light performance and support for Windows Studio effects. While it’s not the best laptop camera I’ve used, it’s perfectly serviceable for video conferencing. The inclusion of infrared sensors for Windows Hello facial recognition is a welcome touch, working quickly and reliably even in dimly lit rooms.

    Software and AI Features: A Glimpse of the Future

    Running Windows 11 Home out of the box, the XPS 13 (9345) comes with several AI-enhanced features that leverage the Snapdragon chip’s neural processing capabilities:

    • Copilot+: An AI assistant accessible via a dedicated key
    • Cocreator: AI-powered image generation integrated into Microsoft Paint
    • Windows Studio effects: Background blur, noise cancellation, and auto-framing for video calls

    While these features show promise, their current implementation feels somewhat limited. I’m curious to see how they evolve with future updates.

    The preinstalled MyDell app provides easy access to system settings and power modes, which I found useful for quickly adjusting performance profiles.

    Who Should Buy the Dell XPS 13 (9345)?

    After spending considerable time with this Snapdragon-powered XPS 13, I believe it’s best suited for:

    • Users prioritizing portability and battery life over raw performance
    • Those who primarily use web-based applications and light productivity software
    • Early adopters interested in exploring ARM-based Windows machines
    • Consumers who value premium design and are willing to accept some compromises

    Conclusion: A Promising but Imperfect Evolution

    The Dell XPS 13 (9345) represents an interesting step forward for the ultrabook market, showcasing the potential of ARM-based processors in Windows laptops. Its stunning design, excellent display, and impressive battery life are undeniable strengths. However, the combination of performance limitations, a cramped keyboard, and a high starting price make it difficult to wholeheartedly recommend over competing Intel or AMD-powered options.

    As someone who has long admired the XPS line, I found myself wanting more from this Snapdragon iteration. While it excels in certain areas, the overall package left me feeling that Dell hasn’t quite nailed the balance between innovation and practical usability. For now, potential buyers should carefully consider their needs and usage patterns before taking the plunge into the ARM-powered ultrabook world.

    Also Check:

  • Amazon Fire Stick Not Working: Troubleshooting Tips and Solutions

    Amazon Fire Stick Not Working: Troubleshooting Tips and Solutions

    When your Amazon Fire Stick suddenly stops working, it can be incredibly frustrating, especially when your’re in the mood to binge-watch your favorite shows. From connectivity problems to performance issues, a variety of things can go wrong with a Fire Stick. Fortunately, most of these issues are relatively easy to fix with some basic troubleshooting steps.

    Amazon Fire Stick Not Working

    In this comprehensive guide, I’ll share what I’ve learned from my experiences to help you get your Fire Stick back in working order as quickly as possible.

    Common Amazon Fire Stick Issues

    Before diving into the solutions, it’s important to understand the most common problems that can cause an Amazon Fire Stick to malfunction. Recognizing these issues can help me diagnose the problem faster and apply the right fix.

    Connectivity Problems

    Connectivity issues are among the most common problems I’ve encountered with my Fire Stick. Here’s a deeper look at what might be going wrong:

    • Wi-Fi Issues: The Fire Stick requires a stable Wi-Fi connection to stream content without interruption. I’ve noticed that even minor disruptions in Wi-Fi connectivity can lead to buffering, poor video quality, or the dreaded “Connection Lost” message. Factors that can affect Wi-Fi performance include the distance between the Fire Stick and the router, physical obstructions like walls and furniture, and interference from other wireless devices.
    • HDMI Connection Problems: If the Fire Stick isn’t properly connected to the TV via HDMI, it might not display anything on the screen, or the screen may flicker. In my experience, HDMI connection issues are often due to a loose cable, a faulty HDMI port, or compatibility issues with the TV’s input settings.

    Power Issues

    Without sufficient power, the Fire Stick won’t function correctly. Here’s what I’ve learned about power-related problems:

    • Power Source Problems: The Fire Stick relies on a steady power supply to operate. If the device isn’t getting enough power, it might reboot unexpectedly, freeze, or fail to start up at all. I’ve found that using the original power adapter and USB cable that came with the Fire Stick is crucial. Plugging the Fire Stick into a TV’s USB port for power is not recommended, as these ports often don’t provide enough power for the device to function properly.
    • Overheating: Like many electronic devices, the Fire Stick can overheat, especially when used for extended periods or in poorly ventilated areas. Overheating can cause the device to slow down, freeze, or shut down unexpectedly. To prevent overheating, I make sure the Fire Stick has plenty of ventilation and occasionally give it a break to cool down.

    Performance Issues

    Performance problems can ruin the streaming experience, but there are ways to fix them:

    • Lagging or Freezing: If my Fire Stick starts lagging or freezing, it’s often due to software glitches, low memory, or too many apps running in the background. The Fire Stick has limited RAM and storage, so keeping too many apps open or installed can slow it down. Regularly clearing the cache and data of apps I don’t use often can help maintain smooth performance.
    • App Crashes: Some apps might crash or fail to load properly, which can be incredibly annoying. This usually happens due to compatibility issues with the Fire Stick’s operating system, corrupted app data, or an outdated app version. Updating the app or the Fire Stick’s software often resolves these issues.

    Remote Control Issues

    A non-responsive remote can make it impossible to control the Fire Stick, but most remote issues are easy to fix:

    • Unresponsive Remote: If the remote stops working, the first thing I check is the batteries. If the batteries are fine, the issue might be with the pairing between the remote and the Fire Stick. Interference from other electronic devices can also cause the remote to behave erratically.
    • Pairing Problems: Occasionally, the remote might lose its connection to the Fire Stick, especially after a software update or if I’ve been using it with multiple devices. Re-pairing the remote usually solves this problem.

    Troubleshooting Tips

    Now that I’ve covered the common issues, let’s dive into some detailed troubleshooting steps to get your Amazon Fire Stick working again.

    Basic Checks

    Before attempting more advanced fixes, I recommend starting with these basic checks—they’re quick and often solve the problem.

    Restart the Fire Stick

    A simple restart can resolve a variety of minor issues with the Fire Stick. Here’s how I do it:

    1. Unplug the Fire Stick: Remove the Fire Stick from both the HDMI port and the power source.
    2. Wait for 30 seconds: This allows the device to reset fully.
    3. Plug it back in: Reconnect the Fire Stick to the HDMI port and the power source, then turn it on.

    This process can clear temporary software glitches and refresh the device’s connection to the TV.

    Check the Power Supply

    Ensuring the Fire Stick is receiving adequate power is crucial. Here’s how I troubleshoot power issues:

    1. Use the original power adapter: I always use the power adapter and USB cable that came with the Fire Stick. Other adapters might not provide the correct voltage.
    2. Avoid using the TV’s USB port: While it might be convenient, I’ve found that TV USB ports often don’t supply enough power for the Fire Stick to function correctly.
    3. Try a different outlet: If the Fire Stick isn’t powering on, I try plugging it into a different outlet or using a different power adapter to rule out issues with the power supply.

    Fixing Connectivity Issues

    Connectivity problems can be frustrating, but they’re usually straightforward to fix. Here’s what I do:

    Improve Wi-Fi Signal Strength

    A strong Wi-Fi signal is essential for streaming. Here’s how I optimize my Wi-Fi connection:

    1. Move the router closer: I’ve found that moving the router closer to the Fire Stick often improves the connection. If that’s not possible, I consider using a Wi-Fi extender.
    2. Reduce interference: Other electronic devices, especially those that use wireless signals (like cordless phones or microwaves), can interfere with the Wi-Fi signal. I make sure there are no such devices between the router and the Fire Stick.
    3. Restart the router: If the connection is still weak, I restart the router. This can refresh the connection and improve performance.

    Check the HDMI Connection

    HDMI connection issues can cause a variety of display problems. Here’s how I troubleshoot them:

    1. Re-seat the HDMI cable: I unplug the HDMI cable from both the TV and the Fire Stick, then plug it back in securely.
    2. Try a different HDMI port: If the screen is blank or flickering, I try connecting the Fire Stick to a different HDMI port on the TV. Sometimes, certain ports can be faulty or incompatible.
    3. Use an HDMI extender: Using the HDMI extender that comes with the Fire Stick can improve the connection, especially if the Fire Stick is too close to the back of the TV, which can cause overheating and connectivity issues.

    Resolving Performance Issues

    Performance issues like lagging or freezing can be particularly annoying. Here’s how I tackle them:

    Clear Cache and Data

    Apps that are lagging or crashing often just need their cache or data cleared. Here’s how I do it:

    1. Navigate to Settings: From the home screen, I go to Settings > Applications > Manage Installed Applications.
    2. Select the problematic app: I choose the app that’s causing issues.
    3. Clear Cache and Data: I select Clear Cache first, and if that doesn’t solve the problem, I go ahead and Clear Data as well.

    Clearing the cache frees up space and removes temporary files that might be causing the app to lag. Clearing data resets the app to its default state, which can fix more stubborn issues.

    Uninstall Unused Apps

    The Fire Stick has limited storage, so I make sure to uninstall any apps I no longer use. This frees up space and can improve overall performance. Here’s how I do it:

    1. Go to Settings: From the home screen, I go to Settings > Applications > Manage Installed Applications.
    2. Select the app to uninstall: I choose the app I no longer need.
    3. Click Uninstall: This removes the app from the Fire Stick, freeing up valuable storage space.

    Regularly cleaning up unused apps helps the Fire Stick run faster and more efficiently.

    Troubleshooting Remote Control Issues

    The remote is an essential part of the Fire Stick experience, and when it stops working, it can be incredibly frustrating. Here’s how I troubleshoot remote issues:

    Check the Batteries

    The first thing I check when the remote stops working is the batteries. Here’s what I do:

    1. Replace the batteries: I replace the existing batteries with fresh ones. I’ve found that high-quality alkaline batteries work best.
    2. Ensure proper insertion: I make sure the batteries are inserted correctly, with the positive and negative ends aligned with the markings inside the remote.

    If the remote still doesn’t work after replacing the batteries, the problem might be with the remote itself or its connection to the Fire Stick.

    Re-Pair the Remote

    If the remote has lost its connection to the Fire Stick, I need to re-pair it. Here’s how:

    1. Hold the Home button: I press and hold the Home button on the remote for at least 10 seconds.
    2. Wait for the pairing confirmation: The Fire Stick should display an on-screen message confirming that the remote has been paired.

    If the remote still isn’t working after trying the above steps, there might be a deeper issue at play. Here are some additional troubleshooting steps I can take:

    Use the Fire TV App as a Remote

    In situations where the physical remote continues to be unresponsive, I can turn to the Fire TV app, which is available for both iOS and Android devices. The app serves as a fully functional remote, allowing me to control my Fire Stick with ease. Here’s how I set it up:

    1. Download the Fire TV App: I download the app from the App Store or Google Play Store on my smartphone or tablet.
    2. Connect to the Same Wi-Fi Network: I ensure that both my Fire Stick and mobile device are connected to the same Wi-Fi network.
    3. Launch the App and Pair: When I open the app, it will automatically search for the Fire Stick on the network. Once it finds the device, I select it and follow the on-screen prompts to pair the app with the Fire Stick.

    Using the app can be a temporary solution or even a permanent one if the physical remote is completely non-functional.

    Factory Reset the Remote

    As a last resort, if none of the above steps have resolved the remote issue, I might consider performing a factory reset on the remote itself. This process will remove all settings and pairings, effectively restoring the remote to its default state. Here’s how I do it:

    1. Press and Hold: I press and hold the Home button, the Back button, and the Left side of the navigation circle simultaneously for 10-12 seconds.
    2. Wait for the Reset: After holding the buttons, I release them and wait for about 5-10 seconds. The remote should reset and unpair from the Fire Stick.
    3. Re-Pair the Remote: To re-pair the remote with the Fire Stick, I press and hold the Home button for 10 seconds until the Fire Stick recognizes the remote.

    Factory resetting the remote can often fix persistent issues, but it should be used as a last resort due to the inconvenience of re-pairing and reconfiguring the remote.

    Advanced Troubleshooting Solutions

    If basic troubleshooting doesn’t resolve the problem, I might need to try more advanced solutions. These steps can be more involved, but they’re often necessary when dealing with more complex issues.

    Update the Fire Stick Software

    Sometimes, the root cause of issues lies in outdated software. Ensuring the Fire Stick is running the latest software version is crucial for optimal performance. Here’s how I update the software:

    1. Navigate to Settings: From the home screen, I go to Settings > My Fire TV > About.
    2. Check for Updates: I select Check for Updates. If a software update is available, I follow the prompts to download and install it.
    3. Restart the Device: After updating, I restart the Fire Stick to ensure the new software is properly implemented.

    Keeping the software up to date not only fixes bugs and glitches but also improves the overall functionality and adds new features.

    Factory Reset the Fire Stick

    If I’ve exhausted all other options and the Fire Stick is still not working correctly, performing a factory reset might be necessary. This step should be considered a last resort because it will erase all data, settings, and installed apps, effectively restoring the Fire Stick to its original out-of-the-box state. Here’s how I perform a factory reset:

    1. Go to Settings: From the home screen, I navigate to Settings > My Fire TV > Reset to Factory Defaults.
    2. Confirm the Reset: I select Reset to confirm. The Fire Stick will begin the reset process, which can take a few minutes.
    3. Set Up the Fire Stick Again: After the reset, I need to set up the Fire Stick as if it were new. This involves connecting to Wi-Fi, signing in with my Amazon account, and reinstalling my favorite apps.

    While a factory reset can be inconvenient, it’s often the best solution for persistent, unresolved issues.

    Check for Hardware Damage

    If the Fire Stick is still malfunctioning after all software-related troubleshooting steps have been tried, the problem might be due to hardware damage. Here’s what I do to check for hardware issues:

    1. Inspect the Fire Stick: I carefully inspect the device for any visible signs of damage, such as cracks, bent connectors, or burnt spots.
    2. Check the HDMI Port: I inspect the HDMI port on the TV to ensure it’s not damaged or filled with dust, which could interfere with the connection.
    3. Try a Different TV: To rule out TV-related issues, I connect the Fire Stick to a different TV. If the device works fine on another TV, the problem might be with the original TV’s HDMI port or settings.

    If I suspect hardware damage, and the Fire Stick is still under warranty, I can contact Amazon customer support for a replacement or repair.

    Additional Tips

    • Regular Maintenance: Performing regular maintenance, such as clearing app caches and uninstalling unused apps, can prevent many common issues.
    • Keep Software Updated: Always keep the Fire Stick software and apps up to date to avoid compatibility issues and take advantage of new features.
    • Proper Placement: Ensure the Fire Stick is placed in a well-ventilated area to prevent overheating, which can lead to performance problems.

    Conclusion

    Having my Amazon Fire Stick not working can be a real headache, but with the right troubleshooting steps, I can usually get it back up and running in no time. From simple fixes like restarting the device or replacing the remote batteries to more advanced solutions like updating the software or performing a factory reset, there’s almost always a way to solve the problem.

    Remember, regular maintenance and keeping everything updated are key to ensuring that my Fire Stick continues to perform at its best. If all else fails, checking for hardware damage and contacting Amazon support might be necessary. With this guide, I’m confident I can tackle any Fire Stick issue that comes my way. Happy streaming!

    Also Check:

  • Is the Amazon Fire Stick 4K Still King? Our 2024 Review

    Is the Amazon Fire Stick 4K Still King? Our 2024 Review

    The Amazon Fire Stick 4K has revolutionized home entertainment, offering a compact and powerful streaming solution for modern viewers. As cord-cutting becomes increasingly popular, devices like the Fire Stick 4K play a crucial role in delivering high-quality content to our living rooms.

    Amazon Fire Stick 4K

    This advanced streaming device packs a punch with its ability to stream 4K Ultra HD content, support for various HDR formats, and integration with Alexa voice control, making it a formidable contender in the crowded streaming device market.

    Key Takeaways

    Feature Benefit
    4K Ultra HD streaming Crystal-clear picture quality
    Dolby Vision & HDR support Enhanced color and contrast
    Wi-Fi 6 compatibility Smoother streaming experience
    Alexa Voice Remote Convenient hands-free control
    Wide content ecosystem Access to numerous streaming services

    Product Specifications

    The Amazon Fire Stick 4K is designed to be a powerful yet discreet addition to your entertainment setup. Its compact form factor allows it to easily hide behind your TV, connected directly to an HDMI port.

    Physical Dimensions and Design

    • Size: 99 mm x 30 mm x 14 mm (housing only)
    • Weight: 43.5 g
    • Sleek black design with a candy bar shape

    Technical Specifications

    The Fire Stick 4K boasts impressive hardware that enables its high-performance streaming capabilities:

    1. Processor: Quad-core 1.7GHz
    2. GPU: 650MHz
    3. Memory: 2GB RAM
    4. Storage: 8GB internal storage
    5. Connectivity:
    • Wi-Fi 6 (802.11 a/b/g/n/ac/ax)
    • Bluetooth 5.2 + BLE
    1. Ports: HDMI 2.1 output with ARC input support, micro USB

    Supported Formats

    The Fire Stick 4K supports a wide array of video and audio formats, ensuring compatibility with various content types:

    • Video: Dolby Vision, HDR 10, HDR10+, HLG, H.265, H.264, VP9, AV1
    • Audio: Dolby Atmos, 7.1 surround sound, 2-channel stereo, and HDMI audio pass-through up to 5.1
    • Photo: JPEG, PNG, GIF, BMP

    Key Features

    Below are some of the features that you will find in the Fire Stick 4k:

    4K Ultra HD Streaming Capability

    The Amazon Fire Stick 4K lives up to its name by offering stunning 4K Ultra HD streaming. This feature provides four times the resolution of Full HD, resulting in incredibly sharp and detailed images. Users can enjoy their favorite movies, TV shows, and even some games in breathtaking clarity, provided they have a compatible 4K TV and sufficient internet bandwidth.

    Support for Dolby Vision, HDR10+, and HDR

    One of the standout features of the Fire Stick 4K is its comprehensive support for various High Dynamic Range (HDR) formats. This includes:

    • Dolby Vision: An advanced HDR format that provides scene-by-scene color optimization
    • HDR10+: An open-source HDR format that offers similar benefits to Dolby Vision
    • HDR: The standard HDR format that enhances contrast and color range

    This wide-ranging HDR support ensures that users can enjoy content with more vibrant colors, deeper blacks, and brighter whites, regardless of the HDR format used by the content provider.

    Dolby Atmos Audio

    The Fire Stick 4K doesn’t just excel in video quality; it also delivers immersive audio experiences through Dolby Atmos support. This advanced audio technology creates a three-dimensional soundscape, making viewers feel like they’re in the middle of the action. It’s worth noting that to fully appreciate Dolby Atmos, users need compatible audio equipment.

    Alexa Voice Remote

    The included Alexa Voice Remote elevates the user experience by providing hands-free control of the Fire Stick 4K. Users can:

    • Search for content across apps
    • Control playback (play, pause, rewind, etc.)
    • Adjust volume
    • Open apps
    • Control compatible smart home devices

    This integration of voice control makes navigation and content discovery significantly more convenient.

    Wide Range of Streaming Services

    The Fire Stick 4K provides access to a vast ecosystem of streaming services, including:

    • Amazon Prime Video
    • Netflix
    • Disney+
    • Hulu
    • YouTube
    • Apple TV+
    • And many more

    Additionally, users can access free content through services like Amazon Freevee, Pluto TV, and Tubi, expanding the range of available entertainment options without additional cost.

    Setup and Ease of Use

    Setting up the Amazon Fire Stick 4K is designed to be a straightforward process, making it accessible even for those who aren’t particularly tech-savvy.

    Step-by-Step Installation Process

    1. Plug the Fire Stick 4K into an available HDMI port on your TV
    2. Connect the power adapter to the Fire Stick and plug it into a power outlet
    3. Turn on your TV and select the appropriate HDMI input
    4. Follow the on-screen instructions to pair the Alexa Voice Remote
    5. Connect to your Wi-Fi network
    6. Sign in with your Amazon account (or create one if you don’t have it)
    7. Begin installing your preferred streaming apps

    User Interface and Navigation

    The Fire Stick 4K features Amazon’s intuitive Fire TV interface, which has been refined over several generations of devices. The home screen presents users with a mix of recommended content, recently used apps, and quick access to favorite streaming services. The interface is designed to be visually appealing while remaining easy to navigate, with clear categories and a logical layout.

    Alexa Voice Control Integration

    One of the standout features of the Fire Stick 4K is its seamless integration with Alexa voice control. Users can perform a wide range of actions simply by speaking into the Alexa Voice Remote, including:

    • Searching for specific movies, TV shows, or actors
    • Launching apps
    • Controlling playback (play, pause, rewind, etc.)
    • Adjusting volume
    • Switching inputs
    • Controlling compatible smart home devices

    This voice integration significantly enhances the user experience, making it easier and faster to navigate the device’s features and find desired content.

    Performance

    The Amazon Fire Stick 4K is designed to deliver high-performance streaming, and it generally lives up to this promise in real-world use.

    Streaming Quality and Speed

    When connected to a stable and fast internet connection, the Fire Stick 4K provides excellent streaming quality. 4K content is crisp and detailed, while HDR content showcases impressive color range and contrast. The device is capable of streaming 4K content at 60 frames per second, ensuring smooth playback for compatible content.

    App Loading Times

    Thanks to its quad-core 1.7GHz processor and 2GB of RAM, the Fire Stick 4K offers snappy performance when navigating the interface and loading apps. Most popular streaming apps load within a few seconds, though this can vary depending on the specific app and your internet connection speed.

    Wi-Fi 6 Benefits for Smoother Streaming

    One of the notable upgrades in the latest version of the Fire Stick 4K is support for Wi-Fi 6 (802.11ax). This newer Wi-Fi standard offers several benefits for streaming:

    • Higher throughput: Wi-Fi 6 can handle more data, which is particularly beneficial for 4K and HDR content.
    • Reduced latency: This results in faster response times and less buffering.
    • Better performance in congested networks: Wi-Fi 6 handles multiple connected devices more efficiently, which is increasingly important in modern smart homes.

    It’s worth noting that to take full advantage of Wi-Fi 6, users need a compatible router. However, the Fire Stick 4K is also backward compatible with older Wi-Fi standards.

    Content Ecosystem

    The Amazon Fire Stick 4K shines not just in its hardware capabilities, but also in the vast content ecosystem it provides access to. This expansive library of entertainment options is one of the device’s strongest selling points.

    Overview of Available Streaming Services

    The Fire Stick 4K supports a wide array of popular streaming services, including:

    1. Amazon Prime Video
    2. Netflix
    3. Disney+
    4. Hulu
    5. HBO Max
    6. Apple TV+
    7. YouTube
    8. Spotify
    9. Pandora
    10. ESPN+

    This comprehensive selection ensures that users have access to a diverse range of content, from movies and TV shows to music and live sports.

    Free Content Options

    One of the appealing aspects of the Fire Stick 4K is the availability of free content through various ad-supported streaming services. Some notable options include:

    • Amazon Freevee: Amazon’s own ad-supported streaming service, offering a selection of movies, TV shows, and original content.
    • Pluto TV: A free streaming service that offers live TV channels and on-demand content.
    • Tubi: Another ad-supported service with a large library of movies and TV shows.
    • YouTube: While not exclusively a free service, YouTube offers a vast amount of free content.

    These free options significantly expand the entertainment possibilities for users, even without paid subscriptions.

    Gaming Capabilities

    While not primarily marketed as a gaming device, the Fire Stick 4K does offer some gaming capabilities:

    • Access to casual games through the Amazon Appstore
    • Compatibility with Amazon Luna, Amazon’s cloud gaming service (requires separate subscription)
    • Ability to stream Xbox games with an Xbox Game Pass Ultimate subscription

    While it won’t replace a dedicated gaming console, the Fire Stick 4K can provide a casual gaming experience for those interested.

    Smart Home Integration

    The Amazon Fire Stick 4K extends its functionality beyond just streaming, serving as a hub for smart home control thanks to its integration with Alexa.

    Alexa-Enabled Features

    With the Alexa Voice Remote, users can control various aspects of their smart home:

    • Adjust smart lighting
    • Control smart thermostats
    • View live feeds from compatible security cameras
    • Arm or disarm smart security systems
    • Control smart plugs and switches

    This integration allows the Fire Stick 4K to serve as a central control point for a wide range of smart home devices, enhancing its value beyond just entertainment.

    Compatibility with Other Smart Home Devices

    The Fire Stick 4K is designed to work seamlessly with other Amazon smart home devices, such as:

    • Echo speakers
    • Ring doorbells and cameras
    • Amazon Smart Plug
    • Eero mesh Wi-Fi systems

    However, its compatibility extends beyond just Amazon’s ecosystem. The Fire Stick 4K can integrate with a wide range of third-party smart home devices that are Alexa-compatible, including products from brands like Philips Hue, Nest, and many others.

    Comparison with Other Streaming Devices

    To fully appreciate the Amazon Fire Stick 4K, it’s helpful to compare it with other options in the streaming device market.

    Fire TV Stick 4K vs. Fire TV Stick 4K Max

    While both devices offer 4K streaming capabilities, there are some key differences:

    Feature Fire TV Stick 4K Fire TV Stick 4K Max
    Processor Quad-core 1.7 GHz Quad-core 1.8 GHz
    RAM 2GB 2GB
    Wi-Fi Wi-Fi 6 Wi-Fi 6E
    Storage 8GB 16GB
    Picture-in-Picture Yes Yes
    Live View Picture-in-Picture Yes Yes

    The Fire TV Stick 4K Max offers slightly better performance and more storage, as well as support for the newer Wi-Fi 6E standard.

    Comparison with Roku and Google Chromecast Alternatives

    When compared to competitors like Roku and Google Chromecast, the Fire Stick 4K holds its own:

    • Roku Streaming Stick 4K: Both offer similar 4K HDR capabilities, but the Fire Stick 4K has the advantage of Alexa integration and a more robust app ecosystem.
    • Google Chromecast with Google TV: The Chromecast offers a similar feature set, including 4K HDR and voice control. The choice often comes down to ecosystem preference (Amazon vs. Google) and specific content availability.

    Pricing and Value Proposition

    The Amazon Fire Stick 4K is competitively priced, offering a lot of features for its cost.

    Cost Analysis

    As of the time of writing, the Fire Stick 4K is priced at $49.99 (though it’s often discounted during sales events). This price point positions it as a mid-range option in the streaming device market, offering high-end features like 4K HDR streaming at a relatively affordable price.

    Bundled Offers and Deals

    Amazon frequently offers bundle deals that can increase the value proposition of the Fire Stick 4K:

    • Bundles with Echo devices for enhanced smart home functionality
    • Packages with extended warranties
    • Promotional offers that include free trials of streaming services

    These bundles and deals can make the Fire Stick 4K an even more attractive option for potential buyers.

    Sustainability Features

    Amazon has made efforts to improve the sustainability of its devices, including the Fire Stick 4K.

    Use of Recycled Materials

    The Fire Stick 4K and its remote are made with 22% recycled materials, reflecting Amazon’s commitment to reducing the environmental impact of its products.

    Energy Efficiency Considerations

    The device includes a Low Power Mode that reduces energy consumption when idle, contributing to its overall energy efficiency. Additionally, Amazon invests in renewable energy projects to offset the electricity usage of its devices.

    Pros and Cons

    Advantages of the Fire Stick 4K

    1. Excellent 4K HDR streaming capabilities
    2. Wide range of supported streaming services
    3. Alexa voice control integration
    4. Competitive pricing
    5. Wi-Fi 6 support for improved streaming performance
    6. Smart home control capabilities

    Potential Drawbacks or Limitations

    1. Interface can sometimes prioritize Amazon content over other services
    2. 8GB storage might be limiting for some users who want to install many apps
    3. Requires an Amazon account, which might not appeal to all users
    4. Some users may find the ads on the home screen intrusive

    Conclusion

    The Amazon Fire Stick 4K stands out as a powerful and versatile streaming device that offers excellent value for money. Its combination of 4K HDR streaming capabilities, wide content ecosystem, Alexa integration, and smart home features make it a compelling choice for anyone looking to upgrade their streaming setup.

    While it faces stiff competition from other streaming devices, the Fire Stick 4K’s seamless integration with the Amazon ecosystem, coupled with its competitive pricing and frequent promotional offers, gives it a significant edge in the market. For those already invested in the Amazon ecosystem or looking for a capable 4K streaming device with smart home capabilities, the Fire Stick 4K is an excellent choice that delivers on its promises.

    Also Check:

  • Amazon Fire Stick Remote: Comprehensive Guide, Troubleshooting Tips, and Maintenance Advice

    Amazon Fire Stick Remote: Comprehensive Guide, Troubleshooting Tips, and Maintenance Advice

    The Amazon Fire Stick Remote is an essential component of the Fire TV experience, offering a convenient way to control your streaming device. Whether you’re browsing through your favorite shows, searching for content using voice commands, or adjusting settings, the remote plays a pivotal role in enhancing the overall user experience.

    Amazon Fire Stick Remote

    In this comprehensive guide, we will delve into the different types of Amazon Fire Stick remotes, their compatibility with various devices, how to set them up, and much more.

    By the end of this article, you’ll have all the information you need to choose the right remote for your needs.

    Key Takeaways

    Feature Details
    Types of Remotes Standard, Alexa Voice Remote, Fire TV Remote App
    Compatibility Varies by Fire Stick generation and model
    Price Range $10.38 on average
    Battery Type Alkaline recommended, avoid rechargeable batteries
    Setup Simple pairing process with step-by-step instructions
    User Feedback Mostly positive, with some compatibility concerns


    Amazon Fire Stick Remote

    The Amazon Fire Stick Remote is more than just a tool to navigate your streaming device—it’s your gateway to a world of entertainment. With a simple press of a button, you can access thousands of movies, TV shows, apps, and games. But not all remotes are created equal.

    Some come with advanced features like voice control and Alexa integration, while others are more basic. Understanding the differences between these remotes can help you make an informed decision when upgrading or replacing your existing one.

    Types of Amazon Fire Stick Remotes

    Amazon offers a range of remotes to cater to different user needs. Below, we’ll explore the three main types: the Standard Remote, the Alexa Voice Remote, and the Fire TV Remote App.

    Standard Remote

    The Standard Remote is the most basic option available for Amazon Fire Stick users. It typically features a simple design with buttons for navigation, playback control, and settings. While it lacks the advanced features of more sophisticated remotes, it is still highly functional and easy to use.

    Key Features:

    • Simple button layout for easy navigation.
    • Compatible with older Fire Stick models.
    • Affordable and widely available.

    Pros:

    • Cost-Effective: Ideal for users looking for a budget-friendly option.
    • User-Friendly: Easy to use with no setup required.

    Cons:

    • Limited Features: No voice control or Alexa integration.
    • Basic Design: Lacks the sleekness and modernity of other models.

    Alexa Voice Remote

    The Alexa Voice Remote is a step up from the Standard Remote, offering advanced features that make it a favorite among tech enthusiasts. With this remote, you can use voice commands to search for content, control playback, and even interact with your smart home devices.

    Key Features:

    • Voice Control: Use Alexa to search for shows, open apps, and more.
    • Advanced Navigation: Includes dedicated buttons for popular apps like Netflix and Prime Video.
    • Smart Home Integration: Control smart home devices using the remote.

    Pros:

    • Convenience: Voice control makes it easier to search and control content.
    • Versatility: Works with a variety of Fire Stick models and smart home devices.

    Cons:

    • Price: More expensive than the Standard Remote.
    • Complexity: May have a steeper learning curve for less tech-savvy users.

    Fire TV Remote App

    For those who prefer a digital solution, the Fire TV Remote App is a great alternative to physical remotes. Available on both Android and iOS, this app offers all the functionality of a physical remote and more.

    Key Features:

    • Touch Navigation: Navigate through the Fire Stick interface using your smartphone.
    • Voice Control: Integrated voice search via your phone’s microphone.
    • Keyboard Input: Type searches and passwords quickly with your phone’s keyboard.

    Pros:

    • Convenience: Always have your remote with you, as long as you have your phone.
    • Additional Features: Use your phone’s keyboard for faster text input.

    Cons:

    • Battery Drain: Using the app can drain your phone’s battery quickly.
    • Connectivity Issues: Requires a stable Wi-Fi connection to function properly.

    Compatibility Guide

    Not all Amazon Fire Stick Remotes are compatible with every Fire Stick model. Below, we’ll explore which remotes work with which devices and how to check compatibility.

    Compatible Devices

    The Amazon Fire Stick Remote is compatible with a variety of Fire Stick devices, but it’s important to ensure you’re using the right remote for your model.

    Fire Stick Model Compatible Remotes
    Fire TV Stick Lite Alexa Voice Remote, Fire TV Remote App
    Fire TV Stick (2nd & 3rd Gen) Standard Remote, Alexa Voice Remote, Fire TV Remote App
    Fire TV Stick 4K & 4K Max Alexa Voice Remote, Fire TV Remote App
    Fire TV Cube (1st & 2nd Gen) Alexa Voice Remote, Fire TV Remote App
    Fire TV (3rd Gen, Pendant Design) Alexa Voice Remote, Fire TV Remote App

    Incompatible Devices

    Some older or less common devices are not compatible with certain remotes. It’s crucial to verify compatibility before making a purchase.

    Incompatible Devices:

    • Fire TV (1st and 2nd Gen)
    • Fire TV Stick (1st Gen)
    • Fire TV Edition Smart TVs (e.g., Toshiba, Insignia)

    How to Check Compatibility

    Before purchasing a new Amazon Fire Stick Remote, it’s advisable to check compatibility with your device. Here’s how:

    1. Consult the User Manual: Most manuals will indicate which remotes are compatible with your Fire Stick.
    2. Check Online: Visit the Amazon website or product page for compatibility information.
    3. Customer Support: Contact Amazon customer service for advice if you’re unsure.

    How to Pair and Set Up Your Amazon Fire Stick Remote

    Setting up your Amazon Fire Stick Remote is a straightforward process, but it’s important to follow the correct steps to ensure smooth operation.

    Initial Setup

    Before pairing your remote, ensure that your Fire Stick is properly connected to your TV and that you have fresh alkaline batteries ready.

    1. Unpack Your Remote: Remove the remote from its packaging.
    2. Insert Batteries: Install new alkaline batteries. Avoid using rechargeable batteries as they can cause performance issues.
    3. Connect Your Fire Stick: Plug in your Fire Stick and ensure it’s powered on.

    Pairing the Remote

    Pairing your Amazon Fire Stick Remote is simple:

    1. Restart the Fire Stick: Unplug the power cable and plug it back in after a few seconds.
    2. Press the Home Button: Hold down the Home button on your remote for about 10 seconds.
    3. Wait for Confirmation: Your TV should display a message confirming that the remote is paired.

    Troubleshooting Tips:

    • Remote Not Pairing: Try holding the Home button for a longer period, up to 20 seconds.
    • Reset the Remote: If the remote is still not working, remove the batteries and reinsert them before trying to pair again.

    Where to Buy Amazon Fire Stick Remotes

    Finding a reliable source to purchase your Amazon Fire Stick Remote is crucial to avoid counterfeit products and ensure compatibility.

    Authorized Retailers

    It’s always best to buy from authorized retailers to guarantee authenticity. Amazon’s official website is the most reliable source, but other trusted retailers include:

    • Best Buy
    • Walmart
    • Target

    Online Marketplaces

    While Amazon is the go-to for many, you can also find Amazon Fire Stick Remotes on other online marketplaces. However, it’s important to be cautious of counterfeit products.

    Popular Online Platforms:

    • eBay: Offers a wide range of remotes, but be sure to check seller ratings and reviews.
    • Newegg: Another trusted online store with good deals on electronics.
    • Local Retailers: In regions like Nigeria, consider local stores that specialize in gadgets.

    Pricing

    The cost of Amazon Fire Stick Remotes can vary depending on the model and region. On average, the remote is priced around $10.38. Prices may be lower in other regions but always consider shipping costs and potential import fees.

    User Reviews and Feedback

    Understanding the experiences of other users can provide valuable insights into the performance and reliability of Amazon Fire Stick Remotes.

    Positive Experiences

    Many users report high satisfaction with their Amazon Fire Stick Remotes, especially with the Alexa Voice Remote. According to a review from Paul on 07/30/2024, “Very functional,” and Oliver E. mentioned on 03/27/2024, “Works perfectly. Thanks so much.”

    Common Issues

    Despite the generally positive feedback, some users have reported issues, particularly regarding compatibility. For example, some users found that older Fire Stick models do not pair well with newer remotes.

    Expert Opinion

    Tech experts often highlight the value of the Amazon Fire Stick Remote, especially the Alexa Voice Remote, as a significant upgrade over traditional TV remotes. According to CNET, the Alexa Voice Remote is praised for its “seamless integration with Amazon’s ecosystem”, allowing users to control not just their Fire Stick but also other Alexa-enabled devices in their home. Experts also note that the voice search functionality is “remarkably accurate”, making it easier to find content quickly.

    However, some experts have pointed out potential downsides. For instance, Tom’s Guide mentions that while the Alexa Voice Remote is powerful, “it can be overkill for users who don’t utilize voice commands or have a simpler entertainment setup.” For those users, the standard remote or the Fire TV Remote App might be more appropriate options.

    Troubleshooting Common Issues with Amazon Fire Stick Remotes

    Even with a reliable device like the Amazon Fire Stick Remote, users may occasionally encounter issues. Below are some common problems and their solutions.

    Remote Not Working

    One of the most frequent issues users face is their remote not working. This can be due to several factors, such as dead batteries, pairing issues, or even a faulty remote.

    Solutions:

    • Check the Batteries: Ensure the batteries are fresh and properly installed. Use alkaline batteries, as rechargeable ones can sometimes cause issues.
    • Re-Pair the Remote: If the remote isn’t responding, try re-pairing it by holding down the Home button for 10-20 seconds.
    • Restart the Fire Stick: Unplug the Fire Stick, wait for a minute, and plug it back in. This can reset the connection.

    Voice Commands Not Working

    If your Alexa Voice Remote isn’t responding to voice commands, this can be frustrating, especially if you rely on this feature.

    Solutions:

    • Check the Microphone: Ensure that the microphone button on the remote is functioning and that you’re speaking directly into the remote.
    • Update the Software: Make sure your Fire Stick is running the latest software version, as updates can fix bugs that affect voice commands.
    • Reboot the Device: A simple restart of your Fire Stick can often resolve issues with voice commands.

    Lagging or Unresponsive Remote

    Sometimes, users may notice that their remote is slow to respond or unresponsive altogether. This can be due to interference, low battery, or an outdated device.

    Solutions:

    • Remove Obstacles: Ensure there are no physical barriers between the remote and the Fire Stick.
    • Replace the Batteries: Low battery power can cause lag. Replace them with new, high-quality alkaline batteries.
    • Update Firmware: Make sure both the remote and the Fire Stick are updated to the latest firmware to ensure optimal performance.

    Maintenance Tips for Prolonging the Life of Your Amazon Fire Stick Remote

    Maintaining your Amazon Fire Stick Remote is crucial for ensuring its longevity and functionality. Below are some tips to help you keep your remote in top condition.

    Regular Battery Checks

    Tip: Always use high-quality alkaline batteries and avoid using rechargeable batteries, as they can reduce the remote’s performance over time. Replace the batteries every few months, depending on usage.

    Keep It Clean

    Tip: Dust and grime can accumulate on the buttons and inside the remote, causing it to malfunction. Wipe down your remote regularly with a dry or slightly damp cloth. Avoid using any harsh chemicals that could damage the remote.

    Store Properly

    Tip: When not in use, store your remote in a safe place where it won’t be easily knocked off or damaged. If you have young children or pets, consider placing the remote in a drawer or on a high shelf to prevent it from being chewed or misplaced.

    Avoid Physical Damage

    Tip: Be careful not to drop the remote or expose it to water. Even though the remote is designed to be durable, repeated drops or exposure to moisture can cause long-term damage.

    Conclusion

    The Amazon Fire Stick Remote is an indispensable tool for anyone using a Fire TV device, offering a range of features from basic navigation to advanced voice control with Alexa. Understanding the different types of remotes available, their compatibility with various Fire Stick models, and how to properly set up and maintain them can significantly enhance your streaming experience.

    Whether you opt for the simplicity of the Standard Remote, the advanced features of the Alexa Voice Remote, or the convenience of the Fire TV Remote App, there is an option to suit every user’s needs. By following the maintenance tips and troubleshooting advice provided, you can ensure that your Amazon Fire Stick Remote remains functional and reliable for years to come.

    In summary, investing in the right Amazon Fire Stick Remote can make a significant difference in how you interact with your streaming device. With the knowledge gained from this guide, you’re well-equipped to make an informed choice that best suits your lifestyle and entertainment needs.

    Also Check:

  • Skullcandy Hesh Evo Headphones Review: The Affordable Audio King?

    Skullcandy Hesh Evo Headphones Review: The Affordable Audio King?

    If you’re on the hunt for affordable wireless headphones that don’t skimp on quality, the Skullcandy Hesh Evo might just be the perfect fit. Priced at $103.99, these headphones promise high-quality audio, a comfortable design, and long-lasting battery life, all without breaking the bank. After putting them to the test, I believe the Hesh Evo could be one of the best budget-friendly options available today. Here’s why they might just be the headphones you’ve been looking for.

    Skullcandy Hesh Evo Headphones Review: The Affordable Audio King?

    Supreme Audio Quality at an Affordable Price

    The Skullcandy Hesh Evo headphones are equipped with 40mm drivers that deliver powerful, crystal-clear sound. For their price range, these headphones punch well above their weight, offering sound quality that rivals more expensive models.

    The acoustics are well-balanced, providing clarity across all frequencies—from deep bass to crisp highs. Whether you’re listening to your favorite playlists, watching movies, or gaming, the Hesh Evo offers a robust audio experience that doesn’t disappoint. It’s no wonder these headphones are rated 4.4 out of 5 stars by over 481 users on Amazon.

    Long Battery Life and Rapid Charging

    One of the standout features of the Skullcandy Hesh Evo is its impressive battery life. With up to 36 hours of playtime on a single charge, these headphones are ideal for long journeys, all-day listening sessions, or marathon gaming.

    Even if you do run out of battery, the rapid charge feature is a lifesaver—just a 10-minute charge provides up to 3 hours of listening time. This makes them perfect for those who are constantly on the go and need headphones that can keep up with their busy lifestyle.

    Comfortable Fit for All-Day Wear

    Comfort is key when it comes to headphones, especially if you plan to wear them for extended periods, and the Hesh Evo delivers on this front. Users have described the fit as “cushiony and plush,” with ample cushioning both on the ear cups and the headband.

    The soft headband adds to the comfort, reducing pressure on the top of the head, while the noise-isolating design ensures that you can enjoy your music without outside distractions. These headphones are perfect for commuting, office use, or lounging at home, offering a snug but comfortable fit that doesn’t cause fatigue.

    Tile Technology: Never Lose Your Headphones Again

    One feature that sets the Skullcandy Hesh Evo apart from other budget headphones is its integration with Tile technology.

    This means you can easily track down your headphones if you ever misplace them. Simply download the Tile app, and you can see their last known location or make them ring if they’re nearby. This feature is incredibly useful for those prone to losing their gadgets, providing peace of mind and adding value to your purchase.

    Extra Value with Additional Accessories and Warranty

    The Hesh Evo headphones come with a few extras that sweeten the deal. Included in the box is a bonus Skullcandy charging cable, ensuring you have everything you need right out of the box. Additionally, these headphones come with a 1-year US warranty, giving you confidence in their durability and build quality.

    Skullcandy’s reputation for creating reliable, long-lasting products is upheld with the Hesh Evo, making them a wise investment for anyone looking for quality headphones without a hefty price tag.

    Conclusion: Are the Skullcandy Hesh Evo Headphones Right for You?

    After testing the Skullcandy Hesh Evo, it’s clear that these headphones are designed with the everyday user in mind. They offer excellent sound quality, impressive battery life, and comfortable wear—all at an affordable price point. The addition of Tile technology and the bonus accessories make them an even more attractive option for budget-conscious buyers.

    If you’re looking for a versatile pair of headphones that deliver on performance without costing a fortune, the Hesh Evo is a great choice. Whether you’re commuting, working out, or just relaxing at home, these headphones offer a fantastic audio experience that’s hard to beat at this price.

    Also Check:

  • RUNOLIM Hybrid Active Noise Cancelling Headphones: After testing them out, I’m convinced these are some of the best headphones

    RUNOLIM Hybrid Active Noise Cancelling Headphones: After testing them out, I’m convinced these are some of the best headphones

    If you’re looking for budget-friendly headphones that pack a punch, the RUNOLIM Hybrid Active Noise Cancelling Headphones are worth considering. Priced at $27.99, these headphones offer premium features, such as advanced noise cancellation, Hi-Fi audio, and an impressive battery life, making them a strong contender in the affordable headphone market.

    RUNOLIM Hybrid Active Noise Cancelling Headphones

    After testing them out, I’m convinced these are some of the best headphones you can get without breaking the bank. Here’s why they might be the perfect choice for you.

    Advanced Active Noise Cancellation for an Immersive Listening Experience

    The standout feature of the RUNOLIM headphones is their Advanced Active Noise Cancellation (ANC) technology. Designed to effectively reduce external ambient noise by up to 95%, these headphones are perfect for blocking out the noise of a bustling street, a noisy coffee shop, or a busy office.

    This makes them ideal for those who want to focus on their music, podcasts, or audiobooks without any distractions. The ANC feature creates an immersive listening experience that allows you to enjoy your favorite tunes in peace, even in noisy environments.

    Hi-Fi Audio Quality with HD Microphones

    Despite their budget-friendly price, the RUNOLIM headphones deliver Hi-Fi audio quality that rivals more expensive models. The updated sound processing technology ensures clear and detailed sound across all frequencies, particularly in the bass and mid-range. This means you can enjoy rich, deep bass without sacrificing clarity in the mids and highs.

    The built-in HD microphone is another bonus, providing clear voice capture for voice assistants, video calls, and online classes. Whether you’re listening to music or participating in a Zoom meeting, the sound quality remains consistently good.

    Impressive 70-Hour Battery Life

    One of the most impressive features of the RUNOLIM headphones is their 70-hour playtime in standard music mode and up to 45 hours with ANC enabled. This extended battery life means you can go days, or even weeks, without needing to recharge, depending on your usage.

    It’s perfect for long trips, daily commutes, or simply forgetting to charge your headphones. And if the battery does run out, the included 3.5mm audio cable allows you to switch to wired mode, ensuring you’re never without your music. However, it’s worth noting that the ANC function only works in Bluetooth mode, not when using the audio cable.

    Seamless Bluetooth 5.3 Connectivity

    The RUNOLIM headphones feature Bluetooth 5.3 connectivity, which provides a stable and fast connection within a range of up to 33 feet (10 meters). This ensures a seamless listening experience without interruptions or drops in connection, whether you’re using them with an iPhone, Android device, or any other Bluetooth-enabled gadget.

    The foldable and adjustable design makes these headphones suitable for all head sizes, and their lightweight build means they’re easy to carry around, whether you’re traveling or just moving from room to room.

    Comfortable Design for All-Day Use

    Comfort is key, especially when wearing headphones for extended periods, and the RUNOLIM headphones excel in this area. The ear muffs are made from protein leather, which mimics the texture of human skin, providing a snug fit without pressure.

    This material is not only soft but also durable, ensuring comfort for long listening sessions. The foldable design also adds to their portability, making them easy to store in a bag or backpack. Whether you’re working from home, traveling, or just relaxing, these headphones provide a comfortable fit for all-day use.

    Value for Money: Affordable Yet Feature-Packed

    At just $27.99 (or $22.99 for Prime members), the RUNOLIM headphones offer an incredible array of features typically found in more expensive models. From advanced noise cancellation and high-quality audio to a comfortable design and long battery life, these headphones provide excellent value for money.

    They also come with a 1-year warranty and 30-day free returns, giving you peace of mind with your purchase. This makes them an excellent choice for those who want premium features without the premium price tag.

    Conclusion: Are RUNOLIM Headphones Worth It?

    If you’re in the market for affordable, high-quality headphones, the RUNOLIM Hybrid Active Noise Cancelling Headphones are a fantastic choice. They offer an impressive range of features, including advanced noise cancellation, long battery life, and high-fidelity audio, all at a budget-friendly price.

    With their comfortable design and versatile connectivity options, these headphones are perfect for everyday use, travel, and more. Whether you’re a casual listener or someone looking for an affordable yet reliable set of headphones, the RUNOLIM headphones are definitely worth considering.

    Also Check:

  • I Spent 24 Hours with the Skullcandy Crusher ANC 2 Headphones, and They’re Surprisingly Impressive So Far

    I Spent 24 Hours with the Skullcandy Crusher ANC 2 Headphones, and They’re Surprisingly Impressive So Far

    After spending a full 24 hours with the Skullcandy Crusher ANC 2, I’m pleasantly surprised by just how impressive these headphones are. Packed with advanced features like active noise cancellation, sensory bass technology, and a whopping 50-hour battery life, these headphones offer a premium listening experience at a mid-range price.

    Skullcandy Crusher ANC 2 Headphones

    Here’s a deep dive into my experience with the Crusher ANC 2 and why they might just be the best over-ear headphones from Skullcandy yet.

    Immersive Bass Experience with Crusher Tech

    Right from the first listen, the Crusher Tech stands out. The headphones feature a bass slider that allows you to customize the bass levels to your liking. You can go from a subtle thump to an earth-shaking bass that literally vibrates through the headphones.

    Whether you’re listening to hip-hop, EDM, or even a movie score, this feature makes every audio experience feel unique and personal. The bass is deep and rich, offering a tactile experience that is rare in this price range.

    Personalized Audio with Custom Sound

    What caught my attention next was the custom sound feature. These headphones come equipped with a built-in hearing test that adjusts the audio output based on your unique hearing profile. After going through a quick test, I noticed a significant difference in the clarity and balance of the sound.

    It was as if the headphones knew exactly what frequencies to boost or tone down to suit my ears. Whether you’re catching subtle details in an acoustic track or feeling the punch of a bass drop, the Crusher ANC 2 makes your music sound better than ever before.

    Effective Noise Cancelling Technology

    During my 24 hours with the Skullcandy Crusher ANC 2, I was particularly impressed by the active noise cancelling capabilities. Equipped with four microphones, these headphones excel at blocking out external noise, whether it’s the hum of a coffee shop, the chatter in a busy office, or the drone of an airplane.

    The adjustable noise cancelling feature is a game-changer—it allows you to fine-tune the level of ambient sound you want to let in, providing flexibility for different environments. This makes the Crusher ANC 2 versatile, adapting to your needs whether you want complete isolation or a bit of awareness of your surroundings.

    Unmatched 50-Hour Battery Life

    The 50-hour battery life is another area where these headphones shine. I was able to use them continuously throughout the day, from morning workouts to evening relaxation, without having to worry about charging.

    The battery life is not only long-lasting but also complemented by rapid charging capabilities. A quick 10-minute charge gives you an additional 4 hours of playtime, which is perfect for those moments when you’re on the go and need a quick power boost. This long battery life, combined with the quick charging feature, ensures that the Crusher ANC 2 can keep up with even the most demanding schedules.

    Seamless Connectivity and Smart Features

    Connecting the Skullcandy Crusher ANC 2 to my devices was a breeze, thanks to Bluetooth connectivity. Pairing with my smartphone, tablet, and laptop was quick and effortless.

    The headphones also come with Skull-iQ smart features and are Alexa-enabled, providing voice control for hands-free operation. This allows you to adjust the volume, skip tracks, or even make calls using just your voice. The convenience of these smart features enhances the overall user experience, making the Crusher ANC 2 not just a pair of headphones, but a comprehensive audio solution.

    Superior Comfort for Prolonged Use

    Comfort is crucial for any over-ear headphones, especially for extended listening sessions, and the Crusher ANC 2 delivers exceptionally in this regard. The plush ear cushions and adjustable headband provide a snug yet comfortable fit, ensuring that the headphones remain comfortable even after hours of use.

    The over-ear design also adds to the immersive experience by effectively blocking out ambient noise and enhancing sound isolation. Whether you’re using them at home, on the commute, or during a long flight, the Crusher ANC 2 is designed to keep you comfortable throughout.

    Exceptional Value at a Competitive Price

    At a limited-time deal price of $139.88 (originally $229.99), the Skullcandy Crusher ANC 2 headphones offer incredible value for money.

    With features like advanced noise cancelling, personalized sound, a powerful bass experience, and a long-lasting battery, they provide a premium listening experience at a fraction of the cost of high-end competitors. The added smart features and comfort enhancements further solidify their position as one of the best choices for budget-conscious audiophiles looking for quality and performance.

    Conclusion: Worth the Investment?

    After spending 24 hours with the Skullcandy Crusher ANC 2 headphones, I can confidently say that they exceed expectations in almost every area. From the customizable bass and personalized sound to the robust noise-cancelling capabilities and impressive battery life, these headphones are designed to deliver an exceptional audio experience.

    Whether you’re a music lover, a frequent traveler, or someone who needs reliable, high-quality headphones for everyday use, the Crusher ANC 2 is a solid investment. Given their competitive pricing and feature set, they’re easily one of the best headphones Skullcandy has released to date.

    Also Check:

  • The Skullcandy Crusher Evo Headphones are Here, and I Think They’re the Best Skullcandy’s Made Yet

    The Skullcandy Crusher Evo Headphones are Here, and I Think They’re the Best Skullcandy’s Made Yet

    When it comes to over-ear headphones, Skullcandy has always been a brand that balances affordability with quality. But with the release of the Skullcandy Crusher Evo headphones, they’ve taken their game to a whole new level. These headphones are not just a minor upgrade—they’re a complete reimagining of what Skullcandy can offer to both casual listeners and serious audiophiles.

    The ‘Skullcandy Crusher Evo’ Headphones are Here, and I Think They’re the Best Skullcandy’s Made Yet

    After spending some time with the Crusher Evo, I believe they are the best headphones Skullcandy has ever made. Here’s why.

    Revolutionary Unmatched Bass Experience

    The first thing that stands out about the Skullcandy Crusher Evo is their sensory bass technology. Unlike standard headphones, which offer a fixed bass response, the Crusher Evo comes with a sensory bass slider that lets you adjust the bass to your liking. Want a subtle thump for your classical music? Slide it down.

    Craving an earth-shaking rumble for your hip-hop playlist? Crank it all the way up. This adjustable bass experience is what makes the Crusher Evo truly unique. It’s like having a built-in subwoofer that you can control, making every listening session a customized experience. The bass is not just loud; it’s deep and resonant, delivering a powerful punch that you can feel, not just hear.

    Personalized Sound for a Tailored Listening Experience

    Another standout feature is the Personal Sound capability. The Skullcandy Crusher Evo headphones can actually tailor their sound output to your specific hearing profile. The headphones utilize an in-app test to analyze your hearing sensitivity at different frequencies and then adjust the sound output accordingly.

    The result is a sound experience that is uniquely yours—one that highlights the frequencies you can hear best and enhances the ones you might struggle with. This feature ensures that whether you’re listening to podcasts, music, or movies, you’re getting the most out of every sound wave. It’s an impressive leap forward for Skullcandy, showing they’re serious about stepping up their audio game.

    Exceptional Battery Life and Rapid Charging Capabilities

    When it comes to battery life, the Crusher Evo doesn’t disappoint. These headphones deliver up to 40 hours of playtime on a single charge. For most users, that’s a week’s worth of use without needing to recharge.

    But even when you do need to plug them in, the Crusher Evo offers Rapid Charge technology—a quick 10-minute charge provides an additional 4 hours of listening time. This makes them perfect for those on the go who don’t have time to sit around waiting for their headphones to charge. The long battery life, coupled with fast charging, ensures that your music is always there when you need it.

    Versatile Connectivity Options for Seamless Audio

    The Skullcandy Crusher Evo headphones offer versatile connectivity options, including both Bluetooth for wireless listening and a 3.5mm audio cable for wired connections. This dual connectivity ensures that you can use these headphones in any situation, whether you’re at home, at the office, or on the move.

    The Bluetooth connection is robust and stable, allowing for seamless pairing with both iPhone and Android devices, as well as laptops and tablets. This versatility is perfect for users who like to switch between devices throughout the day.

    Built-In Tile Technology: Never Lose Your Headphones Again

    Losing your headphones is a common frustration, but Skullcandy has integrated Tile technology directly into the Crusher Evo, making it easy to locate them if they’re misplaced. With the Tile App, you can ring your headphones or see their last known location on a map.

    This feature provides peace of mind, especially for those who are constantly on the go and might accidentally leave their headphones behind. It’s a thoughtful addition that enhances the overall user experience, ensuring that your investment is always protected.

    Comfort and Durability: Built for All-Day Use

    Comfort is another area where the Skullcandy Crusher Evo shines. The headphones feature memory foam ear cushions and an adjustable headband, providing a snug but comfortable fit for all-day wear. The over-ear design not only helps with sound isolation but also adds to the comfort, making these headphones ideal for long listening sessions.

    The build quality is robust, with high-quality materials that feel durable yet lightweight. This makes the Crusher Evo perfect for both commuting and home use, providing comfort and durability without compromising on style.

    Value for Money: High-End Features at a Mid-Range Price

    At a price point of $139.98 (with a 30% discount from the original $199.99), the Skullcandy Crusher Evo offers an exceptional array of features that are typically found in much more expensive headphones.

    From the unique sensory bass and personalized sound profile to the impressive battery life and built-in Tile technology, these headphones deliver tremendous value for the price. They are not just another pair of headphones; they are a comprehensive audio solution designed to enhance your listening experience in every way.

    Conclusion: The Best Skullcandy Headphones Yet?

    After testing the Skullcandy Crusher Evo, it’s clear that these are not just an incremental upgrade—they’re a significant leap forward. The combination of innovative features, robust sound quality, long battery life, and comfortable design makes them stand out in a crowded market. For anyone looking for high-quality over-ear headphones that offer a customized listening experience and powerful bass, the Crusher Evo is an excellent choice. In my opinion, they’re the best headphones Skullcandy has made yet.

    Also Check:

  • Pixel Watch 3 Battery Life: How Long does Pixel Watch 3 Last?

    Pixel Watch 3 Battery Life: How Long does Pixel Watch 3 Last?

    Battery life is a critical factor when choosing a smartwatch, and the Pixel Watch 3 promises some notable improvements in this department. After extensively testing the watch in various scenarios, here’s a detailed breakdown of how long the Pixel Watch 3 truly lasts and what factors can influence its battery performance.

    Pixel Watch 3 Battery Life: How Long does Pixel Watch 3 Last?


    The Promised Battery Life: What Google Claims

    Google claims that the Pixel Watch 3 offers up to 24 hours of battery life with the always-on display (AOD) enabled. This is a significant enhancement compared to its predecessor and positions the Pixel Watch 3 as a strong contender for those seeking a watch that can comfortably last through a full day without needing a charge. For those who opt to use the Battery Saver mode, which limits certain features to extend usage, the Pixel Watch 3 can reportedly last up to 36 hours. This is particularly useful for users on long trips or those who may not have immediate access to a charger.

    Real-World Testing: How Does It Perform in Everyday Use?

    In practical, everyday scenarios, the battery life of the Pixel Watch 3 varies depending on several factors, such as usage patterns, display settings, and connectivity options. Here’s a closer look at how it performs:

    • Standard Usage: With mixed usage, which includes checking notifications, making occasional calls, using fitness tracking features, and controlling music playback, the Pixel Watch 3 comfortably lasted a full 24 hours. This aligns well with Google’s claims, making it a reliable choice for daily use without the worry of the battery running out before the end of the day.
    • Heavy Usage: For power users who frequently engage in activities such as GPS tracking for workouts, streaming music via LTE, or utilizing the watch’s other advanced features like Google Maps navigation and Always-On Display (AOD), the battery life tends to dip closer to 18-20 hours. While this still covers most of a waking day, it’s worth noting that you might need a quick top-up in the evening if you plan on an extended night out or using it overnight for sleep tracking.

    Charging Capabilities: Quick to Recharge

    One of the standout features of the Pixel Watch 3 is its fast charging capability. Google promises that a short charge can provide several hours of battery life. From our tests, a quick 15-minute charge gave approximately 7 hours of battery life, which is perfect for those who need a fast top-up before heading out. A full charge from 0% to 100% takes around 75 minutes, which is fairly standard but faster than some competitors in the same category.

    Battery-Saving Tips: Getting the Most Out of Your Pixel Watch 3

    For those looking to maximize the battery life of their Pixel Watch 3, here are a few practical tips:

    • Turn Off Always-On Display: While the AOD is convenient, disabling it can significantly extend battery life. You can still quickly wake the watch by raising your wrist or tapping the screen.
    • Limit Background Activities: Restricting background activities and closing unused apps can help conserve battery. Also, turning off unnecessary notifications can prevent the watch from waking up too frequently.
    • Use Battery Saver Mode: This mode is especially useful when you need to stretch the battery over longer periods. It limits certain features but still allows for basic functionalities like timekeeping and notifications.
    • Optimize Connectivity: If you’re not using LTE, turning off mobile data can save battery. Similarly, disabling Wi-Fi and relying on Bluetooth alone when paired with your phone can also help extend battery life.

    Comparing to the Competition: How Does It Stack Up?

    Compared to other smartwatches in its category, the Pixel Watch 3’s battery life is competitive. It’s slightly ahead of some models like the Apple Watch Series 8, which also claims around 18-20 hours of battery life but falls behind the likes of Garmin or Fitbit models, which are more geared towards extended battery life due to fewer power-hungry features.

    Conclusion: Is the Battery Life Good Enough?

    The Pixel Watch 3 offers a well-balanced battery life that caters to most users’ needs, especially those who appreciate a smartwatch with robust features and solid integration with the Google ecosystem. Whether you’re a casual user or a fitness enthusiast, the Pixel Watch 3 provides enough juice to get you through the day with some room to spare. Its fast charging capability is an excellent safety net for those moments when you need a quick recharge. So, if battery life is a key consideration in your decision to buy a new smartwatch, the Pixel Watch 3 doesn’t disappoint.

    Also Check:

  • How to Connect Pixel Watch 3

    How to Connect Pixel Watch 3

    The Pixel Watch 3 offers seamless integration with Android devices, particularly those in the Pixel lineup. Setting it up and connecting it to your smartphone is straightforward, but there are a few steps to ensure you’re getting the best experience. Here’s a comprehensive guide on how to connect your Pixel Watch 3 to your smartphone and start enjoying its features.

    How to Connect Pixel Watch 3

    How to Connect Pixel Watch 3

    Before connecting your Pixel Watch 3, make sure your smartphone is ready. Ensure that your phone is running on Android 8.0 or later and has the latest version of the Google Pixel Watch app installed from the Google Play Store. The Pixel Watch 3 works best with Google’s Pixel phones but is compatible with a wide range of Android devices. Make sure Bluetooth is enabled on your smartphone to facilitate a smooth connection.

    Initial Setup and Pairing Process

    Turn on your Pixel Watch 3. When you first power on your Pixel Watch 3, you’ll see a prompt on the watch screen to start the pairing process. If you haven’t already, open the Google Pixel Watch app on your smartphone. The app will guide you through the setup process, beginning with searching for available devices.

    Once your Pixel Watch 3 appears on the list, select it to begin the pairing process. A pairing code will appear on both your watch and your smartphone. Verify that the codes match, then confirm the pairing request on both devices. This step establishes a secure connection between your watch and phone, allowing them to communicate effectively.

    Signing in and Setting Up Google Account

    After pairing, the app will prompt you to sign in with your Google account. This is an important step as it syncs your watch with your account, allowing access to features such as Google Assistant, Google Pay, and seamless synchronization of apps and notifications. If you already have a Google account signed in on your phone, you can quickly sync it with your Pixel Watch 3.

    Follow the instructions on the screen to grant the necessary permissions, such as location access, contacts, and calendar synchronization. These permissions are essential for enabling the full functionality of your Pixel Watch 3, including notifications, navigation, and fitness tracking.

    Personalizing Your Pixel Watch 3

    Once the initial setup is complete, you’ll be prompted to personalize your watch. This includes selecting your preferred watch face from a variety of customizable options. You can choose a watch face that displays essential information such as time, date, weather, or fitness metrics. You can customize the complications and widgets to suit your needs directly through the watch or using the app on your phone.

    The app also allows you to customize quick settings, app shortcuts, and notification preferences. This setup ensures that your Pixel Watch 3 is tailored to your specific requirements, providing quick access to your most-used apps and features.

    Connecting to Wi-Fi and Setting Up LTE (If Applicable)

    If your Pixel Watch 3 supports LTE, you have the option to set up a mobile network connection. This feature allows the watch to function independently of your phone, using a mobile data plan to access the internet, send messages, and make calls. To set up LTE, follow the prompts in the Google Pixel Watch app. You may need to provide information about your carrier and select a suitable data plan.

    Additionally, connecting your watch to a Wi-Fi network can help conserve battery life and improve connectivity. Go to the settings menu on your watch, select “Network & Connections,” then “Wi-Fi,” and choose your network from the list. Enter the password if required, and your watch will connect to Wi-Fi when in range, allowing for more efficient data usage.

    Exploring Features and Syncing Apps

    With the Pixel Watch 3 connected to your phone, you can start exploring its features. The watch is equipped with Google Assistant, allowing for voice commands to set reminders, send messages, control smart home devices, and more. Sync your music apps like Spotify or YouTube Music to enjoy offline playback during workouts.

    The Pixel Watch 3 also integrates deeply with fitness apps, particularly Google Fit and Fitbit. Ensure your fitness and health apps are synced for accurate activity tracking, heart rate monitoring, and access to personalized health insights. This setup allows you to use advanced features like real-time workout stats, sleep tracking, and stress management.

    Updating Your Pixel Watch 3 Software

    After the initial setup, check for any available software updates for the Pixel Watch 3. Keeping your watch updated with the latest software ensures optimal performance, security, and access to new features. To check for updates, navigate to “Settings” on your watch, select “System,” then “Software Update.” If an update is available, follow the prompts to install it.

    Regular updates not only improve the functionality of your Pixel Watch 3 but also provide important security patches that protect your data and personal information.

    Conclusion

    Connecting your Pixel Watch 3 is a straightforward process that enhances its functionality and integrates it with your digital lifestyle. From fitness tracking to smart notifications and seamless integration with Google’s ecosystem, the Pixel Watch 3 is designed to complement and enhance your everyday experiences. By following these steps, you can ensure a smooth setup and start taking advantage of all the features this powerful smartwatch has to offer.

    Also Check: