Author: Evidence

  • How to Connect Apple Pencil to iPad

    How to Connect Apple Pencil to iPad

    The Apple Pencil is a powerful tool that brings precision, creativity, and productivity to your iPad experience. Whether you’re sketching, taking notes, or editing photos, the Apple Pencil enhances the way you interact with your device. To fully enjoy these benefits, it’s crucial to know how to connect your Apple Pencil properly. This guide will help you get started and ensure you’re making the most of your Apple Pencil.
    How to Connect Apple Pencil to iPad

    How to Connect Apple Pencil to iPad

    The Apple Pencil is a game-changer for iPad users, whether you’re an artist, note-taker, or just love the precision it offers. But to unlock its full potential, you need to know how to connect it properly. This guide will walk you through every step, ensuring you get the most out of your Apple Pencil and iPad combo. So, to connect:

    Step 1: Understand the Apple Pencil Models

    Apple offers two versions of the Apple Pencil: the first generation and the second generation. Each is designed for specific iPad models, so it’s important to know which one works with your device. The first-generation Apple Pencil is compatible with earlier iPad models like the iPad (6th generation), iPad mini (5th generation), and iPad Pro 10.5-inch.

    The second-generation Apple Pencil, with its sleek design and magnetic attachment, works with newer models like the iPad Pro 11-inch (3rd generation) and the iPad Air (4th generation). Knowing your Apple Pencil model is the first step in connecting it correctly.

    Step 2: Prepare Your iPad

    Before you connect your Apple Pencil, make sure your iPad is ready. Start by checking for any software updates under Settings > General > Software Update. Keeping your iPad updated ensures compatibility with the Apple Pencil. Additionally, verify that Bluetooth is turned on, as it’s essential for pairing the Pencil with your iPad.

    Step 3: Charge Your Apple Pencil

    A charged Apple Pencil is essential for a successful connection. For the first-generation Apple Pencil, plug it into your iPad’s Lightning port or use a Lightning adapter. The second-generation Apple Pencil charges differently—it snaps magnetically to the side of your iPad, where it also charges wirelessly. Give it a few minutes to juice up if it’s running low.

    Step 4: Connect the Apple Pencil

    (1st Generation):

    • Connecting the first-generation Apple Pencil is straightforward. Begin by removing the cap and plugging the Pencil into your iPad’s Lightning connector.
    • A prompt will appear on the screen asking if you want to pair the devices. Tap “Pair,” and your Apple Pencil will be connected.
    • To charge the first-generation Apple Pencil, simply leave it plugged into the iPad or use a Lightning adapter.

    (2nd Generation):

    • For the second-generation Apple Pencil, the process is even simpler.
    • Just attach the Pencil to the magnetic connector on the side of your compatible iPad. The Pencil will automatically pair with your device, and it will start charging as well.
    • You’ll see a notification on your screen confirming that the Apple Pencil is connected and ready to use.

    Step 5: Test the Connection

    Once your Apple Pencil is connected, you’ll want to make sure it’s working correctly. Open a drawing app like Procreate or use the Notes app to test its responsiveness. If everything is functioning as it should, you’re ready to start creating!

    You can draw, take notes, and navigate your iPad with precision. Explore the settings to customize your experience, like enabling double-tap gestures on the second-generation Pencil. Pair it with apps like Procreate, Notability, or Adobe Fresco to make the most of its features.

    Troubleshooting Connection Issues

    If your Apple Pencil isn’t connecting, don’t worry. First, make sure Bluetooth is enabled on your iPad and that the Pencil is charged. For the first-generation Pencil, try unplugging it and plugging it back in. For the second generation, detach and reattach it to the magnetic connector. Restarting your iPad or checking for software updates can also help resolve any connection problems.

    To keep your Apple Pencil in top condition, handle it with care. Store it in a safe place when not in use, and avoid exposing it to extreme temperatures. For the first-generation Pencil, be mindful of the cap, as it can be easily lost. The battery life is essential, so try to keep it charged, especially if you plan to store it for a while.

    Conclusion

    Connecting your Apple Pencil to your iPad is a simple but essential step in unlocking its full potential. Whether you’re using it for work or play, the Apple Pencil enhances the iPad experience in ways that few accessories can. Now that you’re connected, it’s time to explore all the creative and productive possibilities that await.

    Frequently Asked Questions (FAQs)

    Can you connect more than one Apple Pencil to an iPad?

    No, you can only pair one Apple Pencil to an iPad at a time. If you want to use a different Apple Pencil, you’ll need to unpair the current one and pair the new one.

    What should you do if the Pencil isn’t drawing smoothly?

    First, try restarting your iPad. If the issue persists, check the settings in the app you’re using to ensure there are no issues affecting the Apple Pencil’s performance. Also, inspect the tip of the Apple Pencil for any wear and replace it if necessary.

    How do you replace the Apple Pencil tip?

    To replace the tip, simply unscrew the old one and screw in a new tip until it is securely attached. Replacement tips are available from Apple.

    What should you do if your Apple Pencil isn’t pairing with your iPad?

    Ensure your iPad is compatible with the Apple Pencil and that your iPad’s Bluetooth is turned on. For the 1st Generation, plug the Pencil into the Lightning port; for the 2nd Generation, attach it to the magnetic connector. If it still doesn’t pair, restart your iPad and try again.

    How can you check the battery level of the Apple Pencil?

    You can check the battery level by adding the Batteries widget to your iPad’s Today View. For the 2nd Generation, the battery level will also briefly display when you attach the Pencil to the magnetic connector.

    Can you use the Apple Pencil with a screen protector on your iPad?

    Yes, you can use the Apple Pencil with a screen protector, but make sure the protector is high-quality and designed to work with the Apple Pencil to avoid any impact on sensitivity.

    How do you unpair an Apple Pencil from an iPad?

    To unpair an Apple Pencil, go to Settings > Bluetooth, find your Apple Pencil in the list of devices, and tap Forget This Device. You can then pair a new Pencil if needed.

    Also Check:

  • How to Take Screenshot on iPad Pro

    How to Take Screenshot on iPad Pro

    Taking a screenshot on your iPad Pro can be incredibly handy for various reasons. Screenshots are versatile tools whether you want to save a quick snippet of information, capture a memorable moment in a video, or create a visual guide for a friend. They’re quick to capture, easy to edit, and shareable across multiple platforms. Plus, having the ability to capture exactly what’s on your screen ensures you never miss a detail.

    How to Take Screenshot on iPad Pro

    How to Take a Screenshot on iPad Pro

    Taking a screenshot on your iPad Pro is a quick and easy way to capture whatever is on your screen, whether it’s a favorite quote, an important confirmation number, or a funny conversation you want to save. With just a simple press of buttons, you can instantly create an image of your screen, which you can then edit, share, or save for later.

    Step 1: Locate the Buttons on Your iPad Pro

    On your iPad Pro, find the Power button, usually located on the top right edge, and the Volume Up button, typically on the right side of the device.

    Step 2: Press the Buttons Simultaneously

    Quickly press and release the Power button and the Volume Up button at the same time. You’ll hear a shutter sound if your sound is on, and the screen will briefly flash, indicating that the screenshot has been taken.

    How to Take Screenshot Using Apple Pencil

    Taking a screenshot on your iPad Pro becomes even more intuitive and seamless with the Apple Pencil. Designed for precision and ease, the Apple Pencil allows you to capture your screen with a simple swipe, making it perfect for those who use their iPad for drawing, note-taking, or just navigating with a stylus.

    Here is how to take screenshot using the Apple Pencil:

    If you have an Apple Pencil, you can take a screenshot by swiping up from the bottom-left or bottom-right corner of the screen with the Pencil.

    This method is especially useful for those who use their iPad Pro for drawing or note-taking and want to capture content quickly.

    How to Take Screenshot Using Third-Party Apps

    Capturing screenshots on your iPad Pro can be even more versatile with third-party apps.

    These apps offer advanced features like scrolling screenshots, specific area capture, and easy editing tools, making them ideal for users who need more than the basic screenshot functionality.

    Various third-party apps, like Screen Master or Snap, offer additional features for taking screenshots, such as scrolling screenshots or capturing specific screen regions. These apps might be worth exploring if you need more advanced screenshot capabilities.

    Tips for Taking High-Quality Screenshots on iPad Pro

    Taking high-quality screenshots on your iPad Pro is essential for capturing clear and precise images that stand out. Whether you’re saving important information, creating tutorials, or sharing visuals, the quality of your screenshot matters. By adjusting a few settings and following simple tips, you can ensure your screenshots are crisp, clutter-free, and visually appealing.

    1. Adjusting Settings for Clearer Images:

    Ensure your screen brightness is at an optimal level and that your display settings are set to the highest resolution possible for crisp, clear screenshots. Avoid taking screenshots in dark mode if the contrast makes details harder to see.

    2. Removing Distractions for a Cleaner Screenshot:

    Before taking a screenshot, clear any unnecessary notifications or icons from the screen. This helps focus the attention on the content you want to capture, creating a more professional and uncluttered image.

    Creative Ways to Use Screenshots on iPad Pro

    Screenshots on your iPad Pro aren’t just for capturing quick bits of information—they can be powerful tools for creativity and communication. From enhancing presentations with annotated images to sharing moments on social media, the possibilities are endless. With a little imagination, you can turn your screenshots into visual stories, or instructional guides.

    Annotating Screenshots for Presentations or Tutorials:

    Use the built-in Markup tool to annotate your screenshots with text, arrows, or drawings. This is perfect for creating step-by-step guides, highlighting important information in presentations, or making notes directly on images.

    Sharing Screenshots on Social Media or Messaging Apps:

    Screenshots are great for sharing your progress in a game, a funny conversation, or an interesting article snippet on social media or through messaging apps. They offer a quick way to visually communicate and share moments with friends or followers.

    Troubleshooting Common Issues with Taking Screenshots on iPad Pro

    Taking screenshots on your iPad Pro is usually straightforward, but sometimes, issues can arise that prevent you from capturing that perfect moment. Whether your screenshot isn’t saving, buttons aren’t responding, or the image appears blank, these problems can be frustrating. In this guide, we’ll walk you through troubleshooting common problems with taking screenshots on your iPad Pro.

    Screenshot Not Saving:

    If your screenshot isn’t saving, check your storage space to ensure there’s enough room for new images. Also, verify that your Photos app has the necessary permissions to save screenshots.

    Screenshot Not Working:

    Yes, sometimes a software glitch can prevent screenshots from working here are some steps to resolve the issue:
    1. Restart your iPad to see if this resolves the issue. Restarting your iPad Pro is a simple process that can help resolve many minor issues. Here’s how you can do it:

    How to restart iPad Pro using the buttons combination:

    Step 1: Press and hold the “Power button” along with either the “Volume Up” or “Volume Down” button simultaneously.

    Step 2: Continue holding both buttons until the “slide to power off” slider appears on the screen.

    Step 3: Drag the slider from left to right to turn off your iPad Pro.

    Step 4: After the device powers off completely, press and hold the “Power button” again until the Apple logo appears, signaling that your iPad is restarting.

    How to restart iPad Pro using the settings option (if the buttons are not responsive):

    Step 1: Go to “Settings” on your iPad Pro.

    Step 2: Tap “General”.

    Step 3: Scroll down and tap “Shut Down”.

    Step 4: Once the screen goes black, press and hold the “Power button” to turn the iPad Pro back on.

    Restarting your iPad Pro can often fix minor software glitches, including issues with screenshots not working.

    2. Ensure your iPad Pro is updated to the latest iOS version by going to “Settings” > “General” > “Software Update“.

    Here are the steps to follow to run a software update:

    Step 1: Open the Settings app on your iPad Pro. Then, scroll down and tap on “General.”

    Step 2: Tap on Software Update. Your iPad Pro will now check if a new iOS update is available If an update is available, you’ll see a description of the update and an option to Download and Install.

    Step 3: Next, tap “Download” and then “Install.” You may be prompted to enter your device passcode. The update will begin downloading. You can continue using your iPad Pro while the download is in progress. After the download is complete, you’ll be prompted to install the update.

    Step 4: Tap Install Now. Your iPad Pro will restart, and the update process will begin. You’ll see the Apple logo and a progress bar during installation. Wait for the installation to finish. The iPad Pro will automatically restart once the update is complete.

    Unable to Locate Screenshots in Photos App:

    Screenshots are automatically saved in the Photos app under the “Screenshots” album. If you can’t find them, try searching for “Screenshots” in the Photos app or check if your photos are being saved to iCloud rather than your device.

    Step 1: Open the Photos App: On your iPad Pro, tap on the Photos app icon to open it.

    Step 2: Go to the Albums Tab: At the bottom of the screen, tap on the Albums tab. This will show you all the different albums organized in your Photos app.

    Step 3: Find the “Screenshots” Album: Scroll down to the Media Types section within Albums. Tap on Screenshots. This album contains all the screenshots you’ve taken on your iPad Pro.

    Step 4: SView Your Screenshots: Once you open the Screenshots album, you’ll see all the screenshots you’ve captured, organized by date. You can tap on any screenshot to view, edit, share, or delete it.

    Conclusion

    Taking screenshots on your iPad Pro is a powerful feature that enhances productivity and creativity. Whether you’re capturing important information, creating visual guides, or simply sharing moments with friends, screenshots make it easy and efficient. Practice taking screenshots using the different methods mentioned, and explore the numerous ways you can use and edit them to suit your needs.

    Frequently Asked Questions (FAQs)

    How do I take a screenshot on my iPad Pro?

    To take a screenshot on your iPad Pro, press the “Power button” and the “Volume Up button” simultaneously. You’ll see the screen flash and hear a shutter sound, indicating that the screenshot has been captured. It will be saved to your Photos app.

    How can I take a screenshot on my iPad without using the buttons?

    You can take a screenshot without using the buttons by enabling AssistiveTouch:
    1. Go to Settings > Accessibility > Touch.
    2. Turn on AssistiveTouch.
    3. Customize the menu by adding the Screenshot option.
    4. Tap the AssistiveTouch button on your screen and select Screenshot to capture the screen.

    Is there another way to screenshot on iPad besides using AssistiveTouch?

    Yes, you can use an Apple Pencil:
    1. Simply swipe up from the bottom-left or bottom-right corner of the screen with your Apple Pencil.
    2. This will instantly take a screenshot.

    How do I take a screenshot on my iPad using a keyboard?

    If your iPad is connected to a keyboard, you can use the following shortcut:

    Press Command (⌘) + Shift + 3 simultaneously to take a screenshot. The screenshot will be saved directly to your Photos app.

    Can I create a shortcut to take a screenshot on my iPad?

    Yes, you can create a custom shortcut using the Shortcuts app:
    1. Open the Shortcuts app and tap the “+” icon to create a new shortcut.
    2. Search for and select Take Screenshot as the action.
    3. You can then add this shortcut to your Home Screen or Control Center for easy access.

    Can I edit screenshots on my iPad Pro?

    Yes, you can edit screenshots directly on your iPad Pro. After capturing a screenshot, tap the thumbnail that appears to open the editing tools. You can crop, annotate, add text, and use filters to enhance your screenshot. Once edited, you can save or share it.

    Why can’t I take a screenshot on my iPad Pro?

    If you’re having trouble taking a screenshot, it could be due to:
    Button Issues: Ensure that both the Power and Volume Up buttons are functioning properly.
    Storage Space: Check that you have enough storage available for saving new screenshots.
    Software Glitch: Restart your iPad or check for software updates that may resolve the issue.

    Also Check:


  • iPad Pro not Charging when plugged in, how to fix

    iPad Pro not Charging when plugged in, how to fix

    There’s nothing more frustrating than plugging in your iPad, only to find it’s not charging. Whether you’re trying to power up for work or entertainment, resolving this issue quickly is crucial to keeping your day on track.

    iPad Pro not Charging when plugged in, how to fix

    Why Your iPad Pro May Not be Charging and How to Fix It

    Several factors could be at play when your iPad Pro refuses to charge. Understanding these common causes can help you pinpoint the problem:

    Faulty Charging Cable or Adapter:

    The cable or adapter might be worn out or damaged, causing a weak or nonexistent connection.
    Dust or Debris in the Charging Port:

    Over time, dust can accumulate in the charging port, preventing a solid connection.
    Software Issues:

    Outdated software or glitches can interfere with the charging process.
    Malfunctioning Battery:

    In some cases, the battery itself may be the culprit, especially if it’s old or has been heavily used.

    Troubleshooting Steps

    Before you panic, try these troubleshooting steps to get your iPad Pro charging again.

    1. Check the Charging Cable and Adapter

    First, take a close look at your charging cable and adapter. Look for any visible signs of damage, such as fraying or bent connectors. If something looks off, try using a different cable or adapter that you know works.

    2. Clean the Charging Port

    Next, check the charging port on your iPad Pro. If you see any dust or debris inside, this could be blocking the connection. You can gently blow into the port or use a soft, dry brush to clean it out. Just be careful not to damage the port while doing this.

    3. Restart the iPad

    Sometimes, a simple restart can fix minor glitches. here is how to restart your ipad. Step 1:Press and hold the “Power button” along with either the “Volume Up” or “Volume Down” button simultaneously.

    Step 2: Continue holding both buttons until the “slide to power off” slider appears on the screen.
    Step 3: Drag the slider from left to right to turn off your iPad Pro.
    Step 4: After the device powers off completely, press and hold the “Power button” again until the Apple logo appears, signaling that your iPad is restarting.

    Once it’s powered up, plug in the charger again to see if the issue is resolved.

    4. Update Software

    Outdated software can cause a variety of problems, including charging issues.below are the steps to update your ipad pro.

    Step 1: Open the Settings app on your iPad Pro.

    Step 2: Scroll down and tap on General.

    Step 3: Tap on Software Update. Your iPad Pro will now check if a new iOS update is available

    If an update is available, you’ll see a description of the update and an option to Download and Install.

    Step 4: Tap Download and Install. You may be prompted to enter your device passcode.

    Step 5: The update will begin downloading. You can continue using your iPad Pro while the download is in progress.

    After the download is complete, you’ll be prompted to install the update.

    Step 6: Tap Install Now. Your iPad Pro will restart, and the update process will begin. You’ll see the Apple logo and a progress bar during installation.

    Step 7: Wait for the installation to finish. The iPad Pro will automatically restart once the update is complete.

    5. Reset Settings

    If the problem persists, you might need to reset your iPad’s settings. This won’t erase your data, but it will reset system settings like Wi-Fi passwords and wallpaper. After the reset, see if your iPad charges properly. Here’s how you can reset the settings on your iPad Pro:

    1. Open the Settings App: Tap on the “Settings” app on your iPad’s home screen. It’s the app with the gray gear icon.

    2. Go to General Settings

    Scroll down and tap on “General”.

    3. Select Reset or Transfer or Reset iPad

    Scroll to the bottom of the General settings page and tap on “Transfer or Reset iPad”.

    4. Choose Reset All Settings

    Tap on “Reset All Settings”. This will reset your settings to their default state without deleting your apps, data, or media.

    5. Enter Your Passcode

    If prompted, enter your device passcode to confirm the reset.

    6. Confirm the Reset

    Tap “Reset All Settings” again to confirm. Your iPad Pro will restart, and the settings will be restored to their defaults.

    Additional Tips

    To avoid charging issues in the future, consider these tips:

    Avoid Using Third-Party Charging Accessories: Stick to Apple-certified chargers to ensure compatibility and safety.
    Keep the Charging Port Clean: Regularly check and clean the charging port to prevent dust build-up.
    – **Monitor Battery Health**: Over time, battery health can decline. Keep an eye on it by going to Settings > Battery > Battery Health.

    ### Seeking Professional Help

    If you’ve tried all the troubleshooting steps and your iPad Pro still won’t charge, it might be time to seek professional help. Visit an Apple Store or an authorized service provider. They can diagnose the problem and recommend repair or replacement options.

    ### Conclusion

    Charging issues can be a hassle, but they’re often fixable with a few simple steps. By regularly maintaining your iPad Pro and addressing issues promptly, you can keep your device running smoothly. And remember, if the problem persists, don’t hesitate to seek professional assistance.

    Let me know if you need any adjustments or additional details!


  • iPad Pro Won’t Turn On: Here’s How to Troubleshoot and Fix the Issue

    iPad Pro Won’t Turn On: Here’s How to Troubleshoot and Fix the Issue

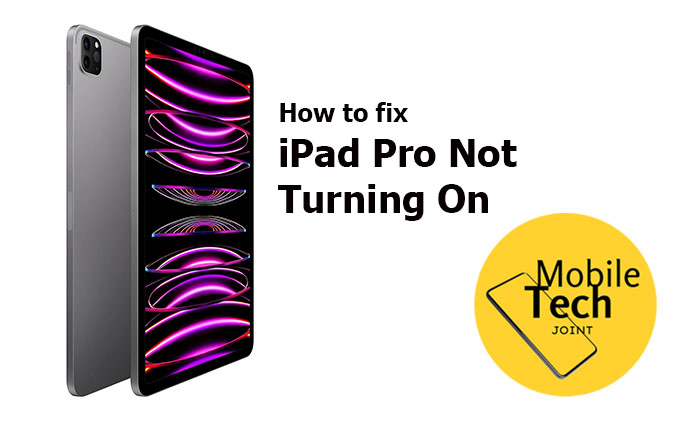
    There’s nothing more frustrating than pressing the power button on your iPad Pro only to find that it won’t turn on. Whether you’re gearing up for a meeting or just want to unwind with a good book, your iPad is an essential part of your daily routine. But what happens when it refuses to power up, even when it’s plugged in?

    My iPad Pro Won't Turn On: Here's How to Troubleshoot and Fix the Issue

    Whether it’s stuck on a black screen or won’t respond even when plugged in, this issue can leave you feeling helpless. This guide will walk you through why this might be happening and what you can do to fix it.

    Common Reasons for iPad Pro Not Turning On

    Before diving into fixes, it’s helpful to understand why your iPad Pro might not be turning on. The reasons can range from something as simple as a drained battery to more complex issues like software glitches or hardware malfunctions. Knowing the potential causes can help you zero in on the problem more effectively.

    • Battery Issues: If your iPad’s battery is completely drained or if the battery itself is failing, it might not turn on. Lithium-ion batteries, like the one in your iPad, degrade over time, which can lead to issues with charging and power.
    • Software Glitches: Sometimes, a software update or app crash can cause your iPad to become unresponsive. A corrupted system file or an incomplete software update might prevent your device from booting properly.
    • Hardware Malfunctions: Physical damage to your iPad’s charging port, power button, or internal components could be preventing it from turning on. Even something as minor as a loose connection inside the device could cause a problem.

    How to Fix an iPad Pro Not Turning On

    Your iPad Pro is a powerhouse of productivity and entertainment. But what happens when it suddenly refuses to turn on? This steps is designed to help you systematically troubleshoot the problem, addressing both simple fixes and more complex issues.

    Step 1: Check the Power Source

    Before you panic, it’s important to rule out any issues with the power source. Sometimes, the problem isn’t with your iPad at all but with the accessories or outlets you’re using to charge it.

    Step 1A: Verify the Charging Cable and Adapter

    Inspect the Cable and Adapter: Start by closely examining the charging cable and adapter. Look for any visible signs of damage, such as frayed wires, bent connectors, or scorch marks. A damaged cable or adapter can prevent your iPad from charging correctly.

    Test with Another Device: Plug the charging cable into a different device, like an iPhone or another iPad. If the other device charges without issues, your cable and adapter are likely working fine. If the other device doesn’t charge, you’ll need to replace the cable or adapter.

    Step 1B: Test with Different Outlets and Chargers

    Try a Different Outlet: Sometimes, the problem is as simple as a faulty wall outlet. Plug your charger into another outlet in a different room. If possible, test it in an outlet that you know is working (e.g., one that powers other devices without issue).

    Use a Computer or Power Bank: If a wall outlet doesn’t seem to work, try charging your iPad through a computer’s USB port or a portable power bank. This can help you determine if the issue lies with the outlet or the iPad itself.

    Step 2: Perform a Force Restart

    If your iPad doesn’t respond to charging, it might be stuck due to a software glitch. Performing a force restart can often resolve these minor issues.

    Step 2A: Force Restart Using Hardware Buttons

    For iPads with Face ID: Quickly press and release the Volume Up button, then press and release the Volume Down button. Finally, press and hold the Power button until the Apple logo appears on the screen. This sequence forces the iPad to shut down and restart, which can clear up any software hiccups.

    For iPads with a Home Button: Press and hold both the Power button and the Home button at the same time. Keep holding them until you see the Apple logo. This method works similarly to the Face ID version but is specific to older iPad models with a physical Home button.

    This step can help resolve problems caused by unresponsive apps, incomplete updates, or temporary system crashes.

    Step 3: Inspect the Charging Port

    If a force restart doesn’t work, the issue might be with the charging port itself. Over time, the port can accumulate dust and debris, or it might suffer damage that prevents a proper connection.

    Step 3A: Check for Debris or Damage

    Use a Flashlight: Shine a small flashlight into the charging port to inspect it for any dust, lint, or debris. Even a small amount of foreign material can prevent the charging cable from making a solid connection.

    Gently Clean the Port: If you spot any debris, carefully remove it using a soft-bristled brush, a wooden toothpick, or a can of compressed air. Be gentle to avoid damaging the delicate pins inside the port. If you’re unsure about doing this yourself, it might be best to seek professional help.

    Step 3B: Test the Charger Again

    After cleaning the port, plug in your iPad and try charging it again. If the port was blocked or dirty, this should resolve the issue. If your iPad still doesn’t turn on, there may be a more significant hardware problem.

    Step 4: Check Battery Health and Status

    If your iPad turns on after following the previous steps, it’s a good idea to check the battery health. A degraded battery might still work but could cause your iPad to be less reliable.

    Step 4A: Access Battery Health Information

    Open Settings: Once your iPad is powered on, go to the Settings app.

    Navigate to Battery Health: Tap on “Battery,” then select “Battery Health.” This section provides an overview of your battery’s maximum capacity and peak performance capability. If your battery health is significantly degraded, it may be time for a replacement.

    Step 4B: Monitor Battery Performance

    Keep an eye on your iPad’s battery performance in the days following these steps. If your iPad is still having trouble holding a charge or if it powers down unexpectedly, a battery replacement might be necessary.

    Step 5: Address Software Issues and Updates

    Software glitches and outdated iOS versions can sometimes prevent your iPad from turning on properly. Ensuring your device is running the latest software is crucial for preventing these problems.

    Step 5A: Update iOS

    Check for Updates: Go to Settings > General > Software Update. If an update is available, download and install it. Software updates often include bug fixes and improvements that can prevent issues like the one you’re experiencing.

    Step 5B: Restore the iPad Using Recovery Mode

    If your iPad won’t turn on even after charging and a force restart, you might need to restore it using recovery mode:

    Connect to a Computer: Use a USB cable to connect your iPad to a computer with iTunes installed (or Finder if you’re using macOS Catalina or later).

    Enter Recovery Mode: Force restart your iPad again, but keep holding the buttons until the recovery mode screen appears (you’ll see the iTunes logo with a cable).

    Restore or Update: In iTunes or Finder, you’ll see an option to either update or restore your iPad. Try updating first to preserve your data. If that doesn’t work, you may need to restore the iPad to factory settings.

    Restoring your iPad can fix deep software issues, but it will erase your data, so be sure to have a backup before proceeding. By following these steps, you’ll increase your chances of bringing your iPad Pro back to life.

    Seeking Professional Help

    If you’ve tried all these steps and your iPad still won’t turn on, it might be time to consult a professional. Take your iPad to an Apple Store or an authorized repair service for a diagnostic check. They can determine if there’s a more serious hardware issue at play, such as a faulty logic board or a damaged display.

    Preventive Measures

    To avoid this issue in the future, consider adopting some preventive measures. Regularly update your iPad’s software, avoid letting the battery drain completely, and keep the charging port clean. Simple habits like these can help maintain your iPad’s health and prevent power issues down the line.

    Conclusion

    Facing a non-responsive iPad Pro can be stressful, but with these troubleshooting steps, you’re well on your way to resolving the issue. Remember, it’s important to stay calm and methodically work through each step. And if all else fails, professional help is just around the corner. Your iPad is an essential tool, and with the right care, it’ll continue to serve you well.

    Frequently Asked Questions (FAQs)

    Why won’t my iPad Pro turn on even after charging it overnight?

    If your iPad Pro doesn’t turn on after being charged overnight, there could be a problem with the charging cable, adapter, or outlet. Additionally, the battery may be completely drained or there could be a software issue preventing the device from powering up.

    How can I tell if my iPad Pro’s battery is completely dead?

    A completely dead battery will show no signs of life, such as a black screen, even when plugged in. If you’ve tried different chargers and outlets without success, the battery might need to be replaced.

    What should I do if my iPad Pro is stuck on a black screen and won’t respond?

    Try performing a force restart. For iPads with Face ID, quickly press and release the Volume Up button, then the Volume Down button, and finally hold the Power button until the Apple logo appears. For iPads with a Home button, hold the Power and Home buttons together until the Apple logo appears.

    Could a software update cause my iPad Pro to stop turning on?

    Yes, if a software update was interrupted or didn’t install correctly, it could cause the iPad to become unresponsive. In such cases, restoring the device via recovery mode using iTunes or Finder might be necessary.

    How do I clean the charging port of my iPad Pro if I suspect it’s causing charging issues?

    Use a flashlight to inspect the port for debris. If you see dust or lint, carefully remove it using a soft brush, wooden toothpick, or compressed air. Be gentle to avoid damaging the port.

    Is it possible that my iPad Pro won’t turn on due to a hardware failure?

    Yes, hardware failures such as a damaged charging port, faulty power button, or internal component issues can prevent your iPad from turning on. If you suspect hardware damage, professional repair might be needed.

    What are my options if my iPad Pro still won’t turn on after trying all troubleshooting steps?

    If your iPad Pro remains unresponsive after following all troubleshooting steps, it’s best to take it to an Apple Store or an authorized service provider for a diagnostic check and potential repair.

    Can a completely drained iPad Pro battery be recharged, or is it permanently damaged?

    A completely drained battery can usually be recharged, but it might take longer to power on initially. If the battery doesn’t charge after being plugged in for an extended period, it could be damaged and may require replacement.

    Will restoring my iPad Pro in recovery mode erase all my data?

    Restoring your iPad Pro in recovery mode can fix software issues but will erase all data on the device. Ensure you have a backup before proceeding with this step.

    How can I prevent my iPad Pro from facing power-on issues in the future?

    To prevent future power-on issues, regularly update your iPad’s software, use only Apple-approved chargers, avoid letting the battery drain completely, and keep the charging port clean.

    Also Check:


  • JOYWISE U18C Bluetooth Headphones: $19.99 Waterproof Sports Earbuds with 16 Hours Playtime

    JOYWISE U18C Bluetooth Headphones: $19.99 Waterproof Sports Earbuds with 16 Hours Playtime

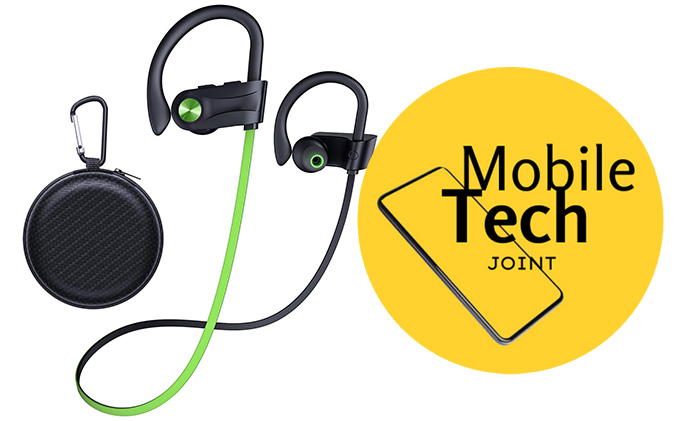
    For those who push their limits during workouts, the JOYWISE U18C Bluetooth Headphones offer a reliable and affordable solution. Priced at $19.99, these wireless earbuds are designed to keep up with your most intense exercise sessions, providing a blend of durability, comfort, and high-quality sound. Here’s a closer look at why the JOYWISE U18C could be your next workout companion.

    JOYWISE U18C Bluetooth Headphones: $19.99 Waterproof Sports Earbuds with 16 Hours Playtime

    Durability and Comfort

    The JOYWISE U18C excels in providing both durability and comfort. Featuring an IPX7 waterproof rating, these headphones are built to withstand sweat and rain, making them ideal for intense workouts and outdoor activities. The ergonomic design, coupled with adjustable ear hooks, ensures a secure fit that remains in place even during vigorous exercise. The upgraded neck lanyard material further enhances the headphones’ durability, increasing their lifespan by 20%.

    Battery Life

    One of the standout features of the JOYWISE U18C is its long-lasting battery life. With up to 16 hours of continuous playback on a single charge, these earbuds are designed to keep you motivated throughout your entire workout. Whether you’re running, cycling, or hitting the gym, you can rely on these headphones to deliver uninterrupted music and calls.

    Sound Quality

    In terms of audio performance, the JOYWISE U18C does not disappoint. The headphones deliver high-fidelity music with robust stereo bass, ensuring an immersive listening experience. Whether you’re tuning into your favorite workout playlist or taking important calls, the sound quality is clear and impactful. This makes it easy to stay focused and energized during your exercise routine.

    Bluetooth 5.3 and Controls

    Equipped with Bluetooth 5.3 technology, the JOYWISE U18C ensures a stable and seamless connection with any Bluetooth-enabled device. The easy-to-use button controls allow you to adjust the volume, skip tracks, answer calls, and activate voice assistants effortlessly. This feature enhances the convenience of using the headphones during workouts, letting you manage your music and calls without breaking your stride.

    Conclusion

    At a price of $19.99, the JOYWISE U18C Bluetooth Headphones offer excellent value for those who need durable, high-performance earbuds for their active lifestyle. With features like IPX7 waterproofing, a comfortable fit, long battery life, and high-quality sound, these headphones are well-suited for both casual listeners and serious athletes. Whether you’re hitting the gym, running outdoors, or just enjoying your favorite tunes, the JOYWISE U18C delivers a dependable and enjoyable audio experience.

    Also Check:

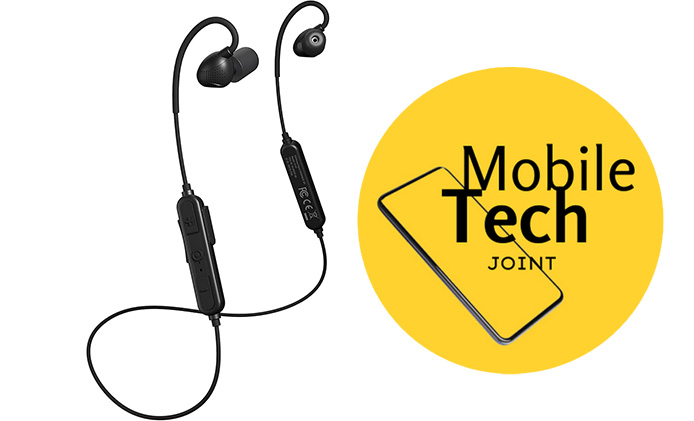
  • ISOtunes Sport ADVANCE BT Shooting Earbuds: Tactical Bluetooth Hearing Protection for $139.99

    ISOtunes Sport ADVANCE BT Shooting Earbuds: Tactical Bluetooth Hearing Protection for $139.99

    For those who demand both superior hearing protection and high-quality audio performance during shooting activities, the ISOtunes Sport ADVANCE BT Shooting Earbuds offer a specialized solution. Priced at $139.99, these tactical earbuds are designed to provide essential hearing protection while delivering clear communication and audio quality. Let’s explore why the ISOtunes Sport ADVANCE might be the right choice for your shooting and hunting needs.

    ISOtunes Sport ADVANCE BT Shooting Earbuds: Tactical Bluetooth Hearing Protection for $139.99

    Tactical Sound Control

    The ISOtunes Sport ADVANCE is engineered to handle the unique demands of shooting environments. With Tactical Sound Control (TSC) technology, these earbuds effectively block out impact noises while allowing you to maintain situational awareness. The TSC feature uses audio passthrough technology to suppress percussive sounds from gunshots or other loud noises, providing a 26 dB noise reduction rate (NRR) for passive noise isolation. This ensures you can hear important environmental sounds and conversations without compromising your hearing protection.

    Battery Life

    Long sessions at the shooting range are well-supported by the ISOtunes Sport ADVANCE, which features a rechargeable lithium-ion battery offering up to 10 hours of continuous use on a full charge. This extended battery life ensures that you won’t need to worry about frequent recharging during extended periods of use, making these earbuds reliable for all-day shooting or hunting trips.

    Bluetooth Connectivity

    Equipped with Bluetooth 5.0 technology, the ISOtunes Sport ADVANCE provides seamless connectivity to your phone, computer, or tablet. This allows you to control your music and phone calls effortlessly, even in noisy environments. The earbuds ensure a stable connection and easy access to your audio and communication needs while on the go.

    Clear Calls in Loud Environments

    One of the standout features of these earbuds is their signature noise-suppressing microphone, which includes echo cancellation technology. This setup effectively filters out percussive noises from firearms, air compressors, or hammers, ensuring that your calls remain clear and intelligible even in high-noise settings.

    Durability

    The ISOtunes Sport ADVANCE is built to endure various environmental conditions. With an IP67 rating, these earbuds are resistant to sweat, water, and dust, making them suitable for use both indoors and outdoors. Whether you’re at an indoor shooting range or exposed to the elements, these earbuds are designed to withstand rugged conditions and maintain their performance.

    Conclusion

    At $139.99, the ISOtunes Sport ADVANCE BT Shooting Earbuds provide an effective combination of tactical hearing protection and high-quality audio performance. With features like Tactical Sound Control, long battery life, Bluetooth connectivity, and robust durability, these earbuds are tailored for shooting enthusiasts and hunters who need reliable protection and clear communication. Whether you’re at the range or in challenging environments, the ISOtunes Sport ADVANCE offers dependable performance to keep your hearing protected and your audio needs met.

    Also check:

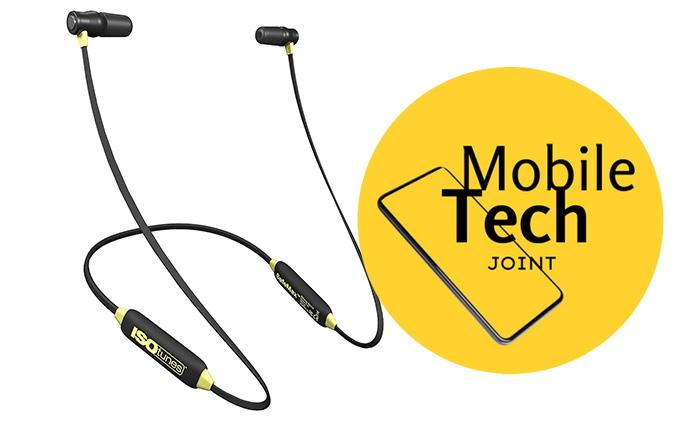
  • ISOtunes Xtra 2.0 Earplug Earbuds: OSHA Compliant Bluetooth Hearing Protection for $79.99

    ISOtunes Xtra 2.0 Earplug Earbuds: OSHA Compliant Bluetooth Hearing Protection for $79.99

    For those in noisy work environments who require reliable hearing protection and high-quality audio, the ISOtunes Xtra 2.0 Earplug Earbuds offer a practical solution. Priced at $79.99, these earbuds are designed to deliver OSHA-compliant hearing protection while providing comfort and convenience. Let’s dive into the key features that make the ISOtunes Xtra 2.0 an excellent choice for both safety and audio enjoyment.

    ISOtunes Xtra 2.0 Earplug Earbuds: OSHA Compliant Bluetooth Hearing Protection for $79.99

    Superior Noise Isolation

    The ISOtunes Xtra 2.0 stands out with its memory foam eartips that expand to fit the ear canal, providing an impressive 27 dB noise reduction rating (NRR). This high level of sound isolation effectively blocks out ambient noise, making these earbuds ideal for use in loud environments where hearing protection is essential. Whether you’re on a construction site or in a noisy workshop, these earbuds help ensure your hearing is safeguarded.

    SafeMax Technology

    One of the critical safety features of the ISOtunes Xtra 2.0 is its SafeMax Technology, which limits the maximum volume to 85 dB. This volume limiter helps prevent potential hearing damage from prolonged exposure to loud music or other audio sources, ensuring that your listening experience remains safe and enjoyable.

    Extended Battery Life

    With up to 11 hours of battery life on a single charge, the ISOtunes Xtra 2.0 is built to last through extended work shifts or long periods of use. This impressive battery life ensures you won’t have to frequently recharge your earbuds, making them a reliable companion for your workday or any extended listening sessions.

    Magnetic Earbuds

    The ISOtunes Xtra 2.0 features magnetic earbuds that conveniently snap together when not in use. This design helps keep your earbuds secure and tangle-free, and it also allows you to pause your music simply by attaching the magnets. This practical feature enhances the overall usability and convenience of the earbuds.

    Durability and Protection

    Designed to withstand harsh conditions, the ISOtunes Xtra 2.0 boasts an IP67 rating, making them resistant to water, sweat, and dust. This durability ensures that the earbuds can handle demanding work environments and various weather conditions, maintaining their performance and longevity.

    Conclusion

    At $79.99, the ISOtunes Xtra 2.0 Earplug Earbuds offer a robust combination of hearing protection and audio performance. With features like superior noise isolation, SafeMax Technology, extended battery life, and a durable design, these earbuds are well-suited for individuals in noisy work environments who need both safety and reliable audio. Whether you’re working on-site or just need dependable protection and comfort, the ISOtunes Xtra 2.0 provides a comprehensive solution to meet your needs.

    Also Check:

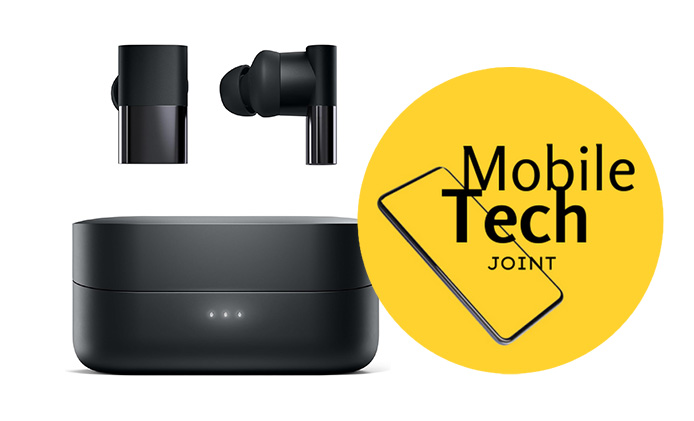
  • Status Between 3ANC True Wireless Earbuds: Premium Noise Cancellation and Audio Quality for $179.00
    Status Between 3ANC True Wireless Earbuds: Premium Noise Cancellation and Audio Quality for $179.00
    The Status Between 3ANC True Wireless Earbuds, available for $179.00, offer a blend of advanced technology and premium audio features designed for audiophiles and everyday users alike. With a focus on active noise cancellation, superior sound quality, and ergonomic design, these earbuds promise an elevated listening experience. Let’s explore what makes the Status Between 3ANC stand out in the crowded wireless earbuds market.

    Status Between 3ANC True Wireless Earbuds: Premium Noise Cancellation and Audio Quality for $179.00
    Advanced Audio Technology

    At the heart of the Status Between 3ANC earbuds is their sophisticated triple driver technology. This system combines one dynamic driver with two balanced armature drivers to deliver a rich and immersive audio experience. The dynamic driver ensures powerful bass, while the balanced armature drivers handle crisp highs and detailed mids. This combination provides a well-rounded sound profile that caters to a variety of listening preferences, making it ideal for music lovers who seek exceptional sound clarity and depth.

    Cutting-Edge Active Noise Cancellation

    One of the standout features of the Between 3ANC earbuds is their advanced active noise cancellation (ANC) technology. The earbuds offer three adjustable ANC modes: Transparency, Noise Cancellation, and Ambient. This flexibility allows users to tailor their listening experience based on their environment. Whether you’re navigating a noisy city street or enjoying a quiet afternoon, these earbuds effectively block out unwanted noise while still providing the option to stay aware of your surroundings when needed.

    Impressive Battery Life and Quick Charging

    The Status Between 3ANC earbuds excel in battery performance. With ANC activated, users can enjoy up to 8 hours of playback on a single charge. Turn off the ANC, and the battery life extends to 12 hours. The included USB-C fast-charging case provides an additional 24 hours of power, ensuring that the earbuds are ready to go when you are. For those in a hurry, a quick 15-minute charge offers up to 2 hours of playback time, making them convenient for busy lifestyles.

    Comfort and Fit

    Designed with user comfort in mind, the Between 3ANC earbuds come with multiple ear tip sizes and wingtips to ensure a secure and comfortable fit. This ergonomic design is perfect for extended listening sessions, whether you’re working out, commuting, or simply relaxing. The earbuds are also rated IPX5 for water resistance, making them durable enough to handle sweat and light rain.

    Seamless Connectivity and Controls

    Equipped with Bluetooth 5.2 technology, the Between 3ANC earbuds provide a stable and reliable wireless connection with a range of up to 33 feet (10 meters). The earbuds offer easy pairing, automatic reconnection, and seamless switching between devices. Built-in microphones and intuitive touch controls enhance usability, allowing for hands-free calls and easy access to voice assistants like Siri or Google Assistant.

    Conclusion

    Priced at $179.00, the Status Between 3ANC True Wireless Earbuds deliver a premium audio experience with advanced noise cancellation, exceptional sound quality, and a comfortable fit. Their long battery life, quick charging capabilities, and seamless connectivity make them a versatile choice for any situation. Whether you’re an audiophile or just seeking high-quality earbuds for daily use, the Status Between 3ANC offers a compelling package that meets a wide range of needs.

    Also Check:

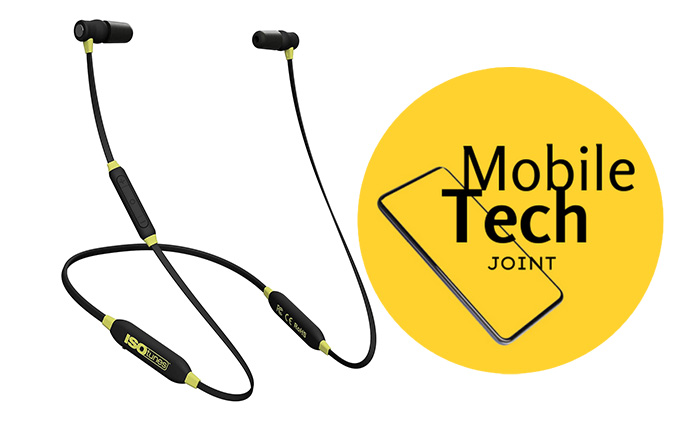
  • ISOtunes Xtra Bluetooth Earplug Headphones: Reliable Hearing Protection and Wireless Convenience for $49.99

    ISOtunes Xtra Bluetooth Earplug Headphones: Reliable Hearing Protection and Wireless Convenience for $49.99

    The ISOtunes Xtra Bluetooth Earplug Headphones, priced at $49.99, offer a combination of effective noise reduction and wireless functionality, designed for those needing hearing protection in noisy environments. With OSHA compliance and ANSI certification, these headphones are built to provide both safety and convenience. Let’s delve into their key features and benefits.

    ISOtunes Xtra Bluetooth Earplug Headphones: Reliable Hearing Protection and Wireless Convenience for $49.99

    Effective Noise Reduction

    The ISOtunes Xtra stands out with its impressive noise reduction capabilities. Featuring heat-activated memory foam eartips, these headphones expand like earplugs to significantly block out external sounds. They offer a 27 dB Noise Reduction Rating (NRR) and incorporate ISOtunes SafeMax Technology to ensure safe listening levels. The package includes four pairs of foam eartips and three pairs of silicone double-flange eartips, allowing for a customizable and comfortable fit that maximizes noise isolation.

    Wireless Music and Calls

    Equipped with Bluetooth 4.1 technology, the ISOtunes Xtra allows you to wirelessly stream music and take calls from up to 30 feet away from your device. This feature ensures you can stay connected and entertained without being tethered by cables, making it ideal for both work and leisure.

    Extended Battery Life

    These headphones are designed for extended use, offering up to 8 hours of battery life on a single charge and a remarkable 180-hour standby time. The memory wire neckband provides a comfortable fit around your neck, and the magnetic earbuds make it easy to store them securely when not in use.

    Clear Calls in Noisy Environments

    One of the key features of the ISOtunes Xtra is its noise-suppressing microphone with echo cancellation technology. This setup ensures clear call quality by blocking steady-state noises like engines and fans. Whether you’re working in a noisy workshop or on a busy construction site, these headphones help ensure your calls are heard clearly without interference from background noise.

    Durable and Reliable

    Built to withstand tough conditions, the ISOtunes Xtra is IP45-rated for sweat, water, and dust resistance. This durability makes them suitable for various work environments and activities. The headphones also come with a one-year limited manufacturer’s warranty, providing peace of mind and reliable support.

    Conclusion

    At $49.99, the ISOtunes Xtra Bluetooth Earplug Headphones offer an effective solution for hearing protection with the added convenience of wireless functionality. Their high noise reduction rating, extended battery life, and durable design make them a valuable choice for those who need to maintain hearing safety while enjoying music and calls in noisy environments. Whether for professional use or personal activities, these headphones deliver a balanced mix of protection and performance.

    Also Check:

  • Shure AONIC 215 TW2 True Wireless Earbuds: Premium Sound and Secure Fit for $227.99

    Shure AONIC 215 TW2 True Wireless Earbuds: Premium Sound and Secure Fit for $227.99

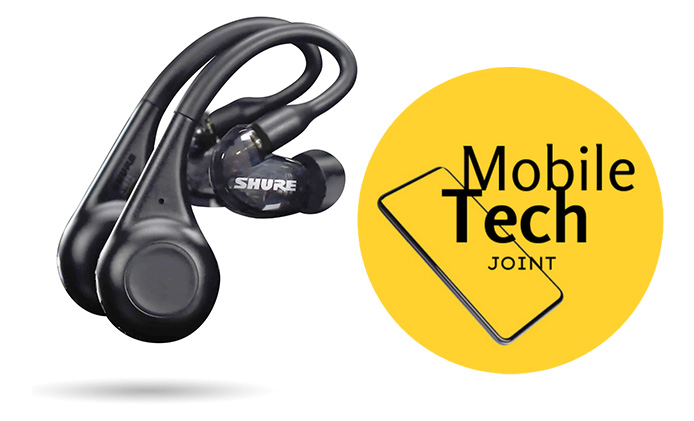
    The Shure AONIC 215 TW2 True Wireless Earbuds, priced at $227.99, represent a blend of cutting-edge audio technology and a secure, comfortable fit. Designed for serious audiophiles and professionals alike, these earbuds deliver superior sound quality and durability. Let’s explore the features that make the AONIC 215 TW2 a standout choice.

    Shure AONIC 215 TW2 True Wireless Earbuds: Premium Sound and Secure Fit for $227.99

    Exceptional Audio Quality

    Shure’s AONIC 215 TW2 earbuds are engineered to offer clear, deep bass and detailed audio, thanks to decades of experience in the audio industry. The sound isolation technology blocks up to 37 dB of external noise, ensuring an immersive listening experience. Whether you’re enjoying your favorite tracks or participating in virtual meetings, these earbuds provide high-quality audio that meets the demands of both casual listeners and professionals.

    Sweat and Water Resistance

    With an IPX4 rating, these earbuds are sweat and water-resistant, making them suitable for intense workouts and challenging environments. They are designed to withstand rigorous use, ensuring that they maintain peak performance even when exposed to sweat or rain.

    Secure and Comfortable Fit

    The AONIC 215 TW2 features a secure, close-fit design with an over-ear hook, providing exceptional comfort and stability during high-energy activities. This design, inspired by professional on-stage monitoring, ensures that the earbuds stay in place and remain comfortable over extended periods, making them ideal for both active and stationary use.

    Extended Battery Life

    These earbuds offer up to 8 hours of battery life on a single charge, with the included carrying case providing three additional charges for a total of 32 hours. This long battery life ensures that you can enjoy uninterrupted audio whether you’re on the move, at the gym, or relaxing at home.

    Advanced Features

    • Environment Mode: This feature allows you to hear external sounds with the push of a button, which is useful for situational awareness in various environments.
    • Bluetooth 5 Technology: Bluetooth 5 ensures a stable connection with a range of up to 30 feet (10 meters), providing seamless pairing with phones, tablets, and laptops.
    • Customizable Settings: The ShurePlus PLAY app lets you customize the EQ settings, button controls, and Environment Mode, enhancing your listening experience according to your preferences.
    • Clear Calls: The beamforming microphones ensure clear and high-quality calls, making these earbuds suitable for video conferencing and phone calls.

    Detachable Connection

    The AONIC 215 TW2 features a detachable connection with MMCX connectors, allowing for versatile connectivity options, including with airplane entertainment systems.

    What’s in the Box

    • AONIC 215 Detachable Sound Isolating Earphones
    • True Wireless Secure Fit Gen 2 Adapter set
    • Fit kit with a variety of sleeves for the perfect fit
    • Premium charging case (not IP-rated)
    • USB-C charging cable
    • Two-year warranty

    Conclusion

    At $227.99, the Shure AONIC 215 TW2 True Wireless Earbuds offer a premium audio experience with exceptional sound quality, a secure fit, and advanced features. Ideal for both professional and casual use, they combine durability, comfort, and cutting-edge technology to meet the needs of discerning listeners. Whether for music, calls, or workouts, these earbuds provide a reliable and immersive audio solution.

    Also Check: