Author: Evidence

  • Oppo Reno 12 Pro 5G Review – A Stylish AI-Powered Contender

    Oppo Reno 12 Pro 5G Review – A Stylish AI-Powered Contender

    The Oppo Reno series has long been synonymous with stylish design and innovative camera features, and the latest addition to this lineup, the Oppo Reno 12 Pro 5G, continues this tradition while introducing a host of AI-powered features. Launched in July 2024, this smartphone aims to strike a balance between premium aesthetics, cutting-edge AI capabilities, and solid performance. In this comprehensive review, we’ll dive deep into what makes the Oppo Reno 12 Pro 5G stand out in the crowded mid-range smartphone market.

    Oppo Reno 12 Pro 5G Review - A Stylish AI-Powered Contender

    Key Takeaways

    Feature Description
    Design Sleek dual-tone finish, 7.4mm thin, 181g weight
    Display 6.7-inch quad-curved OLED, 120Hz refresh rate
    Processor MediaTek Dimensity 7300-Energy
    Camera 50MP main + 8MP ultra-wide + 50MP telephoto
    Battery 5000mAh with 80W SuperVOOC charging
    Software ColorOS 14.1 based on Android 14
    AI Features AI Toolbox, AI Eraser 2.0, AI Studio
    Price Starting at Rs. 36,999 for 12GB+256GB

    Design and Build: Elegance Meets Durability

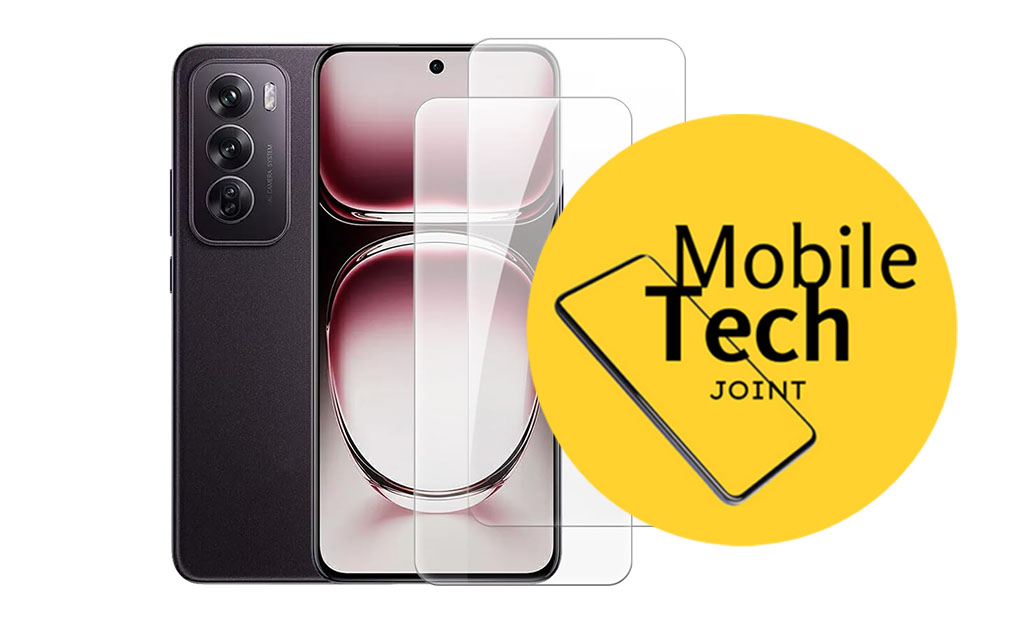
    The Oppo Reno 12 Pro 5G showcases a stunning dual-tone design that immediately catches the eye. Available in Sunset Gold and Space Brown, the phone features a unique blend of matte and glossy finishes, separated by a chic metallic ribbon running horizontally across the back. This design choice not only enhances the visual appeal but also provides a premium feel in hand.

    At just 7.4mm thick and weighing a mere 181 grams, the Reno 12 Pro 5G is one of the sleekest and lightest phones in its category. Despite its slim profile, Oppo hasn’t compromised on durability. The device boasts an IP65 rating for water and dust resistance, a first for the Reno series. Additionally, the screen is protected by Corning Gorilla Glass Victus 2, offering enhanced scratch and drop resistance.

    However, the glossy finish may make the phone slightly slippery, which could be a concern for some users. Fortunately, Oppo includes a soft TPU case in the box to address this issue, though it does hide the beautiful design.

    Display: Immersive Viewing Experience

    The Oppo Reno 12 Pro 5G features a 6.7-inch quad-curved OLED display that offers a truly immersive viewing experience. With a Full HD+ resolution and support for a 120Hz refresh rate, the screen delivers crisp visuals and smooth scrolling. The display also supports HDR10+, ensuring vibrant colors and deep contrasts when viewing compatible content.

    One of the standout features of the display is its 1500 nits peak brightness, which ensures excellent visibility even under harsh sunlight. The color reproduction is accurate, with deep blacks and vibrant hues that make content consumption a joy.

    Oppo provides several display customization options, including:

    • Vivid, Natural, Cinematic, and Brilliant color modes
    • Bedtime Mode for automatic color temperature adjustment
    • Adaptive Tone for ambient light-based adjustments

    The in-display fingerprint sensor is conveniently placed and works flawlessly, with customizable animations adding a touch of personalization.

    Performance: Capable Daily Driver

    At the heart of the Oppo Reno 12 Pro 5G lies the MediaTek Dimensity 7300-Energy chipset, a custom-made processor designed to offer a balance between performance and efficiency. Paired with 12GB of LPDDR4X RAM and up to 512GB of UFS 3.1 storage, the phone delivers smooth performance for everyday tasks and moderate gaming.

    In benchmark tests, the Reno 12 Pro 5G performs well, though it may not top the charts compared to some competitors in its price range:

    • Geekbench 6: 1013 (Single-Core), 2938 (Multi-Core)
    • AnTuTu v10: 619,149
    • 3DMark Wild Life: 3170

    Real-world performance is satisfactory, with the phone handling multitasking and everyday apps with ease. Gaming performance is also decent, with popular titles like Call of Duty: Mobile and Asphalt 8: Legends running smoothly at high settings.

    However, it’s worth noting that for the price, some users might expect a more powerful chipset, especially when compared to competitors like the iQoo Neo 9 Pro or the OnePlus 12R.

    Software and AI Features: The True Differentiator

    Running on ColorOS 14.1 based on Android 14, the Oppo Reno 12 Pro 5G brings a host of AI-powered features that set it apart from the competition. These features aim to enhance productivity and creativity:

    1. AI Toolbox:
    • AI Writer: Generates captions and text for social media posts
    • AI Speak: Reads text aloud, turning articles into audiobooks
    • AI Summary: Summarizes articles in bullet points
    1. AI Recording Summary: Transcribes and summarizes voice recordings, ideal for meetings and interviews
    2. AI Eraser 2.0: Removes unwanted objects or people from photos
    3. AI Studio: Uses generative AI to transform selfies into various styles and characters
    4. File Dock: Allows easy drag-and-drop file sharing between apps
    5. Smart Touch: Enables text and image extraction from screenshots

    While these AI features add significant value, the OS still comes with considerable bloatware, which may detract from the user experience for some.

    Cameras: Versatile Shooting Capabilities

    The Oppo Reno 12 Pro 5G boasts a versatile triple camera setup:

    • 50MP main sensor (Sony LYT600)
    • 8MP ultra-wide sensor (Sony IMX355)
    • 50MP telephoto camera (Samsung S5KJN5)

    The front-facing camera is a 50MP Samsung S5KJN5 sensor.

    Camera Performance:

    • Main sensor: Delivers sharp images with accurate colors and good dynamic range in daylight. Low-light performance is impressive, with good detail retention and noise suppression.
    • Ultra-wide sensor: Produces detailed shots with a large field of view, though colors may be slightly less saturated compared to the main sensor.
    • Telephoto lens: Offers good results in daylight, with 2x optical zoom and up to 20x digital zoom.
    • Selfie camera: Captures detailed selfies in both daylight and low-light conditions, with natural-looking portrait mode effects.

    The AI-powered camera features like AI Eraser 2.0 and AI Studio add creative possibilities, allowing users to remove unwanted objects from photos or transform selfies into various artistic styles.

    Battery and Charging: All-Day Power

    The Oppo Reno 12 Pro 5G is equipped with a 5000mAh battery, which is a significant improvement over its predecessor. In real-world usage, the phone easily lasts a full day with moderate to heavy use, including gaming, video streaming, and social media browsing.

    The standout feature in this department is the 80W SuperVOOC fast charging support. This technology allows the phone to charge from 0 to 56% in just 15 minutes, with a full charge taking approximately 40 minutes. This rapid charging capability ensures that even if you do run low on battery, a quick top-up can get you through the day.

    Audio: Immersive Sound Experience

    The Reno 12 Pro 5G features a stereo speaker setup, with the earpiece doubling as a secondary speaker. While the audio quality is decent, it may not be the best in its class. However, Oppo has included some interesting audio features:

    • Ultra Volume Mode: Allows you to increase the volume up to 300%, though at the cost of some audio quality
    • BeaconLink: Enhances Bluetooth uplink capabilities by up to 300%, enabling device-to-device voice calls over Bluetooth within a 30-meter range

    Pros and Cons

    Pros:

    • Sleek and premium design
    • Vibrant 120Hz OLED display
    • Useful AI features
    • Versatile camera system
    • Fast charging capabilities

    Cons:

    • Moderate hardware performance for the price
    • Considerable bloatware
    • No wireless charging

    Verdict:

    The Oppo Reno 12 Pro 5G brings a unique proposition to the mid-range smartphone market. Its standout features are undoubtedly its sleek design and the array of AI-powered capabilities that enhance both productivity and creativity. The camera system is versatile and capable, while the display offers an immersive viewing experience.

    However, the choice of chipset may leave power users wanting more, especially given the competition in this price range. The presence of bloatware also slightly mars an otherwise smooth software experience.

    For users who prioritize style, camera capabilities, and innovative AI features, the Oppo Reno 12 Pro 5G presents an attractive option. It’s particularly well-suited for those who enjoy experimenting with creative photography and want a phone that stands out from the crowd.

    At a starting price of Rs. 36,999 for the 12GB+256GB variant, the Oppo Reno 12 Pro 5G faces stiff competition from devices like the Realme GT 6T, iQoo Neo 9 Pro, and OnePlus 12R. Potential buyers should weigh the unique AI features and design against raw performance when making their decision.

    Ultimately, the Oppo Reno 12 Pro 5G is a solid choice for users looking for a blend of style, AI innovation, and capable all-round performance in a mid-range package.

    Also Check:

  • ChatGPT Integration Takes Your Experience to the Next Level: How does ChatGPT work on Nothing Ear (a) Earbuds?

    ChatGPT Integration Takes Your Experience to the Next Level: How does ChatGPT work on Nothing Ear (a) Earbuds?

    The Nothing Ear (a) wireless earbuds are making waves in the audio world, thanks to their impressive features and sleek design. But there’s more—these earbuds come with ChatGPT integration, revolutionizing how users interact with their audio devices. Let’s dive into what makes this combination so powerful.

    ChatGPT Integration Takes Your Experience to the Next Level: How does ChatGPT Integration work on Nothing Ear (a) Earbuds?

    How Does ChatGPT Integration Work on Nothing Ear (a) Earbuds?

    ChatGPT is an advanced AI language model developed by OpenAI. It’s designed to understand and generate human-like text, enabling a wide range of applications from answering questions to engaging in conversations. With its integration into the Nothing Ear (a), users gain a smart assistant that enhances the overall experience.

    The Technology Behind Nothing Ear (a)

    The Nothing Ear (a) boasts high-quality audio, smart active noise cancellation, and a long battery life. These features are powered by top-notch hardware, including powerful drivers and advanced Bluetooth technology. This solid foundation allows seamless integration with sophisticated software like ChatGPT.

    How ChatGPT Integration Works

    Integrating ChatGPT with the Nothing Ear (a) involves both hardware and software. Here’s a step-by-step look:

    1. Pairing: Connect the earbuds to your smartphone using Bluetooth.
    2. App Setup: Open the Nothing X app and enable ChatGPT integration.
    3. Voice Activation: Use voice commands to activate ChatGPT.
    4. Interaction: Speak directly to the earbuds, and ChatGPT processes and responds in real-time.

    The software utilizes advanced algorithms to ensure smooth and quick responses, making interactions feel natural and intuitive.

    User Experience Enhancements

    ChatGPT integration elevates the user experience by allowing voice-controlled tasks. You can:

    • Ask for weather updates.
    • Set reminders.
    • Play your favorite songs.
    • Get answers to questions without touching your phone.

    These enhancements make the Nothing Ear (a) not just an audio device, but a smart assistant in your ear.

    Real-Time Communication

    ChatGPT provides real-time responses, making it perfect for on-the-go communication. Whether you’re jogging, commuting, or working out, you can interact with your earbuds seamlessly. This immediacy ensures you’re always connected and informed.

    Privacy and Security Considerations

    Privacy and security are top priorities. The Nothing Ear (a) ensures user data is handled with care:

    • Data Encryption: Protects your interactions.
    • Minimal Data Storage: Only essential data is stored, reducing privacy risks.
    • User Control: You can manage and delete your data via the app.

    These measures ensure your privacy is maintained while enjoying the benefits of AI.

    Compatibility with Other Devices

    The Nothing Ear (a) works seamlessly across multiple platforms, including iOS, Android, Windows, and macOS. This broad compatibility means you can use the earbuds with a variety of devices, ensuring a consistent and integrated experience.

    Future Developments

    The integration of ChatGPT is just the beginning. Future updates may include:

    • Enhanced voice recognition.
    • More personalized responses.
    • Expanded functionality for smart home control.

    These potential developments promise even more powerful interactions and capabilities.

    Conclusion

    The integration of ChatGPT with the Nothing Ear (a) earbuds transforms how users interact with their audio devices. From improved user experiences to real-time communication and robust privacy measures, this combination showcases the potential of AI in personal audio. Embrace the future of smart audio with the Nothing Ear (a) and enjoy an unparalleled listening experience.

    Also Check:

  • Sony Bravia Theatre Quad Review: A Wireless Atmos Powerhouse

    Sony Bravia Theatre Quad Review: A Wireless Atmos Powerhouse

    Sony’s HT-A9 Home Theater System, reviewed last year, was a unique soundbar system that combined four individual speakers into one cohesive unit. This year, Sony introduces the successor: the Sony Bravia Theatre Quad. The new system aims to rectify past issues and elevate the home theater experience to new heights.

    Sony Bravia Theatre Quad Review: A Wireless Atmos Powerhouse

    Key Takeaways

    • Easy Setup: The setup process is straightforward and user-friendly.
    • Sleek Design: Modern, stylish design that blends well with home decor.
    • Advanced Audio Features: Includes 360 Spatial Mapping, Dolby Atmos support, and enhanced connectivity.
    • Stable Wireless Connection: Reliable and robust wireless connectivity with no dropouts.
    • High Price Point: The system is expensive, with additional costs for subwoofers.

    Sony Bravia Theatre Quad Review

    We’ve spent extensive time with the Sony Bravia Theatre Quad, and it has proven to be an impressive wireless home theater system. In this comprehensive review, we’ll delve into the details, discussing its design, connectivity, performance, pros, and cons.

    Sony Bravia Theatre Quad Pros

    Easy Setup

    Setting up the Sony Bravia Theatre Quad is a breeze, thanks to the Bravia Connect app. The app guides users through the setup process, ensuring that even those unfamiliar with home theater systems can get everything up and running quickly. The system includes attachments for both tabletop and wall mounting, providing flexibility in placement. The longer power cables are a welcome addition, offering more freedom in positioning the speakers.

    Sleek Design

    The new design for 2024 features a flatter shape covered in neutral fabric, making it more suitable for various home decors. The speakers are compact yet powerful, measuring approximately 11.5 inches long, 10.9 inches wide, and 2.3 inches deep without the stand. The control box, which serves as the hub, is sleek and unobtrusive, blending seamlessly into your entertainment setup.

    360 Spatial Mapping

    Sony’s proprietary 360 Spatial Sound Mapping technology creates an immersive audio experience by generating multiple phantom speakers around the room. This technology uses the Bravia Connect app to calibrate the speakers based on your room layout and listening position, providing a truly surround sound experience that envelops you from all directions.

    Stable Connection

    The Sony Bravia Theatre Quad boasts a dual antenna frequency hopping system that ensures a stable wireless connection. This upgrade addresses the occasional dropouts experienced with the previous HT-A9 model, providing a seamless and reliable audio experience.

    Improved Phantom Speaker for Center Channel

    The new system significantly enhances the central channel performance, a notable improvement over its predecessor. The Voice Zoom 3 feature allows users to pair a compatible Sony TV and use its speaker as a dedicated center channel, further enhancing the clarity of dialogue and vocals.

    Impressive Soundstage and Loudness

    Each speaker in the system is equipped with dedicated drivers for tweeter, mid-range, bass, and upward-firing Atmos channels, delivering a powerful total output of 504 watts. The system maintains a fantastic soundstage even at high volumes, making it perfect for both movies and music.

    Dolby Atmos Support

    Supporting Dolby Atmos, the Sony Bravia Theatre Quad provides a premium audio experience with sound that moves around you in a three-dimensional space. The inclusion of upward-firing drivers enhances this experience, especially in rooms with higher ceilings.

    Future-Proof with 8K@120 Pass Through

    The control box supports 8K@120 pass-through, ensuring compatibility with future high-resolution content. This feature, along with support for VRR (Variable Refresh Rate) and ALM (Auto Low Latency Mode), makes the system an excellent choice for gamers and tech enthusiasts.

    Sony Bravia Theatre Quad Cons

    Subwoofer Sold Separately

    One downside of the Sony Bravia Theatre Quad is that the subwoofer is sold separately. Users can choose between the SW3 or SW5 subwoofers, depending on their budget and preferences. While the main speakers provide decent bass, the addition of a subwoofer significantly enhances the overall audio experience.

    No Graphic EQ

    The system lacks a graphic equalizer, limiting detailed sound customization. This may be a drawback for audiophiles who prefer to fine-tune their audio settings to suit their preferences.

    High Price Point

    The Sony Bravia Theatre Quad is undeniably pricey, making it a substantial investment. When factoring in the cost of an additional subwoofer, the total price can be quite high compared to other home theater systems.

    Design

    New Design for 2024

    The Sony Bravia Theatre Quad introduces a new design for 2024, shifting from the cylindrical shape of the HT-A9 to a flatter, more modern look. The speakers are covered in a neutral fabric, enhancing their aesthetic appeal and making them more compatible with various home interiors.

    Size and Weight

    The speakers are compact, measuring approximately 11.5 inches long, 10.9 inches wide, and 2.3 inches deep without the stand, and weigh around 5.5 pounds. The control box is also sleek and unobtrusive, measuring 6.4 inches long, 2.3 inches wide, and 6.4 inches deep, and weighing about 2 pounds.

    Mounting Options

    The system includes attachments for both tabletop and wall mounting, providing flexibility in placement. Longer power cables offer more freedom in positioning the speakers, enhancing the overall user experience.

    Control Box

    The control box serves as the hub for the system, featuring two HDMI ports for input and output. It supports Arc/eArc signals up to 8K 4K 120, ensuring compatibility with future high-resolution content and providing a robust connection between the speakers and the TV.

    Connectivity

    Wireless Connectivity

    The Sony Bravia Theatre Quad utilizes a dual antenna frequency hopping system for wireless communication between the speakers and the control box. This technology ensures a stable and reliable connection, addressing the occasional dropouts experienced with the previous HT-A9 model.

    HDMI Ports

    The control box features two HDMI ports: one for input and one for output. The output port supports Arc/eArc signals up to 8K 4K 120, making the system future-proof. Additionally, the system supports VRR (Variable Refresh Rate), ALM (Auto Low Latency Mode), and Dolby Vision, enhancing its versatility for gaming and video playback.

    Wireless Features

    In addition to HDMI connectivity, the Sony Bravia Theatre Quad supports various wireless features, including Wi-Fi, Bluetooth 5.2, AirPlay 2, and Spotify Connect. These features provide multiple options for connecting your devices and streaming content.

    Control Options

    Users can control the system in four ways: using the small remote control included, via HDMI with a compatible Sony TV, through the Bravia Connect app, or with their phone’s built-in microphone for calibration. The app allows for easy setup, calibration, and customization of the audio settings.

    Performance

    Speaker Configuration

    Each of the four speakers in the Sony Bravia Theatre Quad setup is equipped with dedicated drivers for tweeter, mid-range, bass, and upward-firing Atmos channels. This configuration ensures a powerful total output of 504 watts, delivering a balanced and immersive audio experience.

    Audio Processing Algorithms

    Sony’s proprietary algorithms create about 12 virtual speakers around the room, enhancing the surround sound experience. Users can choose from three Surround Sound Processing profiles: Sony spatial mapping, Dolby virtualization, or DTS Neural X, each offering a unique audio experience.

    Sound Quality

    The system delivers impressive sound quality with clear highs, rich mids, and powerful bass. The central channel performance is significantly improved, providing better dialogue clarity. Pairing the system with the SW5 subwoofer enhances the bass response, creating a more immersive audio experience.

    Performance with Music

    The Sony Bravia Theatre Quad performs exceptionally well with music playback. In two-channel mode, it delivers detailed and neutral sound. Upscaling audio to play on all four speakers elevates the experience, filling the room with dynamic and engaging sound.

    Verdict

    Overall Recommendation

    The Sony Bravia Theatre Quad stands out as a premium wireless home theater system, offering impressive audio performance, sleek design, and advanced features. Compared to its predecessor, the HT-A9, it provides a more reliable and immersive audio experience.

    Ideal Users

    This system is ideal for home theater enthusiasts who seek a high-end, wireless setup. Its flexibility in placement, user-friendly setup, and robust connectivity make it suitable for various room sizes and configurations.

    Final Thoughts

    Despite its high price point, the Sony Bravia Theatre Quad is a worthwhile investment for those who prioritize audio quality and convenience. Its sleek design, advanced audio features, and stable wireless connection make it one of the best home theater systems available.

    User Tips

    • Tip 1: Use the Bravia Connect app for easy setup and calibration.
    • Tip 2: Place the speakers at optimal positions for the best audio experience.
    • Tip 3: Pair the system with the SW5 subwoofer for enhanced bass.

    Also Check:

  • BlendJet 2 Review: The Ultimate Portable Blender for Smoothies and More

    BlendJet 2 Review: The Ultimate Portable Blender for Smoothies and More

    The need for a portable, efficient, and easy-to-use blender has never been greater. Whether you’re a fitness enthusiast needing a quick protein shake on the go or someone who loves freshly blended smoothies, the BlendJet 2 promises convenience and versatility. In this comprehensive BlendJet 2 review, we’ll dive deep into its design, performance, ease of use, safety, and more to help you decide if this portable blender is the right fit for you.

    BlendJet 2 Review: The Ultimate Portable Blender for Smoothies and More

    Key Takeaways

    • Portable and Lightweight: The BlendJet 2 is easy to carry, making it perfect for blending on the go.
    • Variety of Designs: Available in numerous colors and patterns, including fun Disney and Pixar collaborations.
    • Efficient Performance: Blends smoothies, ice, and more with its advanced modes.
    • User-Friendly: Simple operation with a single button, but not dishwasher-safe.
    • Important Safety Information: Some units were recalled due to safety concerns; check your unit’s status.

    BlendJet 2 Review

    The BlendJet 2 isn’t just about functionality; it’s also about style. With a variety of colors and patterns, including exclusive Disney and Pixar collaborations, it adds a touch of fun to your daily routine. But how does it perform in real-world use? And what should you know before buying one? This review covers all the essential aspects, helping you make an informed decision.

    Design and Build

    The BlendJet 2 stands out for its portability and sleek design. Measuring just 9 inches tall and 3 inches in diameter, it easily fits into car cup holders and the side pockets of backpacks. Despite its lightweight appearance, the blender is surprisingly sturdy. Its compact size doesn’t compromise its capacity, as it holds up to 16 ounces (473 ml), equivalent to two cups.

    The blender is constructed entirely of plastic, including the jar and motor base. The jar has a see-through body with a screw-on lid and a built-in flap for a secure grip. The blade assembly is attached to the motor base with a thin shaft, slightly offset from the center, which enhances blending efficiency. The motor base sits on three rubber anti-slip pads and features a power button, a battery life indicator light, and a USB-C charging port.

    Colors and Patterns

    BlendJet 2 is available in a wide range of colors and patterns, catering to diverse tastes. From classic colors like black and white to vibrant options like hot pink and lime, there’s something for everyone. The brand has also collaborated with Disney and Pixar, offering designs featuring characters like Mickey Mouse, Elsa, and Buzz Lightyear. These fun and unique designs make the BlendJet 2 not just a kitchen appliance but a fashionable accessory.

    Color Options Pattern Options Collaborations
    Black Geode Disney Mickey Mouse
    White Leopard Disney Elsa
    Hot Pink Carbon Fiber Pixar Buzz Lightyear
    Lavender Urban Camo Disney Minnie Mouse
    Mint Metallic Galaxy Pixar Woody

    Performance

    Blending Capabilities

    The BlendJet 2 excels at making single-serve smoothies. Its powerful motor and well-designed blades ensure efficient blending, even with ice cubes and frozen fruits. However, the texture can be slightly grainy when blending fibrous ingredients like leafy greens.

    Ice Crushing and Frozen Ingredients

    This blender handles ice cubes and frozen fruits with ease, making it a great choice for summer smoothies. It can blend ice, mangoes, strawberries, and more within seconds. For best results, always add liquid ingredients first, followed by solids.

    Pulse Mode

    The BlendJet 2 features a pulse mode, which is ideal for chopping ingredients like tomatoes, onions, and jalapenos. This mode offers more control over the blending process, allowing you to achieve the desired consistency for various recipes.

    Ease of Use

    User-Friendly Operation

    Operating the BlendJet 2 is straightforward, thanks to its single-button design. This button powers the blender on and off and toggles between the three modes: blending, pulse, and lock. The lock mode is a safety feature that prevents accidental blending while the blender is in your bag or you’re drinking from it.

    Battery Life

    The blender’s battery life is impressive, lasting for over 12 blending cycles on a single charge. It takes about 60-90 minutes to fully charge via the included USB-C cable, with the light changing from purple to blue when fully charged. However, the charging cord is relatively short, which can be inconvenient if the power outlet is far away.

    Cleaning

    Cleaning the BlendJet 2 is easy, though none of its parts are dishwasher-safe. The jar and lid can be cleaned by hand, and the jar’s open ends make it easy to rinse out any residue.

    Safety and Recall Information

    Important Safety Information

    It’s crucial to note that some BlendJet 2 units were recalled due to safety concerns. The recall affects units with serial numbers starting between 5201 and 5542. If you own a BlendJet 2, check the manufacturer’s website to see if your unit is affected. BlendJet has assured that current models for sale are safe and not subject to the recall.

    Comparisons

    How BlendJet 2 Stacks Up Against Competitors

    While the BlendJet 2 is a strong contender in the portable blender market, it faces competition from models like the Ninja Blast and NutriBullet GO. The Ninja Blast, for instance, provides smoother blends with fibrous ingredients. Additionally, the Fresh Juice Portable Blender and Cuisinart EvolutionX offer similar portable blending capabilities.

    Feature BlendJet 2 Ninja Blast NutriBullet GO
    Portability High High High
    Blending Smoothness Good Excellent Good
    Battery Life (blending cycles) 12+ 15+ 10+
    Dishwasher Safe No Yes No

    Pros and Cons

    Weighing the Benefits and Drawbacks

    Pros:

    • Portable & Lightweight: Easy to carry anywhere.
    • Variety of Colors and Patterns: Something for everyone.
    • Efficient Performance: Blends smoothies quickly and efficiently.
    • Long Battery Life: Lasts over 12 blending cycles on a single charge.

    Cons:

    • Not Dishwasher-Safe: Requires hand cleaning.
    • Noise: Can be loud when blending large pieces.
    • Short Charging Cord: Inconvenient if the power outlet is far away.

    Conclusion

    Final Thoughts and Recommendations

    Overall, the BlendJet 2 is a versatile and convenient portable blender, ideal for those who need quick, easy blending on the go. Its compact design, variety of fun colors and patterns, and efficient performance make it a standout choice. However, it’s essential to check for any recall information before purchasing or using the blender.

    Who Should Buy It? The BlendJet 2 is perfect for fitness enthusiasts, frequent travelers, and anyone who enjoys fresh smoothies or shakes anytime, anywhere.

    Final Advice: Before purchasing, ensure your unit is not part of the recall by checking BlendJet’s website for safety information.

    Also Check:

  • Nothing Ear (a) Earbuds: Experience Premium Hi-Res Audio and ChatGPT Integration for Under $100

    Nothing Ear (a) Earbuds: Experience Premium Hi-Res Audio and ChatGPT Integration for Under $100

    Introducing the Nothing Ear (a) wireless earbuds, the latest innovation in audio technology. Priced at $99.00, these earbuds deliver exceptional sound quality, advanced noise cancellation, and the unique feature of ChatGPT integration. Whether you’re an audiophile, a busy professional, or a tech enthusiast, the Nothing Ear (a) is designed to enhance your listening experience in every possible way.

    Nothing Ear (a) Earbuds: Experience Premium Hi-Res Audio and ChatGPT Integration for Under $100

    Nothing Ear (a) Wireless Earbuds

    If you’re in the market for cutting-edge wireless earbuds, the Nothing Ear (a) should be on your radar. Let’s dive into why these earbuds stand out.

    Immersive Audio with Powerful 11mm Drivers

    At the heart of the Nothing Ear (a) is a compact yet powerful 11mm driver. This driver delivers deep bass performance, thanks to the extra space that allows sound waves to vibrate more freely. With two new vents, airflow is improved inside the earbud, resulting in less distortion and richer overall clarity. Whether you’re listening to your favorite tracks or enjoying a podcast, the audio quality is nothing short of spectacular.

    Smart Active Noise Cancellation Up to 45dB

    One of the standout features of the Nothing Ear (a) is its smart active noise cancellation (ANC) system. Capable of reducing noise by up to 45dB, these earbuds automatically check for noise leakage between the earbud and your ear canal. The ANC adjusts in real-time, ensuring you get the best possible noise cancellation in any environment. From quiet rooms to bustling streets, you’ll only hear what you want to hear.

    Clear Voice Technology for Crystal Clear Calls

    Stay connected with clear voice technology that isolates your voice from everyday distractions. The Ear (a) features a new talk mic and an extra airway on the stem to reduce interference by 60% compared to previous models. This ensures that your calls are as clear as face-to-face conversations, no matter where you are.

    Long Playtime and Fast Charging

    Never worry about running out of battery with the Nothing Ear (a). These earbuds can fast charge for just 10 minutes and provide 10 hours of music playback with ANC turned off. On a full charge, enjoy over 42.5 hours of playtime with ANC off. This is a 40.5% increase in non-stop playtime compared to the previous Ear (2) model. The fast charging capability ensures you spend more time listening and less time waiting.

    Enhanced Performance for Gaming and Multitasking

    The Nothing Ear (a) is designed for more than just music. With a low lag mode and end-to-end latency of less than 120 ms, these earbuds are perfect for gaming. Game Mode on a Nothing phone triggers reduced audio lag automatically. Additionally, the dual connect feature allows you to stay connected to two devices simultaneously, making it easy to switch between music on your laptop and calls on your phone seamlessly.

    Adaptive ANC and Seamless Integration with Nothing X App

    Take control of your listening experience with adaptive ANC. Switch between three levels of noise cancellation or let Ear (a) adapt automatically to your surroundings in real-time by selecting ‘Adaptive’ in the Nothing X app. This next-level feature ensures you get the perfect balance of noise cancellation and awareness.

    Revolutionary ChatGPT Integration

    The Nothing Ear (a) introduces a first-of-its-kind feature: ChatGPT integration. Use your voice to access ChatGPT on the go, setup via the Nothing X app. This integration allows you to ask questions, get answers, and learn from ChatGPT wherever you are. This feature is exclusive to Nothing earbuds when connected to Nothing phones, providing a seamless and intelligent user experience.

    What’s in the Box?

    When you purchase the Nothing Ear (a), you receive:

    • 1 x Pair of Nothing Ear (a) wireless earbuds
    • 1 x Charging case
    • Multiple ear tip sizes for a custom fit
    • 1 x USB-C charging cable

    Final Thoughts

    The Nothing Ear (a) wireless earbuds offer a perfect blend of advanced technology, superior audio quality, and innovative features. With powerful drivers, smart ANC, clear voice technology, long battery life, and the unique ChatGPT integration, these earbuds are designed to cater to all your audio needs. Whether you’re listening to music, making calls, gaming, or seeking answers from ChatGPT, the Nothing Ear (a) delivers an unparalleled listening experience.

    Ready to elevate your audio game? Try the Nothing Ear (a) and experience the future of wireless earbuds.

    Also Check:

  • Asus Zenbook Duo (2024) Review: Revolutionizing Portable Productivity

    Asus Zenbook Duo (2024) Review: Revolutionizing Portable Productivity

    Asus has once again pushed the boundaries of innovation with its latest offering, the Zenbook Duo (2024). This cutting-edge device is not just another laptop; it’s a portable productivity powerhouse that’s set to redefine how we work and create on the go. With its unique dual-screen design, the Zenbook Duo 2024 promises to boost efficiency and multitasking capabilities for professionals, creatives, and power users alike. In this comprehensive review, we’ll dive deep into what makes this laptop stand out in the crowded market of premium ultrabooks.

    Asus Zenbook Duo (2024) Review: Revolutionizing Portable Productivity

    Key Takeaways:

    • The Asus Zenbook Duo 2024 features dual 14-inch OLED touch displays
    • It offers versatile usage modes with a detachable keyboard
    • Performance is powered by Intel Core Ultra processors
    • The laptop boasts a durable build with MIL-STD 810H certification
    • Pricing starts at Rs. 1,59,990, offering competitive value in its segment

    Asus Zenbook Duo (2024) Review

    The Asus Zenbook Duo 2024 is a marvel of modern engineering, seamlessly blending functionality with aesthetics. At first glance, it might appear to be just another premium laptop, albeit a bit thicker than usual. However, this extra thickness houses the laptop’s pièce de résistance: a second 14-inch display that’s revealed when the detachable keyboard is removed.

    Build Materials and Durability:

    • Aluminum-magnesium alloy construction
    • Available in Inkwell Grey color
    • MIL-STD 810H military-grade durability certification

    The laptop’s lid features subtle glossy lines, a signature design element of the Zenbook series. While there’s some flex on the lid, the overall build quality is solid and inspires confidence in its longevity. The bottom of the device houses a sturdy metal kickstand, which allows for various usage angles and enhances the laptop’s versatility.

    Dimensions and Weight:

    • Weight with keyboard: 1.65kg
    • Weight without keyboard: 1.35kg
    • Comparable in size to a 14-inch MacBook Pro

    Despite housing two screens, the Zenbook Duo 2024 remains surprisingly portable. Its weight is on par with many single-screen premium laptops, making it a viable option for professionals who are always on the move.

    Port Selection: | Left Side | Right Side | |———–|————| | 2x Thunderbolt 4 | HDMI 2.1 | | USB 3.2 Gen 2 Type-A | 3.5mm audio jack |

    The port selection is generous, offering a good mix of modern and legacy options to cater to various connectivity needs.

    Dual Display Technology

    The star of the show is undoubtedly the Zenbook Duo’s dual-screen setup. Both displays are 14-inch OLED panels, offering:

    • Full-HD+ resolution (1920 x 1200 pixels)
    • 16:10 aspect ratio
    • 60Hz refresh rate
    • 500-nits peak brightness
    • HDR and Dolby Vision support
    • Pantone validation for color accuracy

    These displays are not just about the specs; they’re about revolutionizing how we interact with our laptops. The ability to expand your workspace vertically or horizontally opens up new possibilities for multitasking and content creation.

    Usage Modes:

    1. Traditional laptop mode
    2. Dual-screen stacked mode
    3. Expanded landscape mode
    4. Tent mode for presentations

    The flexibility offered by these modes is unparalleled, allowing users to adapt their workspace to any situation or preference. Whether you’re coding, designing, writing, or presenting, the Zenbook Duo 2024 has a configuration to optimize your workflow.

    Keyboard and Touchpad

    The detachable keyboard is a technological feat in itself. Despite being only 4mm thin, it offers:

    • 4mm key travel
    • Three levels of backlighting
    • Bluetooth LE connectivity when detached
    • Pogo pin and magnetic attachment

    The keyboard’s ability to function wirelessly when detached adds another layer of versatility to the Zenbook Duo. The touchpad, while not as large as some competitors, is responsive and supports multi-touch gestures. It offers a 0.23mm travel distance and provides satisfying tactile feedback.

    Performance

    Under the hood, the Zenbook Duo 2024 packs serious power:

    Processor Options:

    • Intel Core Ultra 5 125H
    • Intel Core Ultra 7 155H
    • Intel Core Ultra 9 185H (tested)

    Our review unit, equipped with the top-tier Intel Core Ultra 9 185H, delivered impressive performance across various tasks. In PCMark 10 benchmarks, it scored:

    • Overall score: 6,637 points
    • Productivity score: 8,851 points
    • Essentials score: 10,417 points

    These scores outperform many competitors in its class, including some gaming-oriented laptops. The Zenbook Duo handles multitasking with ease, making it an ideal choice for professionals who run multiple demanding applications simultaneously.

    Graphics: While it doesn’t come with a discrete GPU, the integrated Intel Arc graphics provide sufficient power for light creative work and casual gaming.

    Thermal Management: Despite its powerful internals, the Zenbook Duo manages heat efficiently. The dual-fan cooling system, coupled with heat pipes and a strategically placed heat spreader, keeps temperatures in check even during intensive tasks.

    Software and User Experience

    Asus has put considerable effort into optimizing the software experience for the dual-screen setup:

    • Windows 11 Home out-of-the-box
    • Asus ScreenXpert software for display management
    • AI-enhanced features for camera and audio

    The ScreenXpert software is the backbone of the dual-screen experience, offering intuitive gestures and shortcuts to manage windows across both displays. Features like Task Groups and Control Panel enhance productivity by allowing users to create custom layouts and quick access controls for various applications.

    Battery Life and Charging

    The Zenbook Duo 2024 is equipped with a 75Wh battery, which provides:

    • 8-9 hours of usage in dual-screen mode
    • Up to 13 hours in single-screen mode
    • 65W fast charging support

    While the battery life is impressive considering the dual-screen setup, power users might find themselves reaching for the charger during long workdays. However, the fast-charging capability helps mitigate this issue.

    Audio and Webcam

    Audio:

    • Dual Harman Kardon-tuned speakers
    • Dolby Atmos support
    • Bottom-firing design (potential audio quality compromise in some usage modes)

    Webcam:

    • 1080p sensor
    • IR scanner for Windows Hello
    • AI-enhanced features (Studio effects, background blur, noise reduction)

    Price and Value Proposition

    The Asus Zenbook Duo 2024 starts at Rs. 1,59,990 for the base model, with higher-end configurations reaching up to Rs. 2,39,990. Considering the unique dual-screen design and powerful internals, this pricing is competitive, especially when compared to high-end single-screen ultrabooks.

    Pros and Cons

    Pros:

    • Innovative dual-screen design
    • Versatile usage modes
    • Powerful performance
    • High-quality OLED displays
    • Competitive pricing

    Cons:

    • Average battery life in dual-screen mode
    • Speakers could be better
    • Potential learning curve for optimal dual-screen usage

    Verdict

    The Asus Zenbook Duo (2024) is more than just a laptop; it’s a glimpse into the future of mobile computing. Its dual-screen design offers unparalleled versatility and productivity potential, making it an excellent choice for professionals, creatives, and power users who demand more from their devices.

    While it may have a few minor drawbacks, such as the speaker quality and battery life in dual-screen mode, these are easily overshadowed by the innovative features and powerful performance. The competitive pricing further cements its position as a compelling option in the premium laptop market.

    For those willing to embrace a new way of working and who value screen real estate and multitasking capabilities, the Asus Zenbook Duo 2024 is not just recommended – it’s a game-changer. It successfully balances innovation with practicality, offering a unique solution to the ever-growing demands of modern computing.

    Also Check:

  • How to Use Ulanzi Microphone

    How to Use Ulanzi Microphone

    The Ulanzi Microphone is a versatile and high-quality audio device designed to enhance your recording experience. With features like superior sound clarity, versatile connectivity options, and a user-friendly design, this microphone is ideal for various recording scenarios. On the other hand, properly connecting and setting up the microphone is crucial for achieving optimal performance. In this post, we will consider how to setup and use the Ulanzi Microphone.

    How to Use Ulanzi Microphone

    How to Use Ulanzi Microphone

    Featuring a compact design, excellent sound clarity, and easy connectivity, this Ulanzi Microphone is perfect for vloggers, interviewers, and musicians alike. The microphone offers a versatile and high-quality audio device designed to enhance your recording experience. Using a dedicated microphone significantly improves audio quality, making your videos and recordings more professional and engaging. Here is how to use:

    Unboxing and Setup

    When you receive your Ulanzi Microphone, the first step is unboxing it carefully. Inside the package, you’ll find the microphone itself, a windscreen, a mounting clip, a USB cable, and a user manual. Begin by removing all components from the box, ensuring you do not lose any small parts.

    To set up the microphone, first attach the windscreen to reduce ambient noise. Next, use the mounting clip to secure the microphone to your desired position, whether it’s on a stand or directly on your camera. Connect the microphone to your recording device using the included USB cable. Make sure your device recognizes the microphone by checking the audio input settings.

    Using the Microphone

    The Ulanzi Microphone can be used in various scenarios, making it a versatile tool for different recording needs. For vlogging, attach the microphone to your camera and ensure it’s pointing towards your mouth for clear audio capture. In interview settings, position the microphone centrally between participants to capture dialogue evenly. For music recordings, place the microphone close to the sound source, whether it’s an instrument or a vocalist, to capture detailed audio.

    To achieve the best sound quality, position the microphone close to the sound source and away from any background noise. Experiment with different angles and distances to find the optimal setup for your specific recording situation.

    Adjusting Settings

    The Ulanzi Microphone comes with adjustable settings to help you tailor the audio capture to your environment. You can adjust the volume levels directly on the microphone to ensure your audio isn’t too quiet or distorted. Additionally, some Ulanzi microphones offer directional settings, allowing you to choose between cardioid, omnidirectional, or bidirectional pickup patterns.

    For a quiet indoor environment, a cardioid setting, which focuses on sound from one direction, is often ideal. In a noisier or outdoor setting, an omnidirectional setting may be better to capture sound from all directions evenly. Adjust the settings based on your environment and recording needs.

    Troubleshooting Common Issues

    While using the Ulanzi Microphone, you may encounter some common issues. If the microphone isn’t recognized by your device, ensure the USB cable is properly connected and check your device’s audio input settings. If the sound quality is poor, verify that the windscreen is attached and the microphone is positioned correctly.

    For issues with background noise, try repositioning the microphone and adjusting the directional settings. Ensuring the volume levels are appropriately set can also help prevent audio distortion.

    Recording Tips

    To achieve the best audio quality with the Ulanzi Microphone, follow a few key tips. Always use the windscreen to minimize ambient noise and pop sounds. Position the microphone as close to the sound source as possible without causing distortion. In noisy environments, consider using soundproofing techniques or additional accessories like shock mounts to reduce vibrations.

    Experiment with different recording environments and settings to find what works best for your specific needs. Regularly monitor your recordings to identify any issues early and make necessary adjustments.

    Accessories and Add-Ons

    To enhance the performance of the Ulanzi Microphone, consider using additional accessories. A shock mount can help reduce vibrations and handling noise, while a boom arm can provide flexible positioning options. External audio interfaces can further improve sound quality by offering advanced audio processing capabilities.

    Using high-quality headphones during recording and playback can also help you monitor the audio more accurately and make necessary adjustments in real-time.

    Comparison with Other Microphones

    Compared to other similar products on the market, the Ulanzi Microphone stands out for its affordability, ease of use, and versatile features. While there are higher-end microphones with more advanced capabilities, the Ulanzi Microphone offers an excellent balance of quality and cost, making it a great option for beginners and intermediate users.

    Its compact design and compatibility with a wide range of devices also make it a convenient choice for on-the-go recording, unlike some bulkier and more expensive options.

    Conclusion

    In summary, the Ulanzi Microphone is a reliable and versatile tool that significantly enhances audio quality for various recording needs. Its ease of setup, adjustable settings, and compatibility with different devices make it a valuable addition to any recording setup. Whether you’re a vlogger, interviewer, or musician, the Ulanzi Microphone is worth considering to improve your audio recordings. Try it out and share your experiences to discover the full potential of this excellent microphone.

    Also Check:

  • How to Use Ulanzi Anamorphic Lens

    How to Use Ulanzi Anamorphic Lens

    The Ulanzi Anamorphic Lens opens up a world of creative possibilities for mobile photographers and videographers. Its unique features and cinematic capabilities make it a valuable tool for anyone looking to elevate their content. Whether you’re a seasoned professional or an enthusiastic amateur, this lens is a worthy addition to your mobile photography toolkit. Explore its potential and transform your smartphone footage into cinematic masterpieces.

    How to Use Ulanzi Anamorphic Lens

    How to Use Ulanzi Anamorphic Lens 

    The Ulanzi Anamorphic Lens is a transformative accessory for mobile photography and videography, designed to elevate your smartphone’s camera capabilities. This lens allows you to capture stunning wide-angle shots and create cinematic effects, making it an essential tool for enthusiasts and professionals alike. If you don’t know how to use the Ulanzi Anamorphic Lens and may be probably new to this tool, here is how to use it:

    What is the Ulanzi Anamorphic Lens?

    An anamorphic lens is a special type of lens used in filmmaking to capture a wider field of view and produce distinctive cinematic effects. Unlike standard lenses, anamorphic lenses compress the horizontal aspect of the image onto the sensor, which is then decompressed during post-processing to achieve a widescreen look. This technique not only increases the horizontal field of view but also introduces unique lens flares and depth-of-field effects characteristic of high-end cinema.

    Compatibility with Devices

    The Ulanzi Anamorphic Lens is compatible with a wide range of smartphones, including both iPhone and Android devices. To properly attach the lens, you’ll need to use the included clip or a compatible phone case with a built-in mount. Ensuring the lens is securely fastened and aligned with your phone’s camera is crucial for optimal performance.

    Adjusting the Lens

    Achieving the best results with the Ulanzi Anamorphic Lens involves a few steps for proper adjustment. First, attach the lens to your smartphone using the clip or compatible case. Make sure the lens is aligned with your phone’s camera, with no obstructions or misalignments. Open your camera app and manually adjust the focus to achieve sharpness. If necessary, rotate the lens slightly to align the horizontal lines of your scene with the frame, ensuring the anamorphic effect is correctly applied.

    Shooting Techniques

    Using the Ulanzi Anamorphic Lens can dramatically enhance the quality of your mobile videos and photos. Take advantage of the lens’s wide field of view to capture expansive landscapes or tight indoor scenes. Utilize the lens’s characteristic flares and depth-of-field to add a professional touch to your videos. Incorporate smooth horizontal panning shots to highlight the anamorphic lens’s ability to capture wide, sweeping views.

    Editing and Post-Processing

    Post-processing is essential for enhancing anamorphic footage. Use editing software to decompress the footage, converting it from a distorted image to a widescreen format. Apply color grading techniques to enhance the cinematic look of your footage. Highlight the unique lens flares captured by the anamorphic lens to add a dramatic effect to your videos.

    Accessories and Add-Ons

    To complement your Ulanzi Anamorphic Lens, consider using stabilizers like a gimbal or tripod to keep your shots steady and smooth. Use ND filters to control exposure and add creative effects to your footage. Portable LED lights can improve the quality of your shots in low-light conditions.

    Troubleshooting Common Issues

    Addressing common problems can enhance your experience with the Ulanzi Anamorphic Lens. Ensure the lens is properly aligned and manually adjust the focus to avoid blurry images. While lens flares are often desirable, excessive flaring can be reduced by adjusting the angle of the lens. Vignetting, which can occur if the lens is not properly centered, can be minimized by re-aligning the lens.

    User Testimonials

    Many users have successfully used the Ulanzi Anamorphic Lens to create professional-quality content. Filmmakers and photographers alike praise its ability to deliver stunning visuals and cinematic effects, enhancing the overall quality of their projects.

    Conclusion

    The Ulanzi Anamorphic Lens opens up a world of creative possibilities for mobile photographers and videographers. Its unique features and cinematic capabilities make it a valuable tool for anyone looking to elevate their content. Whether you’re a seasoned professional or an enthusiastic amateur, this lens is a worthy addition to your mobile photography toolkit. Explore its potential and transform your smartphone footage into cinematic masterpieces.

    Also Check:

  • How to Connect Ulanzi Microphone

    How to Connect Ulanzi Microphone

    The Ulanzi Microphone is a high-quality audio device designed to enhance your recording experience, whether you’re a vlogger, interviewer, or musician. Featuring a sleek design, excellent sound clarity, and versatile connectivity options, this microphone is a valuable tool for achieving professional-grade audio. But unfortunately, most people are probably new to this tool and may have some struggle connecting and setting up the microphone. Thus, in this post, we will consider a guide on how to connect your Ulanzi Microphone, ensuring clear and crisp sound in all your recordings.

    How to Connect Ulanzi Microphone

    How to Connect Ulanzi Microphone

    The Ulanzi Microphone is a high-quality audio device designed to elevate your recording experience. It boasts features such as superior sound clarity, versatile connectivity options, and user-friendly design. Ensuring you connect the microphone properly is crucial for achieving optimal audio performance in your videos or recordings. Here are the steps to follow:

    Step 1: Unboxing the Ulanzi Microphone

    When you receive your Ulanzi Microphone, the first step is to unbox it carefully. Inside the package, you will find the microphone itself, a windscreen, a mounting clip, a USB cable, and a user manual. Begin by removing all components from the box, taking care not to lose any small parts. Inspect each item to ensure it is in good condition and ready for use.

    Step 2: Identifying the Connection Ports

    The Ulanzi Microphone features several connection ports, which are essential for setting up and using the device. Typically, these include a USB port for power and data transfer, a 3.5mm audio jack for headphones, and possibly additional ports for external devices. Refer to the user manual for a detailed description of each port. A visual guide can be particularly helpful in locating and identifying these ports quickly.

    Step 3: Connecting the Ulanzi Microphone to a Camera or Smartphone

    To connect the Ulanzi Microphone to your camera or smartphone, follow these steps:

    1. Attach the windscreen to the microphone to reduce ambient noise.
    2. Use the mounting clip to secure the microphone to your camera or smartphone. Ensure it is positioned correctly and securely.
    3. Connect the USB cable from the microphone to your recording device. If you are using a smartphone, you may need an adapter to connect the USB cable.
    4. Verify that your device recognizes the microphone. Check the audio input settings on your device to ensure the Ulanzi Microphone is selected as the input source.

    For common connection issues, ensure all cables are securely connected, and restart your device if necessary.

    Step 4: Adjusting the Microphone Settings

    Once connected, adjusting the microphone settings is vital for capturing high-quality audio. Most Ulanzi Microphones allow you to adjust the gain and directionality:

    1. Gain: Set the microphone gain to an appropriate level for your environment. Higher gain is suitable for quiet environments, while lower gain reduces distortion in louder settings.
    2. Directionality: Choose the appropriate pickup pattern based on your recording needs. Cardioid is ideal for single-source recording, while omnidirectional captures sound from all directions.

    Experiment with different settings to find the optimal configuration for your specific recording environment.

    Step 5: Testing the Microphone

    After setting up and adjusting the microphone, it’s essential to test it to ensure everything is working correctly:

    1. Record a short audio clip to check the sound quality.
    2. Listen to the recording with headphones to monitor audio levels and clarity.
    3. Make any necessary adjustments to the gain and directionality settings.
    4. Repeat the testing process until you achieve the desired audio quality.

    Conclusion

    In summary, the Ulanzi Microphone is a powerful tool for enhancing your recording quality. By following the steps outlined in this guide, you can ensure a proper connection, optimal settings, and high-quality audio in your recordings. Experiment with different configurations and techniques to get the best results from your Ulanzi Microphone, and enjoy creating professional-grade content with ease.

    Also Check:

  • How to Use Ulanzi Tripod

    How to Use Ulanzi Tripod

    Using an Ulanzi tripod is crucial in both photography and videography. It ensures that your camera remains steady, reducing the risk of blurred images and shaky footage. This is especially important in low-light conditions or when capturing long exposures. A tripod allows you to experiment with different angles and perspectives, giving you creative control over your shots. But, some users are new to or probably don’t know how to use the Ulanzi tripod. If you do not know how to use the Ulanzi tripod, this article offers a step-by-step guide to help you master your tripod.

    How to Use Ulanzi Tripod: Mastering Your Shots


    How to Use Ulanzi Tripod

    The Ulanzi Tripod is a versatile and robust tool designed to elevate your photography and videography. With its sturdy build, adjustable legs, and compatibility with various devices, this tripod ensures you capture every moment with precision and ease. Using a tripod is crucial for achieving stability, reducing camera shake, and allowing for creative shots that would be challenging to execute handheld. Whether you’re a professional photographer or an enthusiastic hobbyist, a tripod like the Ulanzi is essential for enhancing the quality of your work.

    Setting Up the Ulanzi Tripod

    Getting started with the Ulanzi Tripod is straightforward. Begin by unfolding the tripod legs. Simply release the leg locks and extend each leg to your desired length. Once the legs are fully extended, lock them securely in place. Next, adjust the height of the tripod by extending the center column. Twist the locking mechanism to raise or lower the column until you achieve the perfect height. Finally, adjust the angle of the tripod head to suit your shooting needs. The ball head allows for 360-degree rotation and tilting, providing maximum flexibility.

    Attaching Your Device

    Attaching your smartphone or camera to the Ulanzi Tripod is easy. The tripod features a universal mount compatible with most devices. To attach your device, align the mounting screw with the tripod socket on your camera or the clip on your smartphone. Tighten the screw or clamp to ensure a secure hold. For added stability, make sure your device is centered and balanced. This prevents tilting and ensures steady shots. Double-check that all locks and clamps are secure before you start shooting.

    Using the Ulanzi Tripod for Photography

    The Ulanzi Tripod excels in capturing still images. For standard shots, position your tripod and adjust the height and angle to frame your subject perfectly. Use the tripod for long exposure photography to capture stunning night scenes or flowing water effects without any camera shake. The stability of the tripod allows you to experiment with creative techniques like HDR photography or macro shots, giving you the freedom to explore different styles and compositions.

    Using the Ulanzi Tripod for Videography

    When it comes to videography, the Ulanzi Tripod provides a stable platform for smooth and steady footage. Use the tripod to shoot professional-quality videos by minimizing shake and jitter. For dynamic shots, utilize the pan and tilt functions. The fluid head allows for smooth movements, enabling you to track moving subjects or create cinematic pans and tilts. Whether you’re filming a documentary, a vlog, or a short film, the Ulanzi Tripod ensures your video quality remains top-notch.

    Portability and Storage

    One of the key advantages of the Ulanzi Tripod is its portability. To collapse the tripod, retract the legs and center column. Lock all the sections in place and fold the legs together. The compact design makes it easy to carry and store. For protection and convenience, consider investing in a carrying case or bag. These accessories safeguard your tripod from damage and make it easier to transport during travel or outdoor shoots.

    Maintenance and Care

    Maintaining your Ulanzi Tripod ensures its longevity. Regularly clean the legs and joints to remove dirt and debris. Use a soft cloth and mild cleaning solution to wipe down the surfaces. Lubricate moving parts if necessary to keep them operating smoothly. If you encounter any issues, such as loose screws or stiff joints, perform minor repairs or consult the user manual for troubleshooting tips. Proper care and maintenance will keep your tripod in excellent working condition for years.

    Accessories and Add-ons

    Enhance the functionality of your Ulanzi Tripod with additional accessories. Consider adding a remote shutter release for hands-free shooting, or an external microphone for improved audio quality during video recording. Ulanzi offers a range of compatible products, including smartphone mounts, LED lights, and extension arms, to complement your tripod and expand its capabilities.

    Showcasing User Examples

    The Ulanzi Tripod has been instrumental in capturing stunning photography and videography. Users have praised its stability and ease of use, sharing impressive images and videos taken with the tripod. From breathtaking landscapes to detailed macro shots, this tripod has helped photographers and videographers achieve their creative vision. Testimonials highlight its reliability and the professional quality it brings to their work.

    Conclusion

    The Ulanzi Tripod is a valuable tool for anyone serious about photography and videography. Its versatile features and sturdy design make it an essential accessory for capturing high-quality shots. Whether you’re shooting stills or videos, this tripod provides the stability and flexibility you need to explore your creative potential. Embrace the possibilities it offers and elevate your work to new heights. Share your experiences and discover the difference a reliable tripod can make in your artistic journey.

    Also Check: