Author: Evidence

  • Updating Airpod Pro Firmware: How often Should you Update your AirPod Pro Settings

    Updating Airpod Pro Firmware: How often Should you Update your AirPod Pro Settings

    Imagine settling into your favorite playlist, only to find your AirPods Pro aren’t delivering the pristine sound quality you expect. Maybe the noise cancellation feels off, or the controls aren’t responding as smoothly. These small inconveniences can disrupt your entire listening experience. That is where updating comes in, keeping your AirPod Pro settings up-to-date can prevent these issues and enhance your overall experience. But, how often should you update your AirPod Pro settings?

    How Often Should You Update Your AirPod Pro Settings

    How Often Should You Update Your AirPod Pro Settings?

    How often should you update your AirPod Pro settings? Keeping your AirPod Pro settings up-to-date ensures you maximize their functionality and enjoy the best possible user experience. Typically, you can update your AirPod Pro settings from time to time to ensure you are using the AirPod firmware version. Since Apple periodically releases firmware updates that improve performance, add new features, or fix bugs.

    This regular maintenance can prevent issues from arising and keep your AirPods Pro in optimal condition. Here’s a detailed guide on when and why you should update your AirPod Pro settings.

    1. After Firmware Updates

    Frequency: As needed

    • Reason: Firmware updates from Apple can introduce new features, improve existing ones, or fix bugs. After an update, review your settings to take advantage of any new options or enhancements.

    2. When Experiencing Issues

    Frequency: As needed

    • Reason: If you notice connectivity problems, poor sound quality, or unresponsive controls, it’s a good time to review and possibly reset your settings to troubleshoot and resolve these issues.

    3. When Changing Devices

    Frequency: When paired with a new device

    • Reason: Different devices (iPhone, iPad, Mac) may have unique settings configurations. Ensure your AirPods Pro settings are optimized for each device you regularly use.

    4. With Significant Lifestyle Changes

    Frequency: As needed

    • Reason: Changes in your daily routine, such as starting a new workout regimen, changing jobs, or traveling more frequently, may necessitate adjustments to settings like noise cancellation, transparency mode, or gesture controls to better suit your environment and activities. For instance, you might want to tweak the noise cancellation or transparency mode settings to better accommodate your new environment or usage scenario.

    5. Regular Maintenance

    Frequency: Every few months

    • Reason: Periodically reviewing your settings can help ensure they are still aligned with your preferences and needs. This is especially important as Apple may release updates or you might change how you use your AirPods Pro over time.

    6. When Getting New Accessories

    Frequency: As needed

    • Reason: If you get new ear tips, cases, or other accessories, you might need to update your settings to ensure compatibility and optimal performance.

    7. Personalized Sound Preferences

    Frequency: As needed

    • Reason: Your sound preferences might change over time. Regularly checking and adjusting settings like the Adaptive EQ or Ear Tip Fit Test can ensure you continue to enjoy the best possible audio experience.

    Conclusion

    Regularly updating your AirPods Pro settings ensures you are making the most out of your device. By staying attuned to firmware updates, troubleshooting issues promptly, adapting to lifestyle changes, and conducting periodic reviews, you can maintain an optimal and personalized listening experience.

    Also Check:
  • Why is One of My Airpods Not Working? 7 Ways to Troubleshoot

    Why is One of My Airpods Not Working? 7 Ways to Troubleshoot

    Experiencing one AirPod not working, whether it’s the right or left, can be incredibly frustrating for users who rely on their AirPods for seamless audio. Understanding the root cause and troubleshooting the problem effectively can save time and restore the functionality of your AirPods.

    Why is One of My Airpods Not Working? 7 Ways to Troubleshoot

    What to Do When One AirPod Isn’t Working

    Here are some steps to help you resolve the issue.

    1. Check for Connection Issues

    • Ensure Proper Connection: Sometimes, the simplest explanation is the correct one. Your AirPods might not be properly connected to your device. Check the Bluetooth settings on your device to ensure that both AirPods are connected. If only one is showing, try reconnecting them.
    • Reconnect AirPods: To do this, go to your device’s Bluetooth settings, find your AirPods on the list of connected devices, and select “Forget This Device.” Then, place both AirPods back in their charging case, close the lid, wait for about 15 seconds, and open the lid again. Press and hold the setup button on the back of the case until the status light flashes white. Reconnect your AirPods by selecting them from the Bluetooth settings on your device.

    2. Clean the AirPods

    • Remove Dust and Debris: Dirt, earwax, and other debris can accumulate in the small openings of your AirPods, affecting their performance. Use a soft, dry cloth to gently clean the exterior of the AirPods and the charging case.
    • Clean Speaker Grills: Use a dry cotton swab or a soft-bristled brush to gently clean the speaker grills and the microphone ports. Avoid using sharp objects or liquids to prevent damage to the internal components.

    3. Reset the AirPods

    • Perform a Reset: Resetting your AirPods can often fix connectivity issues. To reset, place your AirPods in their charging case and close the lid. Wait for 30 seconds, then open the lid. On your device, go to Settings > Bluetooth, find your AirPods, and select “Forget This Device.” Now, press and hold the setup button on the back of the case until the status light flashes amber, then white. Reconnect your AirPods to your device.

    4. Update Software

    • Check for Updates: Software updates can fix bugs and improve the performance of your AirPods. Ensure your iOS device is updated to the latest version. Your AirPods should update automatically when they’re connected to your device and placed in the charging case.
    • Manual Update Check: To manually check for updates, go to Settings > General > About > AirPods when your AirPods are connected to your device. If there is a firmware update available, it will install automatically.

    5. Check Audio Settings

    • Adjust Audio Balance: Sometimes, audio settings on your device can be misconfigured, leading to issues with one AirPod. Go to Settings > Accessibility > Audio/Visual and check the balance slider. Make sure it is centered so that the audio is evenly distributed between both AirPods.
    • Check Volume Levels: Ensure that the volume levels on your device are not too low or muted for one side. Also, try playing audio from different apps to rule out app-specific issues.

    6. Try Different Devices

    • Test on Another Device: Connecting your AirPods to another device can help determine if the problem is with the AirPods or the original device. Pair your AirPods with another iPhone, iPad, or even a non-Apple device. If the AirPods work fine with another device, the issue likely lies with the original device’s settings or Bluetooth connection.

    7. Contact Apple Support

    • Seek Professional Help: If none of the troubleshooting steps work, it might be time to contact Apple Support. They can provide additional solutions, run diagnostics, and determine if there’s a hardware issue that needs repair. You can contact them via phone, chat, or visit an Apple Store or an authorized service provider.

    Consider Buying a Replacement

    If your AirPods are still under warranty and you’ve tried all troubleshooting steps without success, consider getting a replacement. Apple offers a warranty and AppleCare+ for AirPods, which covers manufacturing defects. Even if your AirPods are out of warranty, Apple provides a replacement program for a fee.

    Conclusion

    Troubleshooting one non-working AirPod involves several steps that can often resolve the issue without professional help. By following these suggestions, you can restore your AirPods’ functionality and avoid unnecessary frustration. Always try these solutions before considering replacement options or seeking professional help.

    Also Check:

  • How to Remove AirPod Pro tips: Can’t Remove Airpod Pro tips?

    How to Remove AirPod Pro tips: Can’t Remove Airpod Pro tips?

    AirPods Pro are designed with replaceable tips to provide a customizable fit and enhanced sound quality. On the other hand, knowing how to properly remove and replace these tips is crucial for maintaining the functionality and longevity of your AirPods Pro. But, want if you can’t Remove or don’t know to how Airpod Pro tips? This guide will walk you through the steps to safely remove and replace the tips of your AirPods Pro.

    How to Remove AirPod Pro tips: Can't Remove Airpod Pro tips?


    How to Remove AirPod Pro Tips

    Knowing how to remove and replace these tips properly is essential for maintaining their functionality and longevity. This guide will walk you through each step to ensure you do it correctly.

    Step 1: Preparation

    Gather Necessary Tools

    Before starting, gather a clean cloth or tissue to avoid damaging the AirPods Pro tips. This will help ensure that you have everything you need for a smooth process.

    Ensure a Clean Workspace

    Find a well-lit, clean workspace to prevent losing any small parts. A clear area will help you see what you’re doing and keep everything organized.

    Step 2: Loosening the AirPod Pro Tips

    Gently Twist and Pull

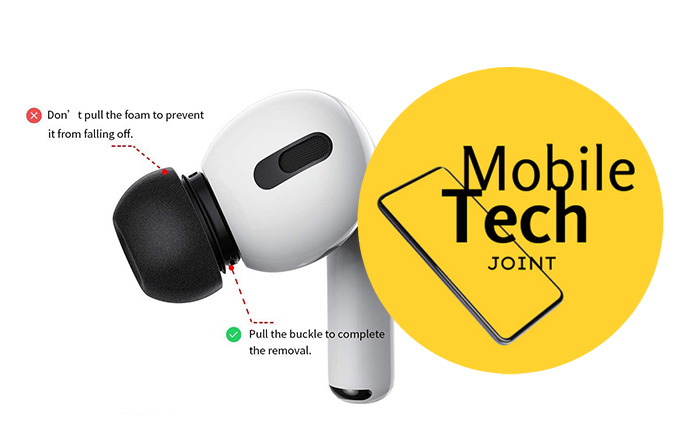
    Hold your AirPods Pro firmly and gently twist the silicone tips while pulling them away from the earbuds. This twisting motion helps to loosen the tips from their secure attachment without applying excessive force.

    Avoid Excessive Force

    Be careful not to use too much force as it could damage the tips or the AirPods Pro. A gentle approach ensures you won’t break or tear any parts. If the tips don’t come off easily, try twisting them a bit more gently.

    Step 3: Removing the AirPod Pro Tips

    Carefully Slide Off the Tips

    Once the tips are sufficiently loosened, carefully slide them off the AirPods Pro. Take your time to ensure they come off smoothly.

    Clean the Tips and AirPods

    Use a clean cloth or tissue to wipe the AirPod Pro tips and the earbuds themselves. This helps remove any accumulated dirt or debris, ensuring optimal performance and hygiene.

    Step 4: Replacing the AirPod Pro Tips

    Align the New Tips

    Take your new AirPod Pro tips and align them with the earbuds. Make sure they are positioned correctly to fit snugly.

    Gently Push into Place

    Gently push the new tips onto the AirPods Pro until they click into place. Ensure they are securely attached to prevent them from falling off during use.

    Conclusion

    Properly removing and replacing the AirPod Pro tips is essential for maintaining the comfort, fit, and functionality of your earbuds. By following these steps, you can ensure that your AirPods Pro remain in excellent condition and continue to provide you with the best possible audio experience.

    Taking care of the tips not only prolongs their life but also enhances your overall listening experience.

    Also Check:
  • How to Change AirPod Pro Settings: What are the steps to Change AirPod Pro Settings?

    How to Change AirPod Pro Settings: What are the steps to Change AirPod Pro Settings?

    How to change AirPod Pro settings? AirPods Pro are designed to offer a premium audio experience with features like noise cancellation, transparency mode, and customizable controls. Understanding how to access and adjust these settings can make your AirPods Pro even more enjoyable and tailored to your needs.

    How to Change AirPod Pro Settings: What are the steps to change AirPod Pro settings?

    How to Change AirPod Pro Settings

    Customizing your AirPod Pro settings can significantly enhance your user experience, tailoring the performance and functionality to meet your specific needs. This guide will walk you through the various settings available and how to adjust them for the best possible experience with your AirPods Pro.

    Step 1: Accessing AirPod Pro Settings

    Accessing on iPhone and iPad

    1. Connect your AirPods Pro to your iPhone or iPad.
    2. Open the Settings app.
    3. Tap on “Bluetooth.”
    4. Find your AirPods Pro in the list of devices and tap the “i” icon next to them to access the settings.

    Accessing on Mac

    1. Connect your AirPods Pro to your Mac.
    2. Click on the Apple menu and select “System Preferences.”
    3. Click on “Bluetooth.”
    4. Find your AirPods Pro in the list of devices and click “Options” next to them to access the settings.

    Step 2: Customizing Controls

    Changing Double-Tap or Squeeze Gestures

    1. Go to the AirPods Pro settings as described above.
    2. Tap on “Left” or “Right” under the “Press and Hold AirPods” section.
    3. Choose between Noise Control, Siri, or Off.

    Customizing Other Gestures

    1. In the AirPods settings, you can adjust the press speed and hold duration under “Press Speed” and “Hold Duration.”
    2. Customize these settings to match your preferences for more responsive controls.

    Step 3: Adjusting Audio Settings

    Changing Noise Cancellation or Transparency Mode

    1. Access the AirPods Pro settings.
    2. Under “Noise Control,” toggle between Noise Cancellation, Transparency, and Off.
    3. You can also switch modes directly from the Control Center on your device by pressing and holding the volume slider.

    Step 4: Managing Battery Settings

    Checking Battery Level

    1. Open the AirPods Pro settings on your device.
    2. The battery level for both the AirPods and the charging case will be displayed.

    Enabling Optimized Battery Charging

    1. In the AirPods settings, enable “Optimized Battery Charging” to extend the battery lifespan by learning your charging routine and reducing wear.

    Step 5: Personalizing Fit and Sound

    Using the Ear Tip Fit Test

    1. In the AirPods settings, tap “Ear Tip Fit Test.”
    2. Follow the on-screen instructions to ensure the best fit and sound quality.

    Adaptive EQ Feature

    1. Adaptive EQ automatically tunes the music to the shape of your ear, providing a personalized sound experience.
    2. Ensure your AirPods Pro fit well for the Adaptive EQ to work effectively.

    Step 6: Updating Firmware

    Checking and Installing Firmware Updates

    1. AirPods Pro firmware updates automatically when connected to your iPhone, iPad, or Mac with internet access.
    2. To check the firmware version, go to the AirPods settings and scroll down to “About.”
    3. Ensure your device is connected and the AirPods are charging to receive updates.

    Step 7: Troubleshooting Common Issues

    Connectivity Problems

    1. If your AirPods Pro are not connecting, try resetting them by holding the setup button on the case until the light flashes amber.
    2. Reconnect your AirPods Pro to your device.

    Unresponsive Controls

    1. If the controls are not responding, check the settings to ensure the gestures are configured correctly.
    2. Restart your device or reset the AirPods if the problem persists.

    Step 8: Using Siri with AirPod Pro

    Customizing Siri Settings

    1. In the AirPods settings, ensure “Hey Siri” is enabled for hands-free voice commands.
    2. Customize Siri responses and functions under “Siri & Search” in your device’s settings.

    Siri Features

    1. Use Siri to control music playback, adjust volume, make calls, and get directions without touching your AirPods.

    Conclusion

    By exploring and customizing the settings on your AirPods Pro, you can enhance your listening experience, ensuring comfort, functionality, and personalized sound quality. Take the time to adjust these settings to get the most out of your AirPods Pro.

    Also Check:

  • Is Airpod Case Flashing Orange a Serious Issue? Here are Some Possible Causes and how to Fix

    Is Airpod Case Flashing Orange a Serious Issue? Here are Some Possible Causes and how to Fix

    What to do if your AirPods case is flashing orange? Generally, a flashing orange light is not a serious issue and can often be resolved with simple troubleshooting steps. However, if the problem persists after trying these steps, it could indicate a more significant hardware problem that may require professional assistance. This guide will help you understand why the orange light might be flashing and provide steps to resolve the issue.

    Airpod Case Flashing Orange: Is Airpod Case Flashing Orange a Serious Issue?


    Possible Causes for Flashing Orange Light

    1. Low Battery: One of the most common reasons for an orange flashing light is a low battery in the AirPods case.
    2. Pairing Error: The orange light may indicate a problem with pairing the AirPods with your device.
    3. Firmware Update Needed: Sometimes, a flashing orange light can signal that the AirPods need a firmware update.
    4. Hardware Issue: Less commonly, the orange light could indicate a hardware issue with the AirPods or the case.

    Steps to Fix Flashing Orange Light

    1. Check the Battery

    • Connect the Charging Case: Plug your AirPods case into a charger using the Lightning cable.
    • Wait for Charging: Allow the case to charge for at least 15 minutes.
    • Check the Light: If the light turns green or white after charging, the issue was likely due to a low battery.

    2. Reset Your AirPods

    • Open the Case: Make sure your AirPods are in the case and the lid is open.
    • Press and Hold the Setup Button: On the back of the case, press and hold the setup button for about 15 seconds until the light flashes amber and then white.
    • Reconnect Your AirPods: Close the lid and reopen it near your device to reconnect the AirPods.

    3. Update Firmware

    • Connect to Power: Ensure your AirPods are connected to a power source and near your iPhone.
    • Automatic Update: The firmware should update automatically when the AirPods are charging and near a connected iPhone.
    • Check Update Status: Go to Settings > General > About > AirPods on your iPhone to check the firmware version.

    4. Contact Apple Support

    • Persistent Issues: If the orange light continues to flash after trying the above steps, there may be a hardware issue.
    • Apple Support: Contact Apple Support or visit an Apple Store for further assistance.

    Conclusion

    A flashing orange light on your AirPods case can be due to several reasons, including low battery, pairing issues, or the need for a firmware update. By following the steps outlined in this guide, you can usually resolve the issue. If the problem persists, it’s best to seek help from Apple Support to ensure your AirPods are functioning correctly. Thank you for reading, and we hope this guide helps you get your AirPods back to working order.

    Also Check:

  • I lost my AirPod case but I have my AirPods, this is how i found my Airpod case without Pods

    I lost my AirPod case but I have my AirPods, this is how i found my Airpod case without Pods

    Losing your AirPod case can be incredibly frustrating, especially when you still have the AirPods themselves. I remember the panic that set in when I realized my AirPod case was missing. I had been so busy running errands that I couldn’t pinpoint where I might have left it. I lost my AirPod case but I have my AirPods. If you’re in the same boat, don’t worry. Here’s a step-by-step guide to help you find your lost AirPod case.

    I lost my AirPod case but I have my AirPods: Here are few tricks to find it

    How to find your AirPod Case without Pods

    Airpod case is essential for charging and protecting your AirPods, making it a crucial accessory. If you find yourself in this situation, don’t worry. Here’s a step-by-step guide to help you locate your lost AirPods case:

    1. Check Your Surroundings

    Look Around the Area

    Start by checking the last place you remember using your AirPods. Look under furniture, in pockets, and in bags. Sometimes, the case can slip into unexpected places.

    • Under Furniture: Move around and check under sofas, tables, and beds.
    • Pockets: Check all the pockets in your clothes, jackets, and bags.
    • Bags: Look inside all the compartments of your backpacks, purses, and any other bags you’ve used recently.

    2. Use the Find My App

    Locating with Find My App

    Apple’s Find My app can be a lifesaver in these situations. If you’ve enabled it, you can use it to locate your AirPod case.

    1. Open the Find My App: On your iPhone, open the Find My app.
    2. Select Devices: Tap on the “Devices” tab.
    3. Find Your AirPods: Select your AirPods from the list.
    4. Locate: If the case is nearby, you can play a sound to help locate it. If it’s not close, the app will show the last known location.

    3. Retrace Your Steps

    Think Back to Recent Locations

    Try to remember where you’ve been since you last had the case. Retrace your steps and visit the places you stopped at or spent time in.

    • Workplaces: Check your desk, lockers, or break rooms.
    • Homes of Friends/Family: See if you left it at someone’s house.
    • Public Places: Check any cafes, parks, or stores you visited.

    4. Use a Bluetooth Tracker

    Locating with Bluetooth Trackers

    If you often misplace your AirPod case, consider using a Bluetooth tracker.

    • Popular Trackers: Products like Tile or Apple’s AirTag can be attached to your case. They connect to your phone and help you locate lost items.
    • How to Use: Attach the tracker to your case and use the associated app to find it.

    5. Contact Apple Support

    Reach Out for Professional Help

    If all else fails, contact Apple Support for assistance.

    • Apple Support Website: Visit the Apple Support website.
    • Contact Information: Use the contact options provided to speak with a representative who can help you.

    Consider Purchasing a Replacement

    Buying a New Case

    If you can’t find your case, you may need to purchase a replacement.

    • Apple Store: You can buy a replacement case directly from Apple.
    • Online Retailers: Check other trusted retailers for possibly lower prices.

    Tips for Preventing Future Loss

    Keeping Track of Your Case

    To avoid losing your AirPod case in the future, consider these tips:

    • Keychain Attachments: Use a case with a keychain attachment to clip it to your bag or keys.
    • Designated Storage Area: Create a specific place at home where you always store your AirPods.

    Conclusion

    Losing your AirPod case can be a hassle, but by following these steps, you can increase your chances of finding it. Check your surroundings, use the Find My app, retrace your steps, ask for help, and consider using a Bluetooth tracker for future prevention. If needed, don’t hesitate to contact Apple Support or purchase a replacement. Stay persistent in your search, and take preventative measures to avoid losing it again in the future.

    Also Check:

  • Airpod Case Magnet Not Working: Is there a way to fix Airpod Case Magnet not working?

    Airpod Case Magnet Not Working: Is there a way to fix Airpod Case Magnet not working?

    If you’ve noticed that the magnet in your AirPod case isn’t working, you know how frustrating it can be. The magnet plays a crucial role in keeping your AirPods secure and ensuring they charge properly. In this guide, we’ll walk you through the process of inspecting, cleaning, and potentially repairing your AirPod case.

    Airpod Case Magnet Not Working: Is there a way to fix Airpod Case Magnet not working?

    How to fix Airpod Case Magnet not working

    A malfunctioning AirPod case magnet can cause your AirPods to not stay in place or charge correctly. This common issue can often be fixed with a few simple steps. Here’s a guide to help you troubleshoot and resolve this issue:

    1. Check for Debris

    Step 1: Inspect the Case: Start by inspecting the inside of your AirPod case. Dirt, dust, or debris can obstruct the magnet, preventing it from working correctly.

    Step 2: Clean the Case: Use a soft, dry cloth to gently clean the inside of the case, focusing on the magnet area. Avoid using any liquids or abrasive materials that could damage the case.

    Tip: A can of compressed air can help remove small particles that are difficult to reach.

    2. Reset the AirPod Case

    Step 1: Open and Close the Lid: Try resetting the AirPod case by repeatedly opening and closing the lid. This can sometimes reposition the magnet and resolve any minor connectivity issues.

    Step 2: Reinsert the AirPods: Remove the AirPods from the case, then place them back inside. Ensure they are seated correctly and that the lid closes properly.

    Note: This simple action can help realign the magnet and improve its functionality.

    3. Update the Software

    Step 1: Check for Updates: Ensure that your AirPod case and the devices it’s connected to have the latest software updates installed. Outdated software can cause compatibility issues that affect the magnet’s performance.

    Step 2: Update Your Devices: Update your iPhone, iPad, or other connected devices to the latest iOS version. This can help resolve software-related issues.

    How-To: Go to Settings > General > Software Update to check for and install updates.

    4. Contact Apple Support

    Step 1: Reach Out for Assistance: If the issue persists despite your efforts, consider reaching out to Apple Support. They can provide additional troubleshooting steps or arrange for a repair or replacement if necessary.

    Step 2: Prepare for Your Appointment: Before contacting Apple, ensure you have your AirPods, case, and any relevant purchase information ready. This will help expedite the support process.

    Resource: Visit Apple Support to get started.

    5. Use a Magnetic Case Alternative

    Step 1: Consider Third-Party Options: If the built-in magnet in your AirPod case cannot be fixed, consider using a third-party magnetic case alternative. These cases can provide a similar function for holding your AirPods in place.

    Step 2: Research and Purchase: Look for reputable brands and read customer reviews to find a reliable magnetic case that meets your needs.

    Recommendation: Search for “magnetic AirPod case” on popular e-commerce sites like Amazon or Best Buy.

    Conclusion

    A functioning magnet in your AirPod case is essential for keeping your AirPods secure and ensuring they charge properly. By checking for debris, resetting the case, updating the software, and seeking professional help if needed, you can resolve this common issue. If all else fails, consider using a third-party magnetic case alternative.

    Remember, maintaining your AirPod case can prevent future problems. Regular cleaning and software updates are simple yet effective ways to keep your AirPods in top condition. If you’ve tried all the steps and the problem persists, don’t hesitate to contact Apple Support for professional assistance.

    Also Check:

  • How do Airpod Case Cover Improve the Overall Lifespan of Your Airpod

    How do Airpod Case Cover Improve the Overall Lifespan of Your Airpod

    With the increasing popularity of AirPods, it’s more important than ever to ensure their longevity through proper protection. AirPod case covers have become a must-have accessory, offering essential protection against everyday wear and tear. In this guide, we’ll explore why AirPod case covers are vital and how they can benefit you.

    How do Airpod Case Cover Improve the Overall Lifespan of Your Airpod

    How Do Airpod Case Cover Improve the Lifespan of Your Airpod

    AirPod case covers provide several benefits that help maintain your AirPods in pristine condition:

    • Prevent Scratches and Dents: AirPods can easily get scratched or dented from daily use. A case cover acts as a protective layer, preventing these minor damages that can accumulate over time and affect the appearance and functionality of your AirPods.
    • Keep AirPods Clean: Dust, dirt, and debris can accumulate on your AirPods, affecting their performance. Case covers help keep your AirPods clean by providing a barrier against environmental contaminants. This is especially useful for those who frequently use their AirPods in various settings.
    • Absorb Shock from Drops: Accidental drops can cause significant damage to your AirPods. Case covers are designed to absorb shock and cushion the impact, reducing the risk of internal and external damage. This can save you from costly repairs or replacements.

    Material and Design Options

    AirPod case covers come in various materials and designs, each offering unique benefits:

    • Silicone: Silicone covers are soft, flexible, and provide a good grip, preventing accidental drops. They are excellent at absorbing shock and come in various colors and designs. However, they can attract dust and lint.
    • Leather: Leather covers offer a premium look and feel, providing a sophisticated and professional appearance. They are durable and provide excellent protection, but they can be more expensive than other materials. Leather covers may also show wear over time, adding a unique patina.
    • Hard Plastic: Hard plastic covers provide sturdy protection and are available in numerous designs and colors. They are resistant to scratches and dents but may not absorb shock as effectively as silicone. They offer a slim profile, maintaining the sleek look of your AirPods.

    Recommendations: If you prioritize shock absorption and a secure grip, silicone is a great choice. For a premium, professional look, leather is ideal. If you want robust protection with a slim profile, hard plastic is the way to go.

    Customization and Personalization

    One of the fun aspects of AirPod case covers is the ability to customize them to reflect your style:

    • Colors, Patterns, and Prints: AirPod case covers come in a wide range of colors, patterns, and prints, allowing you to express your personality and preferences. Whether you prefer vibrant, bold colors or subtle, muted tones, there’s a design for everyone.
    • Personalized Designs: Many manufacturers offer customized designs, including monograms, logos, and unique patterns. This adds a personal touch and makes your AirPods stand out.

    Tips: Choose a case cover that not only protects your AirPods but also complements your personal style. For example, if you have a minimalist aesthetic, opt for a sleek, monochrome cover. If you love bold patterns, choose a case cover with a striking design.

    Durability and Longevity

    Investing in a high-quality AirPod case cover ensures long-lasting protection:

    • Durability: A well-made case cover can withstand daily wear and tear, ensuring your AirPods remain protected over time. Durable materials like leather and hard plastic are less likely to wear out quickly.
    • Longevity: Reliable protection from a quality case cover means fewer damages and repairs, allowing your AirPods to last longer. This is particularly important if you use your AirPods frequently and in various environments.

    Examples: Brands like Spigen, Nomad, and Catalyst are known for their durable and long-lasting AirPod case covers. These brands offer a variety of designs and materials to suit different preferences and needs.

    Maintenance and Care Tips

    To keep your AirPod case cover effective, regular maintenance is key:

    • Cleaning: Regularly clean your case cover with a damp cloth to remove dirt and grime. For silicone covers, a gentle soap solution can help remove stubborn stains. Leather covers can be cleaned with a leather cleaner and conditioner.
    • Care: Handle your AirPods and their cover with care to avoid unnecessary wear and tear. Avoid exposing the case cover to extreme temperatures or harsh chemicals that could damage the material.

    Guidance: Clean the case cover at least once a week and check for any signs of damage that may compromise its protection. Keeping the cover in good condition ensures it continues to protect your AirPods effectively.

    User Reviews and Feedback

    Hearing from others who have benefited from AirPod case covers can be insightful:

    • Real-Life Experiences: Users have reported significant protection from drops and scratches, enhancing their AirPods’ longevity. These testimonials highlight the practical benefits of using a case cover.
    • Visual Proof: Before-and-after photos and videos can demonstrate the effectiveness of using a case cover. Seeing how a case cover has protected AirPods from damage can be convincing for potential buyers.

    Highlight: Many users have shared positive testimonials, emphasizing how their AirPods remained in excellent condition thanks to a quality case cover. These real-life examples can help you make an informed decision when choosing a case cover.

    Conclusion

    AirPod case covers are a valuable investment for protecting your AirPods. They prevent damage, keep your AirPods clean, and can be personalized to match your style. By choosing a high-quality cover and maintaining it properly, you ensure your AirPods’ longevity and functionality. Consider adding a case cover to your AirPods to enjoy these benefits and keep them looking and working like new.

    Also Check:

  • How to Turn Off AirPods in Case

    How to Turn Off AirPods in Case

    AirPods are an essential accessory for many people, offering seamless connectivity and superior sound quality. Knowing how to properly turn them off when not in use is crucial for preserving battery life and avoiding connectivity issues. This guide will walk you through the steps to ensure your AirPods are properly turned off, along with some tips for maintaining them.

    How to Turn Off AirPods in Case

    By following the steps below, you can avoid common mistakes and enjoy a seamless audio experience:

    How to Turn Off AirPods in Case

    Compared to other wireless earbuds or headphones, AirPods offers a unique and straightforward method for turning off and disconnecting. While many wireless earbuds require manual power off via buttons or app controls, AirPods utilize an automatic system activated by simply placing them in the charging case and closing the lid. This feature simplifies the user experience and ensures efficient battery management. Here is how to properly turn off your Airpods in case:

    Step 1: Remove AirPods from Your Ears

    First, remove your AirPods from your ears. This step ensures you have a clear view and better control over placing them in the charging case. It’s important to handle your AirPods carefully to avoid dropping them, which could cause damage. Removing them from your ears also helps prevent any accidental taps that could activate Siri or other features.

    Step 2: Place AirPods in the Charging Case

    Carefully place each AirPod into the charging case. Ensure they are seated correctly to initiate the disconnection process. The AirPods have a specific orientation, so make sure each one fits snugly into its designated slot. This not only ensures proper charging but also triggers the automatic shutdown mechanism.

    Step 3: Close the Lid of the Charging Case

    Close the lid of the charging case to ensure the AirPods are properly seated. This action automatically disconnects and powers off the AirPods. The charging case is designed to keep your AirPods secure and to prevent them from being exposed to dust and debris. A closed lid also helps maintain the internal environment of the case, ensuring optimal charging conditions.

    Step 4: Wait for Disconnection

    Wait a few seconds for the AirPods to disconnect from your device and power off. You’ll notice the light on the case indicating that the AirPods are charging. This waiting period is crucial as it confirms that the AirPods have successfully powered down and are no longer actively connected to your device, which helps conserve battery life.

    Preserving Battery Life

    Turning off your AirPods by placing them in the charging case helps conserve battery life. When AirPods are left outside the case, they remain connected and continue to drain battery power. By following these steps, you ensure that the battery is preserved, extending the overall lifespan of your AirPods. Keeping your AirPods charged also ensures they are ready for use whenever you need them, without unexpected power issues.

    Avoiding Connectivity Issues

    Properly turning off your AirPods can help prevent connectivity issues. If not turned off correctly, AirPods might remain connected to your device, causing issues when you try to use them again. Ensuring they are disconnected and powered off allows for a seamless experience when you next use them. This step also helps avoid interference with other Bluetooth devices, ensuring a stable and uninterrupted connection.

    Common Mistakes to Avoid

    • Leaving AirPods Out of the Case: Always place your AirPods in the case when not in use to avoid unnecessary battery drain. AirPods left out of the case can also be easily lost or damaged.
    • Forgetting to Close the Lid: Make sure to close the lid of the charging case after placing the AirPods inside. This step is crucial for disconnection and power off. An open case can also allow dust and debris to enter, which can affect the charging contacts and overall performance.
    • Using Damaged Cables: Ensure that the charging cable and case are in good condition to prevent charging issues. Damaged cables can lead to inefficient charging or even damage your AirPods and case. Regularly inspect your charging accessories and replace them if they show signs of wear and tear.

    Tips for Maintaining 

    • Keep Them Clean: Regularly clean your AirPods and the charging case to maintain sound quality and charging efficiency. Use a soft, dry cloth to wipe them down. Avoid using liquids, as moisture can damage the electronic components. Keeping your AirPods clean also helps prevent ear infections and ensures they look good as new.
    • Store Properly: Always store your AirPods in their case when not in use. This practice protects them from damage and dust, and ensures they are always charged and ready to go. The case is designed to keep your AirPods secure and to charge them efficiently, so using it correctly is key to maintaining their performance.
    • Avoid Extreme Temperatures: Do not expose your AirPods to extreme temperatures as it can affect battery life and overall performance. Extreme cold can reduce battery efficiency, while high temperatures can cause permanent damage to the battery and other components. Store your AirPods in a cool, dry place to keep them in optimal condition.

    Conclusion

    Turning off your AirPods properly is essential for preserving battery life and ensuring they function optimally. By following the outlined steps, you can avoid common mistakes and enjoy a seamless audio experience. Regular maintenance and proper storage will also help extend the lifespan of your AirPods, ensuring they remain in top condition. Follow these tips to ensure your AirPods remain in top condition, providing you with excellent sound quality and convenience.

    Also Check:

  • How to Change Earbud Tips on AirPod Pro

    How to Change Earbud Tips on AirPod Pro

    Finding the right fit for your AirPods Pro is crucial for both comfort and sound quality. Poorly fitting earbud tips can lead to discomfort and a subpar listening experience. In this guide, we’ll walk you through the steps to change your AirPods Pro earbud tips, ensuring you get the best possible fit.

    How to Change Earbud Tips on AirPod Pro

    How to Change Earbud Tips on AirPod Pro

    Here are the steps to change your AirPods Pro earbud tips, ensuring you get the best possible fit:

    Step 1: Gather the Necessary Materials

    Before you start, make sure you have everything you need:

    • New earbud tips (these usually come in three sizes (small, medium, large) with your AirPods Pro. Make sure you have these handy)
    • A clean, flat workspace
    • A soft cloth (optional, but useful for cleaning your AirPods Pro and the new earbud tips before attaching them.)

    Having a clean workspace helps prevent dirt and debris from getting on your new earbud tips.

    Step 2: Remove the Old Earbud Tips

    1. Hold the AirPods Pro: Grasp your AirPods Pro firmly in one hand, ensuring a stable grip.
    2. Grip the Earbud Tip: Using your other hand, pinch the base of the earbud tip where it connects to the AirPod.
    3. Gently Pull: Carefully pull the earbud tip straight off. It should come off with a little bit of force.

    To avoid damaging your AirPods Pro, make sure you pull straight and do not twist the earbud tips.

    Step 3: Choose the Right Size Earbud Tips

    Finding the correct size earbud tips is essential for comfort and sound isolation. Apple provides three sizes (small, medium, large) to help you find the best fit.

    1. Test Different Sizes: Try each size and see which one feels the most comfortable and provides the best seal.
    2. Check for Fit and Seal: The right size should fit snugly in your ear without causing discomfort and should create a good seal to block out external noise.

    Step 4: Attach the New Earbud Tips

    1. Align the Earbud Tip: Line up the new earbud tip with the connector on the AirPod.
    2. Push and Click: Push the earbud tip onto the connector until you hear a click, indicating it is securely attached.

    Ensure the new tips are properly aligned and securely attached to avoid them falling off during use.

    Step 5: Test the New Earbud Tips

    1. Wear the AirPods Pro: Put on your AirPods Pro and adjust them until they feel comfortable.
    2. Test for Comfort and Sound Quality: Listen to music or a podcast to test the fit and sound quality. Ensure the earbud tips provide a good seal and feel comfortable for extended wear.

    Conclusion

    Finding the right fit for your AirPods Pro earbud tips is vital for both comfort and sound quality. Don’t hesitate to experiment with different sizes to find your perfect fit. With the right earbud tips, you’ll enjoy a superior listening experience and greater comfort.

    Also Check: