Author: Martin Goodnews

  • How to Clear Reminder on iPhone

    How to Clear Reminder on iPhone

    The iPhone  isn’t just a powerful smartphone, but an advanced features and intuitive interface, that helps you stay organized, manage your tasks efficiently, and achieve your goals. A key player in this productivity suite is the Reminders app.

    Clear Reminders on iPhone 15 Pro

    But what happens when your once-organized Reminders app becomes cluttered with completed tasks or outdated reminders?

    Not to worry, this guide will equip you with the knowledge to effectively clear reminders on your iPhone, ensuring your to-do list remains streamlined and efficient.

    About Clearing Reminders on your iPhone

    Keeping your Reminders app organized is crucial for maintaining focus and avoiding information overload.

    There are multiple ways to clear reminders on your iPhone, depending on whether you want to delete a single reminder, multiple reminders at once, or clear an entire list.

    How to Clear Reminder on iPhone

    Below are the steps to take to clear your reminder on your iPhone.

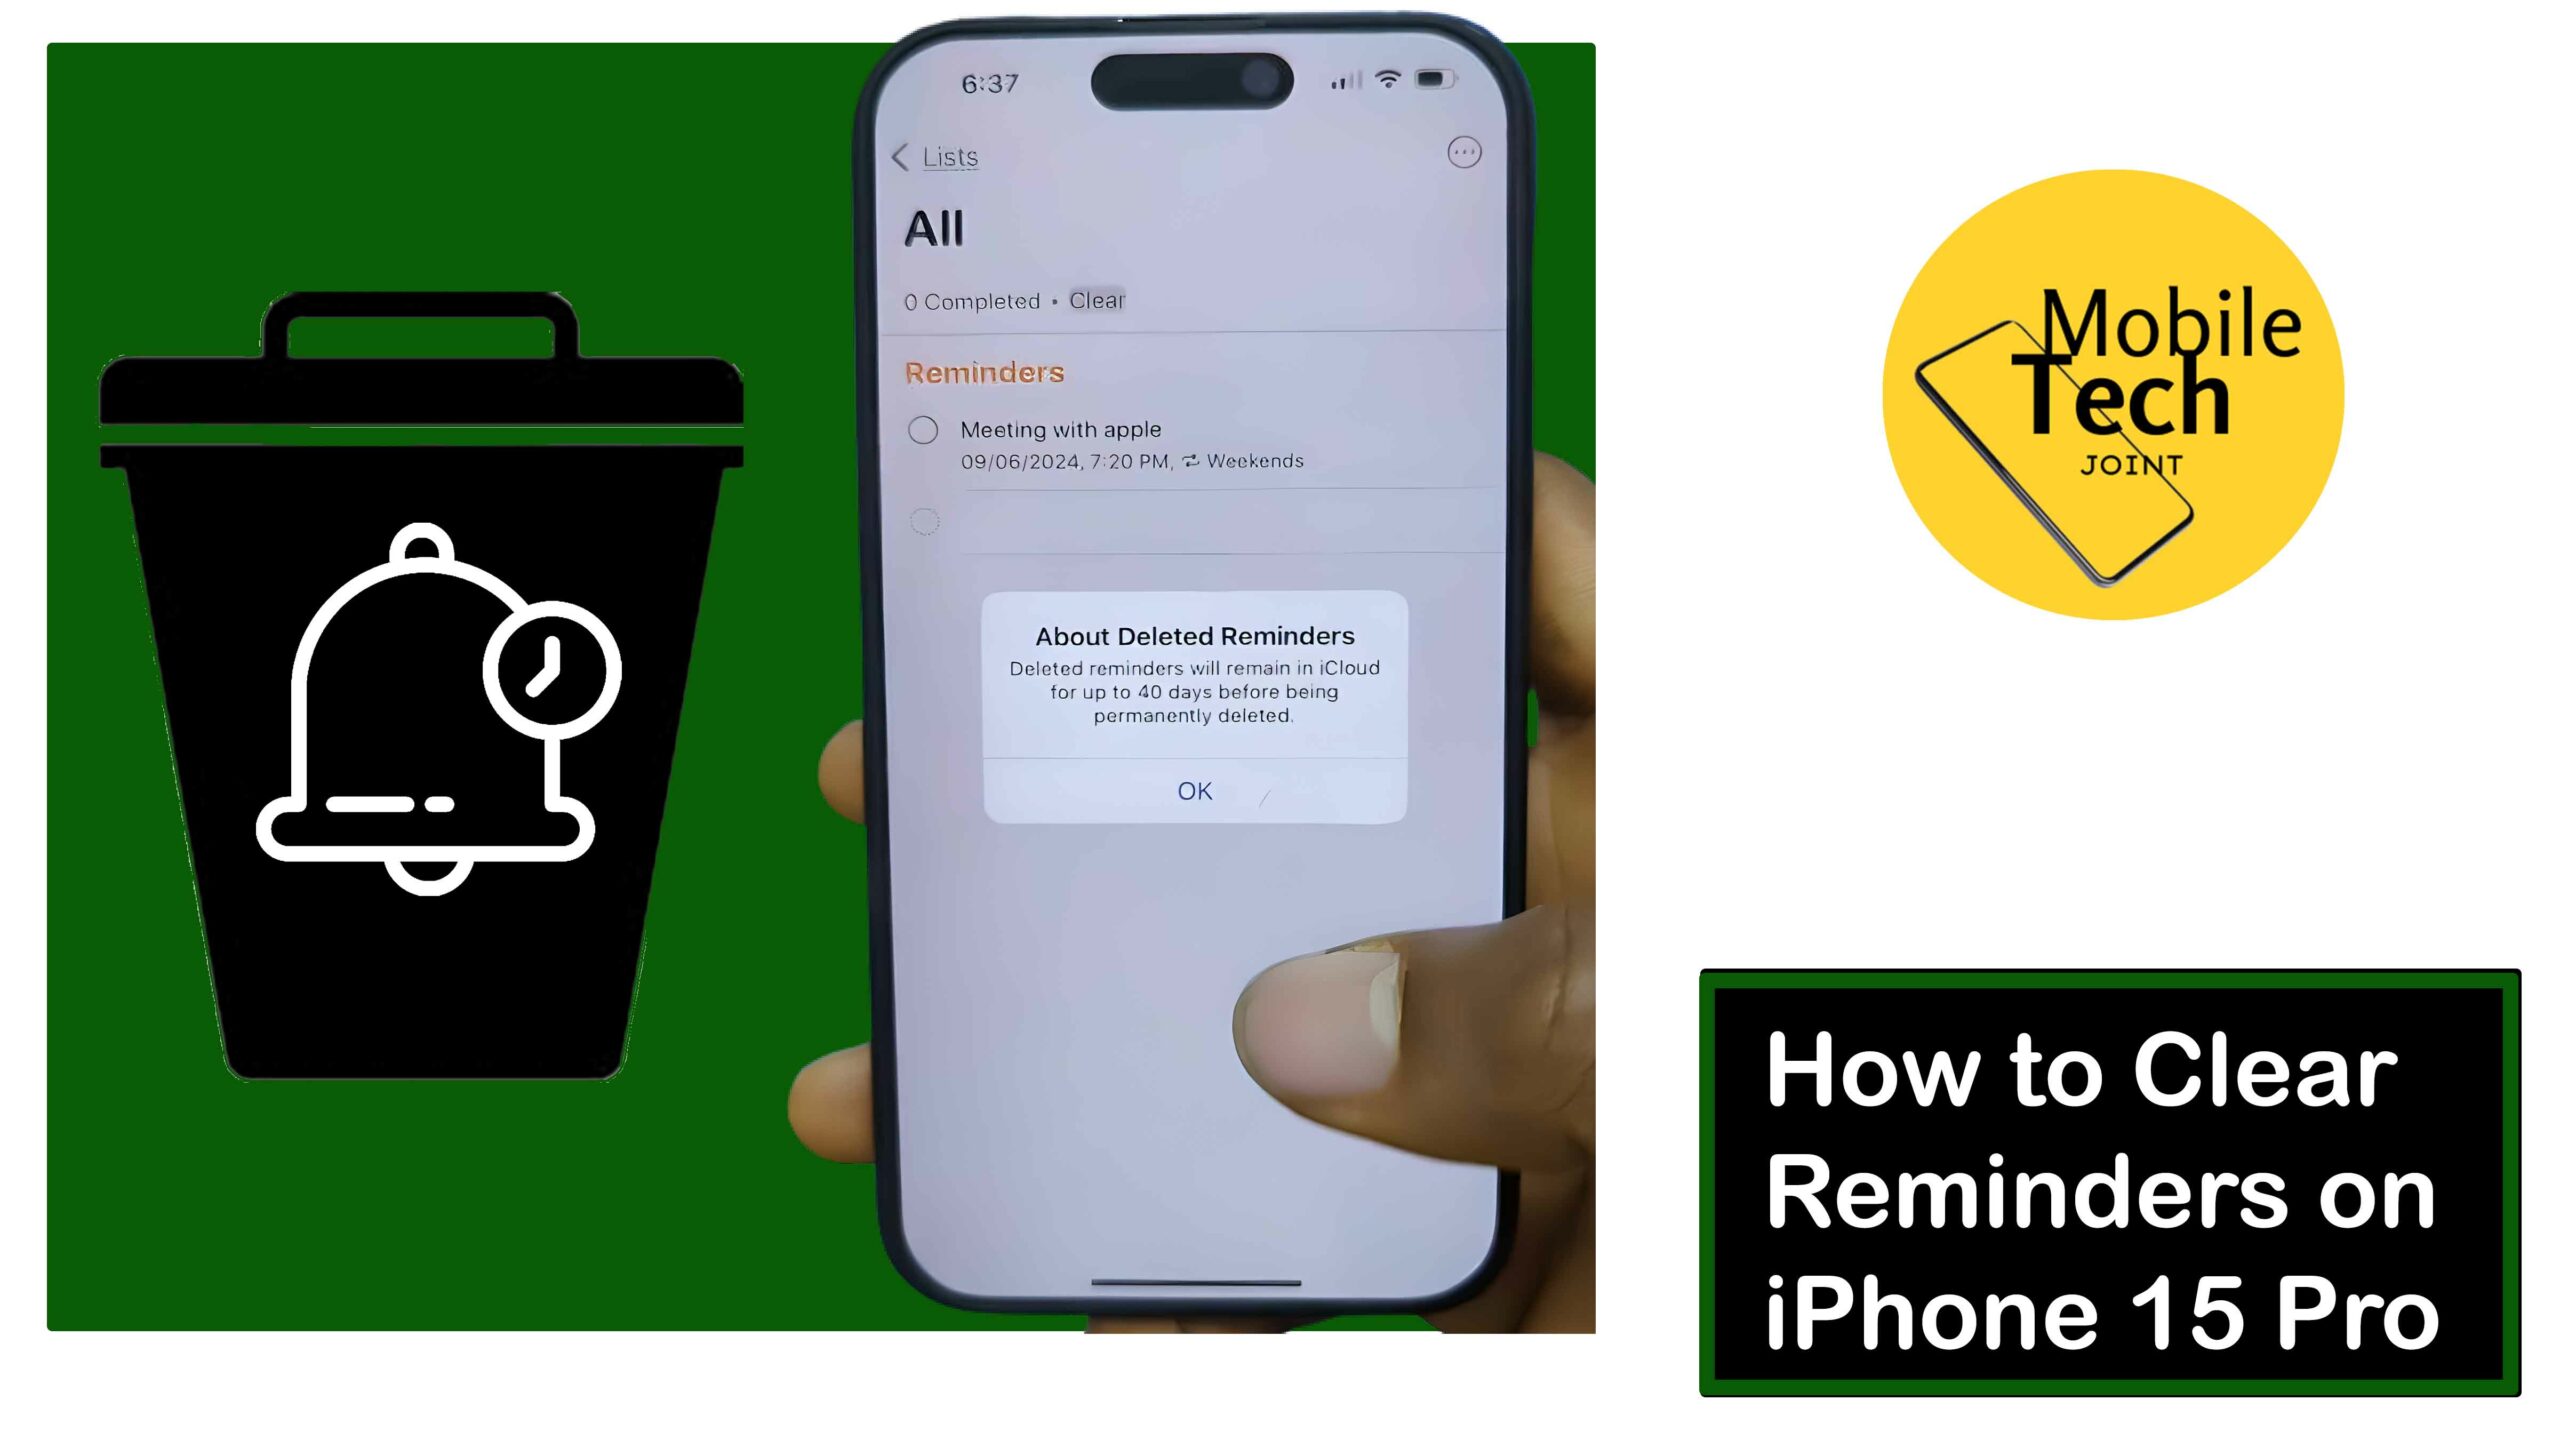
    • First, head to your phone home screen look for the app labeled Reminders, and click on it.
    • Next, on the Homepage of the Reminders app, click on the All option, to open all your lists.
    • Then, click on the Clear option, which is under the All icon.
    • Then click on All Completed, and click on Delete Reminder to successfully clear your reminder.

    Here are the possible steps needed to successfully clear reminders on your iPhone.

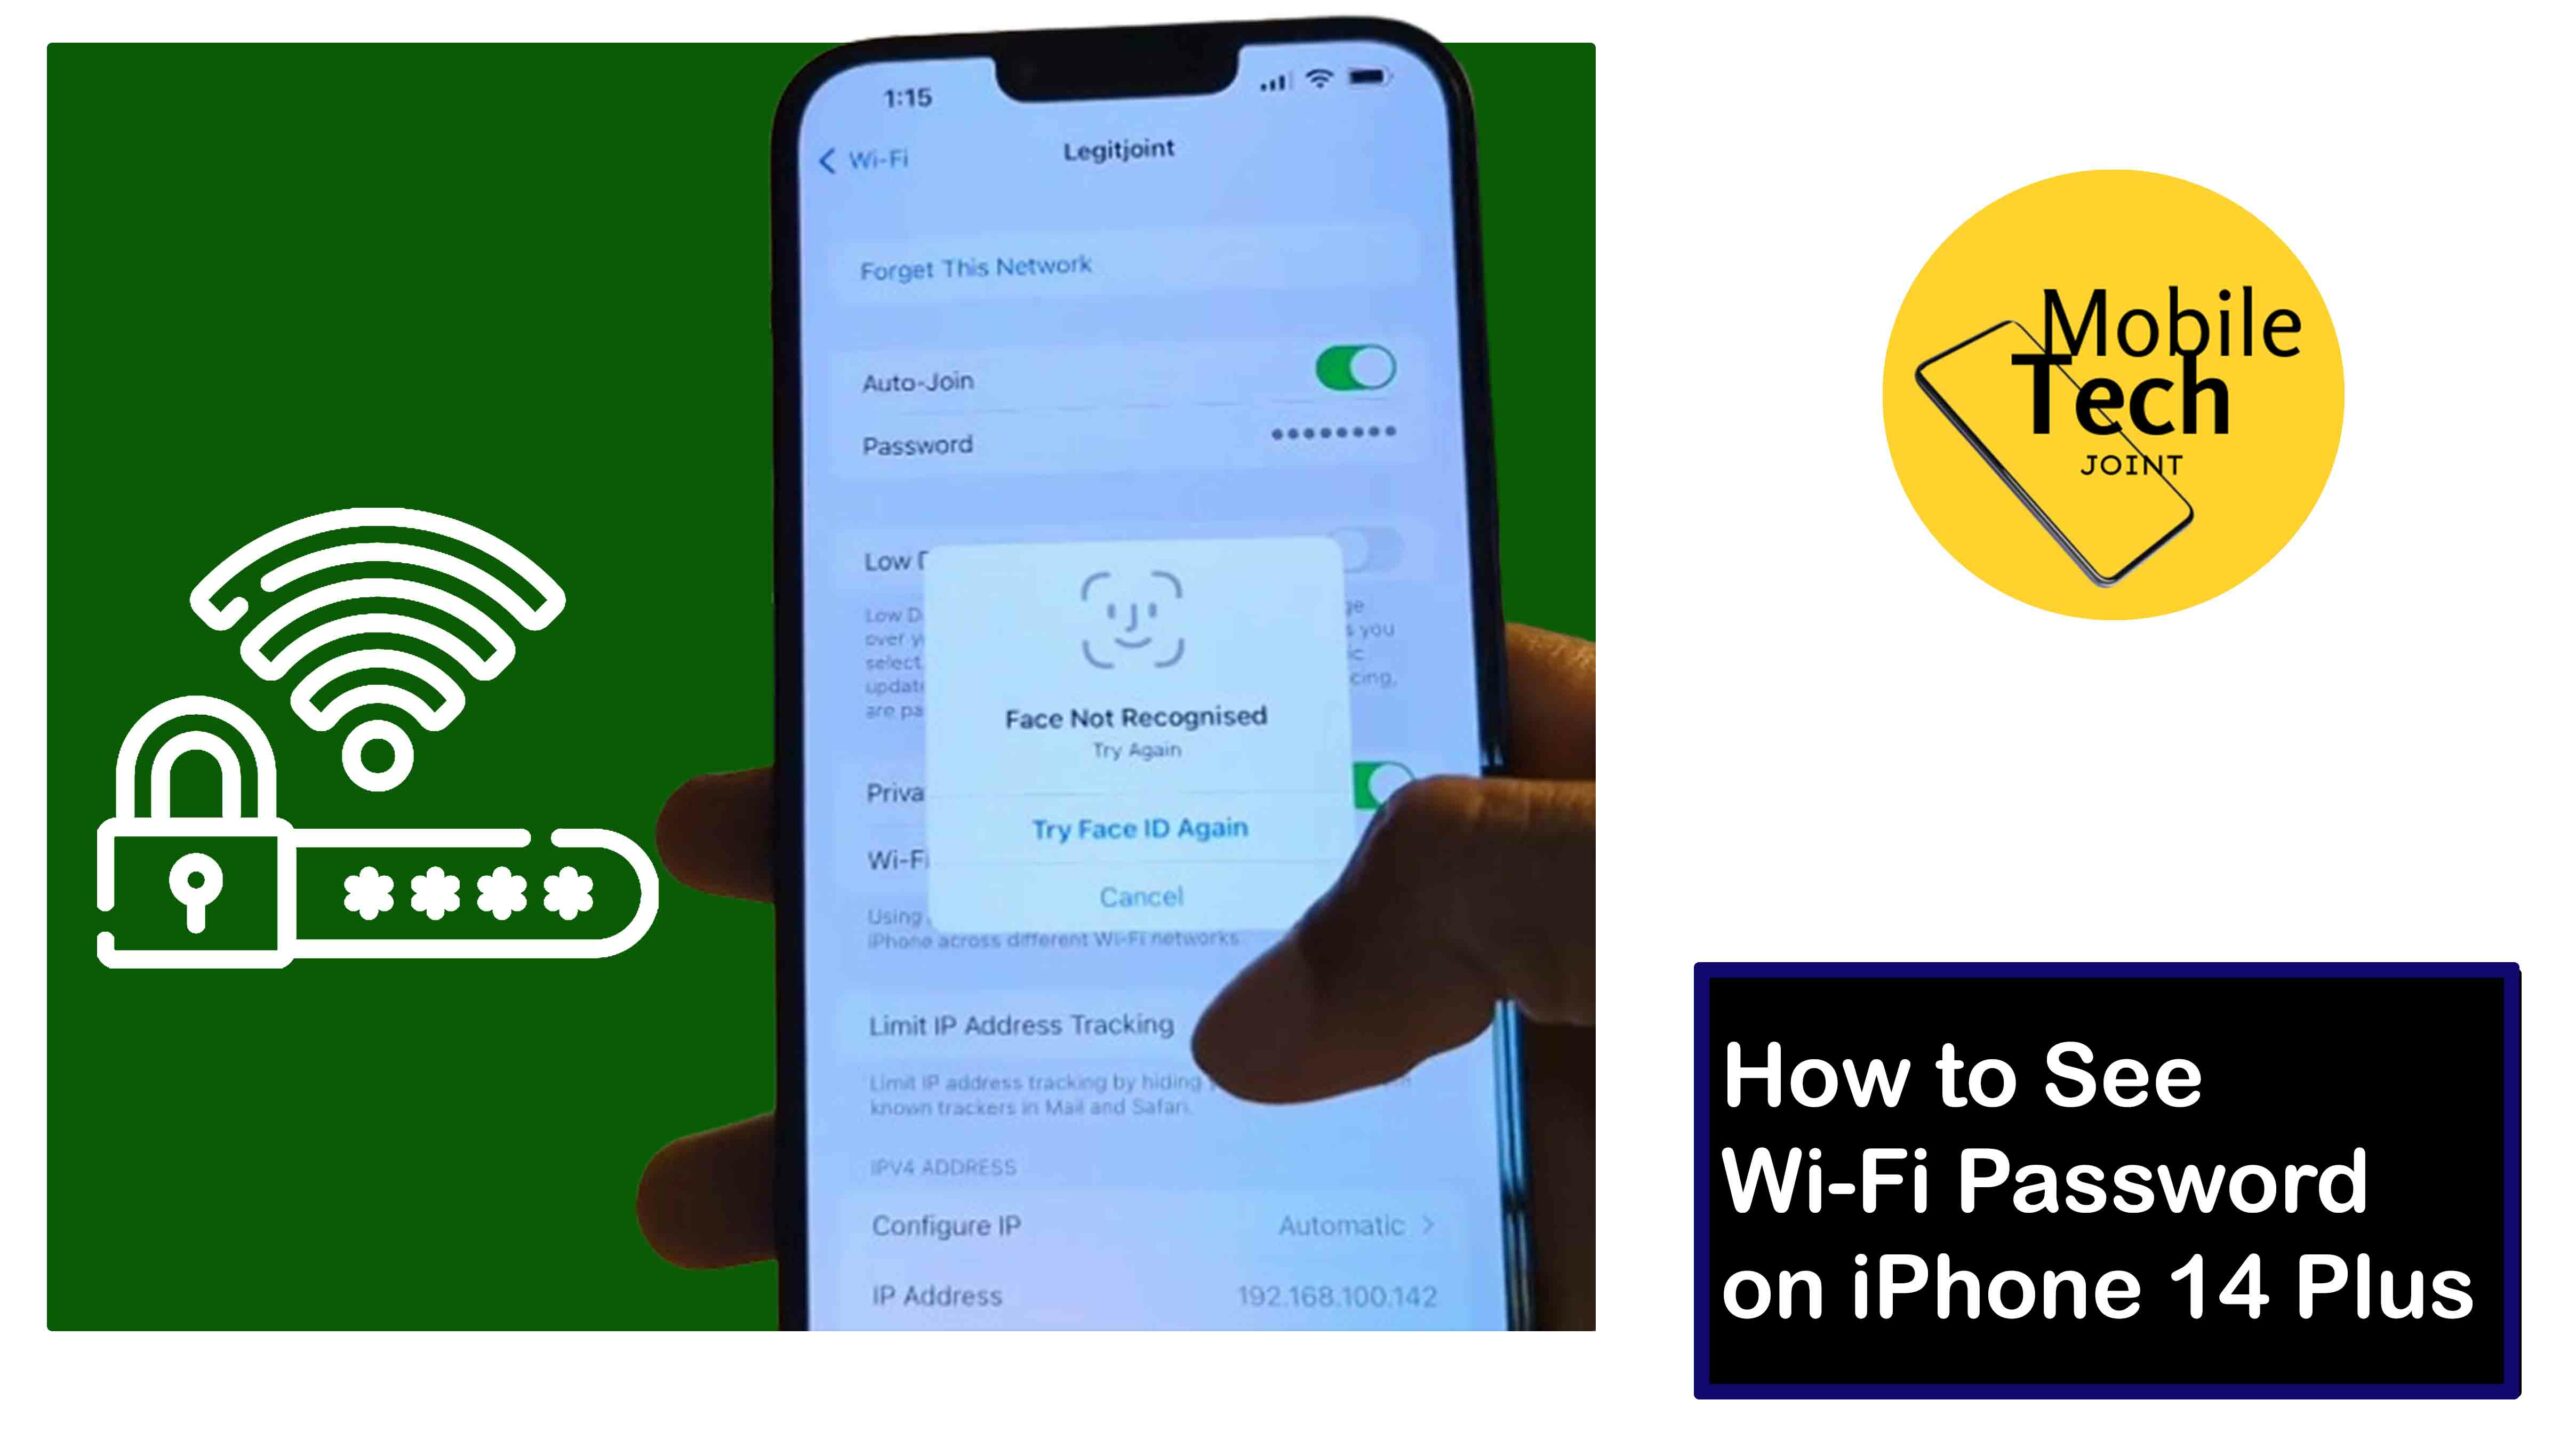
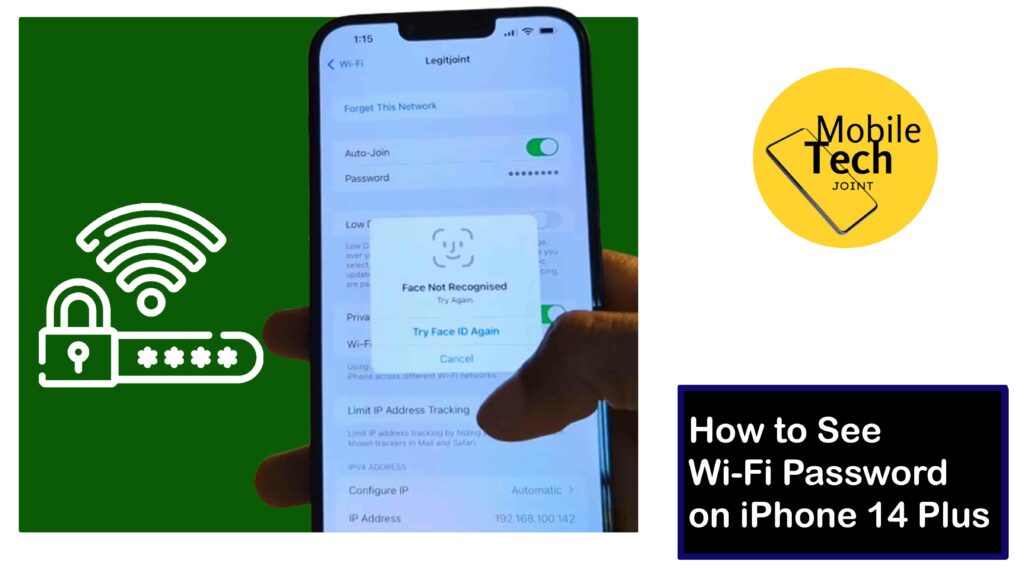
    Related: How to See Wi-Fi Password on iPhone 14 Plus

    Benefits of Clearing Reminders on iPhone

    Here are some benefits you get from clearing reminders on your iPhone:

    Improved Focus: A cluttered reminder list can be visually overwhelming, making it difficult to prioritize tasks and maintain focus. Clearing reminders helps you maintain a clear and concise view of your to-do list, allowing you to concentrate on what truly matters.

    Enhanced Organization: Clearing reminders helps you categorize and organize your tasks more effectively. This allows you to create a more streamlined workflow and avoid the feeling of being overwhelmed by a disorganized list.

    Boosted Productivity: A well-organized reminder list, acts as a clear roadmap for your day. By eliminating distractions and focusing on relevant tasks, clearing reminders can significantly boost your overall productivity.

    Increased Efficiency: When your reminder list is free of clutter, you can quickly locate and address important tasks, saving valuable time that might otherwise be wasted sifting through an overflowing list.

    Improved App Performance: While not a direct benefit, a cluttered reminder list with a large number of entries can potentially slow down the Reminders app. Clearing reminders can help the app function more smoothly and efficiently.

    Conclusion

    In conclusion, clearing reminders on your iPhone is essential for maintaining an organized and efficient workflow.

    By clearing your reminders, you can improve your focus, enhance organization, boost productivity, increase efficiency, and improve the performance of the Reminders app. It’s important to note that when you clear a reminder on your iPhone, it is permanently deleted from the app without a built-in Recycle Bin or undo function.

    However, you can utilize the Completed list to archive important reminders while keeping a record of the tasks. While there isn’t a built-in function to automatically delete reminders after a certain time, you can use custom recurring reminders with short intervals.

    Additionally, Siri can be used to delete specific reminders through voice commands, but currently cannot clear entire lists or multiple reminders at once.

    Will Clearing Reminders on my iPhone Delete them Permanently?

    Yes, once you clear a reminder on your iPhone, it’s permanently deleted from the app. There is no built-in Recycle Bin or undo function for reminders.

    However, if you’re worried about accidentally deleting an important reminder, you can utilize the “Completed” list. When you mark a reminder as Completed, it gets moved to the “Completed” list, essentially archiving it while keeping a record of the task.

    Can I Automatically Delete Reminders, After a Certain Time?

    Unfortunately, there isn’t a built-in function within the iPhone Reminders app to automatically delete reminders after a set time.

    Although, you can set a custom recurring reminder with a short interval (like daily or weekly) and then manually mark it as completed.

    Can I Clear Reminders with Siri?

    Yes, Siri can be a helpful tool for managing your reminders. You can use voice commands to delete specific reminders. But Siri currently cannot clear an entire lists or multiple reminders at once.

    For more insights on this article, check out these video tips across our social platforms:

  • How to See Wi-Fi Password on iPhone 14 Plus

    How to See Wi-Fi Password on iPhone 14 Plus

    The iPhone 14 Plus boasts a sleek design, powerful performance, and a seamless user experience.

    But what happens when you need to connect a new device to your Wi-Fi network and the password escapes your memory or you lose it? Not to worry, your iPhone 14 Plus holds the key (or the password) to this problem.


    See Wifi Password

    Unlike some other operating systems, Apple prioritizes security and keeps Wi-Fi passwords hidden within the depths of your device.

    With the help of this article, you will be able to find out the secret Wi-Fi password on your iPhone 14 Plus as well as its advantages and potential uses. Therefore, thoroughly read everything and adhere to the instructions.

    Why See Wi-Fi Password on iPhone 14 Plus

    When moving to a new place and setting up your Wi-Fi in a new home or apartment, knowing the password is crucial for connecting all your devices to the internet.

    When it comes to Sharing with others, there might be times when you want to share your Wi-Fi access with guests, colleagues, or family members, and knowing your Wi-Fi Password is crucial.

    And occasionally, you might encounter network connectivity issues on your iPhone 14 Plus. And knowing the Wi-Fi Password is also crucial.

    Note: To access your Wi-Fi password on your iPhone 14 Plus, you do not need another Apple device (iPhone, iPad, or Mac) signed in with the same iCloud account.

    How to See Wi-Fi Password on iPhone 14 Plus

    Below are the steps to take to successfully See the Wi-Fi Password on your iPhone 14 Plus.

    • First, open your Settings app, which is located on your phone’s home screen.
    • Then, click on the Wi-Fi option to proceed.
    • Next, click on the (i) icon at the end of the network you are connected to or want to check its password.
    • Next, click on the hidden password in the same line as the Password option. You’ll be prompted to authenticate using Face ID or Touch ID to access the secure network details.
    • Once you’ve unlocked with your preferred verification, the Wi-Fi Password will then be visible for you to see.

    Follow the procedures carefully for positive results.

    Related: How to Clear App Cache on Samsung S23 +

    Benefits of Viewing Wi-Fi Password on iPhone 14 Plus

    There are a few advantages to knowing your Wi-Fi password on your iPhone 14 Plus:

    Connecting New Devices: The most common reason, is to connect new devices, like laptops, tablets, or smart home gadgets, to your Wi-Fi network. Having the password readily available eliminates the need to hunt for it or ask someone else.

    Sharing Wi-Fi Access: If you have guests over and want to offer them Wi-Fi access, knowing the password allows you to easily share it with them.

    Troubleshooting Network Issues: In some cases, troubleshooting network connectivity issues might require knowing the Wi-Fi password to re-enter it on your device or adjust network settings.

    Conclusion

    By following the steps outlined, you will be able to see the Wi-Fi password on your iPhone 14 Plus.

    This newfound knowledge offers several advantages, from effortlessly connecting new devices to your network to troubleshooting connectivity issues.

    Remember, while you might not need to access the Wi-Fi password every day, having it readily available can be a lifesaver in various situations.

    So, the next time you need to share your Wi-Fi with a friend or connect a new gadget, you’ll be well-equipped to handle it with your iPhone 14 Plus.

    Can I See the Wi-Fi Password on my iPhone or Another Apple Device?

    Unfortunately, Apple prioritizes security and doesn’t display Wi-Fi passwords directly within the Settings app on iPhone 14 Plus.

    However, there might be third-party password manager apps that claim to reveal Wi-Fi passwords.  Be cautious with such apps, as they might require intrusive permissions or pose security risks.

    Can I See the Wi-Fi Passwords of Devices Connected to my iPhone 14 Plus Hotspot?

    No, the method described is designed to access Wi-Fi passwords for networks your iPhone 14 Plus has previously connected to.

    You cannot use this method to view passwords for devices connected to your iPhone’s mobile hotspot.  Those devices would typically need the hotspot password you’ve set on your iPhone itself.

    Can I Connect to the Same Network if I Forget the Password?

    No, forgetting the Wi-Fi password won’t stop your iPhone 14 Plus from connecting to a network it’s previously joined.

    Once you are connected to the network and your iPhone remains within range, it will automatically connect without re-entering the password.


    For more insights on this article, check out these video tips across our social platforms:

  • How to Clear App Cache on Samsung S23 +

    How to Clear App Cache on Samsung S23 +

    The Samsung S23 + is a powerhouse, equipped with a lightning-fast processor and a stunning display designed to deliver a seamless user experience.

    However, even the most capable devices can give in to sluggishness and unexpected app behavior over time. One common culprit behind this performance, a bloated app cache.

    Clear Cache

    This guide will equip you with the knowledge to effectively manage your S23 +’s app cache. We’ll explore what it is, why it accumulates, and most importantly, how to clear it to restore optimal app performance. All you are required of, is read and follow the procedures outlined in it carefully.

    About App Cache on Samsung S23 +

    The app cache on your Samsung S23+ acts like a resourceful assistant in the app world. It stores frequently used data like logins and settings, allowing apps to launch faster and run smoother.

    However, this helpfulness can backfire. Over time, the cache can accumulate outdated data and temporary files, turning it from a helpful assistant to a cluttered mess.

    This clutter can slow down apps, eat up storage space, and ultimately hinder the smooth performance of your S23+.

    How to Clear App Cache on Samsung S23 +

    Clearing the app cache on your Samsung S23+ is a simple process, and below are the steps to take to successfully clear the app cache.

    • First, head to your app tray, then look for Settings and click on it, or swipe down from the top of the screen to open the notification panel. Then, tap the settings icon (cogwheel symbol) to launch the Settings App.
    • Then, scroll down the Settings menu and locate the Apps option. Tap on it to proceed.
    • After that, you’ll see a list of all your installed apps. Locate the app you’d like to clear the cache for.
    • Once you’ve found the desired app, tap on it to access its information page.
    • Next, Look for the Storage section within the App Info page. Here, you’ll find an option labeled Clear Cache at the bottom right of the screen, click on it.
    • Depending on your S23+ software version, you might be prompted to confirm the action. Tap OK or Clear to proceed with the clearing of the app cache.

    Bonus Tip: Some apps might offer an in-app option to clear their cache. Check the app’s settings menu to see if this option is available.

    Related: How to Enable Emergency SOS on Samsung S23 +

    Benefits of Clearing App Cache on Samsung S23 +

    Here are some reasons why regularly clearing of app cache on your Samsung S23+ can be beneficial:

    Improvement in Performance: By removing unnecessary temporary files, you can free up storage space and potentially improve the app’s overall responsiveness.

    Reduced Crashes: A cluttered app cache can sometimes lead to crashes and unexpected behavior. Clearing the cache can help minimize such occurrences.

    Potential Battery Life Improvement: In some cases, clearing the cache can slightly improve battery life by reducing the amount of background activity related to managing the cache.

    However, it’s important to note that clearing the app cache does not delete your personal data or app settings. You’ll still be logged in to your accounts and all your saved information within the app will remain intact.

    Conclusion

    Clearing the app cache on your Samsung S23+ is a simple yet effective way to potentially improve performance, reduce crashes, and even free up some storage space.

    While it’s not a permanent solution, making it a regular maintenance practice can help your S23+ run smoothly and efficiently. Remember, clearing the cache doesn’t delete your data, so feel free to experiment and see if it improves your app experience.

    Does Clearing the App Cache on Samsung S23+ Delete my Data?

    No, clearing the app cache on your Samsung S23+ will not delete your data like photos, videos, or downloaded files.

    The app cache only stores temporary files used by the app to speed up loading times.  Your data is typically stored separately within the app itself or in your device’s dedicated storage locations like the Gallery app.

    How Often Should I Clear the App Cache on my Samsung S23+?

    The frequency of clearing your app cache depends on how heavily you use your phone and the specific apps you use.

    If you notice apps running slowly, crashing frequently, or your storage space is dwindling, it might be a good time to clear the app cache for those specific apps.

    Generally, it’s a safe practice to clear the app cache occasionally, but you don’t necessarily need to do it daily.

    Will Clearing the App Cache on Samsung S23+ Log me Out of my Accounts?

    No, clearing the app cache will not log you out of your accounts within the apps. The app cache doesn’t store your login credentials.

    You might need to re-enter your login information temporarily if the app cache contained previously used login details for faster access, but your accounts themselves will remain intact.

    Can Clearing the App Cache on Samsung S23+ Improve Battery Life?

    In some cases, clearing the app cache can potentially lead to slightly improved battery life. This is because a cluttered app cache might require the app to work harder to access the information it needs, leading to increased battery consumption.

    While the improvement might not be drastic, it can contribute to overall better battery performance, especially if you clear the cache for frequently used apps.

    For more insights on this article, check out these video tips across our social platforms:

  • How to Enable Color Correction on Samsung S23 +

    How to Enable Color Correction on Samsung S23 +

    The Samsung S23+ display can sometimes have some can of flop or look like it lacks accuracy in terms of the display color.

    Color Correction


    Perhaps you’re a designer working with critical colors, or maybe you suspect a slight visual impairment while scrolling through your phone or operating it. Fortunately, the S23+ offers a built-in solution called the “Color correction” feature.

    This functionality allows you to fine-tune the way colors are rendered on your device, enhancing the viewing experience for various needs.

    In this comprehensive guide, you will be enlightened on the activation process and exploring the available modes. Whether you’re seeking improved color fidelity or accessibility features, this guide will equip you with the knowledge to optimize your S23+ display.

    About Color Correction on Samsung S23+

    Color correction is an accessibility feature on the Samsung S23+, that allows you to modify the way colors are displayed on the screen.

    This can be beneficial for people with certain visual impairments, such as color blindness, or for those who simply prefer a different color balance on their device.

    Several color correction modes are available on the S23+, each offering a unique way to adjust the on-screen colors.

    How to Enable Color Correction on Samsung S23 +

    Enabling color correction on your Samsung S23+ is a straightforward process that can be done in just a few steps, and below are those steps to take.

    • First, head to your Settings, either by heading to your app list, then look for Settings and click on it, or swipe down from the top of your screen to access the notification shade, then click on the settings icon located at the top-right corner of your screen to access settings.
    • Scroll down, while looking for a tab labeled Accessibility, and click on it
    • Next, click on Vision Enhancement to continue.
    • Then scroll down and click on the Color Correction feature.
    • To enable the Color Correction feature, toggle on the switch at the top right corner of your screen. And choose the best option that has been listed below to suit your preferences.

    Here are the required procedures to follow to enable color correction feature on the Samsung S23 +.

    Related: How to Access Motion and Gestures on Samsung S23 +

    Benefits of Color Correction on Samsung S23+

    Color correction offers several advantages for Samsung S23+ users:

    • Improved Color Visibility

    For individuals with color blindness, color correction modes can significantly enhance the way colors are displayed, making it easier to distinguish between different hues.

    • Enhanced Comfort

    Certain color correction modes, like grayscale, can reduce eye strain, particularly in low-light environments.

    • Customizable Display

    With various color correction options, you can personalize the S23+’s display to match your preferences, whether you prefer a warmer or cooler color tone.

    Conclusion

    The Samsung S23+ boasts a versatile color correction feature that can significantly enhance your viewing experience.

    With the ability to adjust the overall color balance, enhance specific colors for color blindness, or even switch to a grayscale view, you can personalize your S23+’s display to perfectly suit your needs and preferences.

    Whether you’re an artist seeking accurate color representation, someone with visual impairments requiring increased accessibility, or simply looking to reduce eye strain, color correction offers a valuable solution.

    So, don’t hesitate to explore the various modes available and unlock the full potential of your S23+’s display.

    Does Color Correction on the Samsung S23+ Drain the Battery?

    While color correction itself has minimal impact on battery life, the specific mode you choose might have a slight effect.

    Grayscale mode, for example, may use slightly less battery due to the reduced need to display a full-color spectrum. However, the overall impact on battery life is likely negligible compared to other factors like screen brightness and app usage.

    Can I Adjust the Intensity of Color Correction on the Samsung S23+?

    Yes, for some color correction modes on the S23+, you can adjust the intensity to fine-tune the effect.

    This is particularly helpful with modes like “Color tone” where you can choose between a warmer or cooler balance. Look for the settings icon next to the chosen mode to access intensity adjustments.

    What if I Don’t Know What Type of Color Blindness I have?

    The S23+ offers several color blindness correction modes, but if you’re unsure which one best suits your needs, there are online resources available to help you identify your specific type of color blindness.

    Once you know the type, you can experiment with the corresponding correction mode on your S23+ to see which one provides the most significant improvement in color distinction.

    For more insights on this article, check out these video tips across our social platforms:

  • How to Answer Phone Calls on Google Pixel Watch

    How to Answer Phone Calls on Google Pixel Watch

    The Google Pixel Watch offers a convenient way to answer phone calls with just a few taps or swipes, directly from your wrist.

    Answer Phone Calls

    Whether you have a cellular Pixel Watch operating independently or one that is connected to your phone, answering calls with this device is a game-changer. Multitasking becomes a breeze, allowing you to answer calls while engaged in other activities.

    With the ability to adjust call volume and switch between the watch and phone speakers, the Pixel Watch provides a practical and stylish way to manage your calls. However, in this blog, you will be enlightened on How to Answer Phone Calls on Google Pixel Watch like a pro.

    Why Answer Phone Calls on Google Pixel Watch

    Answering calls with your Pixel Watch is a game-changer. Multitasking becomes a breeze, answering calls while cooking, working out, or doing anything that occupies your hands becomes easier with a simple tap or swipe.

    No more phone diving in bags or missing calls because it’s out of reach. Plus, answering calls with your watch adds a touch of civilization.

    And with a cellular Pixel Watch, calls are at your fingertips even without your phone. It’s a convenient, stylish, and practical way to manage your calls, freeing you from the limitations of your phone.

    How to Answer Phone Calls on Google Pixel Watch

    Below are the steps to take to answer phone calls on your Watch and also the things to look for when answering a call.

    When you receive a call from a person, your watch will automatically wake up, and once it wakes, the name in which you saved the person number will display.

    Then you will see two options, to either Answer or Decline the call

    If you answer the call, you can adjust the volume by using the crown on your Pixel Watch (rotate it up or down) you can also switch between the watch speaker and your phone’s speaker/headset, by tapping on the three dots on the call screen and then choose the desired audio source.

    Then to end a call, simply tap the Red Phone icon on the screen.

    Related: How to Enable Always-On Screen on Google Pixel Watch

    The benefit of Answering Calls On Google Pixel Watch

    With the watch on your wrist, you can attend to other things while having a conversation with someone, making it easy to multitask, and ensuring you never miss important calls.

    With a cellular Pixel Watch, calls are at your fingertips even without your phone nearby. Enjoy the freedom to roam without sacrificing connectivity.

    Answering calls with your watch exudes a touch of modern elegance, making you look effortlessly connected and in control.

    Your wrist is prime real estate for notifications and calls. Unlike phones that can get buried in bags or misplaced, your watch is always readily accessible, ensuring you never miss an important call.

    Conclusion

    So let go of your phone blunders. It is quite easy to answer calls with the Pixel Watch. With just a tap or swipe, you can multitask like a pro and look great! With cellular models, you can answer even when your phone is not close by.

    It’s convenient, stylish, and keeps you connected on your terms. Answer calls seamlessly, stay focused, and ditch the outdated phone routine.

    Does Pixel Watch Use SIM?

    The Wi-Fi/Bluetooth model relies on your phone’s connection for calls, texts, and most functionalities. It doesn’t have a SIM card slot and can’t connect to cellular networks by itself. But, if you crave independence, the cellular model with a built-in eSIM is your best option.

    Can I Answer a Phone Call on a Pixel Watch?

    Calls on Pixel Watch? Easy! Both models let you answer calls with a swipe. See caller info, answer on the watch speaker, or manage it all (silence, decline, answer on the phone) from your wrist.

    Cellular models answer calls even without your phone nearby, while Wi-Fi/Bluetooth models need your phone in range.

    Does Pixel Watch Need a Phone Line?

    Depending on the model, your Pixel Watch may be reliant on your phone line. You can use the Wi-Fi/Bluetooth model on top of your phone’s connection, eliminating the need for a separate line for texting and calls.

    However, for the watch to function, your phone has to be within Bluetooth range. The best option is the cellular model that has an integrated eSIM.

    This will require an extracellular plan for the eSIM, but the benefit is that you can use your watch to make calls, send texts, and access data even when your cell phone is not close by.


    For more insights on this article, check out these video tips across our social platforms:

  • How to Enable Data Saver on Google Pixel 7 Pro

    How to Enable Data Saver on Google Pixel 7 Pro

    The Google Pixel 7 Pro Is one of the top-tier known for its advanced features, which give users a wide range to customize settings, to their preference, taking their user experience to the next level, and assisting with some important features.

    Data Saver

    You have to be connected to the internet, and sometimes when trying to enjoy your phone’s full potential, you tend to consume more data than intended.

    Fortunately, there is a way to reduce the overage consumption of your data, with Data Saver enabled, you can significantly reduce the data consumption by background apps and services, saving your data and extending battery life.

    With this guide, you can take full control of your data usage. So, read and follow the procedures carefully.

    Why Enable Data Saver

    The data saver feature is programmed to help reduce data consumption, by restricting background data usage and preventing apps from secretly draining your data allowance.

    This helps in, not only data allowances but all so helps in saving battery life and helps in a smoother and more responsive browsing experience when using mobile data. However, there is more to the Data Saver than just saving your mobile data, more reasons why you should enable that feature are:

    • Conserve Mobile Data

    Data Saver restricts background data usage for most apps, significantly reducing the amount of data your phone consumes when you’re not actively using them.

    This is particularly beneficial for apps that constantly refresh content or automatically download updates in the background.

    • Extend Battery Life

    Data transfer consumes battery power. By limiting background data usage, Data Saver can help you squeeze more juice out of your Pixel 7 Pro’s battery, especially when you’re on the go and may not have immediate access to a charger.

    • Avoid Data Plan Overage Charges

    If you have a limited data plan, exceeding your data allowance can result in hefty overage charges. Data Saver helps you stay within your data limits, preventing unwanted surprises on your phone bill.

    • Peace of Mind When Traveling

    Traveling often involves using cellular data more than usual, especially when Wi-Fi is limited. Data Saver can be a lifesaver, helping you manage your data usage and avoid expensive roaming charges when abroad.

    • More Control Over Your Data

    Data Saver empowers you to take control of your mobile data consumption. You can choose which apps are exempt from Data Saver restrictions, ensuring smooth functionality for essential apps while reducing data usage for others.

    With these factors, it is sure you would want to enable the Data Saver option on your Google Pixel 7 Pro device.

    How to Enable Data Saver on Google Pixel 7 Pro

    To successfully enable Data Saving on your Google Pixel 7 Pro, follow the step-by-step step listed below. So, follow the procedure carefully.

    • Frist, navigate to the Settings app, either by heading to your app’s drawer , or swipe down from the top of your screen, to access device quick panel.
    • Click on the setting icon (looks like a cogwheel or Gear icon).
    • In the Settings section select Network & Internet or Connections depending on your software version.
    • After that, scroll down and locate Data Saver option and click on it.
    • Then, toggle on the switch next to Data Saver to the On position. Then a notification will appear in your Settings app to requiring you to confirm the activation.

    That’s it! Data Saver is now enabled on your Pixel 7 Pro, helping you conserve mobile data and potentially extend battery life.

    Benefit of Enabling Data Saver on Google Pixel 7 Pro

    They are some real good benefits in enabling Data Saver on your Google Pixel 7 Pro, and here’s how it can benefits you:

    With the Data Saver enabled, they will be some restriction on background data usage, preventing apps from quietly draining your data allowance. This translates to significant savings on your mobile plan, especially if you’re on a limited data package.

    By limiting data activity in the background, Data Saver helps your Pixel 7 Pro to save battery. You can enjoy extended use without worrying about a sudden power outage.

    With less background data traffic competing for bandwidth, you might experience a smoother and faster browsing experience when using your mobile data.

    Related: How to Update Software on Google Pixel 7 Pro

    Conclusion

    Enabling your Data Saver on your Pixel 7 Pro, is a fantastic feature that empowers you to take control of your mobile data usage and battery life. By enabling it, you can experience significant cost savings on your data plan, enjoy longer usage between charges, and potentially experience a smoother browsing experience on mobile data.

    So why wait? Activate Data Saver today and unlock a more efficient and budget-friendly mobile experience on your Google Pixel 7 Pro!

    What is APN on Google Pixel?

    APN stands for Access Point Name. It’s like a virtual address that helps your Google Pixel connect to your mobile carrier’s internet network. When you insert your SIM card, your Pixel might automatically configure the APN settings, but sometimes it may not.

    In simple terms, the APN acts like a translator between your phone and your mobile carrier’s network. It tells your phone how to communicate with the towers and access the internet.

    Why Won’t my APN Settings Save?

    Frustrated with APN settings not sticking on your Pixel? Here’s the short story:

    • Double-check the info: Make sure the APN details match your carrier exactly.
    • Fill in all the blanks: Missing fields like MCC and MNC can cause saving issues.
    • Restart your Pixel: Sometimes a simple reboot can fix glitches.

    Still stuck? Check your carrier’s website or Google support for troubleshooting steps specific to your situation. Remember, correct APN settings are key to connecting your Pixel to the internet!

    What Happens if APN is Not Set?

    If there is no APN on your Pixel device? That’s a big problem!  Mobile data won’t be able work, meaning no internet on the go. Apps and features relying on mobile data go dark.  Calls and texts should be fine, but some carrier features might be affected. So fix the APN.

    For more insights on this article, check out these video tips across our social platforms:

  • How to Connect to Wi-Fi Network on Google Pixel Watch

    How to Connect to Wi-Fi Network on Google Pixel Watch

    The Google Pixel Watch is one of the best time-telling gadgets, it is not only stylish but a powerful extension of your smartphone. But for you to unlock its full potential, you need a reliable internet connection.

    connect wifi

    Wi-Fi provides a stable and secure way for your Pixel Watch to stay connected, offering a range of benefits and other features.

    In this article will we show you How to Connect to the Wi-Fi Network on Google Pixel Watch for maximum potential and accessibility. All you need to do is read and follow the instructions carefully in this blog for positive results.

    Why Connect to Wi-Fi Network on Google Pixel Watch?

    When you are connected to a Wi-Fi network, your watch will have a Boost and unlock your Pixel it’s potential.

    Apps will start to work better, you will be able to stream music smoothly, and Google Assistant is always on duty, all without draining your phone’s battery.

    Plus, save mobile data and enjoy automatic updates. It is said to be able to fast charge if connected to Wi-Fi.

    How to Connect to Wi-Fi Network on Google Pixel Watch

    Below are the steps to successfully connect your Google Pixel watch to Wi-Fi Network. So go through the process carefully.

    • First, wake your watch, either by tapping on the screen or pressing the Crown Button.
    • Then Swipe down from the top of the watch face to access the Quick Settings menu.
    • Next, click on the Settings icon, which is represented with a cogwheel symbol.
    • After that, you will an option labeled Connectivity, it represented with the hotspot symbol. Click On it.
    • Then, scroll down a bit to see the Wi-Fi option, and then, click on It to Proceed.
    • If your Wi-Fi is not on, toggle on the switch to turn It on.
    • Next, to add a new network click on + Add Network.
    • Then select and connect to the network you want to connect to.

    These are the required steps to take, to successfully to connect to Wi-Fi Network on your Google Pixel Watch.

    Related:  How to Turn On Mobile Data on Google Pixel Watch

    Benefits of Connecting Google Pixel Watch to Wi-Fi

    Here are some benefits you will get while your Google Pixel Watch is connected to a Wi-Fi network.

    Enhanced Functionality

    For some apps to be fully functional, like Fitness trackers music, News and weather apps that need to content real-time update to keeping you informed, greatly need Wi-Fi Network. To perfume fully and effectively.

    Independent Google Assistant

    When your Wi-Fi Network is connected, your Google Assistant on your Pixel Watch becomes more powerful. Ask questions, get directions, or control your smart home devices – all without needing your phone nearby.

    Conclusion

    Connecting your Pixel Watch to Wi-Fi unlocks its full potential. You’ll experience a wider range of functionalities, improved performance, and a more convenient and enjoyable user experience. So get close to your Wi-Fi network, and take advantage of it and see the difference it makes on your Google Pixel Watch.

    How Do I Know if my Watch is Connected to Wi-Fi?

    To ensure you are connected to a Wi-Fi Network, you will see an indicator at the upper-left of the Control Center screen.

    Which displays in the place of the phone icon and the wireless signal icon is also highlighted if you are connected to a Wi-Fi.

    Can I Make Calls with my Google Pixel Watch while Wi-Fi is On?

    You can make and receive call, send and receive message., on your Google Pixel watch even if your Wi-Fi network is on or connected.

    Can I Make Calls with my Google Pixel Watch?

    Yes, it is possible to make call if you are with the 4G LTE option, you can make and receive calls without your phone.

    For more insights on this article, check out these video tips across our social platforms:

  • How to Enable Always-On Screen on Google Pixel Watch

    How to Enable Always-On Screen on Google Pixel Watch

    The Google Pixel watch is designed with a unique feature, that helps you keep track of time and other information over a long period. One of these features that the watch possesses is the ability of the watch to remain on even if you are not using it, this feature is called the “Always-On Screen”, feature.

    Always-On Screen on Google Pixel Watch

    With this, you may be able to do some things with ease, things like checking the time with a glance and providing notifications of missed calls and messages.

    Fortunately, the Google Pixel Watch provides us with a simple way to enable the always-on feature, with some simple steps that will be listed below, you will be able to turn on or off your Always-On Screen feature in a short period. But first, let’s talk about why you should enable your Google Pixel Watch Always-On Screen feature.

    Why Enable Always-On Screen on Google Pixel Watch

    Keeping your screen always on has some good advantages, that can improve your user experience, like being able to look or tell the time with just a glance

    However, there are some sides to enabling your Always-On Screen feature, which may have a great impact on the device, and the basic disadvantage is battery life, which may prove to be a big problem for most users.

    How to Enable Always-On Screen on your Google Pixel Watch

    Below are the steps to follow, to successfully enable Always-On Screen on your Google Pixel Watch, and there are two different ways in which you can carry out this procedure.

    • Frist, waka your watch, either by tapping on it or by press the Crown Button.
    • Next, swipe down form the top of the watch face to open or access to the Quick Setting menu.
    • After that, look for the Settings app, which is represented with a gear icon, and click on it.
    • Then scroll down, and look for a setting labeled Display, and click on it.
    • Next, scroll down until you see a setting labeled Always-On Screen, and click on it or toggle the switch.
    •  One you turn it on, you have successful taken the step need for you enable your Google Pixel Watch, Always-On Screen feature.

    Here are the possible steps.

    Related: How to Adjust Screen Brightness on Google Pixel Watch

    The benefit of Enabling Always-On Screen on your Google Pixel Watch

    There are some benefits that you can enjoy from enabling the Always-On Screen feature, on your Google Pixel Watch:

    And one of those benefits, is for the watch to be able to prevent the its screen from going dark, even when you’re not using it.

    And also, to be able to look or tell the time with just a glance or with less effort.

    Conclusion

    The Always-On Display (AOD) on your Pixel Watch is like a double-edged sword. On one hand, it offers very convenient faces, of which, constant visibility of time and watch face are been seen, eliminating the need to wake the screen for quick checks.

    On the other hand, it can drain battery life and potentially lead to screen burn-in.

    But the decision comes down to your priorities. If you value constant time visibility and a unique aesthetic, AOD might be a good fit for you. But if maximizing battery life is your concern, keeping it off might be the wiser choice. Consider your usage habits and experiment to find the one that best suit you.

    How Long Does the Pixel Watch Battery Last with Always-on Display?

    When its fully charged, it could to stay awake, for 24 hours when the always-on display is turned on.  Although, operating it when the feature is turned on, may greatly affect the battery life.

    Does Always-On Display Turn Off in Pocket?

    Although, the name tells you everything, it does not follow suit for this aspect. The watch will automatically turn off, if you put it in your pocket or bag to conserve battery.

    For more insights on this article, check out these video tips across our social platforms:

  • How to Bold Text on iPhone 14 Plus

    How to Bold Text on iPhone 14 Plus

    With the highly futuristic iPhone 14 Plus, you can alter or configure a number of the iPhone settings to fit your preferences. And one of these futuristic features is the ability to change the boldness of your device text, making your text, easier to see.

    Bold Text

    This guide will give you insights on the step-by-step process involved in How to Bold Text iPhone 14 Plus, however, all you are required of is, read and follow through the procedures outlined in this blog carefully for positive results.

    About the Bold Text on iPhone 14 Plus

    Bold text is a type of text formatting that makes characters appear thicker and darker than regular text. This distinct appearance assists the user in highlighting and differentiating specific portions of text, making them more noticeable and easier to read.

    It emphasizes certain information and helps to enhance your readability on your iPhone 14 Plus.

    Even when you are reading a message, browsing through websites, or using apps, bold text can make important information stand out, ensuring that you never miss any important details.

    How to Bold Text on your iPhone 14 Plus

    Below is the step-by-step process on how to bold text on your 14 plus.

    • First, unlock your iPhone, and head to your phones Settings, which is located on your home screen.
    • Then Scroll down until you see Accessibility and click on it.
    • Next, within the Accessibility menu, look for an option labeled Display & Text Size. And click on it.
    • After that, turn on the switch next to the Bold Text option, you don’t need to restart your device for the effect to take place. But if your device prompt you to restart, then go ahead.

    Those are the possible steps needed to bold text on your iPhone 14 Plus.

    Related: How to Enable Dark Mode on iPhone 14 Plus

    Benefits of Enabling Bold Text

    Here are some benefits you get from enabling Bold text option on your iPhone 14 Plus:

    • Enhanced Readability

    Bolding text makes it visually stand out from the rest of the content. This is particularly helpful for emphasizing important keywords, headings, or phrases within emails, notes, or messages. It’s like highlighting on paper, drawing the reader’s eye to crucial information.

    • Improved Information Hierarchy

    By strategically bolding text, you can create a clear hierarchy of information on your screen. This is especially beneficial for lists, outlines, or documents where you want to visually differentiate main points from subheadings or details.

    Bolding helps guide the reader through the information and ensures they grasp the intended structure.

    • Increased Emphasis and Importance

    Bold text naturally conveys a sense of importance.  Using it for specific words or phrases can draw attention to critical details, warnings, or calls to action.

    This can be particularly useful in emails or messages where you want to ensure certain information is not overlooked.

    • Accessibility for Users with Visual Disability

    Bolding text can provide a slight improvement in readability for users with mild visual impairments. The increased thickness of the text offers a subtle contrast that can make reading on a screen a little easier.

    • Aesthetics and Style

    Bold text can add a touch of visual interest to your messages, notes, or documents. It can break up monotony and create a more visually appealing layout, especially when combined with italics or underlining for further emphasis.

    Conclusion

    By enabling, Bold text on your iPhone 14 Plus, can significantly enhance readability and emphasize important information, making it a valuable tool for everyday use.

    You can easily enable and apply bold text across your device. Experiment with bold text to find the optimal balance for your needs and enjoy a more accessible and organized experience on your iPhone 14 Plus.

    How Easy is Bolding Text?

    Super Easy! Bolding text on iPhone 14 Plus only requires a few taps within the keyboard or editing options. No technical knowledge is needed, making it accessible to all users.

    How Long Does Bolding Take?

    Quick Process! Bolding text is a breeze. Simply select the text you want to emphasize and choose the bold formatting option. It typically takes a few seconds.

    When to Use Bold Text?

    For Emphasis & Clarity! Use bolding strategically to highlight important points in messages, notes, or emails. It improves readability and ensures key information stands out.

    For more insights on this article, check out these video tips across our social platforms:

  • How to Enable Assistive Touch on iPhone 14 Plus

    How to Enable Assistive Touch on iPhone 14 Plus

    The iPhone assistive touch is a very valuable feature that is built in on your iPhone 14 Plus, which gives users an on-screen menu for easy navigation and to access some essential functions.

    Assistive Touch

    This feature is especially important for individuals who have difficulty in using the hardware buttons or gestures.

    Assistive Touch offers customizable on-screen controls, And Enabling Assistive can significantly enhance the usability and accessibility of your iPhone, making it easier to perform a wide range of tasks.

    However, this guide will put you through the processes of how to enable assistive touch on the iPhone 14 Plus. But first, let’s have a general understanding of what Assistive touch is all about.

    What is Assistive Touch on iPhone 14 Plus

    The Assistive Touch on Apple devices is a built-in feature that allows users to operate their IOS device, without the need to press buttons on their devices.

    It allows users to perform actions that would typically require physical buttons or complex gestures through on-screen touch controls, whether you want to take a screenshot, open a recent app, or even lock your iPhone, the Assistive Touch feature can handle the task.

    How to Enable Assistive Touch on iPhone 14 Plus

    Below is the step-by-step guide on how to enable Assistive Touch on iPhone 14 Plus.

    • First, unlock your device, and navigate to Settings on your device home screen.
    • Next, scroll down and look for the Accessibility option, click on it.
    • After that, in the Accessibility settings, look for an option labeled Touch, and click on it.
    • Then, to enable the Assistive Touch, tap on it and toggle the switch to turn it On or Off.
    • As soon as you enable it, a floating on-screen button will appear, which you can move any side of your screen for your convenience. This button gives you quick access to various functions and controls which is the Assistive Touch.

    How to Customize Assistive Touch on iPhone 14 Plus

    There are different ways to customize your Assistive touch, For example,

    You can customize single-tap, double-tap, long press, and 3D Touch actions by assigning them to different functions in the Assistive touch.

    You can also customize the top-level menu by adding or removing icons to access functions you use most frequently.

    If you also have specific gestures you want to use regularly, you can create new custom gestures within the Assistive Touch settings.

    Related: How to Access Storage on iPhone 14 Plus

    The benefit of Enabling Assistive Touch on iPhone 14 Plus

    The Assistive Touch provides essential support for users with physical disabilities, allowing them to navigate through their iPhone using gestures that may be easier for them to perform.

    Users can configure the Assistive Touch menu to contain a variety of tasks, including volume control, screen rotation, screen locking, and more. This customization might make commonly used functions more accessible.

    It gives users, access to Shortcuts, Assistive Touch can be used to access other accessibility features quickly, such as Voiceovers, Zoom, and Magnifier.

    Conclusion

    In all, enabling and customizing your Assistive Touch on your iPhone 14 Plus can greatly enhance your device’s accessibility. By exploring its various features and tailoring it to your needs, you can perform tasks more efficiently and comfortably.

    Experiment with different functionalities to make the most of this versatile accessibility feature, ensuring a seamless and personalized user experience.

    Is it Easy to Master Assistive Touch?

    Absolutely! Enabling Assistive Touch on iPhone 14 Plus requires just a few steps in Settings.  No technical background is needed, making it perfect for beginners.

    How Long Does it Take to Setup Assistive Touch?

    Quick Activation!  Turning on Assistive Touch usually takes less than 2 minutes. You can customize it further later to fit your needs.

    Why Use Assistive Touch?

    Enhanced Control & Convenience!  Assistive Touch offers an on-screen button for essential functions, replacing physical button usage and simplifying navigation, especially if the physical buttons are difficult to reach or use.

    For more insights on this article, check out these video tips across our social platforms: