Author: Bukky Victoria Agidah

  • How to See WIFI Password on iPad

    How to See WIFI Password on iPad

    Have you ever needed to retrieve a saved Wi-Fi password from your iPad? Whether you’re trying to connect to another device or share the password with a friend, knowing how to view the Wi-Fi password on your iPad can be incredibly useful. In this detailed article, we’ll walk you through the steps on how to see Wi-Fi passwords on iPad, covering iPadOS 16 and later.
    How to See WIFI Password on iPad
    How to See WIFI Password on iPad

    Why You Might Need to See a Wi-Fi Password on iPad

    Your iPad automatically saves Wi-Fi passwords when you connect to a network. While this is convenient, you may occasionally need to access the password for:

    • Connecting a new device to the same WiFi network.
    • Sharing the password with friends or family.
    • Troubleshooting network issues.
    • Recovering a forgotten password.

    Luckily, iPadOS makes it easy to retrieve saved Wi-Fi passwords, and you don’t need any third-party apps or technical expertise.

    How to See Wi-Fi Password on iPad

    To view saved Wi-Fi passwords on your iPad, ensure your device is running iPadOS 16 or later, as this feature was introduced in recent updates. Here’s how to do it:

    First step: Open Settings

    • Unlock your iPad and navigate to the Settings app.
    • Scroll down and select Wi-Fi from the left-hand menu.

    Second step: Locate Your Connected Network

    • Under the Wi-Fi settings, you’ll see a list of available networks.
    • Look for the network you’re currently connected to, indicated by a blue checkmark.

    Third step: Access Network Details

    • Tap the (i) icon next to your connected network. This opens the network’s information page, where you’ll find various settings and details.

    Fourth step: Reveal the Password

    • Scroll down to the Password section.
    • Tap the dots or hidden password field. You’ll be prompted to authenticate using Face ID, Touch ID, or your iPad passcode.
    • Once authenticated, the WiFi password will be displayed.

    Step 5: Use or Share the Password

    • Copy the password to share it, or use it to connect other devices to the network.

    What If You’re Not Connected to the Network?

    If the network you want the password for isn’t the one you’re currently connected to, you can still access saved passwords:

    • Open Settings and go to Wi-Fi.
    • Tap Edit (found in the top-right corner).
    • A list of saved networks will appear. Tap the (i) icon next to the desired network.
    • Authenticate using Face ID, Touch ID, or your passcode to reveal the saved password.

    Simple Troubleshooting Tips

    If you encounter issues while trying to view WiFi passwords on your iPad, here are some solutions:

    Ensure You’re Running iPadOS 16 or Later

    Older iPadOS versions don’t have the option to view WiFi passwords. To check your version:

    • Go to Settings > General > About.
    • Look for the Software Version field.

    If you’re not on iPadOS 16 or later, update your device by going to Settings > General > Software Update.

    Authenticate Properly

    You’ll need to authenticate with Face ID, Touch ID, or your passcode to see the password. Ensure these features are set up correctly:

    • For Face ID: Go to Settings > Face ID & Passcode.
    • For Touch ID: Go to Settings > Touch ID & Passcode.

    Check for Administrative Restrictions

    If you’re using a managed iPad (e.g., from work or school), administrative restrictions might prevent you from accessing saved passwords. Contact your administrator for assistance.

    Frequently Asked Questions

    Can I see WiFi passwords on an iPad running older versions of iPadOS?

    Unfortunately, the ability to view WiFi passwords directly is only available on iPadOS 16 or later. For older versions, you’ll need to use other devices like a Mac or access your router settings.

    Is It Safe to Share My WiFi Password?

    Sharing your WiFi password with trusted individuals is generally safe. However, avoid sharing it publicly or with unknown users to protect your network’s security.

    How Do I Forget a WiFi Network on My iPad?

    To remove a saved network:

    • Go to Wi-Fi in Settings.
    • Tap Edit.
    • Find the network and tap the minus (-) icon, then confirm by selecting Forget.

    Can I view WiFi passwords shared via iCloud Keychain?

    Yes! If iCloud Keychain is enabled, passwords saved on other Apple devices (like an iPhone or Mac) will sync to your iPad. You can view them following the same steps outlined in this guide.

    What If My WiFi Password Doesn’t Display?

    If you can’t see the password:

    • Ensure the network is saved on your iPad.
    • Check if you’re using the correct authentication method (face ID, touch ID, or passcode).

    Conclusion

    Learning how to see WiFi passwords on your iPad is a handy trick that saves time and frustration. Whether you need to connect a new device, share the password with a friend, or troubleshoot network issues, this feature is easy to use with iPadOS 16 or later.

    If you run into any difficulties, don’t hesitate to revisit this article or watch the detailed video tutorial on MobileTechJoint’s YouTube channel for extra support. With this knowledge in hand, you’ll never have to dig through old notes or router stickers to find your WiFi password again. Happy browsing!

    YOUTUBE LINK:

    MORE RELATED CONTENT:

    The iPad Pro Feature that Finally Made Me Ditch My Desktop Setup

    I thought the iPad Air Was Just Another Tablet

    Why the iPad Air Stands Out as One of the Best Value Tablet of 2024
    Why the iPad Pro is Currently a Gold Standard for Tablets

  • Hide Apps on iPhone | How to Hide Apps on iPhone

    Hide Apps on iPhone | How to Hide Apps on iPhone

    If you’ve ever wondered how to hide apps on iPhone, you’re not alone. Many iPhone users want to keep certain apps private, declutter their home screens, or simply organize their devices more efficiently.

    How to Hide Apps on iPhone
    How to Hide Apps on iPhone

    Thankfully, Apple offers several methods to help you hide apps, whether for privacy or convenience. This article will guide you through the steps in simple language, ensuring you can manage your iPhone effortlessly.

    Why hide apps on iPhones?

    People hide apps on their iPhones for various reasons, including:

    • Privacy: Keeping sensitive apps out of sight from others.
    • Organization: Minimizing clutter on the home screen.
    • Parental Control: Preventing children from accessing certain apps.

    No matter your reason, the methods below will help you achieve your goal.

    How to Hide Apps on iPhone

    Use the App Library

    Introduced in iOS 14, the App Library is a fantastic tool for hiding apps. This feature automatically organizes apps into categories, keeping your home screen tidy.

    Steps to hide apps in the App Library:

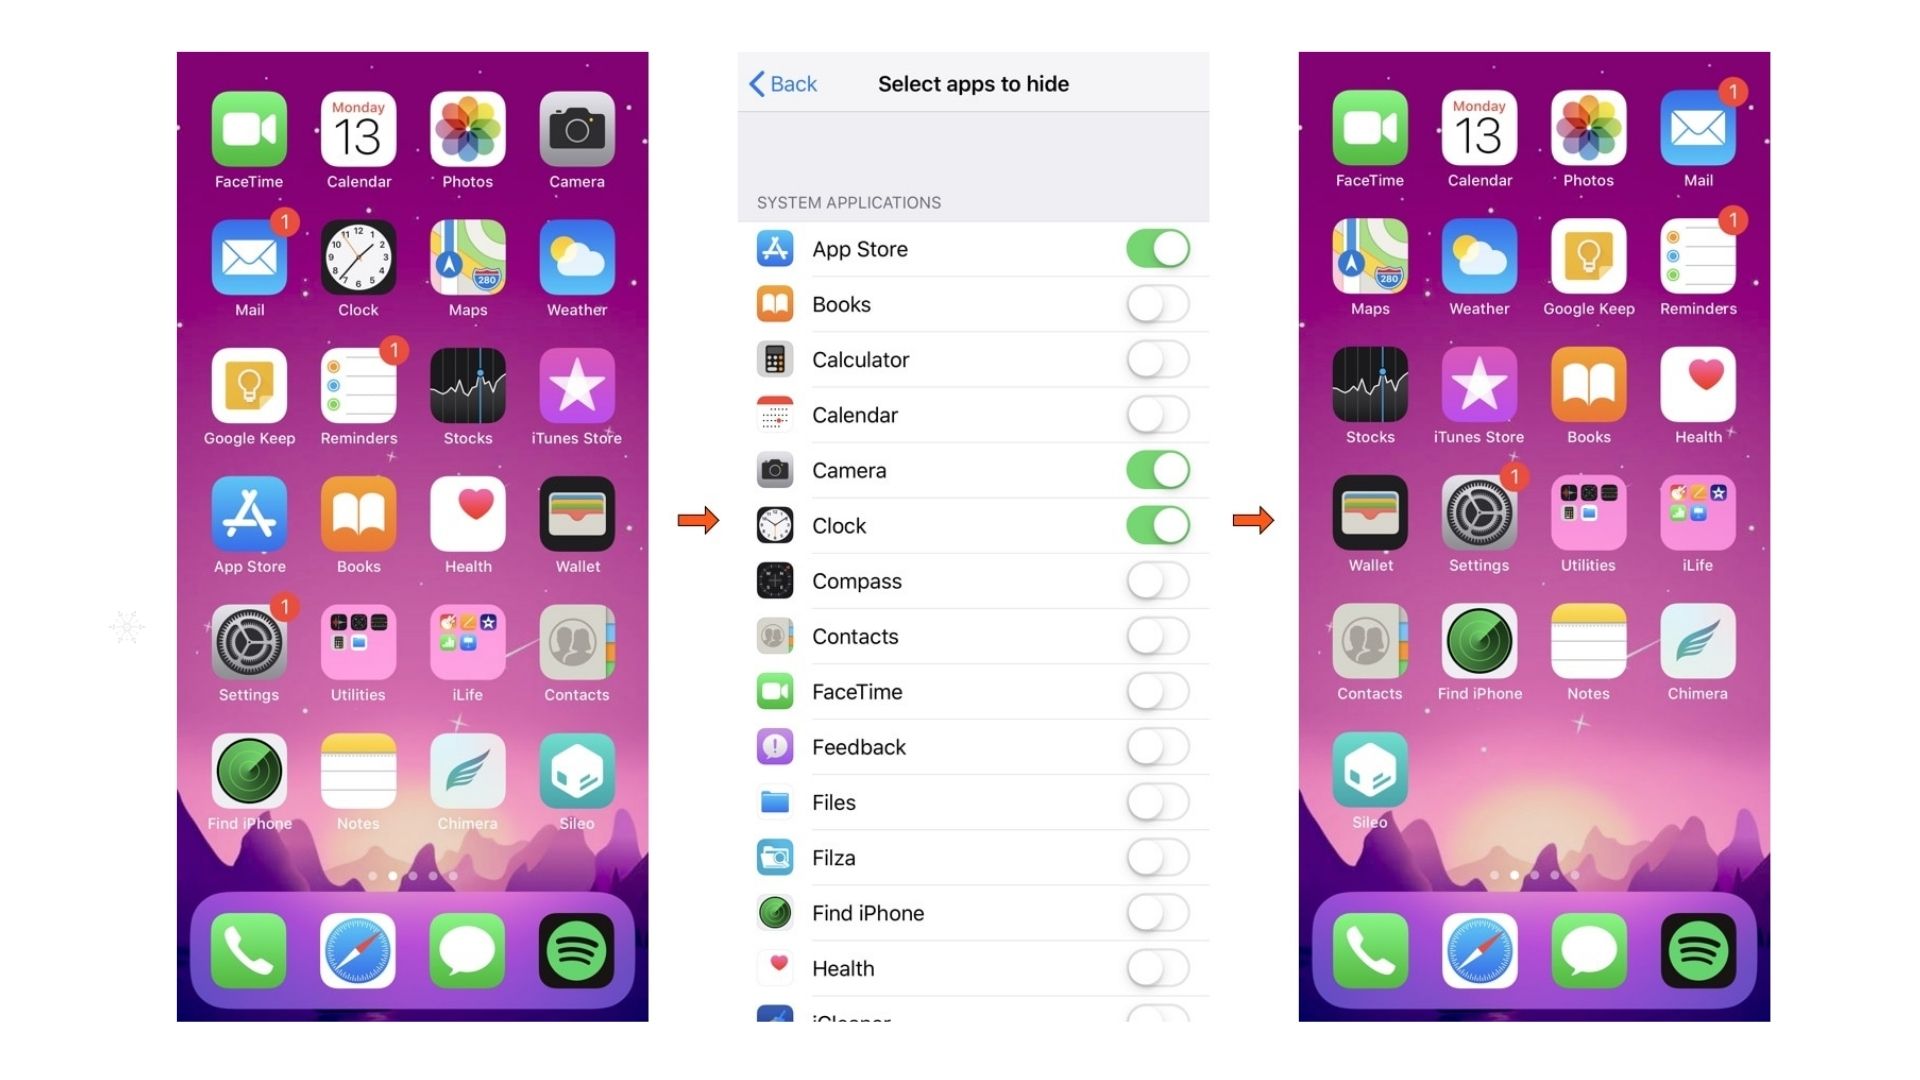
    • Locate the app you want to hide on your home screen.
    • Long-press the app icon until a menu appears.
    • Select Remove App.
    • Tap Remove from the Home Screen (not Delete App).
    • The app will now only be visible in the App Library, which you can access by swiping left past the last home screen.
    Pros:
    • Easy to access hidden apps from the App Library.
    • No need to delete the app or lose data.
    Cons:
    • Apps are still searchable via Spotlight search.

    How to Hide Apps Using Folders

    Using folders is another simple trick to hide apps on your iPhone. While this doesn’t completely remove the app from view, it makes it less conspicuous.

    Steps to hide apps in a folder:

    • Drag the app you want to hide over another app to create a folder.
    • Open the folder and drag the app to the second or third page of the folder.
    • Ensure only unrelated apps are visible on the folder’s first page.

    Tips for Better Concealment:

    • Name the folder something generic, like “Utilities” or “Tools.”
    • Avoid grouping the app with other apps of similar functionality.

    Use Restrictions with Screen Time (Another effective method)

    Screen time settings can effectively hide apps by restricting access based on content ratings or time limits.

    Steps to hide apps with Screen Time:

    • Go to Settings > Screen Time.
    • Tap Content & Privacy Restrictions and enable the feature.
    • Select Allowed Apps to hide built-in apps like Safari or Mail.
    • For third-party apps, go to Content Restrictions > Apps and choose a lower age rating. Apps above the selected age limit will be hidden.
    Pros:
    • Ideal for parental control.
    • Apps remain hidden until restrictions are adjusted.
    Cons:
    • Requires a passcode for screen time settings.

    Create Hidden Home Screen Pages

    If you’re looking to hide multiple apps at once, hiding an entire home screen page is a great option.

    Steps to hide home screen pages:

    • Long-press anywhere on your home screen until apps start to jiggle.
    • Tap the dots at the bottom of the screen.
    • Uncheck the page containing the apps you want to hide.
    • Tap Done to save changes.

    How to Access Hidden Pages:

    • Long press the home screen, tap the dots again and recheck the hidden page to make it visible.

    Frequently Asked Questions (FAQs)

    Can hidden apps still send notifications?

    Yes, hidden apps can send notifications unless you disable them. Go to Settings > Notifications, select the app, and toggle off Allow Notifications.

    Are hidden apps secure from prying eyes?

    Hiding apps makes them less noticeable but not completely secure. Use a passcode, Face ID, or Touch ID to enhance privacy.

    How do I unhide apps?

    Unhide apps by reversing the method used:

    • For App Library: Drag the app back to the home screen.
    • For Screen Time: Adjust content restrictions in settings.
    • For hidden pages: Recheck the hidden home screen page.

    Can I hide pre-installed apps?

    Yes, you can hide built-in apps using the App Library or by disabling them in Screen Time > Allowed Apps.

    Are hidden apps searchable via Spotlight?

    Apps hidden via App Library or folders remain searchable unless you disable them in Siri & Search settings.

    What’s the best method to hide apps for parental control?

    Using screen Time is the most effective method for parental control, as it allows for restrictions based on age ratings or app categories.

    Final Thoughts

    Learning how to hide apps on your iPhone is a valuable skill for enhancing privacy, decluttering your home screen, and managing access for kids. With the step-by-step methods explained in this guide, you can choose the one that works best for your needs. For a more interactive approach, don’t forget to watch the tutorial on MobileTechJoint’s YouTube channel through the link below:

    By implementing these techniques, you can take full control of your iPhone and enjoy a more personalized user experience.

    See This Also:

    How to Set up Siri on any iPhone

    How to Enable Adaptive Charging on Google Pixel

    How I Turn on or Off Assistance Touch on my iPhone

  • How I Turn on or Off Assistance Touch on my iPhone

    How I Turn on or Off Assistance Touch on my iPhone

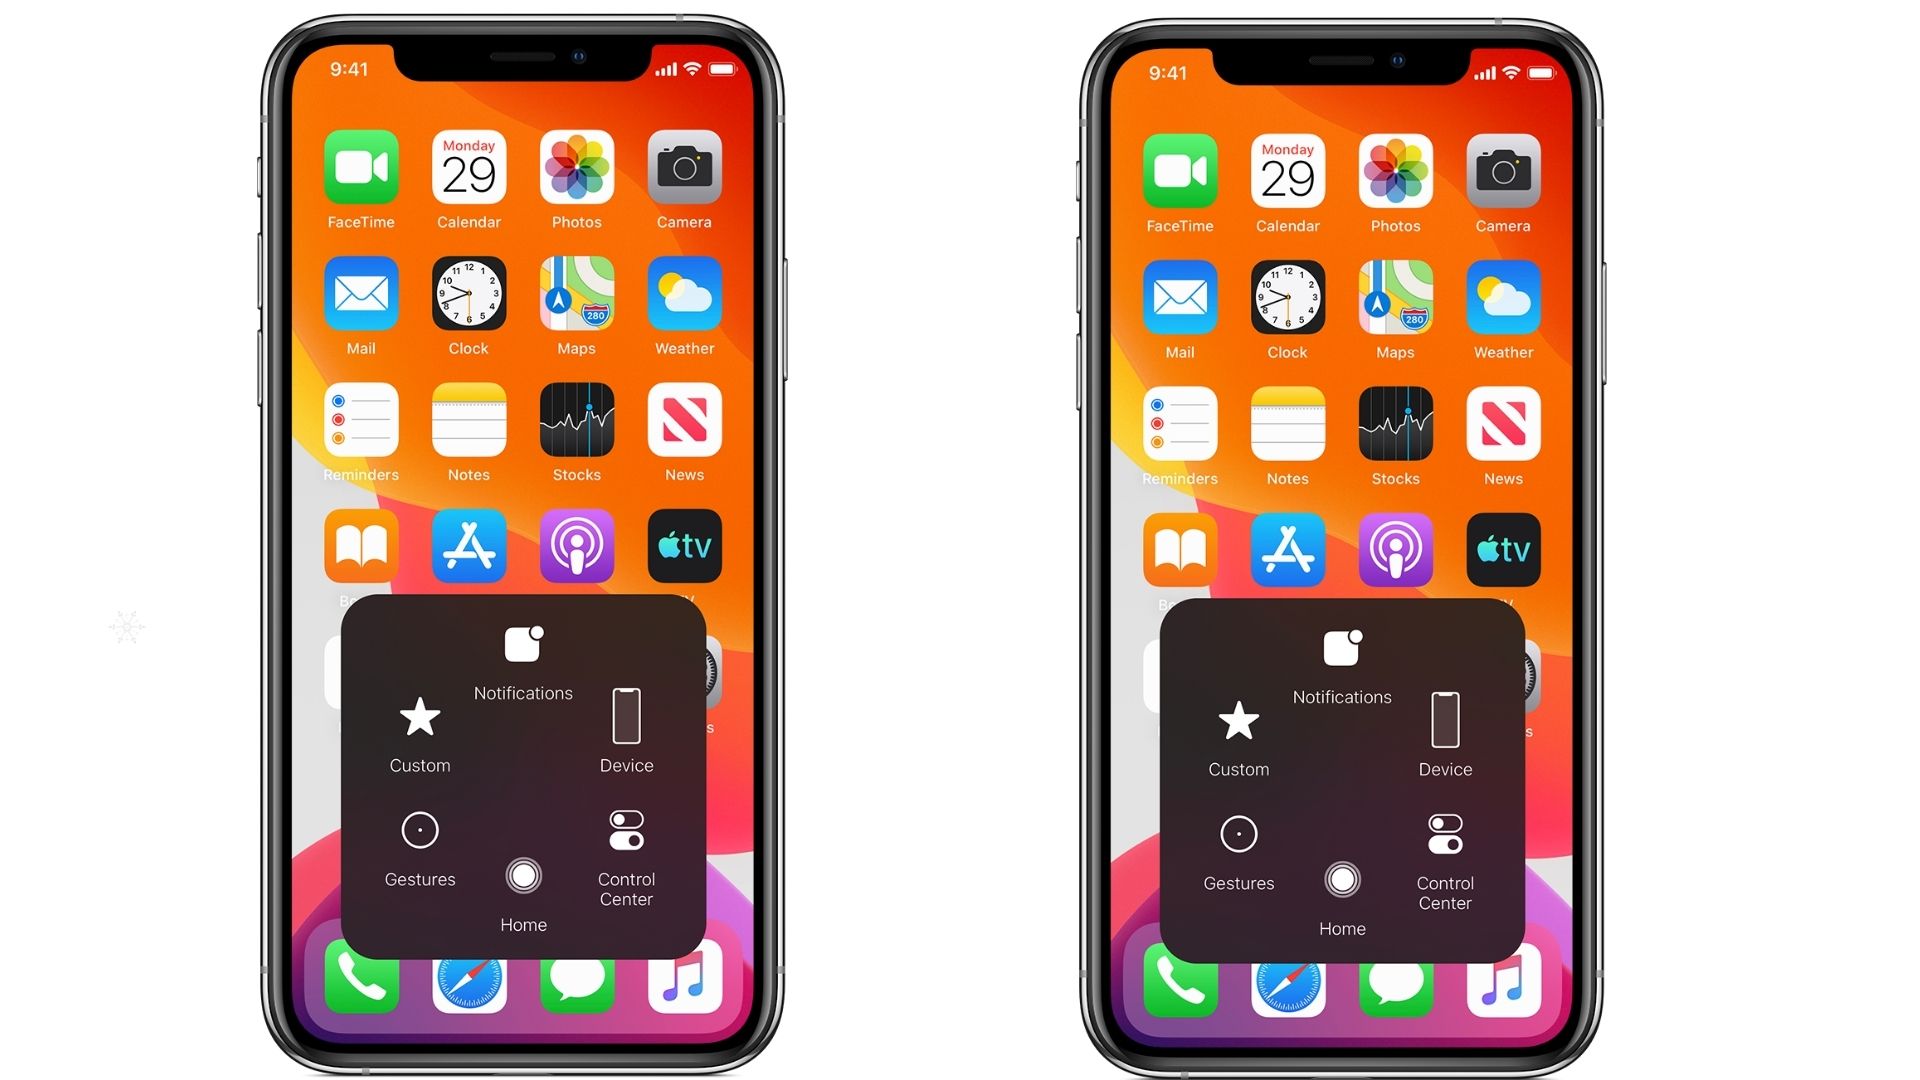
    If you’ve ever wondered how to turn on or off Assistive Touch on your iPhone, this article is for you. Assistive Touch is a helpful accessibility feature that provides on-screen controls for those with difficulty using physical buttons or gestures. Whether you want to enable or disable this feature, the process is straightforward.

    How I Turn on or Off Assistance Touch on my iPhone
    How I Turn on or Off Assistance Touch on my iPhone

    What Is Assistive Touch and Why Use It?

    Assistive Touch is an accessibility feature on iPhones and other Apple devices. It allows users to perform common tasks like taking screenshots, opening the control center, or activating Siri without using physical buttons. This feature is especially useful if:

    • Your iPhone’s physical buttons are broken or unresponsive.
    • You find it difficult to perform gestures like swiping or pinching.
    • You prefer on-screen shortcuts for convenience.

    Whether you want to turn it on or off, follow the steps below to customize your iPhone experience.

    How I Turn on or Off Assistance Touch on my iPhone

    Follow the steps indicated below:

    • Unlock your iPhone and locate the Settings app. The icon looks like a gear. Tap it to open.
    • In the Settings menu, scroll down until you see Accessibility. This section contains various features to help customize your iPhone for ease of use. Tap on it.
    • Within the Accessibility menu, you’ll find the Touch option under the Physical and Motor section. Tap on it to access more touch-related features.
    • On the Touch menu, look for Assistive Touch. It will have a toggle switch next to it. Tap this option to open the Assistive Touch settings.
    • To enable assistive touch, toggle the switch to the right. You’ll see a small, circular button appear on your screen.
    • To disable assistive touch, toggle the switch back to the left. The on-screen button will disappear.

    That’s it! You’ve successfully turned Assistive Touch on or off.

    Customizing Assistive Touch

    Once Assistive Touch is enabled, you can customize its features to suit your needs. Here’s how:

    Custom Actions

    You can assign specific functions to single taps, double taps, long presses, or 3D Touch. For example:

    • Single Tap: Open the Control Center.
    • Double-tap: Lock the screen.
    • Long Press: Open Siri.

    Top-Level Menu

    Assistive Touch has a customizable menu with default options like Home, Siri, and Device. You can add or remove functions or rearrange the icons.

    Steps to customize the menu:
    • Go to Settings > Accessibility > Touch > Assistive Touch.
    • Tap Customize Top Level Menu.
    • Use the + or buttons to add or remove actions.

    Adjust Idle Opacity

    You can control how transparent the Assistive Touch button becomes when not in use. Lower opacity makes it less distracting.

    Steps to adjust opacity:
    • In the Assistive Touch menu, look for Idle Opacity.
    • Use the slider to adjust the transparency level.

    Frequently Asked Questions (FAQs)

    What is the assistive Touch button, and how does it work?

    The Assistive Touch button is a virtual on-screen control that lets you perform tasks like taking screenshots, locking the screen, or adjusting volume without using physical buttons.

    How do I get rid of the assistive touch button?

    To remove the button, turn off assistive touch by going to Settings > Accessibility > Touch > Assistive Touch and toggling it off.

    Can I use Assistive Touch to replace broken buttons?

    Yes, Assistive Touch is an excellent alternative if your Home button, volume buttons, or power button is not working.

    Is Assistive Touch available on all iPhones?

    Assistive Touch is available on all iPhones running iOS, including older models. Ensure your device has the latest iOS update for the best functionality.

    How can I reset Assistive Touch to default settings?

    To reset, go to Settings > Accessibility > Touch > Assistive Touch > Customize Top Level Menu and select Reset.

    Can I change the size of the Assistive Touch button?

    While you cannot change its size, you can adjust its transparency using the Idle Opacity setting.

    How do I take a screenshot using Assistive Touch?

    Once assistive touch is enabled, tap the button, go to Device, and select More > Screenshot.

    Final Thoughts

    Enabling or disabling Assistive Touch on your iPhone is quick and easy. Whether you’re using it as an accessibility feature or to replace faulty buttons, it offers a practical solution for many tasks. Customize it to fit your preferences and make your iPhone experience smoother.

    For a visual tutorial, kindly click on the link below:


    where we’ve broken down every step into simple, easy-to-follow instructions, by understanding how to manage Assistive Touch, you can unlock your iPhone’s full potential and enjoy a more personalized experience.

    More Related Content:

    How to Share a Calendar on iPhone

     Connect Samsung Galaxy Watch 5 Pro to Wi-Fi

    How to Turn Off App Notification on iPhone 15 Pro

  • How to Enable Adaptive Charging on Google Pixel

    How to Enable Adaptive Charging on Google Pixel

    If you’re looking for a way to maximize your Google Pixel’s battery life, enabling adaptive charging on Google Pixel is one of the best steps you can take. This feature helps extend the lifespan of your phone’s battery by optimizing how it charges overnight.

    Adaptive Charging on Google Pixel
    Adaptive Charging on Google Pixel

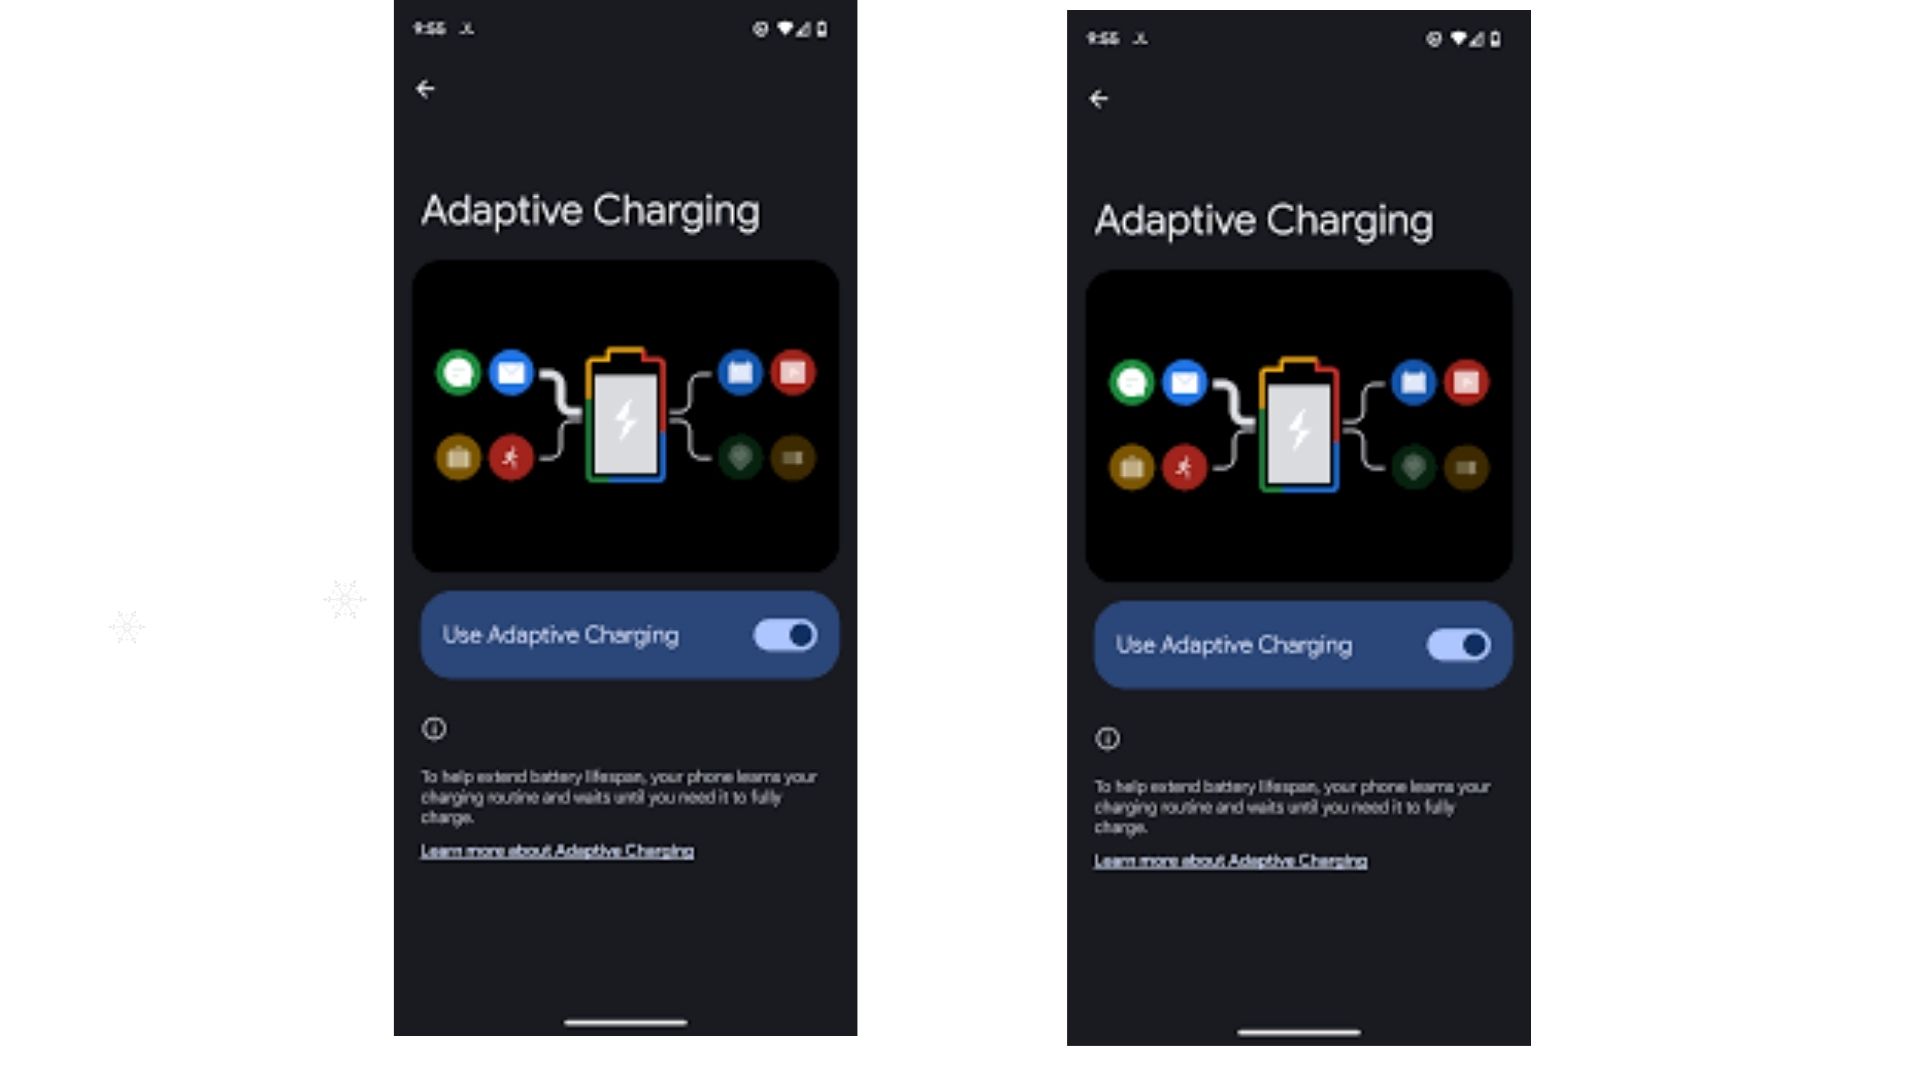
    With adaptive charging enabled, your Pixel learns your daily routine and charges intelligently, reaching 100% just before you wake up. This article explains how to enable Adaptive charging on Google Pixel in simple terms and ensures you’re making the most of this feature.

    What Is Adaptive Charging?

    Before diving into the steps, let’s understand what adaptive charging does and why it’s useful. Adaptive charging is a feature available on Pixel phones that slows down the charging process when your device is plugged in overnight. Instead of charging rapidly to 100%, it charges at a steady pace, aiming to reduce battery wear and overheating.

    Adaptive charging can help you keep your phone functioning well over time by preserving battery health and avoiding the need for expensive repairs or replacements.

    How to Enable Adaptive Charging on Google Pixel

    Here’s how you can turn on adaptive charging on your Google Pixel device:

    • Open the Settings app on your Google Pixel.
    • Scroll down and tap Battery.
    • Select adaptive preferences (sometimes labeled as adaptive charging).
    • Toggle the switch next to Adaptive Charging to turn it on.

    The Adaptive Charging feature works best when the phone has access to your daily alarm or wake-up time. To improve its accuracy, ensure you have set an alarm in the default Clock app.

    How to know if this feature is available on your Google pixel

    Adaptive charging is available on Google Pixel 4 and newer models running Android 12 or later. If your phone doesn’t support this feature, you might not see it in the settings. Ensure your device is updated to the latest software version:

    To check for updates on your device, follow these steps:

    • Open the Settings app on your device.
    • Scroll down and tap on System to access system-related options.
    • Within the System menu, look for and select System Update.

    Once in the System Update section, tap on the option to check for any available updates to ensure your device is running the latest software version.

    How to Know If Adaptive Charging Is Active

    Once Adaptive Charging is enabled, your Pixel will display a notification on the lock screen when it’s active. Look for a message that says, Adaptive Charging active. Full charge by (your alarm time).”

    If you don’t see this notification, ensure that:

    • Your phone is charging with an original or compatible charger.
    • You’ve set an alarm, or your typical wake-up time is consistent.
    • The feature is turned on in settings.

    Benefits of Adaptive Charging

    Enabling Adaptive Charging on your Google Pixel offers several advantages:

    • Extends Battery Lifespan: Reduces battery degradation over time.
    • Energy-Efficient Charging: Only charges as needed, saving energy.
    • Prevents Overheating: Slow charging helps keep your device cooler.
    • Convenient: Ensures your phone is fully charged and ready in the morning.

    Common Issues with adaptive charging and how to Troubleshoot

    Sometimes, users encounter problems with Adaptive Charging. Here are some tips to fix common issues:

    Feature Not Showing in Settings

    If you can’t find Adaptive Charging in the settings:

    • Ensure your phone is running the latest Android version.
    • Confirm that you have a compatible Google Pixel model.

    Notification Not Displayed

    If the notification doesn’t appear, check the following:

    • Use an original Google charger or a high-quality alternative.
    • Set an alarm or ensure your device has access to your daily routine.

    Adaptive Charging Doesn’t Work Consistently

    Make sure you’re plugging in your phone overnight for at least 4 hours and in an environment where your daily patterns are predictable.

    Frequently Asked Questions

    What is Adaptive Charging on Google Pixel?

    Adaptive Charging is a feature that optimizes the charging process to preserve your battery’s health by charging more slowly overnight and finishing just before you wake up.

    How do I enable Adaptive Charging?

    Go to Settings > Battery > Adaptive Preferences and toggle on Adaptive Charging. Ensure your phone is plugged in for at least 4 hours during your usual sleep hours.

    Does Adaptive Charging work on all Pixel phones?

    No, Adaptive Charging is available on Pixel 4 and newer models with Android 12 or later.

    Why is Adaptive Charging not working?

    Ensure your phone is plugged in overnight, using a compatible charger, and that you’ve set an alarm or have a consistent wake-up routine.

    Can Adaptive Charging be turned off?

    Yes, you can disable it by going to Settings > Battery > Adaptive Preferences and toggling off the feature.

    Does Adaptive Charging slow down regular charging?

    No, Adaptive Charging only slows down the charging process when it detects overnight charging. Regular charging remains unaffected.

    Is Adaptive Charging safe for my phone?

    Yes, it is designed to protect your battery and extend its lifespan, making it safer than standard charging methods over time.

    Final Thoughts

    Enabling Adaptive Charging on your Google Pixel is a simple yet powerful way to maintain your phone’s battery health and longevity. By following the steps outlined in this guide, you can make the most of this feature and ensure your device stays efficient for years to come.

    For more help, click on the link below for a detailed video guide, or refer back to this article for troubleshooting tips. Don’t forget to share this article with other Google Pixel users who might benefit from learning about Adaptive Charging!

    YouTube link:

    MORE RELATED CONTENT:

    I Tried the Google Pixelbook, and Its Display Is a Game-Changer for Creative Work

    Best Google Pixel 8 & 9 Phone Cases to Shop This Holiday

    How to Use Maps on Google Pixel Watch

    Google Pixel Buds Pro 2 Design and Comfort

  • How to Set up Siri on any iPhone

    How to Set up Siri on any iPhone

    Siri, Apple’s virtual assistant, can make your life much easier by performing tasks like sending messages, setting reminders, making calls, or even answering questions, all with voice commands. If you’re wondering how to set up Siri on any iPhone, this article will walk you through the entire process in simple, easy-to-follow steps.

    How to Setup Siri on any iPhone
    How to Setup Siri on any iPhone

    Whether you’re using an older iPhone model or the latest version, Siri can be set up in just a few minutes.

    What Is Siri and Why Should You Use It?

    Siri is Apple’s intelligent virtual assistant that allows you to interact with your iPhone using just your voice. Siri can:

    • Answer questions.
    • Send messages or make calls.
    • Set reminders, alarms, or timers.
    • Provide navigation instructions.
    • Control smart home devices.

    Setting up Siri enables hands-free convenience, making your iPhone even more useful in day-to-day life.

    How to Set up Siri on any iPhone

    Here’s a detailed guide to help you enable and customize Siri on your iPhone.

    Ensure Your iPhone Is Compatible

    Siri works on all modern iPhone models, from the iPhone 4S onward. Ensure that your iPhone is updated to the latest iOS version:

    • Go to Settings
    • Tap on General
    • Then select Software Update and check for updates.

    Activate Siri

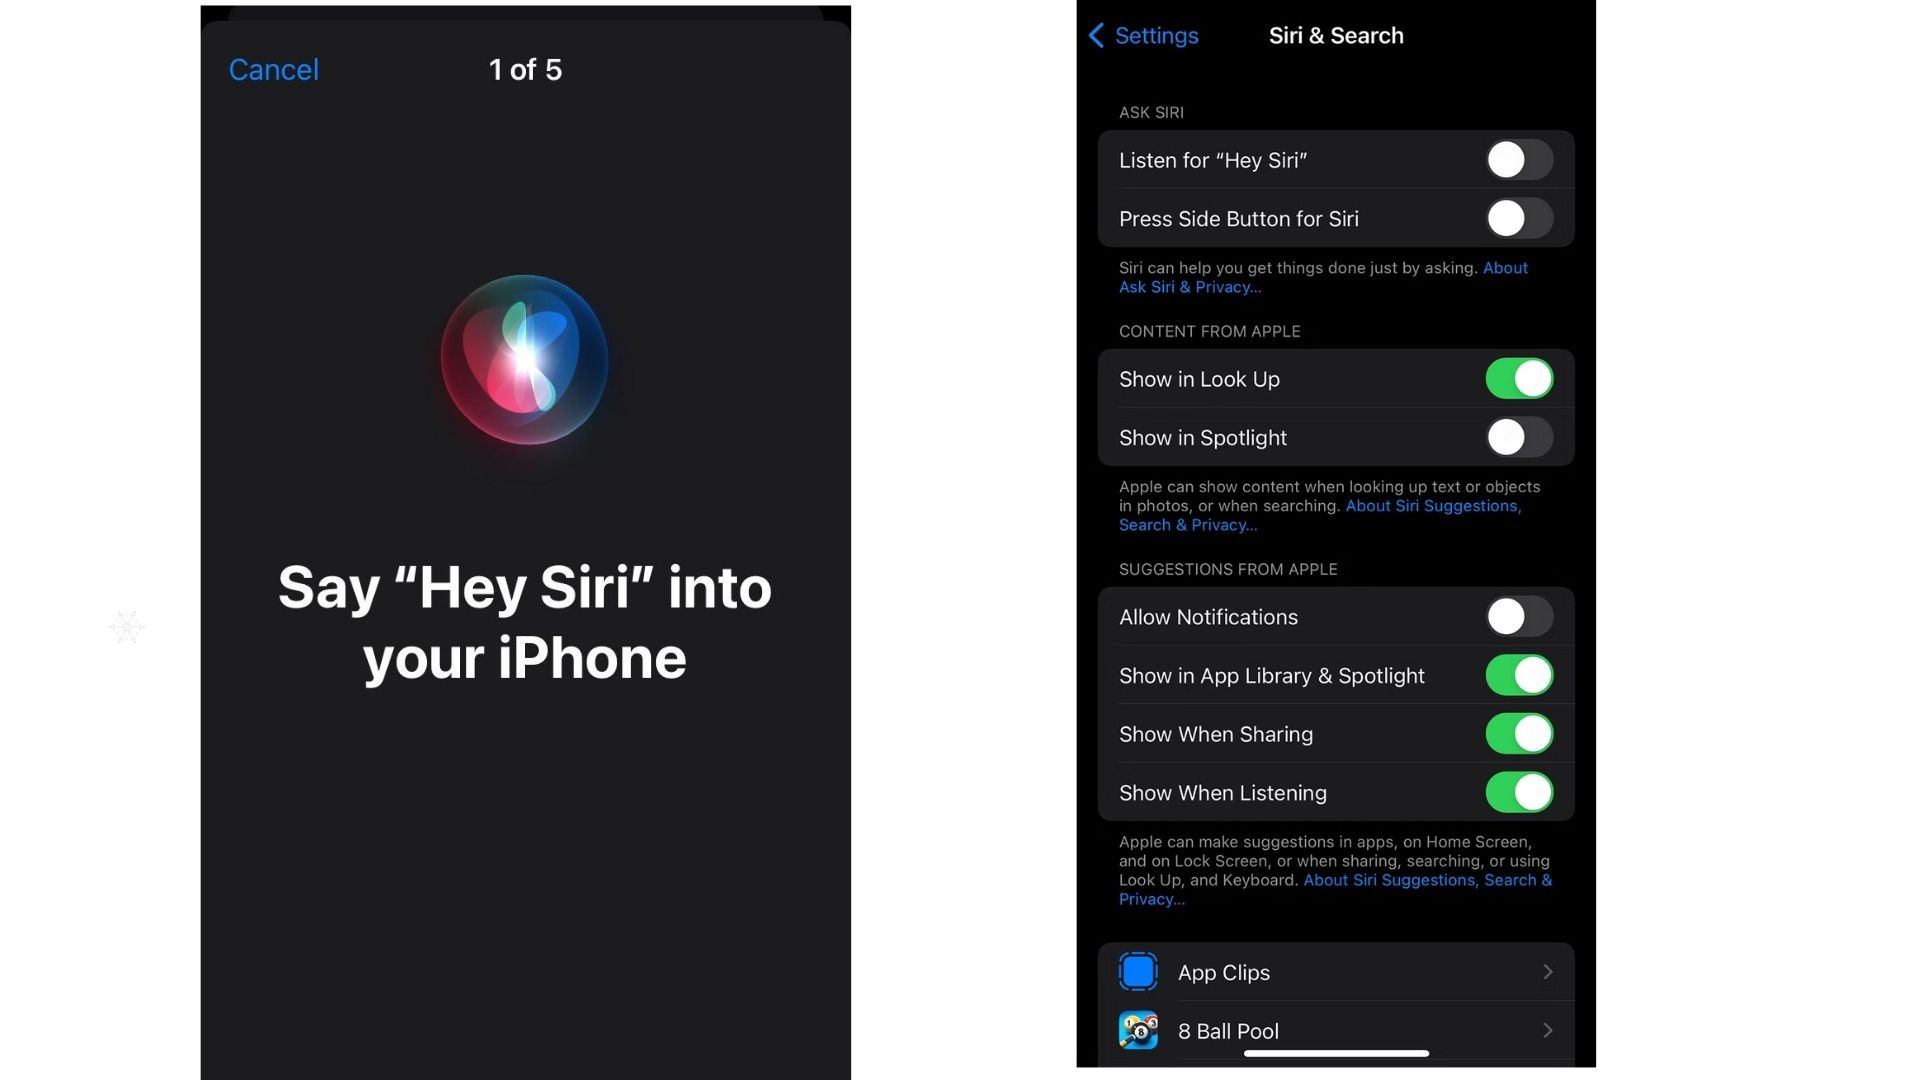
    • Go to Settings > Siri & Search.

    Turn on these options:

    • Listen for “Hey Siri”: Enables hands-free Siri.
    • Press the Side/Home Button for Siri: Allows manual activation.
    • Allow Siri When Locked: Lets you use Siri even when your phone is locked.

    Set Up “Hey Siri”

    Train Siri to recognize your voice:

    • Tap Continue when prompted.
    • Follow on-screen instructions, such as saying “What’s the weather like today?”

    Choose Siri’s Language and Voice

    • Go to Settings > Siri & Search > Language to select your language.
    • Tap Siri Voice to choose gender and accent.

     Enable Siri Suggestions

    In Settings > Siri & Search, turn on:

    • Suggestions in Search
    • Suggestions in Look-Up
    • Suggestions on Lock Screen

    Link Siri to Third-Party Apps

    • In Settings > Siri & Search, find your desired app.
    • Toggle Use with Siri to enable voice commands.

    Test Siri

    Activate Siri by saying “Hey Siri” or pressing the Side/Home button. Try commands like:

    • “Call Mom.”
    • “What’s the weather tomorrow?”
    • “Set an alarm for 7 AM.”

    And that’s it! Siri is ready to assist you.

    Troubleshooting Siri Setup Issues

    If you encounter problems while setting up Siri, here are some tips to resolve them:

    “Hey Siri” Not Responding

    • Ensure Listen for “Hey Siri” is toggled on in settings.
    • Re-train Siri by turning the feature off and on again.

    Siri Doesn’t Recognize My Voice

    • Make sure you’re in a quiet environment during setup.
    • Use clear, natural speech when training Siri.

    Siri Not Available

    If Siri isn’t available:

    • Check your internet connection. Siri requires WiFi or cellular data to work.
    • Confirm that Siri is enabled in Settings > Siri & Search.

    Siri Doesn’t Work with Third-Party Apps

    • Check if the app supports Siri integration.
    • Enable the Use of Siri for the specific app in settings.

    Watch the Video Tutorial on MobileTechJoint

    Customizing Siri for a Better Experience

    Once Siri is set up, you can further personalize it to suit your needs:

    Add Shortcuts

    The Shortcuts app allows you to create custom Siri commands for specific tasks.

    • Open the Shortcuts
    • Tap the + icon to create a new shortcut.
    • Assign a Siri phrase to trigger the shortcut.

    Control Smart Home Devices

    If you have smart home devices compatible with Apple HomeKit, you can control them using Siri.

    • Set up your devices in the home app.
    • Use commands like “Hey Siri, turn off the lights.”

    Enable Accessibility Features

    Siri can help users with disabilities by performing actions hands-free. Explore accessibility options under Settings > Accessibility > Siri.

    Frequently Asked Questions

    What is Siri?

    Siri is Apple’s virtual assistant that uses voice recognition to perform tasks like sending messages, setting alarms, and answering questions.

    How do I enable Siri on my iPhone?

    Go to Settings > Siri & Search, and toggle on Listen for “Hey Siri” and Press the Side/Home Button for Siri.

    Why is Siri not responding to “Hey Siri”?

    Ensure the feature is enabled in settings and re-train Siri in a quiet environment if needed.

    Can I change Siri’s voice?

    Yes, you can customize Siri’s voice by going to Settings > Siri & Search > Siri Voice. Choose from different genders and accents.

    Does Siri work without the internet?

    Some basic functions, like setting alarms or launching apps, may work offline. However, most features require an internet connection.

    Can Siri control third-party apps?

    Yes, Siri supports integration with many third-party apps. Enable Use with Siri for each app in Settings > Siri & Search.

    How do I disable Siri?

    You can turn off Siri by going to Settings > Siri & Search and toggling off Listen for “Hey Siri” and Press Side/Home Button for Siri.

    Is Siri secure?

    Siri is designed with privacy in mind. Voice data is anonymized, and you can manage what Siri learns about you in Settings > Siri & Search > Siri History.

    Final Thoughts

    Setting up Siri on your iPhone is a simple and rewarding process that enhances your phone’s functionality. From hands-free convenience to smarter app integrations, Siri is an invaluable tool for iPhone users. Follow the steps in this article to get started and customize Siri to suit your needs.

    For additional help, watch the comprehensive video tutorial on YouTube by clicking the link below:


    Don’t forget to share this guide with friends and family who might find it helpful!

    MORE RELATED CONTENT:

    How to Setup Siri on iPhone 14 Plus

    I Thought the iPhone 16 Was a Letdown at First

    When Will Apple Release iOS 18 for Your iPhone: Expected Release Date of iOS 18

    Is Apple making an iPhone 16 Ultra? Here is Everything We Know

  • How to Turn on or off Safe Mode on Samsung Phone

    How to Turn on or off Safe Mode on Samsung Phone

    In this article, we’ll guide you through how to turn on or off Safe Mode on a Samsung phone in simple steps. Safe Mode on Samsung phones is a helpful feature for diagnosing and troubleshooting software issues.

    Turn on or off Safe Mode on Samsung Phone
    Turn on or off Safe Mode on Samsung Phone

    It temporarily disables third-party apps and runs only the default system apps, making it easier to identify whether a problem originates from an app or the phone’s operating system.

    How to Turn on Safe Mode on a Samsung Phone

    The easiest way to enter Safe Mode is by restarting your device. Follow these steps to activate Safe Mode on your Samsung phone:

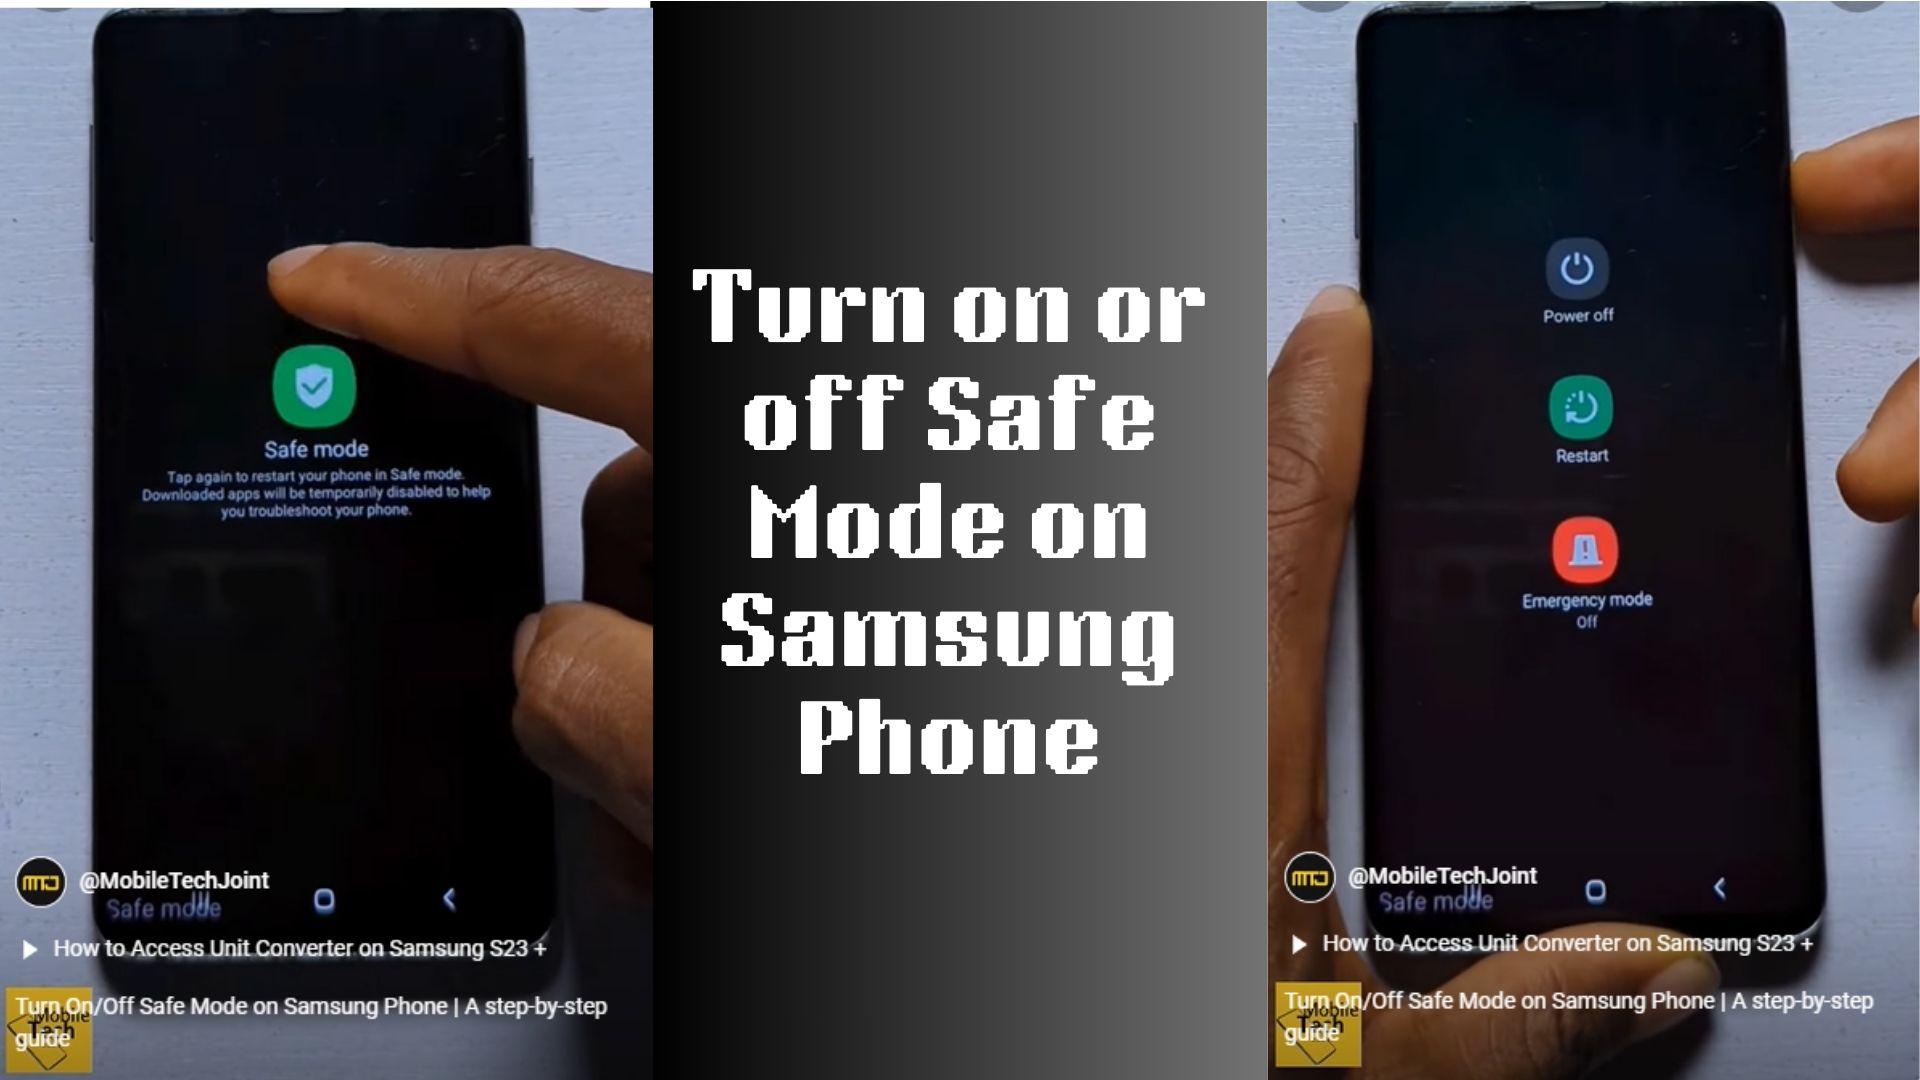
    • Hold down the Power button until the Power Options menu appears.
    • In the power menu, tap and hold the Power Off option until a Safe Mode prompt appears.
    • Tap Safe Mode. Your phone will restart and boot into Safe Mode.

    How to Turn Off Safe Mode on a Samsung Phone

    Once you’ve finished troubleshooting, you can exit Safe Mode and return to normal operation. Here’s how:

    • Simply restart your phone by pressing and holding the Power button and selecting Restart.
    • Your device will reboot in normal mode with all apps re-enabled.

    Why Use Safe Mode on Samsung Phones?

    You may need to enable Safe Mode for several reasons:

    • Troubleshooting App Issues: If your phone crashes or lags after installing a new app, Safe Mode can help determine if the app is causing the problem.
    • Improving Performance Temporarily: When your phone feels sluggish, running it in Safe Mode may speed it up by disabling unnecessary apps.
    • Uninstalling Problematic Apps: Safe Mode allows you to uninstall apps that you cannot remove in normal mode due to crashes or interference.

    Watch Our Video Tutorial on YouTube

    For a step-by-step video guide on enabling and disabling Safe Mode, click on the link below.

    https://www.youtube.com/shorts/ffSfRF_01MY

    Our detailed tutorial simplifies the process and ensures you can troubleshoot your Samsung phone like a pro. Don’t forget to subscribe for more helpful tech tips and tricks!

    Frequently Asked Questions 

    What happens in Safe Mode?

    Safe Mode disables all third-party apps and services, allowing the phone to run only its essential software. It’s used for troubleshooting and diagnosing app-related issues.

    How do I know if my phone is in Safe Mode?

    When your Samsung phone is in Safe Mode, you’ll see the words “Safe Mode” in the lower-left corner of the screen.

    Can I use apps in Safe Mode?

    You can only use pre-installed system apps in Safe Mode. Third-party apps will be disabled.

    Will Safe Mode delete my data?

    No, Safe Mode does not delete any data, apps, or settings. It temporarily disables third-party apps until you exit Safe Mode.

    Why can’t I exit Safe Mode?

    If your phone keeps restarting in Safe Mode, there might be a persistent issue, such as a malfunctioning app or software glitch. Try uninstalling recently installed apps or performing a factory reset if necessary.

    Conclusion

    Safe Mode is an essential tool for diagnosing and fixing software issues on Samsung phones. Knowing how to turn on or off Safe Mode allows you to identify and resolve problems quickly. Whether you’re uninstalling a problematic app or troubleshooting performance issues, Safe Mode simplifies the process.

    For additional guidance, be sure to watch the tutorial on our MobileTechJoint YouTube channel. With these steps, you’ll have full control over Safe Mode on your Samsung phone. Stay tuned to MobileTechJoint for more expert tech tips!

    CHECK THESE OUT:

    Camera Maintenance Tips you Need to Know

    How to Connect Samsung Galaxy Watch 5 Pro to Wi-Fi

    Ways to Share a Calendar on iPhone

    How to Mirror your Phone Screen to TV

  • How to Turn On or Off Location on iPhone

    How to Turn On or Off Location on iPhone

    Managing your iPhone’s location settings is essential for convenience and privacy. Whether you’re sharing your location with friends, using GPS for navigation, or limiting apps’ access to your whereabouts, knowing how to turn on or off location on iPhone is a vital skill. In this article, we’ll walk you through step-by-step instructions to adjust your location settings easily.

    Turn On or Off Location on iPhone
    Turn On or Off Location on iPhone

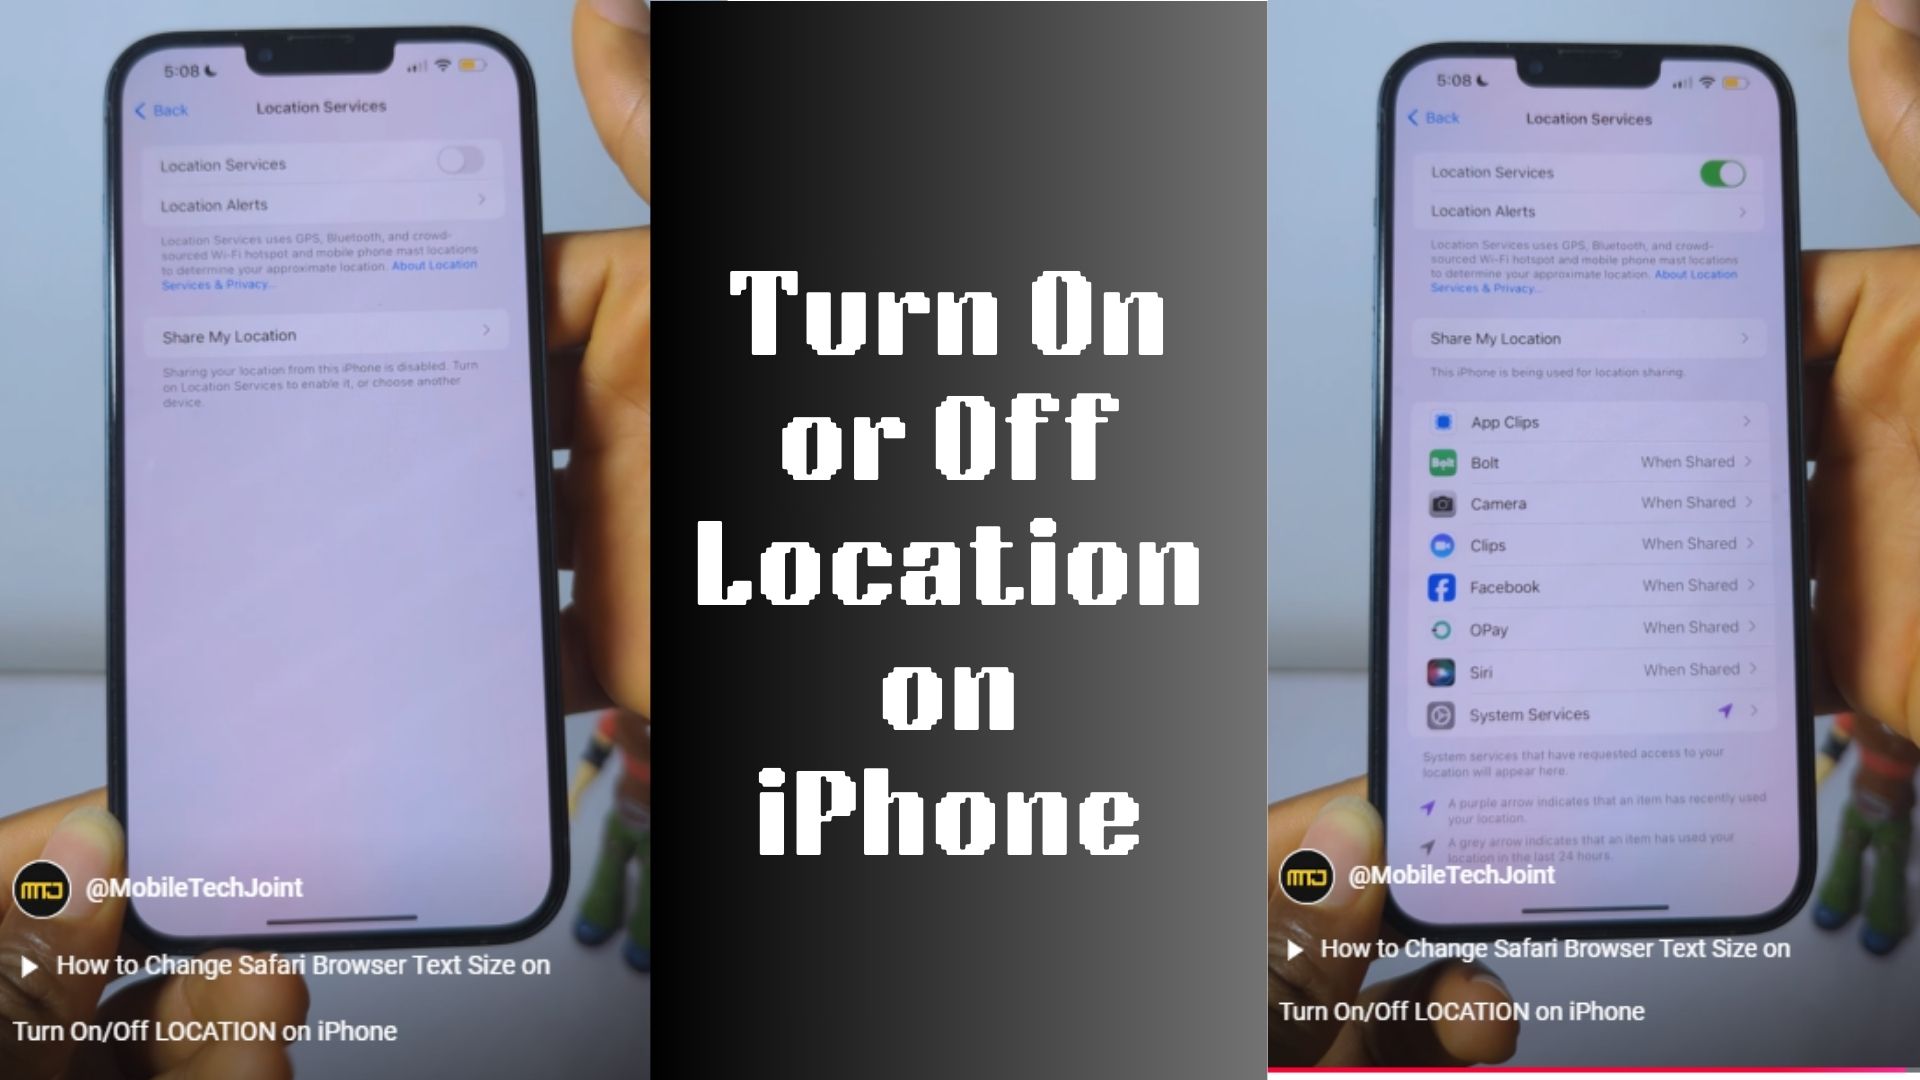
    Turning on location services ensures apps that rely on GPS, such as Maps or ride-hailing services, function correctly. Here’s how you can enable it:

    • Unlock your iPhone and locate the Settings app. It’s the one with a gear icon.
    • Scroll down and tap on Privacy & Security.
    • Tap on Location Services at the top of the Privacy settings.
    • To turn the location on, flip the toggle switch at the top of the screen to green. This enables location services for your device.

    If you followed the detailed steps above, you have successfully turned on the location on your iPhone.

    How to Turn Off Location on iPhone

    If you’re concerned about privacy or want to conserve battery life, turning off location services is a quick process. Follow these steps:

    • Open the Settings app on your iPhone.
    • Scroll down and select Privacy & Security.
    • Tap Location Services.
    • Turn off location services by flipping the toggle to gray. This disables location services for all apps and system functions.

    Note: Some services like Find My iPhone will remain active even if location services are turned off. To disable these, navigate to Find My in settings.

    Why Manage Your iPhone’s Location Settings?

    Location settings on your iPhone allow apps and services to provide tailored experiences, such as real-time navigation, localized weather updates, or location-based reminders. However, leaving location services on all the time can drain your battery and potentially expose your private information. Managing these settings helps balance functionality and privacy.

    Adjusting Location Settings for Specific Apps

    If you don’t want to completely turn off location services, you can customize settings for individual apps. For example:

    • Follow steps 1–3 above to reach the Location Services menu.
    • Scroll through the list of apps and select the one you want to manage.
    • Choose an access level: Never, Ask Next Time, While Using the App, or Always.

    This granular control lets you strike a balance between functionality and privacy.

    Watch Our Video Tutorial on Youtube

    For a visual tutorial on how to manage location settings, click the link below:
    Our step-by-step tutorial will guide you through enabling or disabling location services on your iPhone with ease. Subscribe for more tech tips and tricks for iPhone users!

    FAQs About iPhone Location Settings

    Why can’t I turn off location services for some apps?

    Some apps, like Find My iPhone, require location services to function. These settings are critical for features like device recovery and cannot be fully disabled without turning off the service.

    How do I enable precise location for an app?

    Go to Settings > Privacy & Security > Location Services, select the app, and toggle on Precise Location.

    Will turning off location services affect app functionality?

    Yes, some apps may not work as intended without location access. For instance, navigation apps need GPS to provide accurate directions.

    Can I temporarily turn off location services?

    Yes, you can toggle off location services and turn them back on whenever needed. Use the steps outlined above to enable or disable them quickly.

    How do I check which apps are using my location?

    When location services are active, a small arrow icon appears in the status bar. You can also review location usage by going to Settings > Privacy & Security > Location Services.

    CHECK THESE OUT:

    How to Cast Your Phone to TV

    6 Ways to Cast From Phone to TV Without Hassle

    How to Sync Gimbals with Smartphones

    Top Tricks for Shooting Cinematic Videos

  • Wireless Mic with Noise Cancellation for Cameras

    Wireless Mic with Noise Cancellation for Cameras

    In today’s content-creation environment, having a wireless mic with noise cancellation for cameras is a game-changer. Whether you’re a vlogger, filmmaker, or podcaster, capturing clear, crisp audio can make or break your project.

    Wireless Mic with Noise cancellation for Cameras
    Wireless Mic with Noise cancellation for Cameras

    These mics eliminate background noise, allowing your voice or desired sound to shine effortlessly. In this article, we’ll dive into the essentials of wireless microphones, explore the benefits of noise cancellation, and review the best options for your camera setup.

    Wireless Mic with Noise Cancellation for Cameras

    Audio quality is just as important as video quality when producing high-quality content. Wireless mics with noise cancellation offer:

    • Freedom of Movement: No cords mean you can move freely during your recording without worrying about getting tangled.
    • Noise-Free Clarity: Advanced noise cancellation technology eliminates unwanted background sounds, making your recordings professional-grade.
    • Versatility: These mics are compatible with various camera setups, whether you’re shooting outdoors or indoors.
    • Convenience: Compact and easy to use, wireless mics integrate seamlessly into your workflow.

    Important Features of Wireless Mics with Noise Cancellation

    When selecting the best wireless mic for your camera, consider the following essential features:

    Noise Cancellation Technology

    This feature is crucial for filtering background noise, such as wind, traffic, or crowd chatter. Look for microphones with active noise reduction or digital signal processing (DSP) capabilities.

    Range and Connectivity

    A reliable wireless mic should offer a good range, typically up to 100 meters, depending on your needs. Ensure the device uses a stable connection, such as Bluetooth or UHF transmission.

    Battery Life

    Since wireless mics are battery-powered, a long-lasting battery is essential for extended shoots.

    Compatibility

    Ensure the microphone is compatible with your camera model. Some mics require adapters, while others are plug-and-play.

    Durability and Portability

    Look for lightweight and durable designs, especially if you frequently shoot on location.

    Top Benefits of Noise Cancellation in Wireless Mics

    • Professional-Grade Audio: Noise cancellation ensures your audience hears every word.
    • Time Efficiency: Less background noise means less time spent editing your audio in post-production.
    • Enhanced Focus: Filters out distractions, letting your subject’s voice stand out.
    • Versatility in Environments: Ideal for shooting in noisy places like city streets or windy beaches.

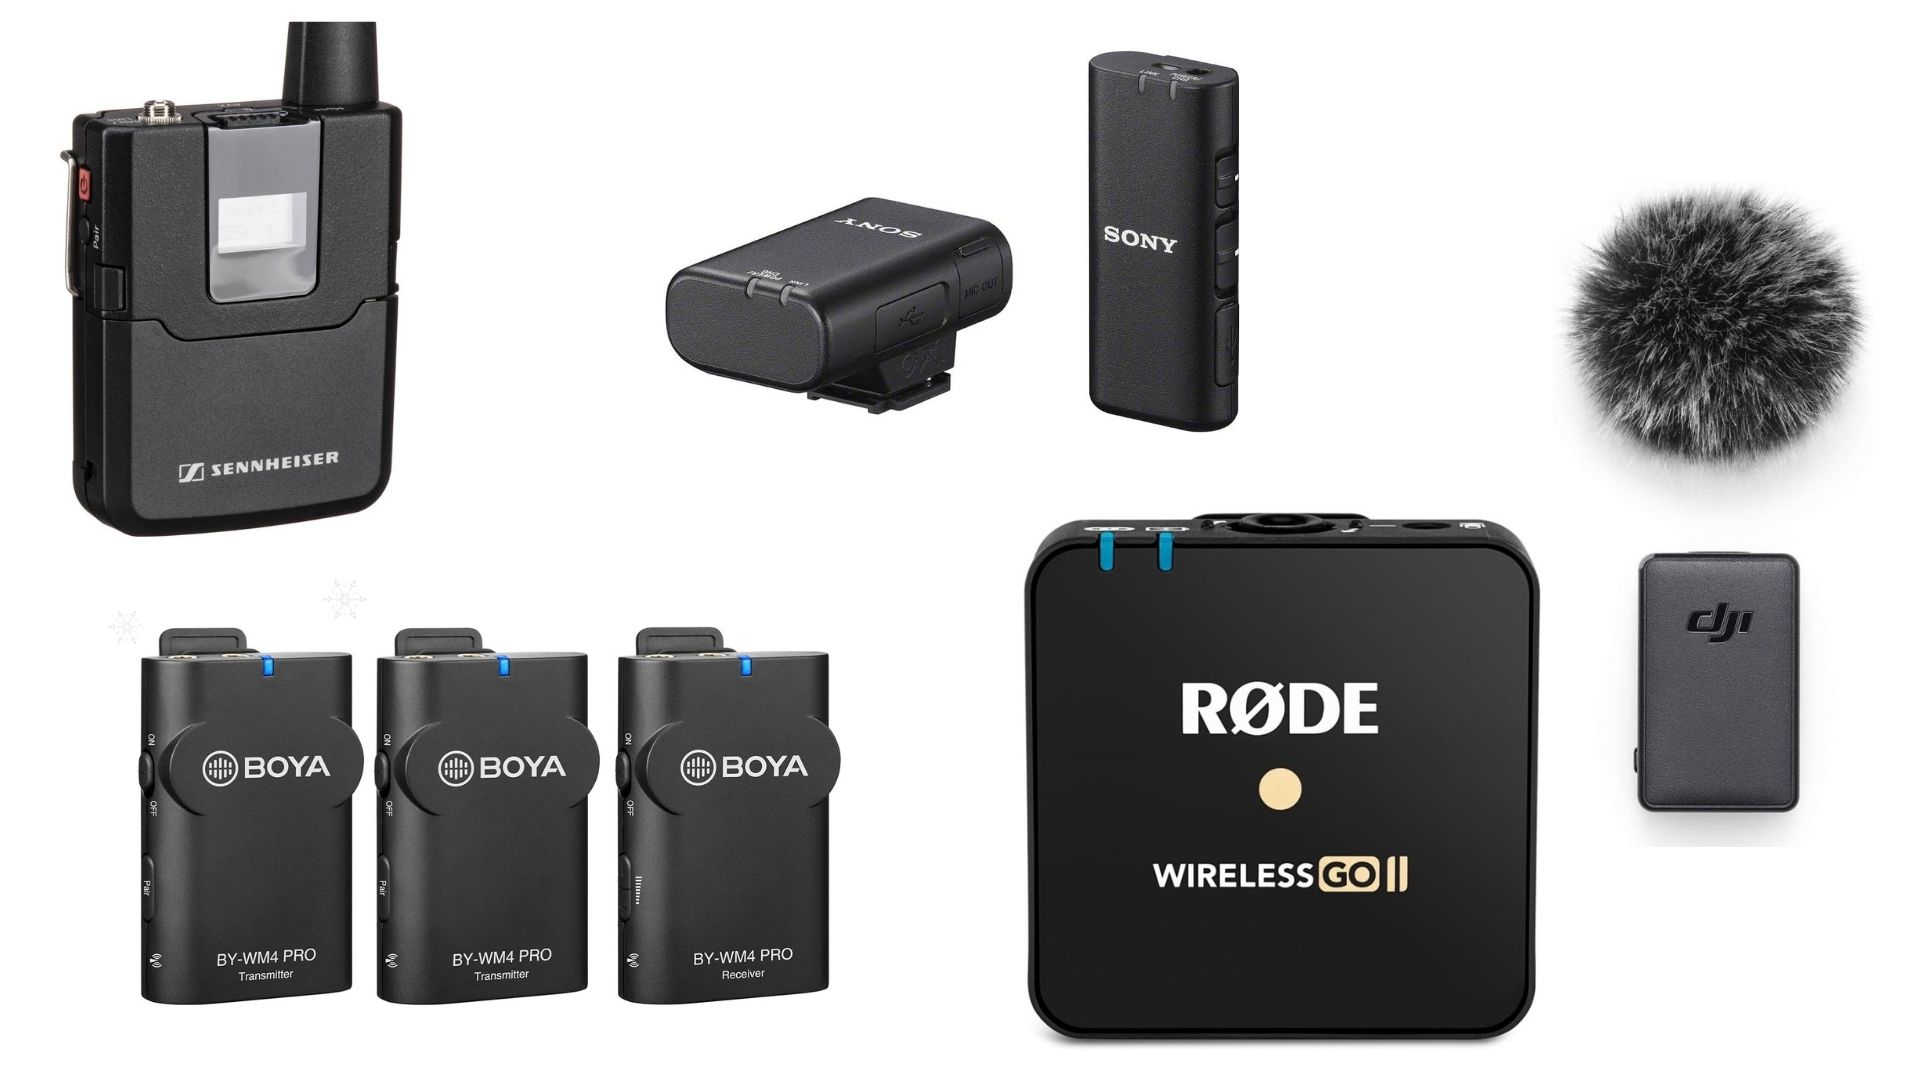
    Top 5 Wireless Mics with Noise Cancellation for Cameras

    RØDE Wireless GO II

    • Features: dual-channel recording, compact design, and exceptional noise cancellation.
    • Range: Up to 200 meters.
    • Battery Life: 7 hours.
    • Why Choose It: Perfect for vloggers and content creators who need portable, high-quality audio.

    CLICK HERE TO SHOP FROM AMAZON

    Sennheiser AVX Digital Wireless Microphone System

    • Features: Plug-and-play design, ultra-low latency, and adaptive noise suppression.
    • Range: 100 meters.
    • Battery Life: 15 hours.
    • Why Choose It: A great choice for professional filmmakers and interviewers.

    CLICK HERE TO SHOP FROM AMAZON

    DJI Mic

    • Features: High-fidelity audio, dual-transmitter design, and built-in noise cancellation.
    • Range: 250 meters.
    • Battery Life: 15 hours with charging case.
    • Why Choose It: Ideal for outdoor shoots and long-distance recording.

    CLICK HERE TO SHOP FROM AMAZON

    Boya BY-WM4 Pro-K2

    • Features: lightweight design, affordable price, and decent noise reduction.
    • Range: 60 meters.
    • Battery Life: 5 hours.
    • Why Choose It: A budget-friendly option for beginners.

    CLICK HERE TO BUY FROM AMAZON

    Sony ECM-W2BT

    • Features: Bluetooth connection, clear noise isolation, and multi-interface support.
    • Range: 200 meters.
    • Battery Life: 9 hours.
    • Why Choose It: Great for hybrid camera setups with excellent noise suppression.

    CLICK HERE TO SHOP FROM AMAZON

    How to Choose the Best Wireless Mic with Noise Cancellation

    When selecting the perfect mic, ask yourself the following questions:

    What is Your Budget?

    Wireless mics range from affordable to premium. Set a budget and look for the best value within it.

    Where Will You Be Shooting?

    For outdoor shoots, ensure the mic has wind noise suppression. For indoor settings, focus on clarity and range.

    Do You Need Multi-Channel Recording?

    If you’re recording interviews or multiple speakers, choose a mic with dual-channel capabilities.

    How Important is Battery Life?

    For long shoots, invest in a mic with extended battery life or a charging case.

    What Camera Are You Using?

    Check for compatibility and whether you need additional adapters.

    Tips for Using Wireless Mics with Noise Cancellation

    • Test Your Mic Before Shooting: Always check for audio quality and connection stability.
    • Position the mic correctly: clip it close to the speaker’s mouth for optimal sound capture.
    • Keep Spare Batteries or a Charger Handy: Ensure your mic doesn’t die mid-shoot.
    • Adjust Noise Cancellation Settings: Fine-tune settings based on your environment.
    • Invest in Accessories: Windshields, additional receivers, or backup transmitters can improve your setup.

    Frequently Asked Questions

    Do wireless mics work with all cameras?

    Not all wireless mics are universally compatible. Check the manufacturer’s specifications for compatibility with your camera model.

    How much do wireless mics cost?

    Prices vary widely, from $50 for entry-level models to $500+ for premium options.

    Is noise cancellation worth it?

    Absolutely! Noise cancellation significantly enhances audio quality, especially in noisy environments.

    Can I use a wireless mic with a smartphone?

    Yes, many wireless mics are compatible with smartphones using the right adapters.

    What’s the average battery life?

    Most wireless mics offer between 5 and 15 hours of battery life, depending on usage.

    Conclusion

    Investing in a wireless mic with noise cancellation for cameras is one of the smartest moves for content creators and professionals. The combination of freedom, convenience, and pristine audio quality makes these devices invaluable for any recording scenario. From affordable options for beginners to premium models for professionals, there’s a wireless mic for everyone.

    With noise cancellation, you can focus on creating content without worrying about background distractions. Whether you’re shooting a vlog, documentary, or live stream, choosing the right mic can elevate your audio game to new heights.

    CHECK THESE OUT:

    Interested in a Top Rated Speedlight for Camera to Illuminate Your Shots? Then Check…

    High-Performance External Flash for Canon Camera

    Exclusive Black Friday Deals on Premium Drones on Amazon

    Amazon Black Friday Deals on Prime Lens

  • Interested in a Top Rated Speedlight for Camera to Illuminate Your Shots? Then Check These Out!

    Interested in a Top Rated Speedlight for Camera to Illuminate Your Shots? Then Check These Out!

    If you want to improve your photography and create beautifully lit images, investing in a speedlight for camera is a great idea. A speedlight, also known as a flashgun, is an external flash unit that offers more power, flexibility, and control than the built-in flash on most cameras.

    Interested in a Top-Rated Speedlight for Camera to Illuminate Your Shots? Then Check These Out!
    Speedlight for Camera

    It can make a huge difference, especially when shooting in low light or trying to add creative effects to your photos. This article will explore everything you need to know about speedlights, including their features, benefits, and how to choose the right one for your camera.

    What Is a Speedlight?

    A Speedlight is a versatile, portable flash unit powered by batteries that can easily be mounted onto your camera’s hot shoe or used off-camera for enhanced creative lighting. In contrast to the built-in flash found in most cameras, a Speedlight provides significantly more illumination strength, allowing photographers to capture clearer images in low-light conditions.

    Additionally, speedlights come with a variety of customization features, such as adjustable power settings, zoom functionality, and the ability to modify light direction. This greater level of control enables photographers to achieve professional-quality lighting, manipulate shadows, and create dynamic effects, making the speedlight an essential tool for both amateur and professional photographers seeking to elevate their work.

    Key Features of a Speedlight:

    • Adjustable Power Output: This lets you control the intensity of the flash.
    • Bounce and Swivel Head: Allows you to direct the flash to bounce light off surfaces for softer effects.
    • High-Speed Sync (HSS): Enables flash use at higher shutter speeds, perfect for freezing motion or shooting in bright light.
    • Zoom Head: Adjust the flash’s spread to match your lens’s focal length.
    • Wireless Functionality: Many speedlights can be triggered remotely for off-camera use.

    Benefits of Using a Speedlight for Camera

    Improved Lighting Control

    With a speedlight, you can adjust the intensity, direction, and quality of the light, ensuring your subject is perfectly lit.

    Versatility

    Speedlights are versatile tools that can be used for portraits, product photography, events, and more.

    Creative Flexibility

    They allow you to experiment with techniques like bounce, fill, and off-camera flash for unique effects.

    Greater Power

    Speedlights have more power than built-in flashes, allowing you to illuminate subjects further away or in challenging conditions.

    Compact and Portable

    Speedlights are small and lightweight, making them easy to carry and use on location.

    Types of Speedlights

    On-Camera Speedlights

    These are mounted directly onto your camera’s hot shoe and are ideal for quick setups like event photography.

    Off-Camera Speedlights

    Used away from the camera, these are triggered wirelessly or with a cable for more creative lighting options.

    Dedicated Speedlights

    Designed specifically for certain camera brands, these speedlights integrate seamlessly with the camera’s metering system for better performance.

    Universal Speedlights

    Compatible with multiple camera brands, these are more affordable options for photographers who own different cameras.

    How to Choose the Best Speedlight for Your Camera

    Compatibility

    Ensure the Speedlight is compatible with your camera brand and model. For example, Canon and Nikon cameras use TTL systems specific to their brands.

    Guide Number (GN)

    The guide number measures the flash’s power. A higher GN means the flash can illuminate subjects further away.

    Recycle Time

    This refers to the time the flash takes to recharge between bursts. Faster recycle times are better for action or event photography.

    Flash Modes

    Look for speedlights with TTL (Through-The-Lens) and manual modes to suit different shooting conditions.

    Build Quality

    Choose a speedlight that is durable and, if needed, weather-resistant for outdoor use.

    Price

    Speedlights range in price from budget-friendly models to high-end options with advanced features.

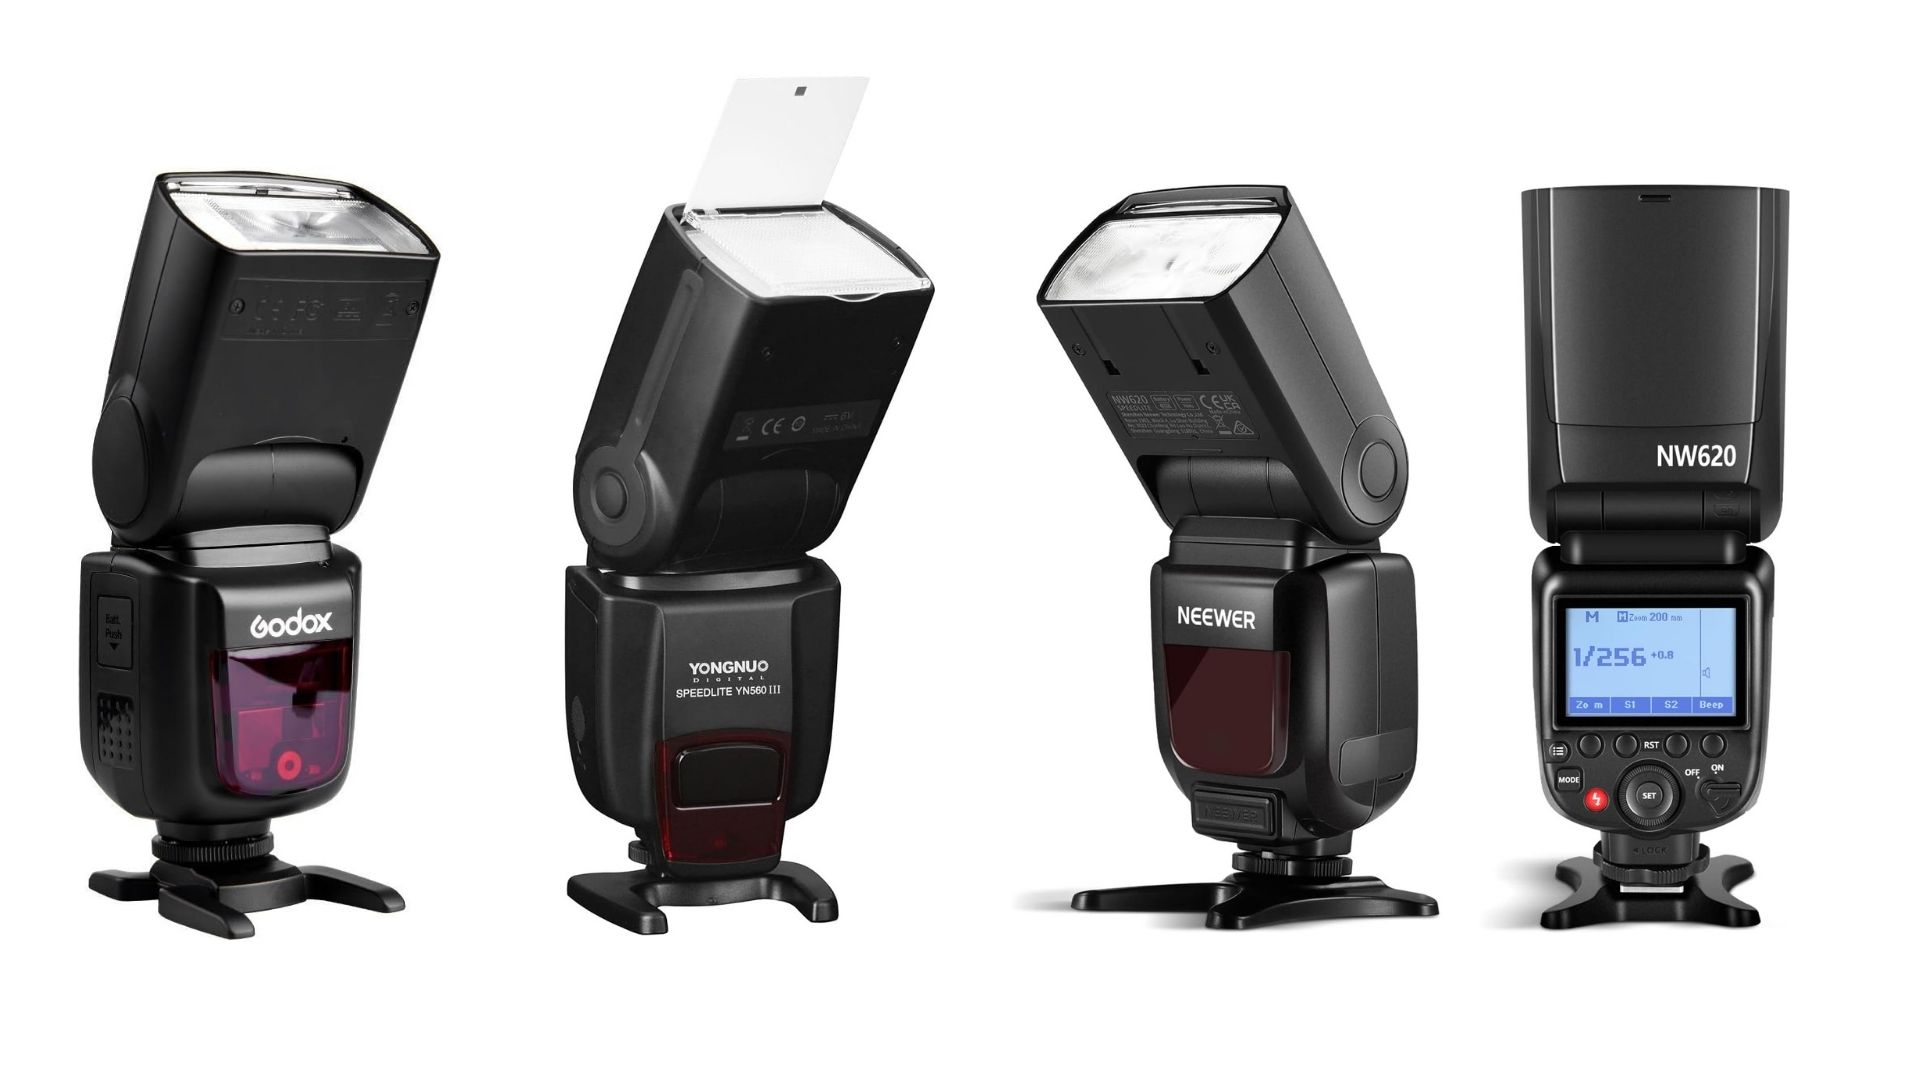
    Top Speedlights for Cameras

    Canon Speedlite 430EX III-RT

    • Features: Compact, wireless capability, and high-speed sync.
    • Guide Number: 43m.
    • Best For: Intermediate photographers.

    Nikon SB-700 AF Speedlight

    • Features: Versatile flash head, TTL compatibility, and user-friendly controls.
    • Guide Number: 38m.
    • Best For: Nikon users seeking reliable performance.

    Godox V1

    • Features: Round head design, TTL support, and rechargeable battery.
    • Guide Number: 76m.
    • Best For: Professional photographers.

    Yongnuo YN560 IV

    • Features: Manual control, wireless receiver, and excellent value for money.
    • Guide Number: 58m.
    • Best For: Budget-conscious photographers.

    Sony HVL-F60RM

    • Features: High-speed sync, LED light for video, and robust build quality.
    • Guide Number: 60m.
    • Best For: Sony camera users.

    Creative Techniques with Speedlights

    Bounce Flash

    Aim the flash at a ceiling or wall to soften the light and reduce harsh shadows.

    Fill Flash

    Use the speedlight to brighten shadows in outdoor portraits or backlit scenes.

    Off-Camera Flash

    Place the speedlight away from the camera to create dramatic lighting effects.

    Flash Gels

    Attach colored gels to the Speedlight to add mood or correct the color temperature.

    Rear Curtain Sync

    Use this technique to capture motion trails with the flash firing at the end of the exposure.

    Common Questions About Speedlights

    Do I need a speedlight for my camera?

    A Speedlight is a valuable tool for photographers who want better lighting control, improved image quality, and creative flexibility.

    Are third-party speedlights good?

    Yes, brands like Godox and Yongnuo offer excellent third-party speedlights at affordable prices.

    What is the difference between TTL and manual flash?

    TTL automatically adjusts the flash output based on the camera’s metering, while manual flash requires you to set the output manually.

    Can I use a speedlight off-camera?

    Yes, many speedlights can be triggered wirelessly or with a sync cable for off-camera use.

    How much does a speedlight cost?

    Prices vary widely, from $50 for entry-level models to over $600 for professional-grade units.

    Conclusion

    A Speedlight for your camera is an essential accessory for photographers who want to take their work to the next level. It provides superior lighting control, versatility, and creative possibilities compared to a built-in flash.

    When choosing a speedlight, consider factors like compatibility, guide number, and features to ensure it meets your needs. Whether you’re a beginner exploring flash photography or a professional capturing dynamic shot, a Speedlight is a worthy investment.

    Experiment with techniques like bounce flash, fill flash, and off-camera setups to unlock your creativity and enhance your photography. With the right speedlight, you’ll be able to capture stunning images in any lighting condition.

    CHECK THESE OUT:

    Best Camera Gear 2024: Top Picks for Aspiring and Professional Photographers

    Black Friday Deals on Action Cameras: Capture Your Adventures for Less

    Camera Maintenance Tips you Need to Know

    Advanced Camera Techniques Every Photographer Should Know

  • High Performance External Flash for Canon Camera

    High Performance External Flash for Canon Camera

    Photography is an art that often demands the perfect balance of light, especially when shooting in challenging lighting conditions. Using an external flash for Canon cameras can significantly enhance the quality of your photos by providing controlled and reliable lighting.

    High-Performance External Flash for Canon Camera
    External Flash for Canon Camera

    Whether you’re a professional photographer or an enthusiast looking to take your skills to the next level, understanding external flashes is essential. This article explores everything you need to know about external flashes for Canon cameras, from their benefits and features to how to choose the best one for your needs.

    What Is an External Flash?

    An external flash, also known as a Speedlight or Speedlite, is a detachable light source that you can mount on your camera or use off-camera. Unlike the built-in flash on your Canon camera, an external flash offers greater power, flexibility, and customization.

    Key Features of an External Flash:

    • Adjustable brightness: allows you to control the intensity of the light.
    • Directional Lighting: Can be tilted or rotated to bounce light off walls or ceilings for a softer effect.
    • High-Speed Sync: Enables flash use at high shutter speeds, perfect for freezing motion.
    • Wireless Functionality: Many models can be triggered remotely for off-camera use.

    Why Use an External Flash for Canon Cameras?

    Better Lighting Control

    With an external flash, you can adjust the intensity and direction of the light, ensuring the subject is well-lit without harsh shadows or overexposure.

    Enhanced Image Quality

    Proper lighting minimizes noise and improves the clarity and sharpness of your photos, especially in low-light conditions.

    Creative Flexibility

    External flashes let you experiment with bounce flash, fill flash, and other techniques to achieve creative effects.

    Increased Power

    External units have more power than built-in flashes, allowing you to illuminate subjects at greater distances.

    Compatibility with Accessories

    Many external flashes can be paired with diffusers, softboxes, and gels to modify the light according to your needs.

    Types of External Flashes for Canon Cameras

    On-Camera Flashes

    These are mounted directly on the camera’s hot shoe and are ideal for events like weddings or parties where mobility is crucial.

    Off-Camera Flashes

    These can be triggered wirelessly or with a cable and are great for studio photography or creative lighting setups.

    Ring Flashes

    Designed for macro photography, these flashes attach around the camera lens, providing even lighting for close-up shots.

    Features to Consider When Buying an External Flash for Canon Cameras

    Guide Number (GN)

    The guide number indicates the power of the flash. A higher GN means more powerful illumination. A GN of 30-60 is sufficient for general use, while professional photographers might prefer higher numbers.

    TTL (Through-The-Lens) Functionality

    TTL flashes automatically adjust the light output based on your camera’s settings, making them user-friendly for beginners.

    Recycle Time

    This refers to the time the flash takes to recharge between shots. Faster recycle times are essential for action or event photography.

    Build Quality

    A durable, weather-resistant flash is a must if you frequently shoot outdoors.

    Wireless Capability

    Flashes with built-in wireless triggers are ideal for off-camera setups.

    Compatibility

    Ensure the flash is compatible with your Canon camera model. Most Canon cameras use the E-TTL or E-TTL II system for flash metering.

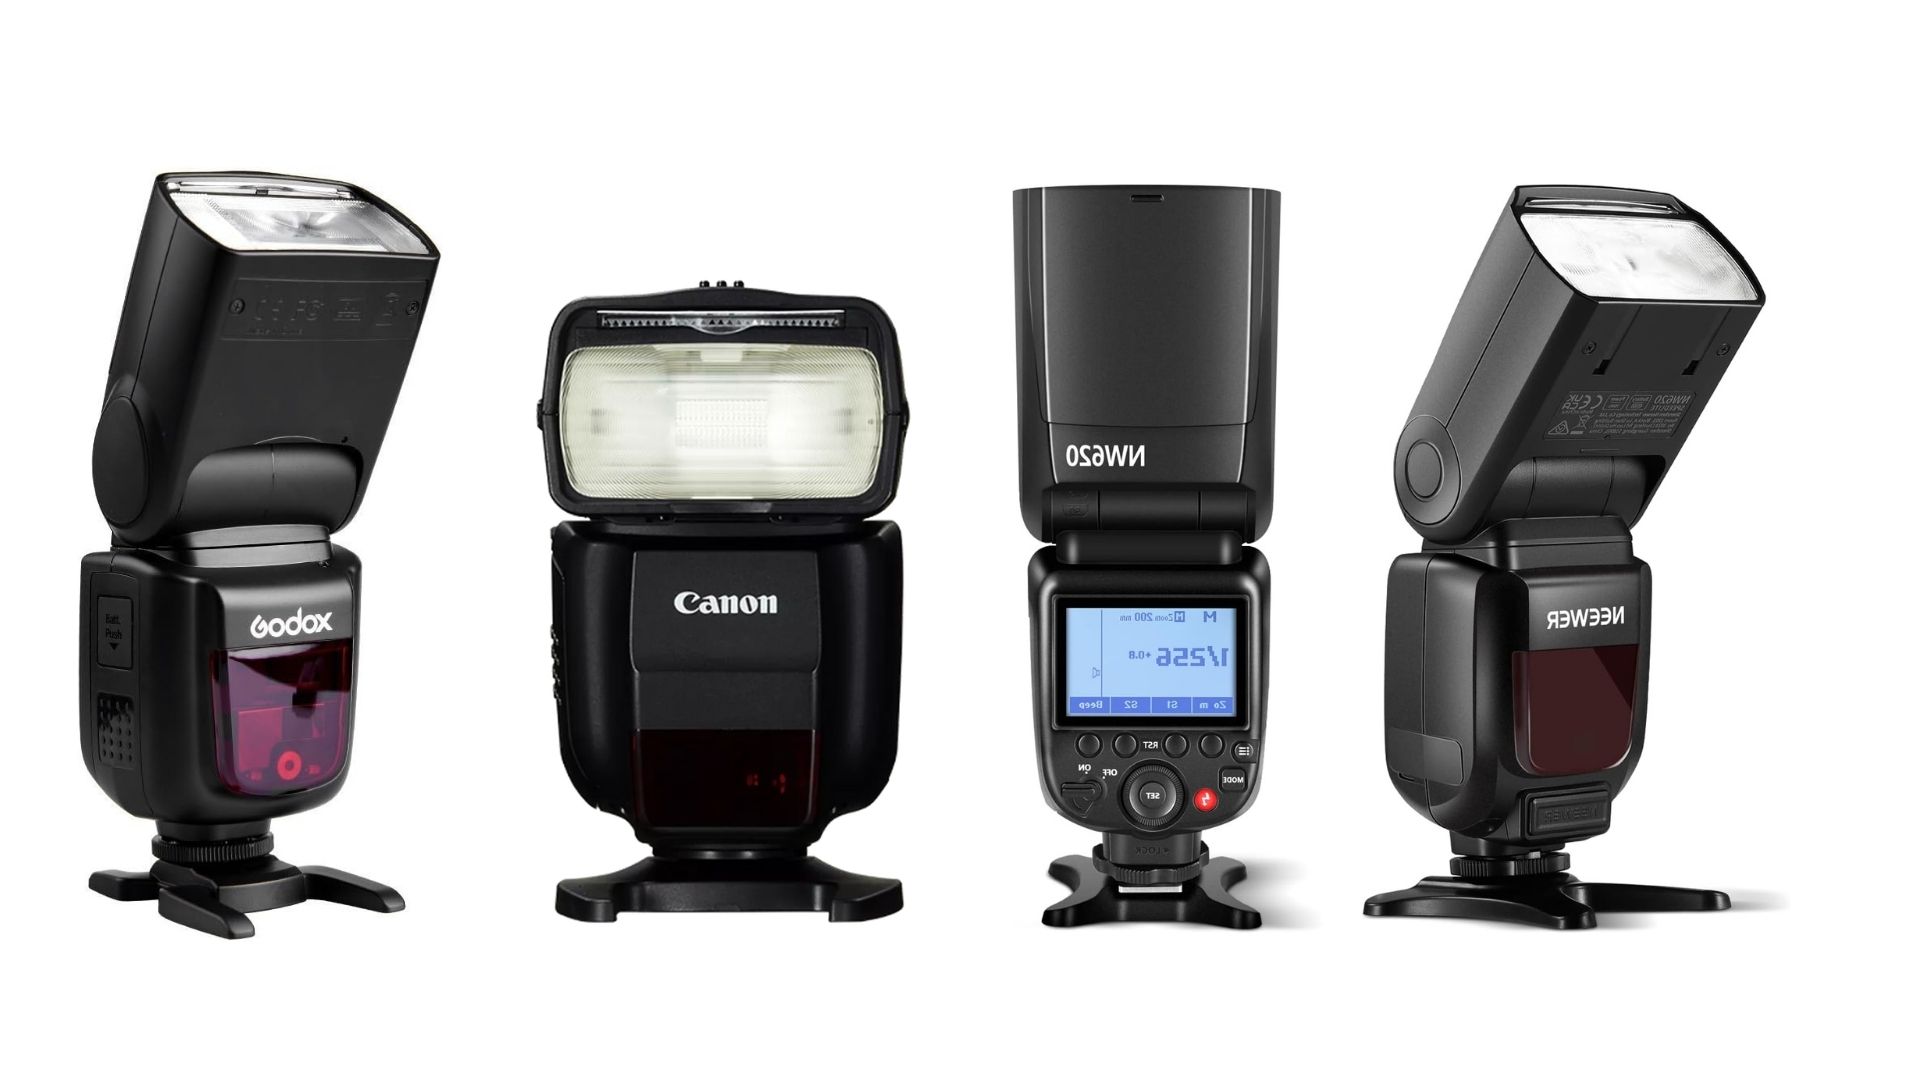
    Top External Flashes for Canon Cameras

    Canon Speedlite 430EX III-RT

    • Features: compact design, wireless functionality, and excellent build quality.
    • Guide Number: 43m.
    • Best For: Intermediate photographers looking for versatile performance.

    CLICK HERE TO SHOP FROM AMAZON

    Canon Speedlite 600EX II-RT

    • Features: high-speed sync, advanced wireless control, and robust construction.
    • Guide Number: 60m.
    • Best For: Professional photographers requiring high power and flexibility.

    CLICK HERE TO SHOP FROM AMAZON

    Godox V860II-C

    • Features: TTL compatibility, long battery life, and affordable pricing.
    • Guide Number: 60m.
    • Best For: Budget-conscious photographers who need reliable performance.

    CLICK HERE TO SHOP FROM AMAZON

    Neewer TT560 Flash Speedlite

    • Features: Manual control, universal compatibility, and lightweight design.
    • Guide Number: 38m.
    • Best For: Beginners and hobbyists exploring flash photography.

    CLICK HERE TO SHOP FROM AMAZON

    Yongnuo YN560 IV

    • Features: manual operation, built-in wireless receiver, and high durability.
    • Guide Number: 58m.
    • Best For: Advanced users looking for a cost-effective solution.

    CLICK HERE TO SHOP FROM AMAZON

    Tips for Using an External Flash with Your Canon Camera

    Bounce the Flash

    Aim the flash at a wall or ceiling to diffuse the light and create a softer effect.

    Use a Diffuser

    Attach a diffuser to soften harsh light and eliminate shadows.

    Experiment with Flash Modes

    Learn to use TTL, manual, and multi-flash modes for different scenarios.

    Try Off-Camera Flash

    Position the flash at various angles to achieve dramatic lighting effects.

    Adjust Flash Exposure Compensation

    Fine-tune the flash output for optimal results, especially in TTL mode.

    Frequently Asked Questions

    Why do I need an external flash for my Canon camera?

    An external flash provides better lighting control, more power, and creative options than the built-in flash.

    Can I use third-party flashes with my Canon camera?

    Yes, many third-party flashes like Godox and Yongnuo are compatible with Canon cameras and offer excellent performance.

    What is the difference between E-TTL and manual flash?

    E-TTL automatically adjusts the flash output based on camera settings, while manual flash requires you to set the output manually.

    How much does an external flash for Canon cameras cost?

    Prices range from $35 for basic models to $500 or more for high-end options.

    Are external flashes difficult to use?

    Not at all! Many models come with user-friendly features like TTL and wireless triggers, making them easy to operate.

    Conclusion

    An external flash for Canon cameras is invaluable for photographers seeking to elevate their skills. From improving lighting control to offering creative flexibility, external flashes can transform your photography experience.

    When choosing an external flash, consider factors like guide number, compatibility, and features to find the perfect match for your needs. Whether you’re a beginner or a seasoned professional, investing in a quality flash is a step toward capturing stunning images in any lighting condition.

    CHECK THESE OUT:

    Best Camera Accessories for Winter Shoots

    Exclusive Black Friday Deals on Premium Drones on Amazon

    Amazon Black Friday Deals on Prime Lens

    Top 10 Black Friday Deals on Camera Gear: Save Big on Photography Essentials