Category: Airpods

Apple’s AirPods are more than just earbuds; they’re a lifestyle. This category explores everything from the latest models to tips for maximizing their features, making them an indispensable part of your tech ecosystem.

Whether it’s AirPods or AirPods Max, find out how these wireless wonders stack up in sound quality, design, and features.

  • The AirPods Max 2 is here, But is it the Headphone you Really Want?

    The AirPods Max 2 is here, But is it the Headphone you Really Want?

    Apple’s AirPods Max 2 has been creating a buzz as the next step forward in premium over-ear headphones. After multiple rounds of testing, it’s clear that Apple has invested heavily in refining an already stellar design with several key improvements. But is it the best noise-canceling headphone available? Here’s what we found after putting the AirPods Max 2 through its paces.

    The AirPods Max 2 is here, But is it the Headphone you Really Want?

    AirPods Max 2: Is It the Headphone You Want?

    The AirPods Max 2 has sparked plenty of excitement in the audio world, but is it the headphone you’ve been waiting for? We took these premium headphones for a spin, testing their sound quality, design, comfort, and features. Here’s what we discovered.

    Design and Comfort: Premium Aesthetic with Enhanced Comfort

    Apple has always been known for its attention to detail, and the AirPods Max 2 are no exception. The aluminum ear cups, stainless-steel frame, and breathable mesh canopy continue to provide that luxurious feel, but with some subtle upgrades.

    This version boasts a lighter frame and redesigned memory foam ear cups for improved comfort during long listening sessions. The weight is still noticeable, but it’s been fine-tuned for better balance.

    Audio Performance: Top-Tier Sound Quality

    Sound quality remains the star of the show. Apple has upgraded its drivers and integrated a new custom-built H2 chip, which significantly boosts the sound processing capabilities. The AirPods Max 2 delivers a rich, full-bodied sound with deep bass, crystal-clear highs, and well-balanced mids.

    Whether you’re listening to classical symphonies or bass-heavy tracks, the sound is immersive, detailed, and refined.

    One standout feature is the Personalized Spatial Audio. Apple continues to innovate here, with improved head-tracking technology that creates a surround-sound effect, whether you’re watching a movie or listening to music. This makes for an ultra-immersive experience, especially when paired with Dolby Atmos content.

    Noise Cancellation: Impressive Performance in All Settings

    Active Noise Cancellation (ANC) has been revamped with the AirPods Max 2. Using upgraded microphones and advanced computational algorithms, the headphones are highly effective in blocking out environmental noise.

    Whether you’re on a plane or in a noisy office, the ANC does an exceptional job of canceling external sounds, making your audio experience truly uninterrupted.

    For those moments when you need to stay alert, the Transparency Mode lets in just enough ambient sound to keep you aware of your surroundings without removing the headphones.

    Battery Life: Longer Usage Time with Fast Charging

    Battery life has always been a key feature for over-ear headphones, and Apple has made sure the AirPods Max 2 holds its own in this regard.

    You’ll get around 24 hours of playback time with both ANC and spatial audio enabled, which is an improvement over the previous model. And thanks to fast charging, you can get 1.5 hours of use from just a 10-minute charge.

    Connectivity: Seamless Across Devices

    As with other Apple products, the AirPods Max 2 excels in device connectivity. Pairing with Apple devices is effortless, thanks to the H2 chip, and switching between devices linked to the same iCloud account is seamless. Whether you’re moving between your iPhone, iPad, or MacBook, the transition is smooth.

    The headphones also support Bluetooth 5.3, making them compatible with non-Apple devices, though some premium features like Spatial Audio are reserved for Apple’s ecosystem.

    Conclusion: Is It Worth the Upgrade?

    The AirPods Max 2 impresses in every department, from design and comfort to sound quality and noise cancellation. The introduction of enhanced spatial audio, longer battery life, and improved comfort makes this an attractive upgrade, especially for those embedded in the Apple ecosystem.

    However, with a premium price tag still attached, this upgrade might be best suited for audiophiles and Apple fans looking for the ultimate listening experience.

    Also Check:

  • How to Link Alexa to Spotify: I Linked Alexa to Spotify, and Now My Music Control is Seamless—Here’s How I Did It

    How to Link Alexa to Spotify: I Linked Alexa to Spotify, and Now My Music Control is Seamless—Here’s How I Did It

    After linking my Alexa to Spotify, controlling my music became a hands-free experience that felt smooth and responsive. If you’re looking to achieve the same seamless control over your music, here’s exactly how I linked Alexa to Spotify and enhanced my music streaming experience.
    How to Link Alexa to Spotify
    Linking Alexa to Spotify is a quick and easy process that significantly enhances your music experience.

    How to Link Alexa to Spotify

    Linking Alexa to Spotify has completely transformed how I enjoy music, making it effortless to control playlists, artists, and genres hands-free. Here’s how I set it up, step by step, and why it’s made my listening experience so much more seamless.

    Step 1: Open the Alexa App

    To get started, I opened the “Alexa app” on my smartphone. The app is your central hub for all things Alexa, from setting up devices to integrating services like Spotify.

    Step 2: Navigate to Settings

    In the app, I tapped on the “More” tab located at the bottom right corner, then selected Settings. Under Settings, there’s an option labeled “Music & Podcasts”—this is where I was able to link Alexa to my Spotify account.

    Step 3: Link Spotify to Alexa

    After tapping on “Music & Podcasts”, I was taken to a page showing various music services. I selected “Spotify” and tapped on the “Link New Service” button. The app then prompted me to sign in to my Spotify account.

    Step 4: Set Spotify as the Default Music Service

    Once my Spotify account was successfully linked, I set it as my default music service. This is crucial because it allows Alexa to automatically pull songs from Spotify when I give a command, rather than having to specify “on Spotify” after every request.

    To do this, I went back to the “Music & Podcasts” settings page and tapped on “Default Services.” From there, I chose Spotify as the default for both “Music” and “Podcasts.”

    Step 5: Test the Integration

    With everything linked, I put Alexa to the test. I said, “Alexa, play my Discover Weekly playlist,” and sure enough, Spotify started playing without any issue. From there, I could ask Alexa to control playback, skip songs, adjust volume, or shuffle tracks—all seamlessly using voice commands.

    Why Link Alexa to Spotify?

    Spotify is one of the most popular music streaming services worldwide, offering an extensive library of songs, playlists, and podcasts. Alexa, Amazon’s voice assistant, allows you to control smart devices, ask for information, and, most importantly for this guide, play your music hands-free.

    Why It’s Worth the Setup:

    Linking Alexa to Spotify has made controlling music at home incredibly easy. Whether I’m cooking in the kitchen or relaxing on the couch, I can play my favorite playlists without lifting a finger. Plus, with Spotify set as the default service, Alexa knows to use it without me needing to clarify.

    By linking Alexa to Spotify, you can request specific songs, control playback, create a personalized music environment, and much more—all with simple voice commands. Once I set it up, I could say, “Alexa, play my workout playlist on Spotify,” and within seconds, my speakers were booming with the exact playlist I wanted.

    Conclusion

    Linking Spotify to Alexa has completely transformed how I interact with my music. I no longer need to tap through apps or fumble with my phone to get my playlists going—everything is just a voice command away. Whether you’re using Alexa for background music during a busy day or for focused listening, the ability to control Spotify hands-free adds a level of convenience that makes the whole experience more enjoyable.

    If you’re a Spotify user with an Alexa-enabled device, I highly recommend linking the two. Not only does it make managing your music easier, but it also allows you to discover new content and curate playlists without interrupting your daily activities. Give it a try, and you’ll see why having seamless control of your Spotify library through Alexa is a game-changer.

    Also Check:

  • How to Charge Airpods Pro Case with Wire: Here’s how to Keep Your AirPods Pro Ready with Wired Charging

    How to Charge Airpods Pro Case with Wire: Here’s how to Keep Your AirPods Pro Ready with Wired Charging

    Charging your AirPods Pro case is an essential part of ensuring that your earbuds are always ready to deliver high-quality sound whenever you need them. While the convenience of wireless charging is increasingly popular, many users still prefer the reliability and speed that comes with wired charging.

    How to Charge Airpods Pro Case with Wire

    If you’re looking to charge your AirPods Pro case using a wire, this guide will walk you through the process step by step, providing detailed instructions and tips to make sure you get the most out of your device.

    How to Charge AirPods Pro Case with Wire

    The charging case comes equipped with a Lightning port at the bottom, which is designed for wired charging. The status light on the front of the case indicates the charging status, so you can easily monitor when the case is fully charged and when it’s still in the process.

    Charging your AirPods Pro case with a wire is a simple process that ensures your AirPods and case are ready to go when you need them. Here’s a step-by-step guide to help you charge the case properly using a wired connection.

    Step 1: Gather the Right Charging Accessories

    To charge your AirPods Pro case with a wire, you will need the Lightning to USB-C cable that comes with the AirPods Pro or a similar Lightning cable. You will also need a power adapter with a USB-C port or a USB-C compatible device (such as a laptop or power bank) to plug the cable into.

    If you’re using an older adapter that has a USB-A port, you’ll need a Lightning to USB-A cable instead of USB-C. Ensure your adapter supports a reliable charging output, ideally between 5W and 20W, for safe and efficient charging.

    Step 2: Plug in the Lightning Cable

    Once you’ve gathered the appropriate cable and adapter, follow these steps:

    1. Insert the Lightning end of the cable into the charging port on the bottom of the AirPods Pro case.
    2. Insert the USB-C or USB-A end into the power adapter or directly into a USB-C port on a laptop or other charging device.

    Step 3: Connect to Power

    Plug the power adapter into a wall outlet or, if using a laptop, ensure the laptop itself is connected to a power source. You should see the status light on the front of your AirPods Pro case light up momentarily, indicating that it’s charging.

    • Amber light means the case is currently charging.
    • Green light means the case is fully charged.

    Step 4: Monitor Charging Progress

    Charging your AirPods Pro case with a wire usually takes around 1-2 hours to fully charge, depending on how depleted the battery is. You can open the case near your iPhone or iPad to see a pop-up indicating the current battery level of the case and the AirPods inside.

    You can also check the battery status on your device’s Batteries widget if your AirPods are connected.

    Step 5: Ensure Proper Charging

    Make sure that the charging cable is securely connected to both the AirPods Pro case and the power source. If the status light does not turn on, double-check the cable and adapter to ensure they are working correctly.

    • Try another cable or adapter if needed.
    • Check the charging port on the case to ensure there is no dust or debris blocking the connection.

    Conclusion

    Charging your AirPods Pro case with a wire is straightforward, but having the right cable and power adapter ensures the process runs smoothly. Whether you’re using the included Lightning to USB-C cable or an older USB-A adapter, keeping your case fully charged will ensure your AirPods are always ready to deliver high-quality sound and features when you need them.

    If you encounter issues, troubleshooting your cable and port connections can help resolve most problems quickly.

    Also Check:

  • How to Know if Airpods Pro Case is Charging

    How to Know if Airpods Pro Case is Charging

    Wondering if your AirPods Pro case is charging? Learn the signs that indicate your AirPods Pro case is charging. Our simple tips will help you ensure your earbuds are always ready for use.

    How to Know if Airpods Pro Case is Charging

    How to Know if Your AirPods Pro Case is Charging

    Knowing whether your AirPods Pro case is charging can save you from potential battery issues and ensure your earbuds are ready when you need them. Fortunately, Apple has made it easy to verify the charging status with several indicators.

    Check the Status Light

    The most immediate way to check if your AirPods Pro case is charging is through the status light on the front of the case. Here’s what the different lights mean:

    • Amber Light (when plugged in): This indicates that the case is currently charging.
    • Green Light (when plugged in): This means the case is fully charged.
    • Amber Light (when unplugged): This suggests the case is not fully charged and has less than one full charge remaining.
    • No Light: If you don’t see any light when plugged in, it could indicate a problem with the charging cable, adapter, or port.

    The status light is visible when you open the case or place it on a wireless charger (if you have a wireless charging case). If you’re using wired charging, the light should also illuminate briefly once you plug in the cable.

    Wireless Charging Pad Indicators

    If you’re using a wireless charger, some charging pads have lights or other indicators to confirm when a device is charging. Place the AirPods Pro case in the center of the pad, and observe whether the pad’s indicator lights turn on, which would signal that the case is receiving power. Additionally, check the AirPods Pro case’s status light for confirmation as described above.

    Use Your iPhone or Other Devices

    When your AirPods Pro case is charging, you can also check the charge status through your iPhone or iPad. Follow these steps:

    1. Open the AirPods Pro case lid with the AirPods inside.
    2. Bring the case near your iPhone or iPad.
    3. A pop-up will appear on the screen showing the battery levels of both the AirPods and the case.

    Alternatively, you can swipe to Today View on your iPhone and look for the Batteries widget, which displays the charge level of all connected devices, including the AirPods Pro case.

    Use the Apple Watch

    If you have an Apple Watch, you can use the Battery Complication to check the charge of your AirPods Pro case. Simply open the Control Center on your watch and tap the Battery percentage to see a list of connected devices and their battery levels, including your AirPods case if it’s nearby.

    Common Charging Issues

    If the status light doesn’t turn on or the AirPods Pro case doesn’t charge properly, there are a few things to check:

    • Charging Cable: Try using a different cable and power adapter to see if the issue is with the accessories.
    • Charging Port: Make sure there is no dust or debris blocking the charging port on your AirPods Pro case.
    • Wireless Charger: Ensure the case is placed correctly on the charger. Sometimes a misalignment on the pad can cause the case not to charge.

    Conclusion

    Verifying if your AirPods Pro case is charging is straightforward with the help of status lights, your iPhone, or other Apple devices. By keeping an eye on these indicators, you can ensure that your case and AirPods are fully charged and ready for use. If you’re experiencing issues, try troubleshooting with different cables or chargers to determine whether the problem lies with the charging equipment or the case itself.

    Also Check:

  • Why is My Airpods Pro Case Not Charging: Why Your AirPods Pro Case May Not Be Charging—And What to Do About It

    Why is My Airpods Pro Case Not Charging: Why Your AirPods Pro Case May Not Be Charging—And What to Do About It

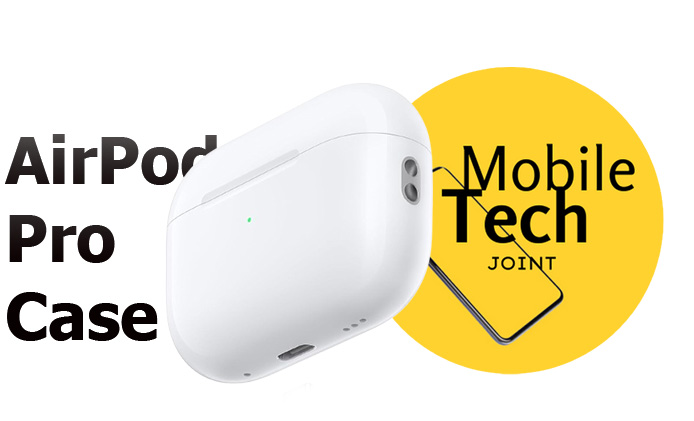
    If your AirPods Pro case isn’t charging, it can be frustrating, especially if you’re unsure of the cause. There are a variety of reasons why this could happen, but thankfully, there are several ways to diagnose and fix the issue. Here’s a detailed guide on what could be wrong and how to troubleshoot.

    why is my airpods pro case not charging

    How do you fix AirPods Pro case charging issues?

    Follow the steps below to fix your Airport Pro case not charging

    Check the Charging Cable and Adapter

    One of the most common issues is with the charging cable or adapter. Before diving into deeper troubleshooting, inspect the cable and wall adapter you’re using. If there’s any visible damage to the cable or adapter, or if it’s not an official Apple-certified product, that might be the root of your problem.

    Try using another Lightning to USB-C cable and a different adapter to see if your case charges. If this fixes the issue, then it’s clear the original cable or adapter was faulty.

    Inspect the Charging Port

    Dust, lint, or debris can accumulate inside the charging port of your AirPods Pro case, which can block the cable from making a proper connection. Take a look inside the port using a flashlight, and if you see any debris, carefully clean it out.

    Use a soft brush or a can of compressed air to clear the port, but avoid using sharp objects as they could damage the internal components. After cleaning, try charging your case again.

    Check the AirPods’ Battery Status

    Sometimes the problem isn’t the case itself, but rather the AirPods inside. To verify this, open the AirPods Pro case with the AirPods inside and bring it close to your iPhone. The battery status should appear on the screen.

    If you see the AirPods have charge but the case is low, this indicates the case itself is not holding power. Conversely, if the AirPods are not charging properly, there might be a communication problem between the case and the earbuds, requiring a reset.

    Restart or Reset Your AirPods Pro

    A reset can often fix strange behaviors, including charging issues. To reset your AirPods Pro case, follow these steps:

    • Place both AirPods in the charging case.
    • Open the lid.
    • Press and hold the setup button on the back of the case for about 15 seconds until the status light flashes amber and then white.

    After the reset, reconnect your AirPods to your iPhone or another device and check if the charging issue persists.

    Wireless Charging Troubles?

    If you’re using a wireless charger, make sure it’s a Qi-compatible charging pad and that it’s functioning correctly. Place the case on the charging pad and check if the status light on the front flashes to indicate it’s charging.

    If the case isn’t charging wirelessly, try charging it with a cable to isolate whether the problem is with the case or the wireless charger itself.

    Battery Life and Degradation

    Over time, the battery in your AirPods Pro case can degrade, reducing its ability to hold a charge. If you’ve been using your AirPods for a couple of years and notice the case’s battery doesn’t last as long as it used to, it might be time for a replacement.

    Apple offers battery replacement services for AirPods and the case if they’re out of warranty. Alternatively, purchasing a new case might be the solution if battery life is severely degraded.

    Software Update Issues

    Sometimes, software bugs can interfere with charging functionality. Make sure your iPhone and AirPods Pro are running the latest firmware updates. This can prevent potential software-related issues that could be stopping your case from charging properly.

    To check for a software update on your iPhone, go to Settings > General > Software Update. For AirPods firmware, they update automatically when connected to an iPhone that’s up to date.

    Conclusion

    If your AirPods Pro case isn’t charging, it’s essential to methodically check for the most common culprits: faulty cables, dirty ports, or even software issues. After going through these troubleshooting steps, you should be able to resolve the issue and get your AirPods back in action.

    However, if none of these solutions work, you may want to contact Apple Support or visit an Apple Store for further assistance.

    Also Check:

  • Your AirPods Pro Case Isn’t Resetting? Here’s How to Get It Done in Seconds

    Your AirPods Pro Case Isn’t Resetting? Here’s How to Get It Done in Seconds

    If your AirPods Pro case isn’t resetting, it can be frustrating, especially when you’re trying to fix a connection issue. However, the process for resetting your case is simple once you know the steps. If you’re struggling to get your AirPods Pro back to their factory settings, follow these easy steps to get it done quickly.

    Your AirPods Pro Case Isn't Resetting? Here's How to Get It Done in Seconds

    Step 1: Ensure Your AirPods are in the Case

    Start by placing both AirPods into the charging case. Ensure that both are securely seated inside, as the reset process requires both earbuds to be in the case.

    Step 2: Open the Case Lid

    With the AirPods inside, open the lid of the case. Keep the lid open throughout the reset process. This allows the AirPods to remain active and ensures the reset will work properly.

    Step 3: Locate the Setup Button

    On the back of your AirPods Pro case, you’ll find a small circular button called the setup button. This button is used for pairing and resetting your AirPods.

    Step 4: Hold the Setup Button

    Press and hold the setup button for at least 15 seconds. As you do this, the status light on the front of the case will flash amber. Continue holding the button until the light flashes white.

    Step 5: Wait for the White Light

    Once the status light turns white, the AirPods Pro case has been reset to factory settings. At this point, the connection data for all previously paired devices has been wiped, and the AirPods are ready to pair with a new device.

    Step 6: Reconnect to Your Device

    After resetting the AirPods Pro case, you’ll need to reconnect the AirPods to your device. Bring the AirPods close to your iPhone or other Bluetooth-enabled device, and a prompt should appear to begin the pairing process. Follow the on-screen instructions to reconnect them.

    Why a Reset May Fail

    Sometimes, even after following these steps, the reset might not work. Here are a few reasons why:

    • Low Battery: Ensure the AirPods Pro case has enough charge. A low battery may prevent the reset from completing successfully.
    • Dirty Charging Contacts: Make sure the charging pins inside the case and on the AirPods are clean. Dust or debris can interfere with the reset.
    • Firmware Issues: Sometimes, firmware glitches may stop the case from resetting. Updating the firmware may resolve these issues.

    Conclusion

    Resetting your AirPods Pro case is a quick fix for many issues, such as connectivity problems, battery drain, or unresponsiveness. By following these simple steps, you can quickly reset your AirPods Pro case and get back to enjoying your audio. If the reset still doesn’t work after several tries, it may be time to consider having the case inspected by an Apple professional.

    Also Check:

  • How Long Does It Take to Charge Your AirPods Pro Case? Here’s the Breakdown

    How Long Does It Take to Charge Your AirPods Pro Case? Here’s the Breakdown

    If you’re wondering how long it takes to charge your AirPods Pro case, the answer depends on how you’re charging and the method you’re using—wired or wireless. Both methods offer convenient ways to quickly get your case powered up and your AirPods ready to go. Here’s a detailed breakdown of the charging time.

    How Long Does It Take to Charge AirPods Pro Case


    Wired Charging: The Fastest Method

    Using a USB-C to Lightning cable or USB-A to Lightning cable is the fastest way to charge your AirPods Pro case. On average, it takes about 1 hour to fully charge the case from 0% to 100%. The wired connection provides a direct current, which ensures faster and more consistent charging compared to wireless options.

    Once the case is fully charged, it can provide up to 24 hours of listening time or 18 hours of talk time when paired with the AirPods Pro. If the AirPods themselves need a quick boost, placing them inside the case for just 5 minutes gives you about 1 hour of listening time.

    Wireless Charging: Convenient but Slightly Slower

    The AirPods Pro case supports wireless charging via MagSafe or any Qi-compatible charger. While wireless charging is highly convenient, especially when you don’t want to deal with cables, it can be slightly slower than using a wired connection. On average, it may take about 1.5 hours to fully charge the case wirelessly, depending on the power of your charging pad.

    Even though it’s slower, the wireless charging option is perfect for overnight charging or when you just want to casually place the case on a charging pad while going about your day.

    Quick Charge for AirPods

    One of the standout features of the AirPods Pro is the quick charge capability. Whether you’re charging the case wirelessly or with a cable, placing the AirPods Pro in the case for just 5 minutes gives you up to 3 hours of listening time or 2 hours of talk time. This is especially handy when you’re in a rush and need your AirPods for an upcoming call or commute.

    Battery Life of the Charging Case

    Once fully charged, the AirPods Pro case holds a significant amount of power, giving you multiple charges for your AirPods before needing to recharge the case itself. On a full charge, the case provides around 24 hours of listening time or 18 hours of talk time. This makes it a reliable option for long trips, commutes, or heavy use throughout the day without frequent recharging.

    How to Know When the Case is Fully Charged

    Your AirPods Pro case has a status light that indicates its charging state. Here’s what to look for:

    • Amber light: The case is charging and is not yet full.
    • Green light: The case is fully charged and ready to go.

    When you place your case on a wireless charger, the status light will briefly turn on to show the current battery status before turning off to preserve battery life.

    Conclusion

    In summary, charging your AirPods Pro case takes around 1 hour with a wired connection and about 1.5 hours with a wireless charger. Whether you’re in need of a quick top-up or a full charge, the AirPods Pro case offers versatility in its charging methods. Thanks to the quick charge feature, even a few minutes in the case will give your AirPods the power they need for hours of listening time.

    Also Check:

  • How to Reset Airpods Pro Case: Easy Steps to Fix Connection Issues

    How to Reset Airpods Pro Case: Easy Steps to Fix Connection Issues

    Resetting your AirPods Pro case is a straightforward process, whether you’re troubleshooting issues or preparing the AirPods for pairing with a new device. This reset clears any connection problems and restores factory settings, allowing your AirPods to start fresh. Here’s how to do it step by step.

    How to Reset Airpods Pro Case

    How to Reset AirPods Pro Case

    A reset can solve issues such as connectivity problems, charging difficulties, or strange behaviors like one AirPod not working. It’s also useful if you plan to sell or gift your AirPods Pro, ensuring all previous data and paired devices are removed.

    Step-by-Step Guide to Reset AirPods Pro Case:

    Step 1: Place Both AirPods in the Case

    Before starting, ensure that both AirPods are securely placed inside the charging case. This is crucial as the reset process affects the earbuds and the case together, ensuring they sync properly during and after the reset.

    Step 2: Open the Case Lid

    Once the AirPods are inside, open the charging case’s lid. Keep the lid open throughout the reset process, as this is necessary for the AirPods to remain active and visible for resetting.

    Step 3: Locate the Setup Button

    On the back of the AirPods Pro case, you’ll find a small circular button known as the setup button. This button is essential for both resetting and pairing the AirPods with devices. Familiarize yourself with this button, as you will need to press it for a specific amount of time.

    Step 4: Hold the Setup Button

    Press and hold the setup button for at least 15 seconds. During this time, you’ll notice the status light on the front of the case. Initially, the light will flash amber, indicating that the AirPods are ready to be reset. Keep holding the button until the light turns white.

    Step 5: Wait for the Light to Turn White

    The white light signifies that the AirPods and the case have been successfully reset to their factory settings. At this point, you can release the setup button, and your AirPods are now reset, ready for new pairing.

    Step 6: Reconnect to Your Device

    After resetting, your AirPods Pro are essentially brand new in terms of connection. To pair them with your device, open the lid near your iPhone or other Bluetooth-enabled device, and follow the on-screen instructions to reconnect them.

    Step 7: Verify the Reset

    Once connected, verify that both AirPods are working correctly by playing some audio and checking for smooth functionality. The reset should solve any connection or sound-related issues.

    Troubleshooting the Reset Process

    If the reset process doesn’t seem to work, ensure the case is properly charged. If the case is low on battery, the reset may not complete. Charging your AirPods for about 30 minutes before attempting the reset again can help resolve any issues.

    Conclusion

    Resetting your AirPods Pro case is a simple process that can fix many common issues and prepare your AirPods for use with a new device. Whether you’re facing connectivity problems or just need to start fresh, this reset will restore the AirPods to their factory condition, making them ready for new connections and a smooth experience.

    Also Check: