Category: Earbuds/Headphones

Find the perfect sound companion in this category. Whether you’re into high-fidelity audio, noise-canceling tech, or workout-friendly earbuds, we test and review a variety of headphones to help you tune into the ultimate listening experience.

  • Nothing Ear (a) Earbuds: Experience Premium Hi-Res Audio and ChatGPT Integration for Under $100

    Nothing Ear (a) Earbuds: Experience Premium Hi-Res Audio and ChatGPT Integration for Under $100

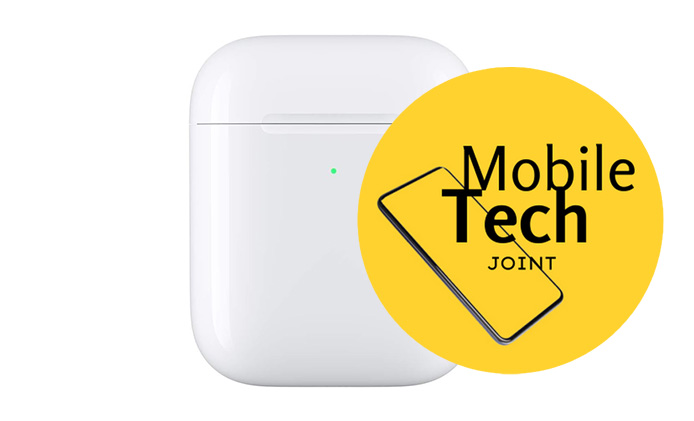
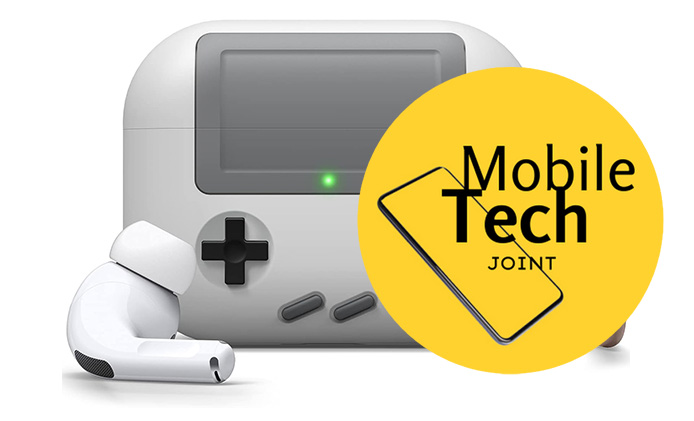
    Introducing the Nothing Ear (a) wireless earbuds, the latest innovation in audio technology. Priced at $99.00, these earbuds deliver exceptional sound quality, advanced noise cancellation, and the unique feature of ChatGPT integration. Whether you’re an audiophile, a busy professional, or a tech enthusiast, the Nothing Ear (a) is designed to enhance your listening experience in every possible way.

    Nothing Ear (a) Earbuds: Experience Premium Hi-Res Audio and ChatGPT Integration for Under $100

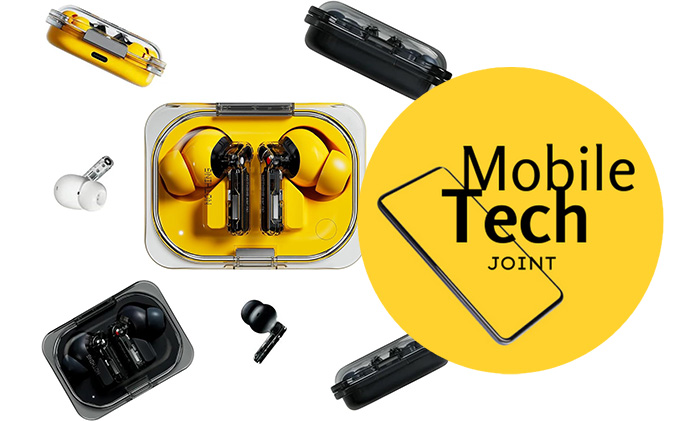
    Nothing Ear (a) Wireless Earbuds

    If you’re in the market for cutting-edge wireless earbuds, the Nothing Ear (a) should be on your radar. Let’s dive into why these earbuds stand out.

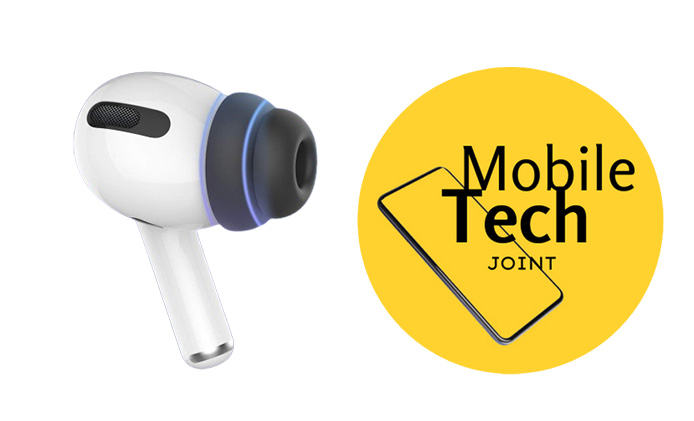
    Immersive Audio with Powerful 11mm Drivers

    At the heart of the Nothing Ear (a) is a compact yet powerful 11mm driver. This driver delivers deep bass performance, thanks to the extra space that allows sound waves to vibrate more freely. With two new vents, airflow is improved inside the earbud, resulting in less distortion and richer overall clarity. Whether you’re listening to your favorite tracks or enjoying a podcast, the audio quality is nothing short of spectacular.

    Smart Active Noise Cancellation Up to 45dB

    One of the standout features of the Nothing Ear (a) is its smart active noise cancellation (ANC) system. Capable of reducing noise by up to 45dB, these earbuds automatically check for noise leakage between the earbud and your ear canal. The ANC adjusts in real-time, ensuring you get the best possible noise cancellation in any environment. From quiet rooms to bustling streets, you’ll only hear what you want to hear.

    Clear Voice Technology for Crystal Clear Calls

    Stay connected with clear voice technology that isolates your voice from everyday distractions. The Ear (a) features a new talk mic and an extra airway on the stem to reduce interference by 60% compared to previous models. This ensures that your calls are as clear as face-to-face conversations, no matter where you are.

    Long Playtime and Fast Charging

    Never worry about running out of battery with the Nothing Ear (a). These earbuds can fast charge for just 10 minutes and provide 10 hours of music playback with ANC turned off. On a full charge, enjoy over 42.5 hours of playtime with ANC off. This is a 40.5% increase in non-stop playtime compared to the previous Ear (2) model. The fast charging capability ensures you spend more time listening and less time waiting.

    Enhanced Performance for Gaming and Multitasking

    The Nothing Ear (a) is designed for more than just music. With a low lag mode and end-to-end latency of less than 120 ms, these earbuds are perfect for gaming. Game Mode on a Nothing phone triggers reduced audio lag automatically. Additionally, the dual connect feature allows you to stay connected to two devices simultaneously, making it easy to switch between music on your laptop and calls on your phone seamlessly.

    Adaptive ANC and Seamless Integration with Nothing X App

    Take control of your listening experience with adaptive ANC. Switch between three levels of noise cancellation or let Ear (a) adapt automatically to your surroundings in real-time by selecting ‘Adaptive’ in the Nothing X app. This next-level feature ensures you get the perfect balance of noise cancellation and awareness.

    Revolutionary ChatGPT Integration

    The Nothing Ear (a) introduces a first-of-its-kind feature: ChatGPT integration. Use your voice to access ChatGPT on the go, setup via the Nothing X app. This integration allows you to ask questions, get answers, and learn from ChatGPT wherever you are. This feature is exclusive to Nothing earbuds when connected to Nothing phones, providing a seamless and intelligent user experience.
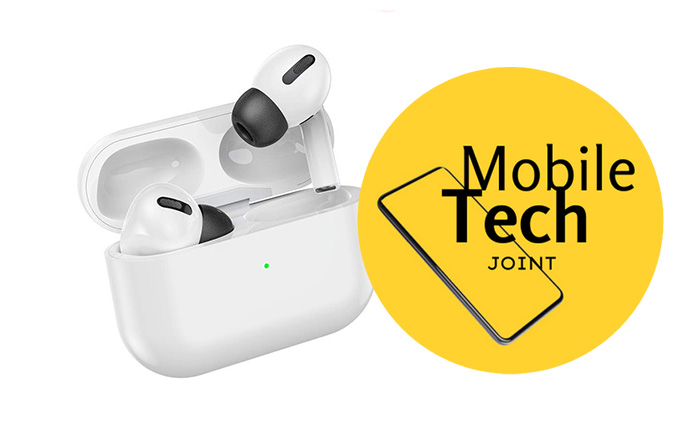
    What’s in the Box?

    When you purchase the Nothing Ear (a), you receive:

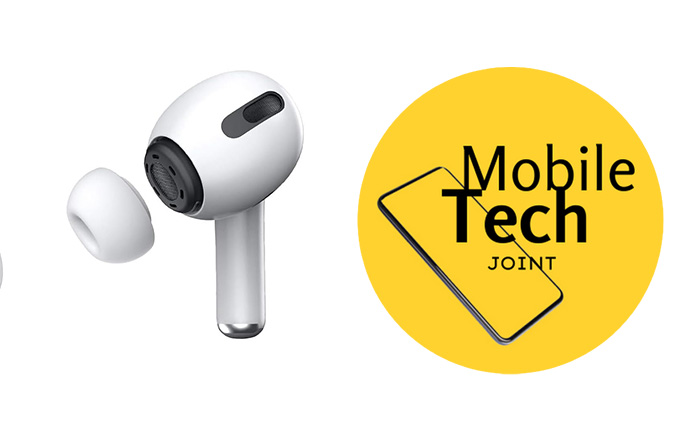
    • 1 x Pair of Nothing Ear (a) wireless earbuds
    • 1 x Charging case
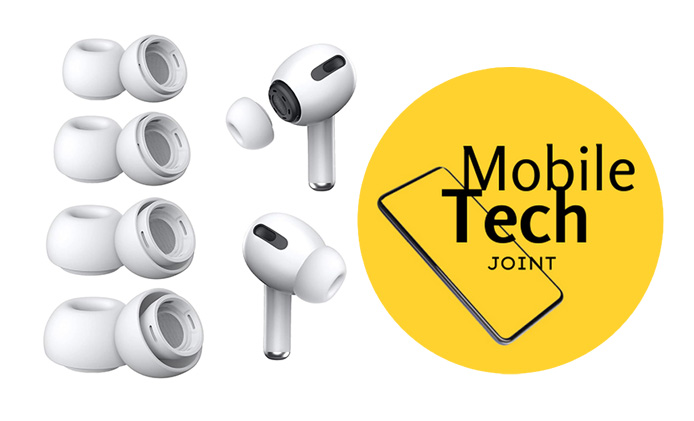
    • Multiple ear tip sizes for a custom fit
    • 1 x USB-C charging cable

    Final Thoughts

    The Nothing Ear (a) wireless earbuds offer a perfect blend of advanced technology, superior audio quality, and innovative features. With powerful drivers, smart ANC, clear voice technology, long battery life, and the unique ChatGPT integration, these earbuds are designed to cater to all your audio needs. Whether you’re listening to music, making calls, gaming, or seeking answers from ChatGPT, the Nothing Ear (a) delivers an unparalleled listening experience.

    Ready to elevate your audio game? Try the Nothing Ear (a) and experience the future of wireless earbuds.

    Also Check:

  • Are you Using these AirPod Pro Settings? 8 Hidden Settings on your AirPod Pro You May Never Know About

    Are you Using these AirPod Pro Settings? 8 Hidden Settings on your AirPod Pro You May Never Know About

    Absolutely! There are several hidden or lesser-known settings and features for the AirPods Pro that can significantly enhance your user experience. The AirPods Pro are packed with features that enhance your listening experience, but some settings are less obvious and can greatly improve your use of these wireless earbuds. In this article, we will consider some of these hidden Airpod Pro settings and how to use them.

    Are You Using These AirPod Pro Settings? 8 Hidden AirPod Pro Settings You Never May Have Heard About

    Do You Know About These Hidden AirPod Pro Settings

    Here’s a detailed look at hidden AirPod Pro settings you need to know and tips to help you get the most out of your AirPods Pro:

    1. Noise Control Modes:

    One hidden gem is the Noise Control feature. While most users are familiar with switching between Active Noise Cancellation and Transparency mode, there’s an option to fine-tune these settings within the Control Center on your iPhone or iPad. By pressing and holding the volume slider, you can access a more detailed noise control menu, allowing you to adjust the intensity of noise cancellation or transparency to your preference.

    2. Ear Tip Fit Test

    The Ear Tip Fit Test is another valuable feature that ensures you’re getting the best seal and sound quality from your AirPods Pro. You can find this test in the Bluetooth settings of your connected device. Running this test periodically, especially if you feel the fit has changed, can help maintain optimal audio performance and comfort.

    3. Announce Messages with Siri

    For those who use Siri frequently, customizing Siri commands can be a game-changer. In the AirPods settings on your iPhone, you can enable or disable “Hey Siri” and choose what happens when you press and hold the stem of your AirPods Pro. This allows for a hands-free experience tailored to your needs, whether it’s adjusting volume, skipping tracks, or making calls.

    4. Customizing Press-and-Hold Actions

    Did you know you can change what happens when you squeeze the AirPods Pro stems? By going into the settings menu, you can customize the press-and-hold action for each AirPod. This means you can set one AirPod to activate Siri and the other to switch between noise control modes, giving you more personalized control over your listening experience.

    5. Spatial Audio

    Sound Quality is paramount, and the AirPods Pro have a hidden setting to enhance it: Spatial Audio. This feature creates an immersive sound experience by using dynamic head tracking. You can enable it through the Control Center by pressing and holding the volume slider and then selecting Spatial Audio. For the best experience, make sure you’re running the latest firmware.

    6. Optimize Battery Charging

    Battery life is always a concern, and there’s a hidden setting to help with that: Optimized Battery Charging. Found in the Bluetooth settings, this feature learns your charging routine and waits to finish charging past 80% until you need to use them, helping extend the overall battery life of your AirPods Pro.

    7. Find My AirPods

    If you frequently misplace your AirPods, the Find My app is your best friend. While many users know it can locate lost AirPods, it also has a hidden setting for enabling “Notify When Left Behind.” This setting sends a notification to your device if you leave your AirPods Pro behind, ensuring you never lose track of them again.

    8. Conversation Boost

    Another lesser-known feature is Conversation Boost, which amplifies voices in front of you to make it easier to hear people in noisy environments. This setting can be found in the Accessibility settings on your iPhone. It’s particularly useful for those with mild hearing difficulties or when trying to have conversations in crowded places.

    Final Verdict

    Lastly, firmware updates often bring new features and enhancements. Many users overlook the importance of keeping their AirPods Pro firmware up to date. Checking for updates is simple: place your AirPods in their case, connect them to power, and ensure your iPhone or iPad is nearby with an internet connection. Updates are installed automatically, ensuring you always have the latest features and improvements.

    In conclusion, the AirPods Pro offer a wealth of hidden settings that can significantly enhance your listening experience. By exploring these features, you can customize your AirPods Pro to better suit your needs, from improving sound quality and extending battery life to ensuring you never lose them. Take the time to delve into these settings and make the most of your AirPods Pro.

    Also Check:

  • Airpod Case Flashing Orange: If your AirPod Case Is Flashing Orange, here is What it Means and how to Fix

    Airpod Case Flashing Orange: If your AirPod Case Is Flashing Orange, here is What it Means and how to Fix

    If you’re an AirPod user, you might have encountered a flashing orange light on your AirPod case. This indicator can be confusing and frustrating, especially if you’re unsure what it means or how to fix it. Understanding the significance of the flashing orange light and knowing how to resolve the issue can ensure your AirPods function smoothly.

    Airpod Case Flashing Orange: If your AirPod Case Is Flashing Orange, here is What it Means and how to Fix


    Airpod Case Flashing Orange What It Means

    When your AirPod case flashes orange, it typically means that there is a problem with the device. It’s a signal from the device that requires your attention to fix a specific issue. The orange light can indicate issues such as low battery, connectivity problems, or software glitches. Recognizing this warning light is crucial for maintaining the performance and longevity of your AirPods.

    Common Reasons for the Orange Flashing Light

    The flashing orange light is an important indicator designed to alert you that something is wrong with your AirPods or the case. Here are several factors that can cause your AirPod case to flash orange:

    • Low Battery: A common reason is that the battery level of your AirPods or the charging case is critically low.
    • Connectivity Issues: Problems with pairing your AirPods to your device can trigger the orange light.
    • Software Glitches: Occasionally, software bugs or glitches can cause the light to flash.

    These common issues can interrupt your experience with AirPods. Furthermore, each of these issues requires different troubleshooting steps, which we consider below.

    How to Fix Low Battery Issues

    Low battery is a straightforward issue to resolve. By following these steps, you ensure your AirPods are charged and ready for use. If the orange light is due to a low battery, follow these steps to resolve it:

    1. Check Battery Levels: Open your AirPods case near your iPhone or iPad to see the current battery levels displayed on the screen.
    2. Charge the Case: Connect your AirPods case to a power source using the Lightning cable. Ensure the case and AirPods are charging properly.
    3. Wait: Allow the case and AirPods to charge for at least 15-20 minutes before checking the status light again.

    Regularly checking battery levels and charging the case can prevent the orange light from appearing in the first place.

    Troubleshooting Connectivity Issues

    If low battery isn’t the issue, connectivity problems might be causing the flashing orange light. Connectivity issues can be a bit more complex but are often resolved with a reset and reconnection. Here’s how to troubleshoot:

    1. Reset Your AirPods: Place both AirPods in the case and close the lid. Wait for 30 seconds, then open the lid. Press and hold the setup button on the back of the case until the status light flashes white, then amber, and finally white again.
    2. Forget Device: On your iPhone or iPad, go to Settings > Bluetooth. Find your AirPods in the list of devices and tap the “i” icon next to them. Select “Forget This Device.”
    3. Reconnect AirPods: After forgetting the device, open the AirPods case near your iPhone or iPad and follow the on-screen instructions to reconnect.

    Following these steps can help restore the connection between your AirPods and your device, ensuring they function correctly.

    Dealing with Software Glitches

    Software glitches can also trigger the orange flashing light. To address these issues, you can:

    1. Update Firmware: Ensure your AirPods firmware is up to date. Connect your AirPods to your iPhone and check for updates in the settings.
    2. Reset AirPods: Perform a reset as described in the previous section.
    3. Restore Factory Settings: As a last resort, you can reset your AirPods to factory settings by holding the setup button until the status light flashes amber multiple times, then white.

    Keeping your firmware up to date can prevent many of these issues. Resetting or restoring factory settings can help clear persistent software problems that cause the orange light to flash.

    When to Seek Professional Help

    Sometimes, despite your best efforts, the issue might be beyond basic troubleshooting. If the orange flashing light persists despite your troubleshooting efforts, it may be time to contact Apple support or visit an authorized service provider.

    Persistent issues could indicate a hardware problem that requires professional diagnosis and repair. Seeking professional help ensures that any underlying hardware problems are addressed by experts, potentially saving you from more significant issues down the line.

    Preventing Future Occurrences

    To avoid encountering the orange flashing light issue in the future, consider these preventive measures:

    • Regularly Update Software: Keep your AirPods and paired devices updated with the latest firmware and software updates.
    • Properly Maintain Batteries: Avoid letting your AirPods and case battery levels drop too low. Charge them regularly.
    • Clean Your AirPods: Ensure that the charging contacts and the case are clean to maintain proper charging and connectivity.

    Regular updates, proper battery maintenance, and cleanliness are simple practices that can significantly extend the life and performance of your AirPods.

    Conclusion

    Understanding the significance of the orange flashing light on your AirPods case and knowing how to address it can save you from frustration and ensure your AirPods continue to function optimally. By following the troubleshooting steps outlined above and taking preventive measures, you can keep your AirPods in good working order. If you have any experiences or tips to share, please leave them in the comments section below.

    Frequently Asked Questions (FAQs)

    What does it mean if my AirPods case is flashing orange?

    A flashing orange light on your AirPods case can indicate several issues, such as a low battery, pairing error, or the need for a firmware update. It can also be a sign of a more serious hardware issue.

    How can I fix a flashing orange light on my AirPods case?

    Here are a few steps you can try to resolve the issue:

    1. Check the Battery: Charge your AirPods case for at least 15 minutes and see if the light changes to green or white.
    2. Reset Your AirPods: Open the case lid, press and hold the setup button on the back of the case for 15 seconds until the light flashes amber and then white, and then reconnect your AirPods to your device.
    3. Update Firmware: Ensure your AirPods are connected to a power source and near your iPhone to receive automatic firmware updates.

    What should I do if the orange light continues to flash?

    If the orange light continues to flash after you’ve tried charging, resetting, and updating the firmware, it’s advisable to contact Apple Support or visit an Apple Store for further diagnosis and assistance. Persistent flashing could indicate a hardware issue that needs professional attention.

    Can I still use my AirPods if the case is flashing orange?

    While a flashing orange light typically indicates an issue that needs to be addressed, you might still be able to use your AirPods. However, the functionality might be limited, and it’s best to resolve the issue as soon as possible to ensure optimal performance.

    Will a flashing orange light affect the battery life of my AirPods?

    If the flashing orange light is due to a low battery or another issue, it’s essential to address the problem to prevent any potential impact on battery life. Regularly charging and maintaining your AirPods and their case will help ensure their longevity and performance.

    How can I prevent my AirPods case from flashing orange in the future?

    To prevent future issues, keep your AirPods and their case regularly charged, ensure they are updated with the latest firmware, and handle them with care to avoid any physical damage. Regular cleaning can also help maintain their condition and functionality.

    Also Check:

  • Temporary Fixes for a Ripped off AirPod Pro Rubber tip: How to Fix AirPod Pro Rubber tip Ripped Off

    Temporary Fixes for a Ripped off AirPod Pro Rubber tip: How to Fix AirPod Pro Rubber tip Ripped Off

    AirPods Pro are renowned for their comfort and superior sound quality, largely thanks to their rubber tips that provide a secure fit. However, these rubber tips can sometimes get ripped off, causing frustration for users. In this guide, we’ll address how to identify and assess the problem, explore replacement options, offer DIY fixes, and suggest preventive measures to keep your AirPods Pro in top condition.

    AirPod Pro Rubber Tip Ripped Off: Temporary fixes for a ripped off AirPod Pro rubber tip

    How to Fix AirPod Pro Rubber Tip Ripped Off

    AirPods Pro are renowned for their comfort and superior sound quality, thanks to their rubber tips that provide a secure fit. However, if you mistakenly ripped off your AirPod Pro rubber tip, here is how to fix it:

    Identify the Problem

    Ripped-off rubber tips can occur for several reasons. Wear and tear from frequent use is one of the most common causes. Over time, the material can deteriorate, making it more susceptible to tearing. The constant insertion and removal of the tips can weaken them, especially if done with force. Another common reason is improper handling, such as roughly pulling off the tips or forcing them back on without aligning them correctly.

    Sharp objects or rough surfaces can also cause tears if the AirPods are not stored properly. Recognizing the root cause of the problem is crucial. It helps in preventing future occurrences and informs the right approach for repair or replacement.

    Assess the Damage

    Once you notice a tear or a missing piece in your AirPods Pro tips, it’s essential to evaluate the extent of the damage. Start with a visual inspection to check for any obvious tears, rips, or missing parts. Examine both the rubber tips and the AirPods themselves. Next, assess the functionality.

    Even if the tear seems minor, it might affect the fit and comfort of the AirPods, or even the sound quality. If the AirPods don’t fit as securely in your ears or the audio seems compromised, it’s a clear sign that the tips need attention. Testing the AirPods for proper noise cancellation and fit can also help in assessing the damage.

    Replacement Options

    When it comes to replacing the rubber tips, you have a couple of options. Purchasing new tips from the Apple Store ensures you get high-quality replacements that are guaranteed to fit and function perfectly. These tips are specifically designed for AirPods Pro and provide the best experience. However, third-party sellers also offer replacement tips, often at a lower cost.

    When choosing third-party options, ensure they are explicitly designed for AirPods Pro to avoid compatibility issues. Look for reputable brands and check customer reviews to ensure quality. Some third-party options might offer different materials or sizes, which can be an advantage if you’re looking for something specific.

    DIY Fix

    If you’re inclined to fix the tips yourself, a DIY approach can be both cost-effective and quick. Here’s a step-by-step guide:

    1. Materials Needed: Gather a small amount of adhesive, tweezers, and a clean cloth. Ensure the adhesive is safe for use on silicone or rubber materials.
    2. Clean the AirPods: Gently clean the AirPods and the tips with the cloth to remove any debris or dirt. This step is crucial to ensure the adhesive bonds properly.
    3. Apply Adhesive: Carefully apply a small amount of adhesive to the torn area, being cautious not to use too much. Use a toothpick or a small tool to spread the adhesive evenly.
    4. Reattach the Tip: Use the tweezers to carefully reattach the rubber tip, ensuring it’s properly aligned with the AirPod. Hold it in place for a few minutes to let the adhesive set.
    5. Let it Set: Allow the adhesive to dry completely before using the AirPods again to ensure a secure bond. Follow the adhesive manufacturer’s instructions for drying time.

    Preventive Measures

    To avoid future issues with your AirPods Pro tips, it’s important to take some preventive measures. Proper storage is key; always store your AirPods in their case when not in use to protect them from accidental damage. Keeping them in the case prevents exposure to sharp objects and reduces the risk of tears.

    Additionally, handle the rubber tips gently when removing or attaching them to prevent tears. Avoid pulling them off with force. Proper care can significantly extend the life of your AirPods Pro tips. Regularly clean the tips and the AirPods to remove dirt and debris that can cause wear and tear. Consider having spare tips handy so you can replace them as soon as you notice any signs of wear.

    Professional Repair

    In cases where the damage is extensive or if a DIY fix doesn’t resolve the issue, seeking professional repair services may be necessary. If the functionality of the AirPods is compromised or if you’re not confident in fixing the tips yourself, it’s best to consult a professional.

    Apple Support or authorized service providers can offer repair or replacement services to ensure your AirPods Pro are restored to optimal condition. They have the expertise and tools to handle such repairs. Sometimes, extensive damage to the tips might indicate underlying issues with the AirPods that a professional can identify and fix.

    Customer Support

    For persistent issues or if you’re unsure about the best course of action, reaching out to Apple Support can be very helpful. They can provide guidance, troubleshoot potential problems, and suggest the best solutions. Additionally, visiting an authorized service provider ensures that any repairs or replacements are done correctly and with genuine parts. Apple Support can also provide information on warranties and coverage, which might save you costs if the damage is due to a manufacturing defect.

    Conclusion

    Dealing with ripped-off rubber tips on your AirPods Pro can be frustrating, but with the right approach, you can address the problem effectively. By identifying the cause of the AirPod Pro rubber tip ripped off, assessing the damage, exploring replacement options, and implementing preventive measures, you can maintain the functionality and longevity of your AirPods Pro. Taking proactive steps and seeking professional help when necessary ensures that you continue to enjoy a seamless and high-quality listening experience.

    Proper maintenance and handling can prevent future issues, allowing you to get the most out of your AirPods Pro.

    Also Check:

  • Apple Airpods Pro Ear tips Replacement: Where Can you find Best Replacement Rubber tips for AirPod Pro?

    Apple Airpods Pro Ear tips Replacement: Where Can you find Best Replacement Rubber tips for AirPod Pro?

    When it comes to getting the best out of your AirPods Pro, having high-quality rubber tips is crucial. Not only do these tips ensure a comfortable fit, but they also significantly impact the sound quality. In this guide, we will explore the importance of replacement rubber tips, factors to consider when choosing them, and provide insights into the best options available.

    Apple Airpods Pro Ear tips Replacement: Where Can you find Best Replacement Rubber tips for AirPod Pro?

    Why Are Replacement Rubber Tips Important?

    The rubber tips on your AirPods Pro play a vital role in ensuring a secure fit in your ears. Well-fitting tips create a proper seal, which is essential for noise cancellation and bass response. Over time, the original tips may wear out or become lost, necessitating replacements. High-quality replacement tips can enhance the overall listening experience by providing better comfort and improved sound isolation.

    Factors to Consider When Choosing Replacement Rubber Tips

    When selecting ear tip replacement, it’s important to consider the size and material. AirPods Pro tips come in different sizes—small, medium, and large—to accommodate various ear shapes. Choosing the right size ensures a snug fit and optimal performance. Additionally, the material of the tips matters. Silicone and memory foam are popular choices, each offering different levels of comfort and sound isolation. Compatibility with AirPods Pro is another crucial factor, as not all third-party tips may fit perfectly.

    Where to Buy Replacement Rubber Tips

    Several reputable online retailers offer high-quality AirPods Pro ear tips. Websites like Amazon, Apple’s official store, and Best Buy have a wide selection of options. Additionally, physical stores such as the Apple Store and electronics retailers often carry replacement tips. When purchasing, it’s beneficial to check customer reviews to ensure the quality and compatibility of the tips.

    Reviews of Popular Replacement Rubber Tips Brands

    Several brands are known for producing high-quality AirPod Pro rubber tips. Brands like Comply, SpinFit, and AhaStyle have received positive feedback from users for their comfort and durability. Customer reviews highlight the enhanced noise isolation and improved fit these tips provide. Many users have found that these brands offer a better experience compared to the original tips, particularly in terms of comfort during prolonged use.

    Tips for Replacing Rubber Tips on AirPods Pro

    Replacing the rubber tips on your AirPods Pro is a straightforward process. First, gently pull off the old tips from the earbuds. Align the new tips with the earbuds and push them on until they click into place. Ensure the tips are securely attached to avoid them falling off during use. It’s important to check that the new tips fit comfortably and create a proper seal in your ears.

    Maintenance and Care Tips for Replacement Rubber Tips

    To ensure the longevity of your replacement rubber tips, regular cleaning and maintenance are essential. Use a soft, dry cloth to wipe the tips after each use to remove earwax and dirt. Avoid using harsh chemicals or soaking the tips in water. Additionally, storing your AirPods Pro in their case when not in use helps protect the tips from damage and debris.

    Customization Options for Replacement Rubber Tips

    Many replacement rubber tips offer customizable features to suit individual preferences. Some brands provide tips in different colors and designs, allowing you to personalize your AirPods Pro. Customizable tips not only add a unique touch to your earbuds but also cater to specific needs, such as improved grip or enhanced noise isolation.

    Comparison of Different Types of Replacement Rubber Tips

    Airpod Pro rubber tips come in various materials, each with its own advantages and disadvantages. Silicone tips are durable, easy to clean, and provide a comfortable fit. Memory foam tips, on the other hand, offer superior noise isolation and conform to the shape of your ear for a personalized fit. Comparing these options can help you choose the best tips based on your comfort preferences and listening environment.

    Customer Satisfaction Guarantee and Return Policies

    Before purchasing replacement rubber tips, it’s important to check the return policies and satisfaction guarantees offered by retailers. Many reputable sellers provide a satisfaction guarantee, allowing you to return or exchange the tips if they do not meet your expectations. Checking for warranties can provide additional peace of mind, ensuring you get a quality product.

    Conclusion

    Investing in high-quality replacement rubber tips for your AirPods Pro can significantly enhance your listening experience. By considering factors such as size, material, and compatibility, and exploring reputable brands, you can find the perfect tips to suit your needs. Proper maintenance and care will ensure they last longer, providing you with the comfort and sound quality you deserve.

    Also Check:

  • Best AirPods Pro Case Covers: Top Picks for Style and Protection

    Best AirPods Pro Case Covers: Top Picks for Style and Protection

    AirPods Pro cases are essential for keeping your earbuds safe and adding a touch of personal style. With so many options available, selecting the right case can significantly enhance your AirPods Pro experience. This review explores some of the best AirPods Pro cases on the market, detailing their features, pros, cons, and pricing to help you make an informed choice.

    Best AirPods Pro Case Covers: Top Picks for Style and Protection

    Best AirPods Pro Case Covers: Top Picks for Style and Protection

    AirPods Pro are a significant investment, and protecting them should be a top priority. A good case cover not only shields your AirPods from daily wear and tear but also offers additional features like secure locks, carabiner clips, and wireless charging compatibility. This comprehensive review will cover a range of top-rated AirPods Pro cases, helping you make an informed decision.

    Spigen Lock Fit Case

    Spigen Lock Fit Case

    The Spigen Lock Fit Case is specifically designed for the AirPods Pro 2nd Generation (2022/2023), offering robust protection and functionality. Its Secure Lock Clip is a standout feature, preventing accidental drops with its secure mechanism. The multi-layered protection, combining a sturdy hybrid shell, ensures your AirPods are well-protected from everyday impacts. The case also includes a carabiner ring for easy portability and cutouts for lanyard compatibility, making it versatile for different carrying styles. Precise cutouts allow seamless access to the pairing button and power level, and the case is compatible with wireless charging, maintaining LED visibility for effortless charging status checks.

    With a high user rating of 4.6 out of 5 stars from 790 ratings, this case is a popular choice, reflected in its Amazon’s Choice status. However, potential buyers should note the high shipping and import fees for international orders. Currently priced at $22.99, down from its list price of $49.99, it offers good value despite additional shipping costs and potential sales tax.

    ESR AirPods Pro Case

    ESR AirPods Pro Case

    The ESR AirPods Pro Case is a versatile option, compatible with both the 2nd and 1st Generation models. It features a Magnetic Lid Lock and is MagSafe ready, ensuring your AirPods are secure and easily accessible. The drop-proof lid lock, using strong magnets, and the slide-to-open feature add convenience and security. The hybrid drop protection, combining an ultra-hard shell with a shock-absorbing core, provides excellent protection against falls and impacts. ESR’s commitment to customer support is evident with their comprehensive support and a 12-month protection plan.

    Sustainability features and detailed setup videos and FAQs further enhance its value. With a user rating of 4.5 out of 5 stars from 1,886 ratings, it is well-regarded by users. The only drawback is the slightly higher price for certain colors. Currently priced at $16.19, a 10% discount from its typical price of $17.99, it offers both protection and sustainability at a reasonable price.

    elago Pager Case

    elago Pager Case

    For those who appreciate a touch of nostalgia, the elago Pager Case offers a retro design with modern protection. Made from premium silicone material, it provides shock-resistant, full protection for your AirPods Pro. The nostalgic pager design is both unique and functional, with precise cutouts for lanyard attachment. This case is a perfect gift for retro enthusiasts and is especially popular during the holiday season. With a rating of 4.5 out of 5 stars from 60 ratings, it is appreciated for its high-quality in-house design. However, it comes with limited color options. Priced at $16.99, a 6% discount from its typical price of $17.99, it blends style and protection effectively.

    Valkit Armor Series Case

    Valkit Armor Series Case

    The Valkit Armor Series Case is designed for the AirPods Pro 1st Generation (2019), providing military-grade protection with a secure lock clip. Its rugged design ensures maximum protection, while the metal keychain clip allows for easy carrying. The case supports both wired and wireless charging, making it versatile. It also includes a cleaner kit and storage bag, adding extra value. With an impressive rating of 4.6 out of 5 stars from 13,057 ratings, it is a top choice for those seeking comprehensive protection. Despite being specific to the 1st Generation AirPods Pro, its affordable price of $6.98 makes it a budget-friendly option without compromising on quality.

    elago AW5 Case

    elago AW5 Case

    The elago AW5 Case stands out with its game console design and durable silicone construction. MagSafe compatibility ensures it works seamlessly with your charging setup. The case is made from flexible, impact-resistant material and features an anti-slip coating inside the cap to prevent accidental drops. With strong user ratings of 4.6 out of 5 stars from 21,952 ratings, it is popular for its unique and adorable design without sacrificing protection. Limited color options are the only downside. Priced at $10.99, it offers good protection against scratches and impacts at a reasonable price.

    KAKUYI AirPods Case:

    KAKUYI AirPods Case

    The KAKUYI AirPods Case brings a playful, cartoon design made from high-quality silicone material. Compatible with AirPods 1st and 2nd Generation, it provides durable and shock-resistant protection. A carabiner is included for easy attachment, making it convenient to carry. With a user rating of 4.6 out of 5 stars from 571 ratings, it is well-liked for its fun and unique design. The case also comes with 24-hour customer service, ensuring support when needed. However, it is specific to certain AirPods generations. Currently priced at $12.99, it offers both style and protection at an affordable price.

    Valkit Compatible AirPods Pro 2nd/1st Generation Case with Cleaner Kit

    Valkit Compatible AirPods Pro 2nd/1st Generation Case with Cleaner Kit

    This Valkit case, compatible with both the 2nd and 1st Generation AirPods Pro, features a cute 3D camera design. Made of high-quality silicone, it provides shockproof protection and precise cutouts for easy access. The case includes a durable keychain for portability and comes with a cleaner kit and storage bag. With strong user ratings (4.7 out of 5 stars from 59 ratings), it’s priced at $12.99, offering both style and protection.

    Doboli Compatible AirPods Pro 2nd & 1st Generation Case Cover

    Doboli Compatible AirPods Pro 2nd & 1st Generation Case Cover

    The Doboli AirPods Pro case is designed for both the 2nd and 1st Generation AirPods Pro, providing a secure lock and smooth silicone skin for added protection. This case prevents bumps and scratches while supporting wireless charging. It has a U.S. Patent Pending design and includes a carabiner and an anti-theft buckle. With user ratings of 4.3 out of 5 stars from 4,582 ratings, it’s a reliable option. Priced at $16.99, it offers a balance of durability and security.

    Conclusion

    In summary, each of these AirPods Pro cases offers unique features and benefits. The Spigen Lock Fit Case and Valkit Armor Series Case are top choices for those prioritizing robust protection. The ESR AirPods Pro Case and elago Pager Case blend functionality with a touch of style, while the elago AW5 Case and KAKUYI AirPods Case provide unique designs that stand out. When choosing a best Airpod Pro case covers, consider your specific needs, preferences, and the features that matter most to you.

    Investing in a good case not only protects your AirPods Pro but also adds a personal touch, ensuring your earbuds remain safe and stylish.

    Also Check:

  • Why do AirPods Not fit in My Ear? How to Make AirPods fit better in your Ear

    Why do AirPods Not fit in My Ear? How to Make AirPods fit better in your Ear

    Struggling with AirPods that don’t fit comfortably? Many users face issues with their earbuds either slipping out or feeling uncomfortable after extended use. This discomfort can detract from the otherwise impressive sound quality and wireless convenience AirPods offer. Finding a solution to achieve a better fit is essential not just for comfort, but also for maximizing the performance of your AirPods.

    Why do AirPods Not fit in My Ear? How to Make AirPods fit better in your Ear

    How to Improve the Fit of Your AirPods

    If you’ve ever struggled with AirPods that don’t seem to fit quite right, you’re not alone. Many people experience frustration and discomfort when their AirPods don’t sit comfortably in their ears. This common issue can detract from the enjoyment of using these high-quality earbuds. Here are some fixes that can help:

    1. Understanding the Issue

    AirPods are designed to fit a broad range of ear shapes, but they aren’t a one-size-fits-all solution. Variations in ear shape and size can significantly affect how well the AirPods fit. For some, this can lead to discomfort and an inconsistent listening experience. Whether it’s the earbuds feeling too loose, too tight, or even falling out, these issues can be quite inconvenient and disrupt your day-to-day use.

    2. Tips for Better Fit

    Improving the fit of your AirPods starts with a few practical adjustments. First, consider trying different sizes of ear tips if your model allows. The right size can make a world of difference in comfort and stability. Additionally, adjusting how you insert the AirPods into your ears can help. Make sure they are seated securely and angled correctly to ensure a snug fit. For example, gently twisting the AirPods as you insert them can help them settle better.

    3. Using Accessories

    If adjustments alone don’t resolve the issue, accessories can offer a significant improvement. Ear hooks or ear fins are designed to provide extra grip and prevent the AirPods from slipping out. These accessories can be particularly useful for active users who are on the move. Consider products like silicone ear hooks that wrap around your ears, adding a layer of security to your AirPods.

    4. Customizing the Fit

    For a more tailored approach, custom-fit solutions can be highly effective. Custom ear tips are made to match the unique shape of your ears, providing a perfect fit that enhances both comfort and sound quality. Investing in these personalized options can make a notable difference, particularly if you have ongoing issues with fit.

    5. Seeking Professional Help

    If you’ve tried various adjustments and accessories without success, consulting a professional might be the best step. Audiologists or ear specialists can provide expert advice and potentially custom solutions for your AirPods. They can help diagnose any fit issues related to ear anatomy and suggest tailored solutions for a more secure and comfortable fit.

    6. Maintaining Comfort and Functionality

    Striking a balance between comfort and functionality is crucial when adjusting the fit of your AirPods. A well-fitting pair of AirPods not only feels better but can also enhance sound quality and overall user experience. Ensuring that your AirPods fit securely in your ears can reduce the risk of them falling out, which in turn enhances the overall user experience.

    Conclusion

    Improving the fit of your AirPods can significantly enhance your listening experience. By understanding the underlying issues, experimenting with various tips and accessories, and considering custom solutions, you can achieve a fit that suits your needs. Don’t hesitate to seek professional help if necessary. With the right adjustments, you’ll be able to enjoy your AirPods with optimal comfort and performance. Remember that comfort should not come at the expense of functionality. A good fit should allow you to use all the features of your AirPods, including touch controls and active noise cancellation, without any hindrance.

    Also Check:

  • Updating Airpod Pro Firmware: How often Should you Update your AirPod Pro Settings

    Updating Airpod Pro Firmware: How often Should you Update your AirPod Pro Settings

    Imagine settling into your favorite playlist, only to find your AirPods Pro aren’t delivering the pristine sound quality you expect. Maybe the noise cancellation feels off, or the controls aren’t responding as smoothly. These small inconveniences can disrupt your entire listening experience. That is where updating comes in, keeping your AirPod Pro settings up-to-date can prevent these issues and enhance your overall experience. But, how often should you update your AirPod Pro settings?

    How Often Should You Update Your AirPod Pro Settings

    How Often Should You Update Your AirPod Pro Settings?

    How often should you update your AirPod Pro settings? Keeping your AirPod Pro settings up-to-date ensures you maximize their functionality and enjoy the best possible user experience. Typically, you can update your AirPod Pro settings from time to time to ensure you are using the AirPod firmware version. Since Apple periodically releases firmware updates that improve performance, add new features, or fix bugs.

    This regular maintenance can prevent issues from arising and keep your AirPods Pro in optimal condition. Here’s a detailed guide on when and why you should update your AirPod Pro settings.

    1. After Firmware Updates

    Frequency: As needed

    • Reason: Firmware updates from Apple can introduce new features, improve existing ones, or fix bugs. After an update, review your settings to take advantage of any new options or enhancements.

    2. When Experiencing Issues

    Frequency: As needed

    • Reason: If you notice connectivity problems, poor sound quality, or unresponsive controls, it’s a good time to review and possibly reset your settings to troubleshoot and resolve these issues.

    3. When Changing Devices

    Frequency: When paired with a new device

    • Reason: Different devices (iPhone, iPad, Mac) may have unique settings configurations. Ensure your AirPods Pro settings are optimized for each device you regularly use.

    4. With Significant Lifestyle Changes

    Frequency: As needed

    • Reason: Changes in your daily routine, such as starting a new workout regimen, changing jobs, or traveling more frequently, may necessitate adjustments to settings like noise cancellation, transparency mode, or gesture controls to better suit your environment and activities. For instance, you might want to tweak the noise cancellation or transparency mode settings to better accommodate your new environment or usage scenario.

    5. Regular Maintenance

    Frequency: Every few months

    • Reason: Periodically reviewing your settings can help ensure they are still aligned with your preferences and needs. This is especially important as Apple may release updates or you might change how you use your AirPods Pro over time.

    6. When Getting New Accessories

    Frequency: As needed

    • Reason: If you get new ear tips, cases, or other accessories, you might need to update your settings to ensure compatibility and optimal performance.

    7. Personalized Sound Preferences

    Frequency: As needed

    • Reason: Your sound preferences might change over time. Regularly checking and adjusting settings like the Adaptive EQ or Ear Tip Fit Test can ensure you continue to enjoy the best possible audio experience.

    Conclusion

    Regularly updating your AirPods Pro settings ensures you are making the most out of your device. By staying attuned to firmware updates, troubleshooting issues promptly, adapting to lifestyle changes, and conducting periodic reviews, you can maintain an optimal and personalized listening experience.

    Also Check:

  • Why is One of My Airpods Not Working? 7 Ways to Troubleshoot

    Why is One of My Airpods Not Working? 7 Ways to Troubleshoot

    Experiencing one AirPod not working, whether it’s the right or left, can be incredibly frustrating for users who rely on their AirPods for seamless audio. Understanding the root cause and troubleshooting the problem effectively can save time and restore the functionality of your AirPods.

    Why is One of My Airpods Not Working? 7 Ways to Troubleshoot

    What to Do When One AirPod Isn’t Working

    Here are some steps to help you resolve the issue.

    1. Check for Connection Issues

    • Ensure Proper Connection: Sometimes, the simplest explanation is the correct one. Your AirPods might not be properly connected to your device. Check the Bluetooth settings on your device to ensure that both AirPods are connected. If only one is showing, try reconnecting them.
    • Reconnect AirPods: To do this, go to your device’s Bluetooth settings, find your AirPods on the list of connected devices, and select “Forget This Device.” Then, place both AirPods back in their charging case, close the lid, wait for about 15 seconds, and open the lid again. Press and hold the setup button on the back of the case until the status light flashes white. Reconnect your AirPods by selecting them from the Bluetooth settings on your device.

    2. Clean the AirPods

    • Remove Dust and Debris: Dirt, earwax, and other debris can accumulate in the small openings of your AirPods, affecting their performance. Use a soft, dry cloth to gently clean the exterior of the AirPods and the charging case.
    • Clean Speaker Grills: Use a dry cotton swab or a soft-bristled brush to gently clean the speaker grills and the microphone ports. Avoid using sharp objects or liquids to prevent damage to the internal components.

    3. Reset the AirPods

    • Perform a Reset: Resetting your AirPods can often fix connectivity issues. To reset, place your AirPods in their charging case and close the lid. Wait for 30 seconds, then open the lid. On your device, go to Settings > Bluetooth, find your AirPods, and select “Forget This Device.” Now, press and hold the setup button on the back of the case until the status light flashes amber, then white. Reconnect your AirPods to your device.

    4. Update Software

    • Check for Updates: Software updates can fix bugs and improve the performance of your AirPods. Ensure your iOS device is updated to the latest version. Your AirPods should update automatically when they’re connected to your device and placed in the charging case.
    • Manual Update Check: To manually check for updates, go to Settings > General > About > AirPods when your AirPods are connected to your device. If there is a firmware update available, it will install automatically.

    5. Check Audio Settings

    • Adjust Audio Balance: Sometimes, audio settings on your device can be misconfigured, leading to issues with one AirPod. Go to Settings > Accessibility > Audio/Visual and check the balance slider. Make sure it is centered so that the audio is evenly distributed between both AirPods.
    • Check Volume Levels: Ensure that the volume levels on your device are not too low or muted for one side. Also, try playing audio from different apps to rule out app-specific issues.

    6. Try Different Devices

    • Test on Another Device: Connecting your AirPods to another device can help determine if the problem is with the AirPods or the original device. Pair your AirPods with another iPhone, iPad, or even a non-Apple device. If the AirPods work fine with another device, the issue likely lies with the original device’s settings or Bluetooth connection.

    7. Contact Apple Support

    • Seek Professional Help: If none of the troubleshooting steps work, it might be time to contact Apple Support. They can provide additional solutions, run diagnostics, and determine if there’s a hardware issue that needs repair. You can contact them via phone, chat, or visit an Apple Store or an authorized service provider.

    Consider Buying a Replacement

    If your AirPods are still under warranty and you’ve tried all troubleshooting steps without success, consider getting a replacement. Apple offers a warranty and AppleCare+ for AirPods, which covers manufacturing defects. Even if your AirPods are out of warranty, Apple provides a replacement program for a fee.

    Conclusion

    Troubleshooting one non-working AirPod involves several steps that can often resolve the issue without professional help. By following these suggestions, you can restore your AirPods’ functionality and avoid unnecessary frustration. Always try these solutions before considering replacement options or seeking professional help.

    Also Check:

  • How to Remove AirPod Pro tips: Can’t Remove Airpod Pro tips?

    How to Remove AirPod Pro tips: Can’t Remove Airpod Pro tips?

    AirPods Pro are designed with replaceable tips to provide a customizable fit and enhanced sound quality. On the other hand, knowing how to properly remove and replace these tips is crucial for maintaining the functionality and longevity of your AirPods Pro. But, want if you can’t Remove or don’t know to how Airpod Pro tips? This guide will walk you through the steps to safely remove and replace the tips of your AirPods Pro.

    How to Remove AirPod Pro tips: Can't Remove Airpod Pro tips?


    How to Remove AirPod Pro Tips

    Knowing how to remove and replace these tips properly is essential for maintaining their functionality and longevity. This guide will walk you through each step to ensure you do it correctly.

    Step 1: Preparation

    Gather Necessary Tools

    Before starting, gather a clean cloth or tissue to avoid damaging the AirPods Pro tips. This will help ensure that you have everything you need for a smooth process.

    Ensure a Clean Workspace

    Find a well-lit, clean workspace to prevent losing any small parts. A clear area will help you see what you’re doing and keep everything organized.

    Step 2: Loosening the AirPod Pro Tips

    Gently Twist and Pull

    Hold your AirPods Pro firmly and gently twist the silicone tips while pulling them away from the earbuds. This twisting motion helps to loosen the tips from their secure attachment without applying excessive force.

    Avoid Excessive Force

    Be careful not to use too much force as it could damage the tips or the AirPods Pro. A gentle approach ensures you won’t break or tear any parts. If the tips don’t come off easily, try twisting them a bit more gently.

    Step 3: Removing the AirPod Pro Tips

    Carefully Slide Off the Tips

    Once the tips are sufficiently loosened, carefully slide them off the AirPods Pro. Take your time to ensure they come off smoothly.

    Clean the Tips and AirPods

    Use a clean cloth or tissue to wipe the AirPod Pro tips and the earbuds themselves. This helps remove any accumulated dirt or debris, ensuring optimal performance and hygiene.

    Step 4: Replacing the AirPod Pro Tips

    Align the New Tips

    Take your new AirPod Pro tips and align them with the earbuds. Make sure they are positioned correctly to fit snugly.

    Gently Push into Place

    Gently push the new tips onto the AirPods Pro until they click into place. Ensure they are securely attached to prevent them from falling off during use.

    Conclusion

    Properly removing and replacing the AirPod Pro tips is essential for maintaining the comfort, fit, and functionality of your earbuds. By following these steps, you can ensure that your AirPods Pro remain in excellent condition and continue to provide you with the best possible audio experience.

    Taking care of the tips not only prolongs their life but also enhances your overall listening experience.

    Also Check: