Category: Earbuds/Headphones

Find the perfect sound companion in this category. Whether you’re into high-fidelity audio, noise-canceling tech, or workout-friendly earbuds, we test and review a variety of headphones to help you tune into the ultimate listening experience.

  • How to Change AirPod Pro Settings: What are the steps to Change AirPod Pro Settings?

    How to Change AirPod Pro Settings: What are the steps to Change AirPod Pro Settings?

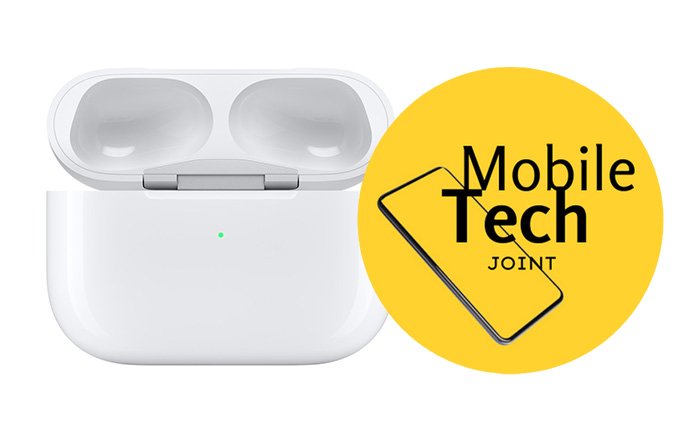
    How to change AirPod Pro settings? AirPods Pro are designed to offer a premium audio experience with features like noise cancellation, transparency mode, and customizable controls. Understanding how to access and adjust these settings can make your AirPods Pro even more enjoyable and tailored to your needs.

    How to Change AirPod Pro Settings: What are the steps to change AirPod Pro settings?

    How to Change AirPod Pro Settings

    Customizing your AirPod Pro settings can significantly enhance your user experience, tailoring the performance and functionality to meet your specific needs. This guide will walk you through the various settings available and how to adjust them for the best possible experience with your AirPods Pro.

    Step 1: Accessing AirPod Pro Settings

    Accessing on iPhone and iPad

    1. Connect your AirPods Pro to your iPhone or iPad.
    2. Open the Settings app.
    3. Tap on “Bluetooth.”
    4. Find your AirPods Pro in the list of devices and tap the “i” icon next to them to access the settings.

    Accessing on Mac

    1. Connect your AirPods Pro to your Mac.
    2. Click on the Apple menu and select “System Preferences.”
    3. Click on “Bluetooth.”
    4. Find your AirPods Pro in the list of devices and click “Options” next to them to access the settings.

    Step 2: Customizing Controls

    Changing Double-Tap or Squeeze Gestures

    1. Go to the AirPods Pro settings as described above.
    2. Tap on “Left” or “Right” under the “Press and Hold AirPods” section.
    3. Choose between Noise Control, Siri, or Off.

    Customizing Other Gestures

    1. In the AirPods settings, you can adjust the press speed and hold duration under “Press Speed” and “Hold Duration.”
    2. Customize these settings to match your preferences for more responsive controls.

    Step 3: Adjusting Audio Settings

    Changing Noise Cancellation or Transparency Mode

    1. Access the AirPods Pro settings.
    2. Under “Noise Control,” toggle between Noise Cancellation, Transparency, and Off.
    3. You can also switch modes directly from the Control Center on your device by pressing and holding the volume slider.

    Step 4: Managing Battery Settings

    Checking Battery Level

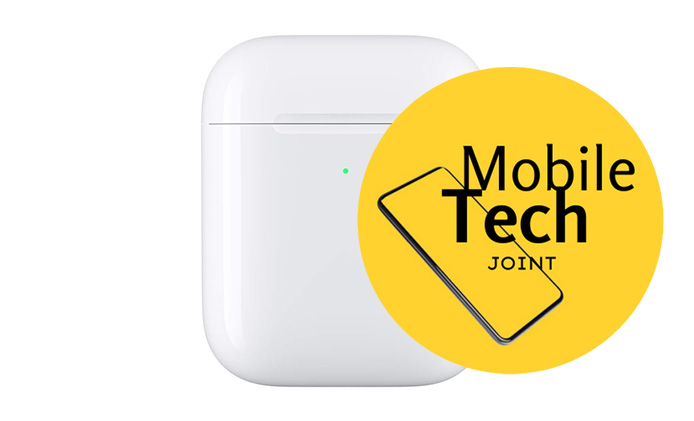
    1. Open the AirPods Pro settings on your device.
    2. The battery level for both the AirPods and the charging case will be displayed.

    Enabling Optimized Battery Charging

    1. In the AirPods settings, enable “Optimized Battery Charging” to extend the battery lifespan by learning your charging routine and reducing wear.

    Step 5: Personalizing Fit and Sound

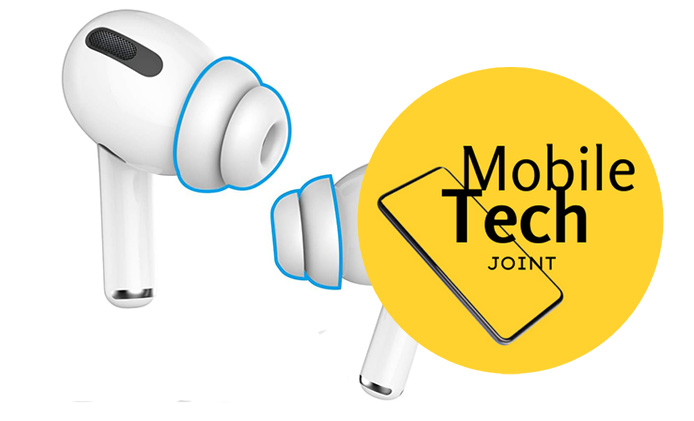
    Using the Ear Tip Fit Test

    1. In the AirPods settings, tap “Ear Tip Fit Test.”
    2. Follow the on-screen instructions to ensure the best fit and sound quality.

    Adaptive EQ Feature

    1. Adaptive EQ automatically tunes the music to the shape of your ear, providing a personalized sound experience.
    2. Ensure your AirPods Pro fit well for the Adaptive EQ to work effectively.

    Step 6: Updating Firmware

    Checking and Installing Firmware Updates

    1. AirPods Pro firmware updates automatically when connected to your iPhone, iPad, or Mac with internet access.
    2. To check the firmware version, go to the AirPods settings and scroll down to “About.”
    3. Ensure your device is connected and the AirPods are charging to receive updates.

    Step 7: Troubleshooting Common Issues

    Connectivity Problems

    1. If your AirPods Pro are not connecting, try resetting them by holding the setup button on the case until the light flashes amber.
    2. Reconnect your AirPods Pro to your device.

    Unresponsive Controls

    1. If the controls are not responding, check the settings to ensure the gestures are configured correctly.
    2. Restart your device or reset the AirPods if the problem persists.

    Step 8: Using Siri with AirPod Pro

    Customizing Siri Settings

    1. In the AirPods settings, ensure “Hey Siri” is enabled for hands-free voice commands.
    2. Customize Siri responses and functions under “Siri & Search” in your device’s settings.

    Siri Features

    1. Use Siri to control music playback, adjust volume, make calls, and get directions without touching your AirPods.

    Conclusion

    By exploring and customizing the settings on your AirPods Pro, you can enhance your listening experience, ensuring comfort, functionality, and personalized sound quality. Take the time to adjust these settings to get the most out of your AirPods Pro.

    Also Check:

  • Is Airpod Case Flashing Orange a Serious Issue? Here are Some Possible Causes and how to Fix

    Is Airpod Case Flashing Orange a Serious Issue? Here are Some Possible Causes and how to Fix

    What to do if your AirPods case is flashing orange? Generally, a flashing orange light is not a serious issue and can often be resolved with simple troubleshooting steps. However, if the problem persists after trying these steps, it could indicate a more significant hardware problem that may require professional assistance. This guide will help you understand why the orange light might be flashing and provide steps to resolve the issue.

    Airpod Case Flashing Orange: Is Airpod Case Flashing Orange a Serious Issue?


    Possible Causes for Flashing Orange Light

    1. Low Battery: One of the most common reasons for an orange flashing light is a low battery in the AirPods case.
    2. Pairing Error: The orange light may indicate a problem with pairing the AirPods with your device.
    3. Firmware Update Needed: Sometimes, a flashing orange light can signal that the AirPods need a firmware update.
    4. Hardware Issue: Less commonly, the orange light could indicate a hardware issue with the AirPods or the case.

    Steps to Fix Flashing Orange Light

    1. Check the Battery

    • Connect the Charging Case: Plug your AirPods case into a charger using the Lightning cable.
    • Wait for Charging: Allow the case to charge for at least 15 minutes.
    • Check the Light: If the light turns green or white after charging, the issue was likely due to a low battery.

    2. Reset Your AirPods

    • Open the Case: Make sure your AirPods are in the case and the lid is open.
    • Press and Hold the Setup Button: On the back of the case, press and hold the setup button for about 15 seconds until the light flashes amber and then white.
    • Reconnect Your AirPods: Close the lid and reopen it near your device to reconnect the AirPods.

    3. Update Firmware

    • Connect to Power: Ensure your AirPods are connected to a power source and near your iPhone.
    • Automatic Update: The firmware should update automatically when the AirPods are charging and near a connected iPhone.
    • Check Update Status: Go to Settings > General > About > AirPods on your iPhone to check the firmware version.

    4. Contact Apple Support

    • Persistent Issues: If the orange light continues to flash after trying the above steps, there may be a hardware issue.
    • Apple Support: Contact Apple Support or visit an Apple Store for further assistance.

    Conclusion

    A flashing orange light on your AirPods case can be due to several reasons, including low battery, pairing issues, or the need for a firmware update. By following the steps outlined in this guide, you can usually resolve the issue. If the problem persists, it’s best to seek help from Apple Support to ensure your AirPods are functioning correctly. Thank you for reading, and we hope this guide helps you get your AirPods back to working order.

    Also Check:

  • I lost my AirPod case but I have my AirPods, this is how i found my Airpod case without Pods

    I lost my AirPod case but I have my AirPods, this is how i found my Airpod case without Pods

    Losing your AirPod case can be incredibly frustrating, especially when you still have the AirPods themselves. I remember the panic that set in when I realized my AirPod case was missing. I had been so busy running errands that I couldn’t pinpoint where I might have left it. I lost my AirPod case but I have my AirPods. If you’re in the same boat, don’t worry. Here’s a step-by-step guide to help you find your lost AirPod case.

    I lost my AirPod case but I have my AirPods: Here are few tricks to find it

    How to find your AirPod Case without Pods

    Airpod case is essential for charging and protecting your AirPods, making it a crucial accessory. If you find yourself in this situation, don’t worry. Here’s a step-by-step guide to help you locate your lost AirPods case:

    1. Check Your Surroundings

    Look Around the Area

    Start by checking the last place you remember using your AirPods. Look under furniture, in pockets, and in bags. Sometimes, the case can slip into unexpected places.

    • Under Furniture: Move around and check under sofas, tables, and beds.
    • Pockets: Check all the pockets in your clothes, jackets, and bags.
    • Bags: Look inside all the compartments of your backpacks, purses, and any other bags you’ve used recently.

    2. Use the Find My App

    Locating with Find My App

    Apple’s Find My app can be a lifesaver in these situations. If you’ve enabled it, you can use it to locate your AirPod case.

    1. Open the Find My App: On your iPhone, open the Find My app.
    2. Select Devices: Tap on the “Devices” tab.
    3. Find Your AirPods: Select your AirPods from the list.
    4. Locate: If the case is nearby, you can play a sound to help locate it. If it’s not close, the app will show the last known location.

    3. Retrace Your Steps

    Think Back to Recent Locations

    Try to remember where you’ve been since you last had the case. Retrace your steps and visit the places you stopped at or spent time in.

    • Workplaces: Check your desk, lockers, or break rooms.
    • Homes of Friends/Family: See if you left it at someone’s house.
    • Public Places: Check any cafes, parks, or stores you visited.

    4. Use a Bluetooth Tracker

    Locating with Bluetooth Trackers

    If you often misplace your AirPod case, consider using a Bluetooth tracker.

    • Popular Trackers: Products like Tile or Apple’s AirTag can be attached to your case. They connect to your phone and help you locate lost items.
    • How to Use: Attach the tracker to your case and use the associated app to find it.

    5. Contact Apple Support

    Reach Out for Professional Help

    If all else fails, contact Apple Support for assistance.

    • Apple Support Website: Visit the Apple Support website.
    • Contact Information: Use the contact options provided to speak with a representative who can help you.

    Consider Purchasing a Replacement

    Buying a New Case

    If you can’t find your case, you may need to purchase a replacement.

    • Apple Store: You can buy a replacement case directly from Apple.
    • Online Retailers: Check other trusted retailers for possibly lower prices.

    Tips for Preventing Future Loss

    Keeping Track of Your Case

    To avoid losing your AirPod case in the future, consider these tips:

    • Keychain Attachments: Use a case with a keychain attachment to clip it to your bag or keys.
    • Designated Storage Area: Create a specific place at home where you always store your AirPods.

    Conclusion

    Losing your AirPod case can be a hassle, but by following these steps, you can increase your chances of finding it. Check your surroundings, use the Find My app, retrace your steps, ask for help, and consider using a Bluetooth tracker for future prevention. If needed, don’t hesitate to contact Apple Support or purchase a replacement. Stay persistent in your search, and take preventative measures to avoid losing it again in the future.

    Also Check:

  • Airpod Case Magnet Not Working: Is there a way to fix Airpod Case Magnet not working?

    Airpod Case Magnet Not Working: Is there a way to fix Airpod Case Magnet not working?

    If you’ve noticed that the magnet in your AirPod case isn’t working, you know how frustrating it can be. The magnet plays a crucial role in keeping your AirPods secure and ensuring they charge properly. In this guide, we’ll walk you through the process of inspecting, cleaning, and potentially repairing your AirPod case.

    Airpod Case Magnet Not Working: Is there a way to fix Airpod Case Magnet not working?

    How to fix Airpod Case Magnet not working

    A malfunctioning AirPod case magnet can cause your AirPods to not stay in place or charge correctly. This common issue can often be fixed with a few simple steps. Here’s a guide to help you troubleshoot and resolve this issue:

    1. Check for Debris

    Step 1: Inspect the Case: Start by inspecting the inside of your AirPod case. Dirt, dust, or debris can obstruct the magnet, preventing it from working correctly.

    Step 2: Clean the Case: Use a soft, dry cloth to gently clean the inside of the case, focusing on the magnet area. Avoid using any liquids or abrasive materials that could damage the case.

    Tip: A can of compressed air can help remove small particles that are difficult to reach.

    2. Reset the AirPod Case

    Step 1: Open and Close the Lid: Try resetting the AirPod case by repeatedly opening and closing the lid. This can sometimes reposition the magnet and resolve any minor connectivity issues.

    Step 2: Reinsert the AirPods: Remove the AirPods from the case, then place them back inside. Ensure they are seated correctly and that the lid closes properly.

    Note: This simple action can help realign the magnet and improve its functionality.

    3. Update the Software

    Step 1: Check for Updates: Ensure that your AirPod case and the devices it’s connected to have the latest software updates installed. Outdated software can cause compatibility issues that affect the magnet’s performance.

    Step 2: Update Your Devices: Update your iPhone, iPad, or other connected devices to the latest iOS version. This can help resolve software-related issues.

    How-To: Go to Settings > General > Software Update to check for and install updates.

    4. Contact Apple Support

    Step 1: Reach Out for Assistance: If the issue persists despite your efforts, consider reaching out to Apple Support. They can provide additional troubleshooting steps or arrange for a repair or replacement if necessary.

    Step 2: Prepare for Your Appointment: Before contacting Apple, ensure you have your AirPods, case, and any relevant purchase information ready. This will help expedite the support process.

    Resource: Visit Apple Support to get started.

    5. Use a Magnetic Case Alternative

    Step 1: Consider Third-Party Options: If the built-in magnet in your AirPod case cannot be fixed, consider using a third-party magnetic case alternative. These cases can provide a similar function for holding your AirPods in place.

    Step 2: Research and Purchase: Look for reputable brands and read customer reviews to find a reliable magnetic case that meets your needs.

    Recommendation: Search for “magnetic AirPod case” on popular e-commerce sites like Amazon or Best Buy.

    Conclusion

    A functioning magnet in your AirPod case is essential for keeping your AirPods secure and ensuring they charge properly. By checking for debris, resetting the case, updating the software, and seeking professional help if needed, you can resolve this common issue. If all else fails, consider using a third-party magnetic case alternative.

    Remember, maintaining your AirPod case can prevent future problems. Regular cleaning and software updates are simple yet effective ways to keep your AirPods in top condition. If you’ve tried all the steps and the problem persists, don’t hesitate to contact Apple Support for professional assistance.

    Also Check:

  • How do Airpod Case Cover Improve the Overall Lifespan of Your Airpod

    How do Airpod Case Cover Improve the Overall Lifespan of Your Airpod

    With the increasing popularity of AirPods, it’s more important than ever to ensure their longevity through proper protection. AirPod case covers have become a must-have accessory, offering essential protection against everyday wear and tear. In this guide, we’ll explore why AirPod case covers are vital and how they can benefit you.

    How do Airpod Case Cover Improve the Overall Lifespan of Your Airpod

    How Do Airpod Case Cover Improve the Lifespan of Your Airpod

    AirPod case covers provide several benefits that help maintain your AirPods in pristine condition:

    • Prevent Scratches and Dents: AirPods can easily get scratched or dented from daily use. A case cover acts as a protective layer, preventing these minor damages that can accumulate over time and affect the appearance and functionality of your AirPods.
    • Keep AirPods Clean: Dust, dirt, and debris can accumulate on your AirPods, affecting their performance. Case covers help keep your AirPods clean by providing a barrier against environmental contaminants. This is especially useful for those who frequently use their AirPods in various settings.
    • Absorb Shock from Drops: Accidental drops can cause significant damage to your AirPods. Case covers are designed to absorb shock and cushion the impact, reducing the risk of internal and external damage. This can save you from costly repairs or replacements.

    Material and Design Options

    AirPod case covers come in various materials and designs, each offering unique benefits:

    • Silicone: Silicone covers are soft, flexible, and provide a good grip, preventing accidental drops. They are excellent at absorbing shock and come in various colors and designs. However, they can attract dust and lint.
    • Leather: Leather covers offer a premium look and feel, providing a sophisticated and professional appearance. They are durable and provide excellent protection, but they can be more expensive than other materials. Leather covers may also show wear over time, adding a unique patina.
    • Hard Plastic: Hard plastic covers provide sturdy protection and are available in numerous designs and colors. They are resistant to scratches and dents but may not absorb shock as effectively as silicone. They offer a slim profile, maintaining the sleek look of your AirPods.

    Recommendations: If you prioritize shock absorption and a secure grip, silicone is a great choice. For a premium, professional look, leather is ideal. If you want robust protection with a slim profile, hard plastic is the way to go.

    Customization and Personalization

    One of the fun aspects of AirPod case covers is the ability to customize them to reflect your style:

    • Colors, Patterns, and Prints: AirPod case covers come in a wide range of colors, patterns, and prints, allowing you to express your personality and preferences. Whether you prefer vibrant, bold colors or subtle, muted tones, there’s a design for everyone.
    • Personalized Designs: Many manufacturers offer customized designs, including monograms, logos, and unique patterns. This adds a personal touch and makes your AirPods stand out.

    Tips: Choose a case cover that not only protects your AirPods but also complements your personal style. For example, if you have a minimalist aesthetic, opt for a sleek, monochrome cover. If you love bold patterns, choose a case cover with a striking design.

    Durability and Longevity

    Investing in a high-quality AirPod case cover ensures long-lasting protection:

    • Durability: A well-made case cover can withstand daily wear and tear, ensuring your AirPods remain protected over time. Durable materials like leather and hard plastic are less likely to wear out quickly.
    • Longevity: Reliable protection from a quality case cover means fewer damages and repairs, allowing your AirPods to last longer. This is particularly important if you use your AirPods frequently and in various environments.

    Examples: Brands like Spigen, Nomad, and Catalyst are known for their durable and long-lasting AirPod case covers. These brands offer a variety of designs and materials to suit different preferences and needs.

    Maintenance and Care Tips

    To keep your AirPod case cover effective, regular maintenance is key:

    • Cleaning: Regularly clean your case cover with a damp cloth to remove dirt and grime. For silicone covers, a gentle soap solution can help remove stubborn stains. Leather covers can be cleaned with a leather cleaner and conditioner.
    • Care: Handle your AirPods and their cover with care to avoid unnecessary wear and tear. Avoid exposing the case cover to extreme temperatures or harsh chemicals that could damage the material.

    Guidance: Clean the case cover at least once a week and check for any signs of damage that may compromise its protection. Keeping the cover in good condition ensures it continues to protect your AirPods effectively.

    User Reviews and Feedback

    Hearing from others who have benefited from AirPod case covers can be insightful:

    • Real-Life Experiences: Users have reported significant protection from drops and scratches, enhancing their AirPods’ longevity. These testimonials highlight the practical benefits of using a case cover.
    • Visual Proof: Before-and-after photos and videos can demonstrate the effectiveness of using a case cover. Seeing how a case cover has protected AirPods from damage can be convincing for potential buyers.

    Highlight: Many users have shared positive testimonials, emphasizing how their AirPods remained in excellent condition thanks to a quality case cover. These real-life examples can help you make an informed decision when choosing a case cover.

    Conclusion

    AirPod case covers are a valuable investment for protecting your AirPods. They prevent damage, keep your AirPods clean, and can be personalized to match your style. By choosing a high-quality cover and maintaining it properly, you ensure your AirPods’ longevity and functionality. Consider adding a case cover to your AirPods to enjoy these benefits and keep them looking and working like new.

    Also Check:

  • How to Turn Off AirPods in Case

    How to Turn Off AirPods in Case

    AirPods are an essential accessory for many people, offering seamless connectivity and superior sound quality. Knowing how to properly turn them off when not in use is crucial for preserving battery life and avoiding connectivity issues. This guide will walk you through the steps to ensure your AirPods are properly turned off, along with some tips for maintaining them.

    How to Turn Off AirPods in Case

    By following the steps below, you can avoid common mistakes and enjoy a seamless audio experience:

    How to Turn Off AirPods in Case

    Compared to other wireless earbuds or headphones, AirPods offers a unique and straightforward method for turning off and disconnecting. While many wireless earbuds require manual power off via buttons or app controls, AirPods utilize an automatic system activated by simply placing them in the charging case and closing the lid. This feature simplifies the user experience and ensures efficient battery management. Here is how to properly turn off your Airpods in case:

    Step 1: Remove AirPods from Your Ears

    First, remove your AirPods from your ears. This step ensures you have a clear view and better control over placing them in the charging case. It’s important to handle your AirPods carefully to avoid dropping them, which could cause damage. Removing them from your ears also helps prevent any accidental taps that could activate Siri or other features.

    Step 2: Place AirPods in the Charging Case

    Carefully place each AirPod into the charging case. Ensure they are seated correctly to initiate the disconnection process. The AirPods have a specific orientation, so make sure each one fits snugly into its designated slot. This not only ensures proper charging but also triggers the automatic shutdown mechanism.

    Step 3: Close the Lid of the Charging Case

    Close the lid of the charging case to ensure the AirPods are properly seated. This action automatically disconnects and powers off the AirPods. The charging case is designed to keep your AirPods secure and to prevent them from being exposed to dust and debris. A closed lid also helps maintain the internal environment of the case, ensuring optimal charging conditions.

    Step 4: Wait for Disconnection

    Wait a few seconds for the AirPods to disconnect from your device and power off. You’ll notice the light on the case indicating that the AirPods are charging. This waiting period is crucial as it confirms that the AirPods have successfully powered down and are no longer actively connected to your device, which helps conserve battery life.

    Preserving Battery Life

    Turning off your AirPods by placing them in the charging case helps conserve battery life. When AirPods are left outside the case, they remain connected and continue to drain battery power. By following these steps, you ensure that the battery is preserved, extending the overall lifespan of your AirPods. Keeping your AirPods charged also ensures they are ready for use whenever you need them, without unexpected power issues.

    Avoiding Connectivity Issues

    Properly turning off your AirPods can help prevent connectivity issues. If not turned off correctly, AirPods might remain connected to your device, causing issues when you try to use them again. Ensuring they are disconnected and powered off allows for a seamless experience when you next use them. This step also helps avoid interference with other Bluetooth devices, ensuring a stable and uninterrupted connection.

    Common Mistakes to Avoid

    • Leaving AirPods Out of the Case: Always place your AirPods in the case when not in use to avoid unnecessary battery drain. AirPods left out of the case can also be easily lost or damaged.
    • Forgetting to Close the Lid: Make sure to close the lid of the charging case after placing the AirPods inside. This step is crucial for disconnection and power off. An open case can also allow dust and debris to enter, which can affect the charging contacts and overall performance.
    • Using Damaged Cables: Ensure that the charging cable and case are in good condition to prevent charging issues. Damaged cables can lead to inefficient charging or even damage your AirPods and case. Regularly inspect your charging accessories and replace them if they show signs of wear and tear.

    Tips for Maintaining 

    • Keep Them Clean: Regularly clean your AirPods and the charging case to maintain sound quality and charging efficiency. Use a soft, dry cloth to wipe them down. Avoid using liquids, as moisture can damage the electronic components. Keeping your AirPods clean also helps prevent ear infections and ensures they look good as new.
    • Store Properly: Always store your AirPods in their case when not in use. This practice protects them from damage and dust, and ensures they are always charged and ready to go. The case is designed to keep your AirPods secure and to charge them efficiently, so using it correctly is key to maintaining their performance.
    • Avoid Extreme Temperatures: Do not expose your AirPods to extreme temperatures as it can affect battery life and overall performance. Extreme cold can reduce battery efficiency, while high temperatures can cause permanent damage to the battery and other components. Store your AirPods in a cool, dry place to keep them in optimal condition.

    Conclusion

    Turning off your AirPods properly is essential for preserving battery life and ensuring they function optimally. By following the outlined steps, you can avoid common mistakes and enjoy a seamless audio experience. Regular maintenance and proper storage will also help extend the lifespan of your AirPods, ensuring they remain in top condition. Follow these tips to ensure your AirPods remain in top condition, providing you with excellent sound quality and convenience.

    Also Check:

  • How to Change Earbud Tips on AirPod Pro

    How to Change Earbud Tips on AirPod Pro

    Finding the right fit for your AirPods Pro is crucial for both comfort and sound quality. Poorly fitting earbud tips can lead to discomfort and a subpar listening experience. In this guide, we’ll walk you through the steps to change your AirPods Pro earbud tips, ensuring you get the best possible fit.

    How to Change Earbud Tips on AirPod Pro

    How to Change Earbud Tips on AirPod Pro

    Here are the steps to change your AirPods Pro earbud tips, ensuring you get the best possible fit:

    Step 1: Gather the Necessary Materials

    Before you start, make sure you have everything you need:

    • New earbud tips (these usually come in three sizes (small, medium, large) with your AirPods Pro. Make sure you have these handy)
    • A clean, flat workspace
    • A soft cloth (optional, but useful for cleaning your AirPods Pro and the new earbud tips before attaching them.)

    Having a clean workspace helps prevent dirt and debris from getting on your new earbud tips.

    Step 2: Remove the Old Earbud Tips

    1. Hold the AirPods Pro: Grasp your AirPods Pro firmly in one hand, ensuring a stable grip.
    2. Grip the Earbud Tip: Using your other hand, pinch the base of the earbud tip where it connects to the AirPod.
    3. Gently Pull: Carefully pull the earbud tip straight off. It should come off with a little bit of force.

    To avoid damaging your AirPods Pro, make sure you pull straight and do not twist the earbud tips.

    Step 3: Choose the Right Size Earbud Tips

    Finding the correct size earbud tips is essential for comfort and sound isolation. Apple provides three sizes (small, medium, large) to help you find the best fit.

    1. Test Different Sizes: Try each size and see which one feels the most comfortable and provides the best seal.
    2. Check for Fit and Seal: The right size should fit snugly in your ear without causing discomfort and should create a good seal to block out external noise.

    Step 4: Attach the New Earbud Tips

    1. Align the Earbud Tip: Line up the new earbud tip with the connector on the AirPod.
    2. Push and Click: Push the earbud tip onto the connector until you hear a click, indicating it is securely attached.

    Ensure the new tips are properly aligned and securely attached to avoid them falling off during use.

    Step 5: Test the New Earbud Tips

    1. Wear the AirPods Pro: Put on your AirPods Pro and adjust them until they feel comfortable.
    2. Test for Comfort and Sound Quality: Listen to music or a podcast to test the fit and sound quality. Ensure the earbud tips provide a good seal and feel comfortable for extended wear.

    Conclusion

    Finding the right fit for your AirPods Pro earbud tips is vital for both comfort and sound quality. Don’t hesitate to experiment with different sizes to find your perfect fit. With the right earbud tips, you’ll enjoy a superior listening experience and greater comfort.

    Also Check:

  • How to find lost AirPods that are offline

    How to find lost AirPods that are offline

    Losing your AirPods is a common occurrence, and it can be quite frustrating, especially when they’re offline and not immediately locatable. However, finding them is not impossible. By following a series of steps, you can significantly increase your chances of recovering your AirPods. This guide will provide you with steps and tips to help you find your lost AirPods, even when they are offline.

    How to find lost AirPods that are offline

    How to find lost AirPods that are offline

    Losing your AirPods can be frustrating, especially when they’re offline. However, there are several strategies you can use to locate them. Here’s a detailed guide to help you find your lost AirPods, even when they’re offline.

    1. Enable Find My iPhone

    The Find My app is a lifesaver when it comes to locating lost Apple devices, including your AirPods. The first step in ensuring you can find your lost AirPods is to enable the Find My iPhone feature. This feature allows you to track your Apple devices, including AirPods, using your iPhone.

    Follow the steps below to enable “Find My” on your iPhone or iPad:

    • Go to Settings: Tap the “Settings app” on your iPhone or iPad.
    • Tap on your name: This will take you to your Apple ID settings.
    • Select Find My: In the list of options under your Apple ID, scroll down and tap on “Find My.”
    • Enable Find My iPhone/iPad: Toggle the switch to turn on Find My iPhone. This will allow your devices to be tracked when connected to the internet.
    • Enable Find My Network: Ensure that “Find My network” is enabled. This allows other Apple devices to help locate your devices even when they are offline.
    • Send Last Location: Turn on the option to send the last known location of your device when the battery is critically low.

    By enabling these settings, you make sure that your AirPods can be located using the Find My app, even if they are offline.

    2. Use the Last Known Location

    The Find My app is an essential tool in your search for lost AirPods. Even if your AirPods are offline, the Find My app can show their last known location, which can be a clue in finding them. This app shows the last known location of your AirPods on a map, providing you with a starting point for your search.

    How to use the Find My app:

    • Open the Find My app: Locate the Find My app on your iPhone and tap to open it.
    • Tap on Devices: At the bottom of the screen, tap the “Devices” tab. This will show you a list of all your Apple devices.
    • Select your AirPods: Find your AirPods in the list of devices and tap on them.

    The app will display the last known location of your AirPods on a map. This location is the last place your AirPods were connected to your iPhone. Use this as a starting point for your search. If the location is somewhere you recognize, head there to begin looking for your AirPods.

    3. Play a Sound

    If your AirPods are nearby but you can’t see them, playing a sound can help you locate them. This feature is particularly useful if they are hidden under something or in an obscure location.

    Steps to play a sound using the Find My app:

    • Open the Find My app: Tap the Find My app on your iPhone.
    • Tap on Devices: Select the “Devices” tab at the bottom of the screen.
    • Select your AirPods: Tap on your AirPods from the list of devices.
    • Tap Play Sound: Choose the option to play a sound on your AirPods.

    Your AirPods will emit a loud sound, making them easier to locate if they’re nearby. This sound will play intermittently, allowing you to track the location by listening carefully. Make sure the environment is quiet, and move around slowly to pinpoint the source of the sound.

    4. Enable Notifications

    Enabling notifications for when your AirPods come online can be a game-changer. This feature alerts you as soon as your AirPods are detected by any nearby Apple device.

    Steps to set up notifications:

    • Open the Find My app: Go to the Find My app on your iPhone.
    • Tap on Devices: Select the “Devices” tab.
    • Select your AirPods: Tap on your AirPods.
    • Enable Notify When Found: Toggle the option to receive a notification when your AirPods come online.

    This way, you’ll be notified immediately when your AirPods are detected by any nearby Apple device. This is particularly useful if your AirPods are in a location where they are occasionally connected to a device, such as at work or in a friend’s car.

    5. Check Nearby Devices

    Sometimes, your AirPods might be connected to another nearby device, like your iPad, Mac, or even someone else’s device if they’ve been paired before.

    Steps to check the Bluetooth settings:

    • Open Settings: Go to the Settings app on the nearby device.
    • Tap Bluetooth: Select the Bluetooth option.
    • Look for your AirPods: Check if your AirPods appear in the list of connected devices.

    If they’re connected to another device, this can help you narrow down their location. Also, try playing a sound from the connected device if it supports this feature.

    6. Use Bluetooth Tracking Devices

    Using Bluetooth tracking devices like Tile can help locate your lost AirPods. These devices are small and can be attached to your AirPods case.

    How Bluetooth tracking devices work:

    • Attach the tracker: Attach the Tile or similar device to your AirPods case. These devices are designed to be small and unobtrusive.
    • Use the app: Use the accompanying app to track the location of the tracker. The app will show the last known location of the tracker on a map.

    These devices work by emitting a Bluetooth signal that can be detected by your phone. When within range, the app will show you the location of the tracker, helping you locate your AirPods.

    7. Search Thoroughly

    If all else fails, a thorough search is necessary. AirPods can end up in the most unexpected places.

    Common places to search:

    • In your bag or pockets: Check all compartments and pockets thoroughly.
    • Couch cushions: Look between and under cushions.
    • Under furniture: Check under beds, desks, and other furniture.
    • In your car: Search the seats, floor, and under the seats.
    • In clothing: Check the pockets of clothes you were wearing.

    Conduct a systematic search in each of these areas, moving slowly and carefully to avoid overlooking any spots.

    8. Contact Apple Support

    If you still can’t find your AirPods, contacting Apple Support is a good next step. They can provide additional guidance and might offer replacement options if your AirPods are irretrievable.

    How to contact Apple Support

    • Visit the Apple Support website: Go to Apple Support and select AirPods.
    • Call Apple Support: Use the provided contact information to speak with a support representative.
    • Visit an Apple Store: If possible, visit your nearest Apple Store for further assistance.

    Apple Support can provide additional help, including advanced search techniques and possible replacement options under warranty or AppleCare+.

    Conclusion

    In this guide, we’ve covered several methods to help you find your lost AirPods, even when they’re offline. By enabling Find My iPhone, using the Find My app, playing a sound, enabling notifications, checking nearby devices, using Bluetooth trackers, and conducting a thorough search, you can increase your chances of locating your AirPods. If all else fails, contact Apple Support for further assistance. Stay calm, follow these steps, and you’ll likely find your AirPods soon. Thank you for reading, and be sure to check out other related topics on our blog for more helpful tips and advice.

    Also Check:

  • Where Can you Buy High Quality AirPod Pro Case Replacement: Here are 5 Places Online

    Where Can you Buy High Quality AirPod Pro Case Replacement: Here are 5 Places Online

    Finding a high-quality replacement for your AirPod Pro case is essential to ensure your AirPods remain protected and functional. But, with various online options available, it’s important to choose a reliable retailer. This guide will help you navigate through the best places to purchase an AirPod Pro case replacement.

    Where Can You Buy High-Quality AirPod Pro Case Replacement


    Where Can You Buy High-Quality AirPod Pro Case Replacement Online

    With various online options available, choosing a reliable retailer ensures you get a quality product. Here are the best places to buy AirPod Pro case replacements online.

    1. Official Apple Store

    Purchasing a replacement case directly from the official Apple Store guarantees quality and compatibility. The official store offers products designed specifically for AirPod Pros, ensuring a perfect fit and optimal performance. Although the price may be higher, the assurance of authenticity and durability makes it a worthwhile investment.

    Product Price Customer Rating
    Apple AirPods Pro Case $79.00 4.8 stars

    2. Amazon

    Shopping for AirPod Pro case replacements on Amazon is convenient and offers a wide variety of options. From official Apple replacements to third-party alternatives, Amazon provides competitive prices and fast shipping, especially for Prime members. The extensive customer reviews can also guide you in making an informed decision.

    Product Price Customer Rating
    Apple AirPods Pro Case $69.00 4.8 stars
    Spigen Rugged Armor Case $17.99 4.7 stars
    Catalyst Waterproof Case $29.99 4.4 stars

    3. Best Buy

    Best Buy is a reputable electronics retailer that offers AirPod Pro case replacements both online and in-store. Shopping at Best Buy allows you to benefit from their knowledgeable staff, potential for in-store pickup, and reliable return policies. Their range of options and occasional deals make it a good place to find a replacement case.

    Product Price Customer Rating
    Insignia Silicone Case $14.99 4.4 stars
    OtterBox Figura Series $24.95 4.6 stars
    Speck Presidio Pro Case $34.95 4.5 stars

    4. eBay

    eBay is a great platform for finding affordable AirPod Pro case replacements. With a wide range of sellers, you can often find deals that are cheaper than other retailers. However, it’s important to carefully review seller ratings and product descriptions to ensure you receive a high-quality item.

    Product Price Customer Rating
    Apple AirPods Pro Case $65.00 4.7 stars
    Spigen Rugged Armor Case $16.99 4.6 stars
    Silicone Protective Case $9.99 4.4 stars

    5. Etsy

    For unique and handmade AirPod Pro case replacements, Etsy is the ideal place to shop. Many sellers offer custom and personalized options, allowing you to add a personal touch to your replacement case. Supporting independent sellers on Etsy not only provides you with a distinctive product but also helps small businesses thrive.

    Seller Product Price Customer Rating
    CraftyCases Leather AirPods Pro Case $22.00 5.0 stars
    CustomCreations Silicone AirPods Pro Case $15.00 4.8 stars
    UniqueDesigns Wood AirPods Pro Case $29.99 4.9 stars

    Choosing the Best AirPods Case Replacement

    Personal Preference

    Choosing the best AirPods case replacement often comes down to personal preference. Here are some considerations:

    • Style: Do you prefer the sleek, original look, or are you interested in a case with a unique design or color?
    • Functionality: Consider if you need additional features like a wireless charging case or extra protection.
    • Budget: Your budget will heavily influence your decision. Balance between cost and the assurance of getting a high-quality product.

    Practical Considerations

    When choosing a replacement AirPods case, consider these practical aspects:

    • Durability: Ensure the case is made of durable materials that will protect your AirPods.
    • Compatibility: Make sure the case is compatible with your AirPods model.
    • Maintenance: Consider how easy it will be to keep the case clean and functional.
    • Resale Value: If you plan to resell your AirPods in the future, a genuine replacement case may hold its value better.

    Customer Reviews

    Customer reviews can provide valuable insights into the quality and reliability of replacement AirPods cases. Here are some common themes to look for:

    • Positive Feedback: Look for reviews that highlight the quality, fit, and durability of the case.
    • Negative Feedback: Pay attention to recurring issues like poor fit, short lifespan, or compatibility problems.
    • Overall Consensus: Consider the overall rating and balance of positive versus negative reviews.

    Conclusion

    Replacing your AirPod Pro case is crucial for keeping your AirPods in good condition and ensuring their longevity. Whether you choose the guaranteed quality from the Official Apple Store, the variety on Amazon, the reliability of Best Buy, the affordability of eBay, or the unique options on Etsy, there are plenty of choices to fit your needs. Carefully consider your options and prioritize quality to ensure you get the best replacement case for your AirPods.

    Also Check:

  • How to Install a Waterproof AirPods Case Cover

    How to Install a Waterproof AirPods Case Cover

    Waterproof AirPods case covers are essential for protecting your AirPods from water damage, which can occur from accidental spills, rain, or even sweat during workouts. In this guide, we will show you how to install a waterproof AirPods case cover to keep your AirPods safe and functional.
    How to Install a Waterproof AirPods Case Cover
    How to Install a Waterproof AirPods Case Cover

    How to Install a Waterproof AirPods Case Cover

    AirPods are a significant investment, and watr damage can be both costly and inconvenient. Protecting your AirPods with a waterproof case cover ensures their longevity and keeps them performing at their best, regardless of environmental conditions.

    1. Choose the Right Waterproof Case Cover

    There are several types of waterproof case covers available for AirPods:

    • Silicone Covers: These are flexible and provide a good grip. They offer decent protection against water and minor impacts.
    • Hard Shell Covers: Made from durable plastic, these covers provide robust protection and are more rigid, ensuring a tight fit.
    • Hybrid Covers: These combine materials like silicone and hard plastic to offer both flexibility and durability.

    When selecting a waterproof case cover, consider the following features:

    • IP Rating: The IP (Ingress Protection) rating indicates the level of water and dust resistance. Look for a cover with an IP67 rating or higher.
    • Fit and Compatibility: Ensure the cover is designed for your specific AirPods model (e.g., AirPods Pro, AirPods 2).
    • Accessibility: Check that the cover allows easy access to the charging port and pairing button.
    • Durability: Choose a cover made from high-quality, durable materials that can withstand regular use.

    2. Prepare Your AirPods

    Before installing the waterproof case cover, it’s essential to clean and dry your AirPods case thoroughly. This step ensures that no dirt or moisture gets trapped under the cover, which could affect its effectiveness.

    1. Remove the AirPods from the Case: This prevents any cleaning solution from damaging your AirPods.
    2. Clean the Case: Use a soft, damp cloth to wipe the case clean. For stubborn dirt, use a mild soap solution. Avoid using harsh chemicals that could damage the case.
    3. Dry the Case: Ensure the case is completely dry before installing the cover. Use a dry cloth or let it air dry to avoid any moisture getting trapped.

    3. Install the Case Cover

    1. Align the Cover: Hold the cover next to your AirPods case, ensuring the cutouts for the charging port and LED indicator align correctly.
    2. Slide the Cover On: Gently slide the cover onto the case, starting from the bottom and working your way up. Make sure the cover fits snugly around the case.
    3. Secure the Fit: Press down firmly on all sides to ensure the cover is securely attached and there are no loose areas.

    Tips for Secure Fit and Alignment:

    • Check Cutouts: Ensure the cover’s cutouts align perfectly with the charging port and LED indicator.
    • Press Firmly: Apply even pressure to all sides of the cover to ensure a tight fit.
    • Test Functionality: Open and close the AirPods case to ensure the cover does not interfere with the hinge or obstruct access.

    4. Test for Waterproofing

    Testing the waterproofing of the case cover is crucial to ensure your AirPods are fully protected before exposing them to water. This step verifies that the cover is installed correctly and provides the intended protection.

    Here is how to conduct a waterproofing test:

    1. Submerge the Case: Submerge the AirPods case (without the AirPods inside) in a bowl of water for a few seconds.
    2. Check for Leaks: Remove the case and dry it off. Open the cover to check for any water inside.
    3. Repeat if Necessary: If water has entered the case, recheck the fit and make sure the cover is securely attached. Repeat the test to confirm the seal.

    5. Maintenance and Care

    • Regular Cleaning: Clean the cover regularly to remove dirt and grime. Use a damp cloth and mild soap if necessary.
    • Avoid Extreme Temperatures: Keep the cover away from extreme heat or cold, which can damage the material.
    • Inspect for Wear and Tear: Regularly check the cover for signs of wear and tear. Replace it if it becomes damaged.

    Proper maintenance ensures your waterproof case cover remains effective and extends its lifespan. Regular cleaning and careful handling are key to maintaining its protective qualities.

    6. Benefits of a Waterproof Case Cover

    • Water Protection: Shields your AirPods from water damage, allowing you to use them worry-free near water.
    • Dust and Dirt Resistance: Protects against dust and dirt, keeping your AirPods clean and functional.
    • Shock Absorption: Provides extra protection against drops and impacts, reducing the risk of damage.

    Using a waterproof case cover helps extend the lifespan of your AirPods by providing comprehensive protection against various hazards.

    7. Additional Features to Consider

    • Carabiner Clips: Allows you to attach the AirPods case to your bag or belt for easy access.
    • Wireless Charging Compatibility: Ensure the cover supports wireless charging if you use a wireless charger.
    • Anti-Lost Straps: Helps keep your AirPods together and reduces the risk of losing them.

    Consider these accessories to complement your waterproof case cover and enhance its functionality.

    8. Troubleshooting Common Issues

    • Cover Doesn’t Fit Properly: Ensure the case is clean and dry. Reposition the cover and apply even pressure.
    • Charging Port Blocked: Check the alignment of the cover and adjust as needed.
    • Difficulty Opening Case: Make sure the cover is not obstructing the hinge. Adjust the fit if necessary.

    Follow these tips to troubleshoot and resolve common issues encountered during installation and use.

    Conclusion

    Installing a waterproof AirPods case cover is essential for protecting your AirPods from water damage and other hazards. Follow the steps for cleaning, installing, and testing to ensure a secure fit and effective protection. Regular maintenance and choosing the right accessories can enhance the functionality and lifespan of your case cover.

    Invest in a high-quality waterproof case cover to enjoy worry-free use of your AirPods, knowing they are well-protected. Thank you for taking the time to learn how to install and maintain a waterproof AirPods case cover. Explore our blog for more tips and advice on protecting your tech gadgets.

    Also Check: