Category: More

  • Roku Not Turning On: Simple Troubleshooting Steps to Get It Back Up and Running

    Roku Not Turning On: Simple Troubleshooting Steps to Get It Back Up and Running

    When your Roku device refuses to turn on, it can be incredibly frustrating, especially if you are looking forward to catching up on your favorite shows or exploring new streaming options. While Roku devices are known for their reliability, they’re not immune to occasional hiccups. This article offers potential reasons why your Roku device won’t turn on and explores detailed troubleshooting steps to get your device back in action.

    Roku Not Turning On

    How to Fix a Roku Device Not Turning On

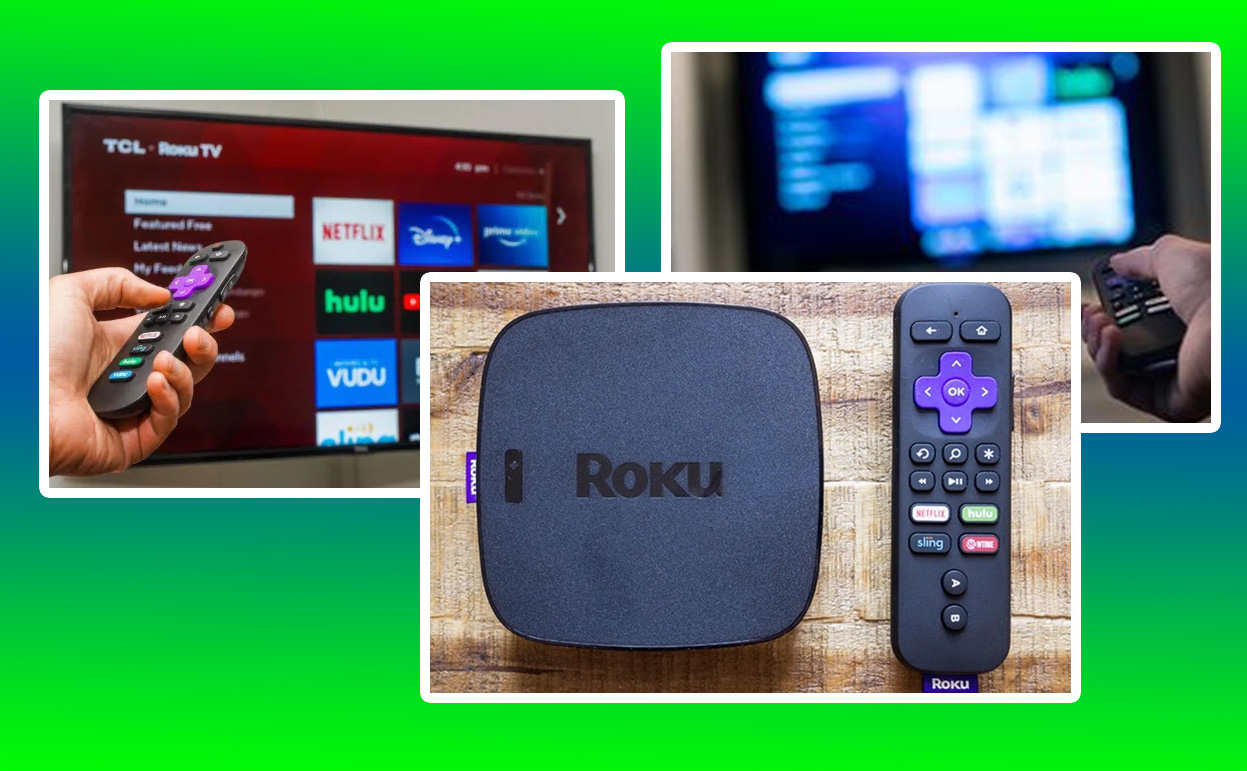
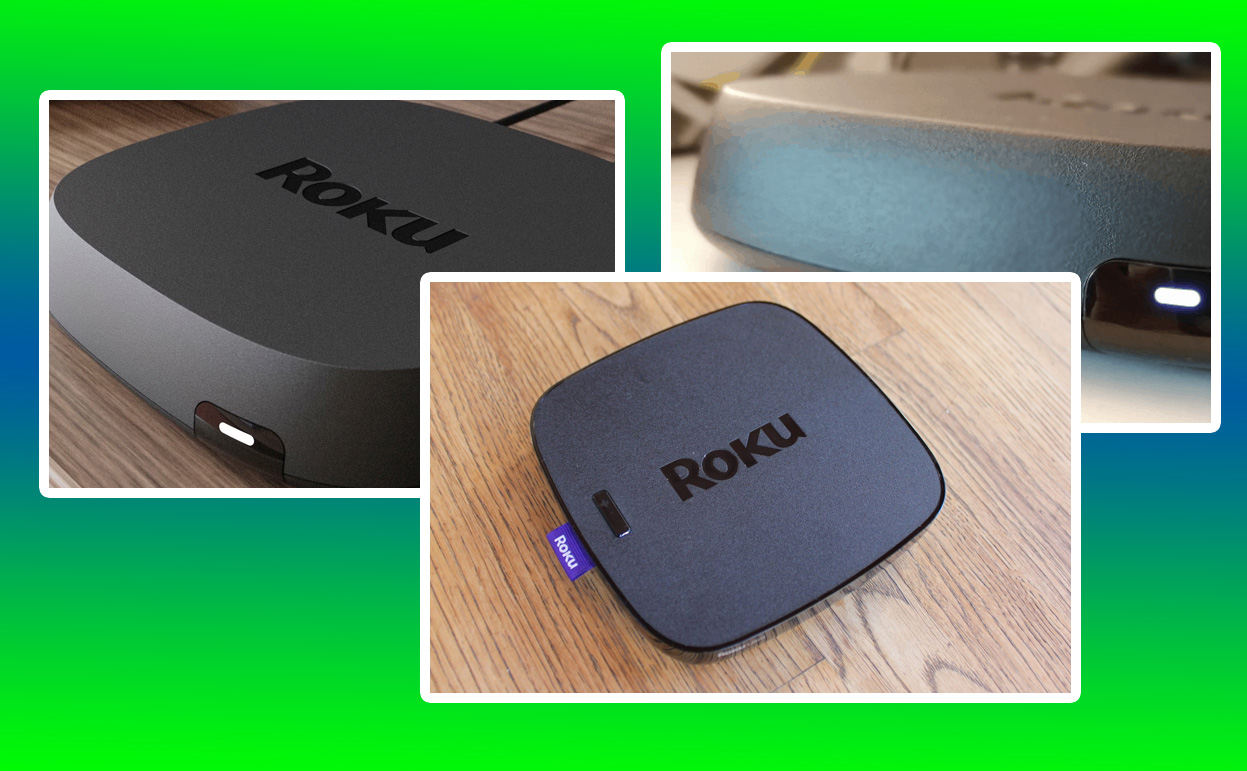
    A Roku device that won’t turn on might show various symptoms. In some cases, there’s no indicator light on the device, which usually suggests a lack of power. Other times, the Roku may appear to start but remains stuck on the logo screen or fails to display anything on your TV. The absence of response from the remote control is another telling sign of power issues.

    Knowing these signs helps you narrow down the root cause. Is it a power supply problem, a hardware failure, or an issue with the TV or HDMI connection? Each of these possibilities requires careful investigation, and understanding these signs is the first step toward resolving the issue.

    Common Causes of Roku Power Issues

    There are several reasons why your Roku device might fail to power on. One of the most common is a faulty power supply. Over time, power adapters and cords can wear out or become damaged, resulting in insufficient power delivery. It’s worth checking for visible signs of wear and tear on the power cord or adapter.

    Another frequent culprit is overheating. Roku devices are designed with internal safeguards that prevent them from operating when they become too hot. Extended use, poor ventilation, or placing the device near heat sources can trigger this safety feature. If your device feels unusually warm, this could be the cause.

    Internal hardware issues, though less common, can also lead to power failures. A damaged motherboard or internal circuitry can render the device non-functional. Lastly, problems with the HDMI connection or the TV’s settings might create the illusion that your Roku isn’t powering on, even though it’s receiving power.

    Diagnosing the Problem

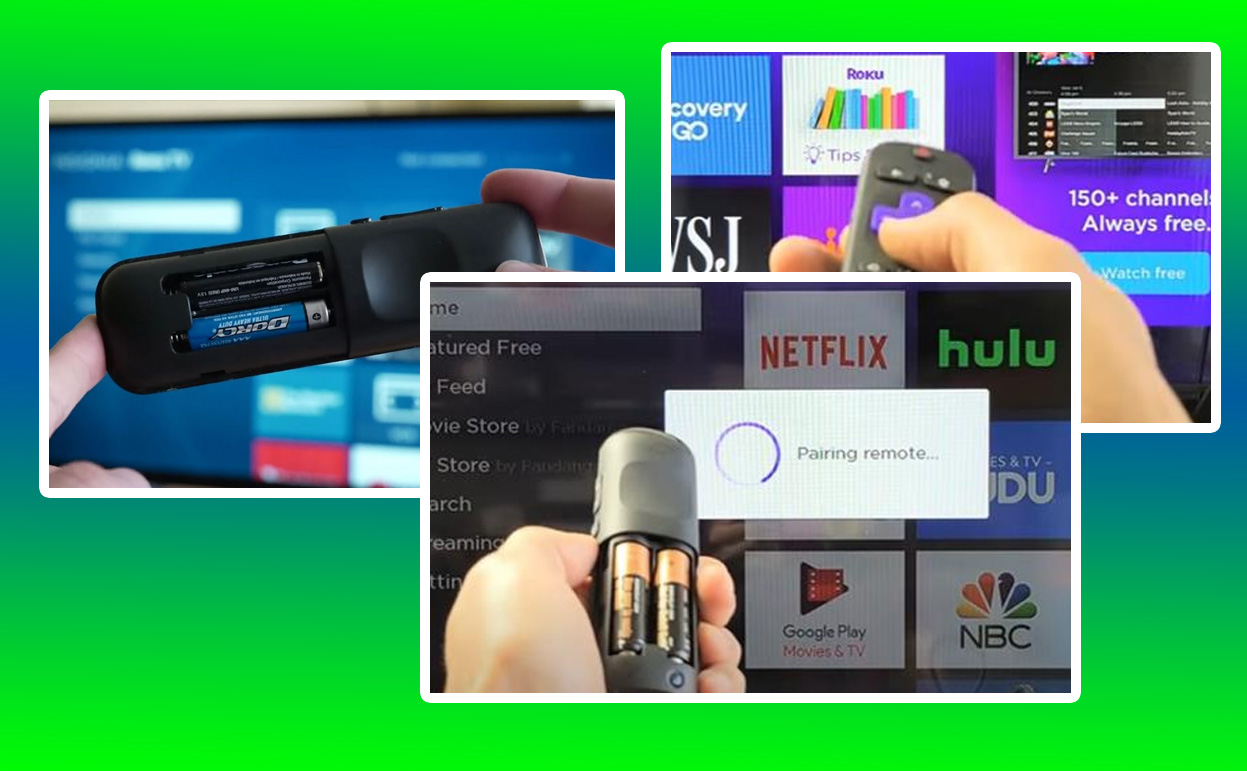
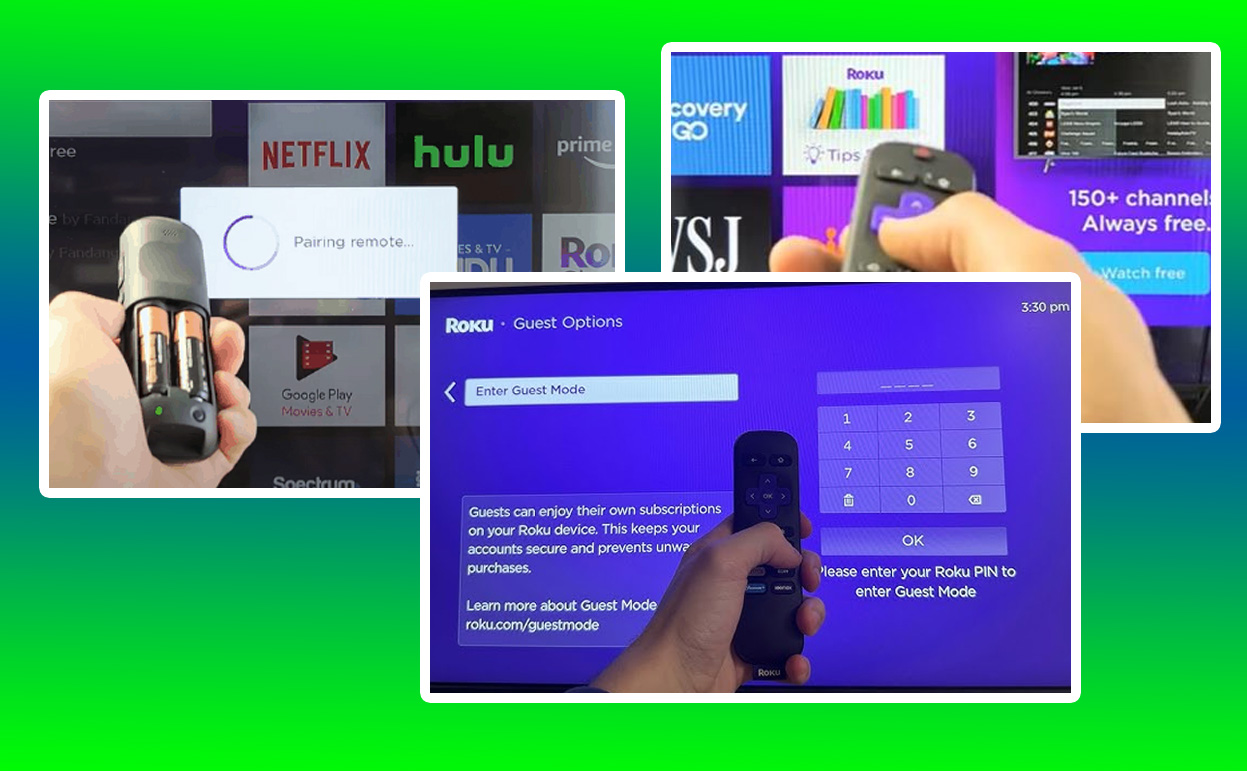
    To determine why your Roku isn’t turning on, start with the basics. Check the power source to ensure it’s functional. Plug another device into the same outlet to verify that it’s delivering power. Inspect the power cord and adapter for any visible damage or loose connections. If possible, try using a different power cord or adapter to rule out issues with your current one.

    Next, examine the Roku device itself. Look for any lights that might indicate power. If the light is blinking or absent, it’s a sign of an underlying issue. Place the device in a well-ventilated area and give it time to cool down if overheating is suspected.

    Check the connection between your Roku and the TV. Ensure that the HDMI cable is securely plugged in and that the TV is set to the correct input. Sometimes, a loose or faulty HDMI connection can create display problems that mimic power failure.

    Troubleshooting Steps to Fix Your Roku

    If your Roku still won’t turn on, it’s time to dig deeper. Start by performing a power cycle. Unplug the device from the power source, wait at least 30 seconds, and then plug it back in. This simple step can resolve minor glitches that prevent the device from powering on.

    If the problem persists, try a factory reset. Locate the reset button on your Roku device, often found on the back or bottom. Press and hold it for about 10 seconds until the indicator light flashes. Keep in mind that this will erase all settings and preferences, requiring you to set up the device again from scratch.

    For devices showing signs of overheating, improve ventilation around the Roku. Avoid placing it in enclosed spaces or near other electronic devices that generate heat. If overheating occurs frequently, consider investing in a cooling pad or relocating the device to a cooler area.

    Reference Table: Roku Power Issues and Solutions

    Issue Potential Cause Suggested Solution
    No power indicator Faulty power adapter Replace the power cord or adapter
    Device is warm Overheating Improve ventilation, cool down device
    No display on TV HDMI connection problem Check and secure HDMI cables
    Stuck on logo screen Firmware issue Perform a factory reset

    Preventing Future Power Problems

    Prevention is key to ensuring your Roku device operates smoothly. Start by using the original power adapter and cord provided by Roku, as third-party alternatives may not deliver consistent power. Place your device in a cool, ventilated area to avoid overheating, and clean the vents regularly to prevent dust buildup.

    Additionally, consider using a surge protector to shield your Roku from power fluctuations. Frequent power surges can damage the internal components of electronic devices, leading to long-term issues. Regularly updating your Roku’s firmware also helps maintain optimal performance and prevents software-related problems.

    When to Seek Professional Help

    If you’ve tried all troubleshooting steps and your Roku still won’t turn on, it might be time to seek professional assistance. Contact Roku’s customer support for guidance or visit a certified repair center. Devices under warranty may qualify for a free replacement or repair, so ensure you have your purchase details handy.

    For older devices no longer covered by warranty, weigh the cost of repair against the price of a new device. In some cases, upgrading to a newer model with enhanced features and improved performance might be a more cost-effective solution.

    Enhancing Your Streaming Setup

    While addressing the issue of a non-functional Roku, consider upgrading your overall streaming setup for a better experience. Invest in high-quality HDMI cables, ensure your TV’s firmware is up-to-date, and explore advanced features offered by newer Roku models. By creating a reliable and optimized home entertainment system, you’ll reduce the chances of encountering similar issues in the future.

    Roku devices have revolutionized the way we consume entertainment, but occasional technical problems can disrupt the experience. By understanding the potential causes and solutions for power issues, you can quickly restore your device and get back to enjoying seamless streaming. With regular maintenance and a proactive approach, your Roku will remain a dependable source of entertainment for years to come.

    Also Check:

  • How to Pair Roku Remote to TV

    How to Pair Roku Remote to TV

    In the world of modern streaming, Roku stands out as a leading platform, providing an effortless way to access a myriad of entertainment options. However, even the best devices need proper setup, and pairing your Roku remote to your TV is a critical first step. This guide will walk you through the process in detail, ensuring a seamless connection between your Roku remote and your TV, allowing you to dive into your favorite shows and movies without a hitch.

    How to Pair Roku Remote to TV

    Pairing your Roku remote to your TV is essential for complete control over your streaming experience. Without this step, you won’t be able to navigate the Roku interface, adjust volume levels, or power on your TV using the remote. Proper pairing ensures that your Roku device and TV work together harmoniously, providing a smooth and intuitive user experience.

    Types of Roku Remotes and Their Functions

    Before diving into the pairing process, it’s important to understand the different types of Roku remotes and their unique features. Roku remotes come in two primary varieties: infrared (IR) remotes and enhanced “point anywhere” remotes.

    Infrared (IR) Remotes

    IR remotes require a direct line of sight to the Roku device to function. They are simpler in design and don’t need pairing in the traditional sense, as they operate through IR signals.

    Enhanced “Point Anywhere” Remotes

    Enhanced remotes utilize Wi-Fi or Bluetooth, allowing them to control the Roku device without needing to be directly pointed at it. These remotes often include advanced features like voice control and private listening, and they require pairing with the Roku device.

    How to Pair an Enhanced Roku Remote to TV

    Pairing an enhanced Roku remote involves a few straightforward steps, which we’ll detail below to ensure a hassle-free setup.

    Step 1: Insert Batteries in the Remote

    Start by inserting fresh batteries into your Roku remote. Proper battery placement and power are crucial for initiating the pairing process.

    Step 2: Turn on Your Roku Device

    Power on your Roku device and wait for the home screen to appear. Ensure that your TV is set to the correct input for the Roku device.

    Step 3: Enter Pairing Mode

    If your remote does not automatically pair, you’ll need to manually enter pairing mode:

    1. Open the battery compartment of the remote.
    2. Locate the pairing button inside the compartment.
    3. Press and hold the pairing button for 3-5 seconds until you see a pairing light or an on-screen message indicating that pairing is in progress.

    Step 4: Follow On-Screen Instructions

    Once the pairing process begins, follow any on-screen instructions provided by your Roku device. This may involve selecting options or confirming the pairing process.

    Troubleshooting Pairing Issues

    Occasionally, you might encounter issues while pairing your Roku remote. Below are some common problems and their solutions.

    Remote Not Responding

    If your remote isn’t responding, try the following:

    • Replace the batteries with new ones.
    • Restart your Roku device by unplugging it and plugging it back in.
    • Ensure there are no obstructions between the remote and the Roku device for IR remotes.

    Pairing Button Not Working

    If the pairing button isn’t working, you can try resetting the remote:

    1. Remove the batteries.
    2. Unplug your Roku device.
    3. Wait for about 30 seconds.
    4. Reinsert the batteries and plug the Roku device back in.
    5. Retry the pairing process.

    Using the Roku Mobile App as an Alternative

    If pairing your physical remote proves problematic, the Roku mobile app serves as an excellent alternative. Available for both iOS and Android devices, the app allows you to control your Roku device using your smartphone.

    1. Download and install the Roku app from your device’s app store.
    2. Connect your phone to the same Wi-Fi network as your Roku device.
    3. Open the app and select your Roku device from the list.
    4. Use the app’s remote feature to navigate and control your Roku device.

    Table: Quick Overview of Pairing Steps

    Step Description
    Insert Batteries Ensure fresh batteries are correctly placed in the remote.
    Power on Roku Device Turn on the Roku device and set the TV to the correct input.
    Enter Pairing Mode Press and hold the pairing button until the pairing light or message appears.
    Follow On-Screen Prompts Complete the pairing by following on-screen instructions.

    Conclusion

    Pairing your Roku remote to your TV is a fundamental step that enhances your streaming experience. Whether you are using an IR or an enhanced remote, following the outlined steps ensures a quick and easy setup. If issues arise, troubleshooting tips and the Roku mobile app offer reliable alternatives.

    With your remote properly paired, you can fully enjoy the convenience and entertainment Roku provides, making your streaming sessions more enjoyable and effortless.

    Also Check:

  • How to Connect Roku Remote to TV without WiFi

    How to Connect Roku Remote to TV without WiFi

    Connecting your Roku remote to your TV without WiFi might seem like a daunting task, but it’s entirely possible and not as complicated as it may appear. In this guide, we’ll explore the various methods available for connecting your Roku remote to your TV without the need for a WiFi connection, detailing each step to ensure you can follow along easily.

    How to Connect Roku Remote to TV without WiFi

    Whether you’re dealing with an outage, setting up a new device, or simply prefer a non-WiFi solution, this article covers all the bases.

    How to Connect Roku Remote to TV without WiFi

    Before diving into the methods, it’s essential to understand the types of Roku remotes and their connection mechanisms. Roku remotes are generally categorized into two types: the IR (Infrared) remote and the Enhanced remote, which uses RF (Radio Frequency) or Bluetooth.

    • IR Remote: This type requires a direct line of sight to the Roku device to function. It doesn’t need WiFi but relies on infrared signals to send commands.
    • Enhanced Remote: Unlike the IR remote, this one can work without a direct line of sight and connects via RF or Bluetooth. Typically, these remotes require an initial pairing process, which is usually done over WiFi. However, there are ways to bypass this, which we’ll discuss.

    Using an IR Remote to Connect Without WiFi

    If you have an IR remote, connecting it to your Roku device is straightforward, as it doesn’t rely on a network connection. Here’s how to do it:

    1. Point the Remote Directly at the Roku Device: Since the IR remote communicates via infrared signals, it needs a clear, unobstructed path to the Roku’s IR sensor.
    2. Press Any Button to Test the Connection: If the Roku responds, your IR remote is connected and ready to use.

    This method works perfectly for those who either have an IR remote or prefer not to use WiFi for their connection.

    Pairing an Enhanced Remote Without WiFi

    Enhanced remotes generally require WiFi for the initial pairing. However, if WiFi is not an option, there are still ways to connect your remote:

    Using the Pairing Button:

    1. Turn On Your Roku Device: Plug in and power on your Roku.
    2. Press and Hold the Pairing Button: Usually located inside the battery compartment, hold this button until you see a light flashing on the remote.
    3. Wait for the Pairing Process to Complete: Your Roku should recognize the remote and pair automatically without needing a WiFi connection.

    Through HDMI-CEC:

    If you have a TV that supports HDMI-CEC, you can use your TV’s remote to control the Roku. Here’s how:

    1. Enable HDMI-CEC on Your TV: This can usually be done via the TV’s settings menu. Look for CEC, which might be branded differently depending on the manufacturer (e.g., Anynet+ for Samsung, SimpLink for LG).
    2. Connect the Roku to an HDMI Port: Ensure the Roku device is plugged into an HDMI port on your CEC-enabled TV.
    3. Use Your TV Remote to Control Roku: Once HDMI-CEC is enabled, your TV remote should work with the Roku device seamlessly.

    Setting Up a Wired Connection

    For users who prefer a wired connection to bypass the need for WiFi, connecting your Roku device directly to your router with an Ethernet cable is a viable solution:

    1. Connect the Ethernet Cable: Plug one end of the Ethernet cable into the Roku device and the other into your router.
    2. Set Up the Roku Device: Follow the on-screen instructions to set up your device. Since it’s connected via Ethernet, you don’t need WiFi for this process.

    This method is especially useful for those who want a stable connection without relying on wireless networks.

    Troubleshooting Common Issues

    Even with these methods, you might encounter some issues while connecting your Roku remote without WiFi. Here are some common problems and their solutions:

    Remote Not Responding:

    • Check the Batteries: Ensure the batteries in your remote are fresh and properly inserted.
    • Reset the Remote: Remove the batteries, unplug the Roku device, wait a few minutes, then reconnect everything.

    Device Not Detecting the Remote:

    • Repeat the Pairing Process: Sometimes the initial pairing attempt might fail, and repeating the process can help.
    • Check for Interference: Make sure there are no obstructions or electronic devices that could interfere with the IR signal.

    Table: Connection Methods

    Method Requires WiFi Ease of Use Equipment Needed
    IR Remote Connection No Easy None
    Enhanced Remote Pairing No Moderate Enhanced Remote
    HDMI-CEC No Easy CEC-Enabled TV
    Ethernet Connection No Moderate Ethernet Cable

    Conclusion

    Connecting your Roku remote to your TV without WiFi is entirely possible with a few alternative methods. Whether you’re using an IR remote, leveraging HDMI-CEC, or setting up a wired Ethernet connection, each approach offers a solution tailored to different needs and preferences. By understanding these methods, you can ensure your Roku device is always ready to deliver your favorite content without the reliance on a wireless network.

    Also Check:

  • Roku Live TV Not Working: Simple Troubleshooting Steps for a Quick Fix

    Roku Live TV Not Working: Simple Troubleshooting Steps for a Quick Fix

    In today’s digital age, streaming devices like Roku have revolutionized how we consume television. With Roku’s live TV feature, users can access a broad spectrum of channels and live broadcasts, turning their TVs into versatile entertainment hubs. However, like any technology, Roku’s live TV functionality can sometimes encounter hiccups.

    Roku Live TV Not Working: Simple Troubleshooting Steps for a Quick Fix

    This article will guide you through detailed troubleshooting steps to help you quickly get back to enjoying your favorite shows.

    Roku Live TV Not Working

    Roku live TV problems can stem from various sources, such as network connectivity issues, outdated software, or hardware malfunctions. Before delving into the solutions, it’s essential to understand the typical problems that users might face:

    • Buffering and Streaming Delays: Slow internet connections or network congestion can cause buffering.
    • Channel Loading Failures: Sometimes, specific channels won’t load due to server issues or app errors.
    • Remote Control Malfunctions: If your remote isn’t functioning correctly, navigating to live TV can become a challenge.
    • Software Glitches: Outdated firmware or software bugs may prevent live TV from operating smoothly.
    • Device Overheating: Extended usage might cause the Roku device to overheat, leading to performance drops.

    Simple Troubleshooting Steps for a Quick Fix

    When Roku live TV isn’t working, it can be frustrating, but many common issues have straightforward solutions. Here are some simple troubleshooting steps to fix it:

    1. Check Your Internet Connection

    A stable internet connection is crucial for streaming live TV on Roku. Start by ensuring that your Wi-Fi is working correctly:

    • Restart Your Router: Unplug your router, wait for about 30 seconds, then plug it back in. This can resolve many connectivity issues.
    • Test Other Devices: Check if other devices connected to the same network are working correctly. If they are, the issue might be with your Roku device.
    • Move Closer to the Router: If possible, reduce the distance between your Roku device and the router to improve signal strength.

    2. Restart Your Roku Device

    A simple restart can fix many minor software glitches:

    • Soft Restart: Go to the Roku settings menu, select “System,” then “System Restart.”
    • Hard Restart: Unplug the Roku device from the power source, wait for a minute, and plug it back in.

    3. Update Roku Software

    Running the latest version of Roku’s software ensures optimal performance:

    • Check for Updates: Navigate to “Settings,” then “System,” and select “System Update.” Roku will automatically check for and install any available updates.

    4. Inspect HDMI Cables and Ports

    Sometimes, faulty HDMI cables or ports can disrupt the live TV experience:

    • Replace the HDMI Cable: Swap out the existing HDMI cable with a new one to see if the issue persists.
    • Try a Different Port: Connect your Roku device to a different HDMI port on your TV.

    5. Clear Cache and Reinstall Problematic Channels

    If a specific channel is not loading, clearing the cache and reinstalling the channel can help:

    • Remove the Channel: Highlight the channel, press the * button on the remote, and select “Remove Channel.”
    • Restart Roku: Perform a system restart as described above.
    • Reinstall the Channel: Go to the Roku Channel Store and reinstall the removed channel.

    6. Address Remote Control Issues

    A non-responsive remote can hinder navigation to live TV:

    • Replace Batteries: Ensure the remote’s batteries are fresh and correctly installed.
    • Pair the Remote Again: If using an enhanced remote, press and hold the pairing button inside the battery compartment for about 5 seconds.

    7. Check for Overheating

    Overheating can degrade performance and cause live TV interruptions:

    • Cool Down the Device: If the Roku device feels hot to the touch, turn it off and let it cool down for a while.
    • Ensure Proper Ventilation: Make sure the Roku device is placed in a well-ventilated area, away from direct sunlight or other heat sources.

    Advanced Troubleshooting Techniques

    Factory Reset

    If none of the basic troubleshooting steps work, performing a factory reset might be necessary:

    • Go to Settings: Navigate to “Settings,” then “System,” and select “Advanced System Settings.”
    • Choose Factory Reset: Follow the on-screen instructions to complete the reset. Remember, this will erase all personal settings and channels.

    Router Configuration

    Sometimes, the router’s configuration might be blocking certain streaming services:

    • Enable UPnP: Universal Plug and Play (UPnP) should be enabled on your router to allow seamless communication between devices.
    • Adjust DNS Settings: Switching to a different DNS provider, like Google DNS or OpenDNS, can improve connectivity and streaming quality.

    When to Contact Roku Support

    If you’ve tried all the above steps and Roku live TV still isn’t working, it might be time to contact Roku’s customer support for further assistance. They can provide more in-depth solutions or determine if the device needs replacement.

    Table: Quick Reference for Troubleshooting Steps

    Issue Possible Cause Solution
    Buffering and Delays Slow Internet Connection Restart router, move closer to the router, or test other devices.
    Channel Loading Failures App Errors or Server Issues Clear cache, remove and reinstall the channel, restart Roku.
    Remote Control Malfunctions Dead Batteries or Unpaired Replace batteries, pair the remote again.
    Software Glitches Outdated Firmware Check for and install Roku updates.
    Device Overheating Poor Ventilation Allow the device to cool down, ensure proper ventilation.

    Conclusion

    Roku’s live TV feature is a powerful tool for accessing diverse content, but occasional technical issues can disrupt the experience. By following these detailed troubleshooting steps, you can address common problems efficiently, ensuring a smoother and more enjoyable viewing experience. Remember, technology isn’t perfect, but with a little patience and the right approach, most issues can be resolved without too much hassle.

    Also Check:

  • No Pairing Button? No Problem! Easy Ways to Connect Your Roku Remote

    No Pairing Button? No Problem! Easy Ways to Connect Your Roku Remote

    The convenience of streaming devices has reshaped how we consume media, and Roku remains one of the most popular choices. Its straightforward setup and easy navigation have made it a favorite among cord-cutters. However, like any technology, it isn’t without its quirks. One common issue users encounter is connecting their Roku remote when the pairing button seems to be missing or malfunctioning. If you’ve found yourself in this situation, don’t worry—you’re not alone, and there are several ways to get your Roku remote connected without a hitch.

    How to Pair Roku Remote With No Pairing Button

    In this article, we’ll delve into the reasons behind this common issue and provide a comprehensive guide on how to resolve it, ensuring you can get back to enjoying your favorite shows and movies in no time.

    How to Pair Roku Remote With No Pairing Button

    Roku remotes come in two main types: the simple remote and the enhanced remote. The simple remote relies on infrared (IR) to connect with the Roku player, meaning it needs a direct line of sight to work. The enhanced remote, however, uses wireless technology and offers extra features like voice commands and private listening with a headphone jack.

    The enhanced remote generally has a pairing button, often found in the battery compartment or on the back. If you can’t locate this button or it doesn’t work, you’ll need to try other ways to connect it to your Roku device.

    Method 1: Using the Roku Mobile App

    One of the easiest alternatives to a malfunctioning remote is the Roku mobile app. Available on both iOS and Android platforms, the app serves as a full-fledged remote control.

    Steps to Connect Using the Roku Mobile App:

    1. Download the App: Install the Roku app from the App Store or Google Play Store.
    2. Connect to the Same Wi-Fi: Ensure your smartphone and Roku device are connected to the same Wi-Fi network.
    3. Launch the App: Open the Roku app and select the “Remote” option from the bottom menu.
    4. Control Your Roku: You can now use your phone to control the Roku device. Navigate to the settings to reconnect or pair your physical remote.

    This method is particularly handy when you can’t find your physical remote or if it’s temporarily out of order. It also allows for more advanced control features like voice search and private listening.

    Method 2: Power Cycling the Roku Device

    Power cycling your Roku device can sometimes resolve connectivity issues, including those related to remote pairing. This simple process involves restarting your Roku device and remote.

    Steps to Power Cycle Your Roku Device:

    1. Turn Off the Roku: Unplug your Roku device from the power source.
    2. Remove Remote Batteries: Take the batteries out of the Roku remote.
    3. Wait for a Few Minutes: Allow both the device and remote to rest for about 5 minutes.
    4. Reconnect: Plug the Roku device back in and reinsert the batteries into the remote.

    This reset can clear minor glitches that might be preventing your remote from connecting. It’s a straightforward solution that often resolves connectivity issues without needing further intervention.

    Method 3: Using the HDMI-CEC Feature

    HDMI-CEC (Consumer Electronics Control) is a feature that allows devices connected through HDMI to communicate with each other. If your TV and Roku support HDMI-CEC, you can use your TV’s remote to control the Roku.

    Steps to Use HDMI-CEC:

    1. Enable HDMI-CEC on TV: Go to your TV’s settings menu and look for the HDMI-CEC option. Enable it. The name of this feature can vary depending on the TV manufacturer (e.g., Anynet+ for Samsung, Simplink for LG, etc.).
    2. Connect Your Roku: Ensure your Roku device is connected to an HDMI port on your TV.
    3. Use TV Remote: Once HDMI-CEC is enabled, your TV remote should be able to control your Roku device.

    This feature is a convenient workaround when your Roku remote isn’t functioning correctly, providing basic control over the streaming device.

    Method 4: Replacing the Remote

    If none of the above methods work, it might be time to consider replacing your Roku remote. Fortunately, Roku remotes are widely available and relatively affordable.

    Options for Replacement:

    • Official Roku Store: You can purchase a new remote directly from Roku’s official website.
    • Retailers: Many electronics stores carry Roku remotes.
    • Universal Remotes: Some universal remotes are compatible with Roku devices, offering an alternative with potentially more features.

    When purchasing a replacement, ensure it is compatible with your specific Roku model to avoid any connectivity issues.

    Common Issues with the Pairing Button

    The pairing button on a Roku remote can sometimes be elusive or non-functional due to various reasons, each presenting its unique challenge.

    • Hidden Pairing Button: Some Roku remotes are designed with the pairing button tucked inside the battery compartment. This concealed placement can easily lead to confusion, as the button is not immediately visible upon a casual inspection. Users might overlook it entirely, assuming their remote lacks a pairing function altogether. Carefully checking inside the battery compartment can often reveal the hidden button, resolving the initial confusion.
    • Malfunctioning Button: Over time, wear and tear can take a toll on the pairing button, causing it to malfunction. This issue may stem from frequent use, physical damage, or manufacturing defects. When the button becomes unresponsive, users might find themselves unable to re-establish the connection between the remote and the Roku device, necessitating alternative methods or repair.
    • Battery Issues: Low or dead batteries can be a subtle yet common cause of an ineffective pairing button. When the remote’s power source is compromised, the pairing process may fail, leaving users puzzled about the sudden connectivity problem. Replacing the batteries with fresh ones can often revive the remote’s functionality, restoring the pairing capability without further intervention.
    • Software Glitches: Sometimes, the root of the pairing issue lies not in the hardware but in the software. Glitches or updates in the Roku device’s operating system can interfere with the remote’s ability to pair successfully. These software anomalies can disrupt the communication between the devices, requiring users to troubleshoot through resets or updates to restore normal operation. Now that we have identified potential issues, let’s explore the various methods to connect your Roku remote without using the pairing button.

    Comparison of Roku Remote Connection Methods

    Method Ease of Use Additional Tools Needed Effectiveness Time Required
    Roku Mobile App High Smartphone Very Effective Low
    Power Cycling Medium None Effective Low
    HDMI-CEC Feature Medium HDMI-CEC Compatible TV Effective Low
    Replacing the Remote High New Remote Very Effective Medium

    Conclusion

    Experiencing issues with your Roku remote not having a functional pairing button can be frustrating, but as outlined in this guide, there are several effective ways to reconnect your device. From leveraging the Roku mobile app to utilizing HDMI-CEC or simply resetting the system, each method offers a practical solution to ensure uninterrupted streaming. Should all else fail, replacing the remote is a reliable last resort.

    By understanding these alternatives, you can navigate Roku remote troubles with confidence and ease, ensuring your entertainment experience remains as seamless as ever.

    Also Check:

  • Pair Roku Remote Without Pairing Button: No Pairing Button Required

    Pair Roku Remote Without Pairing Button: No Pairing Button Required

    Roku streaming devices have revolutionized home entertainment, making it simpler than ever to access a wide range of content. However, setting up and troubleshooting your Roku remote can sometimes be a challenge, especially when you need to pair a remote without a pairing button. This comprehensive guide walks you through the process, ensuring you can enjoy uninterrupted streaming with ease.

    Pair Roku Remote Without Pairing Button

    Pair Roku Remote Without Pairing Button

    Roku remotes come in various models, each with distinct features. Some remotes have a pairing button, which facilitates easy connection to your Roku device. However, there are instances where you might need to pair a remote without this button. This scenario typically applies to older models or remotes designed for basic functions.

    The key to resolving this issue lies in understanding the differences between Roku remotes and the specific steps required to pair those lacking a pairing button.

    Types of Roku Remotes

    Roku offers two main types of remotes: infrared (IR) remotes and enhanced remotes. IR remotes rely on a direct line of sight to the Roku device, while enhanced remotes use wireless technology, such as Bluetooth or Wi-Fi Direct, to connect.

    Infrared (IR) Remotes: These remotes do not require pairing. They function by sending signals via infrared light, which the Roku device receives. For IR remotes, ensuring a clear path between the remote and the device is crucial.

    Enhanced Remotes: Enhanced remotes feature advanced capabilities, such as voice commands, private listening through headphones, and more. These remotes typically require pairing with the Roku device, but the process can vary depending on the remote model, especially when a pairing button is absent.

    How to Identify Your Roku Remote Type

    To determine whether your Roku remote is an IR or enhanced model, observe its physical features and functionality:

    • Infrared Remote: Usually lacks extra buttons or features like voice control or private listening.
    • Enhanced Remote: May have additional buttons for voice search, private listening, or a headphone jack. These remotes often have a reset or pairing button, but in their absence, you need alternative pairing methods.

    Identifying Infrared Remotes

    Infrared remotes are generally simpler in design. They operate through a direct line of sight, so there are no intricate pairing procedures. If your remote lacks additional buttons for features like voice control or private listening, it is likely an IR remote.

    Identifying Enhanced Remotes

    Enhanced remotes are more complex and come with additional functionalities. They often include features like a built-in microphone for voice commands, a headphone jack for private listening, and sometimes even a reset or pairing button. If your remote has these attributes, it is an enhanced model, which might require a different approach for pairing, especially in the absence of a pairing button.

    How Pair an IR Remote

    Since IR remotes do not require pairing, they are straightforward to set up:

    1. Insert new batteries into the remote.
    2. Point the remote directly at your Roku device.
    3. Press any button to test functionality. If the device responds, your remote is ready to use.

    How to Pair an Enhanced Remote Without a Pairing Button

    For enhanced remotes without a visible pairing button, follow these steps to establish a connection:

    Step 1: Check the Batteries

    Ensure the remote has fresh batteries installed correctly. Low battery power can hinder the pairing process. Often, replacing the batteries is the simplest solution to get your remote back in action.

    Step 2: Reset the Remote

    Performing a reset can sometimes trigger pairing mode. To reset:

    1. Remove the batteries from the remote.
    2. Unplug your Roku device from the power source.
    3. Wait for about 30 seconds.
    4. Reinsert the batteries into the remote.
    5. Plug the Roku device back into the power source and wait for it to boot up.

    This process helps to refresh the connection and often resolves issues related to pairing.

    Step 3: Pair Using the Home Screen

    If resetting doesn’t work, use the Roku home screen to initiate pairing:

    1. Navigate to the Home screen on your Roku device.
    2. Go to Settings > Remotes & Devices > Pair Remote.
    3. Follow the on-screen instructions to pair your remote.

    Using the settings menu is a reliable method to establish a new connection between your remote and the Roku device.

    Step 4: Use the Roku App

    Another alternative is using the Roku mobile app as a remote:

    1. Download and install the Roku app on your smartphone or tablet.
    2. Connect your mobile device to the same Wi-Fi network as your Roku device.
    3. Open the app and select your Roku device.
    4. Use the app’s remote feature to navigate to the pairing menu on your Roku device.

    The app can serve as a convenient backup when the physical remote fails to pair, ensuring continuous control over your Roku device.

    Troubleshooting Pairing Issues

    If the above methods do not work, consider the following troubleshooting tips:

    Interference

    Ensure there are no obstructions or electronic devices that could interfere with the remote’s signal. Objects like furniture or electronic devices can disrupt the infrared signal or the wireless connection of enhanced remotes.

    Update Firmware

    Check if your Roku device and remote are running the latest firmware. An outdated system can cause connectivity issues. Keeping your device updated ensures optimal performance and compatibility.

    Factory Reset

    As a last resort, perform a factory reset on your Roku device. Note that this will erase all settings and data:

    1. Go to Settings > System > Advanced System Settings > Factory Reset.
    2. Follow the prompts to reset your device.

    A factory reset can resolve deep-seated issues but should only be used when all other troubleshooting methods fail.

    Table: Pairing Methods for Different Roku Remotes

    Remote Type Pairing Method Special Notes
    Infrared Remote No pairing required Ensure line of sight to the Roku device
    Enhanced Remote Reset, use home screen, or Roku app No pairing button needed; follow alternative steps

    Conclusion

    Pairing a Roku remote without a pairing button may seem daunting at first, but with the right approach, it becomes manageable. By identifying your remote type and following the outlined methods, you can reconnect your remote and resume enjoying your favorite shows and movies. Remember, whether it’s through a reset, home screen navigation, or the Roku app, there’s always a way to get your remote back in action.

    The methods detailed above ensure that even without a pairing button, your Roku remote can be paired successfully. Whether using the app, performing a reset, or accessing the settings menu, these solutions cater to different scenarios, making your Roku experience smooth and hassle-free.

    Also Check:

  • Roku Remote Pairing Button: How to Easily Pair Your Roku Remote

    Roku Remote Pairing Button: How to Easily Pair Your Roku Remote

    Pairing a Roku remote should be straightforward, yet sometimes it feels like navigating an obstacle course. Whether you’re setting up your Roku device for the first time or troubleshooting a disconnected remote, understanding the pairing process is crucial. At the heart of this process lies the Roku remote pairing button, a small but mighty feature that simplifies the connection between your remote and device.

    Roku Remote Pairing Button

    The Role of the Roku Remote Pairing Button

    The pairing button on a Roku remote is a gateway to seamless control. Typically located in the battery compartment or on the back of the remote, this button initiates the pairing process between the remote and your Roku device. The button’s primary function is to establish a secure, wireless connection that enables the remote to control your Roku player or TV without interference.

    Understanding the pairing button’s functionality can save you from countless headaches. When you press and hold the button, the remote sends a signal to the Roku device, prompting it to search for the remote and complete the connection. The success of this process hinges on several factors, including the type of remote, the condition of the batteries, and the proximity to the Roku device.

    Types of Roku Remotes and Their Pairing Features

    Roku offers two main types of remotes: infrared (IR) remotes and enhanced “point-anywhere” remotes. While IR remotes don’t require pairing and work by direct line of sight, enhanced remotes use wireless technology, necessitating the use of the pairing button.

    Enhanced remotes boast advanced features such as voice commands, private listening via headphones, and programmable shortcut buttons. These features make them more versatile but also more complex to set up. If your enhanced remote isn’t pairing as expected, identifying the issue becomes a key step in restoring functionality.

    Steps to Pair Your Roku Remote

    Pairing a Roku remote involves a few straightforward steps, but nuances can vary depending on your setup. Start by inserting fresh batteries into the remote, as low power can disrupt the pairing process. Locate the pairing button—often hidden under the battery cover—and press it for several seconds until the indicator light begins to flash.

    When the light flashes, it signals that the remote is in pairing mode. At this point, your Roku device should automatically detect the remote and display an on-screen notification confirming the successful connection. If this doesn’t happen, troubleshooting is necessary to pinpoint the problem.

    Troubleshooting Common Pairing Issues

    Sometimes, despite following the steps, your Roku remote refuses to pair. In such cases, it’s essential to address potential obstacles systematically. Start by ensuring that your Roku device is powered on and within range of the remote. Interference from other wireless devices or obstructions between the remote and device can disrupt the connection.

    Check the batteries in your remote. Even if they’re newly installed, low-quality or partially depleted batteries can cause issues. Replacing them with high-quality alkaline batteries often resolves pairing problems. Additionally, restarting both your Roku device and remote can refresh their connection, clearing any temporary glitches.

    Solutions for Persistent Pairing Problems

    If basic troubleshooting doesn’t resolve the issue, advanced solutions may be necessary. Performing a factory reset on your remote can clear any existing configurations and restore it to default settings. To do this, remove the batteries, hold the pairing button for 20 seconds, and reinsert the batteries before attempting to pair again.

    Updating your Roku device’s software can also address compatibility issues. Navigate to the settings menu on your Roku device and check for updates. Ensuring both the device and remote are running the latest software versions minimizes the likelihood of persistent pairing problems.

    Reference Table for Roku Remote Pairing

    Issue Cause Solution
    Remote not pairing Low battery power Replace with fresh alkaline batteries
    No flashing light Faulty pairing button Inspect and hold pairing button longer
    Connection lost Wireless interference Reduce interference, restart devices
    Pairing fails repeatedly Outdated Roku device software Update software via settings menu

    Enhancing Your Roku Experience

    A properly paired Roku remote elevates your streaming experience by granting easy access to all features. Enhanced remotes, in particular, open up possibilities like voice search, private listening, and customizable shortcuts, making navigation effortless. Mastering the pairing process ensures that these features are always at your fingertips.

    Investing time in understanding how the pairing button works, along with learning effective troubleshooting techniques, will save you frustration and keep your Roku device running smoothly. By maintaining your remote and staying informed about software updates, you’ll enjoy uninterrupted access to your favorite shows and movies.

    The Roku remote pairing button may be small, but its impact on your streaming experience is significant. Whether you’re setting up for the first time or resolving a connection issue, knowing how to leverage this feature ensures that your Roku device remains a reliable source of entertainment.

    Also Check:

  • Roku Low Power Fix: How to Fix Low Power Alerts (Don’t Let Low Power Ruin Your Streaming)

    Roku Low Power Fix: How to Fix Low Power Alerts (Don’t Let Low Power Ruin Your Streaming)

    Roku devices are cherished for their simplicity, affordability, and reliability. However, even the most user-friendly gadgets can encounter hiccups, and one common issue Roku users face is the dreaded low power alert. This alert typically appears when your Roku device isn’t receiving enough power to function properly. While the issue can be frustrating, it’s rarely insurmountable. With the right guidance, you can identify the cause and implement a solution to restore your streaming experience.

    Roku Low Power Fix

    Roku Low Power Fix

    The low power alert on Roku devices is a warning that your device isn’t getting sufficient electrical current to operate correctly. Roku streaming sticks and other models are designed to draw power via a USB connection, either through a USB port on your TV or a wall adapter. When the power supply falls short of the device’s requirements, a message often appears on-screen, warning you about the issue.

    This alert might also be accompanied by erratic device behavior, such as slow performance, connectivity drops, or frequent reboots. Addressing the low power alert promptly is crucial to ensuring smooth and uninterrupted streaming. Ignoring these alerts can lead to worsening performance over time, eventually resulting in device failure. Thus, understanding and acting on the alert is key to maintaining the longevity and functionality of your Roku device.

    Causes of Low Power Alerts

    Several factors can lead to low power alerts on Roku devices. The most common culprits include:

    Insufficient Power Supply:

    The USB port on some TVs doesn’t provide adequate power for Roku devices. TVs vary in their power output capabilities, with some models designed only for low-power USB devices like flash drives. This limitation becomes an issue for devices like Roku that require steady and sufficient power for optimal performance. Older TVs are especially prone to this problem as they may not meet modern USB power standards. Upgrading to a dedicated wall adapter can often resolve this.

    Additionally, fluctuations in the power supply from the TV’s USB port can create intermittent issues. Even if the port technically meets the Roku’s requirements, inconsistent power flow can trigger alerts. Switching to a stable power source ensures consistent device operation and prevents such power interruptions.

    Faulty Cables or Adapters:

    Worn-out or incompatible USB cables and power adapters can fail to deliver the required current. Over time, USB cables degrade due to frequent bending, twisting, and general wear and tear. This deterioration reduces the cable’s capacity to transmit power efficiently. Similarly, low-quality or damaged adapters might not convert electricity to the appropriate voltage and current needed by your Roku device.

    Choosing high-quality, durable cables and certified adapters can make a significant difference. Cheap, generic accessories often lack the internal components required for consistent power delivery. Opting for branded or recommended products ensures that your device receives adequate and reliable power.

    Loose Connections:

    Poor connections between the USB cable, adapter, or Roku device can lead to inconsistent power delivery. A loose connection might seem minor, but it can severely affect your device’s functionality. For instance, a partially inserted USB cable might result in intermittent power supply, causing your Roku to reboot frequently or display low power alerts.

    Ensuring that all connections are secure and free from obstructions is critical. Inspect the USB ports for debris or damage, as these can also hinder proper connectivity. Regularly checking and maintaining the integrity of these connections prevents avoidable disruptions.

    External Interference:

    The use of long or substandard extension cords or power strips may result in reduced power flow. Extension cords and power strips often introduce additional resistance in the electrical circuit, which can diminish the power reaching your device. Moreover, older or lower-quality power strips might not handle modern electrical demands effectively, exacerbating the issue.

    Switching to direct connections or using high-quality extension cords and power strips can mitigate this problem. Devices like power conditioners or surge protectors designed for sensitive electronics can further enhance power stability, ensuring your Roku operates without hitches.

    Each of these factors plays a significant role in determining the overall performance of your device. For instance, older TVs often have outdated USB standards that don’t meet modern power requirements. Meanwhile, poorly manufactured cables can deteriorate faster, leading to frequent power interruptions. Understanding the specific cause of the alert is the first step toward resolving it. Each issue requires a tailored approach to ensure your Roku device functions as intended.

    Troubleshooting and Fixing Low Power Alerts

    To fix low power alerts on your Roku device, it’s essential to adopt a systematic approach. Begin by identifying the root cause of the problem and proceed with the appropriate solution. Often, users might rush to replace their device when the actual problem lies in a simple component like the USB cable or adapter. Taking the time to diagnose the issue properly can save you money and effort.

    Inspect the Power Source

    The easiest way to address low power alerts is to check the source of power for your Roku device. If your Roku is connected to your TV’s USB port, ensure that the port provides sufficient power output. Some older or low-power TVs may not deliver the 5V and 1A current typically required by Roku devices. Switching to a dedicated wall adapter can often solve the issue. Wall adapters are designed to deliver consistent power, which ensures your Roku device operates without interruptions.

    For newer TV models, it’s worth consulting the user manual or manufacturer specifications to confirm the USB port’s power output. Even among newer TVs, the USB power capacity can vary significantly, with some offering as little as 500mA, which falls short of the Roku device’s requirements. Identifying this mismatch early can save you from unnecessary troubleshooting steps.

    Verify If the USB Cable and Adapter are Compatible

    Using the original USB cable and power adapter that came with your Roku device is highly recommended. Over time, generic or low-quality cables and adapters can degrade, leading to insufficient power delivery. If your original components are unavailable, ensure that replacements meet the device’s power specifications. Investing in a high-quality, third-party adapter can also be a viable solution.

    Cables with high resistance or poor internal wiring can cause significant power loss during transmission. Opting for cables labeled as “fast charging” or “high-speed data transfer” often ensures they are of superior quality. Additionally, some adapters and cables are specifically marketed for streaming devices, making them an excellent choice for long-term reliability.

    Check the Cable Connections

    Loose or partially connected cables can create power delivery issues. Examine each connection point, from the USB cable’s attachment to the Roku device to its plug into the power source. Firmly secure all connections and ensure there is no visible damage to the ports or cables. Dust and debris accumulation around the USB ports can also impact connectivity. Cleaning these ports gently with a dry, soft-bristled brush can enhance the connection quality.

    Try Other Alternative Power Options

    If your current setup isn’t resolving the low power alert, consider an alternative power option. For instance, use a power bank or a different USB power adapter with a higher output rating. These alternatives can often bypass the limitations of underpowered TV USB ports or faulty outlets. Power banks, especially those with “pass-through charging” capabilities, can act as a stable power source during extended usage periods.

    Additionally, some users have reported success using powered USB hubs. These hubs not only expand the number of USB connections available but also provide dedicated power delivery for connected devices. This option is particularly useful if you have multiple devices vying for limited USB power resources.

    Preventing Future Power Issues

    Once the low power alert is resolved, adopting preventative measures can save you from similar issues in the future. Regularly inspect your USB cables and adapters for wear and tear. Keep your Roku device’s firmware up to date to ensure compatibility with its power requirements. Moreover, avoid using overly long USB cables or extensions, as these can reduce the efficiency of power delivery.

    Preventative maintenance also includes ensuring your Roku device is kept in a cool, well-ventilated environment. Overheating can exacerbate power issues, as high temperatures often increase electrical resistance in cables and connections. By maintaining optimal operating conditions, you reduce the likelihood of recurring power alerts.

    Troubleshooting Reference Table

    Issue Potential Cause Solution
    Low Power Alert Insufficient USB power Use a dedicated wall adapter
    Device Reboots Frequently Faulty USB cable Replace with high-quality cable
    Intermittent Alerts Loose connections Secure all connections firmly
    No Alert, But Slow Device Power interference Avoid long or substandard cables

    Final Thoughts

    The low power alert on Roku devices might seem like a significant issue at first, but with the right approach, it’s a manageable problem. By understanding the causes and applying the appropriate fixes, you can ensure your Roku device operates seamlessly. Whether it’s a simple cable replacement or a switch to a wall adapter, addressing the issue promptly will restore your streaming experience to its full potential.

    Roku’s commitment to simplicity and functionality remains steadfast, and resolving power-related issues is part of ensuring a reliable entertainment platform. As you troubleshoot and implement these solutions, your Roku device will continue to serve as a dependable companion for all your streaming needs. Taking proactive steps not only resolves the current issue but also safeguards against potential disruptions, allowing you to enjoy uninterrupted entertainment for years to come.

    Also Check:

  • A Quick Fix: Roku Guest Mode Not Working

    A Quick Fix: Roku Guest Mode Not Working

    The rise of Roku devices as a staple in modern entertainment is undeniable. From binge-watching your favorite shows to enjoying family movie nights, Roku devices offer a seamless streaming experience. However, as user-friendly as the technology may seem, occasional hiccups arise. One common yet frustrating issue is Roku’s Guest Mode not functioning as expected.

    A Quick Fix: Roku Guest Mode Not Working


    Designed to offer temporary access to guests without compromising the host’s account security, this feature can falter for various reasons. In this comprehensive guide, we delve into why Guest Mode may stop working and provide actionable steps to fix the problem effectively. Whether you’re a tech enthusiast or just someone trying to troubleshoot, this guide has you covered.

    Roku Guest Mode Not Working

    Guest Mode is one of Roku’s most thoughtful features, enabling temporary users to sign into their streaming accounts without altering the host’s saved credentials. After the set departure date, the guest’s login data is automatically removed, ensuring privacy and convenience. This functionality is particularly beneficial in settings like Airbnb rentals, hotels, or shared living spaces. However, when Guest Mode malfunctions, it disrupts this convenience and raises concerns about Roku’s reliability.

    The core purpose of Guest Mode is to balance security with user satisfaction. It prevents unauthorized access to personal accounts while granting guests a personalized viewing experience. When it fails, the cause often lies in misconfigurations, software bugs, or network issues. By dissecting these potential causes, we can better understand how to resolve the problem and prevent future occurrences.

    Common Reasons for Guest Mode Issues

    Guest Mode issues can be attributed to several factors, including:

    1. Network Connectivity Problems: Roku devices are heavily dependent on stable internet connections. Weak or unstable networks can disrupt features like Guest Mode.
    2. Software Bugs or Outdated Firmware: Regular updates are crucial for any technology. Outdated firmware might not support newer features or could introduce bugs that affect Guest Mode functionality.
    3. Account Configuration Errors: Errors in enabling or setting up Guest Mode can prevent smooth operation. Incorrect settings may block guests from accessing their accounts seamlessly.
    4. Device-Specific Issues: Certain Roku models, especially older ones, might encounter compatibility issues with Guest Mode.
    5. Server-Side Problems: Occasionally, issues originate from Roku’s servers rather than the device, causing temporary outages or glitches in specific features.

    Troubleshooting Steps to Fix Guest Mode

    To resolve Guest Mode issues, address each potential cause systematically. Below are detailed solutions for each scenario:

    Checking Network Stability

    A stable internet connection is fundamental for Guest Mode. Follow these steps to test and improve your network:

    • Restart your router to refresh the connection.
    • Run a speed test to ensure your internet meets Roku’s recommended requirements.
    • If possible, switch to a wired connection using an Ethernet cable for better stability.
    • Relocate your Roku device or router to minimize interference and enhance signal strength.

    Updating Firmware

    Keeping your Roku device updated is essential for optimal performance:

    1. Navigate to the Settings menu on your Roku device.
    2. Select System, then System Update.
    3. Check for updates and install any available updates immediately.

    Updated firmware not only resolves bugs but also enhances overall functionality, ensuring Guest Mode operates without hiccups.

    Reconfiguring Guest Mode Settings

    Improper setup is a frequent cause of Guest Mode issues. To reset and reconfigure:

    1. Access the Settings menu on your Roku device.
    2. Select System, then Guest Mode.
    3. Disable Guest Mode if it’s already enabled. Restart the device and re-enable it.
    4. Ensure the correct guest departure date is set for smooth operation.
    5. Test the feature by signing in with a guest account to confirm proper functionality.

    Performing a Factory Reset

    For persistent issues, a factory reset can resolve deeper problems by restoring your device to default settings:

    1. Go to Settings > System > Advanced System Settings.
    2. Select Factory Reset and follow the on-screen instructions.

    Keep in mind that this process erases all settings, so you’ll need to reconfigure your Roku device from scratch.

    Verifying Roku Account and Server Status

    Sometimes, the issue lies beyond your device. Here’s how to check:

    • Visit Roku’s official support page or social media channels for updates on server outages.
    • Log in to your Roku account on the official website to ensure it’s active and in good standing.
    • If server issues are confirmed, you may need to wait until they’re resolved.

    Advanced Troubleshooting: Device-Specific Solutions

    Older Roku models may experience unique challenges with Guest Mode. If you suspect your device is outdated:

    • Consider upgrading to a newer model, such as the Roku Ultra, which offers superior performance and enhanced feature support.
    • Reach out to Roku customer support for device-specific troubleshooting steps.
    • Verify hardware compatibility with the latest updates and features.

    Preventative Measures to Avoid Future Issues

    To minimize the risk of encountering Guest Mode problems:

    • Regularly update your Roku device’s firmware.
    • Maintain a stable and fast internet connection.
    • Periodically review Guest Mode settings to ensure they’re configured correctly.
    • Consider upgrading to newer Roku models for improved performance and feature support.

    Comparison Table: Common Issues and Fixes

    Issue Potential Cause Recommended Fix
    Guest Mode not displaying Outdated firmware Update device firmware
    Unable to connect to Guest Mode Network instability Restart router, check connection
    Guest accounts not working Configuration error Reconfigure Guest Mode settings
    Persistent malfunctions Device or server issue Factory reset, check server status

    Conclusion: Restoring Convenience

    Roku’s Guest Mode is a valuable feature for households, rental properties, and more. It offers a secure, efficient way to share streaming capabilities with temporary users. When Guest Mode malfunctions, the root causes often lie in network, software, or configuration issues. By systematically applying the troubleshooting steps outlined in this guide, most problems can be resolved quickly, restoring the feature’s intended functionality.

    As streaming technology evolves, staying proactive with updates and configurations is key to maximizing your Roku device’s potential. Whether you’re hosting guests or exploring the versatility of Guest Mode, understanding its functionality and addressing common issues ensures an uninterrupted entertainment experience for everyone involved.

    Also Check:

  • Roku Green Light Blinking: What Does it Means and How to Fix It

    Roku Green Light Blinking: What Does it Means and How to Fix It

    Roku streaming devices have revolutionized how we access entertainment, offering a seamless way to enjoy movies, shows, and live TV. Yet, even with its cutting-edge design and user-friendly features, users occasionally encounter technical glitches. One of the most perplexing issues is the blinking green light on the Roku remote.

    Roku Green Light Blinking

    For many, this flashing signal raises questions: What does it mean, and how can it be resolved? In this comprehensive guide, we’ll explore the reasons behind the blinking green light and provide actionable solutions to fix it, ensuring your streaming experience remains uninterrupted.

    Roku Green Light Blinking

    The blinking green light on your Roku remote is more than just an annoyance; it’s a signal that something is amiss. Generally, it indicates one of the following:

    1. Pairing Issues: The remote has lost its connection to the Roku device, preventing it from functioning properly.
    2. Low Battery Levels: A rapidly blinking light often points to depleted batteries, signaling the need for a replacement.
    3. Hardware Malfunctions: Internal issues with the remote or the Roku device itself may also trigger the blinking light.
    4. Interference: Nearby electronic devices or obstructions could disrupt the pairing process, causing the green light to blink.

    Recognizing the underlying cause is the first step toward finding a solution. Each scenario requires a specific approach to restore normal functionality.

    Common Causes of the Blinking Green Light

    1. Pairing Interruptions

    The Roku remote and device communicate through a secure pairing process. However, this connection can break due to various factors, such as a system update, power outage, or accidental unpairing. When this happens, the remote enters a pairing mode, indicated by the blinking green light.

    2. Depleted Batteries

    The simplest explanation for the blinking green light is low or dead batteries. If the remote’s power source is insufficient, it may struggle to maintain its connection to the Roku device, triggering the blinking signal.

    3. Physical Obstructions or Interference

    Signal interference from other devices or physical barriers like walls and furniture can disrupt the connection between the remote and the Roku device. This interference often forces the remote into pairing mode.

    4. Firmware Glitches

    Outdated or corrupted firmware on either the Roku device or the remote can lead to communication errors. In such cases, the blinking green light is a symptom of an underlying software issue.

    5. Remote Hardware Defects

    In rare instances, the blinking light might indicate a hardware failure within the remote, such as a damaged circuit board or sensor. If the remote has suffered physical damage, this could be the root cause.

    Troubleshooting Steps to Resolve the Issue

    To address the blinking green light on your Roku remote, follow these detailed troubleshooting steps:

    Replace the Batteries

    Start with the simplest fix: replacing the batteries. Use high-quality alkaline batteries for optimal performance. Remove the old batteries, wait a few seconds, and insert fresh ones. If the blinking stops, the issue was likely power-related.

    Re-Pair the Remote

    If the batteries aren’t the problem, re-pairing the remote with your Roku device can often resolve the issue. To do this:

    1. Remove the power cable from your Roku device and wait 10 seconds.
    2. Reconnect the power cable and wait for the device to restart.
    3. Open the battery compartment on the remote and locate the pairing button.
    4. Press and hold the pairing button until the green light starts flashing rapidly.
    5. Follow the on-screen instructions to complete the pairing process.

    Check for Obstructions and Interference

    Ensure there are no objects blocking the line of sight between the remote and the Roku device. Additionally, move other electronic devices that could cause signal interference, such as Wi-Fi routers or Bluetooth gadgets, away from the Roku setup.

    Update Firmware

    Outdated firmware can cause compatibility issues between the remote and the Roku device. To check for updates:

    1. Navigate to Settings on your Roku device.
    2. Select System, then System Update.
    3. Check for updates and install them if available.

    Updating the firmware ensures your Roku system is equipped with the latest fixes and features.

    Factory Reset the Remote

    If re-pairing doesn’t work, a factory reset might be necessary. To reset the remote:

    1. Remove the batteries from the remote.
    2. Press and hold the pairing button for 20 seconds.
    3. Release the button and reinsert the batteries.
    4. Attempt to pair the remote again.

    Inspect for Hardware Damage

    Examine the remote for signs of physical damage. If you suspect a hardware issue, consider contacting Roku support or purchasing a replacement remote.

    Preventative Measures

    To minimize the risk of encountering a blinking green light in the future, adopt these preventative practices:

    1. Use Quality Batteries: Opt for reliable, long-lasting batteries to ensure consistent performance.
    2. Maintain a Clear Line of Sight: Position your Roku device and remote in a way that avoids obstructions.
    3. Update Regularly: Keep your Roku device and remote firmware up to date to prevent compatibility issues.
    4. Handle with Care: Avoid dropping or mishandling the remote to prevent hardware damage.

    Quick Reference Table: Troubleshooting Steps

    Cause Indicator Solution
    Low batteries Rapid blinking light Replace with fresh batteries
    Pairing interruption Blinking during setup Re-pair the remote
    Signal interference Unresponsive commands Remove obstructions, relocate devices
    Outdated firmware Intermittent issues Update Roku device firmware
    Hardware damage Persistent blinking Inspect and replace remote

    Conclusion

    The blinking green light on your Roku remote might initially seem frustrating, but understanding its meaning and following the outlined troubleshooting steps can quickly restore functionality. Whether it’s a simple battery replacement or re-pairing process, most issues can be resolved at home without requiring professional assistance.

    By staying proactive with updates and proper device care, you can ensure your Roku system remains a reliable centerpiece of your entertainment setup.

    Also Check: