Category: More

  • Roku Error 016 and How to Fix It

    Roku Error 016 and How to Fix It

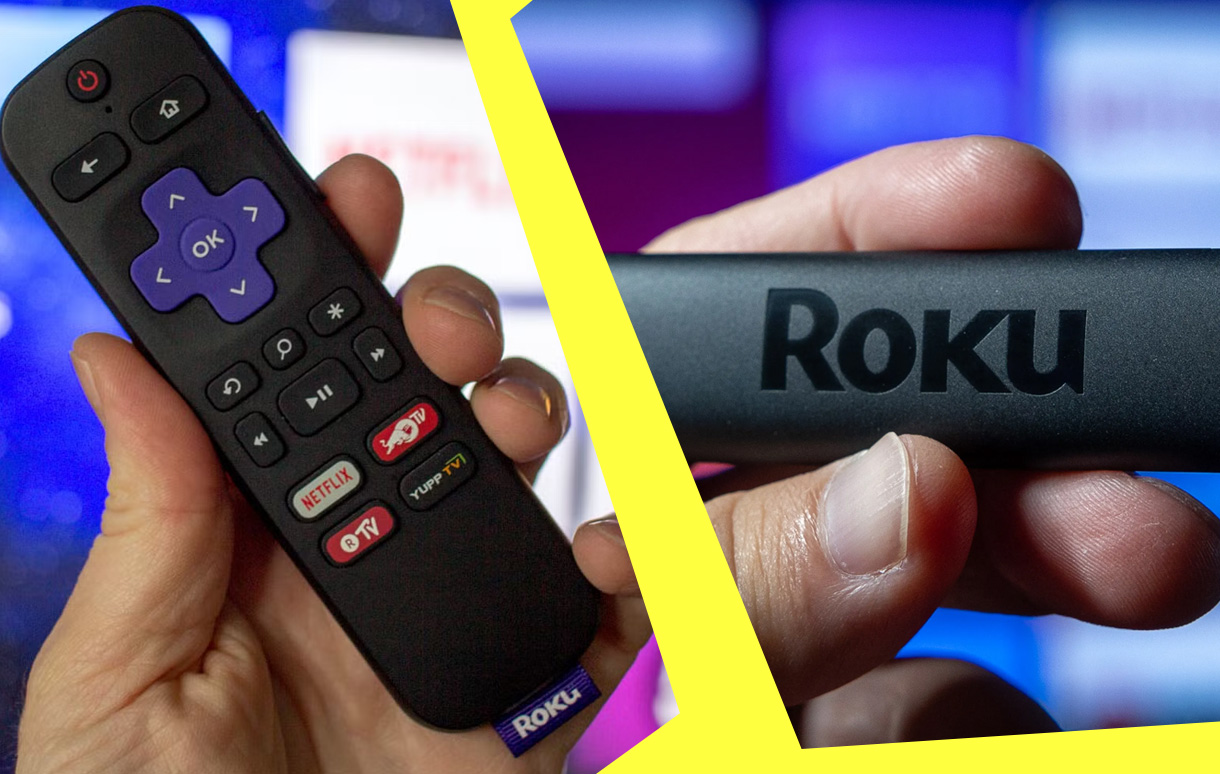
    If you’re a Roku user, you’ve likely come to appreciate its intuitive interface and expansive streaming capabilities. However, no technology is immune to hiccups, and Roku devices occasionally throw errors. One such issue is Error 016—a frustrating notification that can disrupt your viewing experience. If you’ve encountered this error, don’t worry. Here’s a comprehensive guide to understanding what causes Roku Error 016 and how to fix it effectively.

    Roku Error 016 and How to Fix It


    What is Roku Error 016?

    Roku Error 016 typically occurs when the device struggles to establish or maintain an internet connection. Since Roku relies heavily on stable internet connectivity to stream content, any disruption can halt your streaming session, leaving you staring at an error message instead of your favorite show or movie.

    The error message often reads: “Unable to connect to the internet. Please check your network settings or try again later.” While the phrasing may vary slightly, the underlying cause remains the same—a connectivity problem.

    Common Causes of Roku Error 016

    Before diving into fixes, it’s essential to identify the potential causes. The error might stem from:

    • Weak Wi-Fi Signal: Physical obstacles, distance, or interference can weaken your Wi-Fi signal.
    • Router Issues: A malfunctioning router or outdated firmware can disrupt the connection.
    • Internet Service Problems: Temporary outages or low bandwidth from your internet service provider (ISP) may cause interruptions.
    • Roku Device Settings: Misconfigured network settings on your Roku can lead to connectivity issues.
    • Software Bugs: Occasionally, a software glitch or outdated Roku firmware can trigger the error.

    How to Diagnose the Problem

    Understanding the specific cause of Error 016 is the first step toward resolving it. Begin by answering the following questions:

    • Is your internet connection working for other devices?
    • Are other Roku devices or apps on the same network experiencing similar issues?
    • Is your Roku device positioned too far from the router?
    • Has your router been recently updated or rebooted?

    By identifying patterns, you can narrow down the issue to a specific source, whether it’s your Roku device, the network, or external factors.

    Step-by-Step Fixes for Roku Error 016

    Check Your Internet Connection

    Ensure your internet connection is active and stable. Test other devices on the same Wi-Fi network to verify whether they’re experiencing similar problems. If all devices are affected, it’s likely an ISP-related issue, and you should contact your provider.

    Reboot Your Roku Device and Router

    Rebooting can often resolve minor glitches:

    1. Restart Your Roku: Navigate to Settings > System > System Restart. Alternatively, unplug the device, wait 30 seconds, and plug it back in.
    2. Reboot Your Router: Power off your router, wait about a minute, and turn it back on. Once the router restarts, check if your Roku reconnects automatically.

    Reconnect to the Wi-Fi Network

    If rebooting doesn’t work, reconnect your Roku to the Wi-Fi network:

    1. Go to Settings > Network > Set Up Connection.
    2. Choose “Wireless” and select your network from the list.
    3. Enter your Wi-Fi password carefully and ensure it’s correct.

    Optimize Wi-Fi Signal Strength

    If a weak signal is the culprit, improving your Wi-Fi setup can help:

    • Reposition Your Router: Place your router in a central location, away from walls and interference sources like microwaves or cordless phones.
    • Use a Wi-Fi Extender: If your Roku is far from the router, a Wi-Fi extender can boost the signal.
    • Switch to a Wired Connection: If possible, use an Ethernet cable for a direct and more stable connection.

    Update Roku Firmware

    Outdated software can lead to connectivity errors. Check for updates by navigating to Settings > System > System Update. If an update is available, install it and restart your device.

    Perform a Factory Reset

    As a last resort, you can perform a factory reset. Be aware that this will erase all your settings and require you to set up the device from scratch:

    1. Go to Settings > System > Advanced System Settings > Factory Reset.
    2. Follow the on-screen instructions and reconfigure your Roku.

    Comparing Troubleshooting Methods

    Method Effectiveness Difficulty Time Required
    Rebooting Devices High Easy 5 Minutes
    Reconnecting Wi-Fi High Easy 10 Minutes
    Signal Optimization Medium Moderate 15-30 Minutes
    Firmware Updates High Easy 10 Minutes
    Factory Reset Very High Difficult 30+ Minutes

    Preventing Roku Error 016 in the Future

    To avoid encountering Error 016 again, follow these preventative measures:

    • Regular Router Maintenance: Periodically reboot your router and update its firmware.
    • Monitor Network Usage: Avoid overloading your network with multiple high-bandwidth activities simultaneously.
    • Keep Roku Updated: Regularly check for software updates to ensure your Roku device has the latest features and bug fixes.
    • Position Your Devices Strategically: Ensure your Roku device and router are positioned for optimal signal strength.

    Final Thoughts

    Roku Error 016 can be an annoyance, but it’s far from insurmountable. With a systematic approach to diagnosing and resolving the issue, you can restore your streaming experience in no time. Whether it’s a simple reboot, a network adjustment, or a factory reset, the solutions outlined above provide a clear path to fixing this connectivity hiccup. By maintaining your network and device proactively, you’ll minimize the chances of future disruptions and enjoy seamless streaming on your Roku device.

    Also Check:

  • Roku Error 009 and How to Fix It

    Roku Error 009 and How to Fix It

    Streaming devices have become an integral part of our entertainment setups, and Roku leads the pack with its intuitive interface and robust platform. However, like any technology, Roku devices are not immune to technical glitches. Among the most common issues users encounter is Roku Error 009.

    Roku Error 009 and How to Fix It

    This error often leaves users puzzled and disconnected from their streaming services. But what does Error 009 mean, and how can you fix it? Let’s break it down step by step.

    What is Roku Error 009?

    Roku Error 009 typically appears when your Roku device successfully connects to a Wi-Fi network but cannot establish a connection to the internet. It’s a unique situation where the device recognizes your home network yet struggles to communicate beyond it. This issue interrupts access to streaming apps like Netflix, Hulu, or Disney+, making it impossible to enjoy your favorite shows and movies.

    The error message usually reads: “Cannot connect to the internet. Please check your network connection.”

    The causes can range from simple network misconfigurations to more complex problems involving your internet service provider (ISP). Understanding these causes is key to resolving the issue.

    Potential Causes of Roku Error 009 Description
    Weak or unstable Wi-Fi signal The Roku device is far from the router or facing physical obstructions.
    Router or modem issues Outdated firmware, improper settings, or temporary glitches in the router.
    ISP-related problems Temporary outages, throttling, or DNS server issues on the ISP’s side.
    Roku software issues Outdated Roku firmware or a bug in the current software version.
    Incorrect network settings Static IP conflicts or custom DNS configurations causing connectivity problems.

    Diagnosing the Problem

    The first step in troubleshooting Roku Error 009 is to identify the exact cause. Begin by testing your internet connection on another device, such as a smartphone or laptop, to see if it’s working correctly. If the internet is functioning, the issue likely lies with your Roku device or its settings. Conversely, if other devices also fail to connect, you may need to address the problem with your router or ISP.

    Fixing Roku Error 009

    Restart Your Roku and Network Equipment

    A simple restart is often all it takes to resolve connectivity issues. Unplug your Roku device, router, and modem from their power sources, wait for about 30 seconds, and plug them back in. Allow the router and modem to establish a stable connection before turning on your Roku device.

    Improve Wi-Fi Signal Strength

    If your Roku device is situated far from the router or obstructed by walls and other physical barriers, signal strength may be compromised. Relocating the router closer to the Roku device or using a Wi-Fi extender can improve connectivity.

    Check Network Settings on Roku

    Navigate to the Settings menu on your Roku device, then select Network and Check Connection. This built-in diagnostic tool provides detailed insights into the status of your network and internet connection. If any issues are detected, it will guide you with basic troubleshooting steps.

    Update Your Router Firmware

    An outdated router firmware can sometimes cause connectivity issues. Log into your router’s settings via a web browser (usually accessible through an IP address like 192.168.1.1) and check for firmware updates. Many modern routers have an automatic update option, making this process straightforward.

    Switch DNS Servers

    DNS issues can also trigger Roku Error 009. If your ISP’s DNS servers are experiencing problems, switching to a public DNS service like Google DNS (8.8.8.8 and 8.8.4.4) or Cloudflare (1.1.1.1) can help. Access your router’s settings and manually configure these DNS addresses.

    Factory Reset as a Last Resort

    If all else fails, performing a factory reset on your Roku device might resolve persistent errors. Be aware that this will erase all settings and installed apps, so use it as a last resort. You can initiate a factory reset through the System menu in the Settings or by pressing the reset button on the Roku device.

    How Roku Error 009 Differs from Other Errors

    Unlike errors related to direct Wi-Fi connectivity, such as Roku Error 014.40, Error 009 is more nuanced as it isolates the issue to the internet side of the connection. This makes the troubleshooting process slightly different, focusing more on the router, ISP, and DNS configurations rather than the Wi-Fi password or signal.

    Preventing Roku Error 009 in the Future

    To minimize the chances of encountering Roku Error 009 again, consider the following tips:

    • Keep your Roku device and router firmware updated.
    • Regularly restart your router and modem to clear temporary glitches.
    • Avoid overloading your network with too many connected devices.
    • Position your router centrally in your home for optimal signal distribution.
    • Monitor your ISP for outages or service disruptions.

    Why Roku Remains a Reliable Choice

    Despite occasional hiccups like Error 009, Roku remains one of the most reliable streaming platforms available. Its extensive app library, affordability, and ease of use make it a favorite among cord-cutters. While technical errors can be frustrating, they are often easily resolved with a bit of troubleshooting.

    Conclusion

    Roku Error 009 might seem daunting at first, but understanding its causes and following the steps outlined above can help you resolve it quickly. Whether it’s tweaking your network settings, updating firmware, or simply restarting your devices, most users can fix this issue without needing professional assistance.

    The key is patience and a systematic approach to troubleshooting. Once resolved, you can return to uninterrupted streaming, enjoying all the content Roku has to offer. If the problem persists, don’t hesitate to reach out to Roku’s customer support or your ISP for additional help. After all, the ultimate goal is to keep your streaming experience smooth, seamless, and enjoyable.

    Also Check:

  • Roku Error 014.50 and How to Fix It

    Roku Error 014.50 and How to Fix It

    When streaming devices like Roku promise seamless entertainment, encountering errors can be frustrating, especially ones like Roku Error 014.50. This error primarily relates to network connectivity issues, specifically your Roku’s inability to establish a stable connection with the Wi-Fi network. If you’ve come across this issue, you’re not alone—it’s a common problem that can often be resolved with a few simple steps.

    Roku Error 014.50 and How to Fix It

    Error 014.50 tends to pop up during initial setup or after a network change, such as switching routers or updating Wi-Fi credentials. Understanding the root causes of this error can save you time and effort, allowing you to return to streaming your favorite content without delay.

    What Causes Roku Error 014.50?

    At its core, Roku Error 014.50 indicates that your Roku device is struggling to connect to your wireless network. This can happen for several reasons, ranging from incorrect Wi-Fi passwords to more complex issues like signal interference or router settings. Here’s a breakdown of the typical causes:

    Cause Explanation
    Incorrect Wi-Fi Credentials Entering an incorrect password prevents Roku from authenticating your network.
    Weak Signal Strength Physical obstructions or distance between the router and Roku can weaken the signal.
    Router Configuration Security protocols, firewalls, or outdated firmware might block the connection.
    ISP Issues Temporary outages or DNS problems can disrupt internet connectivity.
    Roku Software Bugs Outdated firmware or software glitches may contribute to the issue.

    Diagnosing Roku Error 014.50

    The first step to resolving any error is diagnosing the problem. Begin by checking your network’s status on another device. Can your smartphone or laptop connect to the same Wi-Fi network without issues? If not, the problem might lie with your internet service provider or router settings rather than Roku itself.

    If other devices are working fine, focus your troubleshooting efforts on the Roku device. Attempt to reconnect it to the network and observe the error message details for clues.

    Fixing Roku Error 014.50

    One of the simplest solutions to this problem is verifying your Wi-Fi credentials. It’s surprisingly easy to enter the wrong password, especially with the Roku on-screen keyboard. Re-enter the password carefully, ensuring you’ve chosen the correct wireless network.

    If the credentials are correct, consider the strength of your Wi-Fi signal. Weak signals can cause intermittent connectivity issues, leading to Error 014.50. Relocating your Roku closer to the router or using a Wi-Fi extender can help improve the signal. Additionally, try restarting your router and Roku device. This step often clears temporary glitches that may be blocking connectivity.

    Sometimes, the issue lies in your router’s security settings. Access the router’s admin panel via a web browser and ensure that it’s not set to block new devices. You can also temporarily disable firewalls or security protocols to test if these settings are causing the issue. If this resolves the problem, reconfigure your settings to allow the Roku device without compromising security.

    Advanced Troubleshooting

    For persistent errors, more advanced troubleshooting may be required. Updating your Roku’s firmware can resolve compatibility issues with your network. Navigate to the settings menu on your Roku, select “System Update,” and follow the prompts to ensure your device is running the latest software version.

    Resetting your network settings on Roku can also be an effective solution. This action clears stored Wi-Fi credentials and forces the device to perform a fresh connection setup. To reset the network settings, go to “Settings,” then “System,” and choose “Advanced System Settings.”

    If none of these solutions work, perform a factory reset on your Roku device. This action will erase all settings and installed apps, returning the device to its out-of-the-box state. After resetting, set up your Roku from scratch and reconnect to the Wi-Fi network.

    Preventing Roku Error 014.50 in the Future

    To avoid encountering this error in the future, consider implementing the following best practices:

    • Position your router centrally in your home to maximize signal strength.
    • Regularly update both your Roku device and router firmware.
    • Use a strong, unique Wi-Fi password to prevent unauthorized access while ensuring it’s easy to enter correctly.
    • Limit the number of connected devices to avoid network congestion.

    Why Roku Remains a Top Choice

    While errors like 014.50 can be inconvenient, they don’t detract from Roku’s overall reliability as a streaming platform. Its user-friendly interface, affordability, and vast library of apps make it a popular choice among users worldwide. Additionally, most errors can be resolved with straightforward troubleshooting steps, requiring no professional assistance.

    Conclusion

    Roku Error 014.50 is a network-related issue that can often be resolved with simple fixes, such as checking Wi-Fi credentials, improving signal strength, or restarting your router. By understanding the root causes and following the steps outlined above, you can quickly overcome this error and return to enjoying uninterrupted streaming.

    If the problem persists despite your efforts, reaching out to Roku’s customer support or your ISP may be necessary. Technical issues are a part of the streaming experience, but with a bit of patience and persistence, they can be easily managed. After resolving the issue, Roku continues to deliver a seamless and enjoyable streaming experience for users of all levels.

    Also Check:

  • Roku is Not Connecting to Wifi: Why and How You Can Fix It

    Roku is Not Connecting to Wifi: Why and How You Can Fix It

    Streaming has revolutionized how we consume content, and Roku has been at the forefront of this transformation. With its vast library of channels and user-friendly interface, Roku is a favorite for millions. However, like any tech device, it’s not immune to occasional hiccups. One of the most common issues users face is Roku not connecting to Wi-Fi. While frustrating, this problem is almost always solvable with a bit of troubleshooting.

    Roku is Not Connecting to Wifi: Why and How You Can Fix It

    When your Roku refuses to connect to Wi-Fi, it’s more than just a technical glitch. It can disrupt movie nights, binge-watching sessions, or even your ability to access live TV. The good news is that this issue typically doesn’t require advanced technical skills to resolve. Let’s delve into why this problem occurs and, more importantly, how to fix it.

    Why Roku May Fail to Connect to Wi-Fi

    Wi-Fi connectivity issues with Roku can stem from several factors, ranging from network problems to device-related glitches. Here are some common culprits:

    1. Weak Signal Strength

    If your Roku is far from your router, it may struggle to maintain a stable connection. Walls, furniture, and other obstacles can further weaken the signal.

    2. Network Congestion

    Too many devices connected to your Wi-Fi network can cause interference, leading to connectivity issues.

    3. Software Bugs or Outdated Firmware

    Like all devices, Roku relies on regular updates to fix bugs and improve performance. Outdated software can sometimes cause connectivity issues.

    4. Router Issues

    Problems with your router, such as incorrect settings or outdated firmware, can also disrupt your Roku’s connection.

    5. Hardware Problems

    While rare, hardware malfunctions—either in the Roku device or the router—can also cause connectivity issues.

    Troubleshooting Steps

    Step 1: Check Your Internet Connection

    Before diving into Roku-specific fixes, ensure your internet is working correctly. Test other devices like your smartphone or laptop to see if they can connect to Wi-Fi. If all devices are experiencing issues, the problem likely lies with your internet service provider (ISP) or router.

    Step 2: Restart Roku and Your Router

    A simple restart can work wonders for resolving connectivity problems. Power off your Roku and unplug your router for about five minutes. Then, reconnect everything and try again.

    Step 3: Verify Your Wi-Fi Credentials

    If your Wi-Fi network name (SSID) or password has changed recently, you’ll need to update these details on your Roku. Go to the settings menu, select “Network,” and follow the prompts to reconnect.

    Step 4: Check Signal Strength

    Roku has a built-in feature to check signal strength. Navigate to the “Network” section in the settings menu and select “Check Connection.” This will give you a signal strength reading. If it’s weak, consider moving your router closer to your Roku or using a Wi-Fi extender.

    Common Error Messages and What They Mean

    When Roku fails to connect, you might encounter error messages. Understanding these can help you diagnose the problem faster.

    Error Message Possible Cause Solution
    “Unable to Connect to Network” Incorrect password or weak signal Re-enter credentials, move closer to router
    “Not Connected to Internet” Internet service disruption Check ISP status, restart router
    “Low Signal Strength” Router too far from Roku Use a Wi-Fi extender or reposition devices

    Advanced Fixes

    Update Your Roku Software

    Outdated firmware can often cause connectivity issues. If your Roku is still functioning enough to access settings, check for updates manually by navigating to “Settings > System > System Update.”

    Factory Reset

    As a last resort, consider performing a factory reset. This will erase all customizations and return your Roku to its original settings. Go to “Settings > System > Advanced System Settings > Factory Reset.”

    Preventing Future Wi-Fi Issues

    To avoid future connectivity problems, ensure your Roku and router are in optimal locations with minimal interference. Regularly update your Roku software and router firmware to benefit from the latest performance enhancements.

    Additionally, investing in a dual-band router can help manage network congestion, particularly if you have multiple devices connected.

    When to Call for Help

    If you’ve tried all the troubleshooting steps and your Roku still won’t connect, it might be time to contact Roku support or your ISP. Persistent issues could indicate a hardware problem that requires professional assistance.

    Conclusion

    Wi-Fi issues can be incredibly frustrating, especially when they interrupt your streaming experience. But with a bit of patience and the right approach, you can quickly get your Roku back online. From checking your internet connection to updating your device, the solutions are straightforward and effective.

    Roku has revolutionized how we watch TV, and ensuring it works seamlessly is worth the effort. The next time you encounter a Wi-Fi connectivity issue, remember that you can fix it—and now, you know exactly how to do it.

    Also Check:

  • Roku Says Not Connected: Why and How to Fix It

    Roku Says Not Connected: Why and How to Fix It

    Streaming has become an essential part of our daily lives, and Roku has positioned itself as one of the leading platforms for on-demand entertainment. With a plethora of streaming options, an easy-to-use interface, and a reputation for reliability, Roku devices have become a household staple. However, nothing disrupts a relaxing evening of streaming like seeing the dreaded message: “Not Connected.”

    Roku Says Not Connected

    This notification can leave you frustrated and scrambling for answers, but rest assured, it’s a problem with solutions. The “Not Connected” message on Roku can arise from various reasons, including network issues, incorrect settings, or even device malfunctions. Understanding the cause is the first step toward resolving it, and this article will guide you through every aspect of fixing this issue and ensuring a smoother streaming experience in the future.

    What Does “Not Connected” Mean?

    When Roku displays “Not Connected,” it signifies that the device is not currently connected to the internet. Without an active connection, Roku cannot access streaming services, download updates, or provide a seamless user experience. This disconnection doesn’t necessarily mean your internet is down; it often points to a communication problem between your Roku device and your Wi-Fi network.

    There are a variety of reasons why this happens, from interference in your home network to outdated firmware or router issues. Each of these possibilities requires a different troubleshooting approach.

    Common Reasons Roku Says “Not Connected”

    The “Not Connected” error isn’t as random as it seems. Here’s a breakdown of the most common causes:

    1. Weak Wi-Fi Signal

    If your Roku is positioned far from the router, the signal strength may be insufficient to maintain a stable connection. Objects like walls, furniture, or electronic devices can interfere with signal quality.

    2. Network Configuration Issues

    Incorrect network settings, such as entering the wrong password or selecting the wrong Wi-Fi network, can cause your Roku to lose connectivity.

    3. Overcrowded Network

    In homes with multiple devices connected to the same network, bandwidth can become strained, leading to intermittent connectivity issues for devices like Roku.

    4. Software and Firmware Problems

    Both the Roku device and your router rely on regular updates to function optimally. If either is running outdated software, compatibility issues may arise.

    5. ISP or Router Downtime

    Sometimes, the problem isn’t with Roku at all. Internet service provider outages or router malfunctions can result in connectivity problems.

    Troubleshooting the Problem

    Understanding the root of the issue is only half the battle; fixing it is where the challenge begins. Below, we’ll explore detailed steps to address the “Not Connected” message and get your Roku back online.

    Step 1: Checking Your Network Connection

    The first step is to ensure your internet connection is active. Test your Wi-Fi on other devices such as a smartphone or laptop. If these devices are also struggling to connect, the problem lies with your internet service or router.

    If other devices are working fine, move on to verifying the connection specifically for your Roku. Use the “Check Connection” option in the Roku settings menu. This feature will test your signal strength and confirm whether the device is detecting your network.

    Step 2: Restarting Devices

    Sometimes, a simple restart can resolve the issue. Begin by restarting your Roku device. Navigate to “Settings,” then “System,” and select “System Restart.”

    For your router, unplug it from the power source, wait about five minutes, and then plug it back in. Once both devices are restarted, attempt to reconnect your Roku to Wi-Fi.

    Step 3: Updating Software

    Outdated firmware can cause compatibility issues, leading to connection problems. To check for updates on your Roku device, navigate to “Settings > System > System Update.” Ensure your router’s firmware is also up-to-date by logging into its admin panel (consult your router’s manual for specific instructions).

    Advanced Fixes

    If the basic troubleshooting steps don’t resolve the issue, it’s time to explore more advanced solutions.

    Factory Resetting Your Roku

    A factory reset should be used as a last resort, but it’s highly effective for resolving persistent issues. Keep in mind that this will erase all settings and data on your Roku, requiring you to set it up from scratch. To perform a factory reset, go to “Settings > System > Advanced System Settings > Factory Reset.”

    Optimizing Your Network

    Position your router in a central location to ensure even signal distribution throughout your home. If this isn’t feasible, consider investing in a Wi-Fi extender to boost signal strength.

    Additionally, upgrading to a dual-band or tri-band router can help manage network traffic, especially in homes with multiple devices.

    Switching to a Wired Connection

    For a more stable and reliable connection, consider using an Ethernet cable to connect your Roku directly to your router. While this isn’t an option for all Roku devices, it eliminates the variability of Wi-Fi signals.

    Error Messages and What They Mean

    When facing connectivity issues, Roku may display specific error codes or messages. Understanding these can help streamline the troubleshooting process.

    Error Code/Message Cause Solution
    009: Cannot Connect to Internet Weak signal or incorrect credentials Re-enter Wi-Fi password, check signal strength
    014: Network Not Found Router or ISP issues Restart router, verify network status
    “Unable to Connect” Outdated firmware or interference Update firmware, reduce interference

    Avoiding Future Connectivity Problems

    To minimize the chances of encountering the “Not Connected” message again, consider implementing these tips:

    • Regularly update both your Roku and router firmware.
    • Place your router in a central, elevated location for optimal signal distribution.
    • Reduce network congestion by disconnecting devices that aren’t in use.
    • Periodically check for ISP outages in your area to stay informed.

    When to Seek Help

    If all else fails, it may be time to contact Roku support or your internet service provider. Persistent issues could indicate a hardware problem that requires professional assistance.

    Final Thought

    The “Not Connected” error can be a frustrating roadblock to your streaming experience, but it’s rarely insurmountable. By identifying the cause and following the appropriate troubleshooting steps, you can quickly get your Roku back online.

    In the world of streaming, a seamless connection is key to enjoying your favorite shows and movies. Whether it’s a simple Wi-Fi password update or a full factory reset, the solutions are within reach. Now that you know why Roku says “Not Connected” and how to fix it, you’re better prepared to handle any connectivity issues that come your way.

    Also Check:

  • You Can Watch Live TV on Roku and This is How

    You Can Watch Live TV on Roku and This is How

    Roku has long been a favorite for cord-cutters looking to replace traditional cable subscriptions with streaming services. But did you know that Roku also allows you to watch live TV? Whether it’s breaking news, sports, or your favorite network shows airing in real-time, Roku’s live TV options make it possible to enjoy the traditional TV experience alongside on-demand streaming. Here’s an in-depth guide on how you can watch live TV on Roku and everything you need to know about getting started.

    You Can Watch Live TV on Roku and This is How


    How You Can Watch Live TV on Roku

    Roku’s ecosystem supports various live TV options, ranging from free channels to paid subscriptions. It’s designed to replicate and enhance the experience of traditional television while leveraging the convenience and flexibility of streaming technology. The platform integrates live TV seamlessly through the Roku Channel, dedicated live TV apps, and even external hardware like antennas and cable boxes.

    The core benefit of Roku’s live TV capabilities is the variety. Users can access content through free services like The Roku Channel, subscription-based apps like Hulu + Live TV, and even integrate local channels via an HDTV antenna. All of this is made possible with a user-friendly interface and universal search capabilities, ensuring that live TV becomes just as accessible as your favorite on-demand shows.

    Free Live TV Options on Roku

    Roku offers an impressive array of free live TV channels accessible directly through The Roku Channel. This hub includes over 350 live streaming options covering categories such as news, sports, entertainment, and children’s programming. Examples include ABC News Live, WeatherNation, and channels dedicated to niche interests like food, travel, and DIY.

    One standout feature is Roku’s live TV guide, which mimics the familiar grid-style layout of cable TV guides. This interface allows you to browse through channels, check program schedules, and jump into a live stream seamlessly. The free offerings cater to users who want to keep costs low while still enjoying a robust live TV lineup.

    Subscription-Based Live TV Services on Roku

    If you’re looking for a more comprehensive live TV experience, Roku supports a wide range of subscription-based services. These apps provide access to popular cable channels, local networks, and premium content. Here are some of the most notable options:

    • Hulu + Live TV: This service combines Hulu’s vast on-demand library with live TV channels, including ABC, NBC, CBS, and ESPN. It’s perfect for users who want a one-stop shop for both live and on-demand content.
    • YouTube TV: Known for its user-friendly interface and unlimited DVR storage, YouTube TV offers access to over 85 live channels, including sports networks like ESPN and Fox Sports.
    • Sling TV: Sling provides customizable packages, allowing users to choose channels based on their interests. It’s one of the most flexible live TV options available on Roku.
    • fuboTV: Catering specifically to sports fans, fuboTV includes live streams of major sports leagues alongside entertainment and news channels.
    • Philo: Focused on affordability, Philo offers a curated selection of entertainment and lifestyle channels without breaking the bank.

    Watching Local Channels on Roku

    For viewers who want access to local news, weather, and sports, Roku has several solutions. The easiest method is to use a live TV app that includes local channels, such as Hulu + Live TV or YouTube TV. Alternatively, you can integrate an HDTV antenna with your Roku device using a compatible tuner like the Tablo OTA DVR or the Roku Smart Soundbar with built-in TV tuners.

    These solutions allow you to stream live broadcasts from local stations, ensuring you don’t miss out on regional content. Some apps, like NewsON and Haystack News, also aggregate local news streams, making it easy to stay updated on events in your area.

    External Hardware for Live TV on Roku

    If you’re transitioning from traditional cable, Roku supports external hardware integration for live TV. Devices like cable boxes or satellite receivers can be connected to your TV and used alongside your Roku device. This setup is ideal for users who still rely on traditional broadcast services but want to enjoy Roku’s streaming capabilities.

    Additionally, DVR solutions like TiVo and Plex allow you to record live TV content and watch it later through your Roku device. This feature is especially useful for those who want to time-shift their viewing schedules.

    Comparing Live TV Options: Free vs. Paid

    Feature Free Live TV (e.g., Roku Channel) Subscription-Based Live TV (e.g., Hulu + Live TV)
    Cost Free Starts at $35/month
    Channel Variety Limited Comprehensive
    Local Channels Limited Available
    DVR Functionality Not Available Included
    Premium Channels Not Available Add-ons Available

    Setting Up Live TV on Roku

    Getting started with live TV on Roku is straightforward. Begin by connecting your Roku device to your TV and ensuring it’s connected to the internet. From there, explore the Roku Channel Store to download the necessary live TV apps. For antenna integration, connect your HDTV antenna to a compatible tuner and follow the on-screen setup instructions.

    Roku’s interface makes it easy to switch between apps and live TV channels, ensuring a seamless experience. The platform’s search functionality also allows you to look up specific shows or channels, providing a unified browsing experience across all your live TV options.

    Final Thoughts

    Roku has redefined what it means to watch live TV, offering a diverse range of options that cater to every type of viewer. Whether you’re a cord-cutter looking for free live streams, a sports enthusiast subscribing to fuboTV, or someone seeking local news through an antenna, Roku delivers a flexible and comprehensive live TV solution.

    The combination of affordability, ease of use, and variety makes Roku a top choice for anyone looking to enhance their television experience. By exploring the live TV features and experimenting with different apps and hardware setups, you can create a personalized viewing experience that meets all your needs. Live TV on Roku isn’t just an alternative to cable; it’s a step forward into the future of television.

    Also Check:

    Is Chromecast with Google TV Worth It? Everything You Need to Know

    Black Friday 2024: The Best Smart Home Device Deals to Watch For

    Roku Wireless Speakers Manual: A Beginner’s Guide to Superior Sound

    Will Roku Work on a Non Smart TV: Everything You Need to Know

    2024’s Most Popular Streaming Platforms: What to Watch and Why


  • Will Roku Work on a Non Smart TV: Everything You Need to Know

    Will Roku Work on a Non Smart TV: Everything You Need to Know

    Streaming has revolutionized how we consume entertainment, and devices like Roku have become synonymous with this digital shift. But while most of us associate Roku with smart TVs, the question often arises: will Roku work on a non-smart TV? The answer is a resounding yes.

    Will Roku Work on a Non Smart TV: Everything You Need to Know

    In fact, Roku was initially designed to add streaming functionality to standard televisions. However, there are some nuances to consider when setting up and using Roku on a non-smart TV. Here, we’ll delve into every detail, explaining how it works, what you need, and why Roku might just be the perfect solution for your entertainment needs, even if your TV lacks built-in smarts.

    Roku Serves As an Upgrade For Non-smart TVs

    Roku is a streaming device that connects to your television to provide access to various online services like Netflix, Hulu, Amazon Prime Video, and countless others. Essentially, it’s a bridge between your TV and the internet, transforming even the most basic television into a modern entertainment hub. For non-smart TVs, Roku serves as an upgrade, offering a user-friendly interface and a wide array of streaming options.

    The device comes in several forms, including streaming sticks, standalone boxes, and even Roku-enabled soundbars. Regardless of the form factor, the core functionality remains the same: giving you access to streaming content without requiring a smart TV.

    How Does Roku Work on a Non-Smart TV?

    Non-smart TVs lack built-in internet connectivity and apps, which is where Roku shines. The device connects to your TV via an HDMI port, delivering a full suite of streaming capabilities. Here’s a step-by-step overview of how Roku integrates with a non-smart TV:

    Physical Connection:

    Roku devices require an HDMI port to connect to your TV. If your television is older and only has RCA composite inputs, you can still use Roku with the help of an HDMI-to-RCA adapter.

    Power Source:

    Roku devices need a power source, which is typically provided through a USB port on your TV or an external adapter plugged into an electrical outlet.

    Internet Connectivity:

    Once connected, Roku relies on your home Wi-Fi or an Ethernet connection (for models with an Ethernet port) to stream content. Internet speed and stability are crucial for seamless viewing.

    Setup Process:

    The initial setup involves creating or logging into a Roku account, connecting to Wi-Fi, and downloading the apps or channels you wish to use.

    What You Need to Use Roku on a Non-Smart TV

    To use Roku on a non-smart TV, you’ll need the following:

    • A Roku device (stick or box) compatible with your TV’s input ports.
    • A stable internet connection, either via Wi-Fi or Ethernet.
    • An HDMI port or an HDMI-to-RCA adapter if your TV only supports older inputs.
    • A Roku account to access the Roku Channel Store and manage your subscriptions.

    Compatibility with Older TVs

    One common concern is whether Roku can function on older televisions. While most Roku devices are designed with HDMI compatibility in mind, some models, like the Roku Express+, include composite cable options for older TVs without HDMI ports. This ensures that even decades-old TVs can join the streaming revolution with a little extra effort.

    For televisions with limited resolutions, such as 480p or 720p, Roku will adjust its output to match the TV’s capabilities. While you won’t get high-definition quality, the viewing experience is still vastly improved compared to traditional cable or satellite options.

    Using Roku on a Non-Smart TV

    Using Roku on a non-smart TV brings several advantages. First, it’s a cost-effective way to modernize your entertainment setup without investing in a new television. Roku devices are affordable and offer access to thousands of free and paid channels.

    Another benefit is the intuitive interface. Roku’s simplicity makes it easy to navigate, even for those who aren’t tech-savvy. The device’s remote is straightforward, and the on-screen menus are designed with user-friendliness in mind.

    Additionally, Roku devices receive regular software updates, ensuring compatibility with the latest apps and streaming services. This longevity makes Roku a smart investment for anyone looking to future-proof their entertainment options.

    Roku Models for Non-Smart TVs

    Different Roku models cater to various needs, but some are better suited for non-smart TVs:

    • Roku Express: Compact and affordable, this model is ideal for basic streaming needs. It’s perfect for TVs with HDMI ports but doesn’t include advanced features like 4K streaming.
    • Roku Express+: Designed with composite input compatibility, this model works seamlessly with older TVs lacking HDMI ports.
    • Roku Ultra: A premium option for those who want advanced features like 4K streaming and Ethernet connectivity, provided your non-smart TV supports higher resolutions.

    Buy Roku Devices Here at Amazon

    Common Issues and Solutions

    Using Roku on a non-smart TV isn’t without its challenges. Here are some common issues you might encounter and how to resolve them:

    Issue Cause Solution
    No Signal on TV Incorrect input selection Ensure your TV is set to the correct HDMI input.
    Poor Video Quality Weak internet connection Upgrade your Wi-Fi speed or use an Ethernet connection.
    Remote Not Working Dead batteries or signal obstruction Replace batteries and ensure there’s no obstruction.
    Apps Not Loading Outdated software or connection issues Update your Roku software and check your internet connection.

    Streaming Without Limits

    One of Roku’s standout features is its vast content library. From major streaming platforms like Netflix, Disney+, and Amazon Prime Video to niche services and free channels like The Roku Channel, there’s something for everyone. Adding a Roku device to your non-smart TV unlocks these options, giving you the freedom to customize your viewing experience.

    For sports fans, Roku offers apps for ESPN, Fox Sports, and more. Movie enthusiasts can access classics and blockbusters through platforms like HBO Max and Criterion Channel. Meanwhile, kids and families can enjoy child-friendly content through apps like PBS Kids and Disney+.

    Conclusion

    Roku is not just compatible with non-smart TVs; it’s the ideal solution for transforming a basic television into a versatile streaming powerhouse. Whether you have an older model with composite inputs or a newer non-smart TV with HDMI, Roku’s flexibility ensures a seamless setup and an unparalleled entertainment experience.

    By investing in a Roku device, you’re not just adding streaming capabilities to your TV—you’re future-proofing your entertainment setup. With its affordability, user-friendly interface, and extensive content library, Roku proves that you don’t need a smart TV to enjoy smart entertainment. So, if you’ve been wondering whether Roku will work on your non-smart TV, the answer is clear: it will, and it will elevate your viewing experience to a whole new level.

    Also Check:

  • Google Nest Integration for Seamless Streaming at Home

    Google Nest Integration for Seamless Streaming at Home

    Google Nest has become an integral part of modern smart home setups, providing a centralized solution for controlling devices and enhancing convenience. A standout feature of this ecosystem is its streaming integration capabilities, which allow users to seamlessly connect and view live feeds from their cameras or stream content across compatible devices.

    Google Nest Integration for Seamless Streaming at Home

    In this guide, we’ll explore how to leverage Google Nest integration to transform your home into a connected and efficient space.

    Key Takeaways

    Feature Benefit
    Device Compatibility Works with Chromecast, Google TV, Nest Hub, and more.
    Easy Setup Uses the Google Home app for simple integration.
    Enhanced Smart Home Control Combines voice commands with seamless video streaming.
    Security and Monitoring Live camera feeds for improved home safety.

    Google Nest Streaming Integration

    Google Nest integration is designed to make home automation effortless. By combining devices like Nest cameras, Chromecast, and Google TV, users can stream live video feeds, control entertainment, and access other smart features. This functionality is not just a convenience—it’s a leap forward in making homes more secure, efficient, and connected.

    Why Choose Google Nest for Streaming?

    • Ease of Use: Simple setup through the Google Home app.
    • Wide Compatibility: Supports multiple devices, including smart displays and TVs.
    • Smart Features: Leverage Google Assistant for hands-free control.
    • Security Enhancements: Monitor your home in real-time with Nest cameras.

    Devices Compatible with Google Nest for Streaming

    Nest Cameras

    Nest cameras are at the heart of this streaming ecosystem. Compatible models include:

    • Nest Cam (indoor, wired)
    • Nest Cam (outdoor or indoor, battery-powered)
    • Nest Cam IQ (discontinued but still supported)
    • Nest Doorbell (wired and battery versions)

    Each camera is designed to integrate with Google devices, offering high-definition live streaming and smart detection features.

    Streaming Devices

    Nest integration supports a range of devices, such as:

    1. Chromecast: Enables streaming from your phone or Nest devices to any TV.
    2. Google TV: Adds advanced smart TV features and seamless integration.
    3. Nest Hub: Acts as a central smart display for controlling all devices.

    Smart Displays and Speakers

    Popular third-party smart displays like Lenovo and JBL also support Google Nest, ensuring users have flexible options for their setups.

    How to Set Up Google Nest Streaming

    Step 1: Prepare Your Devices

    Ensure all devices are connected to the same Wi-Fi network. This step is crucial for seamless communication.

    Step 2: Use the Google Home App

    1. Open the app and sign in.
    2. Tap the “+” icon to add devices.
    3. Follow prompts to connect your Nest camera or other devices.

    Step 3: Stream Content

    With setup complete, you can use commands like “Show [camera name] on [device name]” to instantly stream your camera feed.

    Streaming Integration Options

    Google TV and Chromecast

    These devices support voice commands, allowing you to stream content or view live feeds with ease. Simply say, “Hey Google, show the living room camera.”

    Nest Hub

    This smart display is perfect for monitoring your cameras while multitasking. Use commands like “Ok Google, show the front door camera.”

    Third-Party Platforms

    Even Apple TV users can join the ecosystem by installing the Nest app for streaming functionality.

    Troubleshooting Common Issues

    Problem: Devices not connecting.
    Solution: Ensure all devices are on the same Wi-Fi network and reboot the router if needed.

    Problem: Streaming delays.
    Solution: Check for firmware updates or optimize your Wi-Fi signal.

    Benefits of Google Nest Integration for Streaming

    1. Convenience: Manage all devices from one app or through voice commands.
    2. Security: Real-time monitoring for peace of mind.
    3. Efficiency: Centralized control enhances energy management.

    Frequently Asked Questions

    Q: Can I stream multiple devices simultaneously?
    A: Yes, you can stream different cameras to separate devices within the same network.

    Q: Is my data secure with Google Nest?
    A: Google encrypts all data, but it’s recommended to use strong passwords and two-factor authentication.

  • How to Cast YouTube TV to Chromecast Like a Pro

    How to Cast YouTube TV to Chromecast Like a Pro

    YouTube TV offers an extensive range of live TV channels and on-demand content, making it a top choice for cord-cutters. By casting YouTube TV to Chromecast, you can enjoy your favorite shows, movies, and live sports on the big screen. Chromecast seamlessly connects your devices to your TV, creating a smooth and convenient streaming experience.

    How to Cast YouTube TV to Chromecast

    This guide will walk you through the step-by-step process, troubleshoot common issues, and share advanced tips to optimize your casting experience.

    Key Takeaways

    Feature Details
    Devices Needed Chromecast, TV, smartphone/computer
    Key Benefits Big-screen streaming, easy control
    Internet Requirement Stable Wi-Fi network
    Common Issues Connectivity lag, app errors
    Advanced Tip Use voice commands with Google Home

    YouTube TV is an innovative streaming service that allows users to access 85+ live TV channels, including sports, news, and entertainment. By pairing it with Google Chromecast, viewers can cast their favorite shows from a mobile device or computer directly to their TV screen.

    Why Cast YouTube TV to Chromecast?

    • Bigger Screen Experience: Enjoy HD content on a larger display.
    • Seamless Integration: Cast directly from your phone or PC.
    • Convenient Controls: Use your device as a remote.
    • Affordable Setup: Chromecast devices are budget-friendly.

    Prerequisites for Casting YouTube TV to Chromecast

    Before you get started, ensure you have the following:

    1. Active YouTube TV Subscription: A valid account is necessary.
    2. Google Chromecast: Ensure the device is set up and connected.
    3. Compatible Device: Use a smartphone, tablet, or computer.
    4. Stable Wi-Fi Network: Chromecast and your device must share the same network.
    5. TV with HDMI Port: Connect Chromecast via HDMI.

    “A reliable Wi-Fi connection is crucial for smooth streaming without buffering.”

    Setting Up Chromecast

    Before casting YouTube TV, set up your Chromecast device. Follow these simple steps:

    1. Plug Chromecast into Your TV: Connect it via an HDMI port.
    2. Power the Chromecast: Use the provided USB cable and adapter.
    3. Download the Google Home App: Available on iOS and Android.
    4. Connect to Wi-Fi: Use the Google Home app to set up and connect Chromecast.
    5. Verify Connection: Ensure Chromecast appears as a connected device on the app.

    Quick Tip: Double-check that your TV input source is set to the HDMI port where Chromecast is plugged in.

    How to Cast YouTube TV from a Mobile Device

    Using a smartphone or tablet makes casting YouTube TV straightforward. Here’s how:

    1. Open the YouTube TV App on your mobile device.
    2. Connect to the Same Wi-Fi as your Chromecast.
    3. Tap the Cast Icon: Look for the cast symbol at the top right of the screen.
    4. Select Your Chromecast Device: The TV will display the YouTube TV app.
    5. Choose a Show or Channel and start watching.
    6. Control Playback: Use your mobile device to pause, play, rewind, or change channels.

    Common Problems & Fixes:

    • Issue: Cast icon missing?
      Solution: Ensure both devices are on the same Wi-Fi network.
    • Issue: Stream buffering?
      Solution: Check your internet speed (5 Mbps minimum for HD).

    How to Cast YouTube TV from a Computer

    If you prefer using a desktop or laptop, casting via Google Chrome is your best option:

    1. Open Google Chrome and visit YouTube TV.
    2. Log In to Your Account with valid credentials.
    3. Click the Three Dots in the top-right corner of Chrome.
    4. Select “Cast” from the dropdown menu.
    5. Choose Your Chromecast Device: Your TV screen will mirror the content.
    6. Start Watching: Select a show or channel and enjoy.

    Pro Tip: Enable full-screen mode for a better viewing experience.

    Managing Playback While Casting

    When casting YouTube TV to Chromecast, you can control playback directly from your device:

    • Pause or Play: Tap the play/pause button.
    • Rewind or Fast-Forward: Use the slider or video controls.
    • Change Channels: Browse the YouTube TV library while casting.
    • Adjust Volume: Use your device’s volume buttons.
    • Turn on Subtitles: Access caption settings for better clarity.

    Troubleshooting Common Issues

    Casting may occasionally face hiccups. Here are solutions to common problems:

    • Chromecast Not Found: Restart your device and Chromecast.
    • Laggy or Stuttering Playback:
      • Improve your Wi-Fi signal.
      • Close background apps.
    • Audio Issues: Ensure TV audio settings match Chromecast input.
    • App Crashes: Reinstall the YouTube TV app.

    “Rebooting Chromecast resolves over 70% of common connectivity issues.”

    Advanced Tips and Tricks

    Take your YouTube TV and Chromecast experience to the next level:

    1. Voice Control with Google Assistant: Say “Hey Google, play ESPN on Chromecast.”
    2. Multiple Devices: Pause on one device and resume on another.
    3. Custom Playlists: Save favorite channels or shows for quick access.
    4. Stream Quality: Adjust video quality settings to match your Wi-Fi.

    Conclusion

    Casting YouTube TV to Chromecast is an excellent way to bring live TV and on-demand content to the big screen. With its seamless setup and user-friendly controls, Chromecast ensures you get the most out of your YouTube TV subscription. Whether you’re watching live sports, news, or movies, casting offers an enhanced and enjoyable viewing experience.

    Start casting today and transform your home entertainment setup with Chromecast!


    FAQs

    Q: Can I use YouTube TV on older Chromecast devices?

    A: Yes, YouTube TV is compatible with older Chromecast generations.

    Q: Why is the cast icon missing on my YouTube TV app?

    A: Ensure both devices are connected to the same Wi-Fi network.

    Q: How much internet speed do I need for casting?

    A: A minimum of 5 Mbps for HD and 20 Mbps for 4K streaming.

    Also Check:

  • Wireless Mic with Noise Cancellation for Cameras

    Wireless Mic with Noise Cancellation for Cameras

    In today’s content-creation environment, having a wireless mic with noise cancellation for cameras is a game-changer. Whether you’re a vlogger, filmmaker, or podcaster, capturing clear, crisp audio can make or break your project.

    Wireless Mic with Noise cancellation for Cameras
    Wireless Mic with Noise cancellation for Cameras

    These mics eliminate background noise, allowing your voice or desired sound to shine effortlessly. In this article, we’ll dive into the essentials of wireless microphones, explore the benefits of noise cancellation, and review the best options for your camera setup.

    Wireless Mic with Noise Cancellation for Cameras

    Audio quality is just as important as video quality when producing high-quality content. Wireless mics with noise cancellation offer:

    • Freedom of Movement: No cords mean you can move freely during your recording without worrying about getting tangled.
    • Noise-Free Clarity: Advanced noise cancellation technology eliminates unwanted background sounds, making your recordings professional-grade.
    • Versatility: These mics are compatible with various camera setups, whether you’re shooting outdoors or indoors.
    • Convenience: Compact and easy to use, wireless mics integrate seamlessly into your workflow.

    Important Features of Wireless Mics with Noise Cancellation

    When selecting the best wireless mic for your camera, consider the following essential features:

    Noise Cancellation Technology

    This feature is crucial for filtering background noise, such as wind, traffic, or crowd chatter. Look for microphones with active noise reduction or digital signal processing (DSP) capabilities.

    Range and Connectivity

    A reliable wireless mic should offer a good range, typically up to 100 meters, depending on your needs. Ensure the device uses a stable connection, such as Bluetooth or UHF transmission.

    Battery Life

    Since wireless mics are battery-powered, a long-lasting battery is essential for extended shoots.

    Compatibility

    Ensure the microphone is compatible with your camera model. Some mics require adapters, while others are plug-and-play.

    Durability and Portability

    Look for lightweight and durable designs, especially if you frequently shoot on location.

    Top Benefits of Noise Cancellation in Wireless Mics

    • Professional-Grade Audio: Noise cancellation ensures your audience hears every word.
    • Time Efficiency: Less background noise means less time spent editing your audio in post-production.
    • Enhanced Focus: Filters out distractions, letting your subject’s voice stand out.
    • Versatility in Environments: Ideal for shooting in noisy places like city streets or windy beaches.

    Top 5 Wireless Mics with Noise Cancellation for Cameras

    RØDE Wireless GO II

    • Features: dual-channel recording, compact design, and exceptional noise cancellation.
    • Range: Up to 200 meters.
    • Battery Life: 7 hours.
    • Why Choose It: Perfect for vloggers and content creators who need portable, high-quality audio.

    CLICK HERE TO SHOP FROM AMAZON

    Sennheiser AVX Digital Wireless Microphone System

    • Features: Plug-and-play design, ultra-low latency, and adaptive noise suppression.
    • Range: 100 meters.
    • Battery Life: 15 hours.
    • Why Choose It: A great choice for professional filmmakers and interviewers.

    CLICK HERE TO SHOP FROM AMAZON

    DJI Mic

    • Features: High-fidelity audio, dual-transmitter design, and built-in noise cancellation.
    • Range: 250 meters.
    • Battery Life: 15 hours with charging case.
    • Why Choose It: Ideal for outdoor shoots and long-distance recording.

    CLICK HERE TO SHOP FROM AMAZON

    Boya BY-WM4 Pro-K2

    • Features: lightweight design, affordable price, and decent noise reduction.
    • Range: 60 meters.
    • Battery Life: 5 hours.
    • Why Choose It: A budget-friendly option for beginners.

    CLICK HERE TO BUY FROM AMAZON

    Sony ECM-W2BT

    • Features: Bluetooth connection, clear noise isolation, and multi-interface support.
    • Range: 200 meters.
    • Battery Life: 9 hours.
    • Why Choose It: Great for hybrid camera setups with excellent noise suppression.

    CLICK HERE TO SHOP FROM AMAZON

    How to Choose the Best Wireless Mic with Noise Cancellation

    When selecting the perfect mic, ask yourself the following questions:

    What is Your Budget?

    Wireless mics range from affordable to premium. Set a budget and look for the best value within it.

    Where Will You Be Shooting?

    For outdoor shoots, ensure the mic has wind noise suppression. For indoor settings, focus on clarity and range.

    Do You Need Multi-Channel Recording?

    If you’re recording interviews or multiple speakers, choose a mic with dual-channel capabilities.

    How Important is Battery Life?

    For long shoots, invest in a mic with extended battery life or a charging case.

    What Camera Are You Using?

    Check for compatibility and whether you need additional adapters.

    Tips for Using Wireless Mics with Noise Cancellation

    • Test Your Mic Before Shooting: Always check for audio quality and connection stability.
    • Position the mic correctly: clip it close to the speaker’s mouth for optimal sound capture.
    • Keep Spare Batteries or a Charger Handy: Ensure your mic doesn’t die mid-shoot.
    • Adjust Noise Cancellation Settings: Fine-tune settings based on your environment.
    • Invest in Accessories: Windshields, additional receivers, or backup transmitters can improve your setup.

    Frequently Asked Questions

    Do wireless mics work with all cameras?

    Not all wireless mics are universally compatible. Check the manufacturer’s specifications for compatibility with your camera model.

    How much do wireless mics cost?

    Prices vary widely, from $50 for entry-level models to $500+ for premium options.

    Is noise cancellation worth it?

    Absolutely! Noise cancellation significantly enhances audio quality, especially in noisy environments.

    Can I use a wireless mic with a smartphone?

    Yes, many wireless mics are compatible with smartphones using the right adapters.

    What’s the average battery life?

    Most wireless mics offer between 5 and 15 hours of battery life, depending on usage.

    Conclusion

    Investing in a wireless mic with noise cancellation for cameras is one of the smartest moves for content creators and professionals. The combination of freedom, convenience, and pristine audio quality makes these devices invaluable for any recording scenario. From affordable options for beginners to premium models for professionals, there’s a wireless mic for everyone.

    With noise cancellation, you can focus on creating content without worrying about background distractions. Whether you’re shooting a vlog, documentary, or live stream, choosing the right mic can elevate your audio game to new heights.

    CHECK THESE OUT:

    Interested in a Top Rated Speedlight for Camera to Illuminate Your Shots? Then Check…

    High-Performance External Flash for Canon Camera

    Exclusive Black Friday Deals on Premium Drones on Amazon

    Amazon Black Friday Deals on Prime Lens