Category: Roku

Discover the ultimate streaming experience with Roku. From device reviews to tips on maximizing your streaming setup, this category covers everything you need to know about this powerful entertainment hub.

  • Roku Not Connecting to TV: How to Get Your Roku Connected to Your TV in No Time (Expert Tips for a Seamless Setup)

    Roku Not Connecting to TV: How to Get Your Roku Connected to Your TV in No Time (Expert Tips for a Seamless Setup)

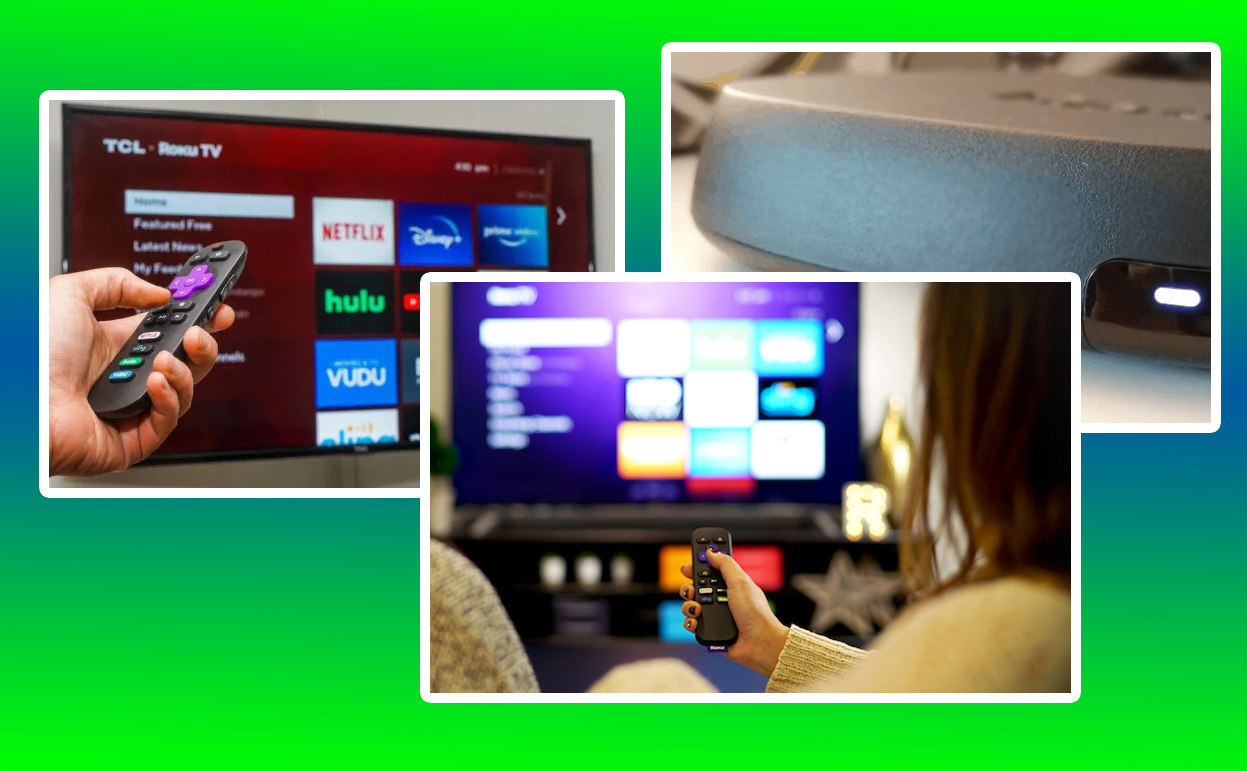
    Setting up a Roku device is often a straightforward process, but there are times when even the most tech-savvy individuals encounter issues getting their Roku to connect to their TV. Whether it’s a new device or an older model, connection problems can be frustrating. Fortunately, with a little patience and a systematic approach, you can overcome these challenges and enjoy seamless streaming in no time.

    Roku Not Connecting to TV

    Why Isn’t Your Roku Connecting

    Before diving into solutions, it’s essential to understand why your Roku might not be connecting to your TV. The reasons can vary widely, from hardware malfunctions to compatibility issues or simple oversights in the setup process. Common culprits include incorrect HDMI port selection, loose cable connections, power supply problems, or network configuration errors. Each of these issues requires a tailored approach to resolve effectively.

    Initial Setup: Ensure Proper Connections

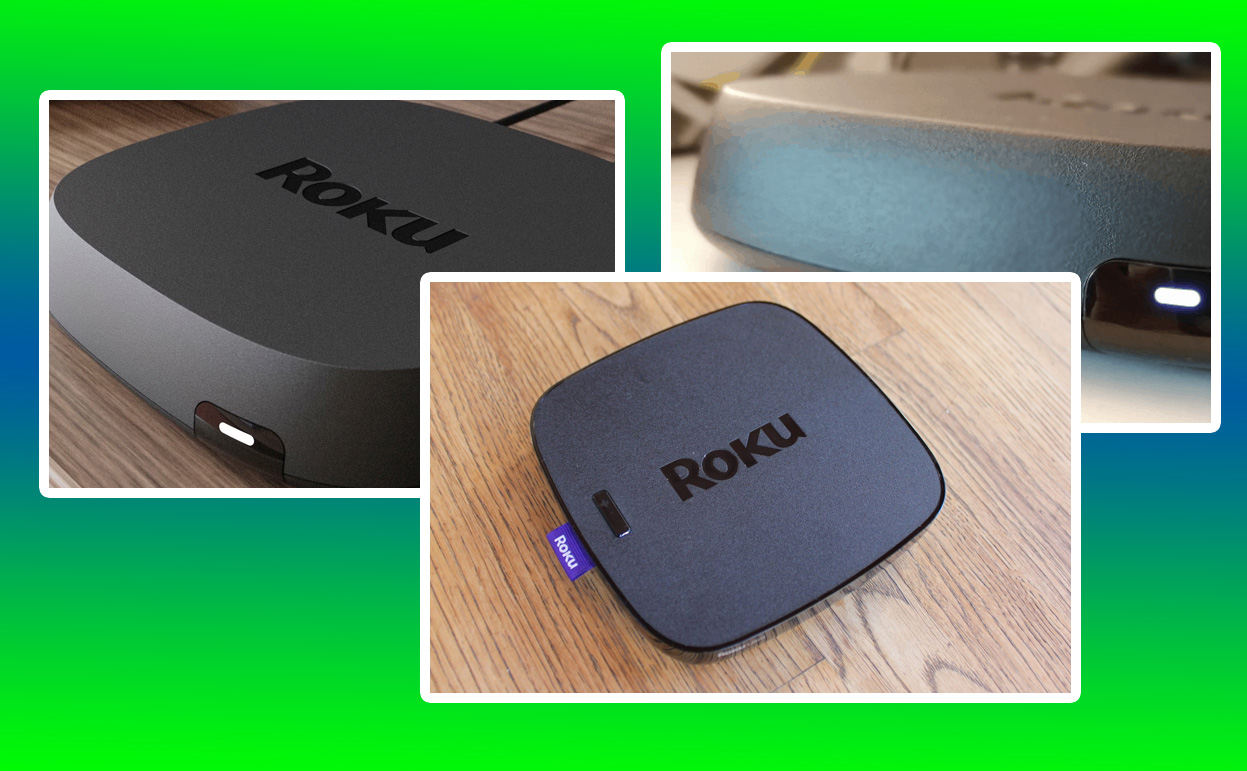
    The first step in troubleshooting a Roku connection issue is to confirm that all physical connections are secure. Begin by checking the HDMI cable connecting your Roku device to your TV. Ensure that it is firmly plugged into both the Roku and the TV and that the selected HDMI input matches the port your device is connected to. For example, if your Roku is plugged into HDMI 1, your TV input should be set to HDMI 1 as well.

    Power supply issues are another common cause of connection problems. Verify that your Roku device is receiving power. If you’re using a USB port on your TV to power the Roku, ensure that the port provides adequate voltage. If you’re unsure, try using the power adapter provided with your Roku and plug it directly into a wall outlet. A consistent power supply can often resolve unresponsive device issues.

    Resolving No Signal or Black Screen Issues

    One of the most common problems users face is a “No Signal” message or a black screen when attempting to connect their Roku to their TV. This issue can usually be traced back to HDMI compatibility or cable problems. To address this:

    • Try using a different HDMI cable, as faulty or low-quality cables can disrupt the signal.
    • Test the Roku on another TV to determine if the issue lies with the device or the original TV.
    • Ensure that your TV supports the resolution output by the Roku device. Older TVs may not be compatible with newer Roku models that default to higher resolutions.

    If the screen remains black, reset your Roku device by unplugging it for 30 seconds and then plugging it back in. This simple step often resolves temporary glitches that prevent the device from displaying correctly.

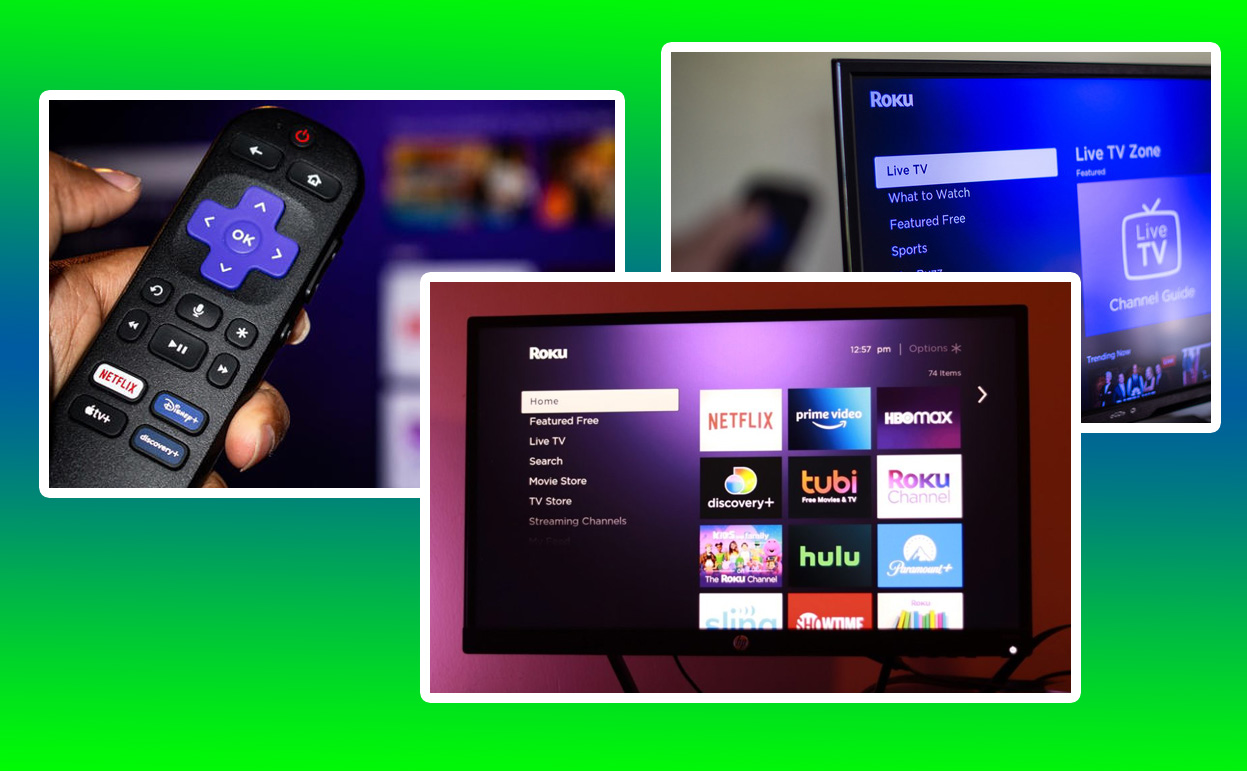
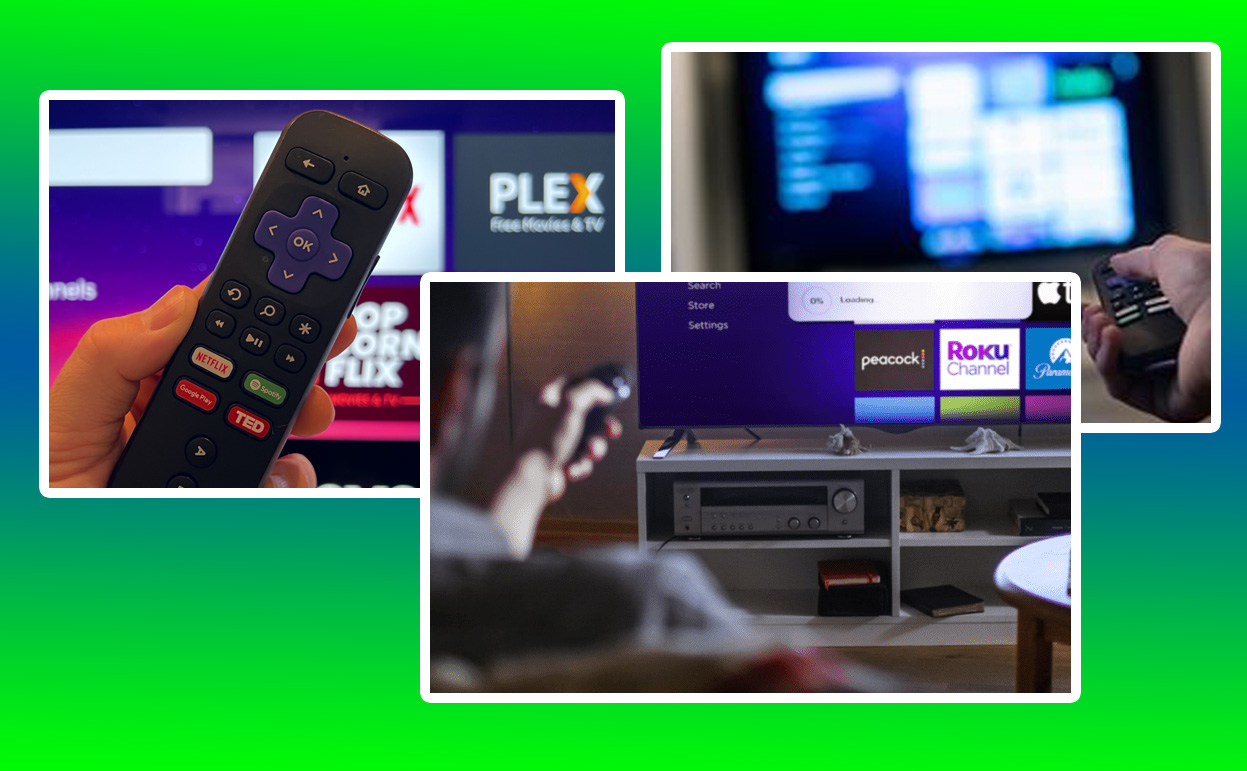
    Connecting Your Roku to Wi-Fi

    A stable internet connection is critical for your Roku to function. If your Roku connects to the TV but struggles to access content, the issue might be with your Wi-Fi setup. During the initial setup, your Roku device will prompt you to connect to a wireless network. If the connection fails:

    For advanced troubleshooting, access the Roku’s settings menu and navigate to the network section. Here, you can view the signal strength and connection status. If the signal strength is weak, consider using a Wi-Fi range extender or connecting via an Ethernet cable if your Roku model supports it.

    Addressing Software and Firmware Issues

    Outdated software can lead to compatibility issues and connection problems. To ensure your Roku device operates smoothly, check for software updates regularly. Navigate to the “Settings” menu, select “System,” and then “System Update.” If an update is available, install it immediately.

    In some cases, resetting the device to factory settings can resolve persistent issues. To perform a factory reset:

    1. Go to the “Settings” menu.
    2. Select “System” and then “Advanced System Settings.”
    3. Choose “Factory Reset” and follow the on-screen instructions.

    Keep in mind that a factory reset will erase all settings and require you to set up the device again from scratch.

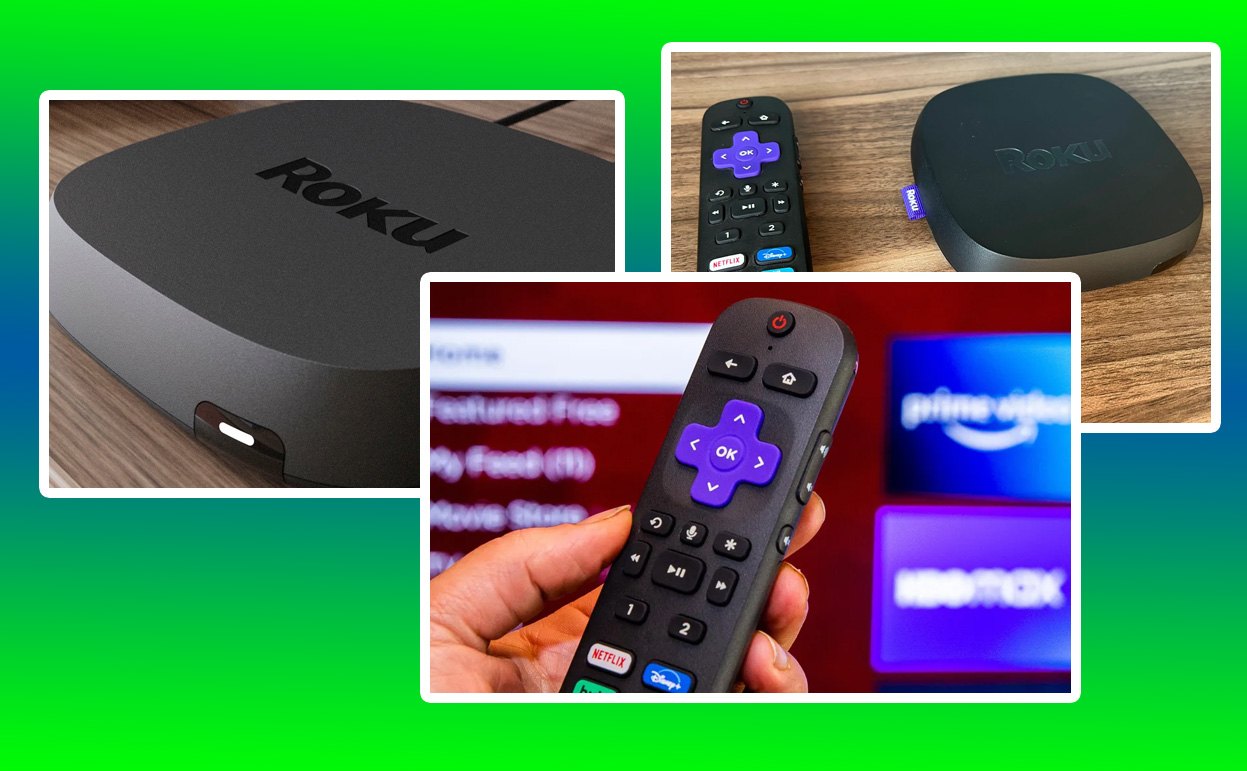
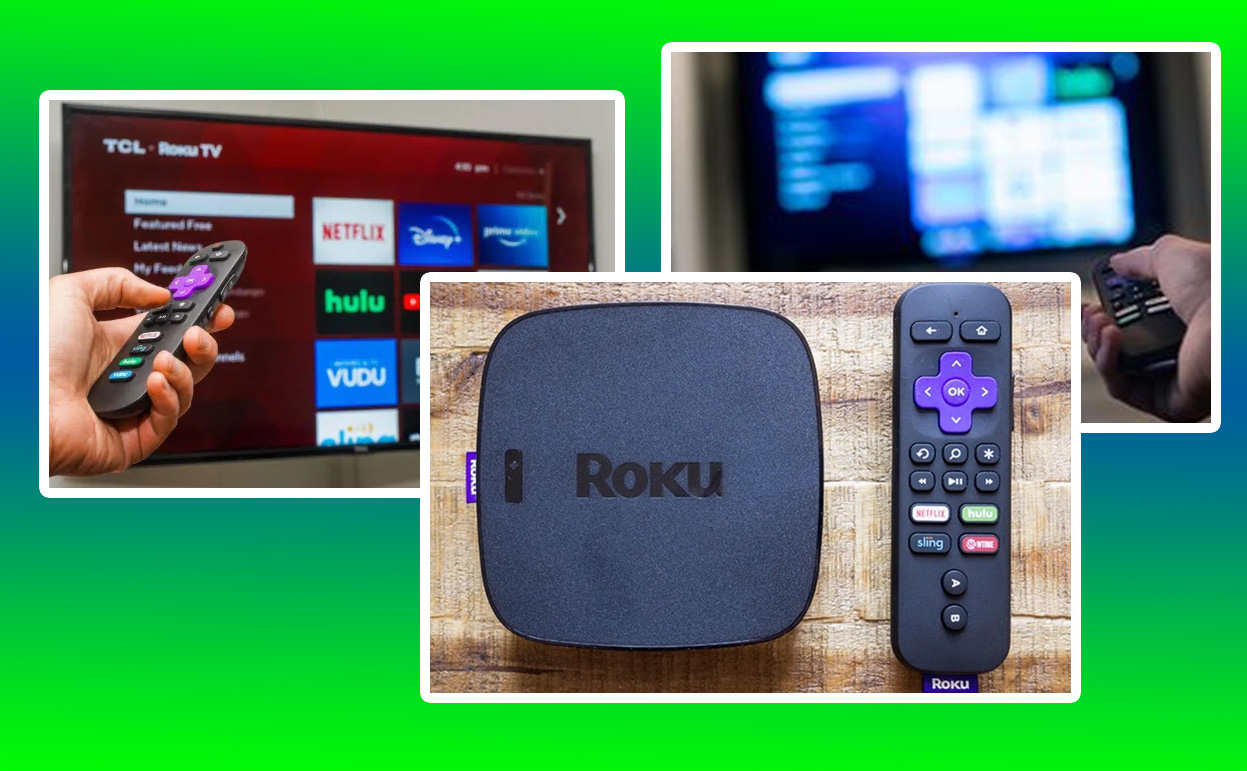
    Troubleshooting Remote Control Issues

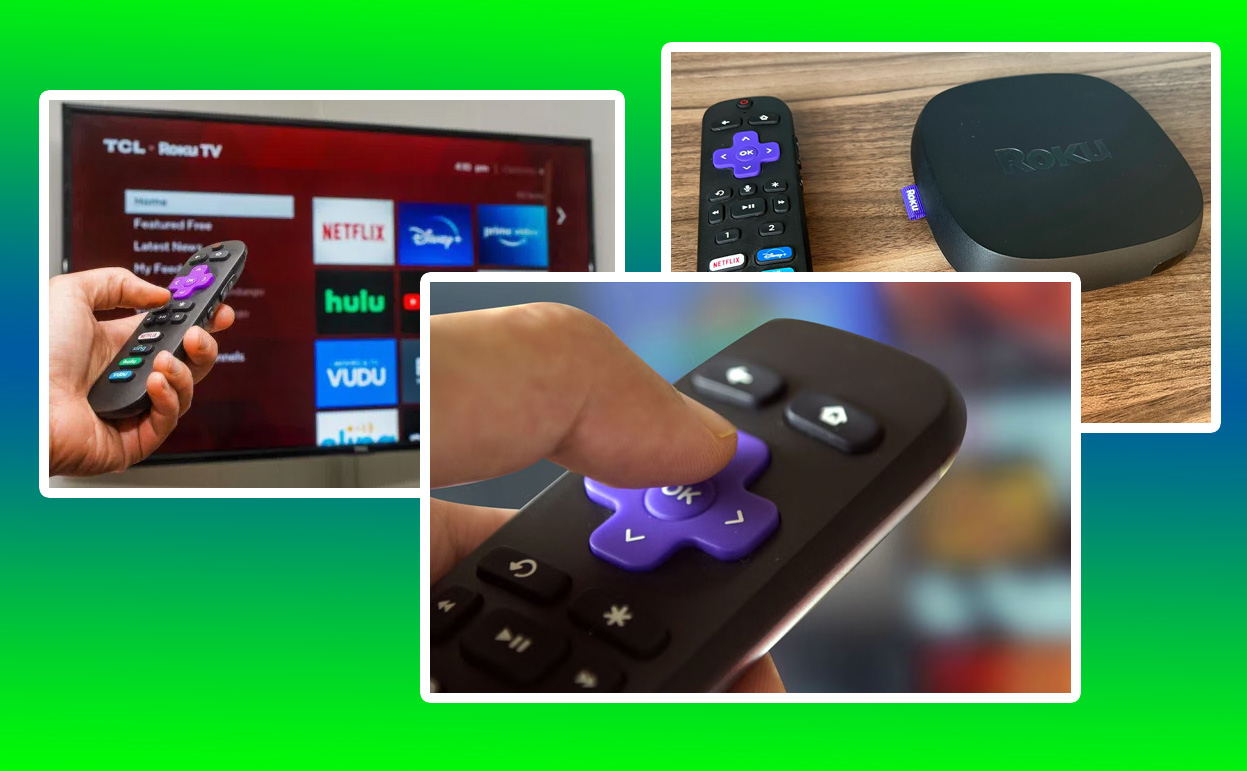
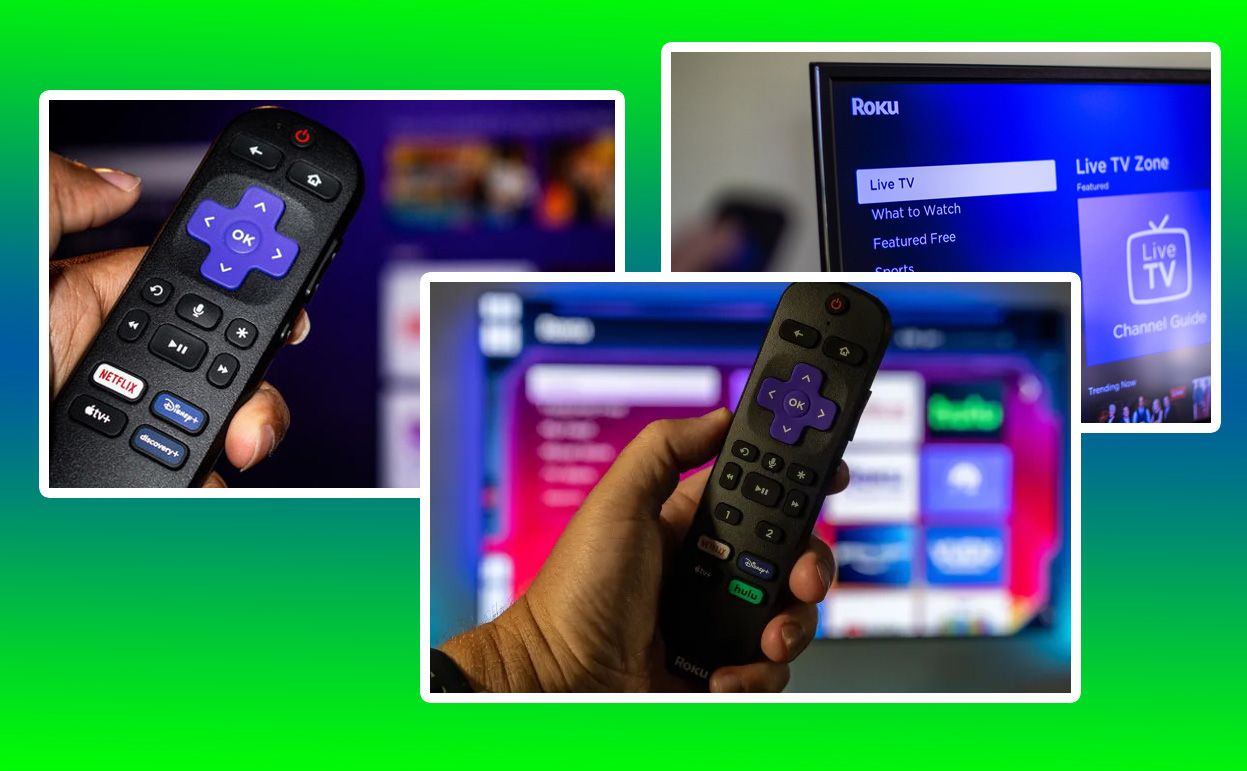
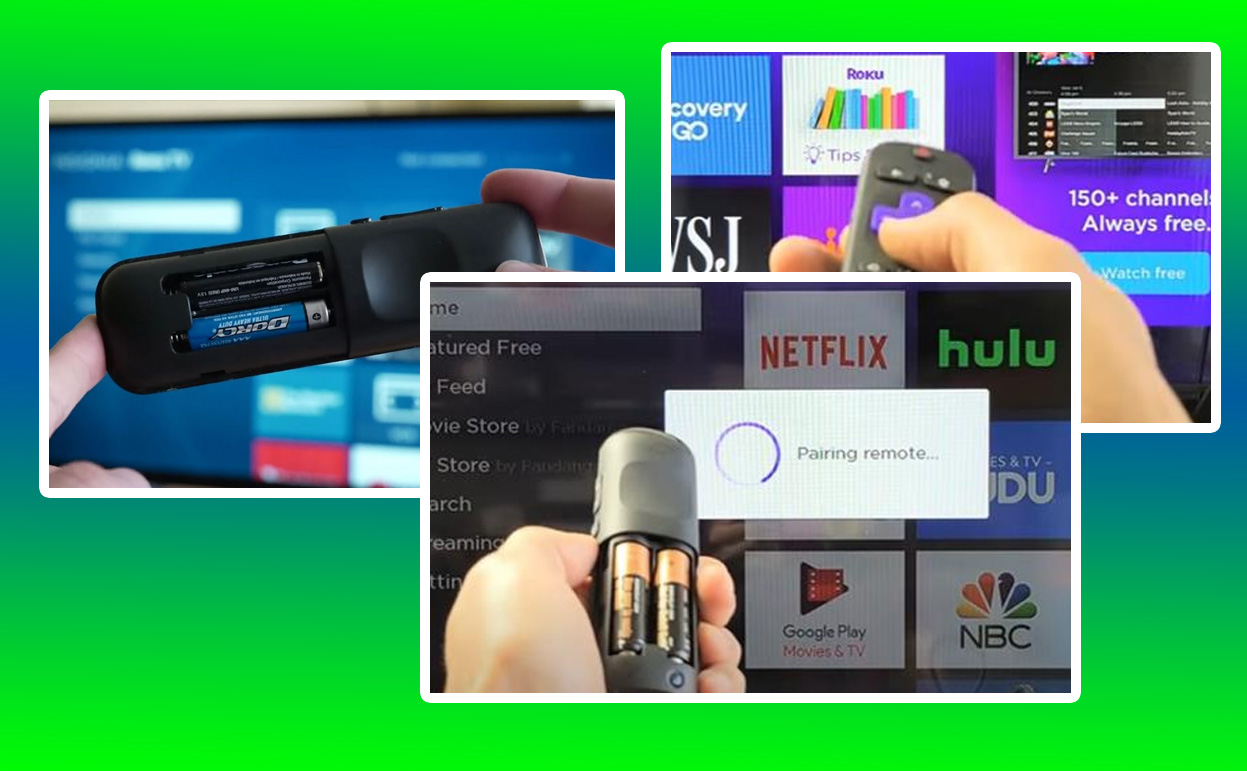
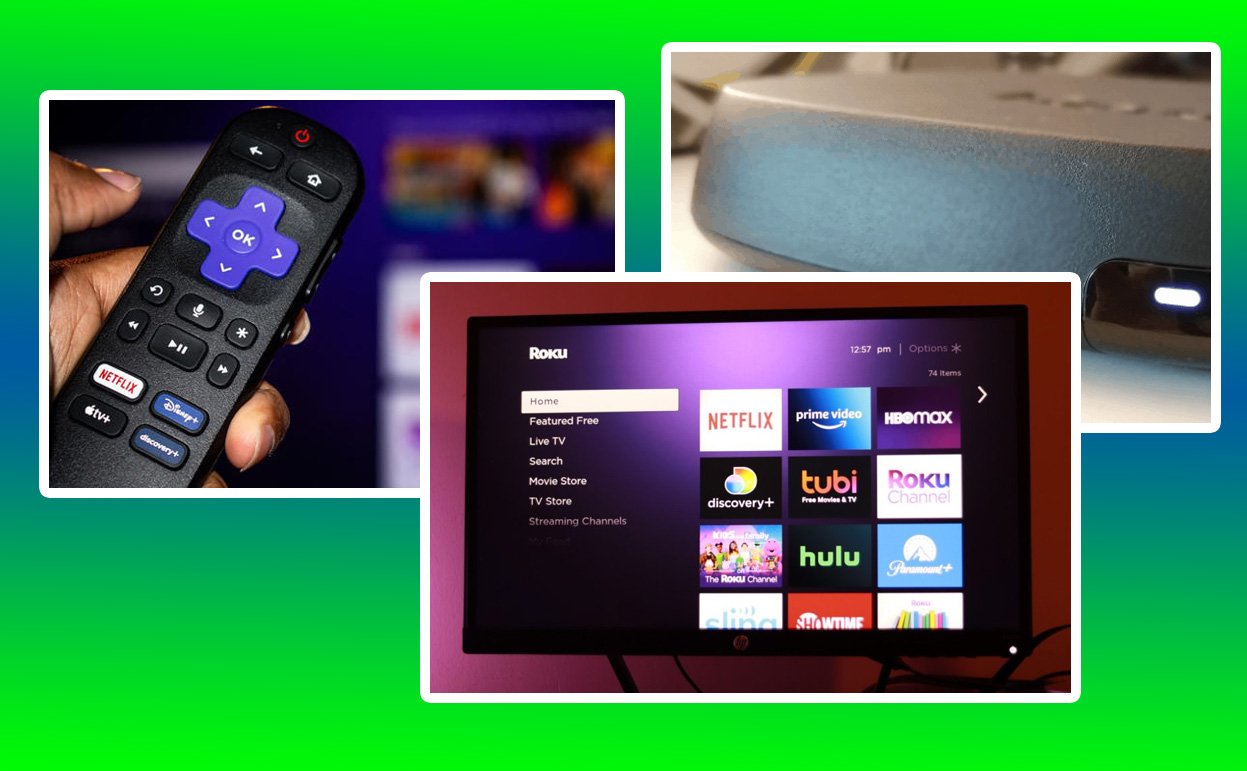
    A properly functioning remote is vital for navigating your Roku device. If your Roku appears to be connected but unresponsive, the remote might be to blame. Check the batteries and replace them if necessary. If your remote uses a pairing button, press and hold it until the pairing light flashes, then follow the on-screen prompts to reconnect it to the Roku device.

    Enhanced remotes, which use wireless technology rather than infrared, may require additional troubleshooting. Ensure there are no obstructions between the remote and the device and that the remote is within range. For further assistance, consult the Roku support website for specific remote model instructions.

    HDMI Compatibility Using the Right Settings

    Modern Roku devices support advanced features like HDCP 2.2 for 4K streaming. However, not all TVs are compatible with these features. If you encounter an “HDCP Error” message or experience flickering screens, you may need to adjust your Roku’s display settings:

    1. Go to “Settings” and select “Display Type.”
    2. Choose a lower resolution to see if it resolves the issue.
    3. Test different HDMI ports on your TV to find the one that works best.

    Investing in a high-speed HDMI cable that supports 4K and HDR can also improve compatibility and reduce connectivity problems.

    Table: Reference Table for Quick Troubleshooting

    Issue Potential Cause Solution
    No signal/black screen Incorrect HDMI port or faulty cable Check connections, use a different cable
    Weak Wi-Fi connection Distance from router Move closer, use an extender
    Remote not working Dead batteries or pairing issues Replace batteries, re-pair the remote
    HDCP error Incompatible TV or cable Adjust display settings, upgrade cable

    Final Thoughts: Ensuring a Seamless Roku Setup

    Setting up a Roku device should be a hassle-free experience, but occasional hiccups can occur. By systematically addressing each potential issue—from physical connections to software settings—you can quickly get your Roku connected to your TV and enjoy uninterrupted streaming. Staying patient and methodical during the setup process ensures a seamless and enjoyable entertainment experience.

    Also Check:

  • Stream Smoothly Again: Roku Overheating Warning and Fixes

    Stream Smoothly Again: Roku Overheating Warning and Fixes

    Roku devices have become an essential part of many households, offering seamless streaming and access to a wealth of content. Yet, like all technology, they’re not immune to issues. One of the more concerning problems Roku users may encounter is an overheating warning.

    Stream Smoothly Again: Roku Overheating Warning and Fixes

    This issue can interrupt your viewing experience and, if left unaddressed, may lead to long-term damage to your device. Understanding the causes and implementing effective fixes can restore your Roku’s performance and ensure a worry-free streaming experience.

    Roku Overheating Warning and Fixes

    Overheating in Roku devices is usually accompanied by specific warning signs. Most Roku models display an on-screen message, “Your device is overheating,” or show a solid red light instead of the usual white light. If you touch the device and it feels unusually warm to the touch, it’s another clear indicator.

    Ignoring these warnings can have dire consequences, ranging from temporary performance dips to permanent hardware failure. Recognizing these signs early is crucial to safeguarding your Roku device and maintaining its longevity. By staying alert to these indicators, you can act promptly to prevent further complications and protect your investment in home entertainment technology.

    The symptoms of overheating are often progressive, starting with subtle performance lags and culminating in outright warnings or shutdowns. If you’ve noticed your Roku struggling to keep up during intensive streaming sessions, it could be an early sign of overheating. Paying attention to these preliminary signs helps mitigate risks before they escalate.

    Common Causes of Roku Overheating

    Several factors can contribute to overheating in Roku devices, many of which stem from how and where the device is used. Understanding these causes helps in both preventing and addressing the issue effectively.

    One of the primary reasons for overheating is poor placement. Roku devices are often placed near or behind TVs, where ventilation is minimal. These tight spaces trap heat, especially when combined with the TV’s own heat output. This lack of airflow creates a hot environment, putting unnecessary stress on the device’s components.

    Another significant factor is continuous use. Streaming for extended periods can overwork the device, causing it to generate more heat than usual. Like any electronic device, Rokus need time to cool down during breaks. Prolonged sessions without pause can lead to sustained high temperatures, increasing the likelihood of damage over time.

    Environmental factors, such as exposure to direct sunlight or high room temperatures, also play a critical role. If your Roku is positioned near a window or exposed to direct sunlight, the additional external heat can exacerbate the issue. Similarly, using the device in a poorly ventilated area can compound the problem, making it more difficult for the internal cooling mechanisms to function effectively.

    Immediate Steps to Cool Down Your Roku

    When faced with an overheating warning, quick action can prevent further complications. Start by turning off your Roku device and unplugging it from the power source. Allow it to cool down for at least 10 to 15 minutes. While the device is cooling, inspect its placement and surroundings.

    If your Roku is placed in a confined space or near other heat-producing devices, relocate it to an open, well-ventilated area. Ensure that it is not exposed to direct sunlight or any external heat sources. Once the device has cooled, reconnect it and check if the warning persists. Taking these steps promptly can help mitigate potential damage and restore your device to optimal functionality.

    For users who experience recurring overheating issues, consider using a fan or other cooling aid to help the device dissipate heat more effectively. Simple adjustments, such as slightly elevating the Roku to improve airflow, can also make a significant difference. Acting decisively during overheating warnings is crucial to maintaining the health of your device and preserving its performance over time.

    Long-Term Fixes to Prevent Overheating

    To ensure that your Roku device doesn’t overheat in the future, consider implementing the following preventive measures:

    • Optimize Placement: Position your Roku in an open area with good airflow. Avoid placing it directly behind your TV or in enclosed entertainment units. Open areas facilitate better air circulation, preventing heat buildup and ensuring that the device remains cool even during extended use. Strategic placement can significantly reduce the risk of overheating and improve overall performance.
    • Use a Cooling Pad: If overheating is a recurring problem, investing in a cooling pad can help regulate the device’s temperature during use. Cooling pads are an affordable and effective solution for users who stream content frequently. By providing a consistent cooling effect, these pads help extend the lifespan of your device and maintain its efficiency.
    • Limit Prolonged Streaming: Give your Roku breaks during extended streaming sessions to prevent it from overworking. Scheduling downtime allows the device to cool naturally and reduces the strain on its internal components. Building these breaks into your viewing habits can contribute to a more reliable and enjoyable streaming experience.

    Software Updates and System Health

    Outdated software can contribute to overheating by causing the device to work harder than necessary. Regularly check for firmware updates via the settings menu on your Roku device. Updates often include optimizations that improve performance and reduce strain on hardware components. Staying up-to-date with the latest software ensures that your device operates efficiently and remains protected against common issues.

    Performing a factory reset can also address overheating issues caused by software glitches. Before resetting, back up your preferences and settings as the process will erase all data on the device. Navigate to the system settings and follow the on-screen instructions to complete the reset. A fresh start can resolve lingering problems and improve overall system stability.

    Software health is just as important as physical maintenance. Regularly reviewing and updating your device’s settings can help you identify and address potential issues before they escalate. By prioritizing both software and hardware upkeep, you can optimize your Roku’s performance and prevent future overheating.

    Troubleshooting for Persistent Overheating

    If the above measures fail to resolve the issue, more advanced troubleshooting may be required. Check the power supply unit to ensure it is functioning correctly. A faulty or incompatible power adapter can lead to excess heat generation. Using a certified power adapter designed for your specific Roku model minimizes the risk of overheating and ensures consistent performance.

    Additionally, consider reaching out to Roku’s customer support or exploring warranty options if your device continues to overheat despite all efforts. They may offer repair or replacement services, especially if the issue stems from a manufacturing defect. Leveraging these resources can provide long-term solutions and peace of mind for users facing persistent problems.

    Advanced troubleshooting may also involve inspecting internal components or seeking professional repair services. While these options require more time and effort, they can address underlying issues that simpler fixes might miss. Taking a comprehensive approach to troubleshooting ensures that your device remains in top condition and performs reliably over the long term.

    Roku’s Heat Management Technology

    Modern Roku devices are equipped with heat management technologies designed to prevent overheating. These include built-in temperature sensors and automatic shutdown features.

    While these safeguards are helpful, they are not foolproof. Users must remain vigilant and proactive in maintaining their device’s health. Familiarizing yourself with these technologies allows you to better understand how your Roku operates and identify potential issues early.

    The integration of heat management systems demonstrates Roku’s commitment to user safety and product reliability. However, these features work best when combined with proper usage and maintenance practices. Staying informed about your device’s capabilities and limitations helps you make the most of its built-in protections.

    Understanding how heat management technologies function can also guide users in troubleshooting and optimizing their devices. By leveraging these features effectively, you can minimize the risk of overheating and enhance your overall streaming experience. Proactive care and informed use are key to maintaining a safe and enjoyable home entertainment setup.

    Reference Table for Roku Overheating Causes and Fixes

    Cause Impact Solution
    Poor placement Traps heat, leading to overheating Relocate to a well-ventilated area
    Extended usage Causes excessive heat buildup Limit prolonged streaming sessions
    Exposure to sunlight Increases device temperature Move away from direct sunlight
    Dust and debris Blocks ventilation Clean device regularly
    Outdated software Strains hardware Update firmware frequently

    Enhancing Your Streaming Experience

    Overheating warnings are a reminder of the importance of proper device care and maintenance. By addressing potential causes and implementing effective solutions, you can keep your Roku running smoothly and extend its lifespan. A well-maintained Roku device not only enhances your streaming experience but also ensures reliable performance for years to come.

    Streaming should be a seamless and enjoyable experience. By staying informed and proactive, you can ensure that your Roku device remains a trusted companion in your entertainment journey. Adopting these best practices allows you to focus on what matters most—enjoying your favorite content without interruptions or concerns. Through consistent care and attention, you can make the most of your Roku and enjoy hassle-free streaming for the long term.

    Also Check:

  • Roku Not Connecting to Internet: Why Your Roku Won’t Connect to the Internet and How to Fix It

    Roku Not Connecting to Internet: Why Your Roku Won’t Connect to the Internet and How to Fix It

    Roku devices are celebrated for their convenience and simplicity, bringing a world of streaming content to millions of households. However, encountering internet connectivity issues can quickly turn your binge-watching plans into frustration.

    Roku Not Connecting to Internet

    Whether you’re met with buffering screens, error messages, or a complete inability to access your favorite apps, understanding why your Roku isn’t connecting to the internet and knowing how to resolve these issues is essential.

    Recognizing Internet Connectivity Issues

    Internet connectivity problems with Roku devices can manifest in various ways. Most commonly, users experience difficulty streaming content, with videos stopping midway or refusing to load. Sometimes, an error message such as “Unable to connect to the wireless network” or “Not connected to the internet” may appear on the screen. These indicators point to issues that need immediate attention.

    Another common sign is a sluggish interface or delayed response when navigating through Roku’s menus. While this might occasionally result from device performance issues, it often correlates with an unstable internet connection. When these signs appear, checking your network’s performance and stability becomes the logical first step. Ignoring these symptoms can lead to more persistent problems, eventually disrupting your overall streaming experience.

    The signs of internet issues can vary depending on the Roku model and the strength of your Wi-Fi network. Whether your device is a Roku Express, Streaming Stick, or a Roku Ultra, the inability to maintain a strong and stable connection to the internet can hinder its functionality. Understanding these signs helps you address the root cause effectively, ensuring that your streaming device operates smoothly.

    Common Causes of Roku Connectivity Issues

    Several factors could be causing your Roku device to struggle with connecting to the internet. One of the most common issues lies within the home network itself. Weak Wi-Fi signals, incorrect network configurations, or an overloaded router can all contribute to connection problems. In many cases, the distance between your Roku device and the router plays a significant role—a far-off device may struggle to maintain a stable signal.

    Another frequent culprit is outdated software on the Roku device. Software glitches or compatibility issues with your network can arise when the device isn’t regularly updated. While Roku’s system updates usually occur automatically, interruptions during the update process or manual settings might prevent your device from receiving the latest firmware.

    Hardware issues, both with the Roku device and your network equipment, can also play a part. For instance, a faulty HDMI connection or an old, underperforming router might hinder proper communication between the devices. Identifying these physical and technical challenges requires a thorough inspection of both the Roku device and the network setup, ensuring every component works as intended.

    Diagnosing the Issue

    Diagnosing why your Roku won’t connect to the internet often starts with testing the basics. Check whether your Wi-Fi network is functioning correctly by connecting another device, such as a smartphone or laptop. If other devices can connect without issues, the problem likely lies with your Roku. On the other hand, if your entire network seems down, addressing the router or internet service provider becomes the next logical step.

    Roku devices also come with built-in diagnostics tools that allow you to test the network connection. Accessing the settings menu and navigating to “Network” can provide insights into signal strength and connectivity status. A weak signal may suggest the need for better router placement or the addition of range extenders.

    Further diagnostic steps include restarting your Roku device and router, as this simple action can resolve temporary glitches in connectivity. Restarting clears the cache and refreshes the network settings, potentially restoring the connection. If these initial steps don’t resolve the problem, delving deeper into advanced troubleshooting methods might be necessary.

    Advanced Troubleshooting Techniques

    When basic fixes fail, advanced troubleshooting becomes essential. A common yet often overlooked solution involves resetting the Roku’s network settings. This process clears saved networks and allows the device to reconnect from scratch, bypassing any prior configuration errors. Reentering your Wi-Fi credentials after a reset can sometimes resolve persistent connection problems.

    Another approach is to examine your router’s settings. Ensure that the router’s firmware is up-to-date, as outdated firmware can cause compatibility issues with streaming devices like Roku. Additionally, check the channel and frequency settings on your router. Many modern routers operate on both 2.4GHz and 5GHz frequencies, with the latter offering faster speeds but shorter range. Switching between these frequencies can optimize performance depending on your Roku’s location.

    For users experiencing frequent drops in connection, investing in a Wi-Fi extender or mesh network system can significantly enhance signal strength throughout the home. These devices ensure consistent internet coverage, particularly in larger spaces or areas with multiple walls obstructing the signal. Addressing the physical layout of your home network can make a substantial difference in connectivity.

    Keeping Your Roku Updated

    Ensuring that your Roku device’s firmware is up-to-date is crucial for maintaining internet connectivity. Regular updates often include fixes for known issues, performance enhancements, and new features that improve the overall user experience. To check for updates manually, navigate to the settings menu and select “System Update.”

    While Roku typically handles updates automatically, situations like power outages or interrupted downloads can leave your device running outdated software. Performing a manual check helps identify whether your device missed any updates. Keeping the software current not only resolves connectivity issues but also protects your device from potential security vulnerabilities.

    Factory resets can also serve as a last resort for persistent software-related problems. By restoring the Roku to its original settings, you can eliminate glitches that may have developed over time. While this process erases saved preferences and accounts, reconfiguring your Roku from scratch can often breathe new life into the device.

    External Factors Influencing Connectivity

    External factors such as internet service provider issues, network congestion, or environmental interference can also impact your Roku’s ability to connect to the internet. During peak usage hours, shared networks may slow down due to increased demand, affecting streaming performance. Contacting your ISP to confirm network stability or upgrade your service plan may resolve these problems.

    Environmental interference from household devices like microwaves, cordless phones, or baby monitors can disrupt Wi-Fi signals, particularly on the 2.4GHz frequency band. Identifying and minimizing such interference through strategic placement of your router and Roku device can enhance connectivity. Positioning your router in a central, elevated location reduces the likelihood of signal disruption.

    Changes in weather conditions, such as heavy rain or snow, can occasionally impact internet performance, particularly for satellite-based services. While these factors are beyond your control, preparing for such interruptions with alternative viewing options, like downloading content for offline use, can help mitigate their effects on your entertainment.

    Reference Table: Connectivity Issues and Solutions

    Issue Possible Cause Suggested Solution
    Cannot connect to Wi-Fi Incorrect credentials Reenter network password
    Frequent disconnections Weak signal or interference Adjust router placement, use extenders
    Slow streaming speeds Network congestion Contact ISP, switch frequencies
    Software errors Outdated firmware Perform system updates
    Total loss of connection Router malfunction Restart router, check hardware

    Enhancing Your Streaming Setup

    Addressing connectivity issues not only restores functionality but also improves your overall streaming experience. By taking proactive steps to optimize your network and maintain your Roku device, you can enjoy uninterrupted access to your favorite shows, movies, and apps. Simple measures, such as keeping devices updated, monitoring network performance, and investing in high-quality equipment, contribute to a seamless and enjoyable home entertainment system.

    The frustration of losing internet connectivity on your Roku can be a thing of the past with the right knowledge and tools. By understanding the causes, recognizing the signs, and implementing effective solutions, you’ll ensure that your streaming sessions remain smooth and hassle-free. With consistent care and attention to both your Roku and home network, you can continue to enjoy the endless entertainment options that make Roku an essential part of modern living.

    Also Check:

  • Roku Not Enough Memory: How to Free Up Space on Your Roku Device and Fix the Problem

    Roku Not Enough Memory: How to Free Up Space on Your Roku Device and Fix the Problem

    The dreaded “Not Enough Memory” error on a Roku device can be a frustrating roadblock for any streaming enthusiast. While Roku devices are designed to offer seamless entertainment, their limited storage can sometimes fall short, leading to performance issues, failed app installations, or playback errors.

    Roku Not Enough Memory

    Understanding how to manage and free up memory on your Roku is crucial to keeping your device running smoothly. This article will explore the causes of this issue and provide comprehensive, detailed steps to resolve it, ensuring you can get back to enjoying your favorite content.

    Why Does Roku Run Out of Memory?

    Roku devices have built-in storage primarily intended for system operations and caching streaming data. However, as you add channels and applications, the storage can fill up quickly. This is especially true for devices with more basic specifications or for users who regularly download multiple apps and games. Memory shortages can also occur when system updates or cached files from apps consume the available space.

    Over time, the accumulation of cached data from frequent use can eat into the device’s memory. Streaming apps like Netflix, YouTube, and Hulu often store temporary files to enhance performance, but this can backfire when the space runs low. Moreover, older Roku models with smaller internal storage are more susceptible to this issue, as they lack the capacity to handle an extensive app library.

    Storage limitations can also impact app performance, sometimes causing frequent crashes or sluggishness.

    Signs of Low Memory on Roku

    When your Roku is low on memory, you might notice several signs, such as:

    • Frequent buffering or playback interruptions.
    • Sluggish navigation through the Roku interface.
    • Error messages indicating insufficient memory when trying to open or install apps.
    • Apps crashing or failing to load altogether.
    • Difficulty installing new apps due to limited available space.

    Identifying these symptoms early can help you take proactive measures before the problem worsens. It’s important to understand how these issues manifest and the ways in which they can disrupt your viewing experience.

    Freeing Up Space on Your Roku

    1. Uninstall Unused Channels and Apps:

    The simplest way to reclaim memory on your Roku is to uninstall channels or apps you no longer use. Start by navigating to the Roku home screen and selecting the app you want to remove. Press the “*” button on your remote to access the options menu, then choose “Remove channel.” This will delete the app and its associated cached data, freeing up space.

    If you’re unsure which apps to remove, consider prioritizing larger streaming platforms you rarely use. Channels like gaming apps or those with high data consumption are excellent candidates for removal. Regularly auditing your app library can prevent future memory constraints.

    2. Clear the Cache:

    Roku devices don’t offer a direct option to clear the cache, but you can perform a system restart to achieve a similar effect. Follow these steps:

    1. Press the Home button five times on your remote.
    2. Press the Up button once.
    3. Press the Rewind button twice, followed by the Fast Forward button twice.

    Your Roku will restart, and cached data will be cleared during the process. This can help resolve performance issues caused by accumulated temporary files. Clearing the cache periodically ensures that your device stays responsive and avoids unnecessary slowdowns.

    3. Perform a Factory Reset:

    If your Roku continues to experience memory issues despite clearing apps and restarting, a factory reset might be necessary. This will erase all data, including downloaded channels and custom settings, effectively restoring the device to its original state. Here’s how:

    1. Navigate to the Roku settings menu.
    2. Select “System” and then “Advanced system settings.”
    3. Choose “Factory reset” and follow the on-screen instructions.

    After the reset, you’ll need to set up your Roku device again, but this method is guaranteed to free up all available memory. While time-consuming, it’s an effective way to eliminate persistent problems.

    4. Disable Auto-Updates for Apps You Rarely Use

    For users who frequently face low memory issues, consider disabling auto-updates for apps you rarely use. This will prevent these apps from downloading updates that occupy storage unnecessarily. You can also manage storage by regularly checking the “System” section in the settings menu to monitor available memory and take action before space becomes critically low.

    5. Use External Storage for Added Memory

    Some Roku devices, such as the Roku Ultra, support external storage through a USB port or microSD slot. Adding an external drive can significantly expand your device’s memory capacity, allowing you to download more channels and store additional data. To use this feature:

    1. Connect a USB drive or insert a microSD card into your Roku device.
    2. Follow the on-screen prompts to format the storage for use with Roku.

    Keep in mind that this additional storage is typically used for app data and not for storing downloaded content from streaming services. A high-quality storage device can enhance performance, particularly for users with extensive channel libraries.

    Maintaining Your Roku Device

    Regular maintenance can help prevent memory issues and ensure your Roku operates efficiently. Consider the following practices:

    • Periodically remove unused apps to avoid unnecessary storage consumption.
    • Restart your device weekly to clear temporary files and refresh its performance.
    • Check for system updates and install them promptly to benefit from performance improvements and bug fixes.

    It’s also helpful to keep your device in a well-ventilated space to prevent overheating, which can contribute to performance issues. Ensure that the power source and cables are reliable to avoid potential disruptions.

    Comparing Roku Models by Memory Capacity

    Model Internal Storage Expandable Storage Best For
    Roku Express Limited No Basic streaming needs
    Roku Streaming Stick 4K Moderate No 4K streaming on a budget
    Roku Ultra High USB and microSD Power users and gamers
    Roku Streambar Moderate No All-in-one sound and streaming

    When to Upgrade Your Roku

    If you find that memory issues persist despite all efforts, it may be time to consider upgrading to a newer Roku model with greater storage capacity and enhanced performance.

    Modern Roku devices are better equipped to handle demanding apps and large libraries, ensuring a smoother streaming experience. An upgraded device can also introduce advanced features, such as faster processors, improved Wi-Fi connectivity, and support for higher-resolution content.

    Conclusion

    Running out of memory on your Roku doesn’t have to spell the end of your streaming enjoyment. By understanding the causes of this issue and implementing the strategies outlined above, you can optimize your device’s performance and reclaim valuable storage space.

    Whether it’s by uninstalling unused apps, clearing caches, or utilizing external storage, there are plenty of options to keep your Roku running like new. And if all else fails, upgrading to a more advanced model can provide the storage and performance boost you need to keep streaming without interruption.

    By maintaining a well-organized and clutter-free Roku device, you’ll enjoy smoother navigation, uninterrupted streaming, and a more enjoyable overall experience. Don’t let memory constraints hold you back from exploring the vast world of streaming entertainment!

    Also Check:

  • Roku Not Responding to Remote: What You Can Do to Fix It

    Roku Not Responding to Remote: What You Can Do to Fix It

    Few things can be as frustrating as sitting down to enjoy your favorite show, only to find that your Roku remote isn’t responding. For a device known for its simplicity and ease of use, a non-functional remote can feel like a major setback. Fortunately, most issues with Roku remotes can be resolved with a bit of troubleshooting and patience.

    Roku Not Responding to Remote

    In this detailed guide, we’ll explore common reasons why a Roku remote might stop working and the steps you can take to get it back up and running. From battery issues to connectivity problems, understanding the root cause is key to finding the right solution.

    Understanding the Types of Roku Remotes

    Before diving into troubleshooting, it’s essential to understand that Roku remotes come in two main types: the Infrared (IR) remote and the Enhanced remote. The IR remote uses line-of-sight technology, meaning it needs a direct path to the Roku device to function. On the other hand, the Enhanced remote connects via wireless technology, allowing it to work even without a direct line of sight.

    Knowing which type of remote you have can help you narrow down the cause of the problem. For example, if you’re using an IR remote, obstacles between the remote and the Roku device could be the issue. With an Enhanced remote, the problem might lie with pairing or connectivity. Each type has its nuances, and troubleshooting methods may vary depending on the model you own.

    Diagnosing Battery Problems

    One of the most common reasons for a Roku remote to stop working is battery-related issues. Weak or dead batteries can cause erratic behavior or a complete failure to communicate with the Roku device. Begin by opening the battery compartment on the back of the remote and inspecting the batteries. If they appear corroded or old, replacing them with fresh, high-quality batteries is the first step.

    Ensure the batteries are inserted correctly, observing the polarity markings inside the compartment. Sometimes, even new batteries may not work if they aren’t seated properly. After replacing the batteries, try using the remote again. If the issue persists, it’s worth testing the remote with another set of batteries to rule out the possibility of defective ones.

    Re-Pairing the Enhanced Remote

    For those using an Enhanced Roku remote, connectivity issues may arise if the remote becomes unpaired from the Roku device. This can happen after a system update, power outage, or if the remote has been out of range for an extended period. To re-pair your remote, follow these steps:

    1. Remove the battery cover and locate the pairing button inside the compartment.
    2. Press and hold the pairing button until the indicator light starts blinking.
    3. On your Roku device, navigate to the “Settings” menu, then select “Remotes & Devices.”
    4. Choose “Pair a New Remote” and follow the on-screen instructions.

    The re-pairing process typically takes a few moments, and you’ll know it’s successful when the remote begins to control the Roku device again. If the problem persists, it’s worth checking for firmware updates on both the remote and the Roku device, as outdated software can sometimes cause compatibility issues.

    Troubleshooting IR Remote Issues

    Infrared remotes rely on an unobstructed line of sight to the Roku device. If your IR remote isn’t responding, first ensure that there are no obstacles between the remote and the device. Items like furniture, decorations, or even pets can block the signal. Test the remote by pointing it directly at the Roku device from a close distance.

    If the remote still doesn’t work, it’s possible that the IR sensor on either the remote or the Roku device is malfunctioning. Use a smartphone camera to check if the IR signal is being emitted. Point the remote at the camera and press any button; if you see a flashing light through the camera’s viewfinder, the remote is working, and the issue may lie with the Roku device. If no light is visible, the remote may need to be replaced.

    Using the Roku Mobile App as a Temporary Fix

    When your remote isn’t working, the Roku mobile app can serve as a convenient alternative. Available for both iOS and Android devices, the app functions as a virtual remote, allowing you to control your Roku device until the physical remote is fixed or replaced. After downloading the app, ensure that your smartphone and Roku device are connected to the same Wi-Fi network. The app will automatically detect your Roku, enabling seamless control.

    The app also offers additional features, such as voice search and keyboard input, which can enhance your Roku experience. While it’s not a permanent solution, using the mobile app can help you continue enjoying your favorite content without interruption.

    Common Roku Remote Issues and Solutions

    Issue Cause Solution
    Remote not working at all Dead batteries Replace with fresh batteries
    Unresponsive buttons Dirt or debris under buttons Clean the remote
    Remote unpaired Connectivity loss Re-pair the remote
    No signal from IR remote Obstructed line of sight Remove obstacles

    When to Consider Replacing Your Remote

    If all troubleshooting methods fail, it may be time to replace your Roku remote. Genuine Roku remotes are available through the Roku website and major retailers. When purchasing a replacement, ensure it’s compatible with your specific Roku model to avoid further issues.

    Third-party remotes are another option, but they may lack certain features or have compatibility limitations. Investing in a genuine remote is often the best choice for maintaining seamless functionality and access to advanced features like private listening or voice commands.

    Preventing Future Remote Problems

    To minimize the risk of remote issues in the future, consider the following tips:

    • Use high-quality batteries and replace them promptly when needed.
    • Store the remote in a safe, dry place to prevent damage from spills or falls.
    • Keep the remote’s firmware updated to ensure compatibility with your Roku device.

    Regular maintenance and careful handling can extend the life of your remote, ensuring reliable performance over time.

    Conclusion

    A Roku remote that doesn’t respond can be a frustrating experience, but most issues are easily resolved with the right approach. From checking batteries to re-pairing the remote, understanding the root cause is the first step toward finding a solution. By following the troubleshooting tips outlined in this guide, you can quickly restore functionality and get back to enjoying your favorite streaming content.

    Whether you’re using an IR or Enhanced remote, taking proactive measures to maintain your remote’s performance will help prevent future problems. And if all else fails, the Roku mobile app or a replacement remote can ensure you never miss a moment of entertainment.

    Also Check:

  • Roku Not Turning On: Simple Troubleshooting Steps to Get It Back Up and Running

    Roku Not Turning On: Simple Troubleshooting Steps to Get It Back Up and Running

    When your Roku device refuses to turn on, it can be incredibly frustrating, especially if you are looking forward to catching up on your favorite shows or exploring new streaming options. While Roku devices are known for their reliability, they’re not immune to occasional hiccups. This article offers potential reasons why your Roku device won’t turn on and explores detailed troubleshooting steps to get your device back in action.

    Roku Not Turning On

    How to Fix a Roku Device Not Turning On

    A Roku device that won’t turn on might show various symptoms. In some cases, there’s no indicator light on the device, which usually suggests a lack of power. Other times, the Roku may appear to start but remains stuck on the logo screen or fails to display anything on your TV. The absence of response from the remote control is another telling sign of power issues.

    Knowing these signs helps you narrow down the root cause. Is it a power supply problem, a hardware failure, or an issue with the TV or HDMI connection? Each of these possibilities requires careful investigation, and understanding these signs is the first step toward resolving the issue.

    Common Causes of Roku Power Issues

    There are several reasons why your Roku device might fail to power on. One of the most common is a faulty power supply. Over time, power adapters and cords can wear out or become damaged, resulting in insufficient power delivery. It’s worth checking for visible signs of wear and tear on the power cord or adapter.

    Another frequent culprit is overheating. Roku devices are designed with internal safeguards that prevent them from operating when they become too hot. Extended use, poor ventilation, or placing the device near heat sources can trigger this safety feature. If your device feels unusually warm, this could be the cause.

    Internal hardware issues, though less common, can also lead to power failures. A damaged motherboard or internal circuitry can render the device non-functional. Lastly, problems with the HDMI connection or the TV’s settings might create the illusion that your Roku isn’t powering on, even though it’s receiving power.

    Diagnosing the Problem

    To determine why your Roku isn’t turning on, start with the basics. Check the power source to ensure it’s functional. Plug another device into the same outlet to verify that it’s delivering power. Inspect the power cord and adapter for any visible damage or loose connections. If possible, try using a different power cord or adapter to rule out issues with your current one.

    Next, examine the Roku device itself. Look for any lights that might indicate power. If the light is blinking or absent, it’s a sign of an underlying issue. Place the device in a well-ventilated area and give it time to cool down if overheating is suspected.

    Check the connection between your Roku and the TV. Ensure that the HDMI cable is securely plugged in and that the TV is set to the correct input. Sometimes, a loose or faulty HDMI connection can create display problems that mimic power failure.

    Troubleshooting Steps to Fix Your Roku

    If your Roku still won’t turn on, it’s time to dig deeper. Start by performing a power cycle. Unplug the device from the power source, wait at least 30 seconds, and then plug it back in. This simple step can resolve minor glitches that prevent the device from powering on.

    If the problem persists, try a factory reset. Locate the reset button on your Roku device, often found on the back or bottom. Press and hold it for about 10 seconds until the indicator light flashes. Keep in mind that this will erase all settings and preferences, requiring you to set up the device again from scratch.

    For devices showing signs of overheating, improve ventilation around the Roku. Avoid placing it in enclosed spaces or near other electronic devices that generate heat. If overheating occurs frequently, consider investing in a cooling pad or relocating the device to a cooler area.

    Reference Table: Roku Power Issues and Solutions

    Issue Potential Cause Suggested Solution
    No power indicator Faulty power adapter Replace the power cord or adapter
    Device is warm Overheating Improve ventilation, cool down device
    No display on TV HDMI connection problem Check and secure HDMI cables
    Stuck on logo screen Firmware issue Perform a factory reset

    Preventing Future Power Problems

    Prevention is key to ensuring your Roku device operates smoothly. Start by using the original power adapter and cord provided by Roku, as third-party alternatives may not deliver consistent power. Place your device in a cool, ventilated area to avoid overheating, and clean the vents regularly to prevent dust buildup.

    Additionally, consider using a surge protector to shield your Roku from power fluctuations. Frequent power surges can damage the internal components of electronic devices, leading to long-term issues. Regularly updating your Roku’s firmware also helps maintain optimal performance and prevents software-related problems.

    When to Seek Professional Help

    If you’ve tried all troubleshooting steps and your Roku still won’t turn on, it might be time to seek professional assistance. Contact Roku’s customer support for guidance or visit a certified repair center. Devices under warranty may qualify for a free replacement or repair, so ensure you have your purchase details handy.

    For older devices no longer covered by warranty, weigh the cost of repair against the price of a new device. In some cases, upgrading to a newer model with enhanced features and improved performance might be a more cost-effective solution.

    Enhancing Your Streaming Setup

    While addressing the issue of a non-functional Roku, consider upgrading your overall streaming setup for a better experience. Invest in high-quality HDMI cables, ensure your TV’s firmware is up-to-date, and explore advanced features offered by newer Roku models. By creating a reliable and optimized home entertainment system, you’ll reduce the chances of encountering similar issues in the future.

    Roku devices have revolutionized the way we consume entertainment, but occasional technical problems can disrupt the experience. By understanding the potential causes and solutions for power issues, you can quickly restore your device and get back to enjoying seamless streaming. With regular maintenance and a proactive approach, your Roku will remain a dependable source of entertainment for years to come.

    Also Check:

  • How to Pair Roku Remote to TV

    How to Pair Roku Remote to TV

    In the world of modern streaming, Roku stands out as a leading platform, providing an effortless way to access a myriad of entertainment options. However, even the best devices need proper setup, and pairing your Roku remote to your TV is a critical first step. This guide will walk you through the process in detail, ensuring a seamless connection between your Roku remote and your TV, allowing you to dive into your favorite shows and movies without a hitch.

    How to Pair Roku Remote to TV

    Pairing your Roku remote to your TV is essential for complete control over your streaming experience. Without this step, you won’t be able to navigate the Roku interface, adjust volume levels, or power on your TV using the remote. Proper pairing ensures that your Roku device and TV work together harmoniously, providing a smooth and intuitive user experience.

    Types of Roku Remotes and Their Functions

    Before diving into the pairing process, it’s important to understand the different types of Roku remotes and their unique features. Roku remotes come in two primary varieties: infrared (IR) remotes and enhanced “point anywhere” remotes.

    Infrared (IR) Remotes

    IR remotes require a direct line of sight to the Roku device to function. They are simpler in design and don’t need pairing in the traditional sense, as they operate through IR signals.

    Enhanced “Point Anywhere” Remotes

    Enhanced remotes utilize Wi-Fi or Bluetooth, allowing them to control the Roku device without needing to be directly pointed at it. These remotes often include advanced features like voice control and private listening, and they require pairing with the Roku device.

    How to Pair an Enhanced Roku Remote to TV

    Pairing an enhanced Roku remote involves a few straightforward steps, which we’ll detail below to ensure a hassle-free setup.

    Step 1: Insert Batteries in the Remote

    Start by inserting fresh batteries into your Roku remote. Proper battery placement and power are crucial for initiating the pairing process.

    Step 2: Turn on Your Roku Device

    Power on your Roku device and wait for the home screen to appear. Ensure that your TV is set to the correct input for the Roku device.

    Step 3: Enter Pairing Mode

    If your remote does not automatically pair, you’ll need to manually enter pairing mode:

    1. Open the battery compartment of the remote.
    2. Locate the pairing button inside the compartment.
    3. Press and hold the pairing button for 3-5 seconds until you see a pairing light or an on-screen message indicating that pairing is in progress.

    Step 4: Follow On-Screen Instructions

    Once the pairing process begins, follow any on-screen instructions provided by your Roku device. This may involve selecting options or confirming the pairing process.

    Troubleshooting Pairing Issues

    Occasionally, you might encounter issues while pairing your Roku remote. Below are some common problems and their solutions.

    Remote Not Responding

    If your remote isn’t responding, try the following:

    • Replace the batteries with new ones.
    • Restart your Roku device by unplugging it and plugging it back in.
    • Ensure there are no obstructions between the remote and the Roku device for IR remotes.

    Pairing Button Not Working

    If the pairing button isn’t working, you can try resetting the remote:

    1. Remove the batteries.
    2. Unplug your Roku device.
    3. Wait for about 30 seconds.
    4. Reinsert the batteries and plug the Roku device back in.
    5. Retry the pairing process.

    Using the Roku Mobile App as an Alternative

    If pairing your physical remote proves problematic, the Roku mobile app serves as an excellent alternative. Available for both iOS and Android devices, the app allows you to control your Roku device using your smartphone.

    1. Download and install the Roku app from your device’s app store.
    2. Connect your phone to the same Wi-Fi network as your Roku device.
    3. Open the app and select your Roku device from the list.
    4. Use the app’s remote feature to navigate and control your Roku device.

    Table: Quick Overview of Pairing Steps

    Step Description
    Insert Batteries Ensure fresh batteries are correctly placed in the remote.
    Power on Roku Device Turn on the Roku device and set the TV to the correct input.
    Enter Pairing Mode Press and hold the pairing button until the pairing light or message appears.
    Follow On-Screen Prompts Complete the pairing by following on-screen instructions.

    Conclusion

    Pairing your Roku remote to your TV is a fundamental step that enhances your streaming experience. Whether you are using an IR or an enhanced remote, following the outlined steps ensures a quick and easy setup. If issues arise, troubleshooting tips and the Roku mobile app offer reliable alternatives.

    With your remote properly paired, you can fully enjoy the convenience and entertainment Roku provides, making your streaming sessions more enjoyable and effortless.

    Also Check:

  • How to Connect Roku Remote to TV without WiFi

    How to Connect Roku Remote to TV without WiFi

    Connecting your Roku remote to your TV without WiFi might seem like a daunting task, but it’s entirely possible and not as complicated as it may appear. In this guide, we’ll explore the various methods available for connecting your Roku remote to your TV without the need for a WiFi connection, detailing each step to ensure you can follow along easily.

    How to Connect Roku Remote to TV without WiFi

    Whether you’re dealing with an outage, setting up a new device, or simply prefer a non-WiFi solution, this article covers all the bases.

    How to Connect Roku Remote to TV without WiFi

    Before diving into the methods, it’s essential to understand the types of Roku remotes and their connection mechanisms. Roku remotes are generally categorized into two types: the IR (Infrared) remote and the Enhanced remote, which uses RF (Radio Frequency) or Bluetooth.

    • IR Remote: This type requires a direct line of sight to the Roku device to function. It doesn’t need WiFi but relies on infrared signals to send commands.
    • Enhanced Remote: Unlike the IR remote, this one can work without a direct line of sight and connects via RF or Bluetooth. Typically, these remotes require an initial pairing process, which is usually done over WiFi. However, there are ways to bypass this, which we’ll discuss.

    Using an IR Remote to Connect Without WiFi

    If you have an IR remote, connecting it to your Roku device is straightforward, as it doesn’t rely on a network connection. Here’s how to do it:

    1. Point the Remote Directly at the Roku Device: Since the IR remote communicates via infrared signals, it needs a clear, unobstructed path to the Roku’s IR sensor.
    2. Press Any Button to Test the Connection: If the Roku responds, your IR remote is connected and ready to use.

    This method works perfectly for those who either have an IR remote or prefer not to use WiFi for their connection.

    Pairing an Enhanced Remote Without WiFi

    Enhanced remotes generally require WiFi for the initial pairing. However, if WiFi is not an option, there are still ways to connect your remote:

    Using the Pairing Button:

    1. Turn On Your Roku Device: Plug in and power on your Roku.
    2. Press and Hold the Pairing Button: Usually located inside the battery compartment, hold this button until you see a light flashing on the remote.
    3. Wait for the Pairing Process to Complete: Your Roku should recognize the remote and pair automatically without needing a WiFi connection.

    Through HDMI-CEC:

    If you have a TV that supports HDMI-CEC, you can use your TV’s remote to control the Roku. Here’s how:

    1. Enable HDMI-CEC on Your TV: This can usually be done via the TV’s settings menu. Look for CEC, which might be branded differently depending on the manufacturer (e.g., Anynet+ for Samsung, SimpLink for LG).
    2. Connect the Roku to an HDMI Port: Ensure the Roku device is plugged into an HDMI port on your CEC-enabled TV.
    3. Use Your TV Remote to Control Roku: Once HDMI-CEC is enabled, your TV remote should work with the Roku device seamlessly.

    Setting Up a Wired Connection

    For users who prefer a wired connection to bypass the need for WiFi, connecting your Roku device directly to your router with an Ethernet cable is a viable solution:

    1. Connect the Ethernet Cable: Plug one end of the Ethernet cable into the Roku device and the other into your router.
    2. Set Up the Roku Device: Follow the on-screen instructions to set up your device. Since it’s connected via Ethernet, you don’t need WiFi for this process.

    This method is especially useful for those who want a stable connection without relying on wireless networks.

    Troubleshooting Common Issues

    Even with these methods, you might encounter some issues while connecting your Roku remote without WiFi. Here are some common problems and their solutions:

    Remote Not Responding:

    • Check the Batteries: Ensure the batteries in your remote are fresh and properly inserted.
    • Reset the Remote: Remove the batteries, unplug the Roku device, wait a few minutes, then reconnect everything.

    Device Not Detecting the Remote:

    • Repeat the Pairing Process: Sometimes the initial pairing attempt might fail, and repeating the process can help.
    • Check for Interference: Make sure there are no obstructions or electronic devices that could interfere with the IR signal.

    Table: Connection Methods

    Method Requires WiFi Ease of Use Equipment Needed
    IR Remote Connection No Easy None
    Enhanced Remote Pairing No Moderate Enhanced Remote
    HDMI-CEC No Easy CEC-Enabled TV
    Ethernet Connection No Moderate Ethernet Cable

    Conclusion

    Connecting your Roku remote to your TV without WiFi is entirely possible with a few alternative methods. Whether you’re using an IR remote, leveraging HDMI-CEC, or setting up a wired Ethernet connection, each approach offers a solution tailored to different needs and preferences. By understanding these methods, you can ensure your Roku device is always ready to deliver your favorite content without the reliance on a wireless network.

    Also Check:

  • Roku Live TV Not Working: Simple Troubleshooting Steps for a Quick Fix

    Roku Live TV Not Working: Simple Troubleshooting Steps for a Quick Fix

    In today’s digital age, streaming devices like Roku have revolutionized how we consume television. With Roku’s live TV feature, users can access a broad spectrum of channels and live broadcasts, turning their TVs into versatile entertainment hubs. However, like any technology, Roku’s live TV functionality can sometimes encounter hiccups.

    Roku Live TV Not Working: Simple Troubleshooting Steps for a Quick Fix

    This article will guide you through detailed troubleshooting steps to help you quickly get back to enjoying your favorite shows.

    Roku Live TV Not Working

    Roku live TV problems can stem from various sources, such as network connectivity issues, outdated software, or hardware malfunctions. Before delving into the solutions, it’s essential to understand the typical problems that users might face:

    • Buffering and Streaming Delays: Slow internet connections or network congestion can cause buffering.
    • Channel Loading Failures: Sometimes, specific channels won’t load due to server issues or app errors.
    • Remote Control Malfunctions: If your remote isn’t functioning correctly, navigating to live TV can become a challenge.
    • Software Glitches: Outdated firmware or software bugs may prevent live TV from operating smoothly.
    • Device Overheating: Extended usage might cause the Roku device to overheat, leading to performance drops.

    Simple Troubleshooting Steps for a Quick Fix

    When Roku live TV isn’t working, it can be frustrating, but many common issues have straightforward solutions. Here are some simple troubleshooting steps to fix it:

    1. Check Your Internet Connection

    A stable internet connection is crucial for streaming live TV on Roku. Start by ensuring that your Wi-Fi is working correctly:

    • Restart Your Router: Unplug your router, wait for about 30 seconds, then plug it back in. This can resolve many connectivity issues.
    • Test Other Devices: Check if other devices connected to the same network are working correctly. If they are, the issue might be with your Roku device.
    • Move Closer to the Router: If possible, reduce the distance between your Roku device and the router to improve signal strength.

    2. Restart Your Roku Device

    A simple restart can fix many minor software glitches:

    • Soft Restart: Go to the Roku settings menu, select “System,” then “System Restart.”
    • Hard Restart: Unplug the Roku device from the power source, wait for a minute, and plug it back in.

    3. Update Roku Software

    Running the latest version of Roku’s software ensures optimal performance:

    • Check for Updates: Navigate to “Settings,” then “System,” and select “System Update.” Roku will automatically check for and install any available updates.

    4. Inspect HDMI Cables and Ports

    Sometimes, faulty HDMI cables or ports can disrupt the live TV experience:

    • Replace the HDMI Cable: Swap out the existing HDMI cable with a new one to see if the issue persists.
    • Try a Different Port: Connect your Roku device to a different HDMI port on your TV.

    5. Clear Cache and Reinstall Problematic Channels

    If a specific channel is not loading, clearing the cache and reinstalling the channel can help:

    • Remove the Channel: Highlight the channel, press the * button on the remote, and select “Remove Channel.”
    • Restart Roku: Perform a system restart as described above.
    • Reinstall the Channel: Go to the Roku Channel Store and reinstall the removed channel.

    6. Address Remote Control Issues

    A non-responsive remote can hinder navigation to live TV:

    • Replace Batteries: Ensure the remote’s batteries are fresh and correctly installed.
    • Pair the Remote Again: If using an enhanced remote, press and hold the pairing button inside the battery compartment for about 5 seconds.

    7. Check for Overheating

    Overheating can degrade performance and cause live TV interruptions:

    • Cool Down the Device: If the Roku device feels hot to the touch, turn it off and let it cool down for a while.
    • Ensure Proper Ventilation: Make sure the Roku device is placed in a well-ventilated area, away from direct sunlight or other heat sources.

    Advanced Troubleshooting Techniques

    Factory Reset

    If none of the basic troubleshooting steps work, performing a factory reset might be necessary:

    • Go to Settings: Navigate to “Settings,” then “System,” and select “Advanced System Settings.”
    • Choose Factory Reset: Follow the on-screen instructions to complete the reset. Remember, this will erase all personal settings and channels.

    Router Configuration

    Sometimes, the router’s configuration might be blocking certain streaming services:

    • Enable UPnP: Universal Plug and Play (UPnP) should be enabled on your router to allow seamless communication between devices.
    • Adjust DNS Settings: Switching to a different DNS provider, like Google DNS or OpenDNS, can improve connectivity and streaming quality.

    When to Contact Roku Support

    If you’ve tried all the above steps and Roku live TV still isn’t working, it might be time to contact Roku’s customer support for further assistance. They can provide more in-depth solutions or determine if the device needs replacement.

    Table: Quick Reference for Troubleshooting Steps

    Issue Possible Cause Solution
    Buffering and Delays Slow Internet Connection Restart router, move closer to the router, or test other devices.
    Channel Loading Failures App Errors or Server Issues Clear cache, remove and reinstall the channel, restart Roku.
    Remote Control Malfunctions Dead Batteries or Unpaired Replace batteries, pair the remote again.
    Software Glitches Outdated Firmware Check for and install Roku updates.
    Device Overheating Poor Ventilation Allow the device to cool down, ensure proper ventilation.

    Conclusion

    Roku’s live TV feature is a powerful tool for accessing diverse content, but occasional technical issues can disrupt the experience. By following these detailed troubleshooting steps, you can address common problems efficiently, ensuring a smoother and more enjoyable viewing experience. Remember, technology isn’t perfect, but with a little patience and the right approach, most issues can be resolved without too much hassle.

    Also Check:

  • Pair Roku Remote Without Pairing Button: No Pairing Button Required

    Pair Roku Remote Without Pairing Button: No Pairing Button Required

    Roku streaming devices have revolutionized home entertainment, making it simpler than ever to access a wide range of content. However, setting up and troubleshooting your Roku remote can sometimes be a challenge, especially when you need to pair a remote without a pairing button. This comprehensive guide walks you through the process, ensuring you can enjoy uninterrupted streaming with ease.

    Pair Roku Remote Without Pairing Button

    Pair Roku Remote Without Pairing Button

    Roku remotes come in various models, each with distinct features. Some remotes have a pairing button, which facilitates easy connection to your Roku device. However, there are instances where you might need to pair a remote without this button. This scenario typically applies to older models or remotes designed for basic functions.

    The key to resolving this issue lies in understanding the differences between Roku remotes and the specific steps required to pair those lacking a pairing button.

    Types of Roku Remotes

    Roku offers two main types of remotes: infrared (IR) remotes and enhanced remotes. IR remotes rely on a direct line of sight to the Roku device, while enhanced remotes use wireless technology, such as Bluetooth or Wi-Fi Direct, to connect.

    Infrared (IR) Remotes: These remotes do not require pairing. They function by sending signals via infrared light, which the Roku device receives. For IR remotes, ensuring a clear path between the remote and the device is crucial.

    Enhanced Remotes: Enhanced remotes feature advanced capabilities, such as voice commands, private listening through headphones, and more. These remotes typically require pairing with the Roku device, but the process can vary depending on the remote model, especially when a pairing button is absent.

    How to Identify Your Roku Remote Type

    To determine whether your Roku remote is an IR or enhanced model, observe its physical features and functionality:

    • Infrared Remote: Usually lacks extra buttons or features like voice control or private listening.
    • Enhanced Remote: May have additional buttons for voice search, private listening, or a headphone jack. These remotes often have a reset or pairing button, but in their absence, you need alternative pairing methods.

    Identifying Infrared Remotes

    Infrared remotes are generally simpler in design. They operate through a direct line of sight, so there are no intricate pairing procedures. If your remote lacks additional buttons for features like voice control or private listening, it is likely an IR remote.

    Identifying Enhanced Remotes

    Enhanced remotes are more complex and come with additional functionalities. They often include features like a built-in microphone for voice commands, a headphone jack for private listening, and sometimes even a reset or pairing button. If your remote has these attributes, it is an enhanced model, which might require a different approach for pairing, especially in the absence of a pairing button.

    How Pair an IR Remote

    Since IR remotes do not require pairing, they are straightforward to set up:

    1. Insert new batteries into the remote.
    2. Point the remote directly at your Roku device.
    3. Press any button to test functionality. If the device responds, your remote is ready to use.

    How to Pair an Enhanced Remote Without a Pairing Button

    For enhanced remotes without a visible pairing button, follow these steps to establish a connection:

    Step 1: Check the Batteries

    Ensure the remote has fresh batteries installed correctly. Low battery power can hinder the pairing process. Often, replacing the batteries is the simplest solution to get your remote back in action.

    Step 2: Reset the Remote

    Performing a reset can sometimes trigger pairing mode. To reset:

    1. Remove the batteries from the remote.
    2. Unplug your Roku device from the power source.
    3. Wait for about 30 seconds.
    4. Reinsert the batteries into the remote.
    5. Plug the Roku device back into the power source and wait for it to boot up.

    This process helps to refresh the connection and often resolves issues related to pairing.

    Step 3: Pair Using the Home Screen

    If resetting doesn’t work, use the Roku home screen to initiate pairing:

    1. Navigate to the Home screen on your Roku device.
    2. Go to Settings > Remotes & Devices > Pair Remote.
    3. Follow the on-screen instructions to pair your remote.

    Using the settings menu is a reliable method to establish a new connection between your remote and the Roku device.

    Step 4: Use the Roku App

    Another alternative is using the Roku mobile app as a remote:

    1. Download and install the Roku app on your smartphone or tablet.
    2. Connect your mobile device to the same Wi-Fi network as your Roku device.
    3. Open the app and select your Roku device.
    4. Use the app’s remote feature to navigate to the pairing menu on your Roku device.

    The app can serve as a convenient backup when the physical remote fails to pair, ensuring continuous control over your Roku device.

    Troubleshooting Pairing Issues

    If the above methods do not work, consider the following troubleshooting tips:

    Interference

    Ensure there are no obstructions or electronic devices that could interfere with the remote’s signal. Objects like furniture or electronic devices can disrupt the infrared signal or the wireless connection of enhanced remotes.

    Update Firmware

    Check if your Roku device and remote are running the latest firmware. An outdated system can cause connectivity issues. Keeping your device updated ensures optimal performance and compatibility.

    Factory Reset

    As a last resort, perform a factory reset on your Roku device. Note that this will erase all settings and data:

    1. Go to Settings > System > Advanced System Settings > Factory Reset.
    2. Follow the prompts to reset your device.

    A factory reset can resolve deep-seated issues but should only be used when all other troubleshooting methods fail.

    Table: Pairing Methods for Different Roku Remotes

    Remote Type Pairing Method Special Notes
    Infrared Remote No pairing required Ensure line of sight to the Roku device
    Enhanced Remote Reset, use home screen, or Roku app No pairing button needed; follow alternative steps

    Conclusion

    Pairing a Roku remote without a pairing button may seem daunting at first, but with the right approach, it becomes manageable. By identifying your remote type and following the outlined methods, you can reconnect your remote and resume enjoying your favorite shows and movies. Remember, whether it’s through a reset, home screen navigation, or the Roku app, there’s always a way to get your remote back in action.

    The methods detailed above ensure that even without a pairing button, your Roku remote can be paired successfully. Whether using the app, performing a reset, or accessing the settings menu, these solutions cater to different scenarios, making your Roku experience smooth and hassle-free.

    Also Check: