Category: Tricks/Tips

Unlock your tech’s full potential with practical hacks and tips. From speeding up your devices to mastering hidden features, simplify your digital life with our expert guidance.

  • Top Tricks for Shooting Cinematic Videos

    Top Tricks for Shooting Cinematic Videos

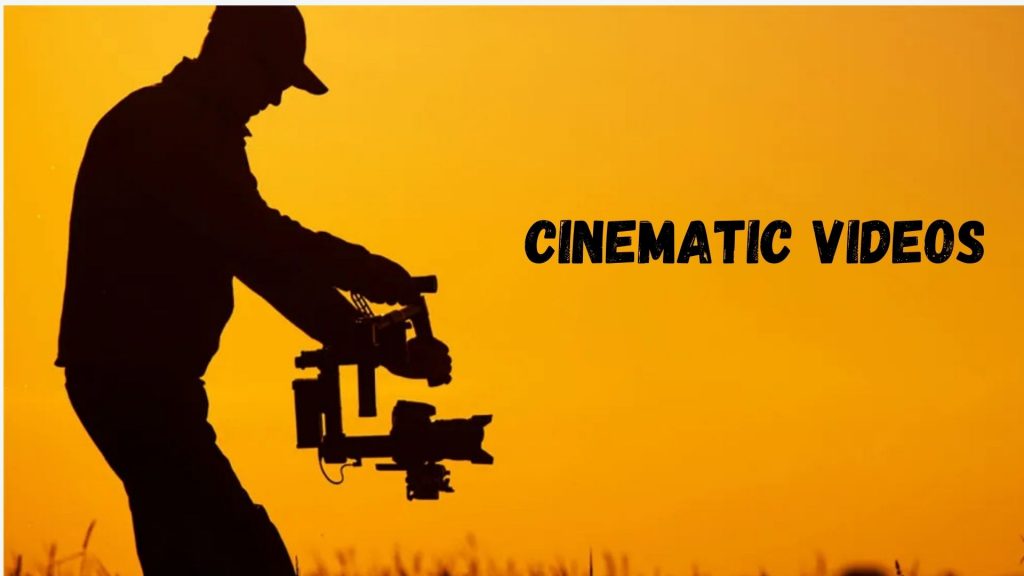
    Creating stunning, professional-looking videos isn’t just about having the best equipment. With the right techniques, you can achieve that sought-after cinematic look even with basic gear. Whether you’re a budding filmmaker or a content creator, knowing the top tricks for shooting cinematic videos can elevate your productions and captivate your audience.

    Top Tricks for Shooting Cinematic Videos
    Top Tricks for Shooting Cinematic Videos

    In this article, we’ll explore essential tips, from camera settings to editing techniques, that will help you achieve cinematic quality. By applying these methods, you can transform your videos into visually compelling stories that look straight out of a movie.

    What does “cinematic” mean in videos?

    The term “cinematic” refers to video content that resembles the style, quality, and feel of professional films. It’s not just about resolution but about creating emotion and visual appeal through:

    • Lighting and Composition: Carefully planned to evoke mood.
    • Camera Movement: Smooth and deliberate.
    • Depth of Field: The use of focus to isolate subjects.
    • Color Grading: Stylized tones and hues to create a film-like atmosphere.

    With these elements in mind, let’s dive into the techniques that can make your videos stand out.

    Top Tricks for Shooting Cinematic Videos

    Master the Rule of Composition

    Composition is the backbone of a cinematic shot. It involves carefully arranging elements in your frame to guide the viewer’s eye.

    • Rule of Thirds: Divide your frame into nine equal sections with two horizontal and two vertical lines. Place your subject along these lines or intersections for a balanced look.
    • Leading Lines: Use roads, railings, or natural lines in your frame to direct attention to your subject.
    • Negative Space: Leave space around your subject to make the shot more visually appealing.
    • Symmetry: Use symmetrical framing to create striking visuals that feel artistic and deliberate.

    Use Lighting to Set the Mood

    Lighting plays a critical role in the cinematic look. Proper lighting not only makes your footage clear but also adds depth and drama.

    • Golden Hour: Shoot during the golden hour (just after sunrise or before sunset) for soft, warm lighting.
    • Backlighting: Place the light source behind your subject to create a dramatic silhouette or halo effect.
    • Artificial Lighting: Use softboxes or LED lights indoors to mimic natural light.
    • Low-Key Lighting: Emphasize shadows and contrast for a moody, dramatic effect.

    Stabilize Your Shots

    Shaky footage can ruin the cinematic quality of your video. Stability ensures smooth and professional-looking visuals.

    • Gimbals: Invest in a gimbal to achieve fluid motion in your tracking or panning shots.
    • Tripods: Use a sturdy tripod for static shots or slow pans.
    • Handheld Stability: If shooting handheld, use your camera strap for extra support and keep your movements slow and deliberate.

    Use Shallow Depth of Field

    A shallow depth of field creates a blurred background, drawing focus to your subject and adding a cinematic feel.

    • Wide Aperture: Use lenses with a wide aperture (like f/1.8 or f/2.8) to achieve this effect.
    • Distance: Increase the distance between your subject and the background to enhance the blur.
    • Manual Focus: Focus manually for precise control over the area in focus.

    Master Camera Movements

    Dynamic camera movements enhance the storytelling aspect of your video. Some effective movements include:

    • Dolly In/Out: Move the camera closer or farther from the subject for an engaging visual effect.
    • Pan and Tilt: Slowly rotate the camera horizontally (pan) or vertically (tilt) to reveal your subject.
    • Tracking Shots: Follow your subject with a steady camera for an immersive experience.
    • Crane or Jib Shots: Use a crane or simulate this movement to achieve dramatic, sweeping shots.

    Capture High-Quality Audio

    While visuals are important, poor audio quality can distract from the cinematic experience.

    • External Microphones: Use a shotgun mic or Lavalier microphone to capture crisp sound.
    • Ambient Sound: Record natural sounds in the environment to layer over your footage.
    • Post-Processing: Clean up audio using editing software to remove noise and enhance clarity.

    Shoot in Log or Flat Profile

    Shooting in a log or flat profile retains more detail in highlights and shadows, making it easier to color grade during post-production.

    • Why Use Log Profiles?: Log footage is less saturated and has lower contrast, giving you more control when editing.
    • Examples: Most modern cameras and drones offer log profiles like S-Log (Sony) or D-Log (DJI).

    Focus on Storytelling

    Every cinematic video needs a compelling narrative. Before you start shooting, plan your shots with a clear story in mind.

    • Visual Storyboarding: Sketch or list out the scenes you want to capture.
    • Establishing Shots: Use wide-angle shots to set the scene or mood.
    • Character Focus: Highlight emotions or actions to engage your audience.

    Use Color Grading

    Color grading can dramatically enhance the mood of your video.

    • Warm Tones: Use for happy, nostalgic, or romantic scenes.
    • Cool Tones: Apply for somber or suspenseful moments.
    • Consistency: Maintain a consistent color palette throughout the video for a cohesive look.

    Slow Motion and Time-Lapse Effects

    Adding creative effects like slow motion or time lapse can make your video stand out.

    • Slow Motion: Use a high frame rate (60 fps or higher) to capture smooth slow-motion footage.
    • Time-Lapse: Set up your camera on a tripod and take sequential shots to create a time-lapse effect.

    Edit Like a Pro

    Post-production is where cinematic magic happens. Use editing software to polish your footage.

    • Cut to the Beat: Sync your edits with the rhythm of your music.
    • Transitions: Use subtle transitions like fades or dissolves for a smooth flow.
    • Enhance with Music: Choose music that complements the mood of your video.

    Frequently Asked Questions (FAQs)

    Can I create cinematic videos with a smartphone?

    Yes! Many smartphones have powerful cameras that can shoot high-quality videos. Use accessories like a gimbal for stabilization and apps for manual control over settings like exposure and focus.

    What is the best frame rate for cinematic videos?

    Most cinematic videos are shot at 24 fps (frames per second), which replicates the natural motion seen in movies. For slow-motion shots, use a higher frame rate like 60 fps or 120 fps.

    Do I need expensive gear for cinematic videos?

    Not necessarily. While professional cameras and lenses help, understanding composition, lighting, and editing techniques is more important. Even budget gear can produce stunning results with the right skills.

    What is color grading, and how does it differ from color correction?

    • Color Correction: Adjusts footage to look natural and balanced.
    • Color Grading: Enhances mood and style by altering tones and colors to match a specific aesthetic.

    How can I improve my storytelling in videos?

    Focus on the emotional core of your story. Use a combination of wide shots for context, medium shots for actions, and close-ups for emotions to engage viewers.

    CHECK THESE OUT:

    Advanced Camera Techniques Every Photographer Should Know

    Here’s How I Use Nikon Camera Control Pro 2 to Its Full Potential

    Best Cheap Camera with Wi-Fi for Beginners and Amateurs

    Everything You Need to Know About the Panasonic Lumix ZS70

  • Camera Maintenance Tips you Need to Know

    Camera Maintenance Tips you Need to Know

    A camera is a significant investment, whether you’re a hobbyist or a professional photographer. Proper care and maintenance are essential to ensure your camera lasts for years and delivers top-quality performance.

    Camera Maintenance Tips You Need to Know
    Camera Maintenance Tips You Need to Know

    Neglecting your camera’s upkeep can lead to issues like lens scratches, sensor dust, or malfunctioning buttons, which can be costly to repair. In this guide, we’ll walk you through detailed camera maintenance tips you need to know to keep your gear in perfect condition.

    Why Camera Maintenance Is Important

    Your camera is made up of delicate components, including lenses, sensors, and electronic parts, all of which require proper handling. Here’s why maintenance is critical:

    • Longevity: Regular upkeep ensures your camera functions well over its lifespan.
    • Image Quality: Clean sensors and lenses lead to sharper, higher-quality images.
    • Cost Savings: Preventive maintenance minimizes the need for expensive repairs.
    • Reliability: A well-maintained camera performs consistently, reducing the chances of failure during important shoots.

    Camera Maintenance Tips You Need to Know

    Clean Your Camera Lens Regularly

    The lens is one of the most critical parts of your camera, and it’s prone to collecting dust, smudges, and fingerprints.

    Steps for Lens Cleaning:

    • Use a Lens Blower: Begin by using an air blower to remove loose dust particles. Avoid blowing with your mouth, as saliva droplets can damage the lens.
    • Lens Brush: For stubborn particles, gently use a soft-bristled lens brush.
    • Microfiber Cloth: Wipe the lens surface using a clean, lint-free microfiber cloth.
    • Lens Cleaning Solution: If smudges persist, apply a small amount of lens cleaning solution to the cloth and clean in circular motions.

    Tips:

    • Never use tissue paper, as it can scratch the lens.
    • Keep a lens cap on when the camera is not in use to prevent scratches and dust accumulation.

    Protect the Camera Sensor

    The sensor is the heart of your camera, capturing light to create images. A dirty sensor can lead to spots or blotches in your photos, especially in clear skies or light backgrounds.

    How to Keep the Sensor Clean:

    • Use the Camera’s Cleaning Mode: Most modern cameras have a sensor cleaning function. Activate this feature to shake off the dust.
    • Air Blower: Use a specialized air blower to remove visible dust. Avoid canned air, as it can leave a residue.
    • Sensor Swabs: For stubborn spots, use a sensor cleaning swab and a cleaning solution specifically designed for sensors.

    Precautions:

    • Always turn off the camera before cleaning the sensor.
    • Avoid touching the sensor with your fingers, as oils can cause permanent damage.
    • If you’re uncomfortable cleaning the sensor, take it to a professional service center.

    Store Your Camera Properly

    Proper storage prevents dust, moisture, and accidental damage. Invest in a safe and clean space for your camera when it’s not in use.

    Storage Tips:

    • Use a Camera Bag: Store your camera in a padded, weather-resistant bag designed for photography equipment.
    • Silica Gel Packs: Place silica gel packs inside the bag to absorb moisture and prevent mold.
    • Temperature Control: Keep your camera in a cool, dry environment, away from direct sunlight and extreme temperatures.
    • Lens and Body Caps: Always use caps to protect the lens and camera mount.

    Avoid Moisture and Humidity

    Moisture is a camera’s worst enemy, as it can lead to fungus growth on lenses and corrosion of electronic components.

    How to Protect Against Moisture

    • Use a weather-resistant camera: If you frequently shoot outdoors, consider investing in a weather-sealed camera.
    • Waterproof Covers: Use rain covers to shield your camera from water during outdoor shoots.
    • Dry Boxes: Store your camera in a dry box with humidity control to protect against long-term exposure to moisture.

    Handle Batteries with Care

    The battery is a vital component of your camera. Improper handling can lead to reduced battery life or malfunction.

    Battery Maintenance Tips:

    • Use Original Batteries: Always use manufacturer-approved batteries to ensure compatibility.
    • Avoid Overcharging: Unplug the charger once the battery is fully charged to prevent overheating.
    • Store Batteries Properly: If you’re not using your camera for an extended period, remove the battery and store it in a cool, dry place.
    • Carry Spares: Always have a spare, fully charged battery when shooting to avoid interruptions.

    Keep Your Memory Card Safe

    Memory cards store your precious photos and videos, so handling them carefully is crucial.

    Tips for Memory Card Maintenance:

    • Eject Properly: Always turn off the camera before removing the memory card to avoid data corruption.
    • Store in a Case: Use a memory card case to protect against physical damage.
    • Format Regularly: Format the card in the camera after transferring files to keep it functioning smoothly.
    • Avoid filling to capacity: Leave some space on the card to prevent performance issues.

    Update Camera Firmware

    Manufacturers often release firmware updates to improve camera performance or fix bugs.

    How to Update Firmware:

    • Check the manufacturer’s website for the latest firmware version.
    • Download the update and follow the instructions provided.
    • Ensure the camera battery is fully charged before starting the update process.

    Check Buttons, Dials, and Ports

    Over time, buttons and dials can become sticky or unresponsive, and ports can collect dust.

    Maintenance Steps:

    • Clean with a Soft Brush: Use a dry brush to remove debris from buttons and dials.
    • Inspect Ports: Check USB, HDMI, and other ports for dust and clean them gently with compressed air or a soft cloth.

    Use a Strap for Protection

    A camera strap can prevent accidental drops, which can cause severe damage.

    Tips for Using a Strap:

    • Choose a sturdy, comfortable strap designed for your camera’s weight.
    • Adjust the strap length for secure handling.
    • Consider wrist straps for smaller cameras.

    Schedule Professional Servicing

    While regular maintenance can handle most issues, some tasks are best left to professionals.

    When to Seek Professional Help:

    • Persistent spots on the sensor after cleaning.
    • Malfunctioning buttons or dials.
    • Unusual noises from the lens or body.
    • Any damage from drops or water exposure.

    Typical Errors in Camera Maintenance to Avoid

    • Using Harsh Chemicals: Always use products specifically designed for camera cleaning.
    • Skipping Lens Caps: Leaving the lens exposed invites scratches and dirt.
    • Ignoring firmware updates: Outdated firmware can lead to performance issues.
    • DIY Repairs: Attempting repairs without expertise can worsen the problem.
    • Storing in Damp Conditions: Moisture is a leading cause of camera damage.

    Creating a Maintenance Schedule

    Maintaining a consistent routine ensures your camera stays in optimal condition. Here’s a sample schedule:

    Frequency Maintenance Task
    After Every Shoot Clean the lens and body. Remove dust.
    Weekly Check the sensor and memory card.
    Monthly Inspect buttons, dials, and ports.
    Annually Schedule professional servicing.


    Conclusion

    Proper care and maintenance of your camera are essential for ensuring it delivers the best performance and lasts a long time. From cleaning the lens to storing the camera correctly, following these camera maintenance tips you need to know will save you money and headaches in the long run. Always handle your gear with care, stay consistent with maintenance, and address issues promptly.

    By investing time in upkeep, your camera will continue to capture stunning images and videos, allowing you to focus on what truly matters: your creative vision. Start implementing these tips today to keep your photography equipment in top shape!

    CHECK THESE OUT:

    Advanced Camera Techniques Every Photographer Should Know

    Here’s How I Use Nikon Camera Control Pro 2 to Its Full Potential

    Best Cheap Camera with Wi-Fi for Beginners and Amateurs

    Everything You Need to Know About the Panasonic Lumix ZS70

  • How to Use Maps on Google Pixel Watch

    How to Use Maps on Google Pixel Watch

    The Google Pixel Watch is a powerful smartwatch packed with features to make your life easier, including Google Maps. Knowing how to use Maps on Google Pixel Watch can help you navigate efficiently, whether you’re walking, driving, or biking. With turn-by-turn directions and a seamless connection to your phone, the Pixel Watch ensures you never get lost.

    How to Use Maps on Google Pixel Watch
    How to Use Maps on Google Pixel Watch

    If you’re looking for a step-by-step guide, you’re in the right place. Plus, you can watch a detailed tutorial on the MobileTechJoint YouTube channel for additional support.

    Why Use Maps on Google Pixel Watch?

    Using Maps on your Pixel Watch is a convenient way to stay on track without constantly checking your phone. Here’s why it’s useful:

    • Hands-Free Navigation: Get directions directly on your wrist while keeping your hands free.
    • Turn-by-Turn Assistance: Clear instructions make it easy to follow the route.
    • Activity-Based Navigation: Perfect for walking, biking, or driving.
    • Quick Access: With a single press, access Google Maps and start navigating instantly.

    What You Need to Use Maps on Google Pixel Watch

    Before you begin, ensure the following:

    • Internet Connection: Your Pixel Watch must be connected to the internet via WiFi, LTE, or Bluetooth through your smartphone.
    • Google Account: Ensure you’re signed in to your Google account on the watch.
    • Google Maps App Installed: Google Maps comes pre-installed, but ensure it’s up to date.

    How to Use Maps on Google Pixel Watch

    Without further ado, let’s dive into the procedure of using maps on your Google Pixel watch:

    Before launching Maps, confirm that your Pixel Watch is connected to the internet:

    • Open the Settings on your watch.
    • Go to Connections and ensure you’re connected to a WiFi network or paired with your phone via Bluetooth.
    • Press the side button on your Pixel Watch to access the app list.
    • Scroll through the apps until you find Google Maps.
    • Tap on the Maps icon to open the app.
    • Once Maps is open, use the interface to search for your destination.

    Options may include:

    • Selecting a recent location.
    • Using voice commands (if enabled) to say your destination.

    After selecting your destination, choose the appropriate navigation mode:

    • Walking: Provides step-by-step directions optimized for pedestrians.
    • Driving: Displays the best driving route with real-time updates.
    • Biking: Offers bike-friendly routes.

    Once navigation starts, your watch will display turn-by-turn directions on the screen. You’ll receive vibration alerts for upcoming turns or changes in the route. If you’re using your Pixel Watch with Bluetooth headphones, voice prompts will also guide you.

    Tips for Using Maps on Google Pixel Watch

    • Enable Location Services:
      Ensure location tracking is turned on in your Pixel Watch settings for accurate directions.
    • Save Battery:
      Using Maps can drain your watch’s battery. Connect to WiFi or your phone instead of LTE for longer battery life.
    • Preload Maps:
      If you’re heading to an area with poor connectivity, preload your route on your phone’s Google Maps app for seamless navigation.
    • Update Apps Regularly:
      Keep Google Maps updated to access the latest features and improvements.

    Frequently Asked Questions

    Can I use Maps on Pixel Watch without a phone?

    Yes, if your Pixel Watch has LTE or is connected to WiFi. Otherwise, it relies on your phone for internet and GPS.

    How do I search for places on my watch?

    You can search using recent destinations or voice commands. For more complex searches, start navigation on your phone and transfer it to the watch.

    Can I get walking or biking directions on my watch?

    Yes, Google Maps supports walking and biking navigation, providing optimized routes for these activities.

    Does using Maps on the watch drain the battery?

    Yes, navigation consumes battery power. To minimize usage, lower the screen brightness and connect to WiFi instead of LTE.

    How do I stop navigation on my Pixel Watch?

    Tap the screen during navigation and select the Stop option to end the route.

    CHECK THESE OUT:

  • How to Connect Samsung Galaxy Watch 5 Pro to Wi-Fi

    How to Connect Samsung Galaxy Watch 5 Pro to Wi-Fi

    The Samsung Galaxy Watch 5 Pro is a feature-rich smartwatch that provides a seamless experience with Wi-Fi. Connecting to a Wi-Fi network is essential for downloading apps, updating software, and exploring features without needing your smartphone.

    How to Connect Samsung Galaxy Watch 5 Pro to Wi-Fi
    How to Connect Samsung Galaxy Watch 5 Pro to Wi-Fi

    Buy Samsung Galaxy Watch 5 Pro at Amazon


    In this article, we’ll walk you through the simple steps to connect the Samsung Galaxy Watch 5 Pro to WiFi so that you can get the most out of your device. For a more detailed explanation, don’t forget to check out the video tutorial on the MobileTechJoint YouTube channel

    Why Connect Your Samsung Galaxy Watch 5 Pro to WiFi?

    Connecting your Galaxy Watch 5 Pro to WiFi has several benefits:

    • Independence from Your Phone: Enjoy online features without needing your smartphone nearby.
    • Faster App Downloads: Directly download apps and updates to your watch over WiFi.
    • Improved Functionality: Access cloud-based apps and services, including messaging and health tracking, seamlessly.

    How to Connect Samsung Galaxy Watch 5 Pro to Wi-Fi

    Now that you know the benefits of why you should connect your Samsung Galaxy Watch 5 pro to Wi-Fi, let’s dive into the process:

    • Swipe down from the top of your Galaxy Watch 5 Pro screen to open the Quick Settings panel.
    • Tap the Settings gear icon to access the main settings menu.
    • In the Settings menu, scroll down and tap Connections.
    • This section contains all the connectivity options for your watch, including WiFi, Bluetooth, and more.
    • Tap WiFi from the Connections menu.
    • Toggle the switch to turn WiFi on if it’s not already enabled.
    • Once WiFi is turned on, scroll down to the option that says Add Networks and tap it.
    • Your Galaxy Watch 5 Pro will scan for available WiFi networks.
    • Locate your WiFi network from the list of available options.
    • Tap on your network to proceed.
    • A text field will appear for you to enter your WiFi password.
    • Tap the Password option, then use the on-screen keyboard to enter the password.
    • You’ll see a confirmation message indicating that your Galaxy Watch 5 Pro is successfully connected to the WiFi network.
    • The connected network will appear under the WiFi section in the settings.

    Troubleshooting Tips

    If you encounter any issues while connecting to WiFi, try these solutions:

    • Double-check the Password: Ensure you’ve entered the correct WiFi password.
    • Restart Your Watch: A simple restart can resolve minor connectivity issues.
    • Move Closer to the Router: Ensure your watch is within range of the WiFi signal.
    • Reset Network Settings: Go to Settings > General > Reset > Reset Network Settings and reconnect.

    Frequently Asked Questions

    Can I connect my Galaxy Watch 5 Pro to any WiFi network?

    You can connect to most 2.4 GHz and 5 GHz WiFi networks that don’t require additional browser-based authentication (like some public hotspots).

    Do I need WiFi to use my Galaxy Watch 5 Pro?

    No, many features work via Bluetooth or LTE (if supported). However, WiFi enhances functionality by allowing you to use apps and services without your phone nearby.

    How do I forget a WiFi network on my watch?

    • Go to Settings > Connections > WiFi.
    • Select the network you want to forget.
    • Tap Forget Network to remove it from the saved list.

    Why is my Galaxy Watch 5 Pro not connecting to WiFi?

    This could be due to:

    • Incorrect password.
    • Weak signal strength.
    • Network compatibility issues.
      Restart your watch or reset your network settings if the issue persists.

    Can I connect my watch to a hidden WiFi network?

    Yes, you can manually add a hidden network by selecting Add Network and entering the network name and password.

    Don’t forget to check out the video tutorial on the MobileTechJoint YouTube channel

    CHECK THESE OUT:

  • How to Share a Calendar on iPhone

    How to Share a Calendar on iPhone

    Sharing a calendar on your iPhone is a great way to keep friends, family, or coworkers in sync with important events and schedules. Whether you’re coordinating a family holiday, managing a work project, or planning a group event, the iPhone Calendar app makes it easy to share events directly from your device.

    How to Share a Calendar on iPhone
    How to Share a Calendar on iPhone

    In this article, we’ll cover how to share your calendar with others using simple steps. If you’d like to see a video tutorial, check out MobileTechJoint on YouTube, where you’ll find a visual tutorial to help.

     How to Share a Calendar on iPhone

    The iPhone’s built-in Calendar app allows you to share entire calendars with others, giving them real-time access to updates and new events. Here’s how to do it:

    Open the Calendar App

    • Launch the Calendar app from your home screen. Ensure you are connected to the internet, as this will help you sync your calendar and ensure the person you invite receives it.

    Select the Calendar You Want to Share

    • At the bottom of the screen, tap on the “Calendars” button. You’ll see a list of all your calendars, including those synced with iCloud, Google, and other services.

    Tap on the Info (i) Icon Next to the Calendar

    • Find the calendar you’d like to share and tap on the “i” icon next to it. This will open a settings menu for that specific calendar, where you can adjust sharing permissions.

    Click “Add Person”

    • Scroll down in the settings menu until you see the option to “Add Person.” This allows you to invite someone to access your calendar.

    Enter the Email of the Person You Want to Share With

    • Type in the email address of the person you want to share the calendar with. Be sure to use the email associated with their Apple ID, if possible, as this will make it easier for them to access the shared calendar.

    Tap “Add” at the Top of the Screen

    • Once you’ve entered the email address, tap “Add” at the top right corner of the screen. This will send an invitation to the person to join your calendar. They’ll receive an email invitation and a notification on their iPhone or iPad.

    Set Permissions for the Invited Person

    • By default, the people you invite can only view the events on your calendar. If you’d like them to make changes to events or add new ones, go to the calendar’s settings again, tap on their name, and toggle on the “Allow Editing” option.

    Why Share a Calendar on Your iPhone?

    Sharing a calendar on your iPhone allows you to stay organized, informed, and in sync with others. Here are some reasons you might want to share a calendar:

    • Coordinating Work Schedules: Share a calendar with colleagues to manage meetings, deadlines, and project timelines.
    • Planning Events: Set up a shared calendar for birthdays, anniversaries, or other celebrations to ensure everyone knows the important dates.
    • Family Management: Create a family calendar for school activities, doctor appointments, and family events so everyone is aware of the upcoming schedule.

    Troubleshooting Tips for Sharing Calendars

    If you run into issues while sharing your calendar, here are a few troubleshooting steps:

    • Check Your Internet Connection: A stable internet connection is required for syncing and sharing calendars.
    • Ensure Correct Email Address: Double-check that the email address you entered is correct.
    • Use iCloud: For seamless sharing, make sure the calendar is saved in iCloud. Third-party calendars may not support sharing as smoothly.
    • Update iOS: Running the latest iOS version can ensure compatibility and reduce issues with Calendar app functions.

    Frequently Asked Questions

    Can I share a calendar with someone who doesn’t use an iPhone?

    Yes, if the person uses another device, they may still view your calendar events by accepting the invitation via email and accessing it through a web browser.

    Can I share more than one calendar at a time?

    Yes, you can share multiple calendars with different people. Just repeat the steps above for each calendar you want to share.

    How can I stop sharing a calendar?

    To stop sharing, go to the calendar’s info screen, tap on the person’s name, and select “Stop Sharing.”

    Can I control what the other person can do with the calendar?

    Yes, you can set permissions to control whether the person can only view the calendar or make edits as well. Just go to the calendar’s settings and update their permissions accordingly.

    What happens if someone declines my calendar invitation?

    If the person declines, you’ll receive a notification. You can try re-sending the invitation if they change their mind.

    CHECK THESE OUT:

    iPhone 16 Pro Max Ultra

    I Use These iPhone 16 Pro Hidden Features to Get More Done Every Day

    Why I Buy the iPhone 16 Anyway Despite the Mixed Opinions

    AirPods Max Not Connecting to Your iPhone? Here’s How to Fixed It in 5…

    5 Problems Everyone Has With Apple iPhone 16

  • How to Update your iPhone to iOS 18

    How to Update your iPhone to iOS 18

    Updating your iPhone to the latest iOS 18 is an exciting step that allows you to enjoy new features, improved performance, and enhanced security. Apple makes the update process simple, but it can be confusing for first-time users or those who aren’t tech-savvy.

    How to Update Your iPhone to iOS 18
    How to Update Your iPhone to iOS 18

    This article will walk you through the process in simple steps, ensuring a hassle-free experience. Plus, if you’re a visual learner, don’t forget to check out the video tutorial on the MobileTechJoint YouTube Channel for a complete walkthrough.

    Why Update to iOS 18?

    iOS 18 introduces many innovative features like improved AI capabilities, enhanced privacy settings, and smoother overall performance. Beyond the flashy new tools, updates like iOS 18 also ensure your device remains secure with the latest bug fixes and security patches. Keeping your iPhone updated is essential to get the best performance out of your device.

    How to Update Your iPhone to iOS 18

    Back-Up Your iPhone

    Before starting, it’s a good idea to back up your data. This ensures you won’t lose important files or photos if something goes wrong during the update.

    iCloud Backup procedure

    • Open the Settings app.
    • Tap your name at the top and select iCloud.
    • Scroll down and tap iCloud Backup.
    • Select Back Up Now and wait for the process to complete.

    Connect to Wi-Fi and Charge Your iPhone

    Make sure your iPhone is connected to a stable Wi-Fi network and has at least 50% battery. If possible, keep your device plugged in to avoid interruptions.

    Access the Software Update Settings

    • Open the Settings app on your iPhone.
    • Scroll down and tap General.
    • Select Software Update.

    Your iPhone will now check for available updates. Wait for it to load and display the iOS 18 update.

    Begin the Update Process

    • When the iOS 18 update appears, tap on Download and Install.
    • If prompted, enter your iPhone passcode to proceed.

    Agree to Terms and Conditions

    You’ll see Apple’s terms and conditions. Read through them (or skim if you’re familiar with Apple updates) and tap Agree to continue.

    Wait for the Download to Complete

    The iOS 18 update will begin downloading. The time this takes depends on your internet speed and the size of the update. During this process:

    • Avoid using your phone for large tasks.
    • Keep it connected to Wi-Fi and power.

    Install the Update

    Once the download is complete, tap Install Now.

    • Your phone will restart during the installation.
    • A progress bar will appear, showing the update’s installation status.

    Set Up After Installation

    After your iPhone restarts, you may be prompted to enter your passcode and set up new features. Follow the on-screen instructions to complete the setup. Congratulations! Your iPhone is now running iOS 18.

    Frequently Asked Questions (FAQs)

    Can I update my iPhone without Wi-Fi?

    No, a stable Wi-Fi connection is required to download the update. Due to the large file size, mobile data isn’t supported for iOS updates.

    What if I don’t have enough storage space for the update?

    If you see a message about insufficient storage:

    • Delete unused apps, photos, or videos to free up space.
    • Alternatively, use a computer to update via Finder or iTunes without needing additional space on your iPhone.

    My iPhone is stuck during the update. What should I do?

    If your update gets stuck:

    • Ensure your device is still connected to power and Wi-Fi.
    • Force restarts your iPhone by holding down the power and volume buttons until the Apple logo appears.
    • If the problem persists, try updating through iTunes or Finder.

    How do I know my iPhone is compatible with iOS 18?

    Apple typically lists compatible devices on its website. As a general rule, devices from the past five years are likely supported. Check your model in Settings > General > About.

    Can I downgrade if I don’t like iOS 18?

    Yes, but it’s a complex process and only possible for a limited time after the update. You’ll need to restore your iPhone to a previous version using iTunes or Finder.

    Watch the Video Tutorial!

    For a more detailed walkthrough, watch the How to Update Your iPhone to iOS 18 video on the YouTube channel. The video provides visuals to help you understand each step and troubleshoot common issues. Enjoy your upgraded iPhone!

    CHECK THESE OUT:

    5 Problems Everyone Has With Apple iPhone 16

    Apple iPhone 16 Pro Max – Do Size Really Matter?

    AirPods Max Not Connecting to Your iPhone? Here’s How to Fixed It in 5…

    Is Apple making an iPhone 16 Ultra? Here is Everything we Know

  • How to Mirror your Phone Screen to TV

    How to Mirror your Phone Screen to TV

    Mirroring your phone screen to a TV is an easy way to enjoy content like photos, videos, and games on a larger display. With screen mirroring, you can duplicate your smartphone’s display directly on your TV, which is perfect for presentations, watching shows, or even casual gaming.

    Mirror Your Phone Screen to TV
    How to Mirror Your Phone Screen to TV

    In this article, we’ll explore the steps to mirror your phone to your TV, as well as common questions. Plus, for a visual tutorial, you can check out the video on our YouTube channel, MobileTechJoint.

    How to Mirror Your Phone Screen to TV

    Mirroring your phone to your TV is simple with the right setup. Here’s how to do it using a feature called Smart View, which is available on most Android devices.

    Swipe Down and Select Smart View

    • Start by swiping down from the top of your phone’s screen to open the notification panel.
    • Locate and tap on the “Smart View” icon. This feature allows your phone to search for nearby devices compatible with screen mirroring.

    Choose Your TV from the Available Devices

    • Once you activate Smart View, a list of available devices will appear. Select your TV from this list. Make sure your TV is compatible with screen mirroring and is on the same Wi-Fi network as your phone.

    Start Casting Your Screen

    • After selecting your TV, a prompt will appear on your phone screen. Tap on “Start Now” to begin mirroring your phone screen to the TV. Within moments, your phone’s display will appear on your TV screen.

    Enjoy Your Phone on the Big Screen

    • Now, anything you do on your phone will be visible on your TV, from scrolling through photos to streaming content. You can control what appears on the TV by navigating directly on your phone, and any changes will instantly reflect on your TV.

    Tips for Optimal Screen Mirroring

    • Wi-Fi Connection: Ensure your phone and TV are connected to the same Wi-Fi network for smooth and uninterrupted mirroring.
    • TV Compatibility: Some older TV models may not support Smart View. In this case, consider using a casting device like a Chromecast or an HDMI adapter.
    • Battery: Screen mirroring can consume a significant amount of battery on your phone. It’s a good idea to keep your phone charged or plugged in while casting.

    Frequently Asked Questions

    Can I mirror my phone to any TV?

    Most modern TVs, especially smart TVs, support screen mirroring. However, older models may require external devices, like Chromecast, Roku, or an HDMI adapter, to work with screen mirroring.

    Do I need Wi-Fi to mirror my phone screen to a TV?

    Yes, both your phone and TV typically need to be on the same Wi-Fi network. For devices using Chromecast or Roku, Wi-Fi is essential. Some devices, however, offer direct mirroring through Wi-Fi Direct or Bluetooth, though this is less common.

    How do I disconnect screen mirroring?

    To stop mirroring, open the Smart View menu on your phone and tap “Disconnect” or “Stop Mirroring.” You can also swipe down the notification bar and disable the mirroring feature from there.

    What if I don’t see my TV on the list of devices?

    Ensure your TV is powered on and connected to the same Wi-Fi network as your phone. Restarting your TV or reconnecting to Wi-Fi on your phone may help. Also, check that your TV has screen mirroring enabled.

    Can I mirror my iPhone to a non-Apple TV?

    Yes, but the process may vary. Many TVs have apps that support iOS mirroring, like AirScreen. Alternatively, you can use an Apple TV device to mirror directly from your iPhone.

    CHECK THESE OUT:

  • How to Use Android Phone as a TV Remote

    How to Use Android Phone as a TV Remote

    Whether you’ve misplaced your TV remote or want to streamline your devices, setting up your Android phone to control your TV is straightforward. This article covers all the steps on How to Use Android Phone as a TV Remote, including an instructional video from MobileTechJoint for added help.

    How to Use Android Phone as a TV Remote
    How to Use Android Phone as a TV Remote

    How to Use Android Phone as a TV Remote

    Using your Android phone as a remote control is a common option for people looking for easy methods to operate their TVs. This method allows you to access various features, switch channels, and control volume without needing your physical remote. Below is the step-by-step tutorial:

    Step 1: (Download a Remote-Control App from Google Play Store)

    • Start by opening the Google Play Store on your Android device. Search for “TV remote control app,” and you’ll find many options. Some popular apps include “Android TV Remote Control,” “Google Home,” or specific manufacturer apps like Samsung Smart View or LG ThinQ for branded TVs. Select a trusted app that matches your TV brand or a universal one compatible with multiple TV models.

    Step 2: (Open and Access the Remote-Control App)

    • After downloading the app, open it on your Android phone. You may need to allow certain permissions, such as access to Wi-Fi or Bluetooth, to enable the app to communicate with your TV. Accept these permissions to proceed.

    Step 3: (Connect the App to Your TV)

    • Most remote-control apps require both your TV and Android phone to be connected to the same Wi-Fi network. Ensure your TV’s Wi-Fi is enabled, then select your TV from the list of available devices displayed in the app. Some TVs may also allow Bluetooth connections if Wi-Fi is unavailable.

    Step 4: (Enter the Code from Your TV)

    • Once connected, a code may appear on your TV screen. Enter this code in the app to confirm the pairing. This step enhances security and ensures that only your device can control your TV. If your app doesn’t display a code, refer to the app’s instructions, as it may automatically pair with compatible TVs on the same network.

    Step 5: (Use Your Phone as Your TV Remote)

    • Once the setup is complete, you can start using your Android phone as your TV remote. The app’s interface usually includes options for controlling volume, channels, input sources, and playback settings.
    • Volume Control: Increase or decrease the TV’s volume directly from your phone.
    • Channel Navigation: Switch between channels with the touch of a button.
    • Input Source: Change between HDMI, AV, or other input sources if available.
    • Playback Controls: Pause, play, rewind, and fast-forward if watching videos on streaming platforms.

    Watch the Tutorial Video on YouTube

    For a visual step-by-step demonstration, visit the MobileTechJoint YouTube channel and watch the instructional video on how to set up your Android phone as a TV remote. This tutorial covers everything from downloading the app to the finished part.

    Frequently Asked Questions

    Can I use my Android phone as a remote for any TV?

    Yes, many remote-control apps work universally. However, some apps work best with specific brands. Check app details to see if your TV model is supported.

    Do I need Wi-Fi to use my phone as a remote?

    Most apps require both devices to be on the same Wi-Fi network. Some apps may offer Bluetooth or IR (infrared) functionality, but this depends on your phone’s capabilities.

    Can I control a smart TV with my Android phone?

    Yes, smart TVs generally work very well with remote-control apps. Simply download a compatible app for your smart TV brand or a universal app.

    What if my TV doesn’t appear on the list of devices?

    Ensure both your phone and TV are connected to the same Wi-Fi network. Restarting your router, TV, or phone can sometimes help, or check if your TV settings allow remote connections.

    Can I control multiple TVs with the same app?

    Most apps allow you to switch between different devices, so if you have multiple TVs connected to the same network, you can select the TV you want to control.

    CHECK THESE OUT:

  • How to Turn Off App Notification on iPhone 15 Pro

    How to Turn Off App Notification on iPhone 15 Pro

    In today’s hyper-connected world, our iPhones constantly bombard us with notifications. From social media updates to news alerts and game prompts, these digital interruptions can disrupt our focus, hinder productivity, and even contribute to feelings of anxiety. Thankfully, your iPhone 15 Pro offers a powerful tool to manage this notification overload: the ability to silence specific app notifications.

    How to Turn Off App Notification on iPhone 15 Pro
    How to Turn Off App Notification on iPhone 15 Pro

    This guide will equip you with the knowledge to turn off app notifications on your iPhone 15 Pro. We’ll explore the concept of turning off notifications, delve into the steps required to achieve this and discuss the benefits and reasons why taking control of your notifications can significantly enhance your digital well-being.

    Why Turn Off App Notifications on iPhone 15 Pro?

    While notifications can serve a purpose by keeping you informed, the constant barrage can have negative consequences.

    • Information Overload: The sheer volume of notifications can be overwhelming and make it difficult to prioritize important information.
    • Distraction and Disruption: Notifications can disrupt your workflow or concentration, hindering your ability to focus on tasks.
    • Unnecessary Stress and Anxiety: The constant feeling of needing to check your phone for notifications can contribute to feelings of stress and anxiety.
    • Reduced Sleep Quality: The blue light emitted from phone screens, particularly at night, can disrupt sleep patterns. Quieting notifications before bed allow you to unwind and prepare for restful sleep.
    • Impulse Checking: The urge to check your phone every time a notification pops up can lead to impulsive checking behaviors, impacting your ability to be present in the moment.

    By turning off unnecessary notifications, you’re not just silencing your phone; you’re creating a space for focused work, uninterrupted relaxation, and a more mindful digital experience.

    How to Turn Off App Notification on iPhone 15 Pro

    Below are the steps to take, to successfully Turn Off App Notifications on your iPhone 15 Pro.

    • First, Locate the “Settings” icon on your home screen and tap on it to launch the Settings app.
    • Then, navigate to Notifications, scroll down the Settings menu, and tap on “Notifications.”
    • Under the “Notifications” section, you’ll see a list of all apps installed on your iPhone 15 Pro. Tap on the specific app you want to adjust notification settings for.
    • Then, toggle switch at the top of the app’s notification settings controls whether the app can send any notifications at all. To completely silence notifications for this app, tap on the toggle switch to turn it off (it will turn grey).
    • Once you’ve made your desired adjustments, review the settings to ensure they reflect your preferences.

    Related: How to Use Stop Watch on iPhone 15 Pro

    Benefits of Turning Off App Notifications on iPhone 15 Pro

    Implementing selective notification control offers a multitude of benefits for your digital well-being.

    • Improved Focus and Productivity: Constant notification interruptions can derail your concentration and hinder your ability to complete tasks effectively. Silencing unnecessary notifications allows you to focus on what matters most.
    • Reduced Stress and Anxiety: The constant barrage of notifications can contribute to feelings of stress and overwhelm. Taking control of your notifications creates a sense of calm and allows you to engage with your phone on your terms.
    • Enhanced Mindfulness: By curating your notification stream, you become more mindful of how you use your phone and what information you allow to interrupt your day.
    • Better Battery Life: Disabling notifications for apps that constantly update or refresh can help conserve battery life on your iPhone 15 Pro.
    • Reduced Screen Time: Quieting unnecessary notifications can lead to you spending less time on your phone overall, promoting a healthier digital balance.

    Conclusion

    The power to manage app notifications on your iPhone 15 Pro lies at your fingertips. By following the outlined steps and understanding the benefits and motivations behind notification control, you can curate a personalized notification experience that enhances your well-being. Remember, technology should serve you, not the other way around.

    Don’t let your iPhone 15 Pro dictate your attention; take control of your notifications and reclaim your focus, peace of mind, and valuable time.

    Frequently Asked Questions (FAQs)

    Will I miss important notifications if I turn the notification off for some apps?

    It’s important to strike a balance. While silencing notifications for social media or games might be beneficial, you might want to keep them on for work apps, messaging tools, or ride-sharing services.  Consider which notifications are crucial for staying informed and adjust settings accordingly.

    Can I set different notification styles for different apps?

    Absolutely!  The beauty of notification control lies in customization. You can choose to have some apps display notifications only in your Notification Center while allowing others to appear as banners on your lock screen with sounds.

    What if I accidentally turned off notifications for an important app?

    No worries! Simply follow the same steps outlined earlier to access the app’s notification settings. This time, ensure the “Allow Notifications” toggle switch is turned on (green) and adjust the notification style preferences as desired.

    Will turning off notifications affect the functionality of the apps?

    No, turning off notifications will not impact the core functionality of the apps themselves. You’ll still be able to access and use the apps normally; you simply won’t receive alerts for updates or activity within those apps.

    For more insights on this article, check out these video tips across our social platforms:

    On Instagram

    On TikTok

  • How to Set an Alarm on iPhone 15 Pro

    How to Set an Alarm on iPhone 15 Pro

    The struggle to wake up on time is a universal experience. Hitting snooze repeatedly disrupts sleep and leads to rushed mornings. But what if your iPhone 15 Pro held the key to a more peaceful awakening? The built-in Clock app offers a user-friendly alarm system designed to transform your sleep routine.

    How to Set an Alarm on iPhone 15 Pro
    How to Set an Alarm on iPhone 15 Pro

    This guide will explore leveraging your iPhone’s alarm functionalities to establish a consistent sleep-wake cycle, ensure timely mornings, and create a personalized wake-up experience.  By mastering the Clock app, you can ditch the outdated alarm clock and embrace a new era of refreshed mornings and improved productivity.

    Why Set an Alarm on iPhone 15 Pro?

    The Alarm app on your iPhone 15 Pro is one of the best-inbuilt features on your phone. Whether you need a reliable wake-up call to ensure punctuality or a friendly reminder for an upcoming appointment, the Alarm app caters to it all. Choose from calming chimes or a jolt-you-awake tune, and customize alarms for recurring needs or one-time events.

    Some models even offer a Doze function for precious extra minutes of sleep, while the new Standby Mode on iPhone 15 Pro with Always-On Display transforms your phone into a sleek bedside clock.  The Alarm app goes beyond just waking you up, it’s your personal time management assistant, keeping you on track and helping you conquer your day.

    How to Set an Alarm on iPhone 15 Pro

    Setting an alarm on your iPhone 15 Pro is a simple and fast process, follow the steps listed below to successfully set your alarm.

    • First, Locate the “Clock” app icon on your home screen and tap on it to launch the app.
    • Then at the bottom of the screen, you’ll see several tabs. Tap on the “Alarms” tab to access the alarm settings.
    • Tap the “+” button located in the top right corner of the screen. This will open a new window for setting your alarm.
    • Use the digital clock interface to set the desired wake-up time. You can adjust hours and minutes by tapping the up or down arrows.
    • Once you’ve customized your alarm settings, tap on “Save” in the top right corner. Your new alarm will be displayed in the Alarms list.

    Read:  How to Use PANO Camera on iPhone 14 Plus

    Benefits of Setting an Alarm on iPhone 15 Pro

    There are several advantages to incorporating alarms into your sleep routine.

    • Consistent Sleep Schedule: Regularly scheduled alarms help establish a consistent sleep-wake cycle, promoting better overall sleep quality.
    • Peace of Mind: Setting an alarm eliminates the worry of oversleeping and ensures you wake up on time for important appointments or commitments.
    • Gentle Waking: The iPhone 15 Pro offers various soothing ringtones or the option to wake up to your favorite song, creating a more pleasant start to your day.
    • Improved Productivity: Waking up on time allows you to start your day efficiently, maximizing your productivity and reducing the stress of rushing in the morning.
    • Personalized Wake-Up Experience: With the ability to customize alarm sounds, labels, and snooze settings, you can tailor your wake-up experience to your preferences.

    Conclusion

    The Clock app on your iPhone 15 Pro offers a convenient and versatile way to manage your sleep schedule.  By utilizing alarms effectively, you can establish a consistent sleep-wake cycle, ensure you wake up on time, and create a more personalized and pleasant wake-up experience. Whether you’re a busy professional, a student juggling a hectic schedule, or simply someone looking to improve your sleep hygiene, incorporating alarms into your routine can be a game-changer.

    So, ditch the outdated alarm clock and embrace the user-friendly functionalities of your iPhone 15 Pro.  A good night’s sleep and a refreshed morning await!

    Frequently Asked Questions (FAQs)

    Can I increase the alarm volume instead of a sudden jolt?

    Unfortunately, the iPhone’s Clock app doesn’t currently offer a built-in feature for gradually increasing the alarm volume. However, with iOS 15 and later, you can create a “Sleep Schedule” routine that includes setting an alarm and adjusting the ringer volume to a specific level before the alarm sounds. This might create a gentler wake-up experience.

    Will the alarm still sound if my iPhone is in silent mode?

    Thankfully, alarms on iPhones prioritize sounding even when the phone is in silent mode. This ensures you wake up on time even if you forget to switch the ringer off before going to sleep.

    Should I consider using a third-party alarm app?

    While the Clock app offers a robust set of features, some third-party apps might provide additional functionalities like sleep cycle tracking, nature sounds for a more peaceful wake-up experience, or integration with smart home devices. However, for most basic alarm needs, the Clock app on your iPhone 15 Pro is a reliable and convenient solution.

    For more insights on this article, check out these video tips across our social platforms:

    On Instagram

    On TikTok