Category: Tricks/Tips

Unlock your tech’s full potential with practical hacks and tips. From speeding up your devices to mastering hidden features, simplify your digital life with our expert guidance.

  • How to Enable Dark Theme on Google Pixel 7

    How to Enable Dark Theme on Google Pixel 7

    The Google Pixel 7 boasts a stunning display, but bright interfaces can sometimes cause eye strain, especially in low-light environments.

    Enable Dark Theme on Google Pixel 7

    However, the Pixel 7 offers a built-in Dark Theme that transforms the entire user interface, menus, and supported apps into a darker color scheme.

    This not only enhances viewing comfort at night but can also potentially contribute to improved battery life. This article will guide you through enabling Dark Theme on your Google Pixel 7 and explore its benefits.

    About Dark Theme on Google Pixel 7

    Dark Theme on the Pixel 7 utilizes a dark color palette with lighter text, creating a more balanced and visually appealing interface for darker environments.

    This reduces the amount of bright light emitted from the screen, minimizing eye strain and promoting a more comfortable viewing experience.

    How to Enable Dark Theme on Google Pixel 7

    There are two primary ways to enable Dark Theme on your Pixel 7:

    Using Quick Settings

    • Swipe down twice from the top of your screen to access the full Quick Settings menu.
    • Locate the Dark Theme tile. It might resemble a drop of paint or have the text Dark theme written next to it.
    • Tap the Dark theme tile to toggle it on.
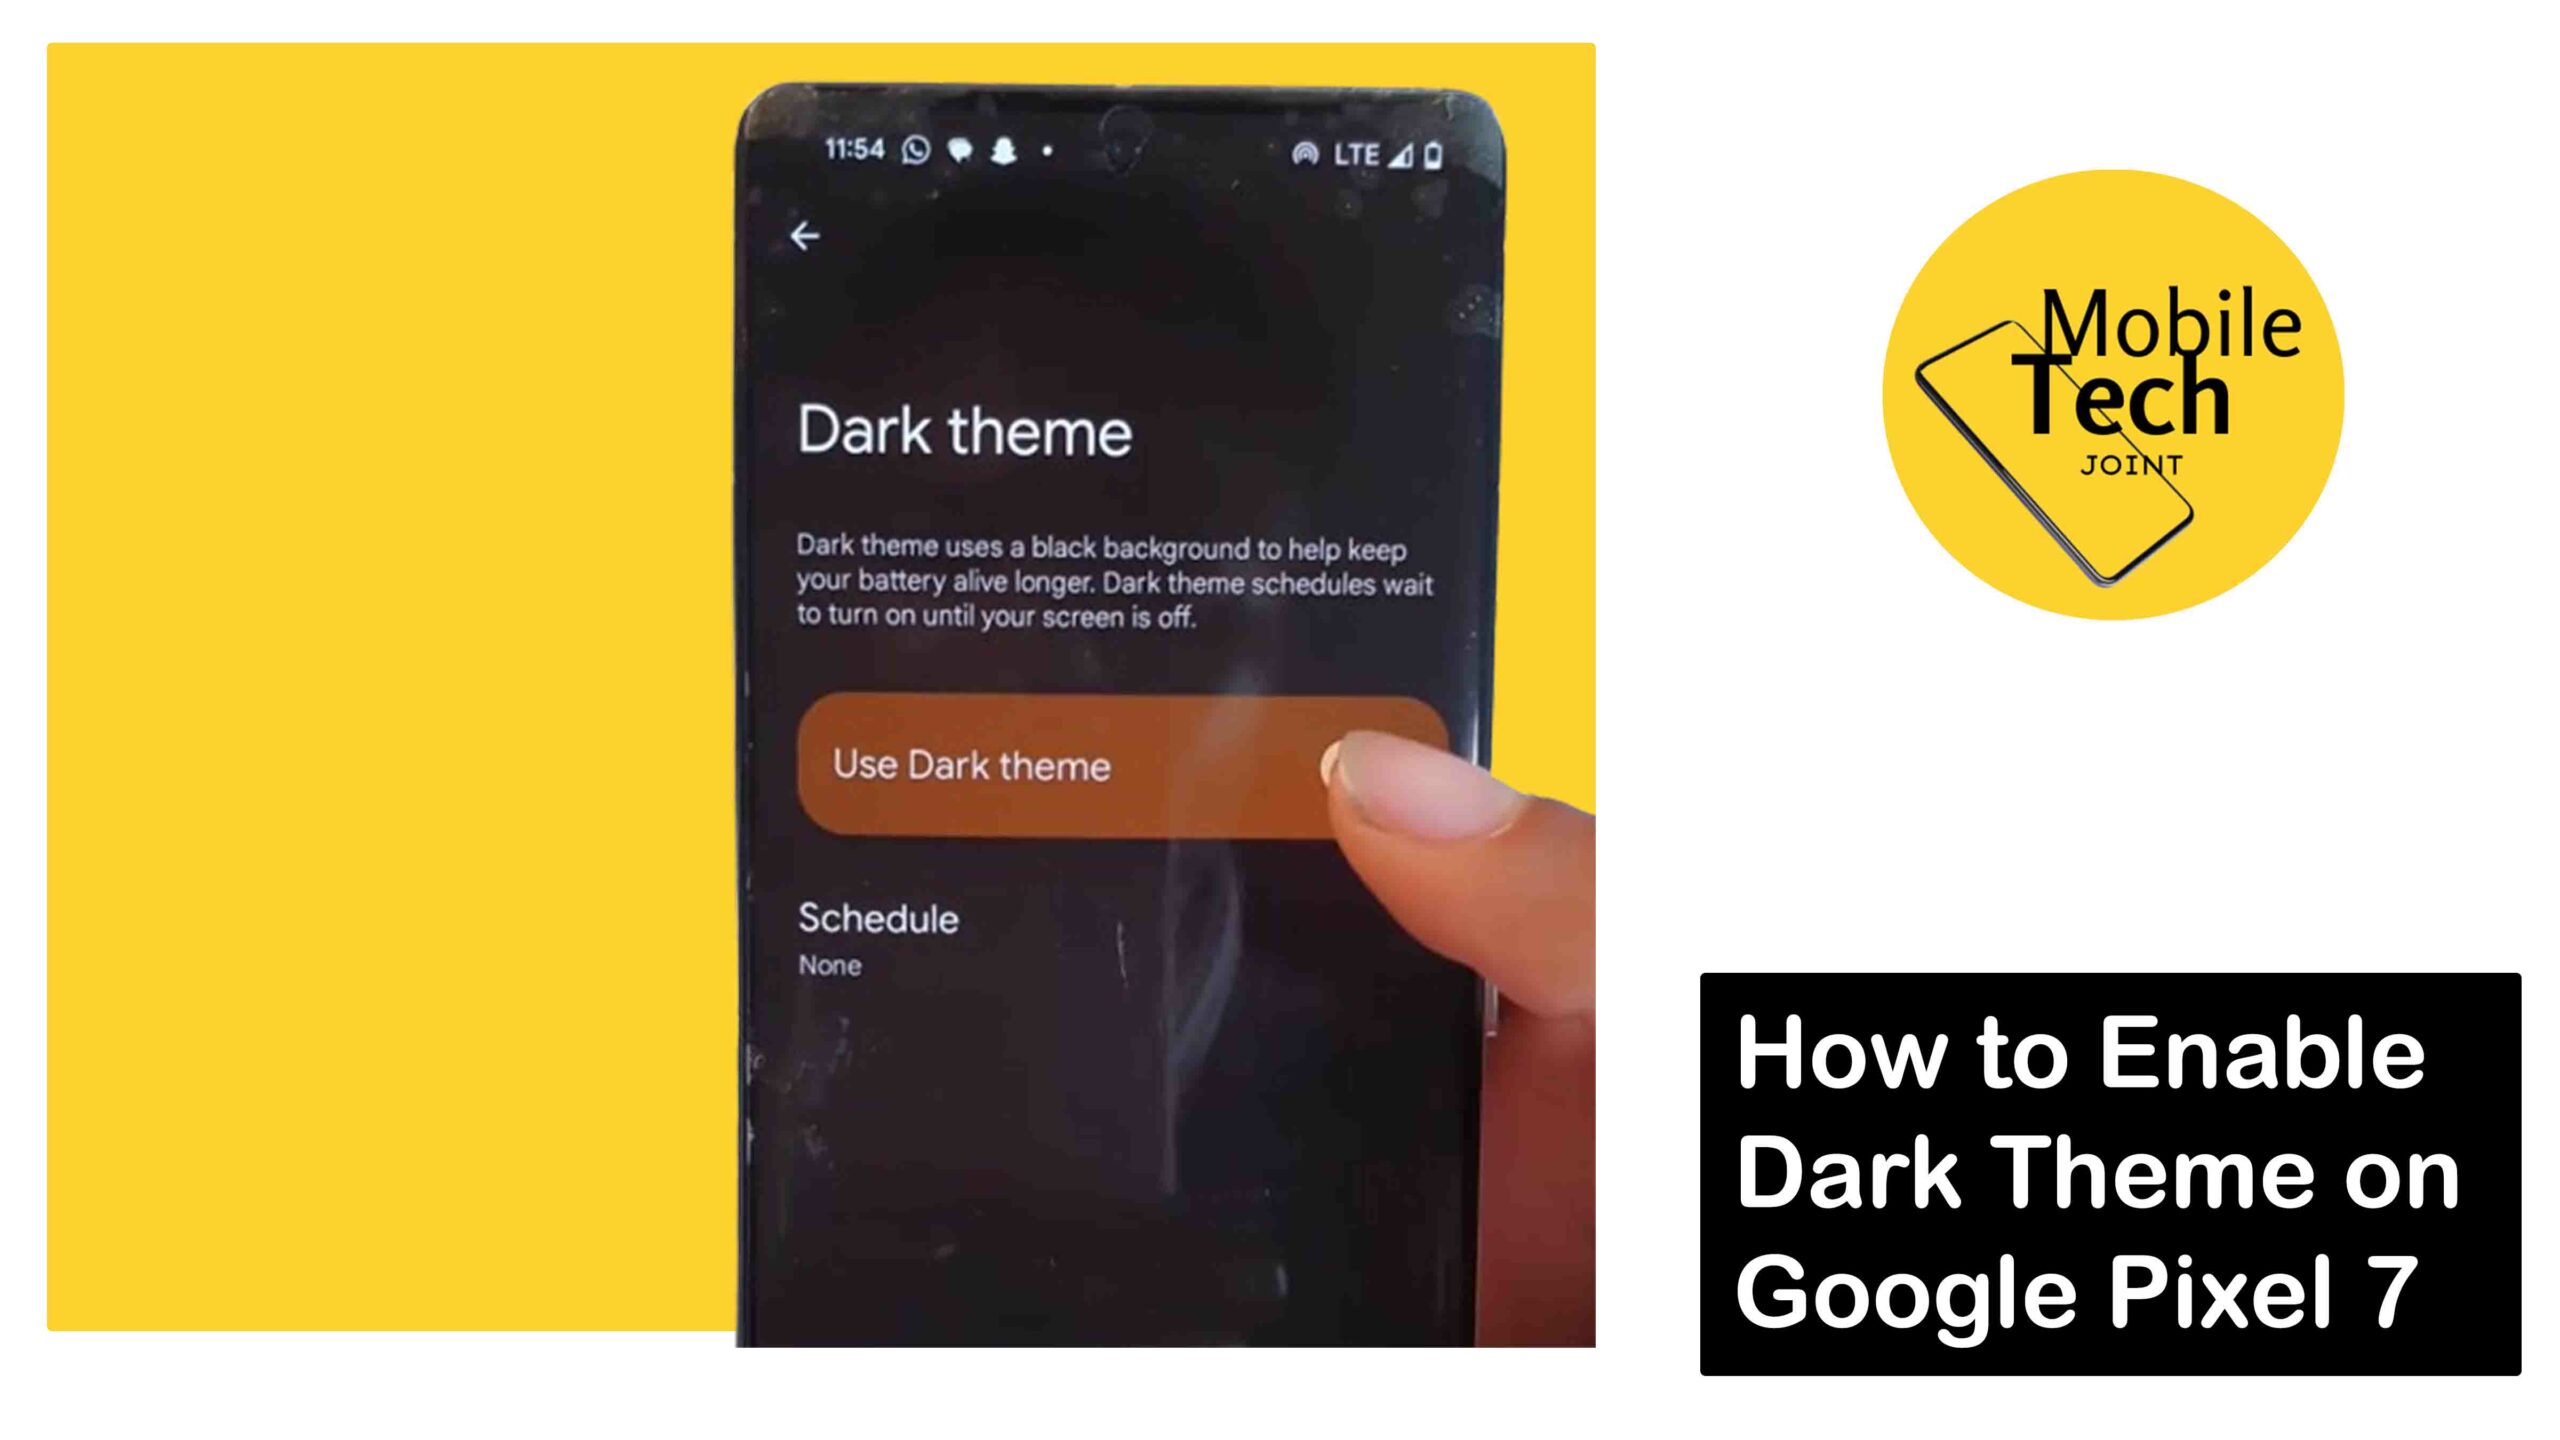
    Using Settings

    • Open the Settings app on your Pixel 7.
    • Tap on Display option.
    • Locate the Dark theme section.
    • Toggle the switch next to Dark theme to turn it on.

    Those are the steps needed to enable dark theme on your Google pixel 7.

    Benefits of Dark Theme on Google Pixel 7

    There are several advantages to enabling Dark Theme on your Pixel 7:

    • Reduced Eye Strain

    Dark Theme minimizes the amount of bright light emitted from the screen, especially at night. This can significantly reduce eye strain and fatigue, making it more comfortable to use your phone in low-light environments.

    • Improved Battery Life

    While the impact might vary depending on usage patterns, studies suggest dark themes can potentially improve battery life on OLED displays like the one found in the Pixel 7. Dark pixels consume less power compared to bright white pixels.

    • Enhanced Readability

    Dark Theme with high-contrast text can improve readability in certain situations, particularly for users with sensitivities to bright light.

    Aesthetics

    Many users simply prefer the visual appeal of a dark interface. Dark Theme can create a more modern and sleek look for your Pixel 7.

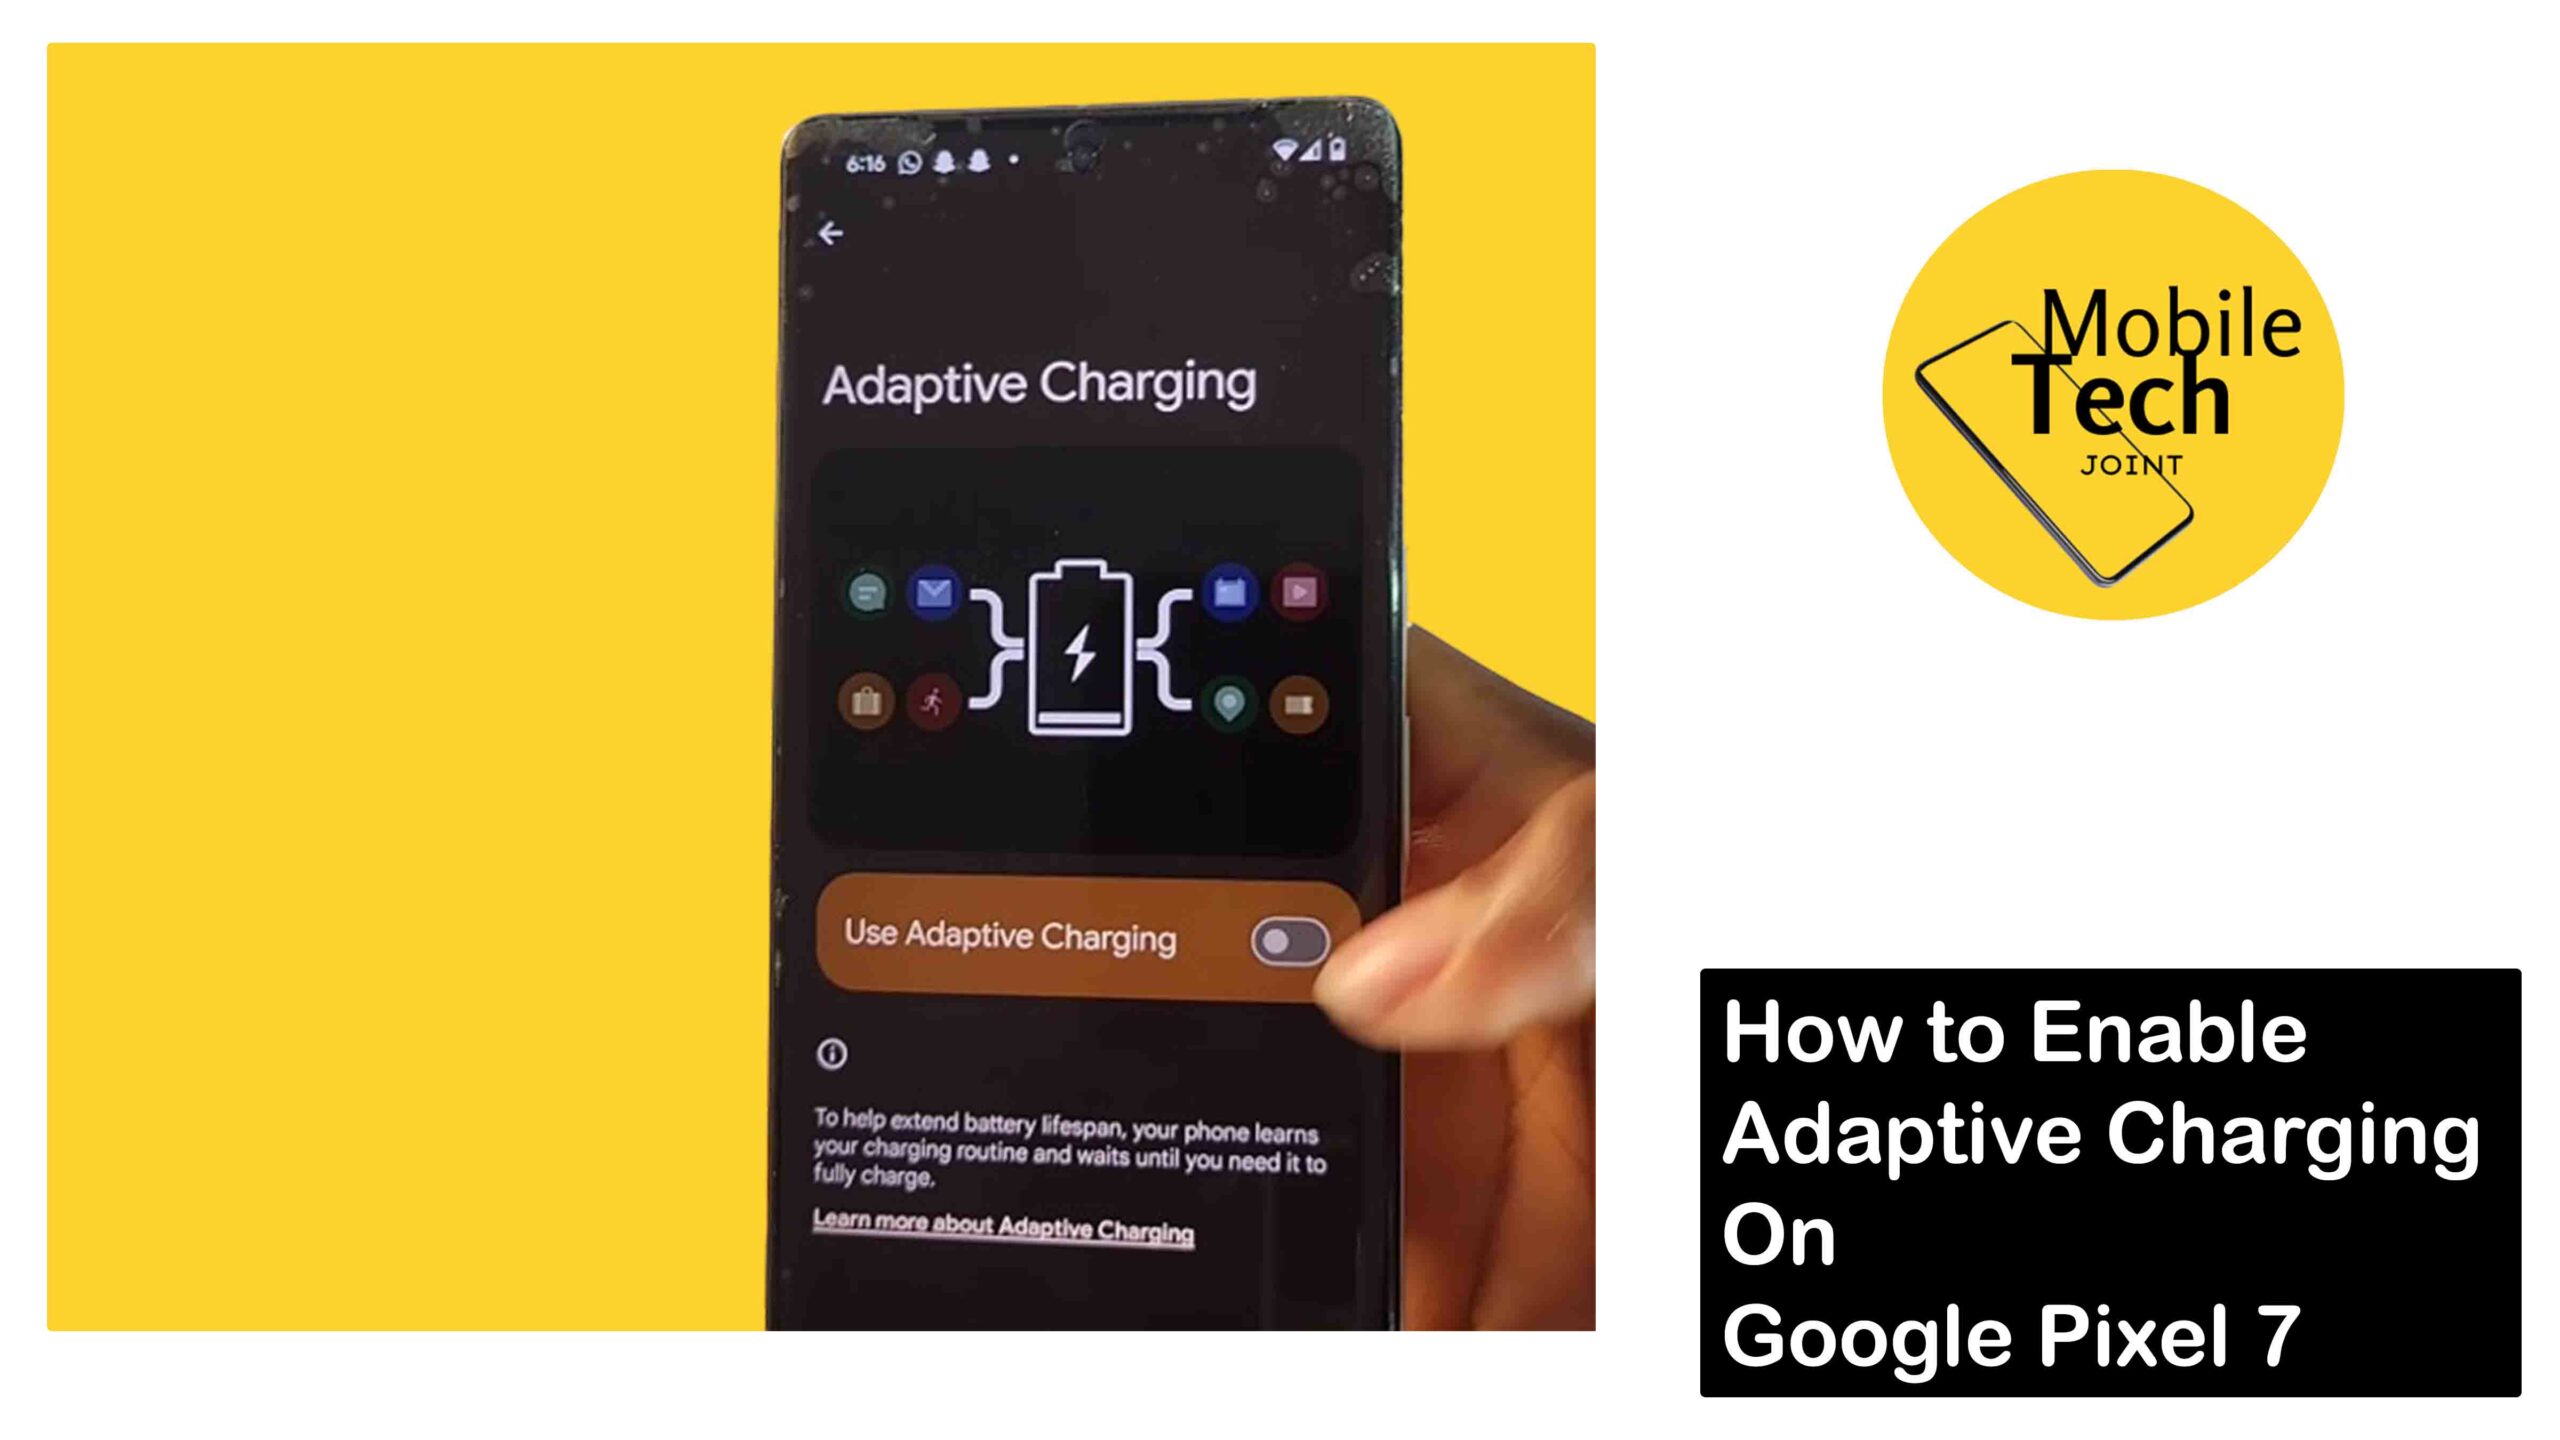
    Related:How to Enable Adaptive Charging On Google Pixel 7

    Conclusion

    Dark Theme is a valuable feature on the Google Pixel 7, offering a combination of visual comfort, potential battery savings, and a touch of aesthetic preference.

    With its ease of use and clear benefits, Dark Theme allows you to personalize your Pixel 7 experience and enjoy a more comfortable and potentially more efficient way to interact with your phone.

    Does Dark Theme Affect All Apps on my Pixel 7?

    While Dark Theme applies to the system-wide interface and many Google apps, individual app developers determine if their app supports Dark Theme. You might need to enable Dark Theme within specific apps for them to adopt the dark color scheme.

    Can I Schedule Dark Theme to Turn on and off Automatically?

    Currently, the Pixel 7 doesn’t offer built-in scheduling for Dark Theme. However, some third-party apps might provide this functionality.

    Is there a Way to Adjust the Intensity of Dark Theme?

    The Pixel 7 doesn’t offer direct control over the intensity of Dark Theme. However, some apps with built-in Dark Theme support might allow customization options.

    Does Dark Theme Make it Harder to see Certain Content?

    In rare cases, some content or images within apps might appear less visible with Dark Theme enabled.  If you encounter such situations, you can temporarily disable Dark Theme or adjust app-specific settings if available.

    Will Dark Theme Save Battery life?

    The impact of Dark Theme on battery life can vary depending on screen brightness, usage patterns, and specific phone model. While OLED displays generally benefit more from Dark Theme in terms of battery savings, the results might not be significant in all scenarios.

    For more insights on this article, check out these video tips across our social platforms:

  • How to Enable Adaptive Charging On Google Pixel 7

    How to Enable Adaptive Charging On Google Pixel 7

    The Google Pixel 7 is a powerful phone, but even the most impressive technology benefits from optimized battery management.

    One way to achieve this is through Adaptive Charging, a feature that helps extend the lifespan of your Pixel 7’s battery.

    Enable Adaptive Charging on Google Pixel 7


    By learning your charging habits, Adaptive Charging delays the final stages of charging until you typically wake up, reducing stress on the battery and potentially extending its overall health.

    However, this article will guide you through enabling Adaptive Charging on your Google Pixel 7 and explore its advantages. All you are required of is go through the procedures carefully for possitive results.

    About Adaptive Charging on Google Pixel 7

    Adaptive Charging utilizes machine learning to analyze your charging routine. It identifies when you typically unplug your phone at night and adjusts the charging pattern accordingly.

    Instead of charging to 100% right away, Adaptive Charging will prioritize reaching 80% by your usual wake-up time.

    The remaining 20% will be delivered gradually throughout the morning, ensuring a full charge by the time you need it.

    How to Enable Adaptive Charging on Google Pixel 7

    Enabling Adaptive Charging on your Pixel 7 is a simple process:

    • Open the Settings app on your Pixel 7.
    • Scroll down and tap on “Battery”.
    • Locate the “Adaptive Battery” section.
    • Toggle the switch next to “Adaptive Battery” to turn it on (usually green or blue).
    • Optional:

    Within the “Adaptive Battery” settings, you might see an option for “Adaptive Charging”. If available, ensure this is also toggled on for optimal battery management.

    Related: How to Enable Quick Share on Google Pixel 7

    Benefits of Enabling Adaptive Charging on Google Pixel 7

    There are several advantages to enabling Adaptive Charging on your Pixel 7:

    • Improved Battery Health

    Lithium-ion batteries, like the one in your Pixel 7, can degrade over time, especially when constantly charged to 100%. Adaptive Charging reduces this stress by limiting the time spent at full capacity, potentially extending the lifespan of your battery.

    • Reduced Wear and Tear

    Constantly reaching 100% charge can cause increased heat and wear on the battery. Adaptive Charging mitigates this by strategically delivering the final 20% when needed, reducing overall strain on the battery.

    • Longer Lifespan

    By promoting better battery health, Adaptive Charging can potentially extend the overall lifespan of your Pixel 7’s battery, allowing you to enjoy optimal performance for a longer period.

    • Peace of Mind

    Knowing your Pixel 7 is charging intelligently and prioritizing battery health can provide peace of mind, especially for users who are concerned about long-term battery performance.

    Conclusion

    Adaptive Charging is a valuable feature on the Google Pixel 7, offering a proactive approach to battery health.

    By intelligently managing your charging routine, it can potentially extend the lifespan of your battery and provide a more efficient charging experience.

    So, enable Adaptive Charging on your Pixel 7 and let your phone take care of the charging process, ensuring optimal battery health and performance in the long run.

    Will Adaptive Charging Slow Down my Charging Speed?

    Yes, Adaptive Charging might slow down the charging speed, especially during the initial stages, as it prioritizes reaching 80% by your wake-up time.  However, the phone will still be fully charged by the time you typically unplug it in the morning.

    What if I Don’t Have a Consistent Sleep Schedule?

    Adaptive Charging can still benefit users with irregular sleep patterns.  The feature learns over time and adjusts the charging schedule based on your charging habits.

    Can I Disable Adaptive Charging if Needed?

    Absolutely! You can easily disable Adaptive Charging by following the same steps mentioned earlier and toggling the switch back to “off”.

    Does Adaptive Charging Affect Wireless Charging?

    Adaptive Charging works with both wired and wireless charging on the Pixel 7.

    Is Adaptive Charging Necessary?

    While Adaptive Charging offers long-term battery health benefits, it’s not mandatory. If you need a quick charge before a meeting or outing, you can disable Adaptive Charging for a specific instance.

    For more insights on this article, check out these video tips across our social platforms:

  • How to Enable Quick Share on Google Pixel 7

    How to Enable Quick Share on Google Pixel 7

    Sharing files between devices can sometimes feel like a chore. Juggling Bluetooth connections, fumbling with cables, or emailing files back and forth can be frustrating and time-consuming.

    Enable Quick Share on Google Pixel 7


    Thankfully, the Google Pixel 7 boasts a stunning feature called Quick Share. This intuitive tool allows you to share photos, videos, documents, and other files with nearby Android devices quickly and seamlessly.

    This article will guide you through enabling Quick Share on your Google Pixel 7 and explore its benefits.

    About Quick Share on Google Pixel 7

    Quick Share leverages a combination of Wi-Fi Direct and Bluetooth to establish a secure and fast connection between your Pixel 7 and other compatible devices.

    When enabled, you’ll see nearby Pixel devices or other Android phones running Android 6.0 (Marshmallow) or later in your sharing menu.

    Simply select the device you want to share with and the file will be transferred wirelessly in a matter of seconds.

    How to Enable Quick Share on Google Pixel 7

    Enabling Quick Share on your Pixel 7 is a breeze, all you need to do is follow through the steps carefully:

    • Swipe down twice from the top of your screen and select the gear icon Settings, access the Settings app from your list of applications.
    • Locate the Connected Device tile and click on it.
    • Click Connection Preferences option.
    • Scroll down and select the Quick Share tab.
    • Now, toggle on the Who Can Share with you option so you could connect with nearby devices.

    Optional:

    • You can also access Quick Share settings by holding your finger on the “Quick Share” tile in the Quick Settings menu from top of the screen.
    • Change the device visibility (visible to all contacts, specific contacts, or hidden)

    Set a device name for your Pixel 7 that will appear when sharing with other devices

    Related: How to Enable Sunlight Boost on Google Pixel Watch

    Benefits of Quick Share on Google Pixel 7

    The Google Pixel 7 boasts a stunning Quick Share feature. Here’s why you should get over the outdated methods and embrace Quick Share for all your transfer needs:

    • Fast and Efficient

    Quick Share utilizes advanced protocols for blazing-fast transfer speeds, especially for photos and videos. No more waiting for large files to trickle through.

    • Intuitive Interface

    The user-friendly interface makes sharing a breeze. Simply select the files you want to send, and a list of nearby devices compatible with Quick Share pops up. Choose the recipient, and the transfer commences effortlessly.

    • Android Ecosystem Integration

    Quick Share isn’t limited to Pixel devices. It seamlessly works with other Android phones running Android 6 or later, eliminating compatibility headaches.

    • Cross-Platform Functionality

    The beauty of Quick Share lies in its ability to bridge the gap between different operating systems. Share files effortlessly between your Pixel 7 and devices running ChromeOS or even Windows with compatible software installed.

    • Secure Sharing

    Rest assured, your precious files are protected. Quick Share utilizes secure connections to transfer data, minimizing the risk of interception.

    • Visibility Control

    Choose who can see your device on Quick Share. You can opt for everyone nearby, only your contacts, or keep it completely invisible, ensuring you share files with intended recipients only.

    • Offline Sharing

    Quick Share isn’t fazed by internet connectivity issues. It allows you to share files offline between nearby devices, perfect for situations where Wi-Fi or data is unavailable.

    • Large File Support

    Unlike some Bluetooth limitations, Quick Share effortlessly handles large files like high-resolution videos or hefty presentations without breaking a sweat.

    By utilizing Quick Share on your Pixel 7, you unlock much of convenience, speed, and security for all your file-sharing needs. So ditch the cables and outdated methods, and embrace the future of effortless file transfer.

    Conclusion

    Quick Share is a valuable feature on the Google Pixel 7, offering a fast, convenient, and secure way to share files with nearby devices.

    With its ease of use and clear benefits, Quick Share eliminates the need for cumbersome file transfer methods, allowing you to share content with ease.

    So, ditch the cables and Bluetooth hassles – activate Quick Share on your Pixel 7 and experience a smoother file-sharing experience.

    Does Quick Share Require an Internet Connection?

    No, an internet connection isn’t necessary for the actual transfer of files using Quick Share. However, both devices need to be within Wi-Fi Direct range to establish a connection.

    Can I Share Files with Non-Android Devices Using Quick Share?

    Currently, Quick Share primarily works for sharing files between Pixel devices and other Android phones running Android 6.0 (Marshmallow) or later.  There might be limited functionality for sharing with other operating systems.

    Is Quick Share Secure for Transferring Sensitive Files?

    Quick Share utilizes encryption to ensure the security of your files during transfer. However,  it’s always recommended to exercise caution when sharing sensitive information.

    What Happens if the Recipient Doesn’t Have Quick Share Enabled?

    If the recipient’s device doesn’t have Quick Share enabled, you might be prompted to use other sharing methods like Bluetooth or email.

    Is there a Limit to the File Size I Can Share Using Quick Share?

    There isn’t a specific file size limit for Quick Share. However, very large files might take longer to transfer depending on the Wi-Fi Direct connection speed.

    For more insights on this article, check out these video tips across our social platforms:

  • How to Enable Sunlight Boost on Google Pixel Watch

    How to Enable Sunlight Boost on Google Pixel Watch

    Ever blink at your Google Pixel Watch screen on a bright day?  Sunlight can often blank out the display, making it difficult to see the time, notifications, or other information.

    Sunlight Boost On Google Pixel Watch

    Thankfully, the Pixel Watch comes equipped with a clever feature called Sunlight Boost. This ingenious function temporarily increases the screen’s brightness, ensuring optimal readability even under the harshest sun.

    In this article, you will gain insigts how to enable Sunlight Boost on your Google Pixel Watch and explore its advantages.

    About Sunlight Boost on Google Pixel Watch

    Sunlight Boost leverages the Pixel Watch’s display technology to automatically adjust its brightness based on ambient light conditions.

    When activated, the screen pushes its brightness to a higher level, effectively counteracting the glare from sunlight.

    This ensures clear and crisp visuals, allowing you to stay informed and connected even during outdoor activities.

    How to Enable Sunlight Boost on Google Pixel Watch

    Enabling Sunlight Boost on your Pixel Watch is a straightforward process:

    • Swipe down on the watch face to access the Quick Settings menu.
    • Locate the Display option.
    • Look for the Sunlight Boost tab.
    • Tap the toggle to switch Sunlight Boost on or off.

    Those are the steps required for you to successfully enable sunlight boost on your Google Pixel Watch, follow the steps carefully for positive results.

    Benefits of Sunlight Boost on Google Pixel Watch

    Sunlight Boost offers several advantages for Pixel Watch users who frequently spend time outdoors:

    • Enhanced Readability

    By boosting the screen’s brightness, Sunlight Boost ensures clear visibility of the watch face and other information displayed, even in direct sunlight.

    • Improved User Experience

    Being able to see your watch screen clearly allows you to stay connected and informed without straining your eyes. This enhances the overall user experience when outdoors.

    • Automatic Adjustment

    Sunlight Boost operates automatically, eliminating the need for you to constantly adjust the brightness settings manually.

    • Battery Optimization

    While Sunlight Boost increases brightness, it’s designed to be energy-efficient. However, keep in mind that extended use under very bright conditions may slightly impact battery life.

    Conclusion

    Sunlight Boost is a valuable feature for Google Pixel Watch users who enjoy spending time outdoors.

    By automatically boosting screen brightness in bright environments, it ensures optimal readability and a seamless user experience.

    With its ease of use and clear benefits, Sunlight Boost is a must-try feature for getting the most out of your Pixel Watch on sunny days.

    Is Sunlight Boost Always Necessary Outdoors?

    Sunlight Boost is a valuable tool, but its necessity depends on the situation.  On moderately bright days or in shaded areas, the Pixel Watch’s automatic brightness controls might be sufficient.

    However, if you frequently encounter intense sunlight, especially during outdoor activities like hiking, cycling, or running, enabling Sunlight Boost is highly recommended.

    The increased screen visibility it provides can be crucial for checking time, monitoring fitness data, or navigating with GPS.

    Are there any Alternatives to Sunlight Boost?

    While Sunlight Boost offers an automatic solution, there are alternative methods for enhancing outdoor visibility on your Pixel Watch.

    One option is to manually adjust the screen brightness through the Quick Settings menu.  However, this requires constant vigilance, especially if light conditions change frequently.

    Another approach is to invest in a screen protector specifically designed for anti-glare. These protectors can help reduce sunlight reflection, improving readability to some extent.

    Can Sunlight Boost be Dimmed Manually When Activated?

    Yes, even with Sunlight Boost enabled, you can still manually adjust the screen brightness on your Pixel Watch.  Simply swipe down on the watch face to access Quick Settings and tap the brightness icon.

    A slider will appear, allowing you to adjust the brightness level to your preference. This provides some flexibility, letting you balance readability with battery conservation based on the specific situation.

    How Do I Enable Sunlight Boost on my Pixel Watch?

    Enabling Sunlight Boost is simple. Swipe down on the watch face to access Quick Settings, then locate the brightness icon (sun symbol).

    ap and hold the icon to expand the brightness controls and find the “Sunlight Boost” toggle. Tap the toggle to switch it on or off.

    Does Sunlight Boost Affect Battery Life?

    Sunlight Boost is designed to be energy-efficient, but any increase in screen brightness will have some impact on battery life.

    The extent of this impact depends on how long you use Sunlight Boost and the overall brightness conditions.

    Is Sunlight Boost Automatic?

    Yes, Sunlight Boost functions automatically. Once enabled, the Pixel Watch will detect bright light environments and adjust the screen brightness accordingly.

    Can I Adjust the Level of Sunlight Boost?

    Currently, the Pixel Watch doesn’t offer manual control over the Sunlight Boost intensity.

    It operates with a pre-set level designed to optimize visibility while balancing battery efficiency.

    For more insights on this article, check out these video tips across our social platforms:

  • How to Adjust Font Size on Google Pixel Watch

    How to Adjust Font Size on Google Pixel Watch

    The Google Pixel Watch boasts a beautiful display, but for some users, the default font size might be a little too small.

    Adjust Font Size On Google Pixel Watch

    Fortunately, the Pixel Watch allows you to adjust the font size to improve readability and personalize your watch experience.

    This article will guide you through the simple steps on how to adjust the font size on your Google Pixel Watch and explore the benefits of doing so.

    About Font Size Adjustment on Google Pixel Watch

    The Pixel Watch offers a range of font sizes to cater to individual preferences and visual needs.

    Whether you prefer a larger and bolder font for better readability or a slightly smaller size for a more condensed display, the Pixel Watch allows you to find the perfect balance.

    This level of customization ensures a comfortable and enjoyable viewing experience for everyone.

    How to Adjust Font Size on Google Pixel Watch

    Adjusting the font size on your Pixel Watch is a straightforward process outlined below:

    • Swipe down on the watch face to access the Quick Settings menu.
    • However, unlike some other settings, the font size option isn’t readily available in Quick Settings.
    • Therefore, tap on the Settings icon to access the full settings menu.
    • Scroll down the menu and locate the Display section.
    • Within the Display options, look for Font Size.
    • Tap on Font Size.
    • You’ll see a slider that allows you to adjust the font size. Click on the + or – button on the bar to adjust the font size.
    • The changes will be reflected in real-time on the screen, allowing you to preview the adjusted font size.
    • Once you’re happy with the chosen size, you may slide back to your homescreen to save the changes.

    Follow throught the procedures carefully.

    Benefits of Adjusting Font Size on Google Pixel Watch

    There are several advantages to adjusting the font size on your Pixel Watch:

    • Improved Readability

    A larger font size can significantly improve readability, especially for users with visual impairments or those who prefer a less cluttered display. This makes it easier to view notifications, messages, and other information on the watch face.

    • Personalized Experience

    The ability to adjust the font size allows you to personalize your Pixel Watch to your specific needs and preferences. You can choose a font size that feels comfortable and visually appealing for you.

    • Accessibility

    Font size adjustment promotes accessibility for users with varying visual abilities. A larger font size can be particularly helpful for those with farsightedness or presbyopia.

    • Reduced Eye Strain

    A larger font size can reduce eye strain, especially for prolonged use. This is beneficial for users who frequently check their watch throughout the day.

    Conclusion

    The Google Pixel Watch’s font size adjustment feature allows you to personalize your watch experience and optimize readability.

    Whether you require a larger font for better visibility or prefer a more compact display, the Pixel Watch empowers you to find the perfect fit.

    With its ease of use and clear benefits, adjusting the font size is a valuable option for getting the most out of your Pixel Watch.

    Can I Make the Font Size on my Pixel Watch Big?

    Yes, the Pixel Watch offers a range of font sizes, including a larger option for improved readability. You can adjust the font size using the steps mentioned in this article.

    Will Adjusting the Font Size Affect Other Aspects of the Watch?

    Adjusting the font size primarily affects the size of text displayed on the watch face, notifications, messages, and other apps. It shouldn’t significantly impact other visual elements on the Pixel Watch.

    Does a Larger Font Size Drain the Battery Faster?

    The impact of font size on battery life is minimal. The Pixel Watch utilizes an efficient display technology, and font size adjustments are unlikely to cause a noticeable difference in battery performance.

    Is there a Way to Change the Font Style on the Pixel Watch?

    Currently, the Pixel Watch doesn’t offer the option to change the font style itself. However, you can adjust the font size for a more personalized look and improved readability.

    What if I Accidentally Make the Font Size too Small and Can’t see Anything?

    Don’t worry! Simply follow the same steps mentioned earlier and adjust the font size slider back to a larger size. You can always preview the changes before saving them.

    For more insights on this article, check out these video tips across our social platforms:

  • How to Access Timer on Google Pixel Watch

    How to Access Timer on Google Pixel Watch

    The Google Pixel Watch goes beyond just telling time. It boasts a built-in timer function, allowing you to set quick reminders and countdowns directly on your wrist.

    Access Timer On Google Pixel Watch

    This is incredibly useful for various situations, from keeping track of your workout routine to monitoring cooking times in the kitchen.

    This article will guide you through two methods on how to access the timer on your Google Pixel Watch and explore its functionalities.

    About the Timer on Google Pixel Watch

    The Pixel Watch’s timer is a simple yet versatile tool. You can set durations ranging from seconds to hours, making it suitable for various tasks.

    Additionally, the timer can run in the background, even when you’re using other apps on your watch or when the display is off. When the timer reaches zero, it will alert you with a vibration and an audible sound.

    Ways to Access Timer on Google Pixel Watch

    There are two primary ways to access the timer on your Pixel Watch. All you need to do for positive result, follow the steps carefully in this blog:

    Using the Quick Settings Menu

    • Swipe down on the watch face to access the Settings menu.
    • Locate the Timer icon (it resembles a stopwatch).
    • Tap the icon to launch the timer app.
    • Use the digital dials on the watch crown to set the desired duration (hours, minutes, seconds).
    • Optionally, click on the three dots menu for additional options like setting a label for the timer or choosing a different notification sound.
    • Once set, tap Start to begin the countdown.

    Using the App List

    • Press the crown on your Pixel Watch to access the app list.
    • Scroll till you find the Timer app.
    • Tap the Timer app to launch it.
    • Click on the + button.
    • Now click on the tick option to start a timer.
    • To pause it, click on the Pause button.

    Those are the steps required to access timer on your Google Pixel Watch.

    Conclusion

    The Google Pixel Watch’s built-in timer provides a convenient and readily available way to keep track of time on your wrist.

    Its accessibility through the Quick Settings menu or dedicated app makes it easy to set reminders and countdowns for various activities.

    So, ditch the need for a separate timer and leverage the Pixel Watch’s functionality for a more streamlined and efficient workflow.

    Does the Pixel Watch Timer Run in the Background?

    Yes, the Pixel Watch timer continues to count down even when you’re using other apps or when the display is off. You’ll receive a notification with vibration and sound (if chosen) upon completion.

    Can I Set Multiple Timers on my Pixel Watch?

    Unfortunately, the Pixel Watch doesn’t currently allow setting multiple timers simultaneously. You can only have one active timer at a time.

    How Do I Stop the Timer on my Pixel Watch?

    There are two ways to stop the timer. You can either swipe down on the watch face to access the Quick Settings menu and tap the timer icon again (it will now show a “pause” symbol).

    Alternatively, press the crown on your watch and tap “Stop” within the Timer app.

    Can I Adjust the Timer Duration After it has Started?

    No, you cannot directly adjust the duration of the timer once it has begun the countdown. However, you can stop the timer and then restart it with a new duration if needed.

    What Notification Sounds are Available for the Timer?

    The Pixel Watch offers a variety of notification sounds for the timer, including chimes, alarms, and beeps. You can choose your preferred sound through the timer app settings.

    For more insights on this article, check out these video tips across our social platforms:

  • How to Check iPad Storage Space

    How to Check iPad Storage Space

    If you’re an iPad user, knowing how to check your storage space is essential to managing your device. Running out of storage can slow down performance, prevent app downloads, and even stop you from capturing new photos or videos.

    How to Check iPad Storage Space
    How to Check iPad Storage Space

    Thankfully, Apple makes it easy to monitor and manage your iPad storage. In this article, we’ll show you how to check iPad storage space in simple steps, ensuring your device stays optimized and functional.

    Why Checking iPad Storage Space Matters

    Your iPad storage is divided among apps, media, files, and system data. Monitoring this usage helps you:

    • Avoid storage-related issues like sluggish performance.
    • Determine which apps or files are taking up the most space.
    • Decide what to delete or offload to free up space.

    Whether you have a base-model iPad or a higher-storage Pro version, managing your storage effectively ensures your iPad continues to work as intended.

    How to Check iPad Storage Space

    Here’s a step-by-step guide on how to check the storage space on your iPad:

    • Locate the Settings app on your home screen (the icon resembles gray gears).
    • Tap on it to access your device settings.
    • In the Settings menu, scroll down and tap General. This option contains various system-related settings for your iPad.
    • Under the General menu, look for the iPad Storage option and tap it.
    • You’ll now see a detailed breakdown of your iPad’s storage usage.
    • At the top, you’ll notice a bar chart displaying your storage usage by category (e.g., Apps, Photos, Media, System, and Other).
    • Under the bar, the total storage capacity and available free space will be listed.
    • Scroll down to view a list of all your apps, sorted by how much space they are using.
    • Tapping on an app will show further details, such as:

    App size: How much space the app itself takes up.

    Documents & Data: Space used by app-related files like cache or saved content.

    Pro Tips for Managing iPad Storage Space

    Offload Unused Apps

    Apple provides an option to offload unused apps, which removes the app but keeps its data intact. Here’s how you can enable this feature:

    • Go to Settings > General > iPad Storage.
    • Tap Enable under the “Offload Unused Apps” section.

    Delete Unnecessary Files

    Manually delete old photos, videos, or files you no longer need. Use the Files app to locate and remove large documents.

    Optimize Photo Storage

    If you’re running out of storage, consider enabling iCloud Photos with the “Optimize Storage” option to save space by keeping only smaller versions of photos on your device.

    Clear Safari Cache

    Free up space by clearing Safari’s cached files:

    • Open Settings > Safari.
    • Scroll down and select Clear History and Website Data.

    Frequently Asked Questions

     How do I know when my iPad is running low on storage?

    When your iPad is running low on storage, you’ll typically receive a notification saying, “Storage Almost Full.” Additionally, apps may crash, and you may experience slower performance.

    Can I expand my iPad’s storage?

    Unfortunately, iPad storage cannot be expanded with external memory like an SD card. However, you can use cloud storage services like iCloud, Google Drive, or Dropbox to store files and free up space on your device.

    What is “other” storage on my iPad?

    The “other” category includes system files, cached data, logs, and temporary files. To reduce “other” storage, you can clear app caches or reset your device settings.

    Is offloading apps the same as deleting them?

    No. Offloading removes the app but keeps its data intact. When you reinstall the app, your data will still be available.

    How much free space should I keep on my iPad?

    It’s a good idea to keep at least 10-15% of your storage free to ensure smooth performance and accommodate new apps or updates.

    Can I check iPad storage from my computer?

    Yes, by connecting your iPad to a Mac or PC:

    • On Mac: Open Finder, select your iPad, and view the storage breakdown.
    • On PC: Open iTunes, select your device, and check the storage bar at the bottom of the window.

    Conclusion

    Knowing how to check iPad storage space is essential for every user. By regularly monitoring your device’s storage, you can avoid performance issues and keep your iPad running smoothly. Whether you prefer following written instructions or watching a video tutorial, MobileTechJoint’s visual guide will guide you through the process with the link below.

    Take control of your iPad storage today, and subscribe to the MobileTechJoint YouTube channel for more helpful tutorials!

    YOUTUBE LINK: https://www.youtube.com/shorts/n2sYhUs0OA0

    MORE RELATED CONTENT:

    How to Turn on Background App Refresh when Greyed Out on Your iPad

    I thought the iPad Air Was Just Another Tablet—But After Testing

    Why the iPad Air Stands Out as One of the Best Value Tablets of 2024

    iPad Air: I Didn’t Realize How Perfect the iPad Air Was for Everyday Use Until I Tried It