Blog

  • Samsung Galaxy Ring and Other Phones: Is Samsung Galaxy Ring Compatible with Other Phones?

    Samsung Galaxy Ring and Other Phones: Is Samsung Galaxy Ring Compatible with Other Phones?

    The Samsung Galaxy Ring represents a leap forward in wearable technology, merging advanced features with sleek design. As technology continues to intertwine with our daily lives, the ability of such wearables to integrate seamlessly with various devices becomes a critical factor in their overall effectiveness and user satisfaction. This review will explore the compatibility of the Galaxy Ring with different devices and provide insights into user experiences.

    Samsung Galaxy Ring and Other Phones: Is the Samsung Galaxy Ring Compatible with Other Phones?

    What is the Samsung Galaxy Ring?

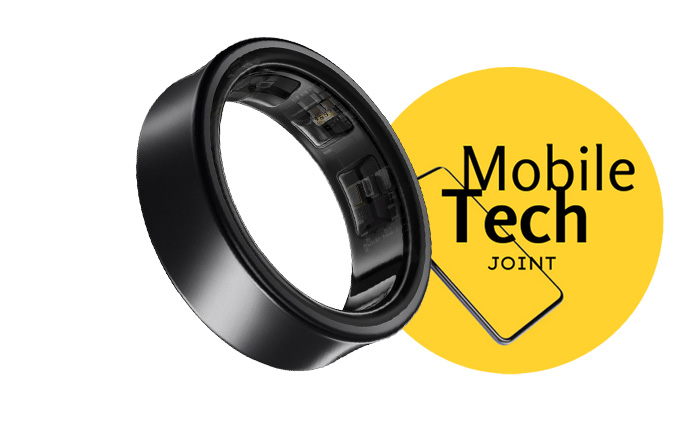
    The Samsung Galaxy Ring is a smart wearable designed to offer more than just timekeeping. It incorporates advanced health tracking capabilities, including heart rate monitoring and activity tracking, while also providing notifications and alerts from your smartphone. The ring aims to deliver a blend of functionality and style, making it a versatile accessory for tech enthusiasts and those keen on monitoring their health and well-being.

    Compatibility Overview

    In the realm of smart devices, compatibility is crucial. It defines how well a device can interact with other hardware and software systems. For wearables like the Galaxy Ring, compatibility involves ensuring that the device can connect seamlessly with smartphones, tablets, and other gadgets. This includes being able to sync data, receive notifications, and utilize all features without encountering technical issues. Effective compatibility ensures that users can fully leverage the capabilities of their device without frustration.

    Supported Devices

    The Galaxy Ring is primarily designed to integrate with Samsung’s range of smartphones, particularly the latest Galaxy models. These phones are equipped with the necessary hardware and software to support the full range of features offered by the ring. For optimal functionality, the Galaxy Ring requires that the phone runs on Samsung’s latest operating system. This tight integration means users can enjoy seamless syncing of health data, notifications, and other ring functionalities.

    Compatibility with Other Brands

    While the Galaxy Ring excels with Samsung devices, it also offers limited compatibility with phones from other brands. It can connect with non-Samsung devices, but users might encounter reduced functionality or connectivity issues. The degree of compatibility largely depends on the operating system of the non-Samsung phone and its Bluetooth capabilities. This means that while you can use the ring with other devices, some features might not work as well, or additional setup steps might be required.

    User Experience and Feedback

    User feedback on the Galaxy Ring is generally positive, especially from those using it with Samsung devices. Users appreciate the smooth integration and ease of use that comes from pairing the ring with a Samsung phone. However, there are reports of challenges when attempting to connect the ring with non-Samsung devices. These issues often relate to limited functionality or difficulties during the pairing process, underscoring the importance of checking compatibility before purchase.

    Setting Up the Galaxy Ring

    Setting up the Galaxy Ring involves a few straightforward steps:

    • Ensure Compatibility: Check that your smartphone’s operating system meets the requirements for the Galaxy Ring.
    • Download the Samsung Wearable App: This app is essential for configuring and managing the Galaxy Ring. It allows users to pair the ring with their phone and customize settings.
    • Follow Instructions: The app provides step-by-step instructions to pair the ring with your phone. This process typically involves placing the ring in pairing mode and connecting it through Bluetooth.
    • Troubleshooting: If you encounter issues, try restarting both the ring and your phone. Reinstalling the Samsung Wearable app can also help resolve connectivity problems. This ensures that any software glitches or temporary issues are addressed.

    Future Updates and Compatibility

    Samsung is proactive in maintaining the Galaxy Ring’s compatibility through regular software updates. These updates can improve the ring’s performance, fix bugs, and enhance compatibility with new devices and operating systems. This commitment ensures that the Galaxy Ring remains a viable and effective wearable even as technology evolves, providing users with continued support and enhanced functionality over time.

    Alternatives to the Galaxy Ring

    For those exploring options beyond the Galaxy Ring, other smart rings such as the Oura Ring and Motiv Ring offer similar functionalities. Each alternative has its strengths and weaknesses, particularly in terms of compatibility with various devices. When choosing an alternative, consider factors such as device compatibility, feature set, and user reviews to ensure you select a ring that meets your needs and integrates well with your existing tech ecosystem.

    Conclusion

    The Samsung Galaxy Ring is a standout in the wearable tech market, offering advanced features and excellent integration with Samsung devices. Its compatibility with non-Samsung devices is functional but may be limited. Ensuring compatibility with your phone is crucial for a seamless experience, and Samsung’s commitment to regular updates helps maintain the ring’s relevance and functionality. Overall, the Galaxy Ring is a sophisticated choice for those looking to enhance their tech lifestyle while enjoying a sleek and functional wearable.

    Also Check:

  • How to Reset the Samsung Galaxy Ring

    How to Reset the Samsung Galaxy Ring

    Resetting your Samsung Galaxy Ring can help resolve various issues, such as software glitches or performance problems. There are different types of resets you can perform: a soft reset and a factory reset. In this guide, we will consider two way to factory reset your Galaxy ring.

    How to Reset the Samsung Galaxy Ring

    Click the Here to Buy Now at Amazon

    How to Reset Samsung Galaxy Ring

    Resetting your Samsung Galaxy Ring can help resolve issues such as connectivity problems, inaccurate tracking, or performance glitches. Here’s a step-by-step guide to resetting your device.

    1. Soft Reset

    A soft reset is a simple restart of the device. This can help resolve minor glitches without affecting your data.

    Steps:

    1. Locate the Power Button: Find the power button on the Galaxy Ring. This is typically a touch-sensitive area or a physical button depending on the model.
    2. Press and Hold: Press and hold the power button for about 10-15 seconds.
    3. Wait for Reboot: The device should turn off and then restart automatically. If it does not, you might need to press the power button again to start the device.

    2. Factory Reset

    A factory reset will erase all data on the Galaxy Ring and restore it to its original factory settings. This is useful if you’re experiencing persistent issues or preparing to sell or give away the device.

    Steps:

    a. Reset via Settings Menu:

    1. Access Settings: Open the Samsung Wearable app on your paired phone.
    2. Navigate to Device Settings: Select the connected Galaxy Ring from the list of devices.
    3. Find the Reset Option: Look for an option like “Device Settings,” “General,” or “Reset.”
    4. Choose Factory Reset: Select “Factory Reset” or “Reset Device” from the menu.
    5. Confirm: Follow the on-screen instructions to confirm the reset. You may need to enter a PIN or password if set.

    b. Hard Reset (if the device is unresponsive):

    1. Ensure Battery Charge: Make sure the Galaxy Ring has enough charge or connect it to a charger.
    2. Power Off: If possible, turn off the device by holding the power button. If the device is unresponsive, skip this step.
    3. Press and Hold Buttons: Simultaneously press and hold the power button and any other relevant button (usually volume up or down) for 10-15 seconds until the device vibrates or shows a logo.
    4. Follow On-Screen Instructions: Use the buttons to navigate through the reset menu and select “Factory Reset” or “Wipe Data.” Confirm your choice.
    5. Restart: The device will restart and begin the reset process. It may take several minutes to complete.

    c. Reset via Samsung Support:

    If you’re unable to reset the Galaxy Ring using the methods above, or if the device is not responding, contacting Samsung Support for assistance may be necessary. They can guide you through additional troubleshooting steps or arrange for a service repair if needed.

    Additional Tips:

    • Back Up Data: If possible, back up any important data before performing a factory reset, as this will erase all user data.
    • Charge the Device: Ensure the Galaxy Ring is adequately charged before performing a reset to avoid any interruptions during the process.
    • Follow Manufacturer Instructions: Always refer to the user manual or Samsung’s official website for specific instructions related to your Galaxy Ring model.

    By following these steps, you can effectively reset your Samsung Galaxy Ring and address various issues that may arise.

    Also Check:

  • How to Update the Firmware of your Samsung Galaxy Ring

    How to Update the Firmware of your Samsung Galaxy Ring

    Regular software updates are crucial for maintaining the performance and functionality of your Samsung Galaxy Ring. Updates can bring new features, enhance existing functionalities, fix bugs, and improve overall stability. Here’s a comprehensive guide on how to manage and understand updates for your Samsung Galaxy Ring.
    How to Update the Firmware of your Samsung Galaxy Ring

    How to Update the Samsung Galaxy Ring

    Keeping your Samsung Galaxy Ring updated is essential for optimal performance and security. Regularly check for updates through the Samsung Wearable app, and understand the different types of updates to ensure your device remains efficient and functional.

    1. Importance of Software Updates

    • New Features: Updates often introduce new features that can enhance the user experience.
    • Bug Fixes: Regular updates help resolve any bugs or glitches that may affect performance.
    • Security Patches: Updates include security patches to protect your device from vulnerabilities.
    • Compatibility: Ensures the device remains compatible with new apps and other devices.

    2. Checking for Updates

    To ensure your Samsung Galaxy Ring is running the latest software, regularly check for updates:

    1. Open the Samsung Wearable App:
      • Ensure your Galaxy Ring is connected to your smartphone via Bluetooth.
      • Open the Samsung Wearable app on your smartphone.
    2. Navigate to Settings:
      • In the app, find and select your Galaxy Ring from the list of connected devices.
      • Tap on the “Settings” or “General” section.
    3. Check for Updates:
      • Look for an option like “Software Update” or “Firmware Update.”
      • Tap on “Check for Updates.” The app will search for any available updates for your Galaxy Ring.
    4. Download and Install:
      • If an update is available, follow the on-screen instructions to download and install it.
      • Ensure your Galaxy Ring is sufficiently charged or connected to a charger during the update process.

    3. Types of Updates

    • Firmware Updates: These updates improve the core functionality of the Galaxy Ring, often including performance enhancements, bug fixes, and new features.
    • App Updates: Updates to the Samsung Wearable app can also affect how the Galaxy Ring operates, bringing new features and improved user interfaces.

    4. Common Update Issues

    • Update Failure: If the update fails, ensure your device is charged and connected to a stable internet connection. Restart both your smartphone and Galaxy Ring and try again.
    • Post-Update Glitches: Sometimes, updates may introduce new issues. Restart your Galaxy Ring to see if that resolves the problem. If issues persist, you might need to perform a soft reset or factory reset.
    • Compatibility Problems: Ensure your smartphone’s operating system is compatible with the latest update of the Samsung Wearable app and the Galaxy Ring firmware.

    5. Update History and Details

    To view the update history and details of your Galaxy Ring:

    1. Open the Samsung Wearable App:
      • Navigate to the “Software Update” section.
    2. View Update History:
      • Look for an option like “Update History” or “Firmware Version.”
      • Here, you can see the details of previous updates, including the date and version number.

    6. Future Updates

    • Automatic Updates: Enable automatic updates if available, so your Galaxy Ring stays up-to-date without manual intervention.
    • Scheduled Updates: Schedule updates for when the device is not in use, ensuring uninterrupted usage during important times.

    How Often Should Update the Samsung Galaxy Ring

    The frequency of updates for the Samsung Galaxy Ring can vary based on several factors including the development cycle of new features, the need for bug fixes, and security requirements. Here’s an overview of what you can generally expect regarding update frequency and what influences it.

    1. Regular Update Schedule

    • Monthly Updates: For most Samsung wearable devices, including the Galaxy Ring, it is common to receive monthly updates. These updates typically include minor bug fixes, security patches, and incremental improvements to existing features.
    • Quarterly Updates: Major updates that introduce new features or significant improvements are usually rolled out on a quarterly basis. These updates are more extensive and may take longer to develop and test.

    2. Factors Influencing Update Frequency

    • New Feature Development: The introduction of new features can influence the frequency of updates. Major features often require extensive testing and development, which may delay regular updates.
    • Security Patches: Immediate updates might be necessary in response to newly discovered security vulnerabilities. Samsung prioritizes user security, and critical patches are released as soon as they are ready.
    • User Feedback: Samsung often takes user feedback into account. If users report widespread issues or bugs, the company may release an update sooner than planned to address these problems.
    • Compatibility Enhancements: Updates may also be released to ensure compatibility with new versions of the Android operating system or other devices. These are often timed with major OS releases from Google.

    3. How to Stay Informed

    • Samsung Wearable App Notifications: Ensure that you have notifications enabled for the Samsung Wearable app. This way, you will be promptly informed whenever a new update is available.
    • Samsung Support Website: Regularly check the Samsung support website or community forums for announcements regarding updates and new features.
    • Social Media and Newsletters: Follow Samsung on social media and subscribe to newsletters for the latest news and updates about your Galaxy Ring and other Samsung devices.

    4. Best Practices for Managing Updates

    • Regular Check-ins: Make it a habit to manually check for updates once a month if automatic updates are not enabled.
    • Backup Data: Before installing major updates, ensure your data is backed up to prevent any loss in case of update issues.
    • Charge Your Device: Always ensure your Galaxy Ring is fully charged or connected to a charger when performing updates to avoid interruptions.

    5. Typical Update Timeline Example

    • Monthly Security Patch: Includes minor bug fixes and security enhancements.
    • Quarterly Feature Update: Introduces new health tracking features, improvements in battery life, or enhancements in the user interface.
    • Bi-Annual Major Update: Significant overhauls in functionality, introduction of new hardware integrations, and major performance improvements.

    Conclusion

    The Samsung Galaxy Ring typically receives updates on a monthly to quarterly basis, with the frequency influenced by the need for new features, security patches, and user feedback. Staying informed through the Samsung Wearable app and other official channels ensures that you won’t miss important updates. By following best practices for managing updates, you can maintain the optimal performance and security of your Galaxy Ring.

    Also Check:

  • How to Connect the Samsung Galaxy Ring to Your Phone

    How to Connect the Samsung Galaxy Ring to Your Phone

    The Samsung Galaxy Ring is a state-of-the-art wearable that elevates your health tracking experience with features such as heart rate monitoring, sleep analysis, and activity tracking. To unlock its full potential, it’s essential to connect the ring to your smartphone. This guide will walk you through the process of connecting your Galaxy Ring to your phone, ensuring you can take full advantage of its features.

    How to Connect the Samsung Galaxy Ring to Your Phone

    How to Connect Samsung Galaxy Ring to Phone

    Before you begin, verify that your device is compatible with the Galaxy Ring. The ring works best with newer Samsung models like the Galaxy S21, S22, Note 20, and Fold series. Check that your phone’s operating system meets the necessary requirements and ensure you have the latest version installed.

    Step 1: Preparing Your Samsung Galaxy Ring

    Before connecting your Galaxy Ring, make sure it is fully charged. Use the provided charging cable and dock to charge the ring until the battery is complete. Turn on the ring by pressing and holding the button on its surface. Once it powers on, check for any firmware updates. Updating the ring ensures it operates smoothly and has the latest features.

    Step 2: Downloading the Necessary App

    The Samsung Galaxy Ring requires either the Samsung Health app or the Galaxy Wearable app to connect to your phone. Download and install the appropriate app from the Google Play Store or Samsung Galaxy Store. Follow the installation prompts to set up the app on your phone.

    Step 3: Enabling Bluetooth on Your Phone

    For the Galaxy Ring to communicate with your phone, Bluetooth must be enabled. Navigate to your phone’s settings, locate the Bluetooth option, and toggle it on. If you encounter any issues, try restarting your phone or turning the Bluetooth setting off and on again.

    Step 4: Pairing the Samsung Galaxy Ring

    To pair the ring with your phone, follow these steps:

    • Activate pairing mode on the Galaxy Ring by holding the button until the light flashes.
    • Open the Samsung Health or Galaxy Wearable app and navigate to the accessories section.
    • Select the Galaxy Ring from the list of available devices. Follow the on-screen instructions to complete the pairing process.

    Step 5: Customizing Settings

    Once connected, explore the settings available for your Galaxy Ring within the app. You can personalize notifications, set health tracking goals, and adjust other features to suit your preferences. Customizing the ring ensures a more tailored and efficient user experience.

    Step 6: Syncing Data

    Regular syncing between the Galaxy Ring and your phone is crucial for accurate health tracking. The app should automatically sync data, but you can manually initiate a sync by opening the app and selecting the sync option. Regular syncing ensures that your health metrics are up-to-date and accurately reflect your activities.

    Conclusion

    Connecting your Samsung Galaxy Ring to your phone unlocks a world of health tracking and personalization features, enhancing your overall wellness journey. By following this guide, you can ensure a smooth setup and start exploring the many benefits of your Galaxy Ring. Remember, the key to a successful connection is ensuring compatibility, maintaining up-to-date software, and customizing settings to suit your lifestyle.

    Also Check:

  • Common Battery Issues of the Samsung Galaxy Ring, and how to Troubleshoot

    Common Battery Issues of the Samsung Galaxy Ring, and how to Troubleshoot

    Experiencing battery issues with your Samsung Galaxy Ring can be frustrating, especially when you rely on it for consistent health monitoring. Here are some common battery issues you might encounter and practical steps to troubleshoot them.

    Common Battery Issues of the Samsung Galaxy Ring and how to Troubleshoot

    1. Short Battery Life

    Issue: Battery drains faster than expected, reducing the device’s usage time.

    Possible Causes:

    • High Usage: Frequent use of features like GPS tracking, continuous health monitoring, or high screen brightness.
    • Background Apps: Apps running in the background may consume additional power.
    • Battery Health: Degradation of battery health over time.

    Troubleshooting:

    • Check Battery Usage: Use the Samsung Wearable app to review which features or apps are consuming the most battery.
    • Adjust Settings: Lower the screen brightness, reduce the frequency of health tracking, and turn off unnecessary notifications.
    • Enable Power Saving Mode: Activate any available power-saving modes to extend battery life.
    • Update Firmware: Ensure the device’s firmware is up to date, as updates often include optimizations for battery performance.

    2. Charging Issues

    Issue: Device does not charge or charges very slowly.

    Possible Causes:

    • Faulty Charger or Cable: Issues with the charging cable, dock, or power source.
    • Dirty Charging Ports: Dirt or debris in the charging port may obstruct the connection.
    • Battery Degradation: Battery issues related to wear and tear.

    Troubleshooting:

    • Check Charger and Cable: Inspect and test the charger and cable with another device to ensure they are functioning correctly. Use only official or certified chargers.
    • Clean Charging Ports: Gently clean the charging port on the device and the charger with a dry, soft brush or compressed air.
    • Restart Device: Try restarting the Galaxy Ring to reset any temporary software glitches that might affect charging.

    3. Overheating During Charging

    Issue: Device becomes excessively hot while charging.

    Possible Causes:

    • Overuse: Running intensive apps or features while charging.
    • Charging Environment: Charging the device in an environment with high temperatures or inadequate ventilation.
    • Faulty Charger: Issues with the charger or charging cable causing excessive heat.

    Troubleshooting:

    • Charge in a Cool Environment: Avoid charging the device in direct sunlight or hot environments. Ensure it has adequate ventilation.
    • Use Official Chargers: Only use the recommended charger and cable designed for the Galaxy Ring.
    • Avoid Heavy Use: Limit the use of the device during charging to reduce the load on the battery.

    4. Battery Not Holding a Charge

    Issue: Battery discharges quickly even when not in use, or does not hold a charge.

    Possible Causes:

    • Battery Degradation: Natural wear and tear over time leading to reduced battery capacity.
    • Software Issues: Bugs or glitches in the software affecting battery performance.
    • Faulty Battery: Hardware issues with the battery itself.

    Troubleshooting:

    • Perform a Reset: Try a factory reset of the Galaxy Ring to eliminate any software-related issues. Ensure to back up any important data before doing this.
    • Contact Support: If the problem persists, contact Samsung support or visit an authorized service center. The battery may need to be replaced or repaired.

    5. Inconsistent Battery Percentage

    Issue: Battery percentage fluctuates or shows inaccurate readings.

    Possible Causes:

    • Calibration Issues: The battery indicator may need recalibration.
    • Software Glitches: Bugs in the device’s firmware or software affecting the battery readings.

    Troubleshooting:

    • Recalibrate Battery: Fully discharge the battery until the device turns off, then charge it to 100% without interruption. This can help recalibrate the battery indicator.
    • Update Software: Check for and install any available firmware updates that might address battery indicator issues.

    By addressing these common battery issues with the appropriate troubleshooting steps, you can enhance the performance and longevity of your Samsung Galaxy Ring. If problems persist, seeking professional assistance from Samsung support may be necessary.

    Also Check:

  • How Long Do Samsung Galaxy Ring Last: Battery Life Per Charge, and Overall Longevity

    How Long Do Samsung Galaxy Ring Last: Battery Life Per Charge, and Overall Longevity

    How long do the Samsung Galaxy Ring last? The lifespan of the Samsung Galaxy Ring can be viewed from two perspectives: the battery life per charge and the overall durability or longevity of the device. Here’s a detailed breakdown of both aspects:

    How Long Do the Samsung Galaxy Ring Last: Battery Life Per Charge, and Overall Longevity

    How Long Do the Samsung Galaxy Ring Last?

    Regarding Battery Life Per Charge: The Samsung Galaxy Ring is designed to last multiple days on a single charge, depending on usage patterns. Continuous use of power-intensive features like heart rate monitoring, sleep tracking, and notifications can shorten the battery life.

    Typical Duration: Users can generally expect a battery life of approximately 2 to 4 days per charge under average usage conditions. Adjusting the frequency of monitoring features and notifications can help extend this duration.

    In terms of Overall Longevity: The Samsung Galaxy Ring is crafted from durable materials meant to withstand regular wear. It’s designed for fitness enthusiasts and tech-savvy users, implying a focus on long-term use and resilience against sweat and minor impacts.

    Maintenance and Care: Proper care, such as regular cleaning of the ring and its charging contacts, along with avoiding exposure to extreme temperatures, can prolong the device’s lifespan. It’s also important to use the original charging accessories to avoid potential damage.

    Software Updates: Keeping the ring’s firmware updated via the Samsung Health or Galaxy Wearable app can improve its performance and lifespan. Updates can provide battery optimizations and bug fixes, enhancing the overall functionality.

    Battery Capacity and Usage

    Battery Capacity: The Samsung Galaxy Ring is equipped with a battery designed to provide long-lasting usage. The specific capacity in milliampere-hours (mAh) or watt-hours (Wh) is typically optimized for extended wear.

    Typical Usage: Under normal usage conditions, including health monitoring, notifications, and other features, the Galaxy Ring’s battery life can vary. On average, users can expect the following battery performance:

    • Standby Time: Approximately 7-10 days on a single charge, depending on usage and settings.
    • Active Use Time: Around 2-4 days with continuous use, such as health tracking and notifications enabled.

    Charging Information

    • Charging Method: The Galaxy Ring is usually charged using a dedicated charging dock or cable. Some models may offer wireless charging options.
    • Charging Time: The time required to fully charge the Galaxy Ring from 0% to 100% is generally around 1-2 hours. The exact charging time may vary depending on the charger used and the battery’s current charge level.
    • Charging Indicator: The device typically features an LED indicator or screen display to show the current charging status and battery level.

    Battery Saving Tips

    • Adjust Settings: To extend battery life, consider adjusting settings such as screen brightness, notification frequency, and health tracking features. Reducing the intensity of these features can help conserve battery power.
    • Enable Power Saving Mode: If available, use the power-saving mode in the Galaxy Ring’s settings. This mode limits certain functions to maximize battery life.
    • Manage Connectivity: Turn off unnecessary connectivity features, such as Bluetooth or GPS, when not in use. Keeping these features off can help extend battery life.

    Battery Health and Maintenance

    • Avoid Extreme Conditions: To maintain battery health, avoid exposing the Galaxy Ring to extreme temperatures or high humidity. Store and use the device in a controlled environment.
    • Regular Charging: Avoid letting the battery fully discharge before recharging. Regular charging helps maintain battery health and performance over time.
    • Firmware Updates: Keep the Galaxy Ring’s firmware updated through the Samsung Wearable app. Software updates can include optimizations for battery life.

    Battery Life Expectations

    • Variability: Battery life can vary based on individual usage patterns, device settings, and environmental factors. Features such as continuous health monitoring and frequent notifications can impact battery performance.
    • User Feedback: Many users report satisfactory battery performance with the Galaxy Ring, but actual experiences may vary. Reading user reviews and feedback can provide additional insights into real-world battery life.

    By following these guidelines and tips, you can optimize the battery life of your Samsung Galaxy Ring and ensure it performs well throughout its usage period.

    Conclusion

    While the Samsung Galaxy Ring offers robust health tracking and convenience, its actual longevity depends on several factors, including usage habits, maintenance, and environmental conditions. With proper care and usage, the ring can serve as a reliable health accessory for several years.

    Also Check: 

  • How to Reset an iPad Without a Password

    How to Reset an iPad Without a Password

    Resetting an iPad can be a lifesaver when you’ve forgotten your password or bought a second-hand device with the previous owner’s data. Knowing how to reset an iPad without a password is essential whether you’re locked out or need a fresh start.

    How to Reset an iPad Without a Password

    How to Reset an iPad

    When you reset an iPad, you essentially return it to its original factory settings. This means all data, apps, and settings will be erased. It’s important to distinguish between a “soft reset“, which simply restarts the device and solves minor issues, and a “factory reset“, which wipes everything and restores the iPad to its out-of-the-box state.

    Preparing for the Reset

    Before resetting, it’s crucial to back up your data if you can access the iPad. Use iCloud or connect the iPad to your computer to create a backup. You’ll also need a computer with iTunes (for Windows or older macOS versions) or Finder (for macOS Catalina and later) to complete the reset.

    Using iTunes or Finder to Reset

    Here’s how to reset your iPad using iTunes or Finder:

    Connect Your iPad: Plug your iPad into your computer using a USB cable.
    Open iTunes or Finder: Launch iTunes (Windows) or Finder (macOS)

    • In iTunes, your iPad should appear in the top left corner.
    • In Finder, find your iPad under the Locations section in the sidebar.

    Enter Recovery Mode: For newer iPads, press and quickly release the Volume Up button, then the Volume Down button, and then hold the Power button until the recovery mode screen appears.
    Restore iPad: In the iTunes or Finder window, you’ll see a prompt saying there’s a problem with the iPad that requires it to be updated or restored. Select Restore. This will erase your iPad and install the latest iOS or iPadOS version.

    Using Recovery Mode

    If your iPad isn’t recognized by iTunes or Finder, or if it’s stuck on the Apple logo, recovery mode is your next best option. Recovery mode forces the device into a state where it can be restored from scratch. Here’s how you can do it:

    • Connect Your iPad: Plug your iPad into your computer using a USB cable.
    • Enter Recovery Mode: For newer iPads, press and quickly release the Volume Up button, then the Volume Down button, and then hold the Power button until the recovery mode screen appears.
    • Restore or Update: When prompted in iTunes or Finder, choose to “Restore” or “Update” your iPad.

    Resetting via iCloud (Find My iPad)

    If you’ve enabled Find My iPad and can’t access the device, you can reset it remotely via iCloud:

    Access iCloud on a Computer: Open a web browser on your computer or another device and go to iCloud.com and Sign in with your Apple ID. Make sure it’s the same Apple ID that’s associated with the iPad you want to reset.
    Go to Find My iPhone: After logging in, click on Find iPhone. You might need to enter your Apple ID password again or verify your identity.

    Select Your iPad: At the top of the screen, click on All Devices to see a list of your Apple devices and select the iPad you want to reset.

    Erase iPad: In the device menu, click on Erase iPad. A confirmation screen will appear, reminding you that this action will erase all content and settings on your iPad. Click Erase to confirm.

    Using iCloud to reset your iPad is convenient, especially if you don’t have access to a computer or your device is lost or stolen.

    What to Do After Resetting?

    Once the reset is complete, your iPad will restart as a brand-new device. Follow the on-screen instructions to set it up. If you backed up your data beforehand, you can restore it during the setup process.

    Troubleshooting Common Issues

    Resetting an iPad can be straightforward, but sometimes you might run into issues. Here are some common problems and troubleshooting tips to help you navigate them:

    Problem: iPad Not Entering Recovery Mode

    Solution:

    • Recheck Button Combinations: Ensure you’re using the correct button combination for your iPad model.
    • Use a Different Cable or Port: Sometimes, faulty cables or USB ports can prevent the iPad from entering recovery mode. Try a different cable or USB port.
    • Restart Your Computer: A simple restart of your computer might resolve connection issues.

    Problem: iTunes or Finder Not Recognizing the iPad

    Solution:

    • Update iTunes/Finder: Ensure you have the latest version of iTunes or Finder.
    • Check USB Connections: Ensure the iPad is properly connected to the computer. Try using a different USB port or cable.
    • Restart Both Devices: Restart both your iPad and computer.

    Problem: iTunes or Finder Errors During Restore

    Solution:

    • Check for Updates: Make sure both your computer’s operating system and iTunes or Finder are up to date.
    • Restart the Process: Disconnect your iPad, restart your computer, and try the process again.
    • Use a Different Computer: If possible, try the reset process on another computer.
    • Disable Security Software: Sometimes, antivirus or firewall settings can interfere with the process. Temporarily disable these to see if it resolves the issue.

    Problem: Stuck in Recovery Mode or DFU Mode

    Solution:

    • Force Restart: Try force restarting your iPad to exit recovery mode.
    • iPads with Home Button: Press and hold the Home button and the Top (or Side) button until you see the Apple logo.
    • iPads without Home Button: Quickly press and release the Volume Up button, then quickly press and release the Volume Down button. Finally, press and hold the Top button until the Apple logo appears.
    • Use a Professional Tool: There are third-party tools like ReiBoot or Dr.Fone that can help exit recovery mode if the above method doesn’t work.

    Problem: Erase iPad via iCloud Isn’t Working

    Solution:

    • Check Internet Connection: Ensure your iPad is connected to the internet. The erase command won’t go through if the iPad is offline.
    • Sign In to the Correct iCloud Account: Double-check that you’re signed into the correct iCloud account.
    • Try Again Later: Sometimes iCloud services may be temporarily unavailable. Wait a while and try again.

    Problem: iPad Doesn’t Boot After Reset

    Solution:

    • Force Restart: Attempt a force restart (see instructions under “Stuck in Recovery Mode”).
    • Connect to iTunes/Finder: Connect the iPad to a computer with iTunes/Finder and attempt to restore it again.
    • Check Battery Level: Make sure the iPad has enough charge. If it’s low on battery, let it charge for at least 30 minutes before trying to turn it on again.

    Problem: Unable to Restore Backup

    Solution:

    • Check Compatibility: Ensure the backup is compatible with the iOS or iPadOS version installed on your iPad.
    • Storage Space: Make sure your iPad has enough storage space to restore from the backup.
    • Try a Different Backup: If one backup doesn’t work, try restoring from another one, if available.
    • Use iTunes/Finder Backup: If you were trying to restore from an iCloud backup, consider using an iTunes or Finder backup instead, and vice versa.

    These troubleshooting tips should help resolve most issues you might encounter during the iPad reset process. If problems persist, consider reaching out to Apple Support for further assistance.

    Conclusion

    Knowing how to reset an iPad without a password is an invaluable skill, whether you’re dealing with a forgotten password or a second-hand device. It’s a process that can save you from a lot of frustration and get your iPad back up and running. Always keep your device information secure and consider using a password manager to avoid future lockouts.

    Also Check:

  • I Tried the New Fire TV Stick 4K Max, and Guess What, the Speed Boost is a Game-Changer

    I Tried the New Fire TV Stick 4K Max, and Guess What, the Speed Boost is a Game-Changer

    I recently got my hands on Amazon’s latest Fire TV Stick 4K Max, and the speed boost is a game-changer. The upgraded 2.0 GHz quad-core processor ensures smoother streaming and faster load times. The support for Wi-Fi 6E means no more buffering, even in a busy household.I Tried the New Fire TV Stick 4K Max, and Guess What, the Speed Boost is a Game-Changer

    Amazon’s Fire TV Takes a Giant Leap with New Features and Devices

    One standout feature is the Fire TV Ambient Experience. My TV now doubles as a smart display, showing useful info and beautiful artwork when idle. Plus, the new conversational AI in Alexa makes finding content easier than ever.

    The Fire TV Stick 4K Max also comes with double the storage—16GB, compared to the previous 8GB. This means more room for apps and games. And with Dolby Vision and Dolby Atmos support, my viewing experience is truly cinematic.

    Pairing it with the new Fire TV Soundbar took the audio to the next level. The sound is bold and immersive, perfect for movie nights. The Fire TV Soundbar is designed to work seamlessly with your Fire TV devices, providing room-filling sound that enhances your overall viewing experience.

    It’s easy to set up, and its sleek design fits perfectly in any home entertainment setup. At $59.99, this device offers incredible value for anyone looking to upgrade their streaming setup.

    New Features and Benefits of the Fire TV Stick 4K Max

    Enhanced Performance: The Fire TV Stick 4K Max features an upgraded 2.0 GHz quad-core processor, making it the fastest and most powerful Fire TV Stick to date. This means smoother streaming and quicker load times for your favorite apps and shows.

    Wi-Fi 6E Support: With support for the latest Wi-Fi 6E technology, you’ll experience faster speeds, lower latency, and less interference, ensuring a seamless streaming experience even in busy households.

    Fire TV Ambient Experience: Transform your TV into a smart display when idle. This feature, previously available only on the Fire TV Omni QLED Series, now comes to the 4K Max. It provides useful information, beautiful artwork, and personalized content recommendations, enhancing your living room ambiance.

    Generative AI for Alexa: The integration of generative AI in Alexa’s voice search allows for more natural and conversational queries. You can ask Alexa for recommendations based on genres, actors, or even specific scenes, making it easier to discover new content tailored to your preferences.

    Double Storage: The Fire TV Stick 4K Max comes with 16GB of storage, double the capacity of the previous generation. This allows you to store more apps, games, and content directly on the device without worrying about running out of space.

    Dolby Atmos and HDR Support: Enjoy a cinematic experience at home with support for Dolby Vision, HDR, HDR10+, and immersive Dolby Atmos audio. This ensures vibrant visuals and rich sound quality, bringing your entertainment to life.

    Fire TV Soundbar Compatibility: Pair the new Fire TV Soundbar with your 4K Max for an enhanced audio experience. The soundbar delivers bold, room-filling sound, making your TV shows, movies, and games even more immersive.

    These new features make the Fire TV Stick 4K Max a standout choice for anyone looking to upgrade their streaming experience. Whether it’s faster performance, better connectivity, or smarter interactions with Alexa, this device has something to offer for everyone.

    Accessories for Your Fire TV Setup

    To enhance your Fire TV experience, consider these additional accessories:

    1. Alexa Voice Remote: This remote includes voice control for easy navigation and search. It’s compatible with all Fire TV devices.
    2. Fire TV Blaster: This accessory allows you to control your TV, soundbar, and receiver with your Fire TV remote, enabling hands-free control via Alexa.
    3. Game Controller: Ideal for gaming on Fire TV, providing a more comfortable and precise control experience compared to the standard remote.
    4. Ethernet Adapter: For a more stable internet connection, especially useful if your Wi-Fi is unreliable or if you prefer wired connections.
    5. HDMI Extender: Helps to optimize the position of your Fire TV Stick for the best Wi-Fi performance and neat cable management.

    These accessories can be found on Amazon and other major electronics retailers, ensuring you get the most out of your Fire TV setup.

    Buy the new Fire TV Stick 4K Max and Fire TV Soundbar

    You can purchase the new Fire TV Stick 4K Max and Fire TV Soundbar directly from Amazon. They are available on the Amazon website where you can find the latest prices, customer reviews, and detailed product information. Additionally, these products might be available at other major retailers like Best Buy, Walmart, and Target, both online and in physical stores.

    Also  Check:

  • How to Factory Reset Your iPad

    How to Factory Reset Your iPad

    Factory resetting your iPad can be crucial in maintaining its performance or preparing it for a new owner. Whether you’re looking to troubleshoot persistent issues or get your device ready for sale, a factory reset returns your iPad to its original settings. This guide will walk you through why and when to perform a factory reset and provide clear instructions on how to do it.

    How to Factory Reset Your iPad

    How to Factory Reset Your iPad

    A factory reset erases all data and settings on your iPad, returning it to the state it was in when it first left the factory. This means all personal data, apps, and customizations will be removed. Unlike a simple restart or a soft reset, which only temporarily clears the device’s memory, a factory reset completely wipes your device.

    Follow the steps below to factory reset your iPad:

    Step 1: Preparing for a Factory Reset

    Before you initiate a factory reset, it’s crucial to back up your data to avoid losing important information. You can back up your iPad using iCloud or iTunes. To back up with iCloud, go to Settings > [your name] > iCloud > iCloud Backup and tap “Back Up Now.” For iTunes, connect your iPad to your computer, open iTunes, select your device, and choose “Back Up Now.”

    Step 3: Accessing Settings

    Start by navigating to the Settings app on your iPad. Look for the app icon that resembles a gear, and tap on it. Once inside, scroll down and tap on “General” to access general settings for your device.

    Step 4: Initiating the Reset

    Within the General settings, scroll down and find the “Reset” option. Tap on “Reset” to see a list of reset options. Choose “Erase All Content and Settings” to begin the factory reset process. This will prompt your iPad to start the process of wiping all data.

    Step 5: Confirming the Reset

    You will be asked to confirm your decision to erase all content and settings. You may need to enter your passcode and Apple ID password to verify your identity. This step ensures that only authorized users can reset the device, preventing unauthorized access.

    Step 6: Waiting for the Process to Complete

    The factory reset process will take some time. Your iPad will restart, display a progress bar, and then complete the reset. The duration can vary depending on the amount of data being erased, but it usually takes a few minutes. After the process is complete, your iPad will be set to its initial setup screen.

    Step 7: Setting Up Your iPad

    After the reset, you’ll have two options: set up your iPad as new or restore it from a backup. If you choose to set it up as new, follow the on-screen instructions to configure your device. To restore from a backup, select “Restore from iCloud Backup” or “Restore from iTunes Backup” and choose the most recent backup file.

    Troubleshooting Common Issues

    If you encounter problems during the reset, ensure your iPad is connected to a stable Wi-Fi network and is sufficiently charged. If the reset process gets stuck or fails, you might need to restart your iPad and try again. For persistent issues, consult Apple’s support resources or visit an Apple Store for professional assistance.

    Conclusion

    Performing a factory reset is a straightforward process that can resolve many issues and prepare your iPad for a new owner. By following these steps, you ensure that your device is clean and ready for its next chapter. If you need further help, don’t hesitate to reach out to Apple support. A factory reset provides a fresh start, and with a little preparation, you’ll have your iPad back in top shape in no time.

    Frequently Asked Questions (FAQs)

    How do I reset my iPad to factory settings?

    To factory reset your iPad, go to Settings > General > Transfer or Reset iPad > Erase All Content and Settings. Confirm your choice and wait for the iPad to erase and restart. Make sure you’ve backed up your data first, as this process will delete everything on the device.

    What should I do before performing a factory reset on my iPad?

    Before resetting your iPad, back up your data to iCloud or your computer. Ensure you sign out of iCloud and other accounts to avoid issues with activation lock. To sign out of iCloud, go to Settings > [your name] > Sign Out.

    How long does it take to factory reset an iPad?

    The reset process usually takes a few minutes to complete. However, it might take longer depending on the amount of data on your device.

    Will a factory reset remove my Apple ID from the iPad?

    Yes, a factory reset will remove your Apple ID and all associated data from the iPad. Make sure you sign out of iCloud and other accounts before resetting to avoid any issues with activation lock.

    What if I forgot my iPad passcode and need to factory reset it?

    If you’ve forgotten your passcode, you’ll need to use recovery mode to reset your iPad. Connect your iPad to a computer with iTunes (or Finder on macOS Catalina and later), then put your iPad into recovery mode. For most models, press and hold the power and volume down buttons until you see the recovery mode screen. Follow the on-screen instructions to restore your iPad.

    How can I back up my iPad before a factory reset?

    You can back up your iPad using iCloud or iTunes/Finder. To use iCloud, go to Settings > [your name] > iCloud > iCloud Backup > Back Up Now. To use iTunes or Finder, connect your iPad to your computer and follow the prompts to create a backup.

    Will a factory reset fix issues with my iPad?

    A factory reset can fix many issues, such as software glitches or performance problems, by returning the device to its original state. If problems persist after a reset, it may indicate a hardware issue or require further troubleshooting.

    Can I restore my iPad from a backup after a factory reset?

    Yes, after resetting your iPad, you can restore it from a backup. During the setup process, you’ll be prompted to restore from an iCloud or iTunes/Finder backup. Select the appropriate backup to restore your data and settings.

    Also Check:

  • Are Memory Foam Ear Tips Compatible with Different Earbuds?

    Are Memory Foam Ear Tips Compatible with Different Earbuds?

    Memory foam ear tips have gained significant popularity among audio enthusiasts and casual listeners alike. Their ability to provide a custom fit makes them a favored choice for enhancing comfort and sound quality in earbuds. Ear tips are a crucial component of any earbud setup, directly influencing the listening experience. The purpose of this blog post is to explore the compatibility of memory foam ear tips with various earbuds, helping you make an informed decision about whether they are the right choice for your needs.

    Are Memory Foam Ear Tips Compatible with Different Earbuds?


    What Are Memory Foam Ear Tips?

    Memory foam is a soft, pliable material known for its ability to conform to the unique shape of each user’s ear canal. Unlike silicone or rubber tips, memory foam provides a snug, personalized fit, which can improve both comfort and sound isolation. The benefits of memory foam ear tips include enhanced noise cancellation, reduced ear fatigue, and a more secure fit that minimizes the risk of earbuds falling out during use. Common brands offering memory foam ear tips include Comply, Dekoni, and Symbio, each providing various options tailored to different earbud models and user preferences.

    Understanding Earbud Compatibility

    Earbuds come in various designs and sizes, which can affect the compatibility of memory foam ear tips. The size and fit of the ear tips are crucial for optimal performance, as they need to create a proper seal in the ear canal to deliver the best sound quality. Factors such as the nozzle diameter and shape of the earbuds play a significant role in determining whether memory foam tips will fit properly. Understanding these factors is essential for ensuring that you choose the right ear tips for your earbuds.

    Are Memory Foam Ear Tips Universally Compatible?

    While memory foam ear tips offer many benefits, they are not universally compatible with all earbuds. Compatibility largely depends on the design of the earbuds and the size of the nozzle. For example, many popular earbuds like Apple AirPods Pro, Sony WF-1000XM4, and Samsung Galaxy Buds work well with memory foam tips. However, certain models with uniquely shaped nozzles or proprietary designs may present challenges in finding a compatible memory foam option. It’s essential to check the specifications of both the ear tips and your earbuds before making a purchase.

    How to Choose the Right Memory Foam Ear Tips

    Selecting the right size and style of memory foam ear tips for your earbuds is crucial for achieving the best fit and performance. Start by considering the nozzle size of your earbuds and choose ear tips that are compatible with that diameter. Many brands offer sizing guides to help you determine the correct fit. Additionally, it’s important to try different options to find the size that offers the best combination of comfort and sound isolation. Brands like Comply provide a variety of sizes, ensuring that there is an option for nearly every earbud model.

    Using Memory Foam Ear Tips with Different Earbuds

    Using memory foam ear tips with your earbuds can significantly enhance comfort, especially during extended listening sessions. The foam conforms to the ear canal, creating a secure fit that reduces the likelihood of ear fatigue. Moreover, memory foam tips offer superior sound isolation, which can improve audio quality by minimizing external noise. This can also enhance the effectiveness of noise-canceling features in earbuds, providing a more immersive listening experience.

    Potential Drawbacks of Memory Foam Ear Tips

    While memory foam ear tips offer many advantages, there are some potential drawbacks to consider. Memory foam tips tend to have a shorter lifespan compared to silicone alternatives, as they can wear out and lose their shape over time. They also require more maintenance, as the porous material can accumulate dirt and earwax, necessitating regular cleaning. Additionally, some users may experience allergic reactions to memory foam, though this is relatively uncommon.

    User Experiences and Reviews

    User feedback on memory foam ear tips varies, with many praising the comfort and sound quality improvements they provide. However, some users have reported issues with fit, particularly with earbuds that have non-standard nozzle sizes. Overall, experiences tend to be positive, but personal preference plays a significant role in determining satisfaction. It’s recommended to read reviews and consider your specific needs before making a decision.

    Tips for Maintaining Memory Foam Ear Tips

    To get the most out of your memory foam ear tips, proper maintenance is essential. Clean the tips regularly using a damp cloth and mild soap to remove dirt and oils. Avoid submerging them in water, as this can damage the material. Store the tips in a dry, cool place when not in use to prevent them from deteriorating. Pay attention to signs of wear, such as a loss of shape or reduced comfort, which indicate that it’s time to replace the tips.

    Conclusion

    Memory foam ear tips can be a valuable upgrade for many earbud users, offering improved comfort and sound quality. However, their compatibility with different earbuds is not guaranteed, so it’s important to consider the specific design and size of your earbuds when selecting memory foam tips. Experimenting with different sizes and brands can help you find the perfect fit, enhancing your overall listening experience. Whether you’re looking to reduce ear fatigue, improve noise isolation, or simply enjoy a more comfortable fit, memory foam ear tips are worth considering.

    Also Check: