Blog

  • For Me, the Ability to Connect your AirPods Max with USB-C Directly to Audio Sources Makes It a Smart Upgrade

    For Me, the Ability to Connect your AirPods Max with USB-C Directly to Audio Sources Makes It a Smart Upgrade

    When Apple released the AirPods Max, they were praised for their premium sound quality, luxurious design, and impeccable integration with the Apple ecosystem. However, one aspect that left many users scratching their heads was the inclusion of the Lightning port instead of USB-C. As Apple started moving more devices toward the USB-C standard, fans of the AirPods Max began wondering when their favorite headphones would follow suit.

    Remove term: You can now Connect your AirPods Max Directly to Audio Sources with USB-C You can now Connect your AirPods Max Directly to Audio Sources with USB-C

    Click Here to Buy Now on Amazon

    Well, the wait is over. I got my hands on the new AirPods Max with USB-C, and after spending some time with them, I can confidently say they offer some distinct advantages over the Lightning version. But do these improvements justify an upgrade? Let’s dive into the details and compare the two versions to see what’s changed.

    Design: Same Look, Different Port

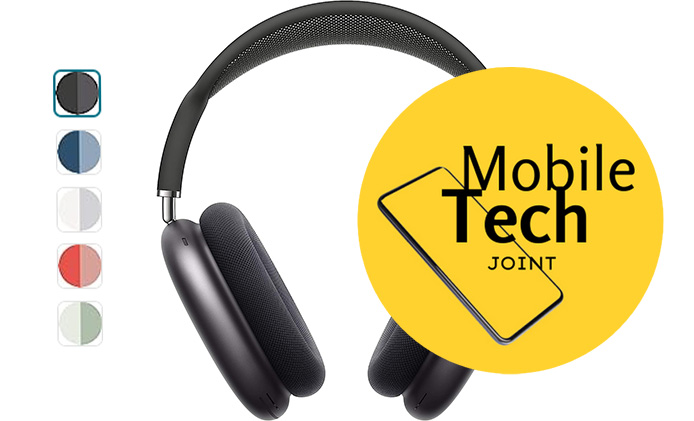
    From the outside, it’s almost impossible to distinguish the AirPods Max USB-C version from the original Lightning model. Apple hasn’t made any drastic changes to the design, and that’s not necessarily a bad thing. The original AirPods Max already set the bar high with their anodized aluminum ear cups, memory foam cushions, and stainless steel frame. They feel substantial without being overly heavy, and the canopy headband still distributes weight evenly for long listening sessions.

    The only visual difference? That USB-C port replacing the old Lightning connection. While it might seem like a small change, it has big implications for convenience and usability, which I’ll get into later. The case, however, remains the same polarizing “Smart Case” that still doesn’t offer much protection. Sadly, if you didn’t like it the first time, there’s nothing new here to change your mind.

    Charging and Connectivity: USB-C Finally Delivers Convenience

    One of the biggest complaints with the original AirPods Max was the use of a Lightning connector for charging, especially as Apple gradually transitioned more products to USB-C. The iPad Pro, MacBook, and now even the iPhone 16 all use USB-C, so why were we stuck carrying an extra cable just for our AirPods Max?

    With the USB-C version, those days are finally over. You can now charge your AirPods Max with the same cable you use for your iPhone, iPad, or MacBook, which simplifies your life—especially when traveling. For someone like me, who is always on the go, this reduction in cable clutter is a game-changer.

    Charging Speed: I noticed a slight improvement in charging speeds with USB-C, particularly when using a higher-wattage charger. While the original Lightning model wasn’t exactly slow to charge, the USB-C version feels faster when paired with a 20W or higher charger, reducing the time spent tethered to a wall outlet.

    Audio Quality: Consistency Across Both Models

    When it comes to sound, both the USB-C and Lightning versions of the AirPods Max deliver the same incredible audio performance. Apple didn’t make any hardware changes to the drivers or sound processing, so if you’re expecting a major difference in sound quality, there’s none to be found here.

    The AirPods Max still excel with their deep bass, balanced mids, and crisp highs. Spatial Audio with dynamic head tracking is as immersive as ever, especially when watching movies or playing games. The active noise cancellation (ANC) remains one of the best in the business, blocking out everything from airplane noise to chatter in coffee shops.

    Whether you’re listening to high-fidelity tracks through Apple Music’s lossless catalog or streaming a playlist on Spotify, the sound remains top-notch. The addition of USB-C hasn’t changed the audio performance, and that’s a good thing because the AirPods Max were already some of the best-sounding headphones on the market.

    Wired Listening: Finally, a Real Upgrade

    Here’s where things get interesting. One of the biggest drawbacks of the original AirPods Max was the need for a separate Lightning-to-3.5mm cable for wired listening. With the USB-C version, Apple has made this process much easier. You can now use a standard USB-C to 3.5mm cable to connect your AirPods Max directly to audio sources like your laptop, console, or even an in-flight entertainment system. No need to buy an additional adapter!

    I tested this out with several devices, including my MacBook and Nintendo Switch, and the convenience of a direct connection was fantastic. The sound quality in wired mode is excellent—arguably better than the wireless connection in certain situations, especially when it comes to minimizing latency in gaming or streaming.

    Why It Matters: The improved wired functionality is a huge plus for audiophiles and those who often use their headphones for critical listening. While Bluetooth 5.0 is more than capable, a wired connection can offer a cleaner, more reliable sound, especially in environments where wireless interference might be an issue.

    Battery Life: Slight Efficiency Gains

    The AirPods Max with USB-C offers the same 20-hour battery life as the original model, but I noticed a slight improvement in efficiency when switching between devices and using Spatial Audio. This could be due to small optimizations Apple has made in the software and power management, but it’s not a huge leap over the Lightning version.

    That said, USB-C charging does feel faster, so even though battery life hasn’t improved significantly, the quicker recharge times mean less waiting around when you do need to juice up.

    Ecosystem Integration: No Changes, But Still Seamless

    One of the standout features of the AirPods Max—whether you’re using the USB-C or Lightning version—is how smoothly they integrate into the Apple ecosystem. Switching between devices, like moving from your iPhone to your MacBook, remains a seamless experience. The H1 chips inside both versions allow for fast, stable connections, and Siri is always ready to assist with hands-free commands.

    The addition of USB-C hasn’t altered any of this, so if you’re used to how well AirPods Max worked with your Apple devices, rest assured that the experience is just as seamless with the USB-C model.

    Should You Upgrade?

    If you already own the Lightning version of the AirPods Max, you’re probably wondering if it’s worth upgrading to the USB-C model. The answer depends on your priorities.

    • For Travel and Convenience: If you’re deeply integrated into the Apple ecosystem and already use USB-C across multiple devices, the convenience of carrying just one charging cable might be enough to justify the upgrade.
    • For Audiophiles and Gamers: If you frequently use wired connections for critical listening or gaming, the improved USB-C wired functionality is a solid reason to make the switch.
    • For Casual Listeners: If you’re content with your current AirPods Max and don’t mind carrying a Lightning cable, the improvements in the USB-C model probably aren’t worth the cost of upgrading.

    Final Thoughts

    The AirPods Max with USB-C brings much-needed convenience to Apple’s premium over-ear headphones. While the overall performance remains the same, the ability to charge with a universal cable and improved wired listening options make it a smart upgrade for those who value simplicity and flexibility.

    For those who already own the Lightning version, it’s not a must-have upgrade unless you’re tired of juggling cables or need the wired functionality. But for new buyers, the USB-C version of the AirPods Max is clearly the better choice, offering a more future-proof experience that aligns perfectly with the rest of Apple’s lineup.

    Also Check:

  • Which Airpod Max Color is the Best

    Which Airpod Max Color is the Best

    The Apple AirPods Max have taken the market by storm with their exceptional sound quality, advanced features, color and stylish design. One of the standout aspects of these premium headphones is the variety of color options available. With choices that cater to different tastes and preferences, the AirPods Max allow users to express their personal style.

    Which Airpod Max Color is the Best

    Which Airpods Max Color is the Best

    In this blog post, we’ll explore the different color options, their unique features, aesthetic appeal, durability, compatibility, sound quality, and customer reviews to help you choose the perfect color for your AirPods Max.

    Table of Comparison

    Color Aesthetics Durability Compatibility Sound Quality
    Space Gray Professional Excellent Universal Exceptional
    Silver Modern Excellent Universal Exceptional
    Green Unique Very Good Universal Exceptional
    Pink Playful Very Good Universal Exceptional
    Sky Blue Calming Very Good Universal Exceptional

    Color Options

    Apple offers the AirPods Max in five stunning colors: Space Gray, Silver, Sky Blue, Green, and Pink. Each color has its unique charm and can cater to various style preferences.

    • Space Gray: Sleek and modern, Space Gray is a classic choice that exudes sophistication. Its neutral tone makes it versatile and suitable for any occasion.
    • Silver: Elegant and timeless, Silver offers a clean and polished look. It pairs well with a wide range of devices and accessories.
    • Sky Blue: Fresh and vibrant, Sky Blue adds a pop of color without being too bold. It’s perfect for those who want a touch of uniqueness.
    • Green: Trendy and stylish, Green is a contemporary choice that stands out. It’s ideal for those who enjoy making a fashion statement.
    • Pink: Soft and chic, Pink is a playful option that adds a bit of fun to your audio experience. It’s great for those who like a touch of femininity.

    Aesthetics

    Each color option for the AirPods Max brings its own aesthetic appeal:

    • Space Gray complements a minimalist style, ideal for professional and casual settings alike.
    • Silver offers a sleek and versatile look that matches well with most Apple devices.
    • Sky Blue is perfect for a modern, trendy look, adding a subtle yet noticeable flair.
    • Green is bold and eye-catching, suitable for those who want to stand out.
    • Pink provides a fun and vibrant aesthetic, perfect for a playful and youthful vibe.

    Durability

    When it comes to durability, the color choice can impact how well the AirPods Max withstand wear and tear:

    • Space Gray and Silver are likely to show fewer scratches and stains due to their darker and neutral tones.
    • Sky Blue, Green, and Pink may be more prone to showing marks and stains, but their vibrant colors can often mask minor blemishes.

    Compatibility

    Each color option is universally compatible with Apple devices and accessories. The versatility of each color option in pairing with different devices and accessories is also a key consideration:

    • Space Gray and Silver seamlessly blend with most Apple devices, including iPhones, iPads, and MacBooks.
    • Sky Blue, Green, and Pink can add a personal touch and make your headphones stand out, especially when paired with neutral-colored devices.

    Sound Quality

    The sound quality of the AirPods Max remains consistent across all color options. Apple ensures that the performance and audio experience are not affected by the color of the headphones. Therefore, you can expect the same high-quality sound regardless of the color you choose.

    Customer Reviews and Feedback

    Customer feedback highlights the popularity of certain colors. It also provides valuable insights into the popularity and reception of the different AirPods Max color options. Here’s a closer look at what users have to say about each color:

    Space Gray:

    Space Gray is often praised for its sleek and professional appearance. Customers frequently describe it as timeless and sophisticated, making it a popular choice for both business and casual settings.

    Many appreciate its subtle elegance, noting that Space Gray seamlessly blends with most outfits and environments, providing a stylish yet understated look. Reviewers also highlight its durability, mentioning that it hides scratches and smudges well, helping it maintain a pristine appearance over time.

    Silver:

    Silver, on the other hand, is celebrated for its clean, polished look that exudes a sense of elegance. Customers often regard it as a safe, classic choice that never goes out of style. Its versatility is another commonly mentioned advantage, as it pairs well with various devices and accessories, complementing a wide range of styles.

    Users appreciate that Silver doesn’t show fingerprints easily and is relatively easy to keep clean, enhancing its durability and maintaining its sleek look.

    Sky Blue:

    Sky Blue receives accolades for its fresh and vibrant look. Customers love how this color stands out without being overly bold, providing a unique and refreshing appearance. Many reviewers mention that Sky Blue gives the AirPods Max a modern, trendy vibe, making it a favorite among younger users and those looking for a contemporary touch.

    The color is often associated with positivity and energy, making it a popular choice for daily use and casual settings, adding a cheerful splash of color to the audio experience.

    Green:

    Green is lauded for its trendy and fashionable appearance. Many users choose this color to make a statement and express their individuality. Customers often note that Green is eye-catching and unique, setting their AirPods Max apart from more common color choices.

    However, reviews on its maintenance are mixed; while some users love the boldness of Green, others point out that it can show marks and wear more easily than darker colors, requiring more careful upkeep to preserve its fresh look.

    Pink:

    Pink is appreciated for its playful and chic look, often chosen by customers who want to add a touch of fun and femininity to their headphones. Reviewers mention that Pink gives the AirPods Max a youthful and vibrant appearance, making it a popular choice among younger users and those looking for a bit of whimsy in their tech accessories.

    However, like Green, some users note that Pink may require more careful maintenance to keep it looking fresh and clean, as it can show marks more readily than other colors.

    Overall Sentiment

    Overall, Space Gray and Silver consistently receive high marks for their classic, versatile, and durable qualities. They are favored by users looking for a sophisticated and understated look. Sky Blue enjoys positive feedback for its unique and refreshing aesthetic, appealing to those who want a touch of color without being too flashy.

    Green and Pink attract users who prefer bold and distinctive colors, though they may require more maintenance to preserve their appearance. These colors are often selected by individuals looking to make a fashion statement with their AirPods Max.

    So, when choosing a color for your AirPods Max, consider your personal style and preferences. Think about how the color will fit into your daily life, complement your wardrobe, and match your other devices. Choosing a color that resonates with your individual taste will ensure that you enjoy your headphones even more.

    Conclusion

    The Apple AirPods Max offers not only superior sound quality and advanced features but also a range of color options to suit different tastes and styles. By considering the aesthetics, durability, compatibility, sound quality, and customer reviews, you can make an informed decision on the best color for you.

    Ultimately, the right choice will be the one that reflects your personal style and meets your needs. But know that, whichever color you choose, you’ll be getting a pair of premium headphones that not only sound great but look fantastic too. Happy listening!

    Also Check:

  • How Long Do AirPods Last: What Is the Average Lifespan of AirPods?

    How Long Do AirPods Last: What Is the Average Lifespan of AirPods?

    AirPods have become synonymous with wireless audio convenience, revolutionizing how we engage with music, calls, and more on the go. As these sleek earbuds continue to gain popularity, understanding their lifespan or how long they last can help users know how to use them and when to replace them to ensure optimal performance. So, how long do AirPods last?

    How Long Do AirPods Typically LastThis blog post explores everything you need to know about AirPods’ lifespan, from their features and battery life to maintenance tips and upgrading options.

    How Long Do AirPods Typically Last

    In terms of the daily battery life of AirPods: AirPods typically offer around 5 hours of listening time on a single charge, with additional charges provided by the charging case extending total use to over 24 hours. Battery life can vary based on usage patterns, settings, and environmental factors.

    In terms of the longevity of AirPods: The expected lifespan of AirPods is influenced by usage habits and environmental conditions. Typically, AirPods can last for about 2 to 3 years with proper care. The table below provides a detailed comparison of various AirPods models, focusing on their battery life, charging capabilities, and average lifespan reported by users.

    Apple designs AirPods with lithium-ion batteries, which have a limited number of charge cycles before their capacity begins to diminish noticeably. On average, users can expect:

    Table of Comparison

    AirPods Model Battery Life Charging Time Average Lifespan Reported
    AirPods 1st Generation Up to 5 hours About 15 minutes for 3 hours 2-3 years
    AirPods 2nd Generation Up to 5 hours About 15 minutes for 3 hours 2-3 years
    AirPods Pro Up to 4.5 hours About 5 minutes for 1 hour 2-3 years
    AirPods Max Up to 20 hours About 5 minutes for 1.5 hours Expected longer lifespan due to premium build


    AirPods 1st Generation

    Battery Life Expectancy: The AirPods 1st Generation typically offer up to 5 hours of listening time on a single charge, with the charging case extending total usage to about 24 hours. This model has been reported to maintain its battery performance well for about 2 to 3 years of regular use.

    Tips for Prolonging the Lifespan: To maximize the lifespan of AirPods 1st Generation, it’s advisable to avoid exposing them to extreme temperatures, maintain regular charging cycles with breaks in between, and keep them clean from dust and debris. These practices help preserve battery health over time.

    User Reviews and Experiences: User feedback generally highlights reliability in everyday use, though some early adopters have reported slight battery degradation after 2 to 3 years of heavy usage. Despite this, many users find the AirPods 1st Generation to be durable and effective for their needs.

    AirPods 2nd Generation

    Improvements in Battery Life: AirPods 2nd Generation maintain a similar battery life of up to 5 hours of listening time per charge, but introduce the H1 chip for faster connectivity and improved efficiency. This model also shows resilience in battery performance, lasting about 2 to 3 years under normal usage conditions.

    Reported Issues with Longevity: While generally reliable, some users have noted minor decreases in battery capacity over time, echoing experiences seen with the 1st Generation. However, advancements in technology have generally improved overall longevity and user satisfaction compared to earlier models.

    Comparison with 1st Generation: The introduction of the H1 chip in AirPods 2nd Generation enhances performance, including faster device switching and lower latency, providing a noticeable upgrade over the 1st Generation. This improvement contributes to a more seamless user experience and prolonged usability.

    AirPods Pro

    Battery Life and Durability: AirPods Pro offer around 4.5 hours of listening time with active noise cancellation enabled, and up to 24 hours with the charging case. Their durability is enhanced by an IPX4 rating for sweat and water resistance, making them suitable for active use. These earbuds typically maintain their functionality and battery life for about 2 to 3 years.

    Features Affecting Lifespan: The adaptive EQ and vent system in AirPods Pro contribute not only to audio quality but also to comfort and durability. These features are designed to withstand regular use and maintain consistent performance throughout their lifespan.

    Comparison with Previous Models: AirPods Pro represents a significant upgrade in sound quality and design compared to earlier models. Their improved battery efficiency and robust build quality contribute to a longer lifespan, ensuring continued satisfaction for users over several years.

    AirPods Max

    Battery Life and Charging Capabilities: AirPods Max offer up to 20 hours of high-fidelity audio playback on a single charge, with a quick charge feature providing approximately 1.5 hours of listening time with just a 5-minute charge. These premium headphones are built to last, with expected longevity well beyond typical earbuds.

    Longevity of Premium Materials: Constructed from stainless steel and featuring memory foam ear cushions, AirPods Max are designed for durability and comfort. The use of premium materials contributes to their extended lifespan, making them a long-term investment for audiophiles.

    User Feedback on Lifespan: Early adopters appreciate the build quality and robust design of AirPods Max, with many expecting them to last for several years without significant degradation in performance. Their high-end features and materials justify their price tag as a durable and reliable audio solution.

    User Experiences and Feedback

    Real-life user experiences provide valuable insights into AirPods’ lifespan. Users report both positive experiences with longevity exceeding expectations and challenges like battery deterioration over time. Understanding these experiences helps set realistic expectations for prospective buyers.

    Signs of Aging AirPods

    As AirPods age, several signs may indicate they are nearing the end of their lifespan. These signs include decreased battery life, reduced sound quality, connectivity issues, and physical wear such as worn-out ear tips or case damage.

    How to Know When It’s Time to Replace AirPods

    It may be time to replace AirPods when they no longer hold a charge as effectively, exhibit frequent connectivity problems, or if the audio quality noticeably declines despite maintenance efforts. Upgrading to a newer model or considering battery replacement options can restore functionality.

    Tips to Extend the Battery Life of AirPods

    To extend the battery life of AirPods, consider adjusting settings like volume and disabling features like active noise cancellation when not needed. Additionally, storing AirPods in their charging case when not in use and keeping the case charged can help maintain optimal battery performance.

    Future advancements in technology, such as improved battery technology and enhanced durability, hold promise for extending AirPods’ lifespan. Monitoring these developments can provide insights into the future of wireless earbuds.

    Conclusion

    Understanding the lifespan of AirPods is essential for maximizing their value and performance. From battery life and maintenance tips to considering upgrades and alternatives, this blog post has covered key aspects to help you make informed decisions. Whether you’re a current user or considering purchasing AirPods, knowing how to care for them ensures a longer, more satisfying experience. Share your own tips and experiences to further enrich the community’s knowledge of AirPods’ longevity.

    Frequently Asked Questions (FAQs)

    How Long Do AirPods Last on a Full Charge?

    AirPods on a full charge can provide impressive usage times, which vary slightly depending on the model. For instance, the first-generation AirPods can last up to 5 hours of listening time or around 2 hours of talk time. The second-generation AirPods offer up to 5 hours of listening time, but with improved talk time of around 3 hours. AirPods Pro, with active noise cancellation and transparency mode enabled, provide up to 4.5 hours of listening time or around 3.5 hours of talk time on a full charge. If these features are disabled, the listening time can extend to 5 hours.

    How Long Do AirPods Last Before They Die?

    The overall lifespan of AirPods before they begin to deteriorate significantly is generally around 2 to 3 years. This timeframe can vary based on usage patterns and care. Over time, the lithium-ion batteries in AirPods lose capacity, which results in reduced battery life per charge and the need for more frequent recharging. Heavy users may notice a decline sooner, while those who use their AirPods less frequently may find they last a bit longer.

    How Long Can 100% AirPods Last?

    When fully charged to 100%, AirPods typically offer the following usage times:

    • First-generation AirPods: Up to 5 hours of listening time or 2 hours of talk time.
    • Second-generation AirPods: Up to 5 hours of listening time or 3 hours of talk time.
    • AirPods Pro: Up to 4.5 hours of listening time with active noise cancellation and transparency mode, or 5 hours with these features disabled, and around 3.5 hours of talk time.

    How Long Do AirPods Last 2nd Generation?

    The second-generation AirPods, introduced with improvements over the first generation, offer a solid battery life. They provide up to 5 hours of listening time on a full charge and up to 3 hours of talk time. With the charging case, users can expect up to 24 hours of listening time and 18 hours of talk time. In terms of overall lifespan, the second-generation AirPods generally last around 2 to 3 years before users might notice significant battery degradation.

    How Long Do AirPods Last Without Charging?

    Without the charging case, AirPods can last for the duration of their battery life per charge. For most models, this means:

    • First-generation AirPods: Up to 5 hours of listening time.
    • Second-generation AirPods: Up to 5 hours of listening time.
    • AirPods Pro: Up to 4.5 hours of listening time with active noise cancellation and transparency mode, or 5 hours with these features disabled.

    Once the battery is depleted, the AirPods will need to be placed back in the charging case to recharge. The charging case itself holds multiple additional charges, extending the total usage time before needing to be plugged in again.

    Also Check:

  • Airpods Max vs Bose Quietcomfort Ultra: Which Wins on Comfort and Best Sound Quality?

    Airpods Max vs Bose Quietcomfort Ultra: Which Wins on Comfort and Best Sound Quality?

    Choosing between the Apple AirPods Max and the Bose QuietComfort Ultra is a tough call. These headphones both pack premium features, sleek designs, and a price tag to match, but each one brings something different to the table in terms of comfort, sound quality, and overall listening experience. In this review, we will consider some of the key factors that set them apart and see which might be the best pick for your ears.

    Airpods Max vs Bose Quietcomfort Ultra


    In the high-end headphone market, Apple’s AirPods Max and Bose’s QuietComfort Ultra stand as two top contenders, both promising premium sound and ultimate comfort. But if you’re looking to invest in a new pair, which of these heavyweights is the best choice? Here’s a deep dive comparing both headphones in terms of comfort, sound quality, and some extra features to help you make the call.


    Comfort: Designed for Long Listening Sessions

    AirPods Max: A Distinctive Look and Feel

    Apple’s AirPods Max were designed with comfort as a priority. With a unique mesh canopy headband and memory foam ear cushions, they distribute pressure evenly over your head, keeping your ears and head cool even during long listening sessions. The materials Apple chose—such as the aluminum ear cups and stainless steel frame—lend a premium feel, but they also make the AirPods Max heavier than most headphones in their class.

    For users sensitive to weight, this could be a drawback, as the AirPods Max comes in at around 385 grams. However, many users report that the weight is offset by the balanced distribution, allowing for hours of wear without significant discomfort. Apple’s meticulous attention to ergonomic detail also minimizes clamping force, which is crucial for prolonged comfort.

    Bose QuietComfort Ultra: Lightweight and Soft

    Bose is no stranger to the world of ultra-comfortable headphones. The QuietComfort Ultra, true to its name, is feather-light compared to the AirPods Max, coming in at a mere 252 grams. The lightweight design, combined with plush memory foam ear cups, makes the QuietComfort Ultra feel almost weightless on your head. Bose uses a mix of durable plastic and soft-touch materials that contribute to its light build without feeling flimsy.

    In terms of overall wearability, the QuietComfort Ultra takes the edge for those who prioritize minimal weight and softer padding. If you’re someone who wears headphones for hours on end, Bose’s QuietComfort Ultra wins for effortless, everyday comfort.

    Comfort Verdict: While the AirPods Max are beautifully designed with luxurious materials, the Bose QuietComfort Ultra wins out for long-term comfort, especially if lightweight wear is a priority.


    Sound Quality: The Real Heavyweight Matchup

    AirPods Max: Precision-Engineered Audio

    Apple’s AirPods Max is celebrated for its high-fidelity audio and balanced sound profile. They feature a custom-designed 40mm driver and Apple’s computational audio, which adjusts sound in real-time based on fit and movement. Spatial Audio, powered by Apple’s H1 chips, creates an immersive, 3D-like audio experience that’s particularly impressive for movies and supported music tracks. The AirPods Max also offers Adaptive EQ, which tunes low and mid-range frequencies based on the fit of the ear cushions to ensure consistent sound quality.

    When it comes to bass, the AirPods Max provides depth without overpowering the mids and highs. Vocals and instruments are crisp, and there’s an open soundstage that many over-ear headphones lack. The combination of clarity and balance makes these headphones perfect for listeners who enjoy an immersive, realistic sound experience.

    Bose QuietComfort Ultra: All About Clarity and Immersive Sound

    Bose is known for its impeccable audio quality, and the QuietComfort Ultra continues that legacy. Bose uses proprietary drivers and advanced noise-canceling technology that’s particularly effective at isolating vocals and higher frequencies. The QuietComfort Ultra also introduces immersive audio features, including spatial audio, which creates a dynamic listening experience without losing clarity.

    The Bose QuietComfort Ultra leans towards a slightly warm sound profile, with a balanced bass that supports but doesn’t dominate the mids and highs. Bose’s renowned Active EQ automatically adjusts sound levels to match the volume, ensuring consistent quality across genres. Whether you’re listening to bass-heavy tracks, podcasts, or classical music, the QuietComfort Ultra delivers clear, balanced audio.

    Sound Quality Verdict: While both headphones offer fantastic sound, the AirPods Max edges out with a wider soundstage and spatial audio experience that feels slightly more immersive for movies and compatible music. For audiophiles who value clarity and real-time audio adjustments, the AirPods Max has the edge, but Bose’s QuietComfort Ultra remains a close competitor.


    Noise Cancellation: Silence at Its Best

    AirPods Max: Impressive Active Noise Cancellation

    Apple’s noise-canceling technology in the AirPods Max is top-notch. With six outward-facing microphones and two inward-facing microphones, the AirPods Max dynamically blocks out external sounds, even in noisy environments. Apple’s Transparency mode is also highly effective, allowing ambient sounds to filter in naturally without losing audio fidelity. For those who commute or work in bustling spaces, this level of noise control offers a peaceful listening experience.

    Bose QuietComfort Ultra: Industry-Leading Noise Cancellation

    Bose has long been a leader in noise cancellation, and the QuietComfort Ultra continues to set a high bar. Using a proprietary digital noise-canceling algorithm, Bose fine-tunes frequencies to silence background noise with precision. Additionally, the QuietComfort Ultra’s Aware Mode (Bose’s version of transparency mode) does an excellent job of bringing in natural sound, perfect for quick conversations or staying alert to your surroundings.

    Noise Cancellation Verdict: Bose QuietComfort Ultra maintains a slight lead, especially for users prioritizing noise cancellation in environments with unpredictable sound patterns, such as travel or crowded areas. The AirPods Max, however, is a strong competitor and performs excellently in more controlled environments.


    Battery Life and Charging: Staying Powered Up

    AirPods Max: Respectable Battery with USB-C Convenience

    The AirPods Max delivers around 20 hours of battery life with both active noise cancellation and Spatial Audio enabled. The recent update to USB-C charging is a big plus, making it faster and more convenient to recharge alongside Apple’s other USB-C devices. Fast charging allows for 1.5 hours of listening with a quick 5-minute charge.

    Bose QuietComfort Ultra: Slightly Longer Battery Life

    Bose’s QuietComfort Ultra offers up to 24 hours of battery life with noise cancellation on, which is slightly longer than the AirPods Max. Bose also supports fast charging, providing 2.5 hours of playtime on a 15-minute charge. This extended battery life could be ideal for travelers or users who often forget to recharge overnight.

    Battery Verdict: Bose wins in battery longevity, though the USB-C charging of the AirPods Max brings Apple users added convenience in a compatible ecosystem.


    Extra Features: Enhancing the Listening Experience

    AirPods Max Features

    • Spatial Audio with Dynamic Head Tracking: Perfect for immersive audio when watching compatible movies or listening to certain music genres.
    • Automatic Switching: Seamlessly switch between Apple devices, making it convenient for those in the Apple ecosystem.
    • Transparency Mode: Lets in outside sound when needed, blending ambient noise with audio.

    Bose QuietComfort Ultra Features

    • Aware Mode: Similar to Transparency Mode, it offers a natural blend of ambient sound and audio.
    • Customizable Noise Cancellation: Allows fine-tuning for different environments.
    • Built-In Voice Assistant: Bose supports Alexa and Google Assistant, offering hands-free convenience.

    Features Verdict: For Apple users, the AirPods Max has more seamless features within its ecosystem, like automatic switching. However, Bose offers more versatility with voice assistant support, appealing to users with mixed-device preferences.


    Final Verdict: Which One Should You Choose?

    In this head-to-head, both the AirPods Max and Bose QuietComfort Ultra are stellar choices, each catering to slightly different needs.

    • For Comfort: Bose QuietComfort Ultra takes the win with its ultra-lightweight design, ideal for long listening hours.
    • For Sound Quality: The AirPods Max edges out with a wider soundstage and immersive Spatial Audio, perfect for Apple users.
    • For Noise Cancellation: Bose remains the leader with its industry-best noise cancellation, suitable for travelers or city dwellers.
    • For Battery Life: Bose has a slight edge with 24 hours of battery life, though the AirPods Max USB-C update adds convenience.

    Ultimately, if you’re deep into the Apple ecosystem and want advanced sound features like Spatial Audio, the AirPods Max is a fantastic investment. For those who prioritize noise cancellation and lightweight comfort, the Bose QuietComfort Ultra may be the better choice. Both offer excellent performance, so you can’t go wrong. It all comes down to what matters most in your listening experience.


    Also Check:

  • Here’s How to Use Alexa to Control YouTube: Streamline Your Viewing Experience

    Here’s How to Use Alexa to Control YouTube: Streamline Your Viewing Experience

    In today’s fast-paced digital world, convenience is king. Many of us rely on smart devices to enhance our day-to-day activities, and one of the most popular combinations is using Amazon’s Alexa with various streaming services.

    Alexa to YouTube

    If you enjoy watching videos on YouTube, you’ll be thrilled to know that you can seamlessly integrate Alexa into your viewing experience. This article will guide you through the steps on how to use Alexa to control your YouTube, making your entertainment setup more efficient.

    Requirements

    Before diving into the setup process, ensure you have the following:

    • An Amazon Alexa-enabled device (Echo, Echo Show, etc.)
    • A compatible smart TV or streaming device (Roku, Fire TV Stick, etc.)
    • The YouTube app installed on your smart TV or streaming device
    • A stable Wi-Fi connection

    How to Use Alexa to Control YouTube

    Get ready to unlock the full potential of your smart home by discovering how Alexa can revolutionize your YouTube adventures.

    Step 1: Set Up Your Alexa Device

    If you haven’t already set up your Alexa device, follow these steps:

    • Download the Amazon Alexa App: Available for both Android and iOS, this app is essential for managing your Alexa-enabled devices.
    • Sign In or Create an Account: Use your Amazon account credentials to log in. If you don’t have an account, you can easily create one within the app.
    • Connect to Wi-Fi: Ensure your Alexa device is connected to the same Wi-Fi network as your smart TV or streaming device. This is crucial for seamless communication between devices.
    • Enable Voice Activation: If you want to control your device hands-free, ensure that the voice activation feature is enabled. This setting is typically found in the device settings within the Alexa app.

    Step 2: Link Your Smart TV or Streaming Device

    To control YouTube with Alexa, you need to link your smart TV or streaming device. The process can vary depending on the device you own:

    For Smart TVs:

    • Access the Settings Menu: Turn on your smart TV and navigate to the settings menu.
    • Link to Alexa: Look for an option to link your TV to Amazon Alexa. This option might be labeled as “Alexa” or “Voice Control.” Follow the prompts to log in with your Amazon account.
    • Complete the Setup: Once linked, you may need to confirm the setup through the Alexa app.

    For Streaming Devices (e.g., Fire TV Stick, Roku):

    • Open the Alexa App: Go to the “Devices” tab and select “Add Device.”
    • Choose Your Device Type: Select the type of streaming device you’re using and follow the prompts to link it to your Alexa account.
    • Enable the YouTube Skill: For some devices, you may need to enable the YouTube skill. In the Alexa app, go to “Skills & Games,” search for “YouTube,” and enable the skill.

    Step 3: Using Alexa to Control YouTube

    Once you have everything set up, you’re ready to start controlling YouTube with your voice! Here are some common commands you can use:

    • Play a Specific Video: “Alexa, play on YouTube.”
    • Search for Content: “Alexa, search for [topic] on YouTube.”
    • Pause/Resume Playback: “Alexa, pause” or “Alexa, resume.”
    • Skip Forward/Backward: “Alexa, skip forward 10 seconds” or “Alexa, rewind 30 seconds.”
    • Adjust Volume: “Alexa, increase the volume” or “Alexa, set the volume to 5.”

    Tips for a Smooth Experience

    • Be Specific: When asking Alexa to play a video, being specific with the title will yield better results. For example, “Alexa, play ‘Cooking with Jamie’ on YouTube.”
    • Update Regularly: Keep both your Alexa app and your smart TV’s software up to date. This ensures compatibility and access to the latest features.
    • Explore Voice Commands: Familiarize yourself with other commands. You can ask Alexa to create playlists, recommend videos, or even check the latest trending topics.
    • Check the Alexa App for History: If you ever forget what you’ve watched, you can review your voice history in the Alexa app under “Settings” > “Alexa Privacy.”

    Conclusion

    Integrating Alexa with YouTube can transform your viewing experience, making it more convenient and enjoyable. With just a few simple steps, you can control your content with voice commands, allowing you to sit back and enjoy your favorite videos without fumbling for a remote.

    So why not give it a try? Embrace the future of entertainment and streamline your YouTube experience with Alexa today.

    ALSO CHECK:

  • Alexa Can Now Control Your Samsung TV: Here’s How to Connect Alexa to Your Samsung TV

    Alexa Can Now Control Your Samsung TV: Here’s How to Connect Alexa to Your Samsung TV

    With smart home technology advancing rapidly, the integration between devices has become seamless and convenient. One such powerful combination is connecting Amazon’s Alexa to your Samsung TV.
    Alexa to Samsung TV
    By pairing these two, you can control your TV with simple voice commands, making everything from turning it on to adjusting the volume, changing channels, and even launching apps a hands-free experience.
    But how do you set this up? In this article, we will walk you through the easy steps to connect Alexa to your Samsung TV, ensuring that your entertainment system is smarter and more intuitive than ever.
    How to Connect Alexa to Your Samsung TV
    Connecting Alexa to Samsung TV is an easy step. follow these simple procedures to learn how to:

    Step 1: Check Compatibility

    Before you begin, it’s important to confirm that your Samsung TV is compatible with Alexa. Samsung Smart TVs made from 2018 onward typically support Alexa, but it’s always good to verify. You’ll need a model that supports voice interaction, like those with the SmartThings app or built-in Alexa.

    If you’re unsure whether your Samsung TV is compatible, check the user manual or the Samsung support website.

    Step 2: Set Up Your TV for Alexa Control

    For Samsung TVs with built-in Alexa, setup is usually straightforward. Here’s how to get started:

    1. Update Your TV Software: Make sure your Samsung TV is running the latest firmware. Navigate to Settings > Support > Software Update > Update Now to download and install any updates.
    2. Enable SmartThings on Your TV: Many Samsung TVs utilize SmartThings, Samsung’s smart home app, for integration with Alexa. Go to the Settings menu on your TV and locate the General or Network section, then enable the SmartThings app. Sign in or create a Samsung account if you don’t have one.
    3. Connect Your Samsung TV to the Same Wi-Fi Network: Ensure that both your Samsung TV and Alexa-enabled device are connected to the same Wi-Fi network for seamless communication.

    Step 3: Set Up the Alexa App

    To control your Samsung TV with Alexa, you’ll need to have the Alexa app installed on your smartphone. If you haven’t already downloaded it, you can find the app on the App Store (iOS) or Google Play Store (Android). Once downloaded, follow these steps:

    1. Open the Alexa App: Launch the app and log in with your Amazon account. If you don’t have an Amazon account, you’ll need to create one.
    2. Add Your TV as a Device: In the Alexa app, tap on the Devices icon at the bottom right corner of the screen, then select Add Device. From there, choose TV and select Samsung from the list of brands. Follow the on-screen instructions to enable the Samsung SmartThings skill and link your Samsung account with Alexa.
    3. Discover Your Devices: After enabling the SmartThings skill, Alexa will automatically begin discovering compatible devices on your network. Wait for Alexa to recognize your Samsung TV. Once discovered, your TV will appear under the Devices section in the Alexa app.

    Step 4: Test Voice Commands with Alexa

    Once the setup is complete, it’s time to test some basic commands and see Alexa in action! You can now use voice commands to control your Samsung TV without ever touching a remote. Here are a few common commands to try:

    • Alexa, turn on/off the TV.”
    • “Alexa, mute the TV.”
    • “Alexa, change the channel to [specific channel].”
    • “Alexa, open Netflix on the TV.”
    • “Alexa, volume up/down on the TV.”

    You can even ask Alexa to switch inputs or launch specific apps like YouTube, Hulu, or Amazon Prime Video, making entertainment a breeze.

    Step 5: Customize and Fine-Tune Alexa’s Capabilities

    Once Alexa is connected to your Samsung TV, you can tweak and enhance its capabilities for a better experience:

    • Create Routines: With Alexa, you can create routines that combine multiple commands into a single voice prompt. For example, you can set up a “Movie Time” routine where Alexa dims the lights, turns on your TV, and opens your favorite streaming app with just one command.
    • Enable Alexa Skills: You can also enhance your TV’s functionality by enabling additional Alexa skills. These skills let you control other aspects of your smart home, like connected lights or thermostats while watching TV.

    Troubleshooting Common Issues

    If you run into problems connecting Alexa to your Samsung TV, don’t worry—most issues are easy to fix. Here are a few troubleshooting tips:

    • Ensure Both Devices Are on the Same Wi-Fi Network: Alexa and your Samsung TV must be on the same Wi-Fi network to communicate properly.
    • Re-enable the SmartThings Skill: If Alexa fails to discover your Samsung TV, try disabling and re-enabling the SmartThings skill in the Alexa app.
    • Update Your TV and Alexa App: Check for updates in both the Samsung TV firmware and the Alexa app to ensure you’re running the latest versions. Sometimes outdated software can cause connection issues.
    • Power Cycle the Devices: Restart both your TV and Alexa-enabled device by turning them off and on again. This can refresh the connection and resolve minor glitches.

    Conclusion

    Connecting Alexa to your Samsung TV is a game-changer, bringing added convenience and smart functionality to your home entertainment setup. By following these simple steps, you’ll unlock voice-activated control, allowing you to manage your TV experience without lifting a finger.

    Whether you want to turn on the TV, adjust the volume, or switch between your favorite apps, Alexa makes it all easy and hands-free. So, go ahead—set up your Samsung TV with Alexa today and enjoy the future of smart home entertainment.

    ALSO CHECK:

  • Here’s Why Your Alexa Device is Yellow and What It Means

    Here’s Why Your Alexa Device is Yellow and What It Means

    If you own an Alexa-enabled device, you may have noticed the colorful ring that lights up around the device. While most users are familiar with the blue light, which indicates that Alexa is listening or processing a command, the yellow light can often leave people puzzled.

    why Alexa is yellow

    If your Alexa device is glowing yellow, it’s essential to understand what this means and how you can respond. Here’s a closer look at why your Alexa device is yellow and what it means for you.

    The Meaning Behind the Yellow Light

    The yellow light on your Alexa device serves as a notification indicator. Here’s what it typically signifies:

    Unread Notifications

    When your Alexa device displays a yellow light, it usually means that you have unread notifications. This could be anything from messages, reminders, or alerts from your Alexa app.

    • Messages: If someone has sent you a voice message through the Alexa app, your device will light up in yellow. To listen to the message, simply say, “Alexa, play my messages.”
    • Reminders: If you have set reminders or if Alexa has reminders scheduled for you, the yellow light will also appear. You can ask, “Alexa, what are my reminders?” to hear them.

    Amazon Shopping Updates

    Another reason for the yellow light could be related to your Amazon shopping notifications. If there are updates about your orders, such as shipment notifications or delivery updates, Alexa will notify you with a yellow light.

    • Order Status: You can ask, “Alexa, what’s my order status?” to get real-time updates about your purchases.

    Device Alerts

    If there are any alerts or issues with your connected devices, such as smart home devices linked through Alexa, the yellow light may also illuminate. This could indicate a problem or a notification that requires your attention.

    Skill Notifications

    Some third-party skills can send notifications to your Alexa device. If you have enabled skills that provide updates or alerts, the yellow light may indicate that there’s something you need to check.

    What to Do When You See the Yellow Light

    If your Alexa device is showing a yellow light, follow these simple steps to address it:

    • Check Notifications: Start by asking Alexa about your notifications. Just say, “Alexa, what are my notifications?” This command will prompt your device to read out any unread messages or reminders.
    • Open the Alexa App: You can also check notifications directly in the Alexa app on your smartphone or tablet. Open the app and navigate to the notifications section to see a list of all messages, reminders, and updates.
    • Listen to Messages: If there are messages waiting for you, ask Alexa to play them. Simply saying, “Alexa, play my messages” will allow you to hear any audio messages sent to you.
    • Check Your Orders: For updates related to Amazon orders, ask, “Alexa, what’s my order status?” This will provide you with the latest information about your purchases.
    • Review Connected Devices: If you suspect the yellow light is due to an issue with a smart home device, check the status of your connected devices in the Alexa app. This can help you troubleshoot any problems.

    When to Worry

    While the yellow light often means that you have notifications to check, there may be times when it indicates a more significant issue. If you notice persistent yellow lights or if your device behaves unusually even after you’ve addressed notifications, consider the following:

    • Restart Your Device: Sometimes, a simple restart can resolve any glitches causing the yellow light to stay on.
    • Software Updates: Ensure your Alexa device and the Alexa app are up to date. Updates can fix bugs and improve performance.
    • Factory Reset: If problems persist, you may want to consider performing a factory reset. However, this will erase all settings and preferences, so use this as a last resort.

    Conclusion

    In summary, when your Alexa device is glowing yellow, it’s a sign that there are notifications waiting for your attention, be it messages, reminders, or updates related to your Amazon orders.

    Understanding the meaning behind the yellow light can enhance your user experience and ensure you stay informed. So, the next time you see that yellow ring, you’ll know exactly what to do.

    ALSO CHECK:

    How to Safely Take Apart a PS5 Pro Controller for Repairs or Cleaning

    How to Connect Your PS5 Pro Controller to PC via Wired & Wireless Methods

    My 7 Favorite Features in the Amazon Sonos One SL You Didn’t Know About

    Why the PS5 Slim Might Be the Perfect Fit for You—But I Picked the…


  • If Your Alexa App Is Not Working, This Is How You Can Fix It with Ease

    If Your Alexa App Is Not Working, This Is How You Can Fix It with Ease

    If you’ve been relying on Alexa to manage your smart home, answer questions, or entertain you with its countless skills, nothing is more frustrating than when the Alexa app stops working. Fortunately, there are simple ways to troubleshoot and get things running smoothly again.

    Alexa App Is Not Working

    In this guide, we’ll help you troubleshoot and resolve the problem when your Alexa app is not working, so you can get back to enjoying its assistance in no time.

    How to Fix the Alexa App if it’s Not Working

    Whether your Alexa app is not working, the app crashes, or voice command issues, follow these steps to fix your Alexa app with ease:

    Check Your Internet Connection

    The Alexa app and Alexa-enabled devices rely heavily on a stable internet connection. The first thing to check is whether your Wi-Fi is working properly. If your Alexa app isn’t responding, follow these steps:

    • Restart your router: Unplug it for 30 seconds, then plug it back in.
    • Ensure your phone or tablet is connected: Open your device’s network settings and make sure you’re connected to Wi-Fi.
    • Try loading other apps: See if other apps that require the Internet are working, confirming whether the issue is Internet-related.

    If the internet is fine but your Alexa app still won’t work, it’s time to move on to other solutions.

    Restart the Alexa App

    Sometimes, all the app needs is a quick restart. Force closing the app and reopening it often resolves minor bugs or glitches.

    • For Android: Go to Settings > Apps > Alexa, and tap Force Stop.
    • For iOS: Swipe up from the bottom of your home screen, locate the Alexa app, and swipe it away to close it.

    Once you’ve closed the app, open it again and see if the problem is fixed.

    Update the Alexa App

    Using an outdated version of the app could be causing issues. Developers often release updates to fix bugs, improve performance, and introduce new features. To check if there’s an update available:

    • For Android: Go to the Google Play Store, search for Alexa, and tap Update if there’s a new version available.
    • For iOS: Open the App Store, search for Alexa, and tap Update if prompted.

    After updating, open the app again and test whether it’s functioning properly.

    Clear App Cache and Data

    Clearing the app cache and data can solve problems related to corrupted files or app performance. Keep in mind, that clearing data will reset the app, and you’ll need to log in again.

    • For Android: Go to Settings > Apps > Alexa > Storage. Tap Clear Cache and then Clear Data.
    • For iOS: Unfortunately, iOS doesn’t have a built-in option to clear cache and data for individual apps. You’ll need to uninstall and reinstall the app (more on that below).

    Uninstall and Reinstall the Alexa App

    If the above steps don’t work, uninstalling and reinstalling the app may fix more persistent issues.

    • For Android: Go to Settings > Apps > Alexa > Uninstall.
    • For iOS: Press and hold the Alexa app icon, then tap the X or choose Delete App.

    After uninstalling, go to your device’s app store, reinstall the Alexa app, and log back into your Amazon account.

    Ensure Your Device Is Compatible

    Alexa app updates sometimes drop support for older devices, so ensure your phone or tablet is compatible with the latest version of the app. Check the app’s system requirements in the Google Play Store or Apple App Store.

    If your device doesn’t meet the requirements, you may need to update its operating system or consider using Alexa on a different device.

    Check Alexa’s Server Status

    Sometimes, the issue isn’t on your end. Amazon’s Alexa services may be temporarily down due to server maintenance or outages. Visit a site like DownDetector to check if there are reports of Alexa outages in your area.

    If the servers are down, you’ll need to wait for Amazon to resolve the issue. Luckily, server-related problems are usually addressed quickly.

    Verify App Permissions

    Alexa requires certain permissions on your phone to function correctly, such as access to your microphone, location, and Bluetooth. If you’ve recently disabled any of these permissions, the app may not work as expected.

    • For Android: Go to Settings > Apps > Alexa > Permissions and ensure all necessary permissions are enabled.
    • For iOS: Go to Settings > Alexa and toggle the permissions, such as Microphone, Bluetooth, and Location, to ON.

    Check Your Amazon Account Settings

    Another thing to consider is your Amazon account itself. If there’s an issue with your account, such as a billing problem or security concern, this could prevent the Alexa app from working properly. Log into your Amazon account through a web browser and check your account settings.

    Contact Amazon Support

    If none of the above steps work, it may be time to reach out to Amazon’s customer support team. They can help diagnose and fix more complex issues with the Alexa app. To contact support, open the Alexa app (if possible), go to Help & Feedback, or visit Amazon’s website for assistance.

    Final Thoughts

    When your Alexa app isn’t working, it’s easy to feel disconnected from all the convenience it provides. However, by following these troubleshooting steps, you can quickly resolve the issue and get back to enjoying the hands-free control and smart home features you rely on.

    Whether it’s a simple restart or clearing the app’s cache, you’ll be back to asking Alexa questions, playing music, and managing your devices in no time.

    ALSO CHECK:

    Amazon Prime Day 2024 Deals List: Save Up to 58% on Amazon Devices—Grab the…

    How to Safely Take Apart a PS5 Pro Controller for Repairs or Cleaning

    How to Safely Take Apart a PS5 Pro Controller for Repairs or Cleaning

    5 Best Places to Buy a PS5 Pro Controller in 2024


  • I Tried Everything, But My Alexa App Was Not Finding My Echo—Here’s How I Finally Fixed It

    I Tried Everything, But My Alexa App Was Not Finding My Echo—Here’s How I Finally Fixed It

    If you’ve ever found yourself frustrated with your Alexa app not finding your Echo device, you’re definitely not alone. I was there too—after countless attempts, multiple resets, and endless troubleshooting guides, my Echo still wouldn’t show up in the Alexa app.

    Alexa App not finding Echo

    But after some trial and error, I finally figured out how to fix the issue, and I’m here to help you do the same. However, if your Alexa app is not finding your Echo device, here’s the step-by-step guide I followed to connect my Alexa app with my Echo device, with a few extra tips I wish I’d known earlier.

    How to Fix Alexa App If It’s Not Finding Echo 

    So, you’re all set to use Alexa, but the Alexa App not finding Echo has you stuck in a tech nightmare? Here’s how to fix it:

    Step 1: Check Your Wi-Fi Connection

    One of the most common reasons your Alexa app isn’t finding your Echo is because of a weak or unstable Wi-Fi connection. Your Echo relies on Wi-Fi to communicate with the Alexa app, so a problem here will halt the entire process.

    • Make sure your Echo is connected to the same Wi-Fi network as your phone or tablet running the Alexa app. If they’re on different networks, the app won’t find your Echo.
    • Restart your Wi-Fi router. Sometimes, a simple reboot of the router will resolve any connectivity issues that might be preventing your devices from syncing up.

    After ensuring both my Echo and phone were on the same network, I noticed an immediate improvement, but I still wasn’t there yet.

    Step 2: Restart Both Your Echo and Alexa App

    This seems almost too simple, but it’s an effective trick that often resolves many technical issues. I restarted both my Echo device and the Alexa app itself, which helped to refresh their connection and cleared any temporary glitches.

    • Unplug your Echo from the power outlet for about 10 seconds, then plug it back in.
    • While your Echo is restarting, force close the Alexa app on your phone or tablet and relaunch it.

    This step cleared some of the communication errors I’d been encountering, but there was more I had to do.

    Step 3: Update the Alexa App and Your Echo

    After restarting, I realized that both my Alexa app and Echo device were running on outdated software versions. Ensuring both are up to date is crucial to avoid compatibility issues.

    • Update the Alexa app by visiting your device’s app store (Apple App Store or Google Play Store) and checking for any available updates.
    • For your Echo, you can ask, “Alexa, check for software updates.” If there’s a new version available, Alexa will download and install it automatically.

    This was the moment things started working more smoothly for me. Updating both the app and device ensured they were on the same page—literally and figuratively!

    Step 4: Reset Your Echo Device

    If all else fails, resetting your Echo device to its factory settings is a surefire way to resolve any hidden software glitches or settings issues. It’s a bit more drastic, but it worked for me after I had exhausted other options.

    Here’s how you can do it:

    • Press and hold the Action button (the one with the dot) on your Echo device for about 25 seconds until the light ring turns orange.
    • Follow the in-app instructions to re-add your Echo device after the reset.

    Once I reset my Echo, it finally appeared in the Alexa app, and I was able to connect it without any issues.

    Step 5: Disable VPNs or Firewalls

    While troubleshooting, I realized that using a VPN or having a firewall on your network can prevent the Alexa app from finding your Echo. If you use a VPN on your phone or have network security settings that block certain connections, this might be causing the problem.

    • Disable any VPNs running on your phone or tablet.
    • If you have access to your router’s settings, check for any firewalls or advanced security measures that might be blocking communication between the app and your Echo device.

    I temporarily turned off my VPN, and this played a significant role in finally getting everything to work seamlessly.

    Step 6: Contact Amazon Support

    If none of the above methods work, don’t hesitate to reach out to Amazon’s customer support. They can guide you through more advanced troubleshooting or identify if your Echo device has a hardware issue.

    When I finally contacted Amazon Support, they confirmed that my Echo was working correctly and gave me additional advice to optimize my Wi-Fi network for Alexa devices.

    Final Thoughts

    Getting my Alexa app to finally find my Echo felt like a victory after several hours of trying to solve the problem. While some issues stemmed from connectivity and software, a combination of restarting, updating, and resetting my Echo helped me finally connect the devices.

    If you’re dealing with the same frustration, don’t worry—following these steps should help get your Alexa and Echo working in harmony in no time. From checking your Wi-Fi connection to resetting the device, these steps will ensure your smart home setup runs smoothly.

    Remember, persistence is key! Alexa can be a bit finicky, but once it’s up and running, you’ll wonder how you ever lived without it.

    ALSO CHECK:

  • Why I Can’t Give Up the JBL Boombox 3 for Any Other Speaker

    Why I Can’t Give Up the JBL Boombox 3 for Any Other Speaker

    The JBL Boombox 3 is a standout in the portable Bluetooth speaker market, providing powerful, room-filling sound with a unique combination of features designed for music lovers and party-goers alike. Here’s a closer look at why this speaker lives up to its reputation:
    Why I Can’t Give Up the JBL Boombox 3 for Any Other Speaker

    Massive Sound and Deep Bass

    The Boombox 3’s 180W maximum output delivers impressive sound through a new 3-way speaker system. With dual midrange drivers, a powerful subwoofer, and tweeters, the speaker offers clarity, minimal distortion, and thundering bass. Whether you’re at a pool party, beach, or outdoor gathering, the Boombox 3 ensures every note is heard, providing an audio experience that punches well above its weight.

    Even at high volumes, the Boombox 3 maintains its rich, full sound without losing depth or clarity. This makes it ideal for large outdoor spaces or even indoor environments where you want to bring music to life. The deep bass is particularly impressive, immersing you in the music, making it perfect for bass-heavy genres like hip-hop or EDM.


    24-Hour Battery Life

    One of the highlights of the JBL Boombox 3 is its long-lasting 24-hour battery life. Whether you’re using it for a day at the beach or an extended camping trip, you don’t have to worry about running out of juice. This extended battery life ensures you can keep the party going well into the night. Even better, you can connect it in AC mode to get even more power from the subwoofer and tweeters, or use it in battery mode for portable convenience.

    IP67 Waterproof and Dustproof

    Designed for the outdoors, the Boombox 3 has IP67 waterproof and dustproof ratings, making it suitable for all weather conditions. Whether you’re poolside or hiking through dusty terrain, this speaker can withstand the elements. You can confidently take it anywhere without worrying about spills, rain, or dust damaging your device.


    Sleek Design and Portability

    The Boombox 3 combines performance with style. Its bold, durable design features a sturdy metal handle with an orange silicone grip, ensuring easy portability. The twin sidecaps not only protect the internal components but also add a sleek aesthetic to its rugged exterior. The iconic JBL silhouette ensures that it stands out, whether on your bookshelf or at a barbecue.

    Despite its large sound capabilities, the speaker is surprisingly portable, making it easy to carry from place to place. It is ideal for users who want to take their speaker on the go without compromising on sound quality.


    PartyBoost Feature

    The JBL PartyBoost feature allows you to connect two JBL PartyBoost-compatible speakers for stereo sound or link multiple speakers for a full-on sound experience. Whether it’s a small gathering or a large party, you can amplify your sound by connecting multiple Boombox 3 units for an even bigger sound experience.

    This feature offers flexibility and makes the speaker ideal for larger events or spaces, where a single speaker might not be enough to cover all corners. If you own other JBL devices with PartyBoost, you can integrate them seamlessly, creating a custom sound setup.


    Environmentally Friendly Packaging

    JBL is committed to sustainable, eco-friendly packaging, and the Boombox 3 is no exception. The speaker comes in a recyclable, paper-based box that is printed with soy ink. This small touch makes a big difference for eco-conscious consumers, allowing you to enjoy your music while also being mindful of your environmental footprint.

    Power and Connectivity

    The speaker is powered by USB-C, giving you fast charging and versatile connection options. Whether you’re streaming wirelessly via Bluetooth or using the wired mode, the Boombox 3 ensures a stable, clear connection at all times. It also has PartyBoost capability, enabling users to sync it with other JBL speakers to create a surround-sound experience.


    Conclusion: Worth Every Penny

    At $499.95, the JBL Boombox 3 is certainly an investment, but it’s one that delivers in every category. From the incredible sound quality and deep bass to its waterproof design and extended battery life, this speaker is built for those who want the best portable sound experience. Whether you’re using it for a party, a workout, or a day at the beach, the Boombox 3 offers unmatched performance, making it a top choice in 2024 for anyone serious about their music.

    Also Check: