Blog

  • How to Use Ulanzi Tripod

    How to Use Ulanzi Tripod

    Using an Ulanzi tripod is crucial in both photography and videography. It ensures that your camera remains steady, reducing the risk of blurred images and shaky footage. This is especially important in low-light conditions or when capturing long exposures. A tripod allows you to experiment with different angles and perspectives, giving you creative control over your shots. But, some users are new to or probably don’t know how to use the Ulanzi tripod. If you do not know how to use the Ulanzi tripod, this article offers a step-by-step guide to help you master your tripod.

    How to Use Ulanzi Tripod: Mastering Your Shots


    How to Use Ulanzi Tripod

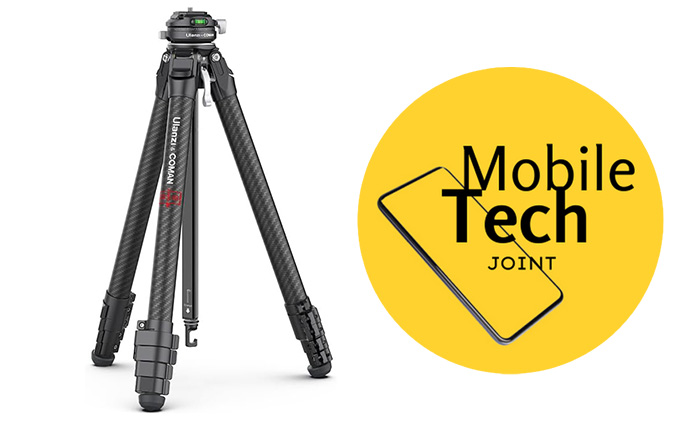
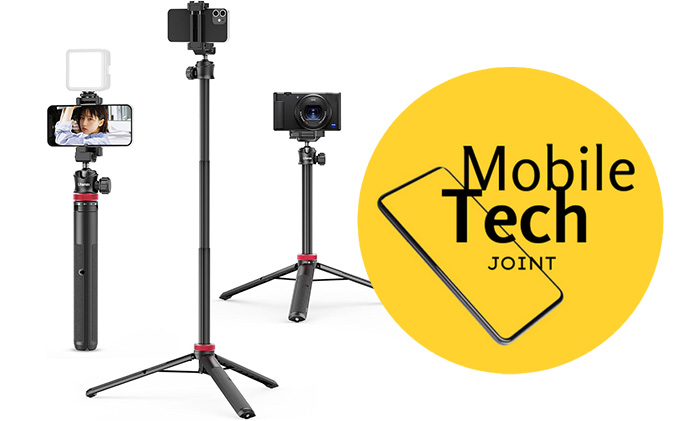
    The Ulanzi Tripod is a versatile and robust tool designed to elevate your photography and videography. With its sturdy build, adjustable legs, and compatibility with various devices, this tripod ensures you capture every moment with precision and ease. Using a tripod is crucial for achieving stability, reducing camera shake, and allowing for creative shots that would be challenging to execute handheld. Whether you’re a professional photographer or an enthusiastic hobbyist, a tripod like the Ulanzi is essential for enhancing the quality of your work.

    Setting Up the Ulanzi Tripod

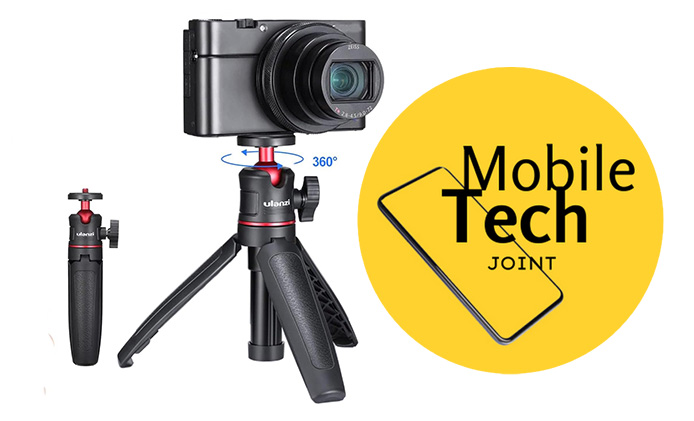
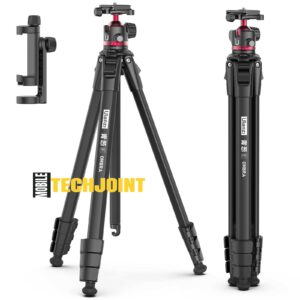
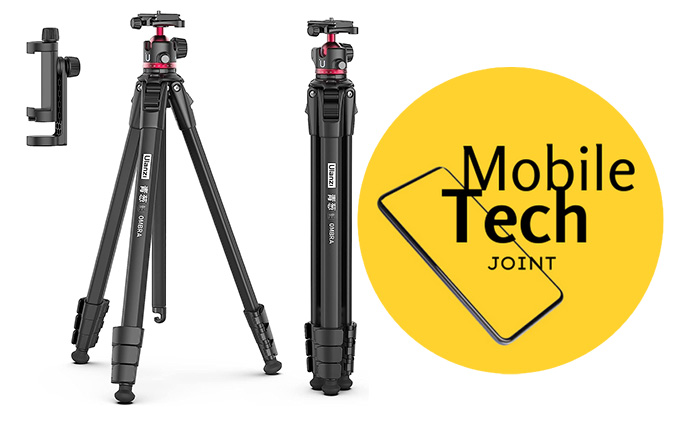
    Getting started with the Ulanzi Tripod is straightforward. Begin by unfolding the tripod legs. Simply release the leg locks and extend each leg to your desired length. Once the legs are fully extended, lock them securely in place. Next, adjust the height of the tripod by extending the center column. Twist the locking mechanism to raise or lower the column until you achieve the perfect height. Finally, adjust the angle of the tripod head to suit your shooting needs. The ball head allows for 360-degree rotation and tilting, providing maximum flexibility.

    Attaching Your Device

    Attaching your smartphone or camera to the Ulanzi Tripod is easy. The tripod features a universal mount compatible with most devices. To attach your device, align the mounting screw with the tripod socket on your camera or the clip on your smartphone. Tighten the screw or clamp to ensure a secure hold. For added stability, make sure your device is centered and balanced. This prevents tilting and ensures steady shots. Double-check that all locks and clamps are secure before you start shooting.

    Using the Ulanzi Tripod for Photography

    The Ulanzi Tripod excels in capturing still images. For standard shots, position your tripod and adjust the height and angle to frame your subject perfectly. Use the tripod for long exposure photography to capture stunning night scenes or flowing water effects without any camera shake. The stability of the tripod allows you to experiment with creative techniques like HDR photography or macro shots, giving you the freedom to explore different styles and compositions.

    Using the Ulanzi Tripod for Videography

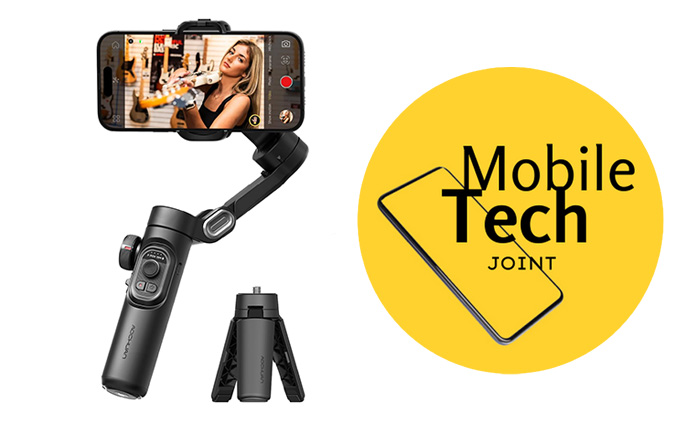
    When it comes to videography, the Ulanzi Tripod provides a stable platform for smooth and steady footage. Use the tripod to shoot professional-quality videos by minimizing shake and jitter. For dynamic shots, utilize the pan and tilt functions. The fluid head allows for smooth movements, enabling you to track moving subjects or create cinematic pans and tilts. Whether you’re filming a documentary, a vlog, or a short film, the Ulanzi Tripod ensures your video quality remains top-notch.

    Portability and Storage

    One of the key advantages of the Ulanzi Tripod is its portability. To collapse the tripod, retract the legs and center column. Lock all the sections in place and fold the legs together. The compact design makes it easy to carry and store. For protection and convenience, consider investing in a carrying case or bag. These accessories safeguard your tripod from damage and make it easier to transport during travel or outdoor shoots.

    Maintenance and Care

    Maintaining your Ulanzi Tripod ensures its longevity. Regularly clean the legs and joints to remove dirt and debris. Use a soft cloth and mild cleaning solution to wipe down the surfaces. Lubricate moving parts if necessary to keep them operating smoothly. If you encounter any issues, such as loose screws or stiff joints, perform minor repairs or consult the user manual for troubleshooting tips. Proper care and maintenance will keep your tripod in excellent working condition for years.

    Accessories and Add-ons

    Enhance the functionality of your Ulanzi Tripod with additional accessories. Consider adding a remote shutter release for hands-free shooting, or an external microphone for improved audio quality during video recording. Ulanzi offers a range of compatible products, including smartphone mounts, LED lights, and extension arms, to complement your tripod and expand its capabilities.

    Showcasing User Examples

    The Ulanzi Tripod has been instrumental in capturing stunning photography and videography. Users have praised its stability and ease of use, sharing impressive images and videos taken with the tripod. From breathtaking landscapes to detailed macro shots, this tripod has helped photographers and videographers achieve their creative vision. Testimonials highlight its reliability and the professional quality it brings to their work.

    Conclusion

    The Ulanzi Tripod is a valuable tool for anyone serious about photography and videography. Its versatile features and sturdy design make it an essential accessory for capturing high-quality shots. Whether you’re shooting stills or videos, this tripod provides the stability and flexibility you need to explore your creative potential. Embrace the possibilities it offers and elevate your work to new heights. Share your experiences and discover the difference a reliable tripod can make in your artistic journey.

    Also Check:

  • How to Open Ulanzi Tripod

    How to Open Ulanzi Tripod

    Ulanzi Tripod is designed to offer key features which include adjustable legs, a sturdy build, and compatibility with various devices to elevate your photography and videography experience. Using a tripod is crucial for capturing sharp images and steady footage.

    How to Open Ulanzi Tripod

    It minimizes camera shake, allows for long exposure shots, and provides stability in different shooting environments. Knowing how to properly open and set up the Ulanzi Tripod is crucial for achieving stable and high-quality shots, ensuring your equipment is secure, and making the most out of your tripod’s capabilities.

    How to Open and Set Up Ulanzi Tripod

    The Ulanzi Tripod is a versatile and reliable tool designed to enhance your photography and videography experience. Its sturdy build and user-friendly features make it an excellent choice for both amateurs and professionals. Here is a step-by-step guide on how to open and set up your tripod:

    Step 1: Unpacking the Ulanzi Tripod

    When you first receive your Ulanzi Tripod, it will come in a well-packaged box to protect it during transit. Carefully open the box and remove the tripod along with any included accessories or components. These might include items such as a carrying case, mounting plate, or additional attachments. Make sure to keep all components in a safe place to avoid losing any small parts.

    Step 2: Understanding the Parts of the Ulanzi Tripod

    Before setting up the tripod, it’s essential to familiarize yourself with its parts. The main components include the tripod legs, center column, mounting plate, and any locking mechanisms. The legs provide stability, the center column allows for height adjustment, and the mounting plate is where you attach your camera or smartphone. Refer to any included visual guides or diagrams to get a clear understanding of each part and its function.

    How to Open Ulanzi Tripod

    Step 3: Extending the Legs of the Ulanzi Tripod

    To begin setting up your tripod, start by extending the legs. Unlock the legs by releasing any locking mechanisms, then pull them out to the desired height. Make sure the legs are evenly extended and securely locked back in place to ensure stability. A tip for added stability is to spread the legs as wide as possible, especially on uneven surfaces.

    Step 4: Adjusting the Center Column

    Next, adjust the center column if additional height is needed. Loosen the lock on the center column and raise or lower it to your preferred height. Once adjusted, tighten the lock to secure the column in place. It’s important to balance the tripod properly; avoid extending the center column too high, as it can make the tripod top-heavy and less stable.

    Step 5: Mounting a Camera on the Ulanzi Tripod

    Mounting your camera or smartphone onto the tripod’s mounting plate is a straightforward process. Begin by attaching the mounting plate to your camera’s base. Once securely attached, align the plate with the tripod head and lock it into place. Ensure that the camera is stable and all locks are tightened to prevent any movement during shooting. Double-check the stability by gently nudging the camera and tripod.

    Conclusion

    Setting up the Ulanzi Tripod correctly is a fundamental step to achieving stable and professional-quality shots. By following these steps—unpacking the tripod, understanding its parts, extending the legs, adjusting the center column, and securely mounting your camera—you can ensure your equipment is properly set up for any photography or videography task. Practice using the tripod to become more comfortable with its features and improve your overall skills. Happy shooting!

    Also Check:

  • Ulanzi Zero y Lightweight Travel Tripod 3028: The Perfect Travel Companion

    Ulanzi Zero y Lightweight Travel Tripod 3028: The Perfect Travel Companion

    The Ulanzi Zero Y Lightweight Travel Tripod 3028 is a top-notch choice for travelers and photographers alike. Its lightweight design, versatility, durability, and ease of use make it an essential tool for capturing stunning travel photos. Consider adding the Ulanzi Zero Y Lightweight Travel Tripod 3028 to your gear collection and elevate your travel photography to new heights.

    Ulanzi Zero y Lightweight Travel Tripod 3028: The Perfect Travel Companion

    Ulanzi Zero y Lightweight Travel Tripod 3028

    When it comes to travel photography, having a reliable and lightweight tripod is essential. Enter the Ulanzi Zero Y Lightweight Travel Tripod 3028, a marvel of design and functionality that promises to elevate your travel photography experience. This tripod offers a perfect blend of portability, stability, and durability, making it a must-have for travelers and photographers alike.

    Portability and Lightweight Design

    One of the standout features of the Ulanzi Zero Y Lightweight Travel Tripod 3028 is its compact and lightweight design. Weighing in at just a few pounds, this tripod is incredibly easy to carry around, whether you’re hiking up a mountain or exploring a bustling city. Its foldable structure ensures that it fits comfortably into your luggage or backpack without adding extra weight. For travelers who prioritize mobility and ease, this tripod is a game-changer.

    Versatility and Stability

    The Ulanzi Zero Y Lightweight Travel Tripod 3028 shines in its versatility. It offers adjustable height and angles, allowing you to capture the perfect shot regardless of the terrain or subject. Whether you’re aiming for a low-angle macro shot or a high-angle landscape view, this tripod can handle it all. Stability is another key feature, with its robust legs and secure locking mechanisms ensuring that your camera remains steady, even in windy conditions. You can confidently use a variety of cameras, from DSLRs to mirrorless models, knowing that they will be held securely in place.

    Durability and Build Quality

    Built to last, the Ulanzi Zero Y Lightweight Travel Tripod is constructed from high-quality materials that ensure its durability. The use of aluminum alloy not only keeps the tripod lightweight but also provides strength and resistance to wear and tear. This durability means that the tripod can withstand the rigors of travel, whether you’re trekking through rough terrains or navigating crowded urban environments. It’s designed to be a reliable companion on all your adventures, offering peace of mind with its robust build quality.

    Compatibility with Different Devices

    Versatility extends to device compatibility as well. The Ulanzi Zero Y Lightweight Travel Tripod 3028 is equipped to handle various cameras and smartphones. It comes with different mounting options, making it easy to switch between devices as needed. Whether you’re shooting with a professional DSLR or capturing moments on your smartphone, this tripod provides the flexibility you need. The universal mounting plate and secure attachments ensure that your device stays put, allowing you to focus on getting the perfect shot.

    Ease of Use

    Setting up and using the Ulanzi Zero Y Lightweight Travel Tripod 3028 is a breeze, even for beginners. Its intuitive design and user-friendly features make it accessible to everyone. The quick-release locks on the legs allow for rapid deployment and adjustment, saving you time and effort. Special features like the 360-degree ball head enable smooth and precise camera movements, enhancing your shooting experience. Whether you’re a seasoned photographer or just starting out, you’ll appreciate the simplicity and functionality of this tripod.

    Value for Money

    In terms of affordability, the Ulanzi Zero Y Lightweight Travel Tripod 3028 stands out as a great value for money. Compared to other similar products on the market, it offers an impressive range of features at a competitive price point. The combination of quality, versatility, and durability ensures that you get the most out of your investment. For travelers and photographers seeking a reliable tripod without breaking the bank, this model is an excellent choice.

    Customer Reviews and Feedback

    Customer reviews of this lightweight travel tripod are overwhelmingly positive. Users praise its lightweight design, ease of use, and stability. Many highlight how it has become an indispensable part of their travel gear, offering great performance in various conditions. Common criticisms are few and far between, often related to personal preferences rather than any significant flaws. Overall, the feedback underscores the tripod’s reliability and quality.

    Tips for Travel Photography

    To make the most of your Ulanzi Zero Y Lightweight Travel Tripod 3028, consider these travel photography tips:

    1. Stable Shots: Always ensure the tripod legs are fully extended and locked for maximum stability.
    2. Unique Angles: Experiment with different heights and angles to find unique perspectives.
    3. Night Photography: Use the tripod for long exposure shots to capture stunning nightscapes.
    4. Time-lapse: Take advantage of the tripod’s stability to create smooth time-lapse videos.

    Conclusion

    The Ulanzi Zero Y Lightweight Travel Tripod 3028 offers a perfect blend of portability, versatility, durability, and ease of use, making it an ideal choice for travel photographers. Its ability to securely hold different devices, combined with its lightweight design, ensures that you can capture stunning shots wherever you go. If you’re looking for a reliable tripod that won’t weigh you down, the Ulanzi Zero Y Lightweight Travel Tripod 3028 is a worthy investment for your next adventure.

    Also Check:

  • Elevate Your Mobile Filmmaking with the AOCHUAN Smart XE 3-Axis Smartphone Foldable Gimbal

    Elevate Your Mobile Filmmaking with the AOCHUAN Smart XE 3-Axis Smartphone Foldable Gimbal

    In the world of mobile filmmaking, capturing smooth and stable footage can be challenging. This is where a mobile phone gimbal stabilizer comes in, providing the stability needed for professional-quality videos. As mobile filmmaking continues to rise in popularity, the demand for high-quality stabilizers has never been greater. One standout option in this market is the AOCHUAN Smart XE 3-Axis Smartphone Foldable Gimbal.

    Elevate Your Mobile Filmmaking with the AOCHUAN Smart XE 3-Axis Smartphone Foldable Gimbal

    Key Features of the AOCHUAN Smart XE 3-Axis Smartphone Foldable Gimbal

    The AOCHUAN Smart XE is equipped with 3-axis stabilization technology, which effectively eliminates shaky footage and ensures smooth, stable video capture. This technology is crucial for anyone looking to produce professional-grade content using their smartphone. Additionally, the gimbal features a focus wheel, allowing for precise focusing while shooting, which is particularly beneficial for achieving creative and cinematic shots.

    One of the gimbal’s major selling points is its compatibility with both iPhone and Android smartphones, making it a versatile choice for a wide range of users. Its foldable design enhances portability, allowing you to easily carry and store the gimbal when not in use. Furthermore, the AOCHUAN Smart XE includes a 1.7M complete camera tripod, offering added versatility for various shooting scenarios.

    Benefits of Using the AOCHUAN Smart XE Gimbal Stabilizer

    Using the AOCHUAN Smart XE gimbal stabilizer significantly improves video quality by providing smooth and stable footage. This improvement is essential for any content creator looking to elevate their work. The focus wheel feature enhances creativity, allowing you to achieve precise focus and add a professional touch to your videos.

    The included tripod expands your shooting options, making it easier to capture a variety of shots, from static scenes to dynamic movements. The gimbal is designed to be user-friendly, making it convenient for on-the-go filmmaking. Whether you are a seasoned filmmaker or a novice, the AOCHUAN Smart XE simplifies the process of capturing high-quality videos.

    Comparison with Other Mobile Phone Gimbal Stabilizers

    When compared to other popular gimbal stabilizers, the AOCHUAN Smart XE stands out in terms of features, price, and performance. Many gimbals on the market offer stabilization, but the AOCHUAN Smart XE’s combination of 3-axis stabilization, focus wheel, and compatibility with multiple devices makes it a superior choice. Its foldable design and included tripod also add to its appeal, offering more versatility and ease of use compared to its competitors.

    Tips for Getting the Most Out of Your Mobile Phone Gimbal Stabilizer

    To maximize the potential of your AOCHUAN Smart XE gimbal stabilizer, consider these practical tips:

    • Balance your smartphone properly on the gimbal to ensure optimal stabilization.
    • Use the focus wheel to achieve precise focusing and add a professional touch to your footage.
    • Experiment with different shooting modes and angles to enhance your creativity.
    • Utilize the included tripod for static shots or time-lapse videos.
    • Keep the gimbal charged and update its firmware regularly for the best performance.

    Customer Reviews and Testimonials

    The AOCHUAN Smart XE gimbal stabilizer has received positive feedback from users. Customers praise its smooth stabilization, easy setup, and versatile features. Many users highlight the focus wheel as a standout feature that enhances their shooting experience. Overall, the AOCHUAN Smart XE has garnered a reputation for its quality and reliability, making it a favorite among mobile filmmakers.

    Conclusion

    The AOCHUAN Smart XE 3-Axis Smartphone Foldable Gimbal stands out as a top choice for anyone looking to capture high-quality, stable footage with their smartphone. Its advanced features, user-friendly design, and competitive price make it an excellent investment for mobile filmmakers. If you’re serious about elevating your mobile videography, the AOCHUAN Smart XE gimbal stabilizer is a tool worth considering.

    Also Check:

  • Ulanzi Zero f38 Quick Release Travel Tripod 3131: What Makes Ulanzi Zero f38 Tripod Stand Out?

    Ulanzi Zero f38 Quick Release Travel Tripod 3131: What Makes Ulanzi Zero f38 Tripod Stand Out?

    The Ulanzi Zero F38 Quick Release Travel Tripod 3131 stands out as a top choice for photographers and content creators due to its compact design, quick release system, sturdy construction, and versatile features.

    Ulanzi Zero f38 Quick Release Travel Tripod 3131: What Makes Ulanzi Zero f38 Tripod Stand Out?

    Its compatibility with various devices and smooth pan and tilt movements make it a valuable tool for capturing stunning images and videos. For those seeking a reliable and affordable tripod, the Ulanzi Zero F38 is an excellent investment that offers exceptional value for money. But, how does the Ulanzi Zero f38 tripod stand out among other tripod?

    Ulanzi Zero f38 Quick Release Travel Tripod 3131

    For photographers and videographers, a reliable tripod is indispensable. The Ulanzi Zero F38 Quick Release Travel Tripod 3131 promises to be the perfect companion for your shooting adventures, offering a blend of portability, durability, and innovative features that cater to the needs of professionals and enthusiasts alike.

    Compact and Lightweight Design

    The Ulanzi Zero F38 tripod stands out for its compact and lightweight design. Weighing in at just a few pounds, it is easy to carry around, making it ideal for travel. Its sleek, foldable structure ensures that it fits effortlessly into your luggage or backpack without adding unnecessary weight. This tripod’s design is a testament to Ulanzi’s commitment to creating travel-friendly photography equipment.

    Quick Release Functionality

    One of the standout features of the Ulanzi Zero F38 tripod is its quick release functionality. This innovative feature allows photographers and videographers to quickly mount and dismount their cameras, saving valuable time during shooting sessions.

    The quick release mechanism is easy to use, providing a secure hold that ensures your equipment stays in place while you focus on capturing the perfect shot. This efficiency boost is particularly useful during fast-paced shoots or when you need to switch between handheld and tripod shots quickly.

    Sturdy and Durable Construction

    Durability is a key factor when choosing a tripod, and the Ulanzi Zero F38 doesn’t disappoint. Constructed from high-quality materials, this tripod is built to withstand various weather conditions and rough handling.

    Whether you’re shooting in the scorching heat of a desert or the chilly winds of a mountain peak, the Ulanzi Zero F38 tripod provides a sturdy and reliable platform for your camera. Its robust build ensures longevity, making it a dependable companion for your photography journeys.

    Versatility and Flexibility

    The versatility and flexibility of the Ulanzi Zero F38 tripod are truly impressive. It offers adjustable height and angles, allowing you to tailor your setup to different shooting scenarios and environments.

    Whether you’re aiming for a low-angle macro shot or capturing a sweeping landscape, this tripod adapts effortlessly to your needs. The flexible leg adjustments and 360-degree ball head ensure that you can position your camera precisely as required, enhancing your creative possibilities.

    Compatibility with Devices

    The Ulanzi Zero F38 tripod is compatible with a wide range of cameras and smartphones. It features a universal mounting plate and secure attachments, making it easy to switch between devices.

    Whether you’re using a professional DSLR, a mirrorless camera, or a smartphone, this tripod provides a stable and secure platform. This compatibility makes it a versatile tool for both photography and videography, catering to a broad spectrum of users.

    Smooth Pan and Tilt Movements

    The Ulanzi Zero F38 tripod features smooth pan and tilt movements, allowing for seamless adjustments and capturing dynamic shots. This fluid movement is essential for creating professional-quality videos and photos, enabling you to follow your subjects with ease and precision.

    Value for Money

    In terms of affordability, the Ulanzi Zero F38 tripod offers great value for money. Compared to other similar products on the market, it provides an impressive array of features at a competitive price point.

    The combination of quality, versatility, and durability ensures that you get the most out of your investment. For photographers and videographers looking for a reliable and affordable tripod, the Ulanzi Zero F38 is a smart choice.

    Customer Reviews and Feedback

    Customer reviews of the Ulanzi Zero F38 tripod are overwhelmingly positive. Users praise its lightweight design, quick release functionality, and robust construction. Many highlight its ease of use and how it has become an essential part of their photography gear.

    Common praises include its stability, versatility, and the value it offers for the price. The positive feedback from photographers and videographers underscores its reputation as a high-quality and reliable tripod.

    Conclusion

    The Ulanzi Zero F38 Quick Release Travel Tripod 3131 stands out for its compact design, quick release functionality, sturdy construction, and versatility. Its compatibility with various devices and excellent value for money make it a must-have for photographers and videographers.

    If you’re looking for a reliable, easy-to-use tripod that won’t weigh you down, the Ulanzi Zero F38 is an excellent investment for your photography and videography needs.

    Also Check:

  • Are you Using these AirPod Pro Settings? 8 Hidden Settings on your AirPod Pro You May Never Know About

    Are you Using these AirPod Pro Settings? 8 Hidden Settings on your AirPod Pro You May Never Know About

    Absolutely! There are several hidden or lesser-known settings and features for the AirPods Pro that can significantly enhance your user experience. The AirPods Pro are packed with features that enhance your listening experience, but some settings are less obvious and can greatly improve your use of these wireless earbuds. In this article, we will consider some of these hidden Airpod Pro settings and how to use them.

    Are You Using These AirPod Pro Settings? 8 Hidden AirPod Pro Settings You Never May Have Heard About

    Do You Know About These Hidden AirPod Pro Settings

    Here’s a detailed look at hidden AirPod Pro settings you need to know and tips to help you get the most out of your AirPods Pro:

    1. Noise Control Modes:

    One hidden gem is the Noise Control feature. While most users are familiar with switching between Active Noise Cancellation and Transparency mode, there’s an option to fine-tune these settings within the Control Center on your iPhone or iPad. By pressing and holding the volume slider, you can access a more detailed noise control menu, allowing you to adjust the intensity of noise cancellation or transparency to your preference.

    2. Ear Tip Fit Test

    The Ear Tip Fit Test is another valuable feature that ensures you’re getting the best seal and sound quality from your AirPods Pro. You can find this test in the Bluetooth settings of your connected device. Running this test periodically, especially if you feel the fit has changed, can help maintain optimal audio performance and comfort.

    3. Announce Messages with Siri

    For those who use Siri frequently, customizing Siri commands can be a game-changer. In the AirPods settings on your iPhone, you can enable or disable “Hey Siri” and choose what happens when you press and hold the stem of your AirPods Pro. This allows for a hands-free experience tailored to your needs, whether it’s adjusting volume, skipping tracks, or making calls.

    4. Customizing Press-and-Hold Actions

    Did you know you can change what happens when you squeeze the AirPods Pro stems? By going into the settings menu, you can customize the press-and-hold action for each AirPod. This means you can set one AirPod to activate Siri and the other to switch between noise control modes, giving you more personalized control over your listening experience.

    5. Spatial Audio

    Sound Quality is paramount, and the AirPods Pro have a hidden setting to enhance it: Spatial Audio. This feature creates an immersive sound experience by using dynamic head tracking. You can enable it through the Control Center by pressing and holding the volume slider and then selecting Spatial Audio. For the best experience, make sure you’re running the latest firmware.

    6. Optimize Battery Charging

    Battery life is always a concern, and there’s a hidden setting to help with that: Optimized Battery Charging. Found in the Bluetooth settings, this feature learns your charging routine and waits to finish charging past 80% until you need to use them, helping extend the overall battery life of your AirPods Pro.

    7. Find My AirPods

    If you frequently misplace your AirPods, the Find My app is your best friend. While many users know it can locate lost AirPods, it also has a hidden setting for enabling “Notify When Left Behind.” This setting sends a notification to your device if you leave your AirPods Pro behind, ensuring you never lose track of them again.

    8. Conversation Boost

    Another lesser-known feature is Conversation Boost, which amplifies voices in front of you to make it easier to hear people in noisy environments. This setting can be found in the Accessibility settings on your iPhone. It’s particularly useful for those with mild hearing difficulties or when trying to have conversations in crowded places.

    Final Verdict

    Lastly, firmware updates often bring new features and enhancements. Many users overlook the importance of keeping their AirPods Pro firmware up to date. Checking for updates is simple: place your AirPods in their case, connect them to power, and ensure your iPhone or iPad is nearby with an internet connection. Updates are installed automatically, ensuring you always have the latest features and improvements.

    In conclusion, the AirPods Pro offer a wealth of hidden settings that can significantly enhance your listening experience. By exploring these features, you can customize your AirPods Pro to better suit your needs, from improving sound quality and extending battery life to ensuring you never lose them. Take the time to delve into these settings and make the most of your AirPods Pro.

    Also Check:

  • Airpod Case Flashing Orange: If your AirPod Case Is Flashing Orange, here is What it Means and how to Fix

    Airpod Case Flashing Orange: If your AirPod Case Is Flashing Orange, here is What it Means and how to Fix

    If you’re an AirPod user, you might have encountered a flashing orange light on your AirPod case. This indicator can be confusing and frustrating, especially if you’re unsure what it means or how to fix it. Understanding the significance of the flashing orange light and knowing how to resolve the issue can ensure your AirPods function smoothly.

    Airpod Case Flashing Orange: If your AirPod Case Is Flashing Orange, here is What it Means and how to Fix


    Airpod Case Flashing Orange What It Means

    When your AirPod case flashes orange, it typically means that there is a problem with the device. It’s a signal from the device that requires your attention to fix a specific issue. The orange light can indicate issues such as low battery, connectivity problems, or software glitches. Recognizing this warning light is crucial for maintaining the performance and longevity of your AirPods.

    Common Reasons for the Orange Flashing Light

    The flashing orange light is an important indicator designed to alert you that something is wrong with your AirPods or the case. Here are several factors that can cause your AirPod case to flash orange:

    • Low Battery: A common reason is that the battery level of your AirPods or the charging case is critically low.
    • Connectivity Issues: Problems with pairing your AirPods to your device can trigger the orange light.
    • Software Glitches: Occasionally, software bugs or glitches can cause the light to flash.

    These common issues can interrupt your experience with AirPods. Furthermore, each of these issues requires different troubleshooting steps, which we consider below.

    How to Fix Low Battery Issues

    Low battery is a straightforward issue to resolve. By following these steps, you ensure your AirPods are charged and ready for use. If the orange light is due to a low battery, follow these steps to resolve it:

    1. Check Battery Levels: Open your AirPods case near your iPhone or iPad to see the current battery levels displayed on the screen.
    2. Charge the Case: Connect your AirPods case to a power source using the Lightning cable. Ensure the case and AirPods are charging properly.
    3. Wait: Allow the case and AirPods to charge for at least 15-20 minutes before checking the status light again.

    Regularly checking battery levels and charging the case can prevent the orange light from appearing in the first place.

    Troubleshooting Connectivity Issues

    If low battery isn’t the issue, connectivity problems might be causing the flashing orange light. Connectivity issues can be a bit more complex but are often resolved with a reset and reconnection. Here’s how to troubleshoot:

    1. Reset Your AirPods: Place both AirPods in the case and close the lid. Wait for 30 seconds, then open the lid. Press and hold the setup button on the back of the case until the status light flashes white, then amber, and finally white again.
    2. Forget Device: On your iPhone or iPad, go to Settings > Bluetooth. Find your AirPods in the list of devices and tap the “i” icon next to them. Select “Forget This Device.”
    3. Reconnect AirPods: After forgetting the device, open the AirPods case near your iPhone or iPad and follow the on-screen instructions to reconnect.

    Following these steps can help restore the connection between your AirPods and your device, ensuring they function correctly.

    Dealing with Software Glitches

    Software glitches can also trigger the orange flashing light. To address these issues, you can:

    1. Update Firmware: Ensure your AirPods firmware is up to date. Connect your AirPods to your iPhone and check for updates in the settings.
    2. Reset AirPods: Perform a reset as described in the previous section.
    3. Restore Factory Settings: As a last resort, you can reset your AirPods to factory settings by holding the setup button until the status light flashes amber multiple times, then white.

    Keeping your firmware up to date can prevent many of these issues. Resetting or restoring factory settings can help clear persistent software problems that cause the orange light to flash.

    When to Seek Professional Help

    Sometimes, despite your best efforts, the issue might be beyond basic troubleshooting. If the orange flashing light persists despite your troubleshooting efforts, it may be time to contact Apple support or visit an authorized service provider.

    Persistent issues could indicate a hardware problem that requires professional diagnosis and repair. Seeking professional help ensures that any underlying hardware problems are addressed by experts, potentially saving you from more significant issues down the line.

    Preventing Future Occurrences

    To avoid encountering the orange flashing light issue in the future, consider these preventive measures:

    • Regularly Update Software: Keep your AirPods and paired devices updated with the latest firmware and software updates.
    • Properly Maintain Batteries: Avoid letting your AirPods and case battery levels drop too low. Charge them regularly.
    • Clean Your AirPods: Ensure that the charging contacts and the case are clean to maintain proper charging and connectivity.

    Regular updates, proper battery maintenance, and cleanliness are simple practices that can significantly extend the life and performance of your AirPods.

    Conclusion

    Understanding the significance of the orange flashing light on your AirPods case and knowing how to address it can save you from frustration and ensure your AirPods continue to function optimally. By following the troubleshooting steps outlined above and taking preventive measures, you can keep your AirPods in good working order. If you have any experiences or tips to share, please leave them in the comments section below.

    Frequently Asked Questions (FAQs)

    What does it mean if my AirPods case is flashing orange?

    A flashing orange light on your AirPods case can indicate several issues, such as a low battery, pairing error, or the need for a firmware update. It can also be a sign of a more serious hardware issue.

    How can I fix a flashing orange light on my AirPods case?

    Here are a few steps you can try to resolve the issue:

    1. Check the Battery: Charge your AirPods case for at least 15 minutes and see if the light changes to green or white.
    2. Reset Your AirPods: Open the case lid, press and hold the setup button on the back of the case for 15 seconds until the light flashes amber and then white, and then reconnect your AirPods to your device.
    3. Update Firmware: Ensure your AirPods are connected to a power source and near your iPhone to receive automatic firmware updates.

    What should I do if the orange light continues to flash?

    If the orange light continues to flash after you’ve tried charging, resetting, and updating the firmware, it’s advisable to contact Apple Support or visit an Apple Store for further diagnosis and assistance. Persistent flashing could indicate a hardware issue that needs professional attention.

    Can I still use my AirPods if the case is flashing orange?

    While a flashing orange light typically indicates an issue that needs to be addressed, you might still be able to use your AirPods. However, the functionality might be limited, and it’s best to resolve the issue as soon as possible to ensure optimal performance.

    Will a flashing orange light affect the battery life of my AirPods?

    If the flashing orange light is due to a low battery or another issue, it’s essential to address the problem to prevent any potential impact on battery life. Regularly charging and maintaining your AirPods and their case will help ensure their longevity and performance.

    How can I prevent my AirPods case from flashing orange in the future?

    To prevent future issues, keep your AirPods and their case regularly charged, ensure they are updated with the latest firmware, and handle them with care to avoid any physical damage. Regular cleaning can also help maintain their condition and functionality.

    Also Check:

  • Temporary Fixes for a Ripped off AirPod Pro Rubber tip: How to Fix AirPod Pro Rubber tip Ripped Off

    Temporary Fixes for a Ripped off AirPod Pro Rubber tip: How to Fix AirPod Pro Rubber tip Ripped Off

    AirPods Pro are renowned for their comfort and superior sound quality, largely thanks to their rubber tips that provide a secure fit. However, these rubber tips can sometimes get ripped off, causing frustration for users. In this guide, we’ll address how to identify and assess the problem, explore replacement options, offer DIY fixes, and suggest preventive measures to keep your AirPods Pro in top condition.

    AirPod Pro Rubber Tip Ripped Off: Temporary fixes for a ripped off AirPod Pro rubber tip

    How to Fix AirPod Pro Rubber Tip Ripped Off

    AirPods Pro are renowned for their comfort and superior sound quality, thanks to their rubber tips that provide a secure fit. However, if you mistakenly ripped off your AirPod Pro rubber tip, here is how to fix it:

    Identify the Problem

    Ripped-off rubber tips can occur for several reasons. Wear and tear from frequent use is one of the most common causes. Over time, the material can deteriorate, making it more susceptible to tearing. The constant insertion and removal of the tips can weaken them, especially if done with force. Another common reason is improper handling, such as roughly pulling off the tips or forcing them back on without aligning them correctly.

    Sharp objects or rough surfaces can also cause tears if the AirPods are not stored properly. Recognizing the root cause of the problem is crucial. It helps in preventing future occurrences and informs the right approach for repair or replacement.

    Assess the Damage

    Once you notice a tear or a missing piece in your AirPods Pro tips, it’s essential to evaluate the extent of the damage. Start with a visual inspection to check for any obvious tears, rips, or missing parts. Examine both the rubber tips and the AirPods themselves. Next, assess the functionality.

    Even if the tear seems minor, it might affect the fit and comfort of the AirPods, or even the sound quality. If the AirPods don’t fit as securely in your ears or the audio seems compromised, it’s a clear sign that the tips need attention. Testing the AirPods for proper noise cancellation and fit can also help in assessing the damage.

    Replacement Options

    When it comes to replacing the rubber tips, you have a couple of options. Purchasing new tips from the Apple Store ensures you get high-quality replacements that are guaranteed to fit and function perfectly. These tips are specifically designed for AirPods Pro and provide the best experience. However, third-party sellers also offer replacement tips, often at a lower cost.

    When choosing third-party options, ensure they are explicitly designed for AirPods Pro to avoid compatibility issues. Look for reputable brands and check customer reviews to ensure quality. Some third-party options might offer different materials or sizes, which can be an advantage if you’re looking for something specific.

    DIY Fix

    If you’re inclined to fix the tips yourself, a DIY approach can be both cost-effective and quick. Here’s a step-by-step guide:

    1. Materials Needed: Gather a small amount of adhesive, tweezers, and a clean cloth. Ensure the adhesive is safe for use on silicone or rubber materials.
    2. Clean the AirPods: Gently clean the AirPods and the tips with the cloth to remove any debris or dirt. This step is crucial to ensure the adhesive bonds properly.
    3. Apply Adhesive: Carefully apply a small amount of adhesive to the torn area, being cautious not to use too much. Use a toothpick or a small tool to spread the adhesive evenly.
    4. Reattach the Tip: Use the tweezers to carefully reattach the rubber tip, ensuring it’s properly aligned with the AirPod. Hold it in place for a few minutes to let the adhesive set.
    5. Let it Set: Allow the adhesive to dry completely before using the AirPods again to ensure a secure bond. Follow the adhesive manufacturer’s instructions for drying time.

    Preventive Measures

    To avoid future issues with your AirPods Pro tips, it’s important to take some preventive measures. Proper storage is key; always store your AirPods in their case when not in use to protect them from accidental damage. Keeping them in the case prevents exposure to sharp objects and reduces the risk of tears.

    Additionally, handle the rubber tips gently when removing or attaching them to prevent tears. Avoid pulling them off with force. Proper care can significantly extend the life of your AirPods Pro tips. Regularly clean the tips and the AirPods to remove dirt and debris that can cause wear and tear. Consider having spare tips handy so you can replace them as soon as you notice any signs of wear.

    Professional Repair

    In cases where the damage is extensive or if a DIY fix doesn’t resolve the issue, seeking professional repair services may be necessary. If the functionality of the AirPods is compromised or if you’re not confident in fixing the tips yourself, it’s best to consult a professional.

    Apple Support or authorized service providers can offer repair or replacement services to ensure your AirPods Pro are restored to optimal condition. They have the expertise and tools to handle such repairs. Sometimes, extensive damage to the tips might indicate underlying issues with the AirPods that a professional can identify and fix.

    Customer Support

    For persistent issues or if you’re unsure about the best course of action, reaching out to Apple Support can be very helpful. They can provide guidance, troubleshoot potential problems, and suggest the best solutions. Additionally, visiting an authorized service provider ensures that any repairs or replacements are done correctly and with genuine parts. Apple Support can also provide information on warranties and coverage, which might save you costs if the damage is due to a manufacturing defect.

    Conclusion

    Dealing with ripped-off rubber tips on your AirPods Pro can be frustrating, but with the right approach, you can address the problem effectively. By identifying the cause of the AirPod Pro rubber tip ripped off, assessing the damage, exploring replacement options, and implementing preventive measures, you can maintain the functionality and longevity of your AirPods Pro. Taking proactive steps and seeking professional help when necessary ensures that you continue to enjoy a seamless and high-quality listening experience.

    Proper maintenance and handling can prevent future issues, allowing you to get the most out of your AirPods Pro.

    Also Check:

  • Apple Airpods Pro Ear tips Replacement: Where Can you find Best Replacement Rubber tips for AirPod Pro?

    Apple Airpods Pro Ear tips Replacement: Where Can you find Best Replacement Rubber tips for AirPod Pro?

    When it comes to getting the best out of your AirPods Pro, having high-quality rubber tips is crucial. Not only do these tips ensure a comfortable fit, but they also significantly impact the sound quality. In this guide, we will explore the importance of replacement rubber tips, factors to consider when choosing them, and provide insights into the best options available.

    Apple Airpods Pro Ear tips Replacement: Where Can you find Best Replacement Rubber tips for AirPod Pro?

    Why Are Replacement Rubber Tips Important?

    The rubber tips on your AirPods Pro play a vital role in ensuring a secure fit in your ears. Well-fitting tips create a proper seal, which is essential for noise cancellation and bass response. Over time, the original tips may wear out or become lost, necessitating replacements. High-quality replacement tips can enhance the overall listening experience by providing better comfort and improved sound isolation.

    Factors to Consider When Choosing Replacement Rubber Tips

    When selecting ear tip replacement, it’s important to consider the size and material. AirPods Pro tips come in different sizes—small, medium, and large—to accommodate various ear shapes. Choosing the right size ensures a snug fit and optimal performance. Additionally, the material of the tips matters. Silicone and memory foam are popular choices, each offering different levels of comfort and sound isolation. Compatibility with AirPods Pro is another crucial factor, as not all third-party tips may fit perfectly.

    Where to Buy Replacement Rubber Tips

    Several reputable online retailers offer high-quality AirPods Pro ear tips. Websites like Amazon, Apple’s official store, and Best Buy have a wide selection of options. Additionally, physical stores such as the Apple Store and electronics retailers often carry replacement tips. When purchasing, it’s beneficial to check customer reviews to ensure the quality and compatibility of the tips.

    Reviews of Popular Replacement Rubber Tips Brands

    Several brands are known for producing high-quality AirPod Pro rubber tips. Brands like Comply, SpinFit, and AhaStyle have received positive feedback from users for their comfort and durability. Customer reviews highlight the enhanced noise isolation and improved fit these tips provide. Many users have found that these brands offer a better experience compared to the original tips, particularly in terms of comfort during prolonged use.

    Tips for Replacing Rubber Tips on AirPods Pro

    Replacing the rubber tips on your AirPods Pro is a straightforward process. First, gently pull off the old tips from the earbuds. Align the new tips with the earbuds and push them on until they click into place. Ensure the tips are securely attached to avoid them falling off during use. It’s important to check that the new tips fit comfortably and create a proper seal in your ears.

    Maintenance and Care Tips for Replacement Rubber Tips

    To ensure the longevity of your replacement rubber tips, regular cleaning and maintenance are essential. Use a soft, dry cloth to wipe the tips after each use to remove earwax and dirt. Avoid using harsh chemicals or soaking the tips in water. Additionally, storing your AirPods Pro in their case when not in use helps protect the tips from damage and debris.

    Customization Options for Replacement Rubber Tips

    Many replacement rubber tips offer customizable features to suit individual preferences. Some brands provide tips in different colors and designs, allowing you to personalize your AirPods Pro. Customizable tips not only add a unique touch to your earbuds but also cater to specific needs, such as improved grip or enhanced noise isolation.

    Comparison of Different Types of Replacement Rubber Tips

    Airpod Pro rubber tips come in various materials, each with its own advantages and disadvantages. Silicone tips are durable, easy to clean, and provide a comfortable fit. Memory foam tips, on the other hand, offer superior noise isolation and conform to the shape of your ear for a personalized fit. Comparing these options can help you choose the best tips based on your comfort preferences and listening environment.

    Customer Satisfaction Guarantee and Return Policies

    Before purchasing replacement rubber tips, it’s important to check the return policies and satisfaction guarantees offered by retailers. Many reputable sellers provide a satisfaction guarantee, allowing you to return or exchange the tips if they do not meet your expectations. Checking for warranties can provide additional peace of mind, ensuring you get a quality product.

    Conclusion

    Investing in high-quality replacement rubber tips for your AirPods Pro can significantly enhance your listening experience. By considering factors such as size, material, and compatibility, and exploring reputable brands, you can find the perfect tips to suit your needs. Proper maintenance and care will ensure they last longer, providing you with the comfort and sound quality you deserve.

    Also Check:

  • Best AirPods Pro Case Covers: Top Picks for Style and Protection

    Best AirPods Pro Case Covers: Top Picks for Style and Protection

    AirPods Pro cases are essential for keeping your earbuds safe and adding a touch of personal style. With so many options available, selecting the right case can significantly enhance your AirPods Pro experience. This review explores some of the best AirPods Pro cases on the market, detailing their features, pros, cons, and pricing to help you make an informed choice.

    Best AirPods Pro Case Covers: Top Picks for Style and Protection

    Best AirPods Pro Case Covers: Top Picks for Style and Protection

    AirPods Pro are a significant investment, and protecting them should be a top priority. A good case cover not only shields your AirPods from daily wear and tear but also offers additional features like secure locks, carabiner clips, and wireless charging compatibility. This comprehensive review will cover a range of top-rated AirPods Pro cases, helping you make an informed decision.

    Spigen Lock Fit Case

    Spigen Lock Fit Case

    The Spigen Lock Fit Case is specifically designed for the AirPods Pro 2nd Generation (2022/2023), offering robust protection and functionality. Its Secure Lock Clip is a standout feature, preventing accidental drops with its secure mechanism. The multi-layered protection, combining a sturdy hybrid shell, ensures your AirPods are well-protected from everyday impacts. The case also includes a carabiner ring for easy portability and cutouts for lanyard compatibility, making it versatile for different carrying styles. Precise cutouts allow seamless access to the pairing button and power level, and the case is compatible with wireless charging, maintaining LED visibility for effortless charging status checks.

    With a high user rating of 4.6 out of 5 stars from 790 ratings, this case is a popular choice, reflected in its Amazon’s Choice status. However, potential buyers should note the high shipping and import fees for international orders. Currently priced at $22.99, down from its list price of $49.99, it offers good value despite additional shipping costs and potential sales tax.

    ESR AirPods Pro Case

    ESR AirPods Pro Case

    The ESR AirPods Pro Case is a versatile option, compatible with both the 2nd and 1st Generation models. It features a Magnetic Lid Lock and is MagSafe ready, ensuring your AirPods are secure and easily accessible. The drop-proof lid lock, using strong magnets, and the slide-to-open feature add convenience and security. The hybrid drop protection, combining an ultra-hard shell with a shock-absorbing core, provides excellent protection against falls and impacts. ESR’s commitment to customer support is evident with their comprehensive support and a 12-month protection plan.

    Sustainability features and detailed setup videos and FAQs further enhance its value. With a user rating of 4.5 out of 5 stars from 1,886 ratings, it is well-regarded by users. The only drawback is the slightly higher price for certain colors. Currently priced at $16.19, a 10% discount from its typical price of $17.99, it offers both protection and sustainability at a reasonable price.

    elago Pager Case

    elago Pager Case

    For those who appreciate a touch of nostalgia, the elago Pager Case offers a retro design with modern protection. Made from premium silicone material, it provides shock-resistant, full protection for your AirPods Pro. The nostalgic pager design is both unique and functional, with precise cutouts for lanyard attachment. This case is a perfect gift for retro enthusiasts and is especially popular during the holiday season. With a rating of 4.5 out of 5 stars from 60 ratings, it is appreciated for its high-quality in-house design. However, it comes with limited color options. Priced at $16.99, a 6% discount from its typical price of $17.99, it blends style and protection effectively.

    Valkit Armor Series Case

    Valkit Armor Series Case

    The Valkit Armor Series Case is designed for the AirPods Pro 1st Generation (2019), providing military-grade protection with a secure lock clip. Its rugged design ensures maximum protection, while the metal keychain clip allows for easy carrying. The case supports both wired and wireless charging, making it versatile. It also includes a cleaner kit and storage bag, adding extra value. With an impressive rating of 4.6 out of 5 stars from 13,057 ratings, it is a top choice for those seeking comprehensive protection. Despite being specific to the 1st Generation AirPods Pro, its affordable price of $6.98 makes it a budget-friendly option without compromising on quality.

    elago AW5 Case

    elago AW5 Case

    The elago AW5 Case stands out with its game console design and durable silicone construction. MagSafe compatibility ensures it works seamlessly with your charging setup. The case is made from flexible, impact-resistant material and features an anti-slip coating inside the cap to prevent accidental drops. With strong user ratings of 4.6 out of 5 stars from 21,952 ratings, it is popular for its unique and adorable design without sacrificing protection. Limited color options are the only downside. Priced at $10.99, it offers good protection against scratches and impacts at a reasonable price.

    KAKUYI AirPods Case:

    KAKUYI AirPods Case

    The KAKUYI AirPods Case brings a playful, cartoon design made from high-quality silicone material. Compatible with AirPods 1st and 2nd Generation, it provides durable and shock-resistant protection. A carabiner is included for easy attachment, making it convenient to carry. With a user rating of 4.6 out of 5 stars from 571 ratings, it is well-liked for its fun and unique design. The case also comes with 24-hour customer service, ensuring support when needed. However, it is specific to certain AirPods generations. Currently priced at $12.99, it offers both style and protection at an affordable price.

    Valkit Compatible AirPods Pro 2nd/1st Generation Case with Cleaner Kit

    Valkit Compatible AirPods Pro 2nd/1st Generation Case with Cleaner Kit

    This Valkit case, compatible with both the 2nd and 1st Generation AirPods Pro, features a cute 3D camera design. Made of high-quality silicone, it provides shockproof protection and precise cutouts for easy access. The case includes a durable keychain for portability and comes with a cleaner kit and storage bag. With strong user ratings (4.7 out of 5 stars from 59 ratings), it’s priced at $12.99, offering both style and protection.

    Doboli Compatible AirPods Pro 2nd & 1st Generation Case Cover

    Doboli Compatible AirPods Pro 2nd & 1st Generation Case Cover

    The Doboli AirPods Pro case is designed for both the 2nd and 1st Generation AirPods Pro, providing a secure lock and smooth silicone skin for added protection. This case prevents bumps and scratches while supporting wireless charging. It has a U.S. Patent Pending design and includes a carabiner and an anti-theft buckle. With user ratings of 4.3 out of 5 stars from 4,582 ratings, it’s a reliable option. Priced at $16.99, it offers a balance of durability and security.

    Conclusion

    In summary, each of these AirPods Pro cases offers unique features and benefits. The Spigen Lock Fit Case and Valkit Armor Series Case are top choices for those prioritizing robust protection. The ESR AirPods Pro Case and elago Pager Case blend functionality with a touch of style, while the elago AW5 Case and KAKUYI AirPods Case provide unique designs that stand out. When choosing a best Airpod Pro case covers, consider your specific needs, preferences, and the features that matter most to you.

    Investing in a good case not only protects your AirPods Pro but also adds a personal touch, ensuring your earbuds remain safe and stylish.

    Also Check: