Blog

  • Redmi Pad SE Review: Affordable Excellence in the Budget Tablet Market

    Redmi Pad SE Review: Affordable Excellence in the Budget Tablet Market

    The Redmi Pad SE has made waves in the budget tablet market, offering a compelling combination of features and performance at an attractive price point. As more consumers seek affordable yet capable devices for entertainment and productivity, Xiaomi’s latest offering aims to strike the perfect balance. In this comprehensive review, we’ll delve deep into the Redmi Pad SE’s specifications, design, performance, and overall value proposition to help you determine if it’s the right tablet for your needs.

    Redmi Pad SE Review

    Buy on Amazon


    Key Takeaways:

    • The Redmi Pad SE boasts a premium build quality uncommon in its price range
    • Its 11-inch FHD+ display with 90Hz refresh rate enhances the viewing experience
    • The tablet offers excellent battery life, lasting up to two days with regular use
    • While suitable for basic tasks and content consumption, it has some performance limitations
    • The Redmi Pad SE runs on the latest Android 14-based HyperOS, offering useful multitasking features

    Redmi Pad SE Review

    As more people seek versatile devices for both work and entertainment, the demand for capable yet affordable tablets has surged. The Redmi Pad SE steps into this arena with a bold promise: to deliver a premium experience without the premium price tag. But does it live up to the hype? In this comprehensive review, we’ll dive deep into the Redmi Pad SE’s features, performance, and overall value proposition to help you decide if this budget champion deserves a place in your tech arsenal.

    From its surprisingly robust build quality to its smooth 90Hz display, the Redmi Pad SE seems to offer more than one might expect at its price point. However, as with any budget device, there are bound to be trade-offs. We’ll explore every aspect of this tablet, from its day-to-day usability to its limitations, giving you a clear picture of what to expect if you choose to make the Redmi Pad SE your next tablet companion.

    Whether you’re a student looking for an affordable study aid, a professional in need of a secondary device, or simply someone who enjoys streaming content on the go, join us as we unpack the Redmi Pad SE and discover if it truly is the budget tablet hero we’ve been waiting for.

    Key Specifications and Features

    At the heart of the Redmi Pad SE lies a carefully curated set of components designed to deliver a satisfying user experience without breaking the bank. The tablet is powered by a Qualcomm Snapdragon 680 processor, a capable mid-range chip that handles everyday tasks with ease. Users can choose from configurations offering up to 8GB of RAM and 128GB of internal storage, with the added benefit of expandable storage via a microSD card slot.

    The centerpiece of the Redmi Pad SE is its 11-inch FHD+ IPS LCD display, which boasts a resolution of 1920×1200 pixels. What sets this screen apart from many competitors in its price bracket is the inclusion of a 90Hz refresh rate, providing smoother scrolling and more fluid animations. This feature significantly enhances the overall user experience, making interactions with the device feel more responsive and enjoyable.

    Audio enthusiasts will appreciate the Redmi Pad SE’s quad-speaker setup, which supports Dolby Atmos technology. This configuration delivers surprisingly good sound quality for a budget tablet, enhancing the multimedia experience whether you’re watching movies, playing games, or listening to music.

    One of the standout features of the Redmi Pad SE is its massive 8,000mAh battery. This generous capacity translates to exceptional battery life, with many users reporting up to two days of regular use on a single charge. However, it’s worth noting that the tablet only supports 10W charging, which means longer charging times compared to devices with faster charging capabilities.

    On the software front, the Redmi Pad SE runs on Xiaomi’s latest HyperOS, based on Android 14. This modern operating system brings a host of tablet-optimized features and multitasking capabilities to enhance productivity and user experience.

    Design and Build Quality

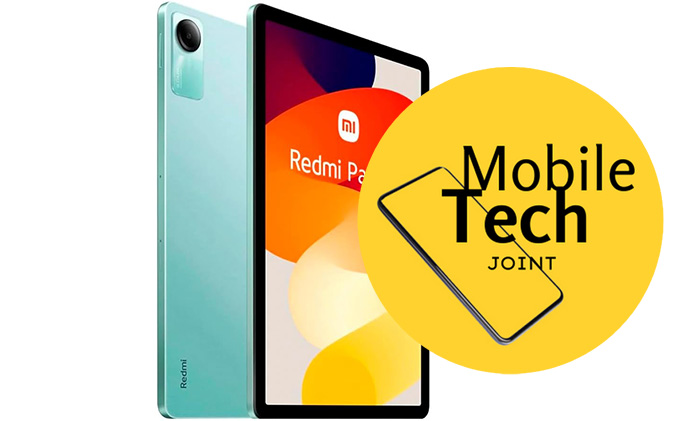
    Xiaomi has truly impressed with the Redmi Pad SE’s design and build quality, defying expectations for a tablet in this price range. The device features an aluminum unibody construction that not only looks premium but also feels sturdy and well-built in hand. With a slim profile measuring just 7.36mm thick and a weight of 478 grams, the Redmi Pad SE strikes an excellent balance between portability and durability.

    The attention to detail is evident in the tablet’s chamfered edges, which provide a comfortable grip without any sharp corners digging into your palms during extended use. Xiaomi offers the Redmi Pad SE in three attractive color options: Graphite Grey, Lavender Purple, and Mint Green, allowing users to choose a style that suits their preferences.

    Button placement is thoughtful, with the power button and volume rocker easily accessible along the tablet’s edges. The USB-C port and 3.5mm headphone jack are conveniently located, ensuring compatibility with a wide range of accessories.

    While the Redmi Pad SE doesn’t boast an official IP rating for water and dust resistance, its solid construction should provide adequate protection for everyday use. Overall, the design and build quality of this tablet punch well above its weight class, offering a premium feel that’s rare in the budget tablet segment.

    Display and Audio Performance

    The Redmi Pad SE’s 11-inch FHD+ IPS LCD display is a standout feature that significantly enhances the tablet’s value proposition. With a resolution of 1920×1200 pixels, content appears sharp and detailed, whether you’re browsing the web, reading e-books, or watching videos. The panel offers good color reproduction and wide viewing angles, ensuring a pleasant visual experience from various positions.

    What truly sets the Redmi Pad SE apart from many of its budget competitors is the inclusion of a 90Hz refresh rate. This higher refresh rate results in noticeably smoother scrolling and more fluid animations throughout the user interface. The difference is particularly apparent when navigating through apps, swiping between home screens, or playing games that support higher frame rates.

    The display’s maximum brightness of 400 nits is sufficient for indoor use, though it may struggle somewhat under direct sunlight. Xiaomi has included two color modes – Saturated and Standard – allowing users to adjust the display’s color profile to their liking.

    Complementing the impressive visual experience is the Redmi Pad SE’s quad-speaker setup with Dolby Atmos support. These speakers deliver surprisingly robust audio for a budget tablet, with clear highs and mids, and even a hint of bass. The sound separation is notable, creating a more immersive experience when watching movies or playing games. While audiophiles may still prefer external speakers or headphones for critical listening, the built-in audio system is more than adequate for casual use and outperforms many tablets in this price range.

    Software and User Experience

    The Redmi Pad SE ships with Xiaomi’s latest HyperOS, based on Android 14, providing users with a modern and feature-rich software experience. This tablet-optimized interface brings several enhancements designed to take advantage of the larger screen real estate and improve productivity.

    Key software features include:

    1. Split Screen: Easily run two apps side by side for efficient multitasking
    2. Floating Windows: Open apps in resizable windows that float above other content
    3. Tablet-style dock: Quick access to recently used and favorite apps
    4. Conference tools: Specialized features for improved audio and video call experiences

    The user interface is clean and intuitive, with a layout that feels natural on a tablet. Xiaomi has included a “Features for Tablets” section in the settings menu, which highlights and explains the various tablet-specific optimizations available on the device.

    While the software experience is generally positive, it’s worth noting that Xiaomi’s update policy for the Redmi Pad SE is not as clearly defined as some competitors. Users should be aware that long-term software support may be limited compared to more premium devices.

    Performance and Gaming

    Equipped with a Qualcomm Snapdragon 680 processor, the Redmi Pad SE delivers decent performance for everyday tasks and light multitasking. The chip handles web browsing, email, social media, and video streaming with ease, providing a smooth experience for most users.

    In benchmark tests, the Redmi Pad SE achieved the following scores:

    • Geekbench 5: 407 (single-core), 1,351 (multi-core)
    • AnTuTu: Unable to install (as noted in the review)

    While these numbers may not be chart-topping, they represent solid performance for a budget tablet. Users can expect responsive app launches and generally smooth navigation throughout the interface, especially when paired with the 90Hz display.

    Multitasking capabilities are adequate, with the ability to run two apps side by side or in floating windows. However, users may notice some slowdown when pushing the device with multiple demanding apps open simultaneously.

    Gaming performance on the Redmi Pad SE is suitable for casual titles and less graphically intensive games. Popular puzzle games, 2D platformers, and strategy games run well on the device. However, more demanding 3D games may require lower graphics settings to maintain playable frame rates. For example, PUBG Mobile is playable on the tablet, but only with reduced graphics settings and lower frame rates.

    It’s important to set realistic expectations for gaming on a budget tablet. While the Redmi Pad SE can handle light gaming sessions, it’s not designed to be a powerhouse for the latest and most graphically intensive mobile games.

    Battery Life and Charging

    One of the most impressive aspects of the Redmi Pad SE is its outstanding battery life, thanks to the large 8,000mAh battery. This generous capacity allows the tablet to easily last through two days of regular use for most users. In our video loop test, the Redmi Pad SE achieved an impressive runtime of 14 hours and 55 minutes, outperforming many competitors in its price range and even some more expensive tablets.

    Real-world battery performance will vary depending on usage patterns, but users can expect:

    • Up to 12 hours of continuous video playback
    • 8-10 hours of web browsing and light productivity tasks
    • 6-8 hours of mixed-use including some gaming

    The excellent battery life makes the Redmi Pad SE an ideal companion for long trips or extended periods away from a power outlet. However, it’s worth noting that the tablet’s charging speed is relatively slow, supporting only 10W charging. This means that fully recharging the large battery can take several hours, with a full charge from 0% to 100% taking approximately 4 hours with the included charger.

    While the slow charging speed is a drawback, it’s a trade-off that many users may be willing to accept given the exceptional battery life. For those who primarily charge their devices overnight, the slower charging rate is unlikely to be a significant issue.

    Camera Capabilities

    As with most tablets, the camera system on the Redmi Pad SE is functional but not a standout feature. The tablet is equipped with an 8MP rear camera and a 5MP front-facing camera, both of which are adequate for basic photography and video calls.

    The rear camera performs reasonably well in good lighting conditions, capturing images with decent detail and color accuracy. However, in low-light situations, image quality degrades noticeably, with increased noise and loss of detail. The camera app offers a few basic modes and filters, but don’t expect the versatility of a smartphone camera.

    The front-facing 5MP camera is suitable for video calls and occasional selfies. It performs adequately in well-lit environments, making it perfectly acceptable for virtual meetings or casual video chats with friends and family. The wide-angle lens helps to fit more people into the frame during group calls.

    Both cameras can record video at 1080p resolution, which is sufficient for basic video needs. However, the lack of image stabilization means that handheld footage may appear shaky.

    While the cameras on the Redmi Pad SE won’t replace a dedicated camera or high-end smartphone, they serve their purpose for a budget tablet. Most users will find them satisfactory for occasional use and video conferencing needs.

    Verdict: Value for Money

    The Redmi Pad SE offers exceptional value for money in the budget tablet market. Its impressive build quality, smooth 90Hz display, and outstanding battery life set it apart from many competitors in its price range. For users primarily interested in content consumption, light productivity tasks, and casual gaming, the Redmi Pad SE delivers a satisfying experience that belies its affordable price tag.

    Key strengths of the Redmi Pad SE include:

    • Premium build quality with aluminum construction
    • Smooth 90Hz FHD+ display
    • Excellent battery life
    • Good audio quality with quad speakers
    • Modern software with useful multitasking features

    However, potential buyers should also consider the following limitations:

    • Performance may struggle with demanding tasks or heavy multitasking
    • Slow charging speeds
    • Camera quality is basic
    • Long-term software support is uncertain

    For students, casual users, or anyone looking for an affordable secondary device, the Redmi Pad SE represents an excellent choice. It offers a well-rounded package that covers the essentials while providing a few premium touches that elevate the overall experience.

    Alternatives to Consider

    While the Redmi Pad SE offers great value, it’s worth considering a few alternatives in the budget tablet market:

    1. Honor Pad X9: Offers similar specifications with a slightly more powerful processor
    2. Oppo Pad Air: Features a comparable build quality and performance
    3. Samsung Galaxy Tab A7: Provides a more established brand name and potentially better long-term software support

    Ultimately, the Redmi Pad SE stands out as a strong contender in the budget tablet space, offering a combination of quality hardware, useful features, and impressive battery life that’s hard to beat at its price point. For those seeking an affordable yet capable Android tablet, the Redmi Pad SE should be high on the list of options to consider.

    Also Check:

  • Oppo F27 Pro+ Hands-on Review+: The Ultimate Rugged Smartphone

    Oppo F27 Pro+ Hands-on Review+: The Ultimate Rugged Smartphone

    Durability often takes a backseat to sleek designs, and the Oppo F27 Pro+ emerges as a true game-changer. This latest addition to Oppo’s F-series lineup redefines what it means to be a rugged smartphone, offering unparalleled resilience while maintaining a stylish and modern aesthetic. Whether you’re an adventurer, a professional in a demanding field, or simply someone who values a device that can withstand life’s inevitable bumps and spills, the Oppo F27 Pro+ is poised to become your ultimate companion.

    Oppo F27 Pro+ hands-on review+

    Buy Now


    Key Takeaways:

    • Unmatched durability with IP68, IP66, and IP69 water/dust resistance ratings
    • Military-grade drop resistance certified by MIL-STD 810H and SGS Premium 5 Stars
    • Stylish design with a vegan leather back and sleek form factor
    • Powerful performance with the Dimensity 7050 chipset and up to 8GB RAM
    • Impressive camera system with a 64MP main sensor and AI-powered features
    • Long-lasting 5,000mAh battery with 67W wired charging support

    Oppo F27 Pro+ hands-on review+

    The Oppo F27 Pro+ is a testament to the brand’s commitment to innovation and customer satisfaction. By combining cutting-edge technology with a renewed focus on durability, Oppo has created a smartphone that not only looks great but also withstands even the harshest environments. From its rugged yet sleek design to its powerful performance and impressive camera capabilities, the F27 Pro+ is a comprehensive package that promises to redefine your expectations.

    Design and Build – Braving the Elements:

    The Oppo F27 Pro+ is a true embodiment of form meets function. Its sleek and stylish design, available in Dusk Pink and Midnight Navy colorways, immediately catches the eye. The vegan leather back not only adds a premium touch but also provides a secure grip, ensuring that the device won’t easily slip from your hands. However, the real star of the show is the F27 Pro+’s unparalleled durability.

    With an IP68 rating, the Oppo F27 Pro+ can withstand dust and water immersion up to 1.5 meters for 30 minutes. But that’s not all – the phone also boasts IP66 and IP69 certifications, meaning it can withstand high-pressure, high-temperature water jets from any direction. This level of water resistance makes the F27 Pro+ truly “monsoon-ready,” capable of enduring even the harshest weather conditions.

    But Oppo didn’t stop there. The F27 Pro+ has also received the Swiss SGS Premium Performance 5 Stars Drop Resistance Certification, which means it can withstand drops from up to 1.8 meters. This certification was achieved through rigorous testing, including multi-angle drop tests, drop resistance tests with a limit height, and drop resistance tests with a limit number of times. Additionally, the phone has passed the MIL-STD 810H military-grade shock resistance test, which encompasses high-intensity impact tests and other demanding durability assessments.

    During my hands-on testing, I took the Oppo F27 Pro+ out in a torrential downpour, and it performed flawlessly. I even submerged the phone for around 20 minutes (just for testing purposes, of course), and it continued to function without any hiccups. It’s important to note, however, that if your F27 Pro+ does get wet or submerged, make sure to completely dry it before charging to avoid any potential damage.

    Vivid and Bright Display:

    While durability is undoubtedly the Oppo F27 Pro+’s standout feature, it doesn’t compromise on other essential aspects of a modern smartphone. The device boasts a stunning 6.7-inch AMOLED display with a smooth 120Hz refresh rate, ensuring a buttery-smooth scrolling experience. The screen is vibrant and sharp, making it perfect for binge-watching your favorite shows or immersing yourself in the latest mobile games.

    With a maximum brightness of up to 950 nits, the F27 Pro+’s display remains easily visible even in direct sunlight, ensuring that you can enjoy your content without any distractions. While the phone lacks dual speakers for stereo output, the bottom-firing speaker comes equipped with an “ultra-volume mode,” which Oppo claims can increase the sound output by an impressive 300 percent. In real-world usage, the single speaker delivers an output similar to that of dual speakers, although it can sound a bit screechy when the volume is set to the highest level.

    Solid Performance for the Price:

    Under the hood, the Oppo F27 Pro+ packs a punch with the Dimensity 7050 chipset, paired with up to 8GB of LPDDR4x RAM and UFS 3.1 storage. This configuration ensures that apps open quickly, multitasking is seamless, and casual gaming is a breeze. The ColorOS 14.1, based on Android 14, offers a smooth user experience without any noticeable lag or slowdown during my testing.

    One area where the F27 Pro+ could improve is in the pre-installed app department – like many other smartphones, it comes with several pre-loaded apps that some users may find unnecessary. However, Oppo has confirmed that the device will receive two Android OS upgrades and three years of security updates, ensuring that it remains up-to-date and secure throughout its lifespan.

    In terms of battery life, the 5,000mAh battery easily lasted me a full day of normal usage, which includes activities like browsing social media, streaming music, and occasional gaming. When it’s time to recharge, the 67W wired charging support ensures that you can go from 0 to 100% in around 50 to 55 minutes, minimizing downtime and keeping you connected to the world.

    Capable Cameras:

    While the Oppo F27 Pro+ may not be marketed as a camera-centric smartphone, it still delivers a solid photography experience. The device features a 64-megapixel OmniVision OV64B main sensor, which captures detailed photos with vibrant colors. The portrait mode, in particular, produces impressive results, thanks to the AI-powered algorithms that help create a natural bokeh effect.

    It’s worth noting that the main camera lacks optical image stabilization (OIS), which can lead to slightly blurred shots in low-light conditions or when dealing with moving subjects. However, the AI features, such as portrait retouching and AI eraser, are surprisingly useful. During my testing, I was able to remove unwanted photobombers from my vacation pictures with ease, thanks to the AI eraser functionality.

    In addition to the main camera, the Oppo F27 Pro+ also features a 2-megapixel secondary camera, which likely serves as a depth sensor for better portrait shots. On the front, there’s an 8-megapixel selfie camera that should suffice for casual selfies and video calls.

    Pricing and Availability in India:

    The Oppo F27 Pro+ has been launched in India in two storage configurations:

    – 8GB RAM + 128GB storage: ₹27,999 (~$335)

    – 8GB RAM + 256GB storage: ₹29,999 (~$360)

    The device is available in two color options: Dusk Pink and Midnight Navy.

    Oppo is now accepting pre-orders for the F27 Pro+ via Amazon, Flipkart, and the Oppo India website. The first sale of the device will be carried out on June 20th. As for offers, buyers can avail of 6 months of accidental and liquid damage protection worth ₹1199, no-cost EMI for up to 6 months, and consumer loans for up to 9 months without a down payment. Additionally, customers can benefit from an exchange bonus of ₹1000 and an additional ₹1000 loyalty bonus for existing Oppo customers. Lastly, there is a 10% instant cashback offer on HDFC, SBI, and ICICI Bank cards.

    Conclusion

    The Oppo F27 Pro+ is a game-changer in the smartphone world, redefining what it means to be a rugged device. With unmatched durability thanks to IP68, IP66, IP69 and military-grade certifications, it can withstand water, dust, drops and impacts with ease. Yet, it doesn’t compromise on performance, display quality or camera capabilities – delivering a well-rounded experience in a sleek package.

    At an affordable starting price of just ₹27,999 (~$335), the F27 Pro+ offers exceptional value for those seeking a durable smartphone that can keep up with their active lifestyles. Whether you’re an adventurer, a professional in a demanding field, or simply value a resilient device, the Oppo F27 Pro+ is an investment worth making. It’s the ultimate rugged companion that promises to withstand life’s inevitable bumps and spills without sacrificing style or functionality.

    Also Check:

  • Infinix GT 20 Pro Review: An Affordable Powerhouse for Mobile Gaming Enthusiasts

    Infinix GT 20 Pro Review: An Affordable Powerhouse for Mobile Gaming Enthusiasts

    The Infinix GT 20 Pro is a budget-friendly gaming smartphone that packs a punch with its impressive hardware specifications. Boasting a large 6.78-inch AMOLED display, a powerful MediaTek Dimensity 8200 processor, and up to 12GB of RAM, this device aims to provide a seamless gaming experience without breaking the bank. Priced competitively at ₹24,999 for the base variant, the Infinix GT 20 Pro is poised to disrupt the midrange smartphone market with its exceptional value proposition.

    Infinix GT 20 Pro Review

    Buy Now


    Key Takeaways:

    • Affordable pricing for a gaming-centric smartphone
    • Large, vibrant AMOLED display with high refresh rate
    • Powerful MediaTek Dimensity 8200 processor for smooth performance
    • Up to 12GB of RAM for efficient multitasking
    • Dedicated gaming features and optimizations

    Infinix GT 20 Pro Review

    Boasting a large 6.78-inch AMOLED display with a silky-smooth 144Hz refresh rate, the Infinix GT 20 Pro ensures that every frame is rendered with breathtaking clarity and fluid motion. Under the hood, the powerful MediaTek Dimensity 8200 processor, coupled with up to 12GB of RAM, provides the raw computational muscle necessary to tackle even the most demanding games with ease.

    But the Infinix GT 20 Pro isn’t just about pure performance; it’s a well-rounded package designed with gamers in mind. From its dedicated gaming optimizations and cooling solutions to its long-lasting battery life and immersive audio experience, this smartphone aims to elevate your mobile gaming sessions to new heights.

    Priced aggressively in the midrange segment, the Infinix GT 20 Pro promises to deliver a premium gaming experience without the premium price tag. Join us as we delve into the nitty-gritty of this gaming powerhouse and uncover whether it truly lives up to its promises.

    Display Quality:

    The Infinix GT 20 Pro features a stunning 6.78-inch AMOLED display with a Full HD+ resolution of 1080 x 2436 pixels, resulting in a pixel density of 388 ppi. This high pixel density ensures crisp and clear visuals, making it an excellent choice for media consumption and gaming. The AMOLED panel offers deep blacks, vibrant colors, and excellent contrast ratios, providing an immersive viewing experience.

    One of the standout features of the display is its high refresh rate of 144Hz, which ensures smooth and fluid on-screen motion. This is particularly beneficial for fast-paced games, as it reduces motion blur and provides a more responsive gaming experience.

    Performance:

    At the heart of the Infinix GT 20 Pro lies the powerful MediaTek Dimensity 8200 processor, built on a cutting-edge 4nm process. This octa-core chipset, combined with up to 12GB of LPDDR5X RAM, delivers exceptional performance for demanding tasks, including gaming, multitasking, and content creation.

    In benchmark tests, the Infinix GT 20 Pro showcases its impressive capabilities:

    • AnTuTu: 895,790 points
    • Geekbench: Single-core: 1,000 points, Multi-core: 3,413 points
    • 3DMark Wild Life: 6,514 points
    • 3DMark Wild Life Unlimited: 6,441 points

    These benchmark scores highlight the device’s prowess in handling intensive workloads, ensuring a smooth and lag-free experience, even with resource-hungry games and applications.

    Design and Build Quality:

    The Infinix GT 20 Pro boasts a sleek and modern design that is both visually appealing and ergonomic. With dimensions of 164.3 x 75.4 x 8.2 mm and a weight of 194g, the device strikes a perfect balance between portability and a substantial feel in the hand.

    The metallic-looking edges and the sturdy plastic build contribute to a premium feel, while the unique “Mecha Loop Lighting” on the back panel adds a touch of style and functionality, lighting up for calls, notifications, and other events.

    Hardware and Specifications:

    • Processor: MediaTek Dimensity 8200 (1 x 3.1GHz Cortex-A78, 3 x 3.0GHz Cortex-A78, 4 x 2.0GHz Cortex-A55)
    • RAM: Up to 12GB LPDDR5X
    • Storage: 256GB UFS 3.1
    • Display: 6.78-inch AMOLED, Full HD+ (1080 x 2436 pixels), 144Hz refresh rate
    • Rear Cameras: 108MP primary, 2MP macro, 2MP depth sensor
    • Front Camera: 32MP
    • Battery: 5,000mAh with 45W fast charging
    • Connectivity: 5G, Wi-Fi 6, Bluetooth 5.2, NFC, USB Type-C
    • Operating System: Android 14 with XOS 14 for GT

    Software:

    The Infinix GT 20 Pro ships with Android 14 out of the box, with the company’s XOS 14 for GT skin on top. Infinix promises two major Android version upgrades and a third year of security updates, ensuring that the device remains up-to-date and secure.

    XOS 14 for GT is optimized for gaming, offering features such as:

    • X-Boost mode (battery saving, standard power, and performance modes)
    • Gaming optimization (HDR mode, e-sports mode)
    • Dedicated gaming tools (cooling fan support, game overlays)

    Additionally, the software experience is relatively clean, with minimal pre-installed apps and no intrusive advertisements, a rarity in this price segment.

    Cameras:

    The Infinix GT 20 Pro features a triple-camera setup on the rear, consisting of a 108MP primary sensor with optical image stabilization (OIS), a 2MP macro camera, and a 2MP depth sensor. On the front, there’s a 32MP selfie camera.

    While the camera hardware may not be the device’s primary selling point, it still manages to capture decent images in well-lit conditions. The primary camera produces detailed shots with good dynamic range and color accuracy, thanks to the OIS and various camera optimizations.

    However, low-light performance could be better, with images exhibiting noise and loss of detail. The macro camera, while present, struggles to capture intricate details and suffers from soft edges.

    Video capabilities are solid, with the ability to record at up to 4K resolution at 60fps, and OIS support for smoother footage. The selfie camera performs admirably in well-lit conditions, capturing natural-looking selfies with good detail.

    How to Buy

    If the Infinix GT 20 Pro has piqued your interest and you’re ready to elevate your mobile gaming experience, you can easily purchase this device through our exclusive affiliate link. By clicking on the link below, you’ll be redirected to Amazon, where you can securely complete your purchase and have the Infinix GT 20 Pro delivered right to your doorstep.

    Link: https://www.amazon.in/dp/B0D5FZQCZ5?tag=gsmcom05-21&linkCode=osi&th=1&psc=1

    Final Verdict

    The Infinix GT 20 Pro is a compelling option for mobile gaming enthusiasts on a budget. With its powerful MediaTek Dimensity 8200 processor, ample RAM, and a large, high-refresh-rate AMOLED display, the device delivers an exceptional gaming experience that punches above its weight class.

    While the camera performance may not be groundbreaking, it is still serviceable for most casual photography needs. The clean software experience, dedicated gaming features, and long-lasting battery life further enhance the overall package.

    If you’re in the market for an affordable gaming smartphone that doesn’t compromise on performance, the Infinix GT 20 Pro is definitely worth considering. It strikes an impressive balance between raw power, gaming-centric features, and affordability, making it an attractive choice for budget-conscious consumers seeking a thrilling mobile gaming experience.

    Also Check:

  • Amazon Fire TV Stick 4K Review: The Ultimate Streaming Powerhouse for Under $50

    Amazon Fire TV Stick 4K Review: The Ultimate Streaming Powerhouse for Under $50

    Streaming has become an integral part of our entertainment consumption. With the rise of 4K content and the increasing affordability of 4K TVs, the demand for high-quality streaming devices has surged. Enter the Amazon Fire TV Stick 4K, a compact powerhouse that promises to revolutionize your streaming experience without breaking the bank.

    Amazon Fire TV Stick 4K Review

    Buy Now


    This review will delve deep into the features, performance, and value proposition of this popular streaming device, helping you decide if it’s the right choice for your home entertainment setup.

    Key Takeaways:

    • Affordable 4K HDR streaming device under $50
    • Supports premium formats like Dolby Vision and HDR10+
    • Access to 12,000+ apps including major streaming services
    • Alexa voice control for convenient navigation and smart home integration
    • Compact design with an improved remote featuring TV controls

    Amazon Fire TV Stick 4K Review

    The Amazon Fire TV Stick 4K is a small but mighty streaming device that packs a punch in terms of features and performance. Priced at under $50, it offers an impressive array of capabilities, including 4K Ultra HD streaming, support for HDR10+ and Dolby Vision, access to over 12,000 apps, and integration with Amazon’s Alexa voice assistant. But does it live up to the hype? Let’s find out.

    Design and Remote Features

    The Amazon Fire TV Stick 4K maintains the sleek, compact design of its predecessors. The device itself is a small rectangular dongle that plugs directly into your TV’s HDMI port. If space is tight behind your TV, Amazon thoughtfully includes an HDMI extender in the box. On one side of the stick, you’ll find a micro-USB port for power, which can be connected to either the included power adapter or, in some cases, directly to your TV’s USB port if it provides sufficient power.

    The real star of the show in terms of design is the updated Alexa Voice Remote. This new iteration addresses one of the biggest complaints about previous Fire TV devices by including dedicated power and volume controls for your TV. This means you can now control your TV’s basic functions without reaching for a second remote – a small but significant quality-of-life improvement.

    The remote also features dedicated buttons for popular streaming services like Prime Video, Netflix, and Amazon Music, allowing for quick access to your favorite content. The addition of a live TV button and a more prominently placed Alexa button further enhance the user experience. The remote’s build quality feels solid, and the button layout is intuitive, making navigation a breeze.

    Setting up the Fire TV Stick 4K is a straightforward process that typically takes about 15 minutes, including any necessary software updates. Simply plug the device into your TV, connect the power source, and follow the on-screen instructions. The user-friendly setup process makes this device accessible even for those who may not be particularly tech-savvy.

    Fire TV OS and User Interface

    The Fire TV Stick 4K runs on Amazon’s Fire OS, which offers a clean and intuitive user interface. The home screen presents a tile-based layout that showcases recommended content, recently watched shows, and popular apps. The interface is designed to be easily navigable, with horizontal scrolling for different categories and sections.

    One of the standout features of the Fire TV OS is its deep integration with Amazon’s Alexa voice assistant. By pressing and holding the Alexa button on the remote, you can perform a wide range of tasks, from searching for content across different apps to controlling smart home devices. This voice control functionality has seen significant improvements over previous iterations, with Alexa now capable of pulling up content from various streaming services, not just Amazon Prime Video.

    The Fire TV Stick 4K provides access to an impressive library of over 12,000 apps, covering all major streaming services such as Netflix, Disney+, Hulu, YouTube, and of course, Amazon Prime Video. This vast selection ensures that you’ll have no shortage of content to enjoy.

    However, it’s worth noting that there is a noticeable bias towards Amazon’s own content on the home screen. Prime Video content dominates the top half of the page where featured content is shown, and only Prime Video content is labeled as 4K on the home screen. While this may be convenient for frequent Prime Video users, those who primarily use other streaming services might find it slightly less intuitive to access their preferred content.

    4K Streaming Performance

    The Fire TV Stick 4K truly shines when it comes to streaming performance. It supports 4K Ultra HD resolution, along with HDR10, HDR10+, and Dolby Vision HDR formats. This wide range of support ensures that you can enjoy the best possible picture quality across various streaming services and content types.

    In terms of connectivity, the device supports Wi-Fi 6 (802.11ax) for both 2.4GHz and 5GHz bands, as well as Bluetooth 5.0. This advanced wireless capability contributes to fast, reliable streaming, even when dealing with data-heavy 4K HDR content.

    During testing, the Fire TV Stick 4K demonstrated impressive performance in loading and playing 4K HDR content. Streaming services like Netflix and Prime Video were able to quickly ramp up to full 4K resolution with Dolby Vision HDR, resulting in stunning picture quality. The device’s interface also feels snappy and responsive, with minimal lag when navigating menus or switching between apps.

    It’s important to note that to fully utilize the 4K streaming capabilities, you’ll need a stable and fast internet connection. Amazon recommends a minimum of 15 Mbps for 4K content, but for the best experience, a faster connection is advisable.

    Audio performance is equally impressive, with support for Dolby Atmos, Dolby Digital Plus, and DTS surround sound. When paired with a compatible sound system, the Fire TV Stick 4K can deliver an immersive audio experience that complements the high-quality visuals.

    Pros and Cons

    To provide a balanced view, let’s break down the key advantages and disadvantages of the Amazon Fire TV Stick 4K:

    Pros:

    • Affordable 4K streaming at under $50
    • Supports premium HDR formats like Dolby Vision and HDR10+
    • Alexa voice control built-in for convenient navigation and smart home integration
    • Access to a large app library covering all major streaming services
    • Quick navigation and responsive 4K streaming performance
    • Improved remote with TV power and volume controls

    Cons:

    • Ethernet adapter not included (must be purchased separately for wired connections)
    • Some favoring of Amazon content in the user interface
    • Requires a fast and stable Wi-Fi connection for optimal 4K streaming

    Should You Buy the Fire TV Stick 4K?

    The Amazon Fire TV Stick 4K presents a compelling value proposition for anyone looking to upgrade their streaming setup to 4K without spending a fortune. Its support for premium HDR formats like Dolby Vision, coupled with its affordable price point, makes it an attractive option even for those who already own a smart TV but are unsatisfied with its built-in streaming capabilities.

    The device’s Alexa integration is a standout feature, offering convenient voice control not just for content navigation but also for smart home management. This can be particularly appealing for those already invested in the Amazon ecosystem.

    The vast selection of available apps ensures that you’ll have access to all your favorite streaming services, while the improved remote with TV controls adds an extra layer of convenience to the overall user experience.

    However, it’s worth considering your specific needs and setup. If you don’t have a 4K TV or don’t plan on streaming 4K content, the standard Fire TV Stick might be a more cost-effective option. Additionally, if you’re heavily invested in a different ecosystem (like Google’s), you might want to explore alternatives that align better with your existing devices and services.

    For most users, though, the Fire TV Stick 4K offers an excellent balance of features, performance, and affordability. It’s particularly well-suited for those looking to breathe new life into an older 4K TV or anyone wanting to upgrade their streaming capabilities without breaking the bank.

    Where to Buy

    The Amazon Fire TV Stick 4K is widely available from various retailers. As of the time of writing, it can be purchased directly from Amazon.com for $49.99 using our referral link, often with promotional discounts available. It’s also available at other major electronics retailers like Best Buy, typically at a similar price point.

    Before making a purchase, it’s worth checking for any ongoing deals or bundle offers, as Amazon frequently includes the Fire TV Stick 4K in promotional sales, especially during major shopping events like Prime Day or Black Friday.

    In conclusion, the Amazon Fire TV Stick 4K stands out as one of the best value propositions in the streaming device market. Its combination of 4K HDR support, Alexa integration, vast app selection, and affordable price make it a top choice for anyone looking to enhance their home entertainment setup. While it’s not without its minor drawbacks, the overall package offers an impressive streaming experience that punches well above its weight class.

    Also Check:

  • How to Edit Text on iPhone

    How to Edit Text on iPhone

    Editing text on an iPhone is a crucial skill in our digital age. Whether you’re sending a quick message, jotting down notes, composing emails, or working on documents, the ability to efficiently edit text can save time and improve communication. This guide will explore various methods for editing text across different applications on your iPhone.

    How to Edit Text on iPhone
    How to Edit Text on iPhone

    How to Edit Text in Messages on iPhone

    Steps for editing text in the Messages app:

    1. Tap and hold the message you want to edit: Press your finger on the message bubble for about 1-2 seconds. You’ll feel a slight vibration or see an animation indicating that the long-press has been registered.
    2. Select “Edit” from the pop-up menu: A menu will appear with several options. “Edit” should be one of them, usually near the top. If you don’t see “Edit,” it may be because the message is too old (Apple typically allows editing only for recently sent messages).
    3. Make your changes: The message will now appear in an editable text field. You can add, delete, or modify text as needed. The keyboard will appear automatically.
    4. Tap “Send” to update the message: After making your edits, the “Send” button will turn blue. Tap it to confirm your changes. The original message will be updated, and recipients will see a small “Edited” label beneath it.

    Tips for quickly correcting mistakes:

    • Use the predictive text bar: This bar appears just above the keyboard with word suggestions. It learns from your typing habits over time, becoming more accurate. You can often find the correct word here faster than typing it out.
    • Shake to undo: This gesture works across many iOS apps. Shake your device gently, and an “Undo Typing” dialog will appear. You can also redo by shaking again.
    • Double-tap word selection: This is faster than trying to position the cursor precisely. After double-tapping, you can drag the blue handles to adjust the selection if needed.

    How to Edit Text in Notes on iPhone

    How to edit text in the Notes app:

    1. Open the note: In the Notes app, tap on the specific note you want to edit. If it’s in a folder, navigate to that folder first.
    2. Tap to edit: Tap anywhere in the note’s body. The keyboard will appear, and you’ll see a blinking cursor where you tapped.
    3. Make changes: Type new text, delete existing text, or cut and paste as needed. You can also use the predictive text bar for quicker word entry.
    4. Save changes: In Notes, saving is automatic. When you’re done editing, simply tap “Done” in the top-right corner to close the keyboard and exit edit mode.

    Using formatting options:

    • Formatting toolbar: Tap the “Aa” button above the keyboard to reveal formatting options. Here you’ll find options for text size, bold, italic, underline, strikethrough, and more.
    • Lists: In the formatting toolbar, you’ll see icons for bulleted, dashed, and numbered lists. Tap one to start a list. Each time you press return, a new list item is created.
    • Tables: The table icon in the formatting toolbar lets you insert a table. You can then add or delete rows and columns as needed, and even add simple formulas.

    How to Edit Text in Emails on iPhone

    Tips for editing text in the Mail app:

    1. Start editing: Tap once in the body of the email to position the cursor. Tap and hold to bring up the magnifying glass for more precise cursor placement.
    2. Selection tools: Double-tap a word to select it. Drag the blue handles to adjust the selection. Alternatively, tap and hold, then choose “Select” from the pop-up menu to select a larger portion of text.
    3. Formatting options: After selecting text, a pop-up menu appears with options like bold, italic, underline, and more. You can also adjust font size and color from here.

    Proofreading and revising:

    • Preview function: This shows you exactly how your email will look to the recipient, including any formatting or attachments.
    • Reading aloud: This technique helps you catch awkward phrasing, repeated words, or missing punctuation that you might miss when reading silently.
    • Mark Up feature: This is particularly useful for PDFs or images. You can add text, draw, highlight, or even add a signature to attachments before sending.

    How to Edit Text in Documents on iPhone

    Features for editing text in document editing apps:

    • Ruler for margins and indents: The ruler usually appears at the top of the document. You can drag markers on the ruler to adjust margins and paragraph indents.
    • Styles: Using styles (like Heading 1, Body Text, etc.) ensures consistency throughout your document. It also makes it easy to update formatting across the entire document by modifying the style definition.
    • Find and replace: This feature is invaluable for making consistent changes throughout a long document. You can often set options like “Match case” or “Whole words only” for more precise replacements.

    Collaborating with others:

    • Sharing and permissions: When sharing a document, you can usually set permissions like “Can edit,” “Can comment,” or “View only.” Be sure to choose the appropriate level for each collaborator.
    • Comments: Comments allow you to suggest changes or ask questions without altering the main text. They’re usually visible in a sidebar or as icons within the document.
    • Track changes: This feature, available in many document editing apps, allows you to see exactly what changes have been made, by whom, and when. You can then choose to accept or reject each change individually.

    Keyboard shortcuts:

    1. Double-tap the space bar to add a period and space: This shortcut automatically adds a period followed by a space when you double-tap the space bar. It’s particularly useful when typing longer texts, as it saves you from manually adding punctuation at the end of each sentence. After using this shortcut, the next word will be automatically capitalized.
    2. Tap and hold letters to access accented characters: For languages that use accented characters, or when you need to use a special character, tap and hold a letter on the keyboard. A pop-up will appear showing various accented versions of that letter. Slide your finger to the desired character and release to select it. For example, holding ‘e’ will show options like é, è, ê, ë.
    3. Use the globe key to switch between keyboards: If you have multiple keyboards installed (e.g., different languages or emoji keyboard), tap the globe key (located next to the ‘123’ key) to quickly switch between them. If you have more than two keyboards, holding the globe key will show a list of all available keyboards for quick selection.

    Using Text Editing Gestures:

    iOS offers several gestures to streamline text editing:

    1. Double-tap to select a word: Quickly tap twice on any word in your text. The word will be highlighted, and selection handles will appear on both ends. This gesture works in most text fields and apps across iOS. After selection, you can drag the handles to adjust the selection, use the pop-up menu to cut, copy, or apply formatting, or start typing to replace the selected word.
    2. Triple-tap to select a sentence: Tap three times in quick succession on any part of a sentence. The entire sentence will be highlighted, from the first word to the punctuation mark. This is particularly useful when you want to move, delete, or rewrite entire sentences. In some contexts, like web browsers, this might select a paragraph instead, depending on the content structure.
    3. Quadruple-tap to select a paragraph: Tap four times quickly on any part of a paragraph. The entire paragraph will be highlighted. This gesture is incredibly useful for longer texts, allowing you to quickly select large chunks of content. It’s especially handy in apps like Notes, Mail, or word processors.
    4. Shake to undo typing: After typing or deleting text, give your iPhone a quick shake. An “Undo Typing” dialog will appear, asking if you want to undo your last action. Tap “Undo” to confirm, or “Cancel” if you shook by accident. You can keep shaking to undo multiple actions in sequence. To redo, shake again and you’ll see a “Redo Typing” option

    Additional helpful gestures:

    1. Pinch with three fingers: This gesture provides a quick way to copy text without using the traditional copy button. To use it, first select the text you want to copy. Then, place three fingers on the screen and pinch them together (bring them closer) in a single, smooth motion. You’ll see a brief animation at the top of the screen confirming that the text has been copied. This gesture is particularly useful when you need to copy text quickly and repeatedly, as it can be faster than using the standard copy option from the pop-up menu.
    2. Pinch with three fingers twice: This gesture is similar to the copy gesture, but it cuts the text instead. After selecting the text, quickly pinch inward with three fingers twice in succession. The selected text will be removed from its original location and stored in the clipboard. You’ll see a brief animation confirming the cut action. This gesture is helpful when you want to move text from one place to another, especially when working with longer documents or across different apps.
    3. Spread with three fingers: This is the counterpart to the copy and cut gestures, allowing you to paste text without using the paste button. Position your cursor where you want to paste the text, then place three fingers on the screen and spread them apart in a single motion. The previously copied or cut text will be inserted at the cursor position. This gesture is particularly useful when you’re working with multiple apps or documents and need to paste content quickly and efficiently.
    4. Swipe left/right with three fingers: These gestures provide a quick way to undo and redo actions without shaking your device or using the undo/redo buttons. Swiping left with three fingers undoes your last action. This could be typing, deleting, formatting, or any other editable action. You can perform this gesture multiple times to undo several actions in sequence.
    5. Swipe right with three fingers: Swiping right with three fingers redoes the last undone action. This is useful if you’ve undone something by mistake or change your mind about an undo. Like the undo gesture, you can perform this multiple times to redo several actions. These swipe gestures are particularly useful when working with longer documents or when you need to quickly revert or reinstate changes without interrupting your workflow.

    Using autocorrect and predictive text:

    1. Add custom words to your dictionary for frequent use: When you type a word that iOS doesn’t recognize, it will often underline it in red. Tap the word, and if it’s correct, choose “Learn Spelling” from the pop-up menu. This adds the word to your dictionary, and iOS won’t try to correct it in the future. This is particularly useful for names, technical terms, or jargon you use frequently.
    2. Use text replacement for common phrases or symbols: Go to Settings > General > Keyboard > Text Replacement. Here, you can create shortcuts for longer phrases. For example, you could set “omw” to expand to “On my way!” or create a shortcut for your email address. This can significantly speed up your typing for frequently used phrases.
    3. Learn to trust (but verify) autocorrect suggestions: Autocorrect can be a powerful tool when used correctly. As you type, pay attention to the suggestions that appear above the keyboard. Often, the correct word will appear before you’ve finished typing it. Simply tap the space bar to accept the suggestion. However, it’s always good to quickly review your text before sending it, as autocorrect can sometimes make unexpected changes.
    4. Use the keyboard as a trackpad: On devices with 3D Touch or Haptic Touch, press and hold the keyboard until it turns blank. You can then slide your finger around to move the cursor precisely within your text.
    5. Quickly delete text: Instead of holding the delete key to remove text, you can shake your device to undo typing. This works across many apps and can be faster for deleting larger chunks of text.
    6. Use QuickPath swipe typing: iOS 13 and later versions support swipe typing. Instead of tapping each letter, you can slide your finger from one letter to the next without lifting it. The keyboard will predict the word you’re trying to type.
    7. Customize keyboard settings: In Settings > General > Keyboard, you can customize various keyboard behaviors. For example, you can turn off auto-capitalization, enable or disable predictive text, or adjust the key repeat rate.

    By mastering these techniques, you can significantly improve your text editing efficiency on your iPhone. Remember, practice makes perfect – the more you use these features, the more natural and quick they’ll become.

    Conclusion

    Text editing on your iPhone can significantly enhance your productivity and communication skills. From quick message edits to detailed document revisions, the tools are at your fingertips. Remember, practice makes perfect – the more you use these features, the more natural and efficient they’ll become.

    Explore different editing techniques across various apps and find the methods that work best for you. With time and practice, you’ll become a proficient iPhone text editor, able to craft and refine your messages with ease and precision.

    Also Check:

  • How to Create FaceTime Link on iPhone 15 Pro

    How to Create FaceTime Link on iPhone 15 Pro

    FaceTime, Apple’s intuitive video calling platform, has revolutionized the way we connect with loved ones. But what if you want to schedule a FaceTime call in advance or connect with someone who doesn’t have an Apple device? The answer lies in the powerful feature of creating a FaceTime Link.

    How to Create FaceTime Link on iPhone 15 Pro
    How to Create FaceTime Link on iPhone 15 Pro

    This innovative feature transcends the limitations of traditional video calling, transforming your iPhone into a powerful tool for effortless connection. With a few taps, you can create a unique link that anyone, regardless of their device or technical expertise, can use to join your FaceTime call with a single click.

    This guide will equip you with the knowledge to create FaceTime links on your iPhone 15 Pro. We’ll explore the concept of FaceTime links, delve into the steps required to create them, and discover the numerous benefits and motivations behind utilizing this innovative feature for effortless FaceTime connections.

    About Creating a FaceTime Link on iPhone 15 Pro

    A FaceTime Link is a unique, shareable link that allows anyone, regardless of whether they have an iPhone or an Apple ID, to join your FaceTime call using a web browser. This eliminates the need to exchange phone numbers or Apple IDs, simplifying the connection process.

    How to Create FaceTime Link on iPhone 15 Pro

    Below are the Steps to take to create a FaceTime link on iPhone 15 Pro.

    • Creating a FaceTime Link is a quick and straightforward process
    • First, Locate the FaceTime icon on your home screen and tap on it to launch the app.
    • Then, you’ll see a “Create Link” button displayed at the top left corner, Tap on the button to share or copy the link.
    • If you want to schedule a FaceTime call and create a link for it, you can tap on the “New FaceTime” button at the top right corner of the screen.  You can then add participants from your contacts or manually enter their phone numbers or email addresses.
    • Depending on your chosen sharing method, you can either join the call yourself by clicking the link (if you’re already in the FaceTime app) or share the link with the intended participants through your chosen messaging platform or app.

    Also Check: Apple Airpods Price: Are Apple AirPods Worth the Price Tag?

    Benefits of Creating a FaceTime Link on iPhone 15 Pro

    Utilizing FaceTime links offers a multitude of advantages for connecting with others.

    • Effortless Connection: Creating a link simplifies the connection process, allowing participants to join the call with just a single click, eliminating the need to exchange contact information.
    • Inclusive Communication: FaceTime links allow you to connect with anyone, regardless of whether they have an Apple device or an Apple ID. This expands your communication options and fosters inclusivity.
    • Scheduling Convenience: If you’re planning a FaceTime call in advance, creating a link beforehand lets participants save the date and join easily when the time arrives.
    • Spontaneous Group Calls: Quickly create and share a FaceTime link for impromptu group calls with friends or family, fostering spontaneous connection and fun.
    • Flexibility: You can create a link directly from the FaceTime app or schedule a call with participants and then generate the link. This flexibility allows you to adapt the process to your needs.

    Why Create a FaceTime Link on iPhone 15 Pro?

    In today’s fast-paced world, effortless communication is key. Here’s why creating FaceTime links can be a valuable tool

    • Connecting with Non-Apple Users: FaceTime links bridge the gap by allowing anyone with a web browser to join your call, perfect for connecting with friends or family who don’t use Apple devices.
    • Streamlined Group Calls: Planning a group call with multiple participants? Creating a link eliminates the need to send individual invites, streamlining the process and ensuring everyone receives the connection information.
    • Simplified Invites: Forget the hassle of exchanging phone numbers or Apple IDs. A single FaceTime link is all you need to share for seamless call participation.

    Conclusion

    The ability to create FaceTime Links on your iPhone 15 Pro empowers you to connect with loved ones and colleagues effortlessly. Whether you’re scheduling a group call, connecting with non-Apple users, or simply seeking a streamlined way to initiate calls, FaceTime links offer a convenient and inclusive solution.  So ditch the complexities of contact exchanges and embrace a world of effortless FaceTime connections through the power of your iPhone 15 Pro.

    Frequently Asked Questions (FAQs)

    Do participants who join through a link need a FaceTime account?

    No, participants joining via a link don’t need a FaceTime account or an Apple ID.  They can simply click on the link and join the call using their web browser.

    Can I schedule a FaceTime call with a link and add participants later?

    Absolutely!  You can create a link without adding participants initially.  Later, you can share the link and add participants directly through the FaceTime app before the call starts.

    Can I limit who can join a FaceTime call using a link?

    Unfortunately, there’s no way to directly restrict access to a FaceTime call using a link. However, you can control who has access to the link itself by choosing a secure sharing method like private messaging or email.

    Will the quality of the FaceTime call be affected if participants join through a link?

    The overall call quality depends on the internet connection of all participants.  Those joining through a link might experience slightly lower quality compared to users with the FaceTime app, but a stable internet connection can still ensure a smooth call experience.

    For more insights on this article, check out these video tips across our social platforms:

    On Instagram

    On TikTok

  • How to Change the Navigation Bar on Samsung S 24 Ultra

    How to Change the Navigation Bar on Samsung S 24 Ultra

    The Samsung S24 Ultra boasts a stunning display and a user-friendly interface. But what if you could personalize the way you interact with your phone even further? Enter the Navigation Bar, a customizable on-screen control panel that provides quick access to essential navigation functions.

    How to Change the Navigation Bar on Samsung S 24 Ultra
    How to Change the Navigation Bar on Samsung S 24 Ultra

    This guide empowers you to take control of your S24 Ultra’s navigation experience by exploring how to change the Navigation Bar layout and functionality.

    About the Navigation Bar on Samsung S24 Ultra

    The Navigation Bar sits at the bottom of your S24 Ultra’s display, typically displaying three buttons

    By default, the Samsung S24 Ultra, offers three on-screen buttons (Back, Home, Recent Apps) that you can customize the order of (if desired). Feeling fancy? Ditch the buttons and switch to intuitive swipe gestures – swipe up for home, swipe left/right for back, and swipe up and hold for recent apps.

    The Navigation Bar settings, found in Display within Settings, give you the flexibility to choose between button or gesture navigation, creating a navigation experience that perfectly suits your style.

    How to Change the Navigation Bar on Samsung S 24 Ultra

    Changing the Navigation Bar on your S24 Ultra is a quick and straightforward process, and here is how to go about it.

    • First, Locate the “Settings” icon on your home screen and tap on it to launch the Settings app.
    • Then, scroll down the Settings menu and tap on “Display.”
    • Then, look for a section labeled “Navigation Bar” or “Navigation bar” (the exact wording might vary slightly depending on your software version).  Tap on it to access the navigation bar settings.
    • At the top of the Navigation bar settings, you’ll see options for “Buttons” and “Swipe gestures.”  Buttons is the default setting, displaying the navigation buttons.  Swipe gestures remove the buttons and rely on swipe actions for navigation.
    • Once you’ve made your desired adjustments, review the settings to ensure everything is configured as you prefer.
    @mobiletechjoint_

    Navigation Bar on Samsung S 24 Ultra 📱🤌 Navigate like a pro with the Samsung S24 Ultra! 🌟 Discover the customizable navigation bar for seamless and intuitive control. Personalize your experience and make every swipe count. Watch our latest guide to unlock the full potential of your device! #samsungs24ultra #navigationbar #techtips #howto #samsung #navigate @Samsung

    ♬ Taste – Tyga

    Also Check: How to Ignore an App Limit on iPhone 15 Pro

    Benefits of Changing the Navigation Bar on Samsung S24 Ultra

    Customizing your Navigation Bar offers several benefits.

    • Enhanced User Experience: Tailoring the navigation layout to your preferences can make interacting with your phone feel more intuitive and efficient.
    • Improved Accessibility: Rearranging button positions or adding an extra button for frequently used functions can improve accessibility for users with specific needs.
    • A More Minimalist Look: Replacing buttons with swipe gestures creates a cleaner and more streamlined aesthetic on your phone’s display. This aligns with the current design trend of minimalism.
    • Increased Efficiency (Swipe Gestures): For users who find swipe gestures more intuitive, switching to gesture navigation can potentially increase navigation efficiency.

    Conclusion

    The Navigation Bar on your Samsung S24 Ultra goes beyond just a control panel – it’s a gateway to a personalized phone experience.  By understanding its functionalities and exploring the simple customization options, you can tailor the Navigation Bar to your preferences, and optimize your interaction with your S24 Ultra.

    Whether you prefer the classic comfort of buttons, the sleek minimalism of swipe gestures, or a customized button layout, the S24 Ultra empowers you to take control.  So, embrace the power of customization and unlock a navigation experience that perfectly suits your style and needs.

    Frequently Asked Questions (FAQs)

    Will changing the Navigation Bar affect the functionality of my apps?

    No, changing the Navigation Bar layout or using swipe gestures typically doesn’t affect the functionality of your apps. Apps are designed to adapt to different navigation methods.

    Can I accidentally activate swipe gestures with my hand in my pocket?

    The sensitivity of swipe gestures can be adjusted within the Navigation Bar settings.  Finding the right balance between responsiveness and accidental activation is key. Experiment with different sensitivity levels to find the sweet spot for your needs.

    Is there a way to get more than three buttons on the Navigation Bar?

    While the standard layout offers three buttons, some Samsung S24 Ultra models (depending on the software version) might allow adding an extra button through the “More options” menu within the Navigation Bar settings.  This extra button offers limited functionality options for screenshots, specific app launches, or voice assistant activation.

    Will using swipe gestures drain my battery life?

    While swipe gestures require some sensor activity, the overall effect on battery consumption is considered minimal compared to other phone functions like display brightness or intensive app usage.

    For more insights on this article, check out these video tips across our social platforms:

    On Instagram

    On TikTok

  • How to Enable Motion and Gestures on Samsung S23 +

    How to Enable Motion and Gestures on Samsung S23 +

    The Samsung S23+ isn’t just a phone, but a powerhouse of innovation designed to seamlessly integrate.  Sure, it boasts a stunning display, unparalleled processing speed, and a camera that captures breathtaking moments. But what truly elevates the S23+ experience is its focus on intuitive interaction.

    How to Enable Motion and Gestures on Samsung S23 +
    How to Enable Motion and Gestures on Samsung S23 +

    This is where Motion and Gestures come into play.  Imagine a world where simple hand movements and gestures replace the use of buttons, and waking your phone becomes a smooth lift-and-go action. Capturing a screenshot involves a quick swipe of your palm. Silencing an incoming call? A discreet hand gesture does the trick.  Motion and Gestures on your Samsung S23+ transform the way you interact with your phone, making it more natural, efficient, and personalized than ever before.

    This guide will equip you with the knowledge to enable Motion and Gestures on your Samsung S23+. We’ll delve into what this feature offers, guide you through the activation process, and explore the numerous benefits and reasons why incorporating this functionality into your daily routine can streamline your interaction with your phone.

    About Motion and Gestures on Samsung S23+

    Motion and Gestures is a collection of features that leverage the capabilities of your Samsung S23+ to move beyond traditional touch controls. Here’s a glimpse of what it offers.

    • Lift to Wake: Picking up your phone instantly wakes it up, eliminating the need to fumble for the power button.
    • Double Tap to Wake/Sleep: Tap the screen twice to wake your phone or put it to sleep, providing a quick and convenient alternative to the power button.
    • Mute with Gestures: Place your hand over the screen or turn your phone face down to silence incoming calls or alarms, ideal for those moments when fumbling for buttons isn’t an option.
    • Finger Sensor Gestures: Swipe up or down on the fingerprint sensor to navigate through your notifications or access Samsung Wallet (availability may vary based on model).
    • Important Note:  These are some of the core functionalities offered by Motion and Gestures on the Samsung S23+.  The specific features and their settings might vary slightly depending on your device model and software version.

    How to Enable Motion and Gestures on Samsung S23 +

    Below are the Steps on How to Enable Motion and Gestures on Samsung S23+

    • Enabling Motion and Gestures is a quick and straightforward process
    • First, Locate the “Settings” app on your home screen and tap on it to launch the Settings app.
    • Then, Scroll down the Settings menu and tap on “Advanced Features.”  On some models, this might be labeled as “Motions and gestures” or a similar variation.
    • Next, locate the “Motion and Gestures” section and tap on the toggle switch next to it. This will turn the overall feature on (it will turn green).
    • Then tap on each gesture within the “Motion and Gestures” menu to customize its behavior or disable functionalities you don’t prefer.

    Also Check: How to Ignore an App Limit on iPhone 15 Pro

    Benefits of Motion and Gestures on Samsung S23+

    Incorporating Motion and Gestures into your interaction routine offers a multitude of benefits:

    • Enhanced Convenience: Motion and Gestures provide quicker and more intuitive ways to perform everyday actions like waking your phone or capturing screenshots, streamlining your workflow.
    • Improved Accessibility: Features like “Mute with Gestures” offer accessibility benefits for users who might have difficulty reaching the power button or volume controls.
    • Reduced Button Wear: By relying less on the physical buttons, Motion, and Gestures can minimize wear and tear, potentially extending the lifespan of your device’s hardware.
    • Personalized Experience: The ability to customize individual gestures allows you to tailor the experience to your preferences and optimize interaction for your needs.
    • Modern Touch: Motion and Gestures embrace a modern approach to phone interaction, adding a sleek and innovative feel to your experience with the Samsung S23+.

    Conclusion

    The Samsung S23+ goes beyond a powerful device, it’s a gateway to a more intuitive and convenient user experience.  Enabling Motion and Gestures unlocks a world of possibilities, allowing you to interact with your phone using simple hand movements and gestures. From effortless screen wake-up to intuitive screenshot capture and convenient muting options, Motion and Gestures enhance usability, streamline workflows, and personalize your connection with the S23+.

    So, embrace the power of motion and gestures, and discover a whole new way to experience your Samsung S23+.

    Frequently Asked Questions (FAQs)

    Will enabling Motion and Gestures drain my battery life?

    The impact on battery life is generally minimal. While Motion and Gestures utilize sensors to detect movements, their overall effect on battery consumption is considered negligible compared to other phone functions like display brightness or intensive app usage.

    Can I accidentally activate gestures with my hand in my pocket?

    The sensitivity of gestures like “Palm Swipe to Capture” can be adjusted within the settings. Finding the right balance between responsiveness and accidental activation is key. Experiment with different sensitivity levels to find the sweet spot for your needs.

    Are Motion and Gestures compatible with all apps?

    Motion and Gestures primarily affect system-wide functionalities like waking the phone or capturing screenshots. Their compatibility with specific app features might vary depending on the app’s design and implementation.

    What if I don’t like a particular Motion and Gesture feature?

    The beauty of Motion and Gestures lies in its customization options.  You can disable any individual gesture within the settings menu that you find unnecessary or inconvenient. This allows you to tailor the experience to your preferences and interaction style.

    For more insights on this article, check out these video tips across our social platforms:

    On Instagram

    On TikTok

  • How to Enable Dark Mode on Samsung S 24 Ultra

    How to Enable Dark Mode on Samsung S 24 Ultra

    The Samsung S24 Ultra is a technological powerhouse, a gateway to a world of information and entertainment at your fingertips. Its vibrant display showcases photos, videos, and games in stunning detail. But as the sun sets, and you transition to a calmer state, the phone’s brilliance can sometimes become a source of eye strain.

    How to Enable Dark Mode on Samsung S 24 Ultra
    How to Enable Dark Mode on Samsung S 24 Ultra

    Fortunately, there’s a solution that can be used to counter this situation, the Dark Mode feature on your Samsung S24 Ultra. This isn’t just a cosmetic change, but a transformative feature that creates a nighttime oasis for your eyes.  Dark Mode bathes your phone’s interface in a soothing darkness, offering a multitude of benefits that go far beyond aesthetics.

    This comprehensive guide empowers you with the knowledge to enable the Dark Mode feature on your Samsung S24 Ultra, exploring its benefits and delving into the simple activation process.

    Why Enable Dark Mode on Samsung S24 Ultra?

    Your Samsung Galaxy S24 Ultra’s Dark Mode goes beyond just aesthetics. It can be a friend to your eyes, battery, and even your sleep. Staring at a bright screen, especially at night, can cause eye strain.

    Dark Mode swoops in with a darker color scheme, making screen time easier on your eyes. AMOLED displays, like the one in your S24 Ultra, benefit from Dark Mode too, as dark pixels use less power, potentially extending your battery life. Plus, who can resist a sleek and stylish phone interface?

    Dark Mode delivers that in spades. It can even minimize screen glare in bright environments and potentially promote better sleep by reducing overall screen brightness before bed. So, enable Dark Mode and experience a world of benefits for your eyes, phone, and well-being.

    How to Enable Dark Mode on Samsung S 24 Ultra

    Below are the steps to take on How to Enable Dark Mode on Samsung S24 Ultra

    • Enabling Dark Mode on your Samsung S24 Ultra is a quick and straightforward process
    • First, swipe down twice from the top of the screen to fully expand the Quick Settings panel.
    • Then look for the “Settings” icon (it might appear as a gear symbol) within the Quick Settings panel, and click on it.
    • After that, scroll down, look for the “Display” option, and click on it.
    • Then Look for the “Dark Mode” icon, within the “Display” Settings and click on it. It is beside the “Light” mode icon.
    •  You can also automatically schedule Dark Mode to turn on and off at specific times.
    @mobiletechjoint_

    Enable Dark Mode on Samsung S 24 Ultra 📱 Dive into the elegance of Dark Mode on Samsung S24 Ultra! 💥 Transform your screen for a sleek, eye-friendly experience. 🤌 Discover how to activate it effortlessly and elevate your device’s style.💯💫 #samsungs24ultra #darkmode #howto #samsung #fyp @Samsung @makeoverarena

    ♬ original sound – mobiletechjoint

    Also Check: How to Set App Limit on iPhone 15 Pro

    Benefits of Enabling Dark Mode on Samsung S24 Ultra

    Enabling Dark Mode on your Samsung S24 Ultra offers several advantages.

    • Reduced Eye Strain: As mentioned earlier, Dark Mode minimizes bright light emission, promoting eye comfort and potentially reducing strain during extended phone use.
    • Improved Battery Life: While the exact impact depends on factors like usage patterns and display brightness, Dark Mode can potentially lead to improved battery life on devices like the S24 Ultra due to the lower power consumption of dark pixels on AMOLED displays.
    • Enhanced Readability in Low-Light: Dark Mode creates a higher contrast between text and background in low-light environments, making content easier to read and reducing eye fatigue.
    • Personalized Look and Feel: Dark Mode allows you to personalize the visual aesthetic of your phone, creating a more modern and stylish interface that suits your preferences.
    • Reduced Blue Light Exposure: Some research suggests that reducing blue light exposure in the evenings can improve sleep quality. By reducing overall screen brightness and blue light emission, Dark Mode might offer indirect benefits for sleep patterns.

    Beyond the specific benefits outlined above, enabling Dark Mode on your Samsung S24 Ultra offers several compelling reasons

    • Enhanced User Experience: Dark Mode creates a more comfortable and visually appealing user experience, especially when using your phone for extended periods or in low-light environments.
    • Modern and Sleek Aesthetics: Dark Mode aligns with the current design trends of minimalism and sophistication, offering a modern and stylish look for your phone’s interface.
    • Potential Health Benefits:  While more research is needed, reducing blue light exposure through Dark Mode might indirectly promote better sleep patterns. This is because blue light exposure in the evenings can suppress melatonin production, a hormone crucial for regulating sleep-wake cycles.
    • Improved Focus:  Dark Mode can potentially minimize visual distractions by reducing overall screen brightness and creating a more focused reading experience. This might be beneficial for activities like reading ebooks or working on documents.
    • Compatibility and Customization:  Samsung offers robust Dark Mode compatibility with most built-in apps and allows for some level of customization through scheduling or app-specific adjustments, catering to individual preferences.

    Conclusion

    Dark Mode on your Samsung S24 Ultra is more than just a visual preference – it’s a valuable tool for enhancing your user experience.  From reducing eye strain and potentially improving battery life to creating a more comfortable and stylish interface, Dark Mode offers a multitude of benefits.

    The simple activation process makes it a feature worth exploring.  So, embrace the comfort and style of Dark Mode, and unlock a whole new way to experience your Samsung S24 Ultra.

    Frequently Asked Questions (FAQs)

    Does Dark Mode eliminate blue light emission from my phone?

    No, Dark Mode doesn’t eliminate blue light emission.  However, it significantly reduces the overall amount of blue light emitted from the display, potentially offering indirect benefits for sleep patterns (further research is ongoing).

    Can I schedule Dark Mode to turn on and off automatically?

    Absolutely!  The Samsung S24 Ultra offers Dark Mode scheduling options within the Quick Settings panel. This allows you to customize when Dark Mode activates and deactivates based on your preferences.

    Will Dark Mode work with all apps on my phone?

    While Dark Mode compatibility with most built-in apps is excellent, some third-party apps might not fully support Dark Mode yet.  These apps might still display a light interface even with Dark Mode enabled on your phone.

    Can I adjust the intensity of Dark Mode on my Samsung S24 Ultra?

    Unfortunately, the Samsung S24 Ultra doesn’t currently offer built-in options to adjust the intensity of Dark Mode. However, some third-party apps might offer additional customization options for Dark Mode appearance.

    For more insights on this article, check out these video tips across our social platforms:

    On Instagram

    On TikTok

  • CMF Neckband Pro: The Best $49 Neckband Headphones for Long-Lasting, High-Quality Audio

    CMF Neckband Pro: The Best $49 Neckband Headphones for Long-Lasting, High-Quality Audio

    If you’re in the market for neckband headphones that blend affordability with premium features, the CMF Neckband Pro is your best bet. Priced at just $49.00, these headphones pack a punch with their impressive specs and user-friendly design. Here’s why the CMF Neckband Pro stands out.

    CMF Neckband Pro: The Best $49 Neckband Headphones for Long-Lasting, High-Quality Audio

    Powerful 50dB Hybrid Active Noise Cancellation

    The CMF Neckband Pro excels in noise cancellation, offering up to 50dB Hybrid Active Noise Cancellation (ANC). This feature is enhanced by Environment Adaptive ANC, which adjusts the noise cancellation level based on your surroundings. Whether you’re on a noisy street or in a quiet room, the Neckband Pro ensures optimal listening by adapting to ambient noise.

    Cinematic Sound with Spatial Audio Effect

    Equipped with the CMF flagship processor, these headphones support Spatial Audio Effect. Designed with the Head-Related Transfer Function (HRTF), they deliver a 360° listening experience that brings movies and games to life. The immersive sound quality makes every audio experience richer and more dynamic.

    Clear Calls with 5 HD Microphones

    The Neckband Pro features five HD microphones that isolate background noise in real-time. This ensures that your phone calls are as clear as face-to-face conversations, regardless of your environment. The Clear Voice Technology has been rigorously tested on over 30 million models, ensuring top-notch call quality every time.

    Smart Control with 3-in-1 Smart Dial

    Managing your audio settings on the go is a breeze with the intuitive 3-in-1 Smart Dial. You can effortlessly adjust the volume, play/pause or skip tracks, and control the ANC with a quick spin or press. This smart control feature adds a layer of convenience to your listening experience.

    Dual Device Connection and IP55 Rating

    Stay connected with the dual-device connection feature, which allows you to switch between two devices seamlessly. This is perfect for multitasking between your phone and laptop. The Neckband Pro also boasts an IP55 rating for dust and water resistance, making it durable enough for various environments.

    Comfort and Long Battery Life

    Designed for day-long use, the flexible cable moves with you, offering ergonomic comfort. Choose from three eartip sizes for a personalized fit. The energy-efficient processor, combined with a 220 mAh battery, delivers an impressive 37 hours of non-stop listening. Plus, quick charging technology provides a swift power boost for 18 hours of playback in just a few minutes.

    What’s in the Box?

    • CMF Neckband Pro Bluetooth Headphones
    • Multiple eartip sizes
    • USB-C charging cable
    • User manual

    Final Verdict

    The CMF Neckband Pro offers exceptional value for its price. With top-tier noise cancellation, immersive sound quality, clear call technology, smart controls, and long battery life, it’s an unbeatable choice for anyone seeking high-quality neckband headphones on a budget. At just $49.00, the CMF Neckband Pro is the perfect blend of performance, comfort, and affordability. Get ready to elevate your audio experience with these outstanding headphones.

    Also Check: