Blog

  • How to Enable Maintenance Mode on Samsung S24 Ultra

    How to Enable Maintenance Mode on Samsung S24 Ultra

    The Samsung Galaxy S24 Ultra empowers you with a powerful suite of features, but safeguarding your privacy is equally important.

    Enable Maintenance Mode

    Here’s where Maintenance Mode comes in, a valuable tool that protects your personal data when handing your phone over for repairs or service.

    This comprehensive guide provides insights on the steps to enable Maintenance Mode on your Samsung Galaxy S24 Ultra, ensuring your privacy remains secure.

    What is Maintenance Mode on Samsung S24 Ultra?

    Before going into how to enable Maintenance Mode on your Samsung Galaxy S24 Ultra, let’s understand what it actually does.

    Maintenance Mode is a valuable security feature designed to safeguard your privacy when you need to hand over your phone for repairs or service.

    Here’s a breakdown of its functionality:

    • Creates a Separate Environment

    When activated, Maintenance Mode establishes a temporary, isolated space on your phone. This isolated environment restricts access to your personal data, such as photos, messages, contacts, and other files.

    • Protects Your Information

    By shielding your data, Maintenance Mode ensures that service technicians or anyone else using your phone cannot access your private information. This provides significant peace of mind when your phone requires servicing.

    • Customization Options

    While Maintenance Mode restricts access to your personal data, it offers some degree of customization.

    You can choose specific apps and functionalities to remain accessible during Maintenance Mode. This allows you to maintain essential features like making calls or using the camera if needed.

    In essence, Maintenance Mode acts as a digital safeguard, creating a secure environment for your phone when it’s not in your immediate control.

    How to Enable Maintenance Mode on Samsung S24 Ultra

    There are two primary ways to activate Maintenance Mode on your Samsung Galaxy S24 Ultra:

    Using Settings App (Detailed Control)

    • Open the Settings app on your Galaxy S24 Ultra.
    • Scroll down and tap on Device Care.
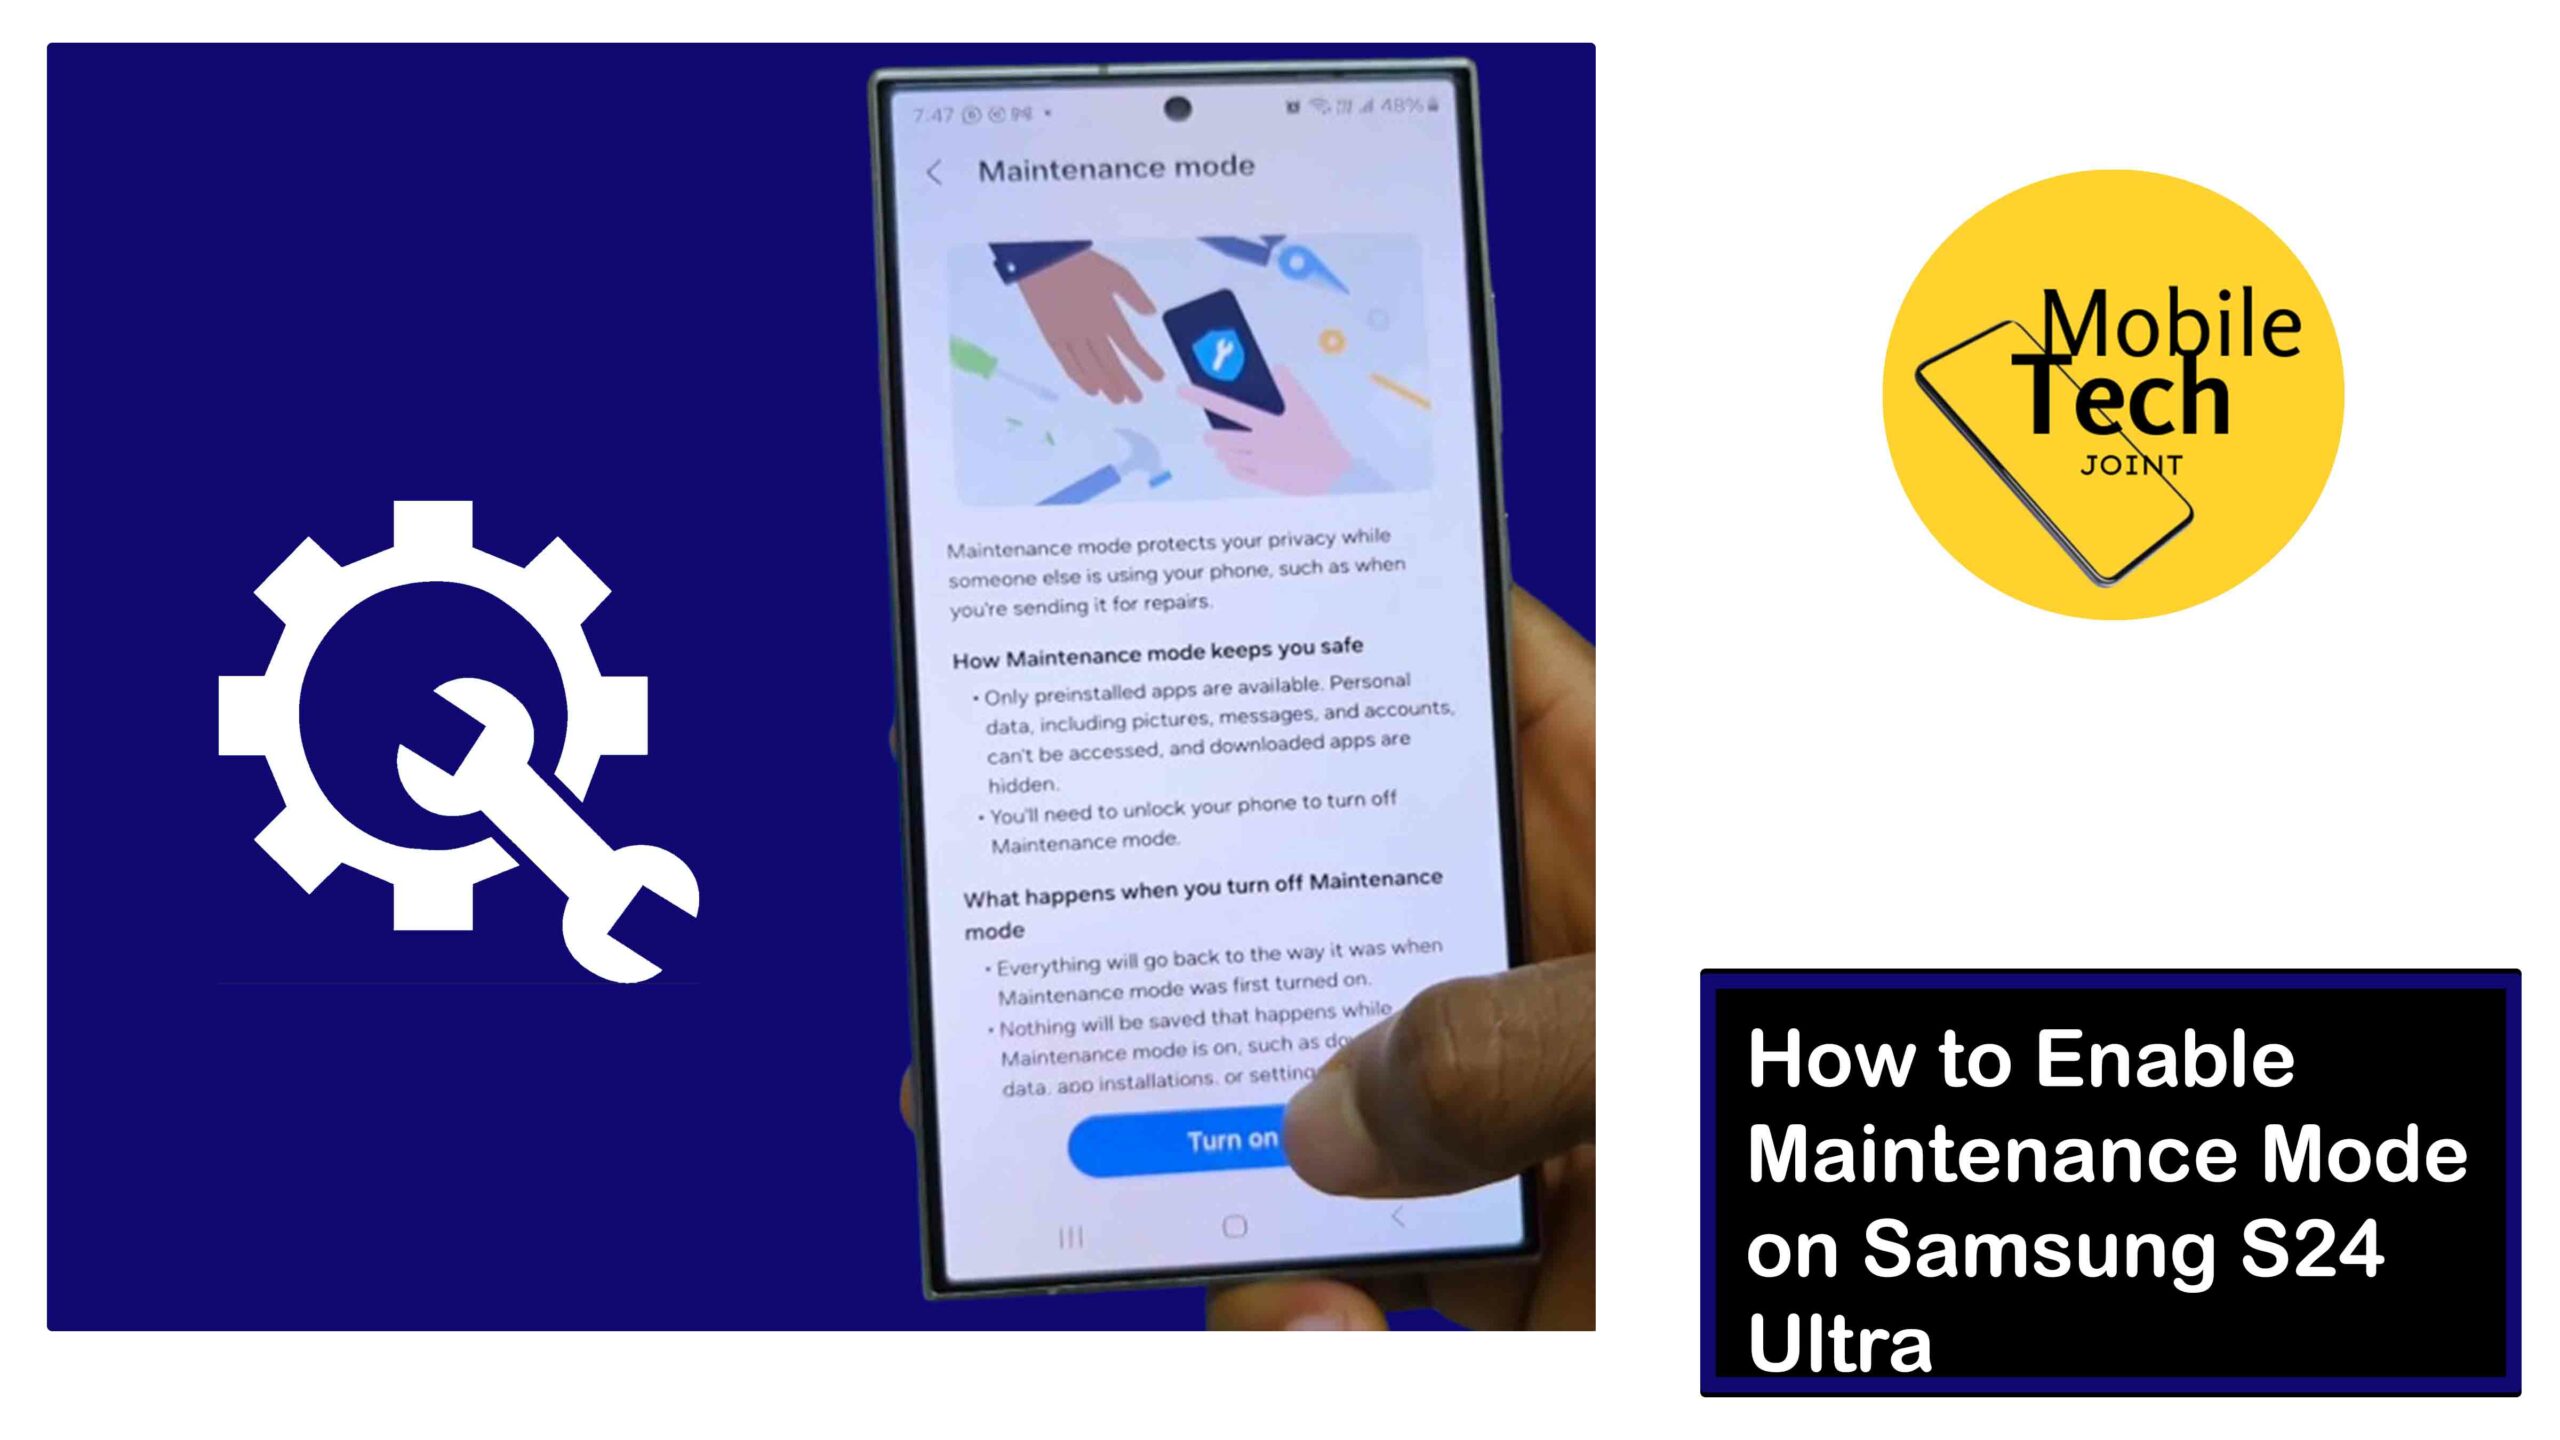
    • Within Device Care, scroll down to the least and tap on Maintenance Mode.
    • Tap on the Turn on button to enable Maintenance Mode.
    • A pop-up message will appear, informing you that your phone will restart to enter Maintenance Mode. Tap Restart to confirm.

    Your phone will restart, and Maintenance Mode will be active. A watermark will appear on your screen indicating that Maintenance Mode is enabled.

    Using Samsung Members App

    • Open the Samsung Members app on your Galaxy S24 Ultra.
    • Navigate to the Support tab.
    • Within the Support section, tap on Maintenance Mode.
    • You’ll see a screen with information about Maintenance Mode. Tap the Turn on button to activate it.
    • Follow the on-screen prompts, which might involve entering your PIN or Password for security purposes.
    • Your phone will restart, and Maintenance Mode will be enabled.
    • Exiting Maintenance Mode on Galaxy S24 Ultra

    Once your phone is serviced and you’re ready to disable Maintenance Mode, follow these steps:

    • Unlock your phone using your PIN, Password, or Fingerprint.
    • You’ll see a notification prompting you to Exit Maintenance Mode. Tap on the notification.
    • (Optional) If you previously chose specific apps to remain accessible, you’ll be prompted to confirm if you want to keep them accessible after exiting Maintenance Mode. Choose your preference and tap Exit.
    • Your phone will restart, and Maintenance Mode will be deactivated. Your regular phone environment with full access to your data will be restored.

    Related: How to Scan Threats on Samsung S24 Ultra

    Why Use Maintenance Mode on Galaxy S24 Ultra?

    There are compelling reasons to use Maintenance Mode on your S24 Ultra, here are some of them:

    • Enhanced Privacy

    When enabled, Maintenance Mode creates a temporary, isolated environment on your phone. This means your personal data (photos, messages, contacts, etc.) is hidden and inaccessible to service technicians or anyone else using your phone.

    • Peace of Mind

    By utilizing Maintenance Mode, you can hand over your phone for repairs or warranty claims with peace of mind, knowing your private information is shielded.

    • Customization Options

    Maintenance Mode allows you to choose which apps and functionalities remain accessible while the mode is active. This way, you can still access essential features like making calls or using the camera if needed.

    Conclusion

    By understanding the benefits and utilizing the methods outlined in this guide, you can leverage Maintenance Mode on your Samsung Galaxy S24 Ultra to ensure your privacy remains protected whenever your phone requires service.

    This valuable tool empowers you to hand over your device with confidence, knowing your personal information is secure.

    Embrace the peace of mind that comes with Maintenance Mode and enjoy the powerful features of your Galaxy S24 Ultra worry-free.

    What Happens to my Apps when I Enable Maintenance Mode?

    By default, Maintenance Mode restricts access to all your apps and data to protect your privacy. However, it offers customization.

    You can choose specific apps (like phone calls or camera) to remain accessible while Maintenance Mode is active.

    Is there a Way to Access my Personal Data while Maintenance Mode is On?

    No, once Maintenance Mode is enabled, your personal data (photos, messages, contacts, etc.) is hidden and inaccessible.

    This is a security feature to ensure your privacy. To access your data again, you’ll need to exit Maintenance Mode, which requires restarting your phone and verifying your identity with your PIN, password, or fingerprint.

    For more insights on this article, check out this video tips on our social platform:

  • How to Enable 24 Hour Time Format on iPhone 14 Plus

    How to Enable 24 Hour Time Format on iPhone 14 Plus

    The iPhone 14 Plus, a device designed to integrate into your life, offers a high level of customization, including the way you view time.

    For those who prefer the obvious efficiency of the 24-hour clock, the iPhone 14 Plus empowers you to switch from the standard 12-hour format (AM/PM) to a 24-hour display.

    Enable 24 Hour Time Format on iPhone 14 Plus

    This minor adjustment can offer significant benefits, from eliminating confusion when dealing with international colleagues to promoting a more streamlined way of viewing time.

    Whether you’re a seasoned traveler, a business professional working across time zones, or simply someone who appreciates a clear and concise timekeeping system, enabling the 24-hour format on your iPhone 14 Plus can enhance your user experience.

    This guide will enlighten you on simple steps involved in on how to enable 24 hour time format on iPhone 14 Plus, ensuring you can navigate your day with perfect clarity, knowing exactly what time it is, anywhere in the world. So continue reading this article and follow the procedures carefully.

    Why Use 24-Hour Time Format?

    There are several advantages to using the 24-hour time format:

    • Universal Understanding

    It is widely used around the world, eliminating confusion when encountering times in different locations.

    • Clarity and Precision

    The 24-hour format removes ambiguity by explicitly displaying the hour, eliminating the need to decipher between AM and PM.

    • Efficiency

    It can be more efficient for some users, as it requires less mental processing to understand the time.

    Related: How to Enable Dark Mode on iPhone 14 Plus

    How to Enable 24 Hour Time Format on iPhone 14 Plus

    The process for enabling 24-hour time format on your iPhone 14 Plus is straightforward:

    • Open the Settings app on your iPhone 14 Plus.
    • Scroll down and tap on General.
    • Locate the Date & Time section and tap on it.
    • Tap on the 24-Hour Time option to enable the 24-hour time format.

    Exit the Settings app. The clock on your iPhone’s lock screen and throughout the system will now display time in the 24-hour format (e.g., 14:25 instead of 2:25 PM).

    Conclusion

    By enabling the 24-hour time format on your iPhone 14 Plus, you can ensure clear and unambiguous timekeeping.

    This format can be particularly beneficial for frequent travelers or anyone who works with international colleagues.

    With this simple adjustment in your Settings app, you can keep yourself on schedule and avoid any confusion regarding the time of day. So, switch to the 24-hour format and experience a more streamlined and efficient way to view time on your iPhone 14 Plus.

    Can I Use Both 12 Hour and 24 Hour Time Format at Same Time?

    Unfortunately, iPhone 14 Plus doesn’t offer a way to display both time formats simultaneously. You can choose either the 12-hour format with AM/PM or the 24-hour format.

    Will Enabling 24-hour Time Affect How Apps Display Time?

    While the system clock and lock screen will switch to 24-hour format, some apps might retain their own time format settings.  This depends on the individual app’s design and functionality.

    What if I Switched to 24-hour Time and Want to go Back to the 12-hour Format?

    No worries! Simply follow the same steps mentioned in the article.  Navigate to Settings > General > Date & Time.  Under the “Format” section,  choose “AM/PM” to switch back to the 12-hour time format.

    Does Using 24-hour Time Save Battery Life on iPhone 14 Plus?

    The switch to 24-hour time format has a little impact on battery life. Battery usage is influenced by factors like screen brightness, app usage, and cellular connectivity.

    Will Using 24-hour Time Make me Better at Math?

    There’s no direct link between using 24-hour time and improved math skills. However, the 24-hour format can promote familiarity with military time or time zones that use the 24-hour system.

    For more insights on this article, check out these video tips across our social platforms:

  • How to Edit Text Size on iPhone 14 Plus

    How to Edit Text Size on iPhone 14 Plus

    The iPhone 14 Plus boasts a stunning display, but ensuring the text is crisp and comfortable to read is essential for a positive user experience.

    Edit TExt Size

    Thankfully, Apple provides several ways to adjust the text size on your iPhone 14 Plus, allowing you to personalize your view and prevent eye strain.

    This comprehensive guide will explore all the methods for editing text size on your iPhone 14 Plus, empowering you to find the perfect fit for your reading preferences.

    Why Edit Text Size on iPhone 14 Plus?

    There are several compelling reasons to adjust the text size on your iPhone 14 Plus:

    • Enhanced Readability

    For users with farsightedness or those who simply prefer larger text, increasing the text size can significantly improve reading comfort and reduce eye strain.

    • Accessibility

    For users with visual impairments, enlarging the text size is crucial for ensuring they can clearly read content on their iPhone.

    • Personal Preference

    Some users might simply prefer a slightly larger or smaller font size for a more comfortable reading experience, regardless of vision concerns.

    How to Edit Text Size on iPhone 14 Plus 

    There are two primary methods for editing the text size on your iPhone 14 Plus:

    Using Settings App

    • Open the Settings app on your iPhone 14 Plus.
    • Scroll down and tap on Display & Brightness.
    • Locate the Text Size section.  You’ll see a slider bar with a sample text box displaying the current font size.
    • Drag the slider bar to the left to decrease the text size or to the right to increase it.  The sample text box will update in real-time, allowing you to preview the changes.
    • Once you’ve chosen the desired text size, simply exit the Settings app. The new text size will be applied across your entire iPhone system, including apps, menus, and messages.

    Using Zoom Feature (System-Wide Magnification)

    • Open the Settings app on your iPhone 14 Plus.
    • Scroll down and tap on Accessibility.
    • Locate the Zoom option and tap on it.
    • Toggle the switch next to Zoom to turn it On.  This activates the Zoom feature, which magnifies the entire iPhone screen content, including text.
    • You can now use pinch gestures (pinching two fingers together to zoom in and spreading them apart to zoom out) on your iPhone screen to adjust the zoom level. This will magnify all the content on your screen, including text.

    Here are the required procedures.

    Related: How to Access Storage on iPhone 14 Plus

    Choose the Right Text Size for You

    The ideal text size is a matter of personal preference. Here are some tips to help you find the perfect fit:

    • Consider Readability

    Choose a text size that allows you to read comfortably without straining your eyes. Adjust the size until the text appears sharp and clear.

    • Experiment

    Don’t be afraid to experiment with different text sizes using both methods mentioned above. Find the size that feels most comfortable for extended reading sessions.

    • Balance Comfort and Functionality

    While a larger font size might be easier on the eyes, it can also lead to less content being visible on the screen at once. Strike a balance between comfort and functionality.

    Conclusion

    By understanding the methods for editing text size and following the tips provided, you can personalize your iPhone 14 Plus display to ensure a comfortable and enjoyable reading experience.

    Don’t settle for a one-size-fits-all approach. Take control, adjust the text size to your preference, and unlock the full potential of your iPhone 14 Plus display.

    How Can I Make the Text Bigger on my iPhone 14 Plus?

    There are two main ways to increase text size on your iPhone 14 Plus. You can use the Settings app to adjust a dedicated Text Size slider, offering precise control over font size.

    Alternatively, you can activate the Zoom feature within Accessibility settings, which magnifies the entire screen content, including text, using pinch gestures.

    Is there a Way to Set Different Text Sizes for Apps on iPhone 14 Plus?

    Unfortunately, iPhone 14 Plus doesn’t allow you to set individual text sizes for specific apps.  The adjusted text size will be applied uniformly across your entire system, including all apps, menus, and messages.

    What if I Zoomed in Using the Zoom feature and can’t Zoom Back Out?

    If you activated Zoom and can’t see the entire screen, simply tap three times with three fingers anywhere on your iPhone 14 Plus screen. This is a universal zoom shortcut that will toggle zoom on and off.

    Alternatively, you can navigate back to the Zoom settings within Accessibility and turn the toggle switch back to “Off.”

    For more insights on this article, check out these video tips across our social platforms:

  • How to Enable AssistiveTouch on iPhone 14 Plus

    How to Enable AssistiveTouch on iPhone 14 Plus

    The iPhone 14 Plus prioritizes user experience, and AssistiveTouch is a powerful accessibility feature that enhances control and interaction for users with specific needs.

    Enable Assistive Touch on iPhone 14 Plus

    AssistiveTouch creates an on-screen virtual button that acts as a gateway to various iPhone functions, replacing the need for precise physical gestures or button presses.

    This comprehensive guide will explore more on how to enable AssistiveTouch on iPhone 14 Plus and explore its functionalities to empower your user experience. So read and follow the steps carefully.

    Why Use AssistiveTouch on iPhone 14 Plus?

    AssistiveTouch offers a multitude of benefits for iPhone 14 Plus users, including:

    • Simplified Navigation

    For users with limited dexterity or difficulty using certain iPhone gestures, AssistiveTouch provides an alternative way to perform actions like going home, opening the app switcher, or taking screenshots.

    • Accessibility Bridge

    AssistiveTouch acts as a bridge to various accessibility features on your iPhone 14 Plus. You can customize the on-screen button to access features like Voice Control, Siri, or Reachability.

    • Customization Options

    AssistiveTouch is highly customizable. You can choose the functions assigned to the virtual button and even set up custom multi-tap gestures for added convenience.

    How to Enable AssistiveTouch on iPhone 14 Plus

    The process of enabling AssistiveTouch on your iPhone 14 Plus is straightforward:

    • Open the Settings app on your iPhone 14 Plus.
    • Scroll down and tap on Accessibility.
    • Locate Touch and tap on it.
    • Locate AssistiveTouch and tap the toggle switch next to it to turn it On. The switch will turn green, indicating AssistiveTouch is active.
    • A small white dot, representing the AssistiveTouch button, will appear on your screen. You can drag and reposition this dot to a convenient location on your display.

    These are the required steps.

    Explore AssistiveTouch Functions

    Once activated, the AssistiveTouch button acts as a gateway to various functionalities. Here’s a closer look:

    • Single Tap

    By default, a single tap on the AssistiveTouch button opens a menu with various options. You can customize this menu to include frequently used functions like Home, App Switcher, Lock Screen, Volume control, Siri, and more.

    • Long Press, Double Tap, and 3D Touch

    You can assign additional functionalities to the AssistiveTouch button by setting custom actions for long presses, double taps, or even 3D Touch (available on iPhone models that support it). This allows for even more personalized control.

    • Custom Menus

    Delve deeper into customization by creating custom AssistiveTouch menus. You can have multiple menus for different scenarios, each containing the specific functions you need for that situation.

    Advanced AssistiveTouch Features on iPhone 14 Plus

    Beyond basic functionality, AssistiveTouch offers some advanced features on iPhone 14 Plus:

    • Assistive Devices

    Connect Bluetooth® and USB assistive devices like joysticks, trackpads, or even mouse devices to your iPhone and control them through the AssistiveTouch interface.

    • On-Screen Keyboard

    Display the on-screen keyboard directly through the AssistiveTouch menu for easier text input, especially helpful for users with limited mobility.

    • Always Show Menu

    This option ensures the AssistiveTouch menu remains visible even when a pointer device is connected, offering additional control options.

    Related: How to Access Keyboard Settings on iPhone 14 Plus

    Optimizing Your AssistiveTouch Experience

    Here are some tips to get the most out of AssistiveTouch on your iPhone 14 Plus:

    • Personalize Your Menu

    Customize the AssistiveTouch menu to include the functions you use most frequently. This will streamline your interaction and make it more efficient.

    • Explore Custom Gestures

    Experiment with assigning different actions to long presses, double taps, or 3D Touch (if applicable) for a truly personalized and convenient AssistiveTouch experience.

    • Consider Assistive Devices

    If you use assistive devices like joysticks or trackpads, explore how they can integrate with AssistiveTouch to create a control system tailored to your needs.

    Conclusion

    AssistiveTouch on iPhone 14 Plus offers a customizable on-screen button for simplified navigation and access to various functionalities.

    Explore its features to tailor your iPhone experience and unlock a world of accessibility options.

    What Can I Do with AssistiveTouch on iPhone 14 Plus?

    AssistiveTouch provides an on-screen button that acts as a gateway to various iPhone functions.

    You can use it for simplified navigation (going home, opening apps), access features like Voice Control or Siri, and even create custom multi-tap gestures for shortcuts.

    Is AssistiveTouch Difficult to Set up on iPhone 14 Plus?

    No, enabling AssistiveTouch is a straightforward process. It involves opening Settings > Accessibility > Touch > AssistiveTouch and turning on the toggle switch. The on-screen button will appear, and you can customize its functions and placement.

    Can I use AssistiveTouch with Other Accessibility Features on iPhone 14 Plus?

    Absolutely! AssistiveTouch acts as a bridge to various accessibility features. You can customize the menu to include functions like Voice Control or Reachability, allowing you to combine AssistiveTouch with other tools for a personalized and accessible iPhone experience.

    For more insights on this article, check out these video tips across our social platforms:

  • How to Update Software on Google Pixel 7 Pro

    How to Update Software on Google Pixel 7 Pro

    The Google Pixel 7 Pro is a powerhouse phone, and keeping its software up-to-date is crucial to ensure you have the latest features, security patches, and bug fixes.

    Update Software on Google Pixel 7 Pro

    Thankfully, updating your Pixel 7 Pro’s software is a straightforward process. This guide will walk you through the methods for updating your device. So, read and follow the procedures carefully.

    Why Update Pixel 7 Pro Software?

    There are several compelling reasons to keep your Pixel 7 Pro’s software updated:

    • Enhanced Features

    Software updates often introduce new features and functionalities to your Pixel 7 Pro, expanding its capabilities and user experience.

    • Improved Performance

    Updates can optimize your phone’s performance, potentially leading to smoother operation, faster app loading times, and better battery life.

    • Security Patches

    These updates address vulnerabilities in the software that could leave your phone susceptible to malware or hacking attempts. Keeping your Pixel 7 Pro updated is essential for maintaining a strong security posture.

    • Bug Fixes

    Software updates often resolve bugs and glitches that you might have encountered while using your phone.

    How to Update Software on Google Pixel 7 Pro

    Here are the two primary methods for updating your Pixel 7 Pro’s software:

    Using Settings App (Recommended)

    • Open the Settings app on your Pixel 7 Pro.
    • Scroll down and tap on System.
    • Locate System Update and tap on it.
    • Select Software Update again.
    • Your Pixel 7 Pro will now check for available updates. This process might take a few seconds.
    • If an update is available, you’ll see the details of the update, including the version number and a brief description of what’s included.
    • Tap on Download and install to begin downloading the update.
    • Your Pixel 7 Pro might display an on-screen message while downloading the update. It’s recommended to keep your phone connected to Wi-Fi for faster download speeds.
    • Once the download is complete, you’ll see a notification prompting you to restart your phone to install the update.
    • Tap on Restart Now to complete the update process. Your Pixel 7 Pro will restart, and the update will be installed.

    Using Notification Bar (When Update Available)

    • Sometimes, you might receive a notification in the notification bar informing you that a software update is available for your Pixel 7 Pro.
    • Swipe down from the top of your screen to access the notification panel.
    • Locate the notification about the software update and tap on it.
    • This will take you directly to the System Update menu within the Settings app (refer to steps 5-9 from Method 1 for the remaining process).

    Related: How to Enable Focus Mode on Google Pixel 7 Pro

    Important Considerations Before Updating

    Here are some things to keep in mind before updating your Pixel 7 Pro software:

    • Battery Level

    Ensure your Pixel 7 Pro has at least 50% battery life before starting the update process. It’s recommended to connect your phone to a charger during the update for uninterrupted installation.

    • Wi-Fi Connection

    While cellular data might work, using a Wi-Fi connection for software updates is highly recommended. Wi-Fi offers faster download speeds and helps conserve your mobile data allowance.

    • Backup

    It’s always a good practice to back up your important data (photos, contacts, etc.) before performing a software update. This ensures you have a copy of your data in case of any unforeseen issues during the update process.

    Conclusion

    By following the simple steps outlined in this guide, you can effortlessly update your Google Pixel 7 Pro’s software and ensure you’re always running the latest version.

    Remember, staying updated provides you with the newest features, improved performance, enhanced security, and a bug-free user experience. Keep your Pixel 7 Pro updated and enjoy its full potential!

    What Happens if my Phone Restarts During the Update and Doesn’t Turn On?

    In rare cases, an update might cause unexpected issues during installation.  If your Pixel 7 Pro restarts during the update and doesn’t turn back on normally, don’t panic.

    Try connecting your phone to its charger and holding down the power button for about 30 seconds. This might trigger a forced restart and complete the update installation.

    If this doesn’t work, you might need to consult official Google support resources for further troubleshooting steps.

    Can I Roll Back to a Previous Software Version After Updating my Device?

    Unfortunately, Google Pixel phones don’t offer a built-in option to directly roll back to a previous software version.

    However, depending on the specific update and any potential issues you encounter, you might find solutions or workarounds through Google’s support resources or online communities.

    Will Updating my Software Erase my Data?

    Software updates typically don’t erase your data. However, it’s always a good practice to back up your important data (photos, contacts, etc.) before performing any software updates.

    This ensures you have a copy of your information in case of any unforeseen circumstances during the update process.

    For more insights on this article, check out these video tips across our social platforms:

  • How to Enable Focus Mode on Google Pixel 7 Pro

    How to Enable Focus Mode on Google Pixel 7 Pro

    The Google Pixel 7 Pro comes to the rescue with Focus Mode, a valuable tool that helps you minimize distractions and stay on track with your tasks.

    Enable Focus Mode on Google Pixel 7 Pro

    By enabling Focus Mode, you can temporarily silence specific apps and notifications, allowing you to concentrate on work, studies, or simply enjoy uninterrupted personal time.

    This comprehensive blog will explore everything you need to know about enabling and using Focus Mode on your Google Pixel 7 Pro.

    Benefits of Enabling Focus Mode

    Focus Mode offers several key benefits  for Pixel 7 Pro users:

    • Reduced Distractions

    By silencing notifications from chosen apps, Focus Mode minimizes distractions that might otherwise disrupt your workflow or concentration.

    • Increased Productivity

    Minimizing distractions can significantly enhance your focus and efficiency when tackling tasks that require concentration.

    • Improved Well-being

    Focus Mode can contribute to a sense of digital well-being by encouraging you to take breaks from the constant influx of notifications.

    • Customizable Control

    You have the flexibility to choose which apps to silence during Focus Mode, ensuring it caters to your specific needs.

    How to Enable Focus Mode on Pixel 7 Pro

    There are two primary ways to enable Focus Mode on your Google Pixel 7 Pro:

    Using Quick Settings Panel (Fast Access)

    • Swipe down twice from the top of your Pixel 7 Pro screen to fully expand the Quick Settings panel.
    • Locate the Focus Mode tile. It might resemble a bell icon with a slash through it.
    • Tap the Focus mode tile to activate it.
    • You’ll see a pop-up message with a timer allowing you to choose the duration of Focus Mode (from 30 minutes to 2 hours) or select a custom duration.
    • Tap your preferred duration to activate Focus Mode. Silenced notifications from chosen apps will be displayed for your reference.

    Using Digital Wellbeing App (More Control & Scheduling)

    • Open the Digital Wellbeing app on your Pixel 7 Pro.  You can usually find it within the app drawer or go to Settings app and locate it.
    • Scroll down to where it says Focus Mode and tap on it.
    • Within the Focus Mode settings, you’ll see options to:
    • Turn Focus Mode on or off using the toggle switch.
    • Customize which apps to silence during Focus Mode by tapping on Select Apps and choosing the desired apps from the list.

    Schedule Focus Mode: Tap on Schedule to set specific times or recurring schedules for Focus Mode to automatically activate.

    Once you’ve customized your settings, tap the Turn on now button to activate Focus Mode.

    Advanced Focus Mode Features on Pixel 7 Pro

    Beyond basic activation, Pixel 7 Pro offers some additional Focus Mode features:

    • Breaks

    While in Focus Mode, you can take short breaks to check your phone without completely disabling it.

    Simply tap on the notification for “Focus Mode is on” and choose “Take a break.” You’ll have a set amount of time to access your phone before Focus Mode automatically resumes.

    • Allowed Notifications

    Focus Mode allows you to whitelist specific apps or notification categories (e.g., calls) to ensure important notifications still come through even when Focus Mode is active.

    Access this option within the Digital Wellbeing app’s Focus Mode settings.

    Related: How to Enable Dark Theme on Google Pixel 7

    Maximize Your Focus Mode Experience

    Here are some tips to get the most out of Focus Mode on your Pixel 7 Pro:

    • Personalize Your Focus Mode

    Choose the apps you want to silence based on your needs. Consider creating different Focus Mode profiles for different scenarios (e.g., “Work Focus” or “Study Time”).

    • Schedule Focus Mode

    Utilize scheduling to automatically activate Focus Mode during specific times when you typically need to concentrate.

    • Minimize Distractions Before Activating

    For optimal focus, consider silencing notifications or putting your phone on silent mode before activating Focus Mode.

    Conclusion

    Focus Mode on Google Pixel 7 Pro assists you to take control of your digital well-being and enhance your productivity.

    By understanding its benefits, activating it using the methods described, and exploring the advanced features, you can leverage Focus Mode to create distraction-free pockets of time and achieve your goals with greater focus.

    So, silence the distractions, embrace the power of Focus Mode, and unlock a world of focused productivity on your Pixel 7 Pro.

    What Happens to my Silenced Notifications During Focus Mode?

    Notifications from silenced apps won’t appear on your screen or make any sounds while Focus Mode is active.

    However, they won’t be deleted. Once Focus Mode ends, you’ll see notification icons for the silenced apps on your lock screen, and you can then view the notification details.

    Can I Still Access Silenced Apps while Focus Mode is on?

    Yes, even though notifications are silenced, you can still access the apps you’ve chosen to silence during Focus Mode.

    They won’t be hidden or disabled. You can simply launch them from your app drawer like usual. This allows you to check those apps if needed without getting bombarded by notifications, but it also helps you stay mindful of your focus goals.

    For more insights on this article, check out these video tips across our social platforms:

  • How to Use Live Caption on Google Pixel 7

    How to Use Live Caption on Google Pixel 7

    The Google Pixel 7 takes accessibility to a whole new level with Live Caption, a powerful feature that transcribes speech from videos, podcasts, phone calls, and even real-time conversations in surrounding environments  directly on your phone’s screen.

    Live Caption on Google Pixel 7 Pro

    This real-time captioning can be a game-changer for those who are hard of hearing, in noisy environments, or simply want to follow along with a conversation without needing headphones.

    This comprehensive guide will delve into everything you need to know about using Live Caption on your Google Pixel 7.

    About Live Caption

    Live Caption utilizes Google’s automatic speech recognition (ASR) technology to convert spoken audio into captions.

    These captions appear as an overlay on your screen, making it easier to understand the dialogue. Here are some key points to remember about Live Caption:

    • Offline Functionality (Limited)

    While an internet connection generally enhances accuracy, Live Caption can function partially offline for certain media like downloaded videos or recorded audio messages. However, the accuracy and language options might be limited in offline mode.

    • Supported Languages

    Live Caption currently supports a wide range of languages, with more being added regularly. You can check the latest supported languages within your Pixel 7 settings.

    • Focus on Clarity

    Live Caption prioritizes clarity over verbatim transcription. While it aims to be accurate, it might not capture every single word perfectly, especially in fast-paced conversations or strong accents.

    How to Enable Live Caption on Pixel 7 Pro

    There are two primary ways to activate Live Caption on your Google Pixel 7:

    Using Volume Button

    • Play any media that contains speech, such as a video, podcast, or phone call.
    • Press one of the volume buttons on the side of your Pixel 7 to access the volume control slider.
    • Click on the Three Dots displayed below the volume bar and select Settings from the button left corner of the screen.
    • Look for the Use Live Caption icon and click on it.
    • Now that you have enabled it, go to any media and play it then you’ll see captions appear on your screen, transcribing the speech in real-time.

    Using Settings App (More Control)

    • Open the Settings app on your Pixel 7.
    • Scroll down and tap on Sound & Vibration.
    • Locate Live Caption and click on it.
    • Within the Live Caption Settings, you’ll find a toggle to turn Use Live Caption on or off.

    Additionally, you can explore other settings within Live Caption, such as:

    • Show Profanity Blocking to filter out explicit language from the captions.
    • Show Sound Labels to display captions for non-speech sounds like laughter, applause, or music.
    • Download for Offline Use (limited functionality, see above).

    Those are the required methods to successfully enable the live caption on the Google Pixel 7 Pro, follow the process carefully.

    Advanced Live Caption Features on Pixel 7

    Beyond basic activation, Pixel 7 offers some advanced Live Caption features:

    Live Caption in Phone CallsPixel 7 allows you to enable captions during phone calls. This can be helpful for clarity or accessibility purposes.

    To enable Live Caption during calls, navigate to the “Sound & vibration” settings within Settings, then tap on “Live Caption” and toggle on “Caption calls.”

    • Interactive Captions (Pixel 7 Pro Only)

    The Pixel 7 Pro takes Live Caption a step further with interactive captions. This feature, exclusive to the Pro model, allows you to reply to captions during a phone call by typing a message.

    Your message will then be read aloud to the other person on the call.

    Related: How to Modify Navigation Mode on Google Pixel 7 Pro

    Maximizing Your Live Caption Experience

    Here are some tips to get the most out of Live Caption on your Pixel 7:

    • Ensure a Clear Audio Source

    The accuracy of Live Caption relies on clear audio quality. If the audio is muffled, distorted, or in a very noisy environment, it might affect the accuracy of the captions.

    • Adjust Caption Placement

    Live Caption captions appear as an overlay on your screen. You can often drag the caption box slightly to position it for optimal viewing without obstructing other content.

    • Customize Settings

    Explore the settings within “Live Caption” (Settings > Sound & vibration > Live Caption) to personalize your experience. You can enable profanity blocking, show sound labels, or download for limited offline functionality.

    Conclusion

    Live Caption on Google Pixel 7 is a powerful accessibility tool that can enhance your phone experience in various ways.

    By understanding its functionalities, activating it using the methods described, and exploring the advanced features, you can leverage Live Caption to suit your needs and wants.

    Is Live Caption Accurate?

    Live Caption prioritizes clarity over verbatim transcription. While it’s generally accurate, it might not capture every single word perfectly, particularly in challenging situations like strong accents or rapid speech. Background noise or muffled audio can also affect accuracy.

    Will Live Caption Work when Listening to Music?

    Live Caption primarily focuses on transcribing speech. While it might detect some lyrics or singing with strong vocals, it’s not optimized for music and might not provide accurate captions for musical content.

    For more insights on this article, check out these video tips across our social platforms:

  • How to Log Out of Your Google Account on Samsung S10

    How to Log Out of Your Google Account on Samsung S10

    The Samsung Galaxy S10 integrates with Google services, making it convenient to manage your email, contacts, calendar, and more.

    Log Out Google Account on Samsung S10

    However, there might come a time when you need to log out of your Google account on your S10. Whether you’re switching to a different account, changing your phone, or simply taking a break, logging out offers you control over your data and privacy.

    This comprehensive guide will explore the various methods for logging out of your Google account on your Samsung S10, along with some additional considerations for managing your Google account and data. So read through carefully.

    Why You Might Need to Log Out

    There are several reasons why you might want to log out of your Google account on your S10:

    • Switching Accounts

    If you’re using multiple Google accounts, you might need to switch between them for different purposes. Logging out of the current account allows you to sign in with a different one.

    • Changing Your Phone

    Before selling or giving away your S10, it’s crucial to log out of all accounts, including your Google account. This ensures your personal information and data remain secure and the new user can set up their own account.

    • Taking a Break

    Logging out can be a temporary measure if you want to take a break from syncing your Google data with your phone. This might be helpful for troubleshooting syncing issues or simply wanting a digital detox.

    How to Log Out of Google Account on Samsung S10

    There are two primary methods to log out of your Google account on your Samsung S10:

    Using Settings App (Recommended)

    This method offers a more crucial way to log out and manage your Google account settings on your S10. Here’s a step-by-step guide:

    • Open the Settings app on your Samsung S10.
    • Scroll down and tap on Accounts and Backup.
    • Locate Manage Accounts and tap on it.
    • You’ll see a list of all accounts currently linked to your S10. Find your Google account on the list.
    • Tap on your Google account.
    • On the account details page, you’ll see various options related to your Google account and synced data. Scroll down to the bottom.
    • Look for the option labeled Remove Account or  Unlink Account and click on it. The exact wording might vary slightly depending on your software version.
    • A pop-up window might appear asking you to confirm if you want to remove the account and any associated data from your device.
    • If you want to keep some data synced, you might be presented with options to choose which data types to keep (e.g., contacts, calendar events). Deselect any data you don’t want to remove.
    • If you’re sure you want to remove everything, select all data types or simply proceed with confirmation.
    • Tap on Remove Account or Unlink Account again to finalize the process.

    Using Gmail App (Limited Functionality)

    While not a complete logout solution, you can log out of your Google account specifically within the Gmail app. Here’s how to:

    • Open the Gmail App on your Samsung S10.
    • Tap on the Hamburger Menu (three horizontal lines) located in the top left corner of the screen.
    • Swipe down on the menu to locate your Google Account email address.
    • Tap on your Google account email address.
    • A pop-up menu with your account details will appear.
    • Tap on Remove Account or similar wording.

    Note: Logging out of your Google account within the Gmail app only removes your account from the Gmail app itself. It doesn’t log you out of other Google services or completely remove your account from your S10.  For a complete logout, use Method 1 (Settings App).

    Additional Considerations after Logging Out

    Once you’ve successfully logged out of your Google account, here are some additional points to consider:

    • Data Backup

    If you chose to remove synced data during the logout process, ensure you have backups of any important information you might have stored in Google services like contacts, calendar events, or photos.

    • Factory Reset

    If you’re selling your phone or want a clean slate, consider performing a factory reset after logging out of your Google account. This will erase all data from your S10, including any remaining Google account

    Conclusion

    By following the methods outlined in this guide, you can successfully log out of your Google account on your Samsung S10.

    Remember, logging out offers you control over your data and privacy,  whether you’re switching accounts, ensuring a clean slate before selling your phone, or simply taking a break from syncing.

    Make informed decisions about your Google account and data management to optimize your S10 experience.

    Is it Safe to Log out of my Google Account if I Plan to Log Back in Later?

    Yes, logging out and logging back in is perfectly safe. Your Google account and data remain secure in Google’s servers, and you can access them again by signing in with your username and password.

    Can I Log out of my Google Account Remotely if My Phone Got Stolen?

    Yes! Google offers a feature called Find My Device that allows you to remotely locate, lock, or erase data on your lost or stolen phone.

    You can also use this feature to remotely log out of your Google account to protect your data.

    For more insights on this article, check out this video tips across our social platform:

  • How to Enable Developer Options on Samsung S10

    How to Enable Developer Options on Samsung S10

    The Samsung Galaxy S10 is a powerful device, but it offers even more functionality when you unlock Developer Options.

    Enable Developer Options on Samsung S10

    This hidden menu provides access to advanced settings and features typically used by app developers and experienced users.

    This piece article will give you insights on how to enable developer options on samsung s10, read and follow through the procedures carefully and explore some of the benefits it offers.

    Why Enable Developer Options?

    Developer Options provide a variety of benefits, including:

    • Debugging Tools

    These tools assist developers in testing and troubleshooting apps. While some users might not need them directly, they can be helpful for identifying app-related issues.

    • Advanced Settings

    Developer Options offer access to hidden settings that can customize your S10’s behavior in various ways.

    For example, you can enable USB debugging for file transfer or activate features like “Stay awake” to prevent the screen from automatically turning off while charging.

    • Performance Monitoring

    Certain options allow you to monitor your S10’s performance, such as tracking CPU usage and memory allocation.

    How to Enable Developer Options on Samsung S10

    Before you could possibly enable the Developer options feature on your Samsung Galaxy S10, you will have to read and follow the procedures outlined below:

    • Open the Settings app on your Samsung S10.
    • Scroll down and tap on  the About Phone option.
    • Locate the Software Information tab and tap on it.
    • Now you have to find  the Build Number option. You might need to scroll down a bit.
    • The rapidly click on the Builder Number option 7 times and you’ll see a message on the screen indicating how many taps are left until Developer Options are unlocked.
    • Enter your PIN, Password, or Pattern to confirm your identity.
    • Once confirmed, you’ll see a popup message stating Developer mode has been turned On.

    Access Developer Options on Samsung S10

    After enabling the developer options on your Samsung device, you will then access it. In most cases, you wont see the developer option in same section where you enable it. So what you will do next to access it, is follow the steps below:

    • Navigate to Settings on the device you turned the developer options on.
    • Scroll to the least.
    • Then below you will see the Developer Options, you may click on it to access it.

    Those are the possible steps you need to enable and access the Developer options on your Samsung S10, this procedures also works for most Android devices.

    Important Cautions

    While Developer Options offer various functionalities, it’s crucial to use them with caution. Some settings can modify your S10’s behavior in ways that might impact performance or stability.

    It’s recommended to only enable options you understand and avoid modifying settings unless you’re confident about the potential consequences.

    Conclusion

    By enabling Developer Options on your Samsung S10, you unlock an array of hidden features and settings.

    Explore this menu responsibly, and you might discover valuable tools for troubleshooting, performance monitoring, or even customizing your S10’s user experience in unforeseen ways.

    Remember, a little knowledge goes a long way, so  be cautious while venturing into these advanced settings. Happy exploring!

    What if I Enable a Setting I Don’t Understand my Phone?

    Most Developer Options can be disabled and reset to their default settings.  If you encounter an issue, navigate back to the specific setting you modified and toggle it back to the off position.

    Are there Any Risks in Enabling Developer Options?

    While unlikely, some settings within Developer Options have the potential to alter your S10’s behavior in unforeseen ways.  It’s always best to research any setting before enabling it, especially if you’re unsure about its function.

    Is it Okay to Keep Developer Options Enabled all the Time?

    For most users, keeping Developer Options disabled is perfectly acceptable.

    You can enable them only when needed for troubleshooting or specific purposes and then disable them again afterward.

    For more insights on this article, check out this video tips across our social platform:

  • How to Modify Navigation Mode on Google Pixel 7 Pro

    How to Modify Navigation Mode on Google Pixel 7 Pro

    The Google Pixel 7 Pro offers a smooth and intuitive user experience, with navigation playing a crucial role.

    Modify Navigation Mode on Google Pixel 7 Pro

    By default, the Pixel 7 Pro utilizes gesture navigation, allowing you to swipe on the screen to navigate between apps, go back, and access the home screen. However, you might prefer a more traditional button-based navigation system.

    Thankfully, the Pixel 7 Pro allows you to modify your navigation mode to suit your preferences.  This guide will walk you through the process on how to modify navigation on Google Pixel 7 Pro.

    Why Modify Navigation Mode?

    There are a few reasons why you might want to change the navigation mode on your Pixel 7 Pro:

    • Familiarity

    If you’re accustomed to using buttons for navigation on previous phones, you might find gesture navigation less intuitive and prefer a familiar button layout.

    • Accidental Swipes

    Gesture navigation relies on swiping from specific screen edges. If you find yourself accidentally triggering gestures while holding your phone, button navigation can offer a more precise and less error-prone experience.

    • Personal Preference

    Ultimately, the navigation mode comes down to personal preference. Experimenting with both gesture and button navigation can help you decide which method feels most comfortable and efficient for you.

    Explore Navigation Options

    The Pixel 7 Pro offers two primary navigation modes:

    • Gesture Navigation

    This mode utilizes on-screen swipes for navigation. Swiping up from the bottom goes home, swiping up from the bottom and holding opens recent apps, swiping left or right from the left edge goes back.

    • 3-Button Navigation

    This traditional mode presents three on-screen buttons at the bottom of your display: Back button, Home button, and Recent Apps button.

    How to Modify Navigation Mode on Google Pixel 7 Pro

    Here’s how to modify your navigation mode on your Google Pixel 7 Pro:

    • Open the Settings app on your Pixel 7 Pro.
    • Scroll down and tap on System.
    • Locate Navigation Mode and tap on it.
    • You’ll see the two available navigation modes: “Gesture navigation” and “3-button navigation”.
    • Tap on your preferred navigation mode.
    • Selecting Gesture Navigation will activate the swipe-based navigation system.
    • Selecting 3-button Navigation will activate the traditional on-screen button layout.
    • Once you’ve chosen your desired mode, exit the Settings app. The navigation system on your Pixel 7 Pro will be updated accordingly.

    Those are the steps needed to successfuly modify the navigation mode on your Google pixel 7 Pro, follow through carefully.

    RelatedHow to Enable Dark Theme on Google Pixel 7

    Additional Tips to Master Navigation

    Here are some helpful tips for using both navigation modes on your Pixel 7 Pro:

    • Gesture Navigation

    Practice the swipe gestures to ensure smooth and accurate navigation. There are helpful animations within the Settings menu that demonstrate the gestures.

    • 3-Button Navigation

    The button layout is fairly standard and intuitive for most users familiar with traditional phone navigation.

    • Customizing Sensitivity

    Within the “Navigation mode” settings for gesture navigation, you’ll find an option to adjust the back gesture sensitivity.

    This allows you to fine-tune how far you need to swipe from the edge to trigger the back action.

    Conclusion

    By understanding the available navigation modes and following the simple steps outlined above, you can easily modify the navigation system on your Google Pixel 7 Pro to suit your preferences.

    Experiment with both options and choose the method that feels most comfortable and efficient for navigating your Pixel 7 Pro. With the right navigation mode in place, you can unlock the full potential of your phone’s user experience.

    Will Changing the Navigation Mode Affect the Way I Access other Pixel 7 Pro Features?

    No, changing the navigation mode only affects how you navigate between apps, go back, and access the home screen.

    Other Pixel 7 Pro features like opening the notification panel, accessing the power menu, or taking screenshots will function the same way regardless of the navigation mode you choose.

    Can I Use a Combination of Gestures and Buttons for Navigation?

    Unfortunately, the Pixel 7 Pro doesn’t currently offer a hybrid navigation mode that combines gesture swipes and on-screen buttons. You’ll need to choose between gesture navigation (all swipes) or 3-button navigation (entirely button-based).

    What if I Change Navigation Mode and Forget How to Change it Back?

    If you switch to gesture navigation and forget how to access Settings to switch back, don’t worry!  Here’s a shortcut: Slowly swipe up from the bottom center of your screen

    This gesture will still trigger the home screen even in gesture navigation mode, allowing you to access your apps and locate the Settings app to change the navigation mode back to your preference.

    For more insights on this article, check out these video tips across our social platforms: