Blog

  • How to Connect Beats Studio Pro: A Step-by-Step Guide to Connect Beats Studio Pro to Any Device

    How to Connect Beats Studio Pro: A Step-by-Step Guide to Connect Beats Studio Pro to Any Device

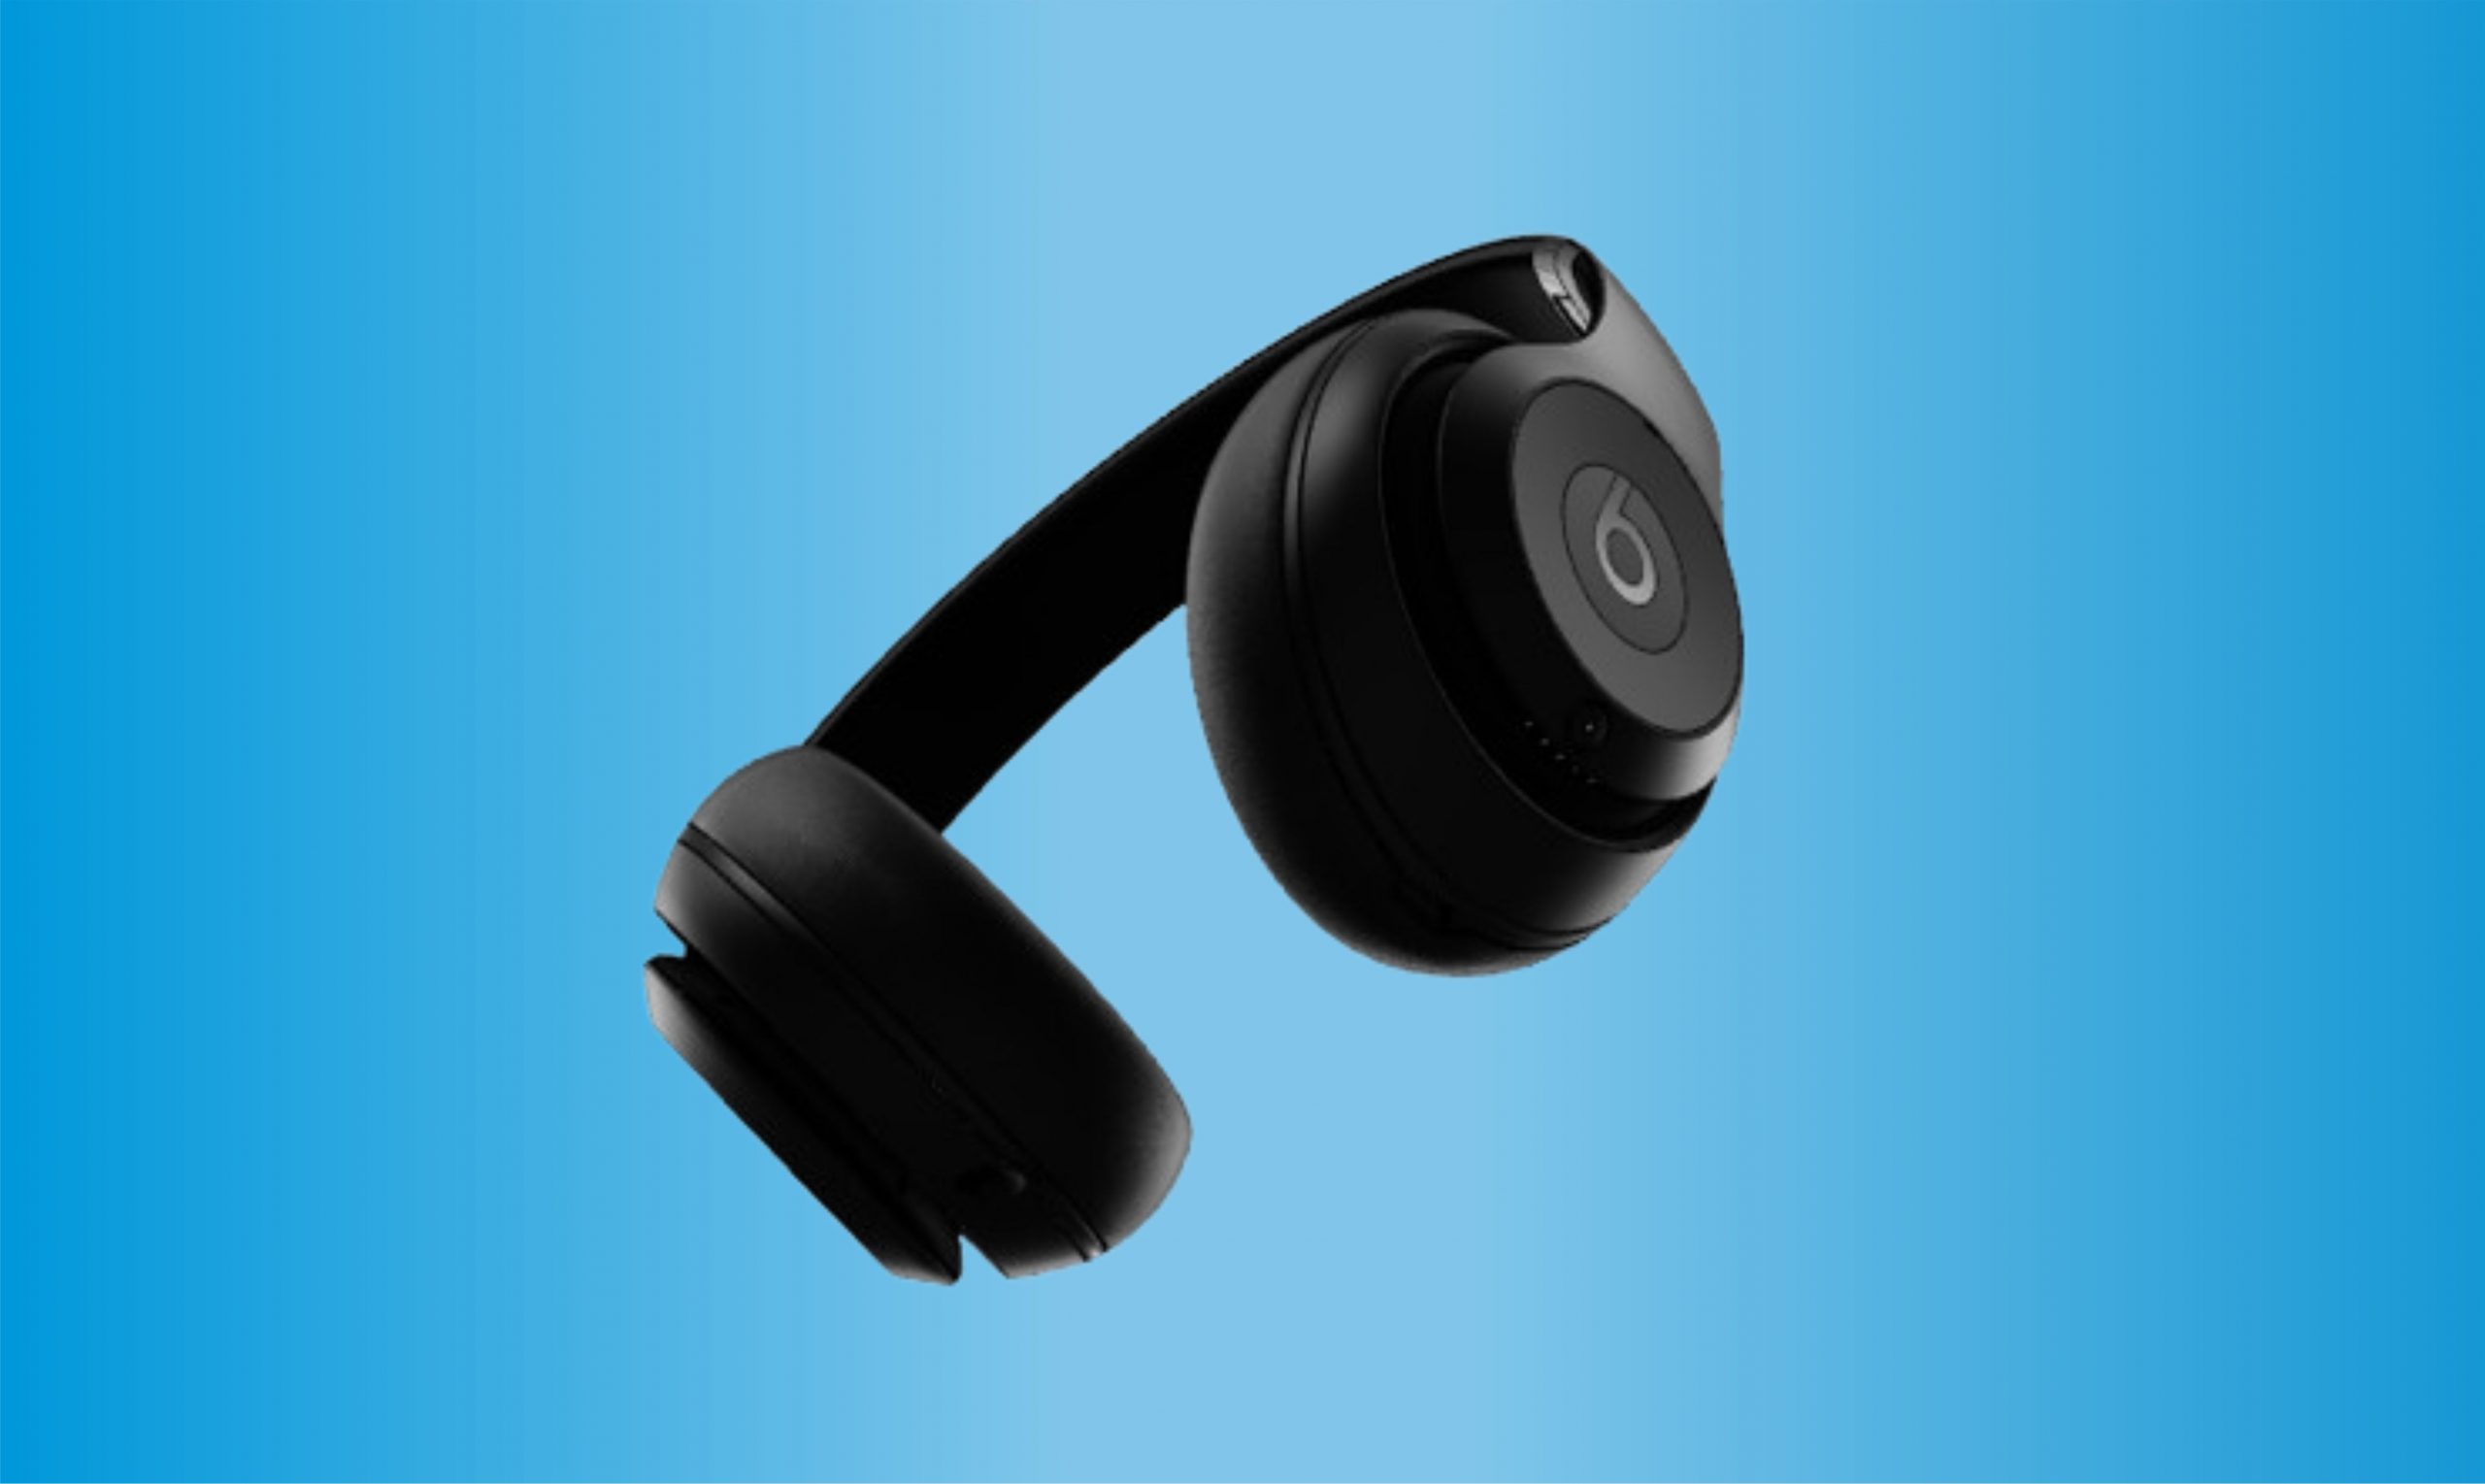
    The Beats Studio Pro headphones offer an easy Bluetooth connection process, whether you’re pairing with an iPhone, laptop, or other devices. Let’s dive into how to make sure your Beats Studio Pro is connected, so you can start enjoying that incredible sound.

    How to Connect Beats Studio Pro


    How to Connect Beats Studio Pro to iPhone or iPad

    Connecting your Beats Studio Pro to an Apple device is incredibly fast, thanks to seamless integration within Apple’s ecosystem. Connecting your Beats Studio Pro to an iPhone or iPad is straightforward and takes just a few steps.

    1. Turn on Bluetooth on Your iPhone:
      • Open the Settings app on your iPhone or iPad.
      • Tap on “Bluetooth” and toggle it on. Make sure your iPhone or iPad is ready to scan for devices.
    2. Power On Your Beats Studio Pro:
      • Press and hold the power button on the right earcup until you see the LED indicator light start flashing. This means your Beats Studio Pro is now in pairing mode.
    3. Find Your Beats in Bluetooth Settings:
      • Once your Beats Studio Pro is in pairing mode, go back to your iPhone or iPad and check under “Other Devices” in the Bluetooth menu.
      • Select “Beats Studio Pro” from the list to connect.
    4. Confirm the Connection:
      • Once selected, your iPhone or iPad will connect to your Beats Studio Pro. You should hear a chime indicating the connection is complete.
      • Look for “Connected” next to Beats Studio Pro in the Bluetooth menu, and you’re ready to go.

    Pro Tip: If you want to check the battery life of your Beats Studio Pro on your iPhone or iPad, swipe down to open the Control Center and find the battery widget (ensure the widget is added to see connected devices)


    How to Connect Beats Studio Pro to Android Phones and Tablets

    Android users can also enjoy the Beats Studio Pro with ease. Here’s how to pair them:

    1. Enable Bluetooth on your Android device:
      • Swipe down to access Quick Settings and enable Bluetooth, or go to Settings > Connections > Bluetooth.
    2. Put Your Beats in Pairing Mode:
      • Hold the power button on the Beats Studio Pro until you see the LED flash.
    3. Select Beats Studio Pro from Available Devices:
      • Once you see “Beats Studio Pro” in the device list, tap to connect.

    How to Connect Beats Studio Pro to Laptop

    If you want to enjoy your Beats Studio Pro’s sound quality while working or streaming on a laptop, here’s how to connect them. Instructions vary depending on whether you’re using a Windows or macOS laptop.

    Connecting to a Windows Laptop

    1. Turn on Bluetooth on Your Laptop:
      • Go to “Settings” > “Devices” > “Bluetooth & other devices.”
      • Toggle Bluetooth to “On.”
    2. Put Your Beats Studio Pro in Pairing Mode:
      • Press and hold the power button on your Beats until the LED light flashes, indicating pairing mode.
    3. Add Your Beats Studio Pro to Bluetooth Devices:
      • On your laptop, select “Add Bluetooth or other device,” then select “Bluetooth.”
      • Wait for your Beats Studio Pro to appear, and select it to connect.
    4. Confirm the Connection:
      • Once connected, you’ll see “Connected” next to your Beats Studio Pro in the Bluetooth menu.

    Connecting to a MacBook

    1. Turn on Bluetooth on Your Mac:
      • Open “System Preferences,” and select “Bluetooth.”
      • Make sure Bluetooth is turned on.
    2. Put Your Beats in Pairing Mode:
      • Press and hold the power button on your Beats until the LED flashes.
    3. Find and Connect to Your Beats:
      • Your Beats Studio Pro should appear in the list of Bluetooth devices. Click “Connect” next to your Beats Studio Pro.
      • Once connected, you’ll see “Connected” next to your Beats.

    Quick Tip: If you want your Beats to auto-connect in the future, select “Options” next to your Beats Studio Pro and set it as your preferred output.


    How to Connect Beats Studio Pro to a Smart TV

    Your Beats Studio Pro can bring a high-quality audio experience to your smart TV as well.

    1. Turn on Bluetooth on Your TV:
      • Head to the Bluetooth or Sound settings on your smart TV, and enable Bluetooth.
    2. Put Beats in Pairing Mode:
      • Hold the power button until the LED blinks, indicating pairing mode.
    3. Find and Select Beats Studio Pro:
      • In your TV’s Bluetooth device list, look for “Beats Studio Pro” and select it to connect.

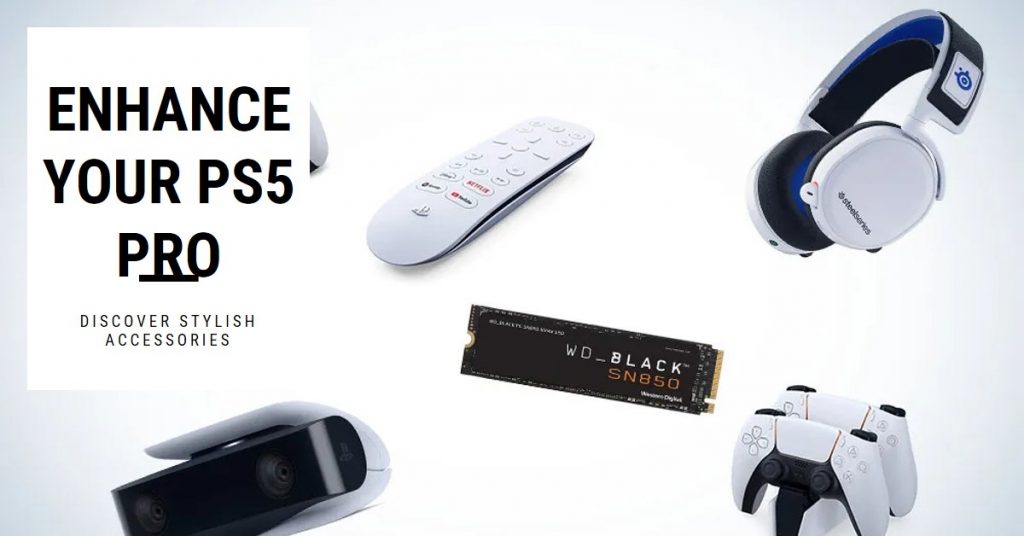
    How to Connect Beats Studio Pro to a Gaming Console (PlayStation, Xbox, etc.)

    While not all gaming consoles support Bluetooth audio, here’s how to try connecting your Beats Studio Pro to popular ones. If direct Bluetooth isn’t supported, you might need a Bluetooth adapter.
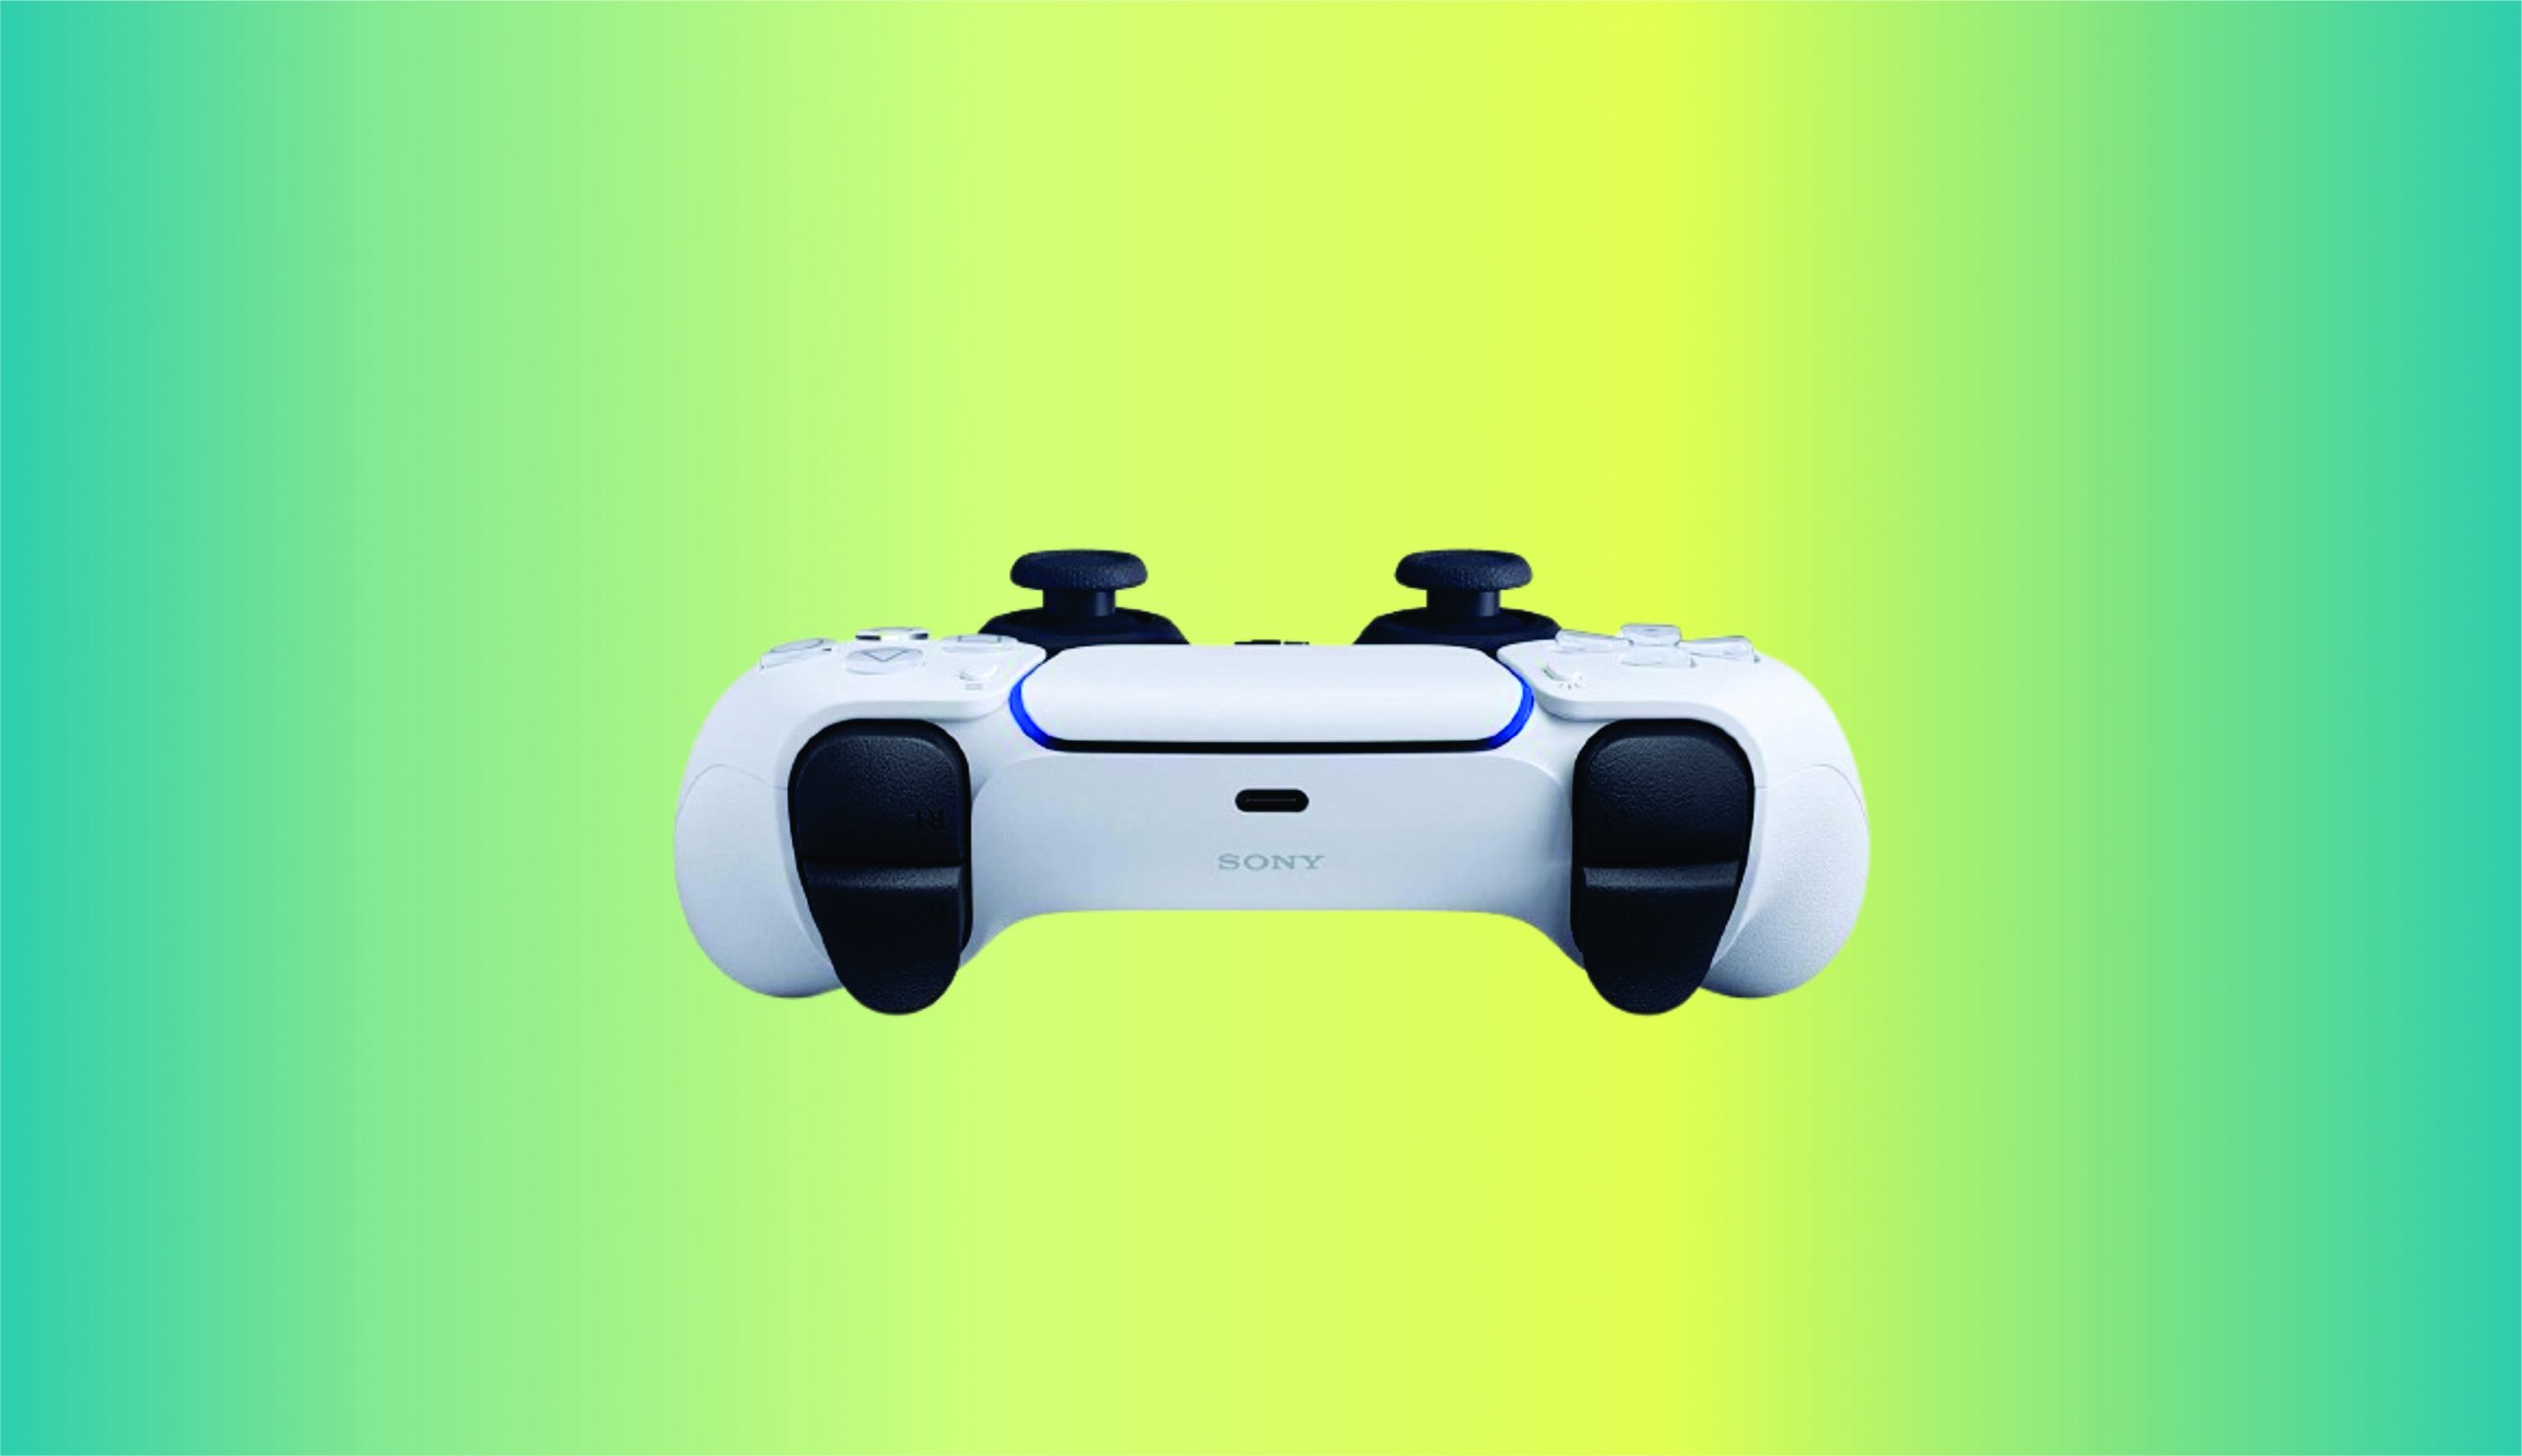
    For PlayStation:

    1. Use a Bluetooth Adapter:
      • Plug a compatible Bluetooth adapter into the USB port on your PS5 or PS4.
    2. Enable Pairing Mode on Beats:
      • Put your Beats in pairing mode by pressing and holding the power button.
    3. Connect Beats to Adapter:
      • Follow the adapter’s instructions to complete the connection.

    For Xbox:

    Unfortunately, Xbox consoles don’t support Bluetooth for audio devices. However, you can connect your Beats Studio Pro to an Xbox controller with a 3.5mm audio cable if you have one, or use a third-party Bluetooth adapter for Xbox compatibility.


    How to Connect Beats Studio Pro to Desktop PC

    Connecting your Beats Studio Pro to a desktop PC is similar to a laptop setup, provided the PC has Bluetooth. If not, you’ll need a Bluetooth USB adapter.

    1. Enable Bluetooth:
      • Go to “Settings” > “Devices” and toggle Bluetooth on.
    2. Put Beats in Pairing Mode:
      • Press and hold the power button until the LED blinks.
    3. Select Beats Studio Pro:
      • Choose “Add Bluetooth or other device” on your PC, then select Beats Studio Pro from the list.

    How to Connect Beats Studio Pro to Apple Watch

    If you’re pairing Beats with an Apple Watch for workout music without needing your iPhone, here’s how:

    1. Open Settings on Apple Watch:
      • Go to the Settings app, then to “Bluetooth.”
    2. Put Beats in Pairing Mode:
      • Hold down the power button on the Beats until you see the flashing light.
    3. Connect:
      • Select “Beats Studio Pro” on your Apple Watch. You’re now connected and ready to enjoy your workout tunes!

    Using a Bluetooth Adapter for Non-Compatible Devices

    Some devices, such as older gaming consoles or certain desktop PCs, may lack built-in Bluetooth. In these cases, a Bluetooth adapter can bridge the gap.

    1. Insert Bluetooth Adapter:
      • Plug the adapter into the device’s USB or headphone jack.
    2. Put Beats in Pairing Mode:
      • Hold the power button until the LED flashes.
    3. Follow the Adapter’s Pairing Steps:
      • Depending on the adapter, you may need to press a pairing button to connect your Beats.

    Whether you’re listening on your phone, TV, or laptop, Beats Studio Pro headphones make connectivity easy across a variety of devices. With these steps, you can make the most of your Beats, from gaming sessions to hands-free calls. Enjoy the versatility and high-quality sound!


    Troubleshooting Connection Issues

    If your Beats Studio Pro isn’t connecting, here are a few things to try:

    1. Check Bluetooth: Make sure Bluetooth is on and your device isn’t already connected to another device.
    2. Restart Your Devices: Sometimes, turning off your headphones and the Bluetooth on your device can resolve the issue.
    3. Forget Device: Go to the Bluetooth menu on your device, select “Forget” or “Remove” Beats Studio Pro, then try reconnecting.
    4. Update Software: Ensure your device’s software and the Beats firmware are updated, as these can affect connectivity.

    Why You’ll Love Using Your Beats Studio Pro with Different Devices

    The Beats Studio Pro offers fantastic flexibility, whether you’re listening to music on your iPhone, working on a Windows laptop, or watching movies on your MacBook. Switching devices is easy, and the strong Bluetooth connection keeps the audio experience smooth across platforms. Plus, Beats’ fast-pairing feature means minimal setup hassle, especially on iOS devices.

    Now that you know how to connect your Beats Studio Pro to any device, you’re all set to enjoy the ultimate audio experience, no matter what device you’re using!

    Also Check:

  • How to Turn On and Off Beats Studio Pro: Simple Steps to Master Your Beats

    How to Turn On and Off Beats Studio Pro: Simple Steps to Master Your Beats

    The Beats Studio Pro headphones bring immersive sound and advanced features, but understanding the basics of how to turn them on and off is essential for any new owner. Whether you’re looking to preserve battery life or just ensure your headphones are ready for action, here’s a step-by-step guide to getting the most out of powering up and shutting down your Beats Studio Pro.

    How to Turn On and Off Beats Studio Pro


    Turning On Your Beats Studio Pro: Quick and Easy

    1. Locate the Power Button: The power button is usually on the right earcup of your Beats Studio Pro. It’s designed to be easy to find, even when you’re not looking directly at the headphones.
    2. Press and Hold: To turn your headphones on, press and hold the power button for about 1 second. You’ll know they’re on when the LED light on the earcup illuminates, and if you have Bluetooth enabled on a nearby device, your headphones should quickly pair if they’ve been connected before.
    3. Listen for the Power-Up Sound: Beats Studio Pro headphones emit a distinct power-up chime when they’re turned on. This audio cue lets you know they’re active and ready to go.
    4. Check Bluetooth Connection: If you’re using a smartphone, tablet, or computer, make sure Bluetooth is enabled and that your Beats Studio Pro is listed in the device’s Bluetooth settings. Once turned on, your Beats should automatically connect to the last paired device within range.

    Turning Off Your Beats Studio Pro: Save Battery Life

    Shutting down your Beats Studio Pro is just as easy as turning them on. Here’s how to do it:

    1. Press and Hold the Power Button: Just like turning them on, you’ll press and hold the power button on the right earcup for about 1 second. This will initiate the shutdown process.
    2. Listen for the Power-Off Chime: You’ll hear a distinct power-down sound when your headphones turn off, letting you know that they’ve successfully shut down.
    3. LED Indicator: The LED light on your headphones will go off, confirming that they’re now powered down and saving battery.

    Auto-Off Feature: Save Battery Without Lifting a Finger

    The Beats Studio Pro comes with an auto-off feature, which is perfect if you forget to turn your headphones off manually. This setting will automatically power down your headphones after a period of inactivity, helping you conserve battery without needing to do anything. Here’s how to make sure it’s enabled:

    • For iPhone Users: Go to the Bluetooth settings on your device, find your Beats Studio Pro in the list, and tap the info (i) button. Here, you can toggle the auto-off feature.
    • For Android Users: Use the Beats app to access your headphone settings, where you’ll find the auto-off toggle. Make sure it’s enabled for automatic power-down after inactivity.

    Auto-off is especially handy if you tend to forget to turn your headphones off or if you’re switching between multiple devices and want to preserve battery life.


    Troubleshooting: When Your Beats Studio Pro Won’t Turn On or Off

    Sometimes, your Beats Studio Pro may not respond to the power button. Here’s what to do if you encounter issues:

    1. Charge Your Headphones: If your Beats Studio Pro won’t turn on, it might be because the battery is completely drained. Plug them into a USB-C charger for at least 15-20 minutes and then try powering them on again.
    2. Check the Power Button: Make sure you’re pressing and holding the power button correctly. If you’re holding it down for too short a time, the headphones might not respond.
    3. Factory Reset: As a last resort, you can reset your Beats Studio Pro. This won’t just power cycle them; it will restore all settings to their default. To do this, press and hold both the power and volume down buttons simultaneously for about 10 seconds until you see the LED indicator flash. Then, release the buttons and try turning them on as usual.

    Quick Tips for Managing Power on Your Beats Studio Pro

    1. Use the Fast Fuel Charge: If you’re low on battery, the Fast Fuel feature gives you up to 4 hours of playback with just a 10-minute charge.
    2. Enable Auto-Off: Activate auto-off through the Beats app or device settings to prevent battery drain when your headphones aren’t in use.
    3. Power Down During Breaks: If you’re not using your headphones for a while, it’s a good habit to turn them off manually, especially if auto-off isn’t enabled.
    4. Regularly Check Battery Level: Use the Beats app (for Android users) or the battery widget (for iOS users) to monitor your headphone’s battery level and know when it’s time to charge.

    Final Thoughts: Simple Steps to Mastering Your Beats

    Knowing how to turn your Beats Studio Pro on and off is a straightforward but essential part of using them efficiently. Whether you’re ready to start your next workout, travel, or gaming session, understanding these basics will keep your headphones powered and performing at their best. And with options like auto-off and quick-charging, managing your Beats Studio Pro is as seamless as your listening experience. Enjoy the music without missing a beat!

    Also Check:

  • How to Reset Beats Studio Pro: Step-by-Step Guide to Restoring Your Headphones

    How to Reset Beats Studio Pro: Step-by-Step Guide to Restoring Your Headphones

    Your Beats Studio Pro headphones are built to deliver premium audio, but like any electronic device, they might occasionally need a reset. Whether you’re facing connectivity problems, software glitches, or simply want a fresh start, resetting the Beats Studio Pro is a quick way to troubleshoot issues and restore optimal performance. Here’s everything you need to know about how to reset them properly.

    How to Reset Beats Studio Pro


    1. Why Reset Your Beats Studio Pro?

    There are several reasons why a reset might be necessary:

    • Connection Issues: If your Beats Studio Pro is having trouble connecting to your device or keeps disconnecting, a reset can often clear the issue.
    • Battery Drain or Charging Problems: When the battery doesn’t hold a charge as expected or shows erratic behavior, a reset can help recalibrate it.
    • Audio Lag or Distortion: Resetting can also resolve minor audio issues, such as sound distortions or delays during playback.
    • Firmware and Software Glitches: After updates or prolonged use, minor software issues can sometimes impact performance. Resetting clears these glitches.

    Note: Resetting your Beats Studio Pro will not erase saved data like firmware updates. It simply reboots the device, clearing any temporary software issues.


    2. How to Perform a Quick Reset on Beats Studio Pro

    The Beats Studio Pro offers an easy, built-in reset function. Here’s a quick breakdown of the steps:

    1. Power Off the Headphones: Start by turning off your Beats Studio Pro. Hold down the power button until the LED indicator light goes dark.
    2. Press and Hold the Power and Volume Down Buttons: With the headphones powered off, press and hold the power button and the volume down button simultaneously. Hold them for 10 seconds.
    3. Wait for the LED Indicator to Flash: After holding the buttons, the LED indicator light should flash. This is your signal that the reset is complete.
    4. Release the Buttons: Once the LED light flashes, let go of both buttons.

    Your Beats Studio Pro is now reset and ready to reconnect to your devices.


    3. Reconnect Your Beats Studio Pro to Your Devices

    After resetting, you’ll need to re-pair your Beats Studio Pro with your Bluetooth devices. Here’s a quick guide to re-establishing a connection:

    • For iOS Devices: Open Settings > Bluetooth on your iPhone or iPad. Ensure Bluetooth is turned on, then select your Beats Studio Pro from the list of available devices.
    • For Android Devices: Launch the Beats App (available on the Google Play Store), make sure Bluetooth is enabled, and follow the pairing instructions for your Beats Studio Pro.
    • For Other Bluetooth Devices: Put your headphones in pairing mode by pressing and holding the power button until the LED starts flashing. Then, go to the Bluetooth settings of your device and select your Beats Studio Pro.

    4. Troubleshooting Tips if the Reset Doesn’t Work

    If your headphones still aren’t performing as expected after a reset, here are a few additional troubleshooting tips:

    • Try Charging Fully: Plug the Beats Studio Pro into a USB-C charger and let it charge fully before attempting another reset. Low battery levels can sometimes interfere with a successful reset.
    • Update Firmware: Ensure your headphones are running the latest firmware by checking for updates on the Beats app for Android or iOS.
    • Check the USB-C Port: A dusty or dirty USB-C port can cause charging or reset issues. Use a soft brush or compressed air to gently clean the port.
    • Consult Support: If problems persist, visit the official Beats support website or contact customer service. Sometimes, persistent issues may require professional assistance.

    5. How Often Should You Reset Your Beats Studio Pro?

    Regularly resetting your Beats Studio Pro isn’t necessary unless you experience specific issues. In most cases, a reset is a quick fix when something isn’t working right. If your headphones work smoothly, there’s no need to reset them frequently.

    Tip: Restarting or turning off your Beats when not in use can also prevent minor software glitches, which could reduce the need for a full reset.


    Final Thoughts: Keeping Your Beats Studio Pro at Peak Performance

    The Beats Studio Pro is designed to offer a seamless, high-quality audio experience. When issues arise, resetting your headphones can be a lifesaver, often resolving problems within minutes. Whether you’re dealing with connectivity glitches or battery oddities, these steps help ensure your Beats Studio Pro remains ready for all your listening needs.

    Also Check:

  • PS5 Pro Rumors: Everything We Know About Specs, Release Date & More

    PS5 Pro Rumors: Everything We Know About Specs, Release Date & More

    The anticipation around the PS5 Pro is at an all-time high. Gamers worldwide are buzzing with excitement, eager to see how this upgraded version will enhance their gaming experience.

    PS5 Pro rumor

    The PS5 has already set a high bar, but if rumors hold true, the PS5 Pro promises even more powerful specs, better performance, and advanced features. From enhanced graphics to faster processing, there’s a lot to look forward to.

    In this article, we’ll dive deep into the latest rumors surrounding the PS5 Pro, including its potential specs, design, release date, and more.

    Key Takeaways Details
    Expected Specs Enhanced GPU, AI upscaling, 2TB SSD
    Potential Design Sleeker build, modular design with disc option
    Release Date Speculations Late 2024, based on insider leaks
    Rumored Price $599 – $699
    Confirmed and Enhanced Game Titles Spider-Man 2, Final Fantasy XVI, and others

    PS5 Pro Specs Rumors: What to Expect?

    GPU and Processing Power

    One of the most exciting aspects of the PS5 Pro rumors is the speculated improvement in GPU and CPU. The original PS5 already delivers stunning visuals and fast load times, but the Pro version is rumored to bring even more powerful processing capabilities. Some insiders suggest that Sony will include a custom AMD GPU that supports 8K resolution, enhanced ray tracing, and AI-driven upscaling. This means gamers could see smoother frame rates and vibrant, lifelike visuals, even in demanding games.

    Key Features Expected:

    • 8K resolution support
    • Ray tracing and AI-enhanced graphics
    • Advanced cooling systems for improved performance

    The PS5 Pro may also feature a boost in CPU power, which can mean faster processing and reduced lag. Overall, these enhancements could set a new standard for next-gen consoles, providing a gaming experience that is faster, clearer, and more immersive.

    Storage Enhancements

    One of the common complaints about the current PS5 is limited storage. If the rumors are accurate, the PS5 Pro will feature a larger 2TB SSD, which not only accommodates more games but also improves loading speeds. This would be particularly beneficial for gamers who juggle multiple titles and need the extra space.

    The additional storage could also mean a smoother experience when switching between games, and potentially even faster game installations. This would make the Pro model a must-have for gamers who prioritize seamless transitions and ample storage.

    Wi-Fi and Connectivity

    Connectivity improvements are another aspect heavily rumored for the PS5 Pro. With the increasing importance of online multiplayer and streaming services, enhanced Wi-Fi 7 support and Bluetooth 5.2 could make a significant difference. Better connectivity means less lag during online gaming, faster downloads, and an all-around improved gaming experience.

    Design and Aesthetics: What Might Change?

    Sleeker, More Modular Design

    The PS5’s design was divisive—some loved it, while others found it bulky. Rumors suggest that the PS5 Pro may have a slimmer, sleeker build. Additionally, there are whispers of a modular design, where players can choose between an all-digital version or add a detachable disc drive. This would allow Sony to cater to different types of gamers, making the console more versatile.

    Design Tweaks Expected:

    • Compact and sleek build
    • Customizable, modular design
    • New color options, possibly including a matte black finish

    Some leaked images have shown a potentially all-black design, which would be a shift from the PS5’s white-and-black color scheme. Fans have already started sharing mock-ups and concept designs, creating a buzz around how the new model might look.

    Release Date Speculations: When Will the PS5 Pro Be Available?

    Late 2024 Release Date?

    The biggest question is when the PS5 Pro will hit the shelvesIndustry insiders have hinted at a late 2024 release, aligning with past patterns seen in Sony’s console launches. Historically, Sony has followed a three-to-four-year cycle between releasing the base model and its Pro counterpart, which fits this timeline.

    Notable Industry Insights:

    • “The PS5 Pro could be set for a holiday 2024 launch, just in time for the peak gaming season.”
    • “Production schedules suggest an announcement at E3 2024, followed by pre-orders in the fall.”

    While there hasn’t been an official announcement, leaked documents have also hinted at test models being distributed among game developers. This suggests that Sony is getting ready to launch sooner rather than later.

    Pricing Rumors: What’s the Cost?

    Potential Price Range

    Pricing has always been a big factor for gamers. The PS5 Pro is rumored to be priced between $599 and $699, making it slightly more expensive than the original PS5 but packed with enhanced features. Given the upgraded specs, this price could be seen as reasonable for what’s on offer.

    Console Expected Price
    PS5 $499
    PS5 Pro $599 – $699

    Sony might also offer bundles, where the console is packaged with enhanced games or accessories, providing better value for gamers who want to make the most of their purchase.

    Confirmed and Rumored PS5 Pro Enhanced Games

    Enhanced Titles to Look Out For

    It’s not just about the hardware; it’s about how it makes games more immersive. Several titles have been rumored to be enhanced for the PS5 Pro. Expect better graphicsfaster load times, and even exclusive features for games like:

    • Marvel’s Spider-Man 2
    • Final Fantasy XVI
    • Horizon Forbidden West
    • The Last of Us Part II

    The Game Boost feature could also mean older titles will run smoother, with better resolution and higher frame rates. This would make the PS5 Pro not just a console for new games but a platform that elevates your entire game library.

    PS5 Pro vs. Competitors: How Will It Stack Up?

    Xbox Series X vs. PS5 Pro

    A significant part of the buzz is about how the PS5 Pro will compare to its competitors, particularly the Xbox Series X. With similar hardware improvements, both consoles are expected to provide high-quality gaming experiences, but the real question lies in exclusives, pricing, and ecosystem.

    Should You Wait for the PS5 Pro or Buy Now?

    Pros and Cons of Waiting

    Deciding whether to wait or buy a PS5 now depends on your gaming needs. If you’re looking for a console that will stay competitive for the next few years, waiting might be the best option. However, for gamers who don’t want to wait, the current PS5 still offers an incredible experience.

    Fan Reactions and Community Buzz

    Quotes from the Community

    Gamers are sharing their thoughts across social media platforms, with many stating that the PS5 Pro could set new benchmarks for next-gen consoles. Here’s what the community is saying:

    • “I hope the PS5 Pro has better cooling. My PS5 sounds like a jet engine sometimes!”
    • “It’s going to be a game-changer if the PS5 Pro can run games in 8K.”

    Conclusion: The Future of PS5 Pro

    In summary, the PS5 Pro rumors are creating a massive wave of excitement in the gaming community. With expected improvements in hardwaredesign enhancements, and exclusive titles, it’s shaping up to be a must-have for gamers worldwide. Keep an eye out for official announcements, and get ready for the next evolution in gaming.

  • Must Have PS5 Pro Accessories to Elevate Your Gaming Experience

    Must Have PS5 Pro Accessories to Elevate Your Gaming Experience

    The PS5 Pro is already a powerhouse, delivering cutting-edge graphics and performance. But to truly elevate your gaming experience, investing in the right PS5 Pro accessories can make a world of difference.

    PS5 Pro accessories

    From controllers that enhance gameplay to audio gear that immerses you in the action, these accessories can transform how you interact with your console. This guide will explore the must-have PS5 Pro accessories that every gamer should consider. Let’s dive into the best gear available to enhance your PS5 Pro setup.

    Key Takeaways

    Accessory Category Top Benefit Recommended Product
    Controllers Improved gameplay immersion DualSense Wireless Controller
    Audio Enhanced 3D audio for deeper immersion Pulse 3D Wireless Headset
    Storage Extra space for games and media External SSD, Internal SSD upgrades
    Charging Solutions Convenience and multitasking DualSense Charging Station
    Gaming Furniture Improved ergonomics and comfort Gaming chairs, Cooling docks
    Peripheral Connectivity Enhanced streaming and media control Media Remote, Camera accessories
    VR Compatibility Immersive virtual reality experiences PlayStation VR2

    1. Essential Accessories for PS5 Pro

    DualSense Wireless Controller

    The DualSense Wireless Controller is arguably one of the most critical accessories for any PS5 Pro owner. Known for its haptic feedback and adaptive triggers, this controller offers a tactile experience, making gameplay more immersive. Whether you’re driving a car or pulling a bowstring, the realistic feedback makes every action feel more engaging. Here’s why it’s essential:

    • Haptic Feedback: Adds vibrations to create a sense of touch.
    • Adaptive Triggers: Adjusts resistance based on in-game actions.
    • Wireless Design: Ensures freedom of movement without tangled cables.

    Pulse 3D Wireless Headset

    For gamers who want to get the most out of their PS5 Pro’s 3D audio capabilities, the Pulse 3D Wireless Headset is a must-have. It’s designed specifically to work with the Tempest 3D AudioTech, delivering crisp, surround sound. With noise-canceling microphones, you can communicate clearly with your teammates.

    • 3D Audio Support: Experience sounds from every direction, bringing games to life.
    • Noise-Canceling Microphones: Ensure clear in-game communication.
    • Comfortable Design: Can be worn for extended gaming sessions without discomfort.

    2. Charging Solutions

    DualSense Charging Station

    The DualSense Charging Station allows you to charge two controllers simultaneously, making it an ideal accessory for households with multiple gamers or for those who frequently play multiplayer games. It eliminates the need to connect controllers via USB, keeping your gaming area tidy and organized.

    • Efficient Charging: Quick and simultaneous charging for two controllers.
    • Space-Saving Design: Compact and easy to set up.
    • Compatibility: Works seamlessly with DualSense controllers.

    Third-Party Charging Docks

    There are also numerous third-party charging solutions that offer additional features such as LED indicators, fast charging, and even extra USB ports. When choosing a third-party dock, ensure compatibility with your PS5 Pro controllers to avoid connectivity issues.

    Click this Link to Buy PS5 Dualsense Charging Solution


    3. Storage Expansion Options

    PS5 Compatible External SSDs

    Running out of storage space can be frustrating, especially with the large file sizes of modern games. External SSDs provide a quick and easy solution, giving you more room to download and install games.

    • Fast Transfer Speeds: Reduce load times significantly.
    • Plug-and-Play: Easy setup and use.
    • Portable: Take your games with you anywhere.

    Internal SSD Upgrades

    For those seeking an even faster gaming experience, upgrading the internal SSD of the PS5 Pro can be a game-changer. It requires a bit of technical knowledge but offers substantial improvements in performance.

    • Performance Boost: Faster read/write speeds.
    • More Storage: Expands internal storage capacity without external drives.
    • Installation Tip: Follow Sony’s guide to ensure compatibility and safe installation.

    Click Here to Buy PS5 Compatible External SSDs


    4. Audio Enhancements

    Sony Pulse 3D Wireless Headset

    We’ve already touched on the Pulse 3D headset, but it’s worth reiterating how crucial good audio is for an immersive experience. It not only enhances gameplay but also lets you hear subtle in-game cues, such as enemy footsteps.

    • Seamless Integration: Built to complement the PS5 Pro’s audio system.
    • Wireless Convenience: No need for cumbersome cables.
    • Long Battery Life: Game for hours without needing a recharge.

    Third-Party Headsets

    Some gamers may prefer third-party headsets that offer additional features like customizable sound profiles or superior build quality. Brands like SteelSeries and Razer offer excellent alternatives.


    5. Controllers and Grips

    Controller Grips and Cases

    One of the simplest ways to improve your gaming experience is by adding controller grips or cases. They not only provide better grip but also protect your controllers from wear and tear.

    • Enhanced Comfort: Anti-slip designs make long sessions more enjoyable.
    • Durability: Protects controllers from drops and scratches.
    • Variety: Available in numerous designs to suit your style.

    Customizable Back Buttons

    For competitive gamers, customizable back buttons can make a big difference. They allow you to assign additional controls, giving you a competitive edge.

    • Improved Precision: Faster response times.
    • Custom Configurations: Tailor the buttons to your playing style.

    6. Gaming Furniture and Ergonomics

    PS5 Stands and Cooling Docks

    Keeping your PS5 Pro cool is essential for maintaining performance. Cooling docks help regulate temperature, preventing overheating during marathon gaming sessions. Additionally, a PS5 stand can help save space and improve ventilation.

    • Vertical and Horizontal Stands: Choose what suits your setup.
    • Additional USB Ports: Some stands come with built-in ports for added connectivity.

    Gaming Chairs and Desks

    Comfort is key for long gaming sessions. Investing in a good gaming chair and ergonomic desk can help you maintain posture and prevent back pain.

    • Adjustable Settings: Find the perfect fit for your body.
    • Extra Padding: Maximum comfort for long hours.

    Click Here to Buy the PS5 Stands and Cooling Docks


    7. Peripheral Connectivity

    Media Remote

    The Media Remote is a handy accessory for those who use their PS5 Pro for more than just gaming. It provides easy access to streaming apps, music, and movies.

    • Streamlined Control: Navigate menus and streaming services easily.
    • Pre-Programmed Buttons: Quick access to popular apps like Netflix and Disney+.

    Camera and Streaming Accessories

    If you’re looking to start streaming, consider adding a webcam or capture cardSony’s HD Camera is optimized for the PS5, providing high-definition capture and easy setup.

    • High-Quality Streaming: Perfect for Twitch and YouTube gamers.
    • Easy Setup: Plug-and-play design.

    8. VR Compatibility

    PlayStation VR2

    The PlayStation VR2 enhances the PS5 Pro’s capabilities, providing an immersive virtual reality experience. It’s compatible with a growing library of VR games, letting you dive deeper into your favorite titles.

    • Advanced Tracking: Precise movements without lag.
    • VR Games: Titles like Resident Evil Village and No Man’s Sky offer VR modes.
    • Comfortable Fit: Adjustable headbands for all-day comfort.

    Conclusion

    Adding must-have PS5 Pro accessories to your setup can significantly enhance your gaming experience, providing better gameplay, superior audio, and a more comfortable setup. Whether you’re a casual player or a competitive gamer, there’s something on this list that will improve how you play. Take the time to invest in quality accessories and get the most out of your PS5 Pro.

  • How to Connect PS5 Controller: A Step-by-Step Guide That Guarantees Your PS5 Controller Syncs Perfectly Every Time

    How to Connect PS5 Controller: A Step-by-Step Guide That Guarantees Your PS5 Controller Syncs Perfectly Every Time

    The PS5 DualSense controller is one of the most innovative game controllers ever created, offering a next-level immersive experience with its haptic feedback and adaptive triggers. But before you can dive into your favorite games, you need to know how to connect the PS5 controller to your console or other devices.

    How to Connect PS5 Controller

    Whether you’re connecting it to your PlayStation 5 or pairing it with a PC or mobile device, this guide will walk you through each step. Let’s get started and make sure you’re all set to enjoy your DualSense to its fullest potential.


    How to Connect the PS5 Controller to Your PlayStation 5

    Connecting the DualSense controller to your PS5 is incredibly simple, and most of the time, it happens automatically right out of the box. However, if you’re setting up an additional controller or need to reconnect, here’s what you need to do.

    Step 1: Use a USB-C Cable

    • Start by plugging the USB-C cable (the one that came with your PS5) into the DualSense controller and then into one of the USB ports on the front of your PS5 console.
    • While the PS5 DualSense controller can be connected wirelessly via Bluetooth, using the cable for the initial pairing is the most reliable method. Plus, it charges your controller at the same time.

    Step 2: Power on Your PS5

    • Turn on your PS5 console by pressing the power button, or by pressing the PS button in the center of the DualSense controller.
    • If you’re using the controller to power on the console, the connection process begins automatically.

    Step 3: Pair the Controller

    • After you’ve connected the controller via the USB-C cable, press the PS button on the controller to pair it with the PS5 console.
    • The light bar around the touchpad will flash blue, indicating the controller is syncing. Once the light turns solid white, the controller is fully connected.

    That’s it! Your DualSense controller is now paired with your PS5 and ready for use. You can now disconnect the USB-C cable and play wirelessly.


    How to Connect the PS5 Controller to a PC

    The PS5 DualSense isn’t just for your PS5—it can also be connected to a PC to enhance your gaming experience. Whether you’re playing on Steam or using a platform like Epic Games, the DualSense’s haptic feedback and adaptive triggers can elevate your PC gaming too. There are two main ways to connect: Wired or Wireless.

    Option 1: Wired Connection via USB-C

    This is the most straightforward method for connecting your PS5 controller to a PC.

    • Step 1: Plug one end of a USB-C cable into your PS5 controller.
    • Step 2: Plug the other end into an available USB-A port (or USB-C port, if you have a USB-C to USB-C cable) on your PC.
    • Step 3: Your PC should automatically detect the controller, and it will be usable in most games or software that supports controllers.

    Option 2: Wireless Connection via Bluetooth

    If you prefer to play wirelessly, connecting the PS5 DualSense controller via Bluetooth is just as simple.

    • Step 1: Open your PC’s Bluetooth settings. You can do this by searching for “Bluetooth” in your Windows search bar and selecting “Bluetooth and other devices settings.”
    • Step 2: Turn on Bluetooth if it isn’t already active.
    • Step 3: On your PS5 controller, press and hold the PS button and the Create button (located to the left of the touchpad) at the same time. The light bar around the touchpad will begin to flash, indicating the controller is in pairing mode.
    • Step 4: In the Bluetooth settings on your PC, click “Add a device” and select Bluetooth.
    • Step 5: When “Wireless Controller” appears in the list of devices, click on it to complete the pairing process.

    Once paired, your DualSense controller will work wirelessly on your PC, and you can start gaming without the need for a cable.


    How to Connect the PS5 Controller to a Mobile Device

    The DualSense controller can also be paired with smartphones and tablets, making it a great option for mobile gaming or Remote Play from your PS5. Both iOS and Android devices support the PS5 controller via Bluetooth.

    Step 1: Activate Bluetooth Pairing Mode on the Controller

    • Press and hold the PS button and the Create button simultaneously on your PS5 controller until the light bar begins flashing.

    Step 2: Turn on Bluetooth on Your Mobile Device

    • Go to the Bluetooth settings on your smartphone or tablet.
    • Make sure Bluetooth is enabled.

    Step 3: Pair Your Controller

    • In the Bluetooth menu of your mobile device, select “Wireless Controller” from the list of available devices.
    • Once connected, the light bar will stop flashing and stay lit.

    Now, your DualSense controller is paired with your mobile device, allowing you to enjoy gaming apps or Remote Play from your PS5.


    Troubleshooting Tips

    If you run into any issues while trying to connect your PS5 controller, here are some quick troubleshooting tips that can help:

    • Reset the Controller: If the controller isn’t responding, you can perform a reset. There’s a small reset button on the back of the controller (near the L2 button). Use a pin to press and hold the button for a few seconds, then try pairing again.
    • Update Your Console or PC: Sometimes a software update may be required to properly recognize the controller. Make sure your PS5, PC, or mobile device is updated to the latest software version.
    • Check the Battery: If your controller isn’t turning on or connecting, it might just need a charge. Plug it in via the USB-C cable and let it charge for a few minutes before trying again.

    Conclusion: The DualSense Is Versatile

    The PS5 DualSense controller isn’t just for the PlayStation 5—it’s a versatile gaming accessory that can be used across multiple platforms, from your PC to mobile devices. With features like haptic feedback and adaptive triggers, it elevates gaming experiences no matter where you’re playing.

    Now that you know how to connect your PS5 controller, it’s time to jump into your favorite game and experience everything the DualSense has to offer. Whether you’re battling it out in the latest PlayStation exclusive or exploring a new world on your PC, the DualSense adds an extra layer of immersion and control that sets it apart from other controllers.

    Also Check:

  • GameStop PS5 Controller: What Makes GameStop’s PS5 Controller Worth a Second Look

    GameStop PS5 Controller: What Makes GameStop’s PS5 Controller Worth a Second Look

    When it comes to gaming accessories, the PS5 DualSense controller already sets a high bar with its impressive features, from adaptive triggers to immersive haptic feedback. So, why would you want to consider buying a PS5 controller from GameStop? After all, it’s just the same DualSense, right? Well, not exactly. GameStop offers more than just the standard controller — they bring additional value, unique designs, and deals that make their PS5 controllers worth a second look.

    GameStop PS5 Controller

    Let’s dive into why picking up a PS5 controller from GameStop might be one of the smartest choices you make as a gamer.


    Exclusive Colors and Designs

    One of the most exciting aspects of buying a PS5 controller at GameStop is the exclusive colors and limited-edition designs. While the standard white DualSense controller that comes with your console is sleek, many gamers want their gear to stand out. GameStop frequently offers controllers in unique shades like Midnight Black, Cosmic Red, and Galactic Purple, giving you more personalization options.

    Not only do these colors look cool, but they also give your setup a distinctive touch that reflects your gaming style. Limited-edition controllers with custom artwork tied to major game releases are also available at GameStop, making it a go-to destination for gamers looking to celebrate their favorite franchises.


    GameStop’s Trade-In Program

    One of the biggest perks of buying a PS5 controller from GameStop is their robust trade-in program. If you’ve been gaming for a while, chances are you’ve accumulated some older controllers or other gear. GameStop’s trade-in service lets you bring in your old hardware in exchange for credit towards a shiny new DualSense controller.

    Not only is this an eco-friendly option, but it’s also a fantastic way to save money on your purchase. Instead of letting your old controllers collect dust, you can turn them into value for your next gaming investment. For gamers looking to upgrade or replace a worn-out PS5 controller, the trade-in program can make a new one much more affordable.


    GameStop’s Bundle Deals

    Another reason why GameStop’s PS5 controller offerings are worth your attention is the variety of bundle deals. GameStop frequently packages DualSense controllers with other gaming accessories or even games, giving you more bang for your buck. For example, you might find a deal that includes a controller charging station, a high-quality headset, or even a popular game at a discounted price.

    These bundle options can save you time and money, especially if you’re in the market for multiple items. GameStop often offers deals during special promotions like Black Friday or GameStop Pro Days, where the savings can be even more significant.


    Warranty and Protection Plans

    Accidents happen, and gaming accessories like controllers take a lot of wear and tear. GameStop offers protection plans for their PS5 controllers, providing peace of mind for gamers who want to ensure their investment lasts. While Sony offers a warranty on their controllers, GameStop’s plans go a step further, covering accidental damage that might not be included in the standard warranty.

    For a small fee, you can protect your controller from drops, spills, and other mishaps, ensuring that you won’t have to shell out for a new one if disaster strikes. This added layer of protection is a big draw for gamers who tend to play hard and don’t want to worry about costly replacements.


    Trade-In Credit for Games and Consoles

    Not only does GameStop accept trade-ins for hardware, but they also offer credit for games and consoles. If you’re looking to upgrade your PS5 setup or even buy a second controller for multiplayer, this trade-in credit can help reduce the cost of your purchase. You can even stack your GameStop PowerUp Rewards for extra discounts, making it possible to snag a PS5 controller at a steep discount.

    The trade-in system is easy to use—just bring your old games or hardware to a local GameStop, and they’ll assess the value. You can either get cash or opt for store credit, which gives you more flexibility. This makes GameStop a one-stop-shop for those who want to upgrade or expand their gaming arsenal without breaking the bank.


    In-Store Demos and Pre-Owned Options

    GameStop also allows you to try out the PS5 DualSense controller in-store, so you can get a feel for the product before making a purchase. This can be particularly useful if you’ve never used a DualSense before or if you’re debating between different color options or special editions.

    If you’re on a budget, GameStop’s pre-owned PS5 controllers offer another great option. Every pre-owned controller is tested for quality, and you can often find them at a much lower price than a brand-new unit. Plus, GameStop’s 7-day return policy on pre-owned controllers ensures that if you aren’t satisfied, you can easily exchange it for another.


    GameStop Pro Member Benefits

    If you’re a GameStop Pro Member, the perks don’t stop there. Pro members earn additional points for every dollar spent, which can be redeemed for rewards like discounts on future purchases. These membership benefits stack up quickly, making it easier to save on gaming accessories like the PS5 controller. GameStop also offers exclusive deals and early access to promotions for Pro members, so you’ll never miss out on a great deal.

    For gamers who frequently buy hardware, games, or accessories, the Pro membership quickly pays for itself, especially when combined with trade-ins and other promotions.


    Conclusion: Is GameStop’s PS5 Controller Worth a Second Look?

    In short, GameStop’s PS5 controller offerings are definitely worth considering. With exclusive colors, special editions, trade-in programs, bundle deals, and protection plans, GameStop brings a lot to the table for gamers looking to buy a new DualSense controller. Whether you’re looking to save money through trade-ins or bundle deals, or you simply want a controller that stands out with a unique design, GameStop has options that go beyond the standard offering.

    Plus, with the ability to try out the controllers in-store, access to pre-owned options, and benefits for Pro members, GameStop makes it easy to get exactly what you need without overspending. If you’re serious about your gaming setup, a trip to GameStop might be just what you need to elevate your PS5 experience.

    Also Check:

  • We Finally Found the PS5 Charger That Ticks All the Boxes: The NexiGo PS5 DualSense Charging Station

    We Finally Found the PS5 Charger That Ticks All the Boxes: The NexiGo PS5 DualSense Charging Station

    If you’ve ever experienced that sinking feeling when your PS5 controller dies right in the middle of an epic battle or critical cutscene, you know how important it is to have a reliable charger. But with so many options on the market, finding the perfect PS5 controller charger can feel like navigating a maze. You want something fast, easy to use, and, of course, stylish enough to fit right in with your sleek console setup.

    NexiGo PS5 DualSense Charging Station

    Click Here to Buy Now on Amazon

    After rigorous testing and comparing features, speeds, and designs, we can confidently say we’ve found the PS5 charger that truly ticks all the boxes. Whether you’re a casual gamer or someone who spends hours grinding through your favorite RPGs, this charger is the answer to all your controller power problems.

    Let’s dive into what makes this charger stand out, and why it’s a must-have addition to your gaming setup.


    The Charger: NexiGo PS5 DualSense Charging Station

    After comparing multiple charging options, the NexiGo PS5 DualSense Charging Station emerged as the clear winner. It’s a device that manages to balance affordability, speed, design, and convenience. Here’s why it impressed us so much.

    1. Charging Speed: Faster Than You Think

    The first thing we wanted to know was how fast this charger could juice up our DualSense controllers. With so many chargers on the market, speed is a top priority. In our tests, the NexiGo station charged two completely dead controllers to full capacity in just 3.5 hours—pretty impressive for a dual charger.

    For reference, the official Sony charger clocked in at 3 hours, so the NexiGo station isn’t far behind, and when you factor in the price difference, the slight extra wait time seems like a fair trade-off. If you’re a serious gamer who hates waiting, you’ll appreciate how this charger gets your controllers powered up and ready for action faster than most competitors.

    2. Design: Sleek and Functional

    Let’s face it: part of the appeal of the PS5 is its sleek, futuristic design, and your accessories should follow suit. NexiGo nailed the aesthetics here. The charger has a low-profile, matte black design that blends in seamlessly with your gaming setup. It’s compact enough to fit on a small shelf or desk, and its angled design allows you to easily drop in your controllers without any fiddling or frustration.

    The two charging slots are clearly marked, and the design ensures a secure fit every time. No need to worry about whether your controller is properly docked—it snaps into place easily and stays there. Plus, it’s powered via USB-C, which means fewer tangled cords and a faster, more reliable connection.

    And for those who like a bit of visual feedback, the charger comes with LED indicators that turn from red to green when your controllers are fully charged. This is a simple but essential feature that many third-party chargers lack, and it’s a game-changer (literally) when you want to know at a glance if your controllers are ready for action.

    3. Ease of Use: Set It and Forget It

    A good charger should make your life easier, not complicate it. The NexiGo charging station does exactly that. You don’t have to fumble with any wires or wonder whether your controllers are seated correctly. Just place your DualSense controllers into the dock, and they start charging automatically. The magnetic docking system ensures they stay in place, so there’s no risk of them slipping out or charging incorrectly.

    One feature that really stood out during our tests was the built-in overcharge protection. Once your controllers hit 100%, the charger stops powering them, preventing any damage from overcharging. This might seem like a small feature, but it’s an important one that protects your investment and ensures the longevity of your controllers.

    4. Price: Budget-Friendly Without Sacrificing Quality

    At just under $20, the NexiGo charging station is a steal compared to some of the more expensive options on the market, including the official Sony charger. For budget-conscious gamers, this is a huge win. You get fast charging speeds, a stylish design, and all the convenience of a high-end charger without breaking the bank.

    Given its solid construction, intuitive design, and reliable performance, the NexiGo charger offers incredible value for the price. It’s proof that you don’t need to spend a fortune to get a quality accessory for your PS5.

    5. Extra Features: The Cherry on Top

    While the core functions of the NexiGo charger already had us sold, it also includes a few extra features that push it over the edge. One standout is its dual power options. You can plug it directly into your PS5 via USB, or you can use a separate power adapter and plug it into the wall. This flexibility means you’re not tethered to one specific setup, and you can choose whichever method works best for your gaming space.

    Additionally, the NexiGo charger has a small footprint, which is a godsend for gamers with limited desk or shelf space. Despite its compact size, it charges two controllers simultaneously with no compromise in speed or power.


    The Competition: Why NexiGo Takes the Crown

    We tested a variety of other popular PS5 controller chargers, including the official Sony DualSense Charging Station, the OIVO PS5 Controller Charger, and Razer’s pricier options. While each had its strengths, none offered the same combination of price, speed, and ease of use as the NexiGo.

    • The official Sony DualSense Charging Station is sleek and fast, but at $30, it’s nearly double the price of the NexiGo model with only marginally faster charging times.
    • The OIVO PS5 Controller Charger is another great budget option, but it lacked the magnetic docking mechanism of the NexiGo charger, which made docking controllers feel a bit less secure.
    • Razer’s Quick Charge Stand offers impressive charging speeds and premium design, but it’s much pricier, and only charges one controller at a time, making it less convenient for those with multiple controllers.

    Final Verdict: NexiGo PS5 DualSense Charging Station Ticks All the Boxes

    After extensive testing, we can confidently say the NexiGo PS5 DualSense Charging Station is the charger that ticks all the boxes. It offers a perfect blend of affordability, fast charging times, a sleek design, and thoughtful extras like overcharge protection and dual power options.

    Whether you’re looking for a budget-friendly option or simply want a reliable charger that fits seamlessly into your setup, the NexiGo charger is a no-brainer. It keeps your controllers powered up, your gaming area clutter-free, and your gameplay uninterrupted—all without making a dent in your wallet.

    If you’re in the market for a new PS5 controller charger, this one should be at the top of your list. With the NexiGo PS5 DualSense Charging Station, you’ll never have to worry about your controllers dying in the middle of the action again.

    Also Check:

  • PS5 Controller: Hands-On with the PS5 Controller and Why it DualSense Might Be the Most Advanced Controller Yet

    PS5 Controller: Hands-On with the PS5 Controller and Why it DualSense Might Be the Most Advanced Controller Yet

    When Sony unveiled the PlayStation 5, it wasn’t just the powerful hardware that grabbed attention—it was the new DualSense controller that promised to revolutionize the gaming experience. If you’ve been gaming for a while, you know that controllers are usually an afterthought, merely a tool for input. But with the PS5 DualSense, Sony has completely flipped the script. This controller does more than just translate button presses into actions; it brings the game to life in ways that haven’t been done before.

    PS5 Controller

    Click Here to Buy Now on Amazon

    In this hands-on review, we’ll break down what makes the PS5 DualSense controller stand out and why it might be the most advanced controller on the market.


    First Impressions: A New Design for a New Generation

    At first glance, the DualSense controller feels familiar yet different. It still has the classic PlayStation layout—two analog sticks, a D-pad, and the traditional triangle, circle, square, and X buttons. But the overall design has taken a leap forward. The body is bulkier compared to the DualShock 4, with rounded edges and a more ergonomic shape that feels comfortable for long gaming sessions.

    The first thing you’ll notice when you pick it up is how solid and premium it feels in your hands. It’s slightly heavier than previous controllers, but not so much that it becomes uncomfortable. The weight is perfectly balanced, and the texture on the back—a series of tiny PlayStation symbols—is both aesthetically pleasing and functional, providing a better grip.

    But it’s not just about looks and feel—the real magic lies under the hood.


    Haptic Feedback: Immersive Gaming Like Never Before

    One of the DualSense’s standout features is its haptic feedback system. This isn’t just a fancy rumble pack; it’s a sophisticated technology that adds a whole new layer of immersion to gaming. Instead of feeling the same buzz no matter what’s happening on-screen, the haptic feedback reacts dynamically to in-game events.

    Imagine walking through a dense forest in Demon’s Souls—you feel every footstep as your character trudges over gravel, dirt, or wooden bridges. Or, when you’re driving a sports car in Gran Turismo 7, the controller mimics the feeling of different road surfaces, from the smoothness of asphalt to the bumpiness of gravel tracks. This level of immersion can’t be overstated; it’s something you need to experience to fully appreciate.

    This feature extends to every interaction in the game world, making you feel like you’re part of it. Whether it’s raindrops landing on your in-game character or a massive explosion shaking the ground, the DualSense ensures you feel every moment with a level of detail that’s never been possible in a controller before.


    Adaptive Triggers: Next-Level Interaction

    The other key feature that sets the DualSense apart is its adaptive triggers. Unlike the basic triggers found in most controllers, these are pressure-sensitive and can change their resistance based on what you’re doing in the game.

    Let’s say you’re pulling back a bowstring in Horizon Forbidden West—you’ll feel the tension build as you draw the string, and the trigger will push back against your finger, simulating real-world resistance. It’s an incredible feeling that adds a new layer of immersion and makes certain actions in games more physically engaging.

    In a racing game, for example, you might feel the trigger stiffen as you press down on the gas, simulating the friction of the tires gripping the road. Or, when you’re using different weapons in a shooter, the resistance in the triggers can vary based on the weapon type—adding weight to a shotgun’s powerful blast or giving a light, snappy feel to a handgun.

    This kind of dynamic interaction changes the way you play games, giving you a more tactile and realistic experience.


    Built-in Microphone and Speaker: Communication Made Simple

    Another nifty feature of the DualSense is its built-in microphone and speaker. You no longer need to plug in a headset for quick multiplayer chat—though you’ll still want one for more serious gaming sessions. The microphone is sensitive enough for casual voice communication, which is perfect for those moments when you just want to jump into a quick round of Fortnite or Call of Duty without worrying about your setup.

    The built-in speaker, while present in the DualShock 4, has also seen improvements. In certain games, it’s used creatively to add immersion. For example, you might hear radio transmissions or sound effects like a character’s footsteps coming directly from the controller, creating a more layered and immersive sound experience.

    Plus, there’s a dedicated mute button right on the controller. One press and you can instantly mute the mic—a small, but very handy feature that makes it easy to manage your in-game communication.


    Motion Controls and Touchpad: The Return of Great Features

    While motion controls and the touchpad aren’t new—they were both present in the DualShock 4—Sony has refined them for the DualSense. The motion controls are smoother and more responsive, allowing for more precise actions in games that support them.

    The touchpad has also been enlarged and made more sensitive, offering more utility in games. It’s used in a number of creative ways, from swiping gestures in puzzle games to navigating menus with ease. It’s not a groundbreaking feature, but it adds to the overall versatility of the DualSense.


    Battery Life: A Mixed Bag

    For all the impressive features packed into the DualSense, one area that still needs improvement is the battery life. On average, the DualSense lasts about 8 to 12 hours on a single charge, which is decent but can feel short during marathon gaming sessions. The advanced features, especially haptic feedback and adaptive triggers, tend to drain the battery faster than traditional controllers.

    That said, the USB-C charging port is a welcome upgrade, allowing for faster recharging times compared to the micro-USB used in previous PlayStation controllers. And for those who hate the hassle of constantly plugging in, Sony’s DualSense Charging Station is a great accessory to keep your controllers ready to go.


    The Future of Gaming Feels Different

    There’s no doubt that the PS5 DualSense is one of the most innovative controllers we’ve ever seen. It’s not just about pressing buttons anymore—it’s about feeling the game world around you. Whether it’s the detailed haptic feedback, the dynamic adaptive triggers, or the simple convenience of built-in communication features, the DualSense offers an entirely new level of interaction.

    This isn’t just a leap forward in terms of technology, but a shift in how we experience games. Sony has clearly invested in making sure the controller is as much a part of the PS5 experience as the console itself, and it shows.


    Final Thoughts: A Controller That Sets a New Standard

    In a gaming world where immersion is key, the DualSense takes things to the next level. It’s not just the best PlayStation controller yet—it’s arguably the best controller on the market. Whether you’re a casual player or a hardcore gamer, this controller will make you rethink how important a role the controller plays in the gaming experience.

    With the PS5’s DualSense, Sony has managed to elevate the humble controller from a simple input device to an essential part of the immersive gaming experience. If you haven’t tried it yet, trust us—this is more than just a controller. It’s a whole new way to play.

    Also Check:

  • Best PS5 Controller Charger: Our Tests Shows These Controllers Are Faster Than You Can Say “Loading Screen”

    Best PS5 Controller Charger: Our Tests Shows These Controllers Are Faster Than You Can Say “Loading Screen”

    If there’s one thing every PlayStation 5 gamer dreads, it’s the dreaded low battery warning mid-game. You’re in the heat of battle or in the middle of an epic boss fight when—bam—your controller starts blinking red, signaling that the charge is running out. We’ve all been there, and it’s a buzzkill. But worry not, because a fast, reliable PS5 controller charger can be a real game-changer (pun intended).

    Best PS5 Controller Charger

    Click Here to Buy Now on Amazon

    We set out to find the best PS5 controller chargers that not only get the job done but do so with speed, style, and efficiency. We tested a variety of chargers, from the official Sony model to third-party docks and wireless charging pads. The results? We found several standouts that can fully juice up your DualSense controllers faster than you can load into a new game.

    Here are our top picks for the best PS5 controller chargers that will have you ready to jump back into the action without waiting around.


    1. Sony DualSense Charging Station: The Official Fast Charger

    Speed: 3 hours
    Price: $29.99

    Let’s start with the official option: Sony’s DualSense Charging Station. It’s no surprise that this model made the cut, given it’s designed specifically for the PS5 controllers. The sleek, compact design allows you to dock two controllers at once, and in our tests, it consistently delivered fast charging times. In just 3 hours, our controllers went from 0% to fully charged, which is impressive for a dual-charging dock.

    What sets this charger apart is its ease of use. The docking mechanism is simple—just click the controller into place and walk away. No fiddling with cables or aligning ports. The dock connects directly to the PS5’s USB port or any other power source with a USB adapter, making it versatile for setup in any gaming space.

    Why We Love It: If you want something that fits right into your PS5 aesthetic and is officially supported by Sony, this is the go-to. It’s fast, reliable, and allows you to keep your controllers fully charged without cluttering your setup with cables.


    2. NexiGo PS5 DualSense Charging Station: The Budget-Friendly Charger

    Speed: 3.5 hours
    Price: $19.99

    Looking for a budget-friendly option without sacrificing much speed? The NexiGo PS5 DualSense Charging Station is a fantastic alternative. At just under $20, it’s one of the most affordable options out there. It charges two controllers simultaneously and did so in about 3.5 hours during our tests, just half an hour slower than Sony’s official version.

    The NexiGo charger also comes with an LED indicator to let you know when your controllers are fully charged, which is a nice touch. It’s powered through a USB-C connection and even has overcharge protection to ensure your controllers aren’t getting fried if you forget to take them off the dock.

    Why We Love It: The NexiGo charger is an excellent choice for gamers who want a fast charger but don’t want to spend a lot. It’s compact, efficient, and looks good next to your PS5, all without breaking the bank.


    3. OIVO PS5 Controller Charging Station: Best for Multi-Device Setup

    Speed: 2.5 – 3 hours
    Price: $23.99

    For those with multiple controllers or a larger setup, the OIVO PS5 Controller Charging Station stands out. This charger is a bit more versatile, featuring four USB ports for charging not only your DualSense controllers but also your headphones, phone, or other USB-powered accessories.

    In terms of speed, it’s one of the fastest chargers we tested, taking just 2.5 hours to fully charge two controllers at the same time. What makes this even better is the built-in fan, which prevents overheating. So, even after hours of charging, the station stays cool, and your controllers are ready for action without any risk of heat damage.

    Why We Love It: The OIVO charging station is perfect for gamers with a lot of gear. It offers speedy charging, protects your equipment from overheating, and allows you to charge multiple devices at once—all at a reasonable price.


    4. Fosmon Dual PS5 Charging Station: Best LED Indicator Design

    Speed: 3 hours
    Price: $25.99

    The Fosmon Dual PS5 Charging Station is another fast, efficient charger that stands out thanks to its unique design. The LED indicators on this charger are larger and more vibrant than on other models. They light up in red while charging and switch to blue when your controllers are ready to go, making it easy to check the status at a glance.

    It charges two controllers simultaneously in about 3 hours, matching Sony’s official speed. The docking mechanism is magnetic, which makes it easier to attach and detach your controllers. This means no wiggling around to find the perfect angle—it clicks into place effortlessly.

    Why We Love It: If you’re all about aesthetics and want a charger that looks as cool as it functions, the Fosmon charger is a great choice. The LED lights are super bright, and the magnetic dock is incredibly easy to use.


    5. Razer Quick Charge Stand: Best Wireless Option

    Speed: 2.5 hours
    Price: $39.99

    For gamers who prefer a more premium, wireless experience, the Razer Quick Charge Stand is in a league of its own. This charging stand delivers a full charge in just 2.5 hours, making it the fastest charger we tested. Unlike the other options, this stand holds your controller in an upright position, and the sleek design adds a touch of elegance to your gaming setup.

    One of the standout features is the wireless charging capability. Simply place your DualSense controller on the stand, and it begins charging immediately—no need to plug anything in. It’s the perfect blend of convenience and speed. The Razer Quick Charge Stand comes in various color options to match your controller or your PS5 console, which adds a fun, personal touch.

    Why We Love It: If you want the fastest, most convenient charging experience, and you’re willing to pay a bit more for it, the Razer Quick Charge Stand is hands down the best option. The wireless design and speed make it worth every penny.


    Conclusion: The Fastest PS5 Controller Chargers

    After testing all these PS5 controller chargers, it’s clear that speed and convenience can make a big difference in your gaming experience. Whether you want the official Sony dock, a budget-friendly alternative like NexiGo, or the ultra-fast Razer wireless stand, there’s a charger out there that’ll fit your needs.

    For the fastest charge, the Razer Quick Charge Stand takes the crown with its 2.5-hour charge time and wireless convenience.
    For the best value, NexiGo offers reliable performance at an unbeatable price.
    And for those who like to keep things official, the Sony DualSense Charging Station remains a top choice, combining speed with a stylish, console-matching design.

    Whichever you choose, you’ll be back in the game faster than you can say “loading screen.”

    Also Check: