Blog

  • How to Turn Off Beats Studio Pro: A Quick and Easy Guide

    How to Turn Off Beats Studio Pro: A Quick and Easy Guide

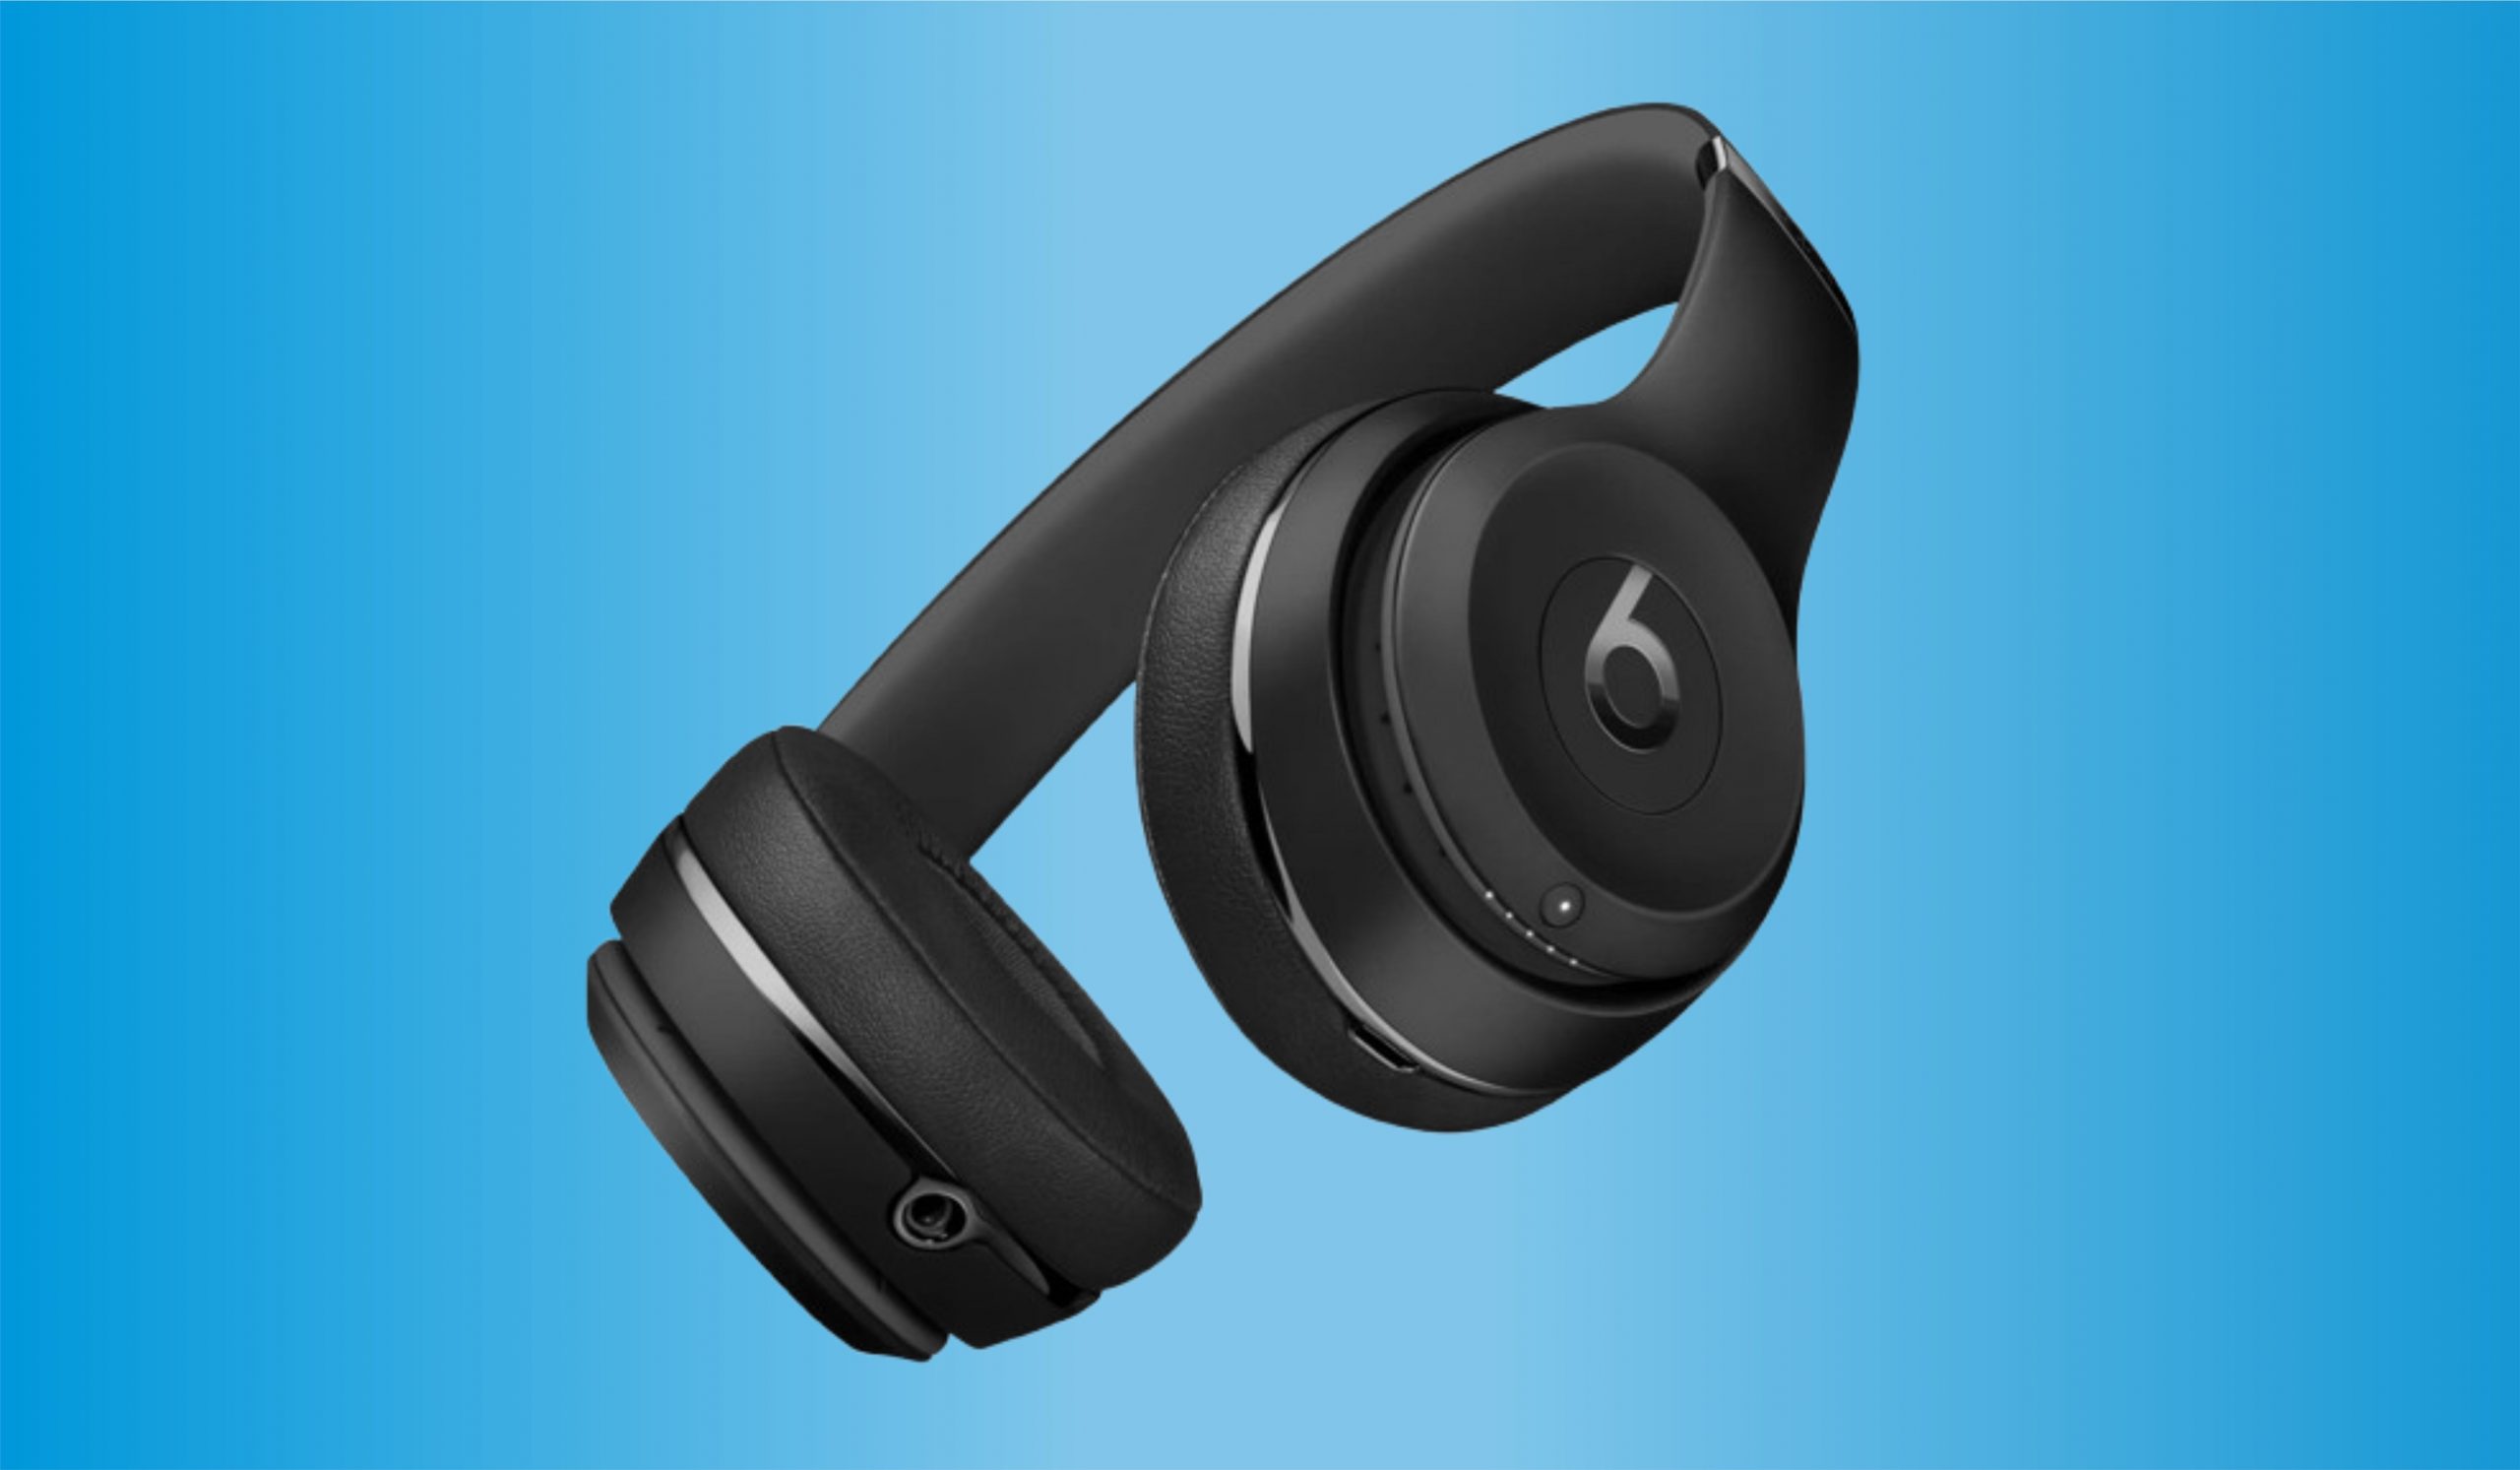
    Turning off your Beats Studio Pro might sound straightforward, but with their modern design and tech-packed features, it’s worth knowing the steps to make sure you’re powering down properly and saving battery.

    How to Turn Off Beats Studio Pro

    Here’s everything you need to know about turning off the Beats Studio Pro, as well as some tips for managing power and battery effectively.


    1. The Basics: Using the Power Button to Turn Off

    The simplest way to turn off your Beats Studio Pro is to use the dedicated power button. Here’s a step-by-step guide:

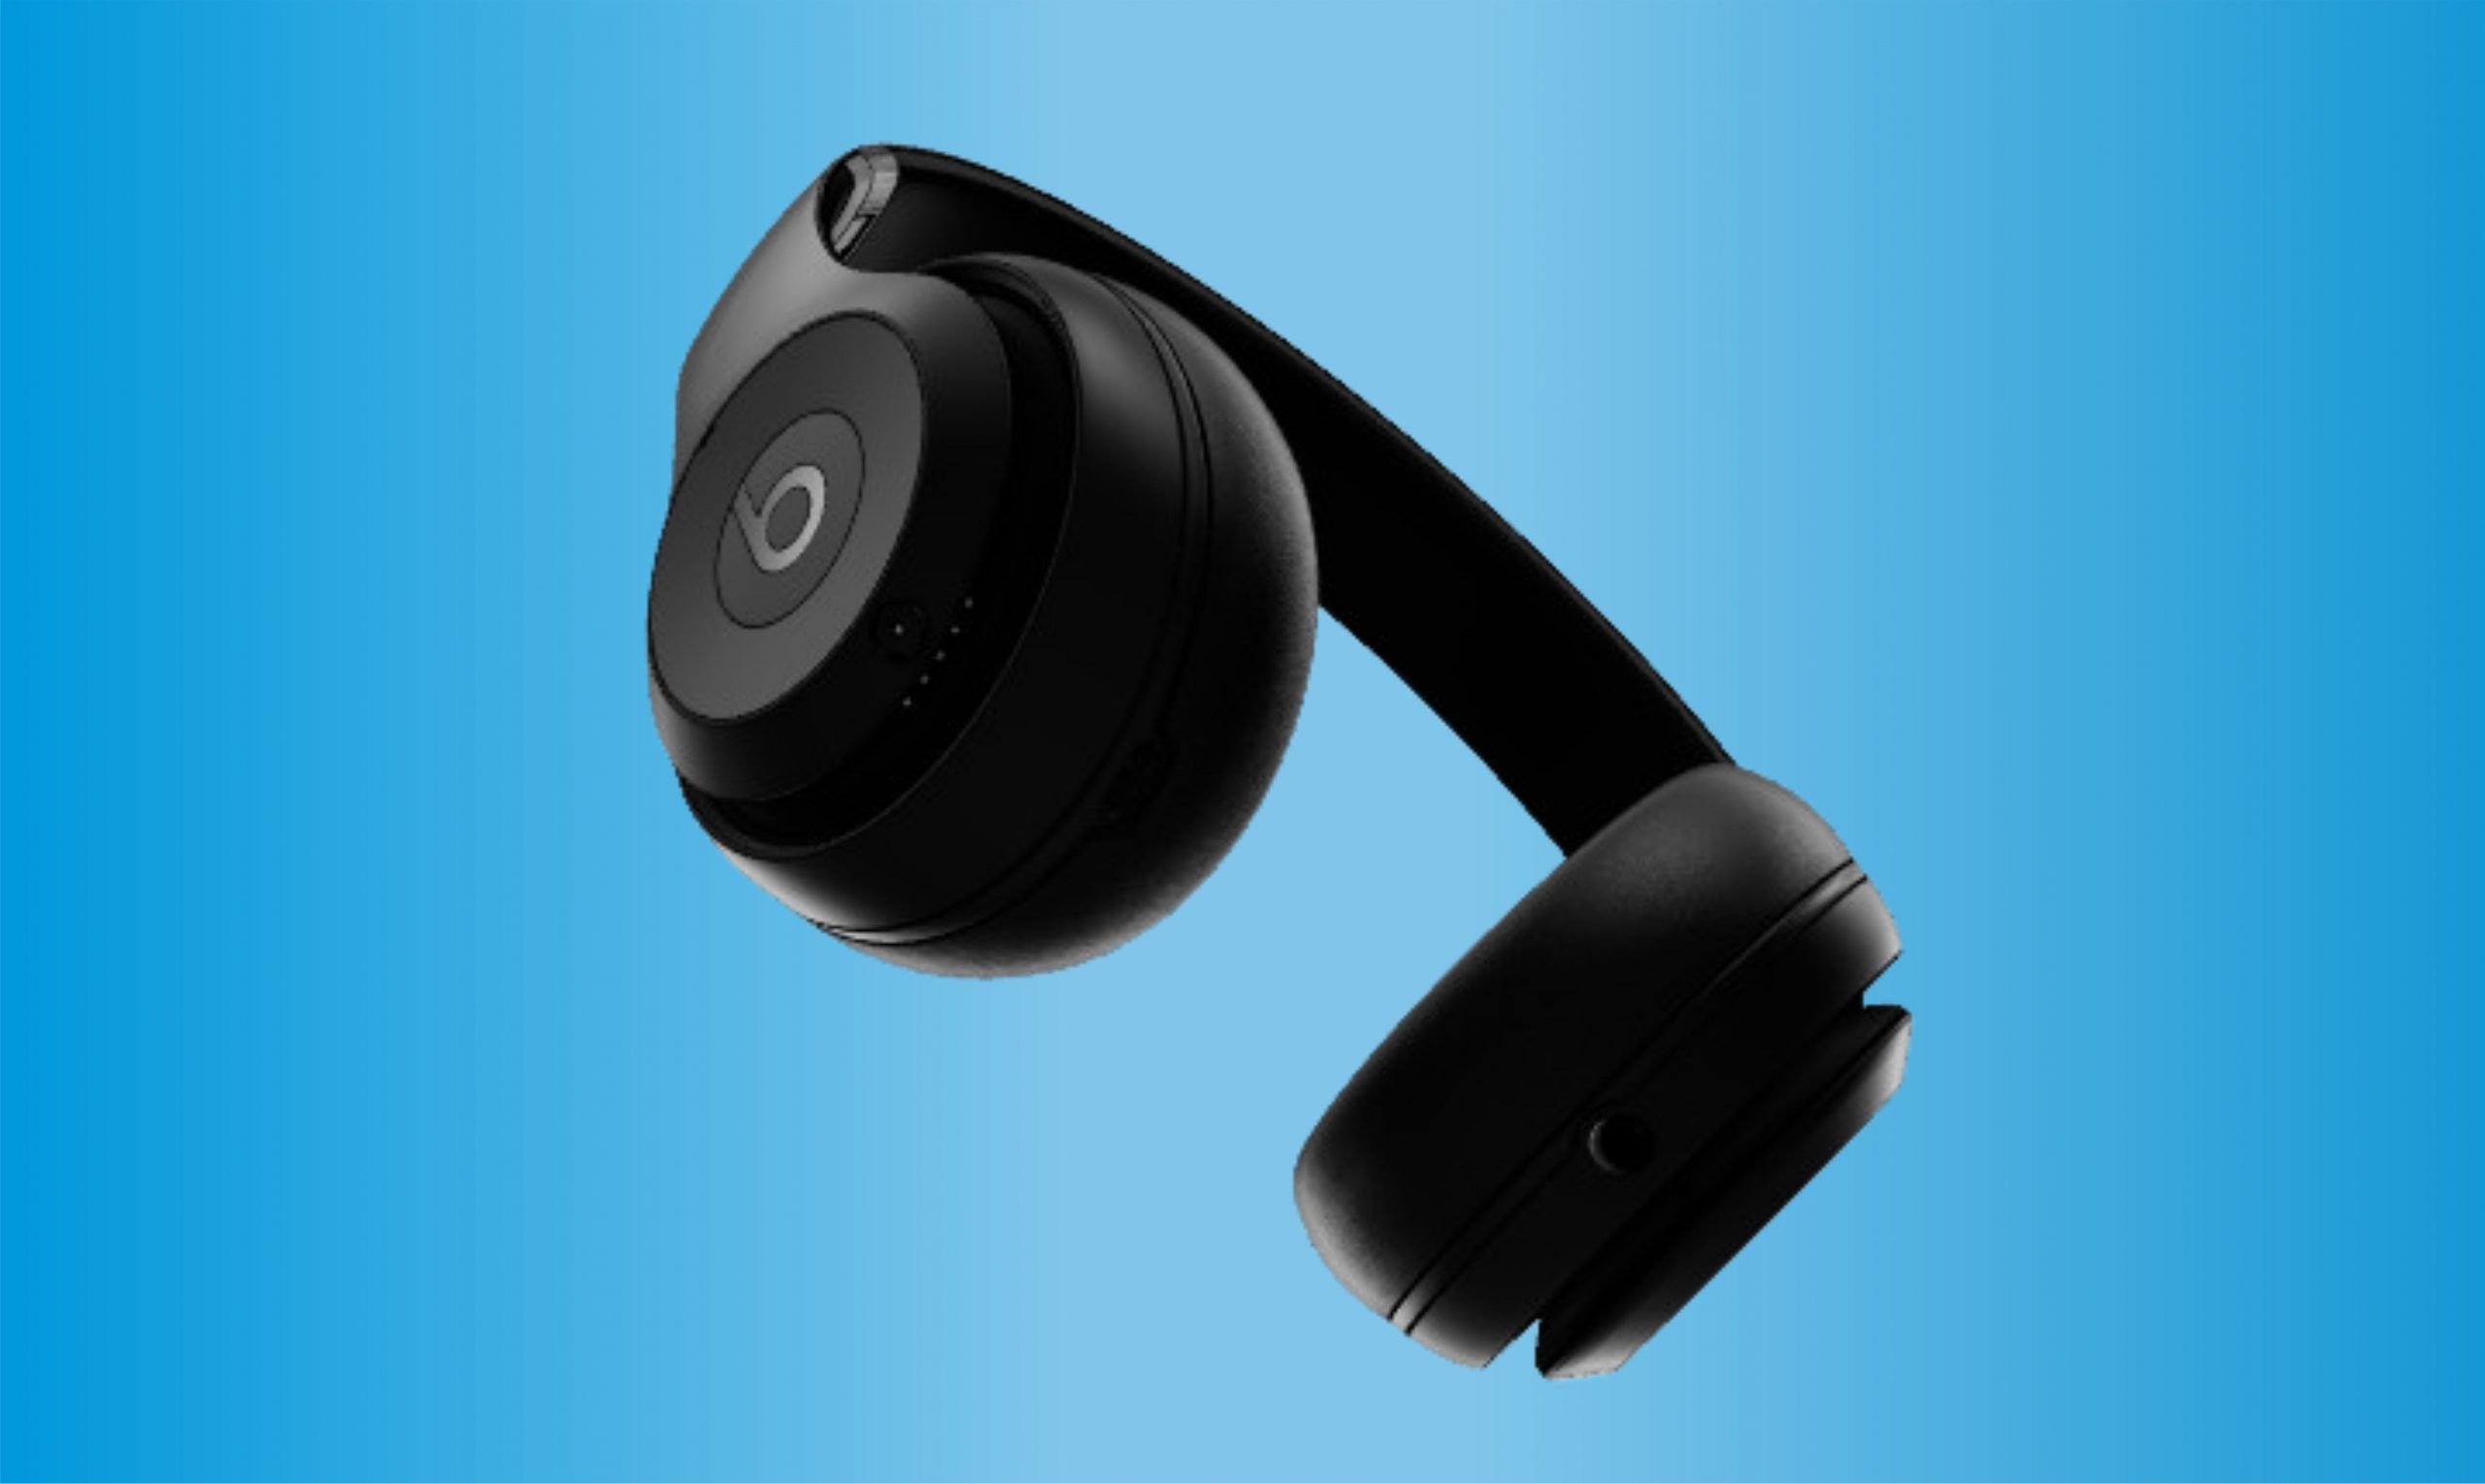
    • Locate the Power Button: On your Beats Studio Pro, the power button is on the right ear cup. It’s slightly raised, so you should feel it easily.
    • Press and Hold: Hold down the power button for about 1-2 seconds. You’ll hear a quick chime or notice a light flash, indicating they’re turning off.
    • Double-Check: If you’re unsure they’ve powered off, check for a lack of any LED lights on the side. When they’re completely off, the lights will no longer be visible.

    Using this simple method ensures you’re fully powering down, saving battery life for the next time you want to listen.


    2. Auto-Off Feature: Power Down Automatically When Idle

    One of the conveniences with Beats Studio Pro is the built-in auto-off feature. This smart feature automatically turns off your headphones after a period of inactivity, which is a great battery saver if you forget to manually turn them off.

    Here’s how the auto-off function works:

    • Stay Idle: If you leave your Beats Studio Pro idle without any audio playing, they will power down automatically after a few minutes.
    • Wake Up Quickly: When you put them back on, or press any button, they’ll reconnect quickly, so there’s no lengthy reboot time.

    The auto-off feature is ideal for anyone who tends to leave their headphones on by accident, whether they’re in a rush or simply forgetful.


    3. Using the Charging Case: A Battery-Saving Option

    If you have the charging case for the Beats Studio Pro, placing your headphones inside the case will automatically power them down and start charging. It’s a double benefit — your headphones turn off and start to recharge without you needing to hit the power button.

    Here’s what to do:

    • Place in Charging Case: Gently slide each ear cup into the charging case.
    • Close the Case: Once they’re securely in, the case will recognize the headphones and power them down while charging.
    • Charging Light Indicator: A small light on the charging case will show they’re charging and turned off.

    This option is especially useful when you’re on the go or need to keep your Beats Studio Pro stored safely when not in use. Plus, it guarantees they’ll have a full charge when you’re ready to use them again.


    4. Manage Bluetooth Connection to Turn Off Remotely

    Another way to conserve battery when you’re not using your Beats Studio Pro is to disconnect the Bluetooth connection. While this doesn’t fully power them down, it does place them in a low-power state, which helps save battery life.

    • Go to Bluetooth Settings: On your phone or paired device, open the Bluetooth settings menu.
    • Disconnect or Forget Device: Select “disconnect” or “forget” to stop the connection. The Beats Studio Pro will go into a low-power standby mode after a few minutes.
    • Reconnect When Needed: When you’re ready to listen again, just reconnect through Bluetooth to wake them back up.

    5. Using the Beats App for Advanced Power Management

    If you have the Beats app installed (available on iOS and Android), you can manage power settings more precisely, including setting custom time intervals for auto-off or adjusting other power-saving features.

    • Open the Beats App: Launch the app on your device.
    • Select Your Beats Studio Pro: Tap on your headphones in the device list.
    • Customize Settings: Within the app, you’ll find options for managing auto-off timers and battery-saving features that can help extend your playtime and ensure they’re turned off when not in use.

    Using the Beats app allows for a more personalized setup and helps you make the most out of the battery life.


    Why Power Management Is Important for the Beats Studio Pro

    The Beats Studio Pro headphones pack powerful sound quality and noise-canceling capabilities, but these features require a lot of power. Properly turning off your headphones when they’re not in use can significantly extend the battery life, making them ready when you need them and reducing the time spent charging. Plus, effective power management is eco-friendly, keeping your battery in top condition over time.


    Quick Tips for Maximizing Battery Life

    Here are a few extra tips to help make the most of your Beats Studio Pro battery:

    • Turn Off Noise Cancelation When Not Needed: Noise cancellation is a high-power feature. If you’re in a quiet environment, consider turning it off to conserve energy.
    • Keep Firmware Updated: Sometimes, power management improvements come with firmware updates, so make sure your Beats Studio Pro is up-to-date.
    • Use the Beats App for Monitoring: The Beats app can help you track battery levels and alert you when the battery is low, so you never run out of power unexpectedly.

    Wrapping Up

    Powering off your Beats Studio Pro is easy once you know your options. Whether you prefer using the power button, relying on auto-off, placing them in a charging case, or managing them through the Beats app, there’s a method for every situation. So, next time you’re done listening, turn them off with ease and preserve that battery life for another great listening session!

    Also Check:

  • Beats Studio Pro vs Beats Studio 3: What’s Changed and What’s Stayed the Same and Which Should You Buy?

    Beats Studio Pro vs Beats Studio 3: What’s Changed and What’s Stayed the Same and Which Should You Buy?

    The Beats Studio 3 has long held its place as a popular choice in premium headphones, delivering that signature Beats sound profile and reliable noise cancellation. But with the recent release of the Beats Studio Pro, there’s a new powerhouse on the scene, packed with updated features and fresh design tweaks.

    Beats Studio Pro vs Beats Studio 3

    So, what’s changed between these two models, and what stayed the same? If you’re deciding between these headphones, here’s everything you need to know.


    Design and Comfort: New Look, Familiar Feel

    Beats Studio Pro: A Sleeker, Modern Redesign

    The Beats Studio Pro arrives with a subtly refined design that’s a bit sleeker and more streamlined than its predecessor. The look feels more understated and premium, with materials that give off a high-end vibe. You’ll notice that Beats has gone with subtle branding this time around, with smaller “b” logos on the ear cups and more color choices, including a new deep blue.

    The ear cushions in the Studio Pro are a little thicker than the Studio 3, providing a snug fit that seals out more ambient noise. With memory foam that contours around the ear, the comfort level sees an upgrade for longer listening sessions without feeling weighed down.

    Beats Studio 3: Iconic Look, Lightweight Comfort

    The Studio 3’s design hasn’t aged too badly; it still has that iconic Beats style that’s recognizable. The materials, while not as refined as the Studio Pro, are lightweight and make the Studio 3 comfortable for long periods. The ear cushions do a great job at providing a comfortable seal, though they’re not quite as dense as those on the Studio Pro.

    Verdict: Both headphones are comfortable for extended use, but the Studio Pro wins with slightly more premium materials and a sleeker design.


    Sound Quality: Tuning Up the Beats Sound

    Beats Studio Pro: A Balanced, Enhanced Listening Experience

    The Beats Studio Pro represents a step up in audio quality. While the Studio 3 leaned towards heavy bass (a Beats signature), the Studio Pro introduces a more balanced sound signature that brings out the mids and highs more clearly. This refined tuning makes the Studio Pro ideal for all kinds of music, from bass-heavy hip-hop to instrumental tracks and podcasts. Enhanced with 24-bit audio processing and support for lossless audio playback, the Studio Pro can make high-quality tracks sound even richer when paired with compatible devices.

    Another major upgrade with the Studio Pro is its Spatial Audio support. If you’re listening through Apple Music or other compatible apps, you can enjoy an immersive, 3D audio experience that makes it feel like the music is surrounding you, which is especially impressive for live recordings and movies.

    Beats Studio 3: Bass-Heavy Sound, Clear Vocals

    The Studio 3 offers that classic Beats sound profile with a powerful bass, which is perfect for fans of bass-driven genres. However, this can sometimes overshadow the mids and highs, making vocals and intricate details less prominent. For casual listening, the sound quality is satisfying, especially if you enjoy a bass-heavy experience. However, compared to the Studio Pro, it lacks the same level of clarity and depth across all ranges.

    Verdict: If you want balanced sound with less focus on bass, the Studio Pro delivers a more nuanced listening experience, especially with 24-bit and Spatial Audio support.


    Noise Cancellation and Transparency Modes: Enhanced Control

    Beats Studio Pro: Upgraded ANC and Transparency

    Beats has significantly improved Active Noise Cancellation (ANC) with the Studio Pro. It’s more adaptive and able to filter out a wider range of frequencies, making it perfect for blocking out background chatter in coffee shops, plane engines, or even office noise. Transparency mode is another feature added to the Studio Pro, allowing external sound in when you need it, which is convenient when you want to stay aware of your surroundings.

    Beats Studio 3: Reliable ANC, No Transparency Mode

    The Studio 3 offers reliable noise cancellation, but it doesn’t have the transparency mode. While the ANC works well to block out noise, it doesn’t handle mid and high frequencies as effectively as the Studio Pro, meaning some voices or sharper sounds may still be heard in quieter environments. For most daily scenarios, it does a good job, but it’s not quite as adaptable as the Studio Pro.

    Verdict: The Studio Pro’s advanced ANC and added transparency mode offer better control and a more versatile experience.


    Battery Life: All-Day Listening

    Beats Studio Pro: Extended Playtime and Quick Charge

    The Beats Studio Pro offers an impressive 40 hours of listening time without ANC and around 24 hours with ANC active. Additionally, Fast Fuel charging gives you up to four hours of playback with just a 10-minute charge, which is great for when you’re on the go and need a quick top-up.

    Beats Studio 3: Still Strong on Battery Life

    The Studio 3 is no slouch in the battery department, offering up to 22 hours with ANC on and up to 40 hours without it. While it doesn’t have quite as fast a quick charge feature as the Studio Pro, it’s still plenty of power for most listeners.

    Verdict: Both models deliver solid battery life, but the Studio Pro’s Fast Fuel charging and longer ANC battery life are beneficial for heavy users.


    Connectivity and Compatibility: Seamless Apple Integration

    Beats Studio Pro: USB-C, Bluetooth 5.3, and Cross-Platform Support

    One of the standout upgrades in the Studio Pro is the shift to USB-C charging, which is more versatile and works seamlessly with both Apple and non-Apple devices. Additionally, Bluetooth 5.3 improves connectivity and latency, offering a more stable connection when switching between devices.

    For Android users, the Beats Studio Pro has improved cross-platform compatibility and a dedicated Android app for adjusting settings. For iOS users, it seamlessly integrates with Apple’s ecosystem and supports Spatial Audio for Apple Music.

    Beats Studio 3: Lightning Cable and Solid Apple Compatibility

    The Studio 3 still relies on a Lightning cable, which is convenient for Apple users but less so for Android users or those who’ve fully transitioned to USB-C. It also lacks Bluetooth 5.3, though it still offers a reliable connection for Apple users and can pair easily with iPhones, iPads, and Macs.

    Verdict: The Studio Pro is more versatile with USB-C and improved compatibility across Apple and Android devices.


    Price and Value: Are the Upgrades Worth It?

    Beats Studio Pro: Higher Price for Premium Features

    With all the enhancements in sound quality, design, ANC, and connectivity, the Studio Pro comes in at a higher price point than the Studio 3. But for those looking for the latest features, improved sound, and modern conveniences, it might just be worth the investment.

    Beats Studio 3: Affordable and Still Reliable

    The Studio 3 is now more affordable, making it a great option for those who want solid ANC, that iconic Beats bass, and Apple ecosystem compatibility without needing the latest bells and whistles. While it doesn’t have every feature of the Studio Pro, it still delivers a fantastic listening experience.

    Verdict: If you’re on a budget, the Studio 3 remains a solid choice, but if you want the latest upgrades, the Studio Pro brings more to the table.


    Final Verdict: Which Beats Is Right for You?

    Ultimately, the choice between the Beats Studio Pro and the Beats Studio 3 comes down to what you value most:

    • Choose the Beats Studio Pro if you want an improved listening experience, with balanced sound, Spatial Audio support, and a sleeker, modern design. The USB-C charging, enhanced ANC, and transparency mode make it a great pick for those who need versatility and plan to use it for long listening sessions.
    • Opt for the Beats Studio 3 if you’re looking for a more affordable Beats experience that still delivers excellent noise cancellation, battery life, and that iconic bass-heavy sound. It may lack some of the latest features, but it still provides great value, especially if you’re an Apple user.

    In the end, both the Studio Pro and Studio 3 have their own appeal, but the Studio Pro takes the experience a step further, positioning itself as the new go-to standard for Beats headphones.

    Also Check:

  • iPad Mini: The Most Capable Small Tablet I’ve Ever Used

    iPad Mini: The Most Capable Small Tablet I’ve Ever Used

    The iPad Mini isn’t just a smaller version of its bigger siblings

    In a market dominated by larger-than-life screens and increasingly powerful devices, the iPad Mini stands as a unique contender. With its compact size, lightweight design, and mighty capabilities, this small tablet has managed to carve out a niche of its own. Whether you’re a student, a professional, or just someone who loves tech, the iPad Mini has something for everyone.

    iPad Mini: The Most Capable Small Tablet I’ve Ever Used

    After spending extensive time with it, I can confidently say this: the iPad Mini isn’t just a smaller version of its bigger siblings—it’s a powerhouse in its own right. Here’s why the iPad Mini has earned the title of the most capable small tablet I’ve ever used.


    Design: Small Size, Big Impressions

    One glance at the iPad Mini, and its design immediately grabs your attention. Apple has managed to pack a high-quality device into a frame that’s both sleek and portable.

    Compact and Lightweight

    The iPad Mini measures just 7.69 inches tall and 5.3 inches wide, with a thickness of 0.25 inches. Weighing in at a mere 293 grams (Wi-Fi model), it’s light enough to hold for extended periods without fatigue. Its compact form factor makes it easy to slip into a bag or even a large pocket, making it an ideal travel companion.

    Premium Build

    As expected from Apple, the build quality is top-notch. The aluminum chassis feels solid, and the device exudes a premium vibe. The minimalist design with flat edges mirrors the aesthetics of the iPad Air and iPad Pro, adding a touch of sophistication.

    Color Options

    Apple offers the iPad Mini in four stunning colors: Space Gray, Pink, Purple, and Starlight. These options add a personal touch, allowing you to choose a look that suits your style.

    Verdict: The iPad Mini’s design proves that small doesn’t mean compromising on quality. It’s as premium as it is portable.


    Display: A Feast for the Eyes

    The 8.3-inch Liquid Retina display is one of the highlights of the iPad Mini. It’s vibrant, sharp, and perfect for just about any task.


    High Resolution and Color Accuracy

    With a resolution of 2266 x 1488 pixels at 326 PPI (pixels per inch), the screen delivers crisp text and vivid images. The P3 wide color gamut and True Tone technology ensure accurate colors and comfortable viewing in any lighting condition.

    Brightness and Anti-Reflective Coating

    The screen reaches up to 500 nits of brightness, making it easy to use outdoors. The anti-reflective coating reduces glare, so you can read or watch videos without straining your eyes.

    Size vs. Usability

    While the screen is smaller than other iPads, it feels just right for tasks like reading eBooks, watching videos, or taking notes. Its compact size makes it easy to use with one hand, a rarity among tablets.

    Verdict: The iPad Mini’s display punches above its weight, delivering a viewing experience that’s both immersive and versatile.


    Performance: Small Tablet, Mighty Power

    At the heart of the iPad Mini lies Apple’s A15 Bionic chip, the same processor found in the iPhone 13 series. This chip ensures the iPad Mini handles everything you throw at it with ease.

    iPad Mini: The Most Capable Small Tablet I’ve Ever Used

    Everyday Tasks

    Whether it’s browsing the web, checking emails, or managing your calendar, the iPad Mini handles everyday tasks effortlessly. Apps load quickly, and multitasking is smooth, thanks to iPadOS.

    Creative Work

    The iPad Mini is surprisingly capable when it comes to creative tasks. With support for the Apple Pencil (2nd generation), it’s perfect for sketching, note-taking, or photo editing. The powerful GPU ensures that even demanding apps like Procreate or Lightroom run seamlessly.

    Gaming

    If you’re into gaming, the iPad Mini doesn’t disappoint. Titles like Genshin Impact and Call of Duty: Mobile run smoothly, with stunning graphics and zero lag.

    Verdict: The A15 Bionic chip makes the iPad Mini a powerhouse, proving that good things do come in small packages.


    Battery Life: All-Day Performance

    Apple claims the iPad Mini offers up to 10 hours of battery life, and in my experience, this holds true. Whether you’re streaming videos, browsing, or working, the device easily lasts a full day on a single charge.

    Charging

    The iPad Mini charges via USB-C, a welcome upgrade that allows for faster charging and better compatibility with modern accessories.

    Verdict: The iPad Mini’s battery life is impressive, ensuring it keeps up with your busy day without needing frequent recharges.


    Software: iPadOS at Its Best

    The iPad Mini runs on iPadOS, Apple’s tablet-specific operating system. It’s optimized for the device’s smaller screen, offering a seamless and intuitive user experience.

    Split View and Multitasking

    Despite its compact size, the iPad Mini supports multitasking features like Split View and Slide Over, making it easy to work on two apps simultaneously.

    App Ecosystem

    From productivity tools to creative apps and games, the App Store offers an unparalleled selection of optimized apps. Whether you’re a student, professional, or creative, you’ll find apps tailored to your needs.

    Verdict: iPadOS transforms the iPad Mini into a versatile device that’s equally suited for work and play.


    Camera: More Than Just a Tablet Camera

    The iPad Mini features a 12MP rear camera and a 12MP ultra-wide front camera, making it more capable than most tablets in its class.

    Rear Camera

    The rear camera is perfect for scanning documents, taking photos, or shooting 4K videos. While it’s not meant to replace a smartphone camera, it’s more than adequate for occasional use.

    Front Camera with Center Stage

    The ultra-wide front camera supports Center Stage, a feature that keeps you in the frame during video calls, even if you move around. This makes the iPad Mini an excellent choice for remote work or virtual meetings.

    Verdict: The iPad Mini’s cameras are versatile enough to meet most needs, especially for video calls and content creation.


    Connectivity and Accessories

    5G Connectivity

    For those on the go, the iPad Mini offers optional 5G support, ensuring fast internet speeds wherever you are.

    Apple Pencil (2nd Generation)

    The iPad Mini’s support for the Apple Pencil takes productivity and creativity to the next level. The stylus attaches magnetically to the side of the tablet for easy charging and storage.

    Smart Folio

    Apple’s Smart Folio cover not only protects the device but also doubles as a stand, adding to its versatility.

    Verdict: With 5G and accessory support, the iPad Mini is a complete package for both work and play.


    Use Cases: Who Is It For?

    The iPad Mini’s versatility makes it ideal for a wide range of users:

    • Students: Perfect for note-taking, studying, and online classes.
    • Professionals: Great for managing emails, attending meetings, and working on the go.
    • Creatives: An excellent tool for sketching, designing, and photo editing.
    • Travelers: Its compact size and lightweight design make it the perfect travel companion.

    What Could Be Better?

    While the iPad Mini is an impressive device, it’s not without its shortcomings:

    • Price: Starting at $499, it’s not the most affordable small tablet on the market.
    • No Face ID: Unlike the iPad Pro, the iPad Mini relies on Touch ID, which feels slightly dated.
    • Lack of Magic Keyboard Support: The absence of Magic Keyboard compatibility limits its potential as a laptop replacement.

    Final Verdict: Why the iPad Mini Is Still the Best Small Tablet

    The iPad Mini strikes a perfect balance between portability and performance. It’s powerful enough to handle demanding tasks, yet compact enough to carry anywhere. Whether you’re looking for a productivity tool, a creative companion, or an entertainment device, the iPad Mini delivers.

    It’s not just the most capable small tablet I’ve ever used—it’s one of the best tablets, period. If you’re in the market for a device that’s small in size but big on features, the iPad Mini should be at the top of your list.

    Also Check:

  • iPad Mini 7: I Tried the New iPad Mini 7 and It’s Surprisingly Capable for Its Size

    iPad Mini 7: I Tried the New iPad Mini 7 and It’s Surprisingly Capable for Its Size

    What makes the iPad Mini 7 stand out, what it could improve, and who it’s perfect for?

    When Apple announced the iPad Mini 7, I was curious but cautious. The iPad Mini has always been a niche product in Apple’s lineup—a compact tablet that appeals to specific users. With the latest iteration, Apple promised improved performance, an updated display, and all the modern features you’d expect from a cutting-edge device. But could such a small tablet really deliver on those promises, or was it destined to be just another incremental update?

    I Tried the New iPad Mini 7 and It’s Surprisingly Capable for Its Size

    After spending a few weeks with the iPad Mini 7, I can confidently say that this little tablet punches well above its weight. It’s not just a downsized iPad—it’s a capable, versatile device that feels tailor-made for anyone who values portability without sacrificing power. Here’s a detailed look at what makes the iPad Mini 7 stand out, what it could improve, and who it’s perfect for.


    First Impressions: Small, Sleek, and Stylish

    Unboxing the iPad Mini 7 is an experience in itself. As soon as I held it, I was struck by its compact size and premium design. Measuring 7.7 x 5.3 inches and weighing just 293 grams, it’s incredibly light and easy to handle. The flat edges, thin bezels, and aluminum chassis give it a modern look that fits seamlessly with Apple’s current design language.

    The Portability Factor

    The iPad Mini 7 is the kind of device you can slip into a small bag, or even a jacket pocket, without a second thought. Whether I was traveling, commuting, or lounging on the couch, it was always within arm’s reach. For someone who’s constantly on the go, this level of portability is a game-changer.


    A Display That Shines

    The 8.3-inch Liquid Retina display on the iPad Mini 7 is a thing of beauty. With a resolution of 2266 x 1488 pixels and support for True Tone and the P3 wide color gamut, the screen delivers sharp, vibrant visuals that rival those of larger iPads.

    Great for Streaming and Reading

    Watching Netflix or YouTube on this screen is a joy. The small size doesn’t feel like a limitation because the high pixel density ensures crystal-clear images. Reading eBooks and articles was equally pleasant; the display is bright enough for outdoor use and comfortable for extended sessions thanks to its anti-reflective coating.

    Improved Scrolling with ProMotion

    One of the standout features of the iPad Mini 7 is the addition of ProMotion technology, which provides a refresh rate of up to 120Hz. Scrolling through web pages, documents, or social media feels incredibly smooth, and the responsiveness is noticeable during tasks like note-taking or drawing.


    Performance: Small Device, Big Power

    The iPad Mini 7 is powered by Apple’s A16 Bionic chip, the same processor found in the iPhone 15 lineup. This upgrade makes it one of the most powerful small tablets on the market.

    Seamless Multitasking

    From switching between apps to using Split View and Slide Over, the iPad Mini 7 handled multitasking effortlessly. Whether I was editing documents in Microsoft Word, streaming a YouTube tutorial, or jotting down notes in Notability, the performance was consistently smooth.

    Gaming Performance

    I put the iPad Mini 7 through its paces with graphically demanding games like Genshin Impact and Call of Duty: Mobile, and it didn’t disappoint. The A16 chip, combined with the improved GPU, delivered stunning graphics and lag-free gameplay. Even after extended gaming sessions, the device remained cool to the touch.


    Apple Pencil 2 Support: Creativity Unleashed

    The iPad Mini 7 continues to support the Apple Pencil (2nd generation), which attaches magnetically to the side of the tablet for easy storage and charging. Using the Apple Pencil on the Mini feels natural and fluid, thanks to the improved display responsiveness.

    Perfect for Notes and Sketches

    Taking notes in GoodNotes or sketching in Procreate was a breeze. The small size of the Mini made it feel like I was using a high-tech notepad, and the precision of the Apple Pencil ensured that every stroke was captured accurately.


    Battery Life: All-Day Performance

    Apple claims the iPad Mini 7 offers up to 10 hours of battery life for web browsing or video playback, and my real-world usage reflected this. Whether I was working on a project, streaming content, or browsing the web, the battery consistently lasted an entire day.

    USB-C for Faster Charging

    The move to USB-C is a welcome change, making the iPad Mini 7 compatible with a wide range of accessories. Charging the device from 0% to 50% took just over 30 minutes, which is impressive for a tablet this size.


    Cameras: Surprisingly Versatile

    The iPad Mini 7 features a 12MP rear camera and a 12MP ultra-wide front camera with Center Stage, which automatically adjusts the frame to keep you centered during video calls.

    Rear Camera

    While I wouldn’t use the iPad Mini as my primary camera, the rear shooter is more than adequate for casual photography, scanning documents, or recording 4K videos.

    Front Camera

    The ultra-wide front camera is a standout feature. Video calls in FaceTime or Zoom felt more dynamic with Center Stage, and the image quality was excellent even in low-light conditions.


    Software: iPadOS at Its Best

    Running the latest version of iPadOS, the Mini 7 benefits from Apple’s robust ecosystem. Features like Universal Control, Quick Notes, and improved multitasking make the tablet more versatile than ever.

    The App Advantage

    With access to the App Store, the iPad Mini 7 can run apps designed specifically for the iPad, from productivity tools like Notion to creative apps like Affinity Designer. The software experience is optimized for the Mini’s size, making it feel just as capable as larger models.


    Who Is the iPad Mini 7 For?

    The iPad Mini 7 is perfect for:

    • Students who need a portable note-taking device.
    • Travelers looking for an ultra-lightweight tablet.
    • Professionals who want a second screen or a mobile productivity tool.
    • Gamers and Creatives seeking powerful performance in a compact package.

    What Could Be Better?

    While the iPad Mini 7 is impressive, it’s not without its shortcomings:

    1. Price: Starting at $499, it’s on the expensive side for a small tablet.
    2. No Magic Keyboard Support: The lack of a dedicated keyboard limits its use as a laptop replacement.
    3. No Face ID: Touch ID works well but feels outdated compared to Apple’s newer devices.

    Final Thoughts

    The iPad Mini 7 is a remarkable device that proves great things come in small packages. It combines top-tier performance, a stunning display, and exceptional portability in a sleek, modern design. Whether you’re a student, professional, or casual user, this tablet offers something for everyone.

    If you’re in the market for a compact tablet that doesn’t compromise on power or functionality, the iPad Mini 7 is well worth considering. It’s not just a smaller iPad—it’s a device that stands on its own as one of Apple’s most capable and versatile offerings yet.

    Also Check:

  • M4 Mac Mini vs M4 MacBook Air: Which Should You Buy?

    M4 Mac Mini vs M4 MacBook Air: Which Should You Buy?

    Apple has upped the ante with its latest M4 chip lineup, bringing the M4 Mac Mini and M4 MacBook Air into the spotlight. Both devices promise exceptional performance and value, but they cater to slightly different audiences. If you’re trying to decide between the two, you’ve come to the right place. Let’s dive into the details to see which M4-powered machine is better for your needs.

    M4 Mac Mini vs M4 MacBook Air

    Whether you’re looking for a portable workhorse or a desktop powerhouse, this comparison will cover everything: performance, design, connectivity, price, and user experience.


    Design: Sleek vs. Compact

    M4 MacBook Air

    The M4 MacBook Air retains its iconic ultrathin design, making it one of the most portable laptops on the market. At just 11.3mm thick and weighing 2.7 pounds, it’s ideal for on-the-go professionals, students, and anyone who values mobility. The unibody aluminum chassis comes in four finishes: Midnight, Starlight, Space Gray, and Silver.

    • Strengths: Lightweight, elegant, and built for portability.
    • Drawbacks: The thin design limits ports, which might require adapters for connectivity.

    M4 Mac Mini

    The M4 Mac Mini is a desktop computer that prioritizes compactness without sacrificing power. It’s a square block of understated aluminum, measuring just 7.7 inches on each side and standing 1.4 inches tall. While it’s not portable like the MacBook Air, it can easily fit on any desk or entertainment center.

    • Strengths: Minimalistic design, small footprint, and customizable setup.
    • Drawbacks: Requires external peripherals like a monitor, keyboard, and mouse.

    Verdict:
    Choose the M4 MacBook Air for mobility and all-in-one convenience. Opt for the M4 Mac Mini if you prefer a powerful stationary setup.


    Performance: How Does the M4 Chip Shine?

    The M4 chip is Apple’s latest processor, offering unparalleled efficiency and speed. Both devices feature the base M4 chip, but the M4 Mac Mini also comes in M4 Pro and M4 Max variants, making it more scalable for demanding workloads.

    CPU and GPU Performance

    • Base M4 (Both): The 8-core CPU and 10-core GPU deliver a balanced performance for everyday tasks, light video editing, and multitasking.
    • M4 Pro/Max (Mac Mini Only): The Pro version features a 12-core CPU and 18-core GPU, while the Max pushes it further with a 14-core CPU and 32-core GPU—ideal for professionals working on 3D rendering, video production, and machine learning tasks.

    Thermal Management

    • M4 MacBook Air: Fanless design means silent operation, but the passive cooling can throttle performance under sustained heavy loads.
    • M4 Mac Mini: Includes active cooling, which ensures consistent performance even during demanding tasks.

    Verdict:
    For everyday users, both devices perform similarly. Professionals and power users, however, will benefit from the M4 Pro or M4 Max options on the Mac Mini.


    Display and Portability

    M4 MacBook Air

    • Comes with a 15.3-inch Liquid Retina display boasting 500 nits of brightness, True Tone, and P3 wide color.
    • The all-in-one design means you don’t need an external monitor.

    M4 Mac Mini

    • No built-in display, but it supports up to two monitors in the base model and up to four monitors in the M4 Max configuration.
    • Display capabilities include 6K resolution via Thunderbolt and 8K via HDMI 2.1, offering flexibility for multi-monitor setups.

    Verdict:
    The MacBook Air wins for simplicity and portability, while the Mac Mini is unbeatable for multi-monitor setups and customizable workstations.


    Connectivity and Ports

    M4 MacBook Air

    • Ports: Two Thunderbolt 4 ports, a MagSafe charging port, and a headphone jack.
    • Limitations: Requires dongles or hubs for additional connectivity.

    M4 Mac Mini

    • Ports:
      • Base model: Two Thunderbolt 4 ports, two USB-A ports, HDMI 2.1, Ethernet, and a headphone jack.
      • Pro/Max models: Four Thunderbolt 4 ports, making it a true connectivity hub.
    • Flexibility: The Mac Mini’s broader port selection supports a wide range of peripherals, including legacy devices.

    Verdict:
    The Mac Mini is far superior for connectivity. The MacBook Air suffices for minimalistic setups but lacks the versatility of the Mini.


    Battery Life vs. Energy Efficiency

    M4 MacBook Air

    The 18-hour battery life makes it a standout for mobile users. Whether you’re working remotely, traveling, or attending lectures, the MacBook Air ensures all-day productivity.

    M4 Mac Mini

    As a desktop computer, the Mac Mini doesn’t have a battery. However, its energy efficiency is excellent, consuming significantly less power than traditional desktops.

    Verdict:
    If portability and battery life are priorities, the MacBook Air is the clear winner.


    Price and Value

    M4 MacBook Air

    • Starts at $1,199 for the base model.
    • Includes a display, keyboard, and trackpad, so no additional purchases are required.

    M4 Mac Mini

    • Starts at $699, making it Apple’s most affordable M4-powered device.
    • Requires peripherals, which can add to the overall cost if you don’t already own them.

    Verdict:
    The Mac Mini offers incredible value for desktop users. The MacBook Air is more expensive upfront but includes everything you need for mobile productivity.


    Use Cases: Which One is Right for You?

    Choose the M4 MacBook Air If:

    • You’re always on the move and need a lightweight laptop.
    • You prioritize battery life and an all-in-one solution.
    • Your workflow involves web browsing, word processing, and light creative tasks.

    Choose the M4 Mac Mini If:

    • You need a powerful, customizable desktop for creative or professional workloads.
    • You already own or prefer external monitors and peripherals.
    • You want access to higher performance tiers (M4 Pro/Max).

    Head-to-Head Comparison Table

    Feature M4 Mac Mini M4 MacBook Air
    Starting Price $699 $1,199
    Portability Stationary Highly portable
    Display External (up to 6K) Built-in (15.3-inch)
    Battery Life N/A 18 hours
    Performance Options M4, M4 Pro, M4 Max M4 only
    Ports Extensive Minimal

    Conclusion: The Final Verdict

    Both the M4 Mac Mini and M4 MacBook Air are excellent choices, but the right one depends on your priorities.

    • Pick the MacBook Air if you need portability, long battery life, and an all-in-one device for casual to moderate use.
    • Pick the Mac Mini if you value performance, expandability, and a robust desktop setup for heavy workloads.

    In the end, both devices showcase Apple’s mastery of combining power and efficiency. Whether you go Mini or Air, you’re getting an M4-powered device that’s sure to impress.

    Also Check:

  • How to Connect Your Roku to a Hotspot: A Step-by-Step Guide

    How to Connect Your Roku to a Hotspot: A Step-by-Step Guide

    If you want to enjoy your Roku streaming device while traveling or in a location where Wi-Fi isn’t available, connecting to a mobile hotspot is a great solution. This comprehensive guide will cover exactly how to connect your Roku to a hotspot, tips for data management, streaming performance, and some alternative solutions to help you get the most out of your streaming experience while using a hotspot.

    How to Connect Your Roku to a Hotspot

    Using a Hotspot with Roku What You Should Know

    Roku devices generally depend on a stable Wi-Fi network for streaming. However, when Wi-Fi is unavailable, a mobile hotspot—a wireless network created by your smartphone or dedicated mobile hotspot device—can provide internet access to your Roku. This setup can be useful in various situations, such as traveling, staying in a location without Wi-Fi, or during internet outages at home.

    Key Takeaways

    Key Aspect Summary
    Hotspot Compatibility Roku can connect to mobile hotspots, making it possible to stream without a home Wi-Fi network.
    Data Usage Hotspot streaming can consume significant data, especially in HD or 4K resolution.
    Alternatives Other solutions, like using portable Wi-Fi routers, might offer more stable or data-efficient options.

    Connecting Roku to a Mobile Hotspot

    Using a hotspot with your Roku can provide streaming access when Wi-Fi isn’t available. Here are some common scenarios where this setup can be useful:

    1. On-the-Go Streaming: If you’re traveling, a hotspot allows you to enjoy content on your Roku in a hotel or vacation rental.
    2. Temporary Wi-Fi Solution: In areas without reliable Wi-Fi access, a hotspot can be an excellent backup solution.
    3. During Internet Outages: If your home Wi-Fi service goes down, you can connect to a mobile hotspot and continue streaming.

    While convenient, keep in mind that streaming over a mobile hotspot can use a lot of data, and performance may vary based on signal strength and data limits.

    How to Connect Your Roku to a Hotspot

    Connecting your Roku to a mobile hotspot is relatively straightforward. Follow these steps to get started:

    Step 1: Set Up and Enable Your Mobile Hotspot

    1. Activate the Hotspot on your smartphone or mobile hotspot device by navigating to the Settings menu.
    2. Configure the Network: You can set up a name (SSID) and password. Ensure you use a secure password to prevent others from connecting.
    3. Make a note of the SSID and password, as you’ll need them to connect your Roku.

    Pro Tip: Some phones offer options to set a data usage limit to avoid accidentally using too much data while streaming.

    Step 2: Connect Roku to the Hotspot

    1. Turn on your Roku device and navigate to Settings > Network > Set up connection.
    2. Choose the Wireless option, and your Roku will start scanning for networks.
    3. Select your hotspot’s SSID from the list of available networks.
    4. Enter the password when prompted, then connect.

    Once connected, your Roku should be ready to stream content over your mobile hotspot connection. Keep in mind that streaming quality and performance may vary based on your data speeds and provider.

    Data Usage Considerations When Using a Hotspot

    Streaming on Roku using a mobile hotspot can quickly consume data, especially at higher resolutions. Here’s a breakdown of the approximate data usage by resolution:

    Streaming Quality Approximate Data Usage per Hour
    Standard Definition 1 GB
    High Definition 3 GB
    4K Ultra HD 7–10 GB

    To manage data usage, here are a few strategies:

    • Lower Streaming Quality: Switching to SD instead of HD or 4K will significantly reduce data consumption.
    • Track Data Usage: Many smartphones and mobile plans offer options to track or limit data usage.
    • Use Data Alerts: Some devices allow you to set data alerts to notify you when you’re close to your data limit.

    Case Study: A user on a 10 GB data plan discovered that streaming a movie in HD over a hotspot consumed nearly a third of their monthly data in one evening, highlighting the importance of data management.

    Device Compatibility and Network Performance

    Not all Roku models handle mobile hotspots the same way. Here’s how different models and network speeds can affect your experience:

    1. Device Models: Newer Roku models, like the Roku Ultra, tend to have better Wi-Fi compatibility, which can improve connectivity and stability with a mobile hotspot.
    2. Data Speed Requirements: For optimal streaming, Roku recommends at least 3 Mbps for SD, 5 Mbps for HD, and 25 Mbps for 4K Ultra HD.

    Tips to Improve Connection Quality

    • Place the Devices Close Together: Keeping the hotspot and Roku close can help maintain a stronger signal.
    • Use a 5 GHz Network if possible, as it can provide faster speeds, though it may have a shorter range than 2.4 GHz.
    • Limit Other Devices on the Network to reduce competition for bandwidth.

    Note: Many mobile hotspots support both 2.4 GHz and 5 GHz bands. Choosing 5 GHz can improve streaming quality if your Roku is compatible and in close proximity.

    Hotspot Speeds and Streaming Quality

    For smooth playback, you’ll need sufficient speed from your mobile hotspot. Here’s a general breakdown of recommended speeds for each streaming quality:

    Resolution Recommended Speed
    Standard Definition 3 Mbps
    High Definition 5 Mbps
    4K Ultra HD 25 Mbps

    If your connection speeds fall below these recommendations, you may experience buffering, reduced picture quality, or playback interruptions. Check your data speeds and consider adjusting your streaming quality if necessary.

    Enhancing Your Streaming Experience

    1. Close Background Apps: Reduce the load on your device by closing any unnecessary apps.
    2. Adjust Picture Quality: Change the Roku picture settings to a lower resolution if buffering occurs.
    3. Consider Unlimited Data: For frequent users, an unlimited data plan can be a practical option to avoid overage charges.

    Alternatives to Using a Mobile Hotspot

    If a hotspot isn’t the best option for your streaming needs, here are some alternatives that may be more effective:

    1. Portable Wi-Fi Routers: Portable routers allow you to create a personal Wi-Fi network, providing a stronger and often faster connection than a mobile hotspot.
    2. Download Content for Offline Viewing: Services like Netflix and Amazon Prime allow offline downloads on mobile devices. Use screen mirroring to watch downloaded content on your Roku without using additional data.
    3. Public Wi-Fi Networks: If you’re in a location with accessible public Wi-Fi, like a hotel or coffee shop, consider using this connection to save data.

    Connecting your Roku to a mobile hotspot can be a valuable solution when regular Wi-Fi isn’t available. However, it’s essential to monitor your data usage, manage streaming quality, and consider alternative options if needed. With the right setup, you can enjoy your favorite shows and movies on Roku, even when away from a traditional Wi-Fi connection.

    Also Check:

  • How to Fix iPads: My iPad Was Unresponsive Before Trying this Fixes

    How to Fix iPads: My iPad Was Unresponsive Before Trying this Fixes

    When your iPad starts acting up, your first thought might be to head to the nearest Apple Genius Bar. While Apple’s expert technicians provide fantastic service, you may not need them for every iPad problem. Many common issues can be fixed quickly, right from the comfort of your home. By understanding some easy troubleshooting techniques, you’ll not only save time and money but also gain confidence in managing your tech.

    How to Fix iPads

    This guide will cover the most common iPad issues and provide step-by-step solutions, from battery and connectivity problems to screen issues and app crashes. Each solution is crafted to be simple and effective, giving you the tools to resolve issues on your own.


    Step 1: Diagnosing the Issue

    The first step in any troubleshooting process is diagnosing the issue. Here’s how to pinpoint what’s wrong with your iPad.

    1.1 Look for Patterns in the Problem

    Does the screen freeze when you use certain apps, or does the battery drain unusually fast when you’re connected to Wi-Fi? Identifying patterns can help isolate the issue and streamline your troubleshooting process.

    1.2 Restart Your iPad

    The simplest fixes are often the most effective. Restarting your device is a great first step to resolve minor software glitches.

    • How to restart: Press and hold the power button until the slider appears, then drag the slider to turn off the device. After it turns off, press the power button again to restart.
    • Why it works: Restarting closes all running applications and refreshes the operating system, often resolving glitches.

    1.3 Check for iPadOS Updates

    Apple frequently releases updates for iPadOS, which may include fixes for bugs and performance improvements.

    • How to check for updates: Go to Settings > General > Software Update.
    • Tip: Make sure your device is connected to Wi-Fi and has a full charge before updating, as this can prevent interruptions during the installation.

    Section 2: Resolving Performance Issues

    If your iPad is running slow or freezing, there are several effective ways to restore it to peak performance.

    2.1 Free Up Storage Space

    When an iPad runs low on storage, it may slow down significantly. Check your storage usage to see if any files, apps, or media are taking up unnecessary space.

    • How to free up storage: Go to Settings > General > iPad Storage. You’ll see a breakdown of what’s using your space. Delete unused apps, large media files, or old documents.

    2.2 Clear Cache and Temporary Files

    Over time, cache and temporary files can accumulate, causing performance issues.

    • For Safari: Go to Settings > Safari > Clear History and Website Data.
    • For other apps: Some apps have an internal cache-clearing option; otherwise, uninstalling and reinstalling an app can clear its cache.

    2.3 Turn Off Background App Refresh

    Background App Refresh allows apps to update content even when they’re not in use, but it can slow down your iPad.

    • How to disable it: Go to Settings > General > Background App Refresh, and either turn it off completely or selectively disable it for apps you don’t use frequently.

    2.4 Restart or Force Restart Your iPad

    A regular restart can resolve many issues, but sometimes you may need to force restart your iPad.

    • How to force restart: Quickly press and release the volume up button, then the volume down button, and finally hold down the power button until the Apple logo appears.

    Step 3: Fixing Battery Issues

    Battery life is a common concern for iPad users. If your battery drains quickly or isn’t holding a charge, try these solutions.

    3.1 Check Battery Usage by App

    Some apps consume more power than others, especially those with frequent background activity.

    • How to check usage: Go to Settings > Battery and scroll down to see which apps are using the most battery.

    3.2 Reduce Screen Brightness

    Keeping your screen brightness at a high level drains the battery quickly.

    • How to reduce brightness: Go to Settings > Display & Brightness and adjust the brightness slider to a comfortable level.

    3.3 Enable Low Power Mode

    While iPads don’t have an official “Low Power Mode” like iPhones, you can manually disable certain features to conserve battery life.

    • Tips: Turn off Wi-Fi and Bluetooth when not in use, reduce screen brightness, and limit background app activity.

    3.4 Check for Battery Health

    If your iPad is still not holding a charge well, it might be due to battery health degradation. While iPadOS doesn’t have a built-in battery health feature, you can check battery health using third-party apps or consult Apple Support if the battery appears faulty.


    Step 4: Fixing Wi-Fi and Bluetooth Issues

    Connectivity issues are common but can be frustrating. Here’s how to resolve them quickly.

    4.1 Toggle Wi-Fi and Bluetooth

    Sometimes simply turning Wi-Fi or Bluetooth off and back on can resolve connectivity problems.

    • How to toggle: Swipe down to open the Control Center and toggle the Wi-Fi and Bluetooth icons off and on.

    4.2 Forget and Reconnect to Wi-Fi Networks

    If toggling Wi-Fi doesn’t work, try forgetting the network and reconnecting.

    • How to forget a network: Go to Settings > Wi-Fi, tap the (i) icon next to your network, and select Forget This Network.

    4.3 Reset Network Settings

    This is a more comprehensive solution that resets all Wi-Fi, Bluetooth, and VPN settings.

    • How to reset network settings: Go to Settings > General > Reset > Reset Network Settings. Note that you’ll need to re-enter Wi-Fi passwords afterward.

    Step 5: Screen Issues—Flickering, Unresponsiveness, and Cracks

    Screen issues, such as flickering or an unresponsive display, can disrupt usability. Here’s how to fix these problems.

    5.1 Restart the iPad

    A restart is often the simplest way to resolve minor screen glitches.

    5.2 Check for Physical Damage

    If your screen has visible cracks or damage, it may require professional repair. You can try a temporary fix by placing a screen protector over cracks to prevent them from spreading.

    5.3 Adjust Display Settings

    Certain settings can cause flickering, especially in low-light conditions.

    • True Tone: Go to Settings > Display & Brightness > True Tone and toggle it off if flickering continues.
    • Auto-Brightness: Disable auto-brightness to control brightness manually, which may help in some cases.

    5.4 Clean the Screen and Charging Port

    Dirt or debris can interfere with touch sensitivity, especially around the edges of the screen or in the charging port. Use a microfiber cloth to clean the screen, and a soft brush or compressed air for the charging port.


    Step 6: App Crashes and Freezing

    If your iPad’s apps keep crashing, try these methods to fix the problem.

    6.1 Update the App

    App updates often fix bugs and improve performance. Make sure all your apps are up to date by visiting the App Store.

    6.2 Clear Cache (if supported)

    Some apps allow you to clear cache data directly within the app settings. For others, you may need to reinstall the app to reset its cache.

    6.3 Delete and Reinstall the App

    If an app continues to crash, delete it and reinstall it from the App Store.

    6.4 Restart Your iPad

    A simple restart can refresh app functionality and resolve conflicts causing crashes.


    Step 7: Fixing Charging Issues

    If your iPad won’t charge, these steps should help.

    7.1 Check the Cable and Adapter

    Examine your charging cable and adapter for signs of wear. Try using a different Apple-certified cable or adapter to see if that solves the issue.

    7.2 Clean the Charging Port

    Debris in the charging port can prevent proper contact. Use compressed air or a soft brush to gently clean the port.

    7.3 Restart Your iPad

    Restarting can help in cases where software issues are preventing charging.

    7.4 Update to the Latest iPadOS

    Sometimes charging issues stem from software glitches. Updating to the latest iPadOS version can fix these problems.


    Step 8: When All Else Fails—Resetting Your iPad

    If none of the above solutions work, resetting your iPad can be a last-resort fix.

    8.1 Soft Reset

    A soft reset won’t delete your data but will reset all your settings to default.

    • How to soft reset: Go to Settings > General > Reset > Reset All Settings.

    8.2 Hard Reset

    A hard reset will erase all your data, so only use it if you’ve backed up your iPad.

    • How to hard reset: Go to Settings > General > Reset > Erase All Content and Settings.

    Conclusion: Fix Your iPad Without the Genius Bar

    Most iPad issues can be solved at home with the right approach. By following these tips, you’ll become a pro at diagnosing and fixing iPad issues, from screen glitches to connectivity problems. With this guide, there’s no need to make a trip to the Genius Bar—you’ve got the skills to keep your iPad in top shape right at home.

    Also Check:

  • iPad 10th Generation: Why Is It Still a Smart Buy?

    iPad 10th Generation: Why Is It Still a Smart Buy?

    The iPad 10th Generation Is Apple’s Best Entry-Level Tablet Yet, But How Is It a Smart Buy

    The iPad 10th generation has carved out a unique spot in Apple’s product lineup, standing as a bridge between premium and entry-level options. It’s been hailed as a capable device for students, professionals, and casual users who want the iPad experience without splurging on the Pro line.

    iPad 10th Generation Why Is It Still a Smart Buy

    With a modern design, robust performance, and great versatility, the iPad 10th generation continues to make a strong case as a smart buy, even as newer models emerge. In this article, we’ll dive deep into what makes the iPad 10th generation a compelling choice and whether it truly lives up to the “smart buy” label.


    1. Sleek and Modern Design: A Look That Feels Premium

    The iPad 10th generation brings a modern design reminiscent of the iPad Air and Pro models, which sets it apart from previous entry-level iPads. With flat edges, a slim form factor, and a sleek, industrial look, this iPad exudes a premium feel. The Home button is gone, replaced by Touch ID on the side, offering users more screen real estate and an uninterrupted display.

    • Why It’s a Smart Design: The redesign makes the iPad look like a much more expensive device. The flat edges are not only stylish but also functional, providing a better grip and a more compact profile.
    • Room for Improvement: While the design is modern, an OLED or mini-LED display would make it even more competitive by offering deeper blacks and richer colors.

    Display Quality

    With a 10.9-inch Liquid Retina display, the iPad 10th generation is a joy to use for browsing, reading, and media consumption. The 2360 x 1640 resolution and True Tone technology make colors vibrant and text sharp, which enhances the overall user experience.

    • Why It’s Still Relevant: The display is well-suited for most tasks, from streaming videos to editing photos. It strikes a good balance between quality and affordability, making it a practical option for most users.
    • What Could Be Better: A 120Hz refresh rate would make scrolling and gaming smoother. However, this feature is generally reserved for higher-end models, so it’s understandable at this price point.

    2. Processing Power: Smooth Performance Without the Premium Price

    Powering the iPad 10th generation is Apple’s A14 Bionic chip. While it’s not the newest processor in Apple’s lineup, it’s more than capable of handling daily tasks, light gaming, and multitasking. The A14 ensures the iPad can run iPadOS smoothly, supporting productivity apps, photo editing, and even some light video editing.

    • A Well-Rounded Performer: The A14 strikes a good balance between power and efficiency. Most users won’t notice a difference compared to newer chips unless they’re working with very intensive applications.
    • Potential for More Power: An upgrade to the M1 chip or the latest A-series chip would make the iPad 10th generation even more future-proof, especially with iPadOS updates continuing to push multitasking capabilities.

    Real-World Performance

    For students, professionals, and casual users, the iPad 10th generation is more than capable of managing daily tasks. Apps open quickly, animations are smooth, and multitasking is responsive. Even when using split-screen mode, this iPad keeps up without noticeable lag.

    • Why It’s Still a Smart Choice: The A14 Bionic chip delivers excellent performance for typical use cases without a premium price tag, making it ideal for those who need a reliable tablet without overpaying for power they won’t fully utilize.

    3. iPadOS and Software Experience

    One of the main reasons why the iPad 10th generation remains a great buy is the software experience. Apple’s iPadOS has made strides in offering a desktop-like experience on a tablet, bringing features like multitasking, Stage Manager, and improved Files app functionality.

    Enhanced Productivity with iPadOS

    The iPad 10th generation runs iPadOS 16, providing a suite of tools that make it ideal for work, education, and entertainment.

    • Multitasking: The ability to use Split View and Slide Over, along with a variety of widgets, allows users to stay productive. While it may not support the full Stage Manager experience like the M1 iPad models, it still offers a high level of multitasking for an entry-level device.
    • Apple Ecosystem Benefits: The seamless integration with other Apple devices, like MacBooks and iPhones, makes this iPad a smart buy for those already within the Apple ecosystem.

    What Could Be Better in the Software Department?

    While iPadOS brings a lot of features, the iPad 10th generation doesn’t support all multitasking capabilities. A stronger processor could allow for a more robust multitasking experience in future models, making this iPad even better suited for power users.


    4. Battery Life: All-Day Usage with Ease

    The battery life on the iPad 10th generation is commendable, often providing up to 10 hours on a single charge with moderate usage. This makes it ideal for students, remote workers, and anyone on the go who wants a device that can keep up throughout the day.

    • Why It’s a Smart Buy: The iPad 10th generation’s battery life ensures you don’t have to worry about frequent charging, making it dependable for travel and everyday use.
    • Where It Could Improve: Faster charging would be a nice addition, especially since the iPad has now adopted USB-C charging. A battery that can reach 50% in 30 minutes would further enhance its appeal.

    5. Camera Quality: Decent for a Tablet

    While the camera setup on the iPad 10th generation isn’t groundbreaking, it’s solid for a tablet. It has a 12MP rear camera and a 12MP ultra-wide front camera, making it sufficient for video calls, document scanning, and occasional photos.

    • Smart Choice for Casual Photography: The camera isn’t meant to replace a smartphone but works well enough for casual use, which is often all that’s needed on a tablet.
    • Room for Growth: Improved low-light performance would be a welcome addition. Adding a LiDAR scanner, like in the Pro models, would make it more versatile for AR applications and enhanced photography.

    6. Accessories and Versatility

    One of the strengths of the iPad 10th generation is its compatibility with a range of accessories, making it a highly versatile device for different user needs.

    Apple Pencil and Keyboard Compatibility

    The iPad 10th generation is compatible with the 1st-gen Apple Pencil, allowing users to draw, take notes, and engage with creative apps. Additionally, it works well with Bluetooth keyboards, which transforms it into a quasi-laptop for productivity tasks.

    • Why It’s a Smart Buy for Creatives and Students: The Apple Pencil expands the iPad’s capabilities, turning it into a drawing tablet for creatives or a note-taking device for students. The USB-C port also means that users can connect a range of peripherals.
    • Future Potential: Support for the 2nd-gen Apple Pencil would eliminate the need for adapters, making it more convenient. Also, offering a more robust typing experience with an official Apple keyboard case would be a game-changer.

    7. iPad 10th Generation for Entertainment and Gaming

    The iPad 10th generation shines as an entertainment hub. Its bright display, robust speakers, and impressive app ecosystem make it ideal for streaming, gaming, and more.

    Streaming and Content Consumption

    Thanks to the large 10.9-inch screen, watching movies, TV shows, or YouTube videos on the iPad 10th generation is an enjoyable experience. The stereo speakers provide good sound quality for a tablet, and the display quality brings visuals to life.

    • Why It’s a Smart Buy for Entertainment: This iPad is priced reasonably for a device that delivers a great content consumption experience. It’s a go-to choice for those who want a versatile device for reading, streaming, and gaming.

    Gaming Performance

    The A14 chip is capable of handling many popular games, and the App Store offers a wide selection. Whether it’s Apple Arcade games or graphics-intensive titles, the iPad 10th generation holds up well.

    • Room for Improvement: A higher refresh rate would make gaming smoother, especially for action-packed games. The 11th-generation iPad could benefit from ProMotion or similar technology.

    8. Price and Value Proposition

    One of the biggest selling points of the iPad 10th generation is its value for money. It’s priced below Apple’s Pro and Air models but still offers a lot of the same functionality. For users who need a capable tablet without breaking the bank, it’s hard to beat this balance of price and performance.

    Why It’s a Smart Investment

    For those looking for a device that can handle work, school, and play, the iPad 10th generation offers a compelling package. It’s a solid investment that can be expected to perform well for several years, even as Apple continues to release software updates.


    9. What Could Be Better in Future Models?

    While the iPad 10th generation is a well-rounded device, a few enhancements could elevate the user experience further. Here’s what would make it even more appealing:

    • Faster Processor: An A16 or M1 chip would make it more future-proof and enable better multitasking.
    • Better Accessory Support: Support for the 2nd-gen Apple Pencil and more advanced keyboards would add convenience.
    • Improved Display: A higher refresh rate and OLED options would enhance viewing and gaming experiences.

    Conclusion: A Smart Buy for Today and Beyond

    The iPad 10th generation remains a standout choice for anyone seeking a tablet that delivers high performance without the premium price tag. From its design to its multitasking capabilities, it offers a solid user experience that meets the needs of students, professionals, and casual users alike. While there are areas for improvement, it’s clear that the iPad 10th generation is a smart buy, with a balance of features and affordability that’s hard to beat.

    Also Check:

  • How to Turn On Noise Cancelling on Beats Studio Pro

    How to Turn On Noise Cancelling on Beats Studio Pro

    Beats Studio Pro headphones deliver powerful sound quality and Active Noise Cancelling (ANC) technology that helps you enjoy your music, podcasts, or calls without interruptions. ANC works by analyzing ambient noise and generating sound waves to counteract it, allowing you to block out everything from the hum of public transport to bustling street sounds.

    How to Turn On Noise Cancelling on Beats Studio Pro

    Here’s a step-by-step guide to help you turn on noise cancelling on your Beats Studio Pro headphones and make the most out of this immersive feature.


    1. Power On Your Beats Studio Pro Headphones

    To begin, make sure your headphones are turned on:

    • Locate the Power Button: You’ll find the power button on the right earcup of your Beats Studio Pro.
    • Press and Hold: Press and hold the power button until the LED light turns on, which signals that your headphones are now powered up.

    Quick Tip: It’s a good idea to check that your headphones are charged, as ANC can drain the battery faster than regular listening mode.


    2. Activate Noise Cancelling Mode

    Once your headphones are powered on, you’re ready to turn on noise cancelling:

    • Press the ‘b’ Button on the Left Earcup: The Beats Studio Pro has a multifunction button with the Beats logo on the left earcup. Press and hold this ‘b’ button to toggle between Active Noise Cancelling (ANC) and Transparency Mode.
    • Listen for the Audio Cue: You’ll hear a soft chime when ANC is activated, letting you know that you’re now in Noise Cancelling Mode. This audio cue confirms that ANC is turned on.

    Note: Pressing the ‘b’ button again will switch to Transparency Mode, which allows outside sounds to pass through. This is useful for situations where you need to hear what’s going on around you, like in airports or while walking outdoors.


    3. Check ANC Status with the Beats App (Optional)

    If you’re using an Android device, you can manage your Beats Studio Pro settings with the Beats app:

    • Open the Beats App: Download and open the Beats app from the Google Play Store if you haven’t done so already.
    • Find Your Device: Once your Beats Studio Pro is connected, locate it within the app.
    • Toggle Noise Cancelling: Within the app, you’ll have the option to toggle Noise Cancelling on or off, as well as check the battery life and update firmware. This app provides an easy interface to manage your ANC settings.

    4. Adjusting ANC Levels with Apple Devices

    For iOS devices, you can adjust ANC settings directly from the Bluetooth menu, especially if you’re using Beats headphones with an Apple device like an iPhone, iPad, or MacBook:

    • Open Settings: On your iPhone or iPad, go to the Settings app.
    • Bluetooth Menu: Tap on Bluetooth, then find your Beats Studio Pro in the list of paired devices.
    • Tap ‘i’ Icon: Tap the small ‘i’ icon next to your Beats Studio Pro to open its settings.
    • Noise Control: You’ll see options for Noise Cancelling and Transparency Mode. Select Noise Cancelling to activate ANC on your headphones.

    This method is convenient for Apple users who want to manage their noise-cancelling settings without touching the headphones directly.


    5. Use Transparency Mode as an ANC Alternative (When Needed)

    There may be times when you need to hear your surroundings, even while wearing headphones:

    • Switch to Transparency Mode: By pressing and holding the ‘b’ button on the left earcup again, you can activate Transparency Mode, allowing external sounds to pass through so you’re more aware of your environment.
    • Ideal for Situations Requiring Awareness: Transparency Mode is perfect for environments where you need to stay alert, like crossing busy streets, walking through crowded areas, or listening for boarding announcements at the airport.

    Switching between ANC and Transparency Mode ensures that you have full control over your listening experience in any environment.


    6. Troubleshooting Noise Cancelling Issues

    If you find that ANC doesn’t seem to work properly, try these troubleshooting tips:

    • Check the Battery: ANC can be battery-intensive, and if your Beats Studio Pro has a low battery, ANC may not perform optimally. Ensure your headphones are adequately charged.
    • Reset Your Beats Studio Pro: If ANC isn’t working or you experience audio issues, try resetting your headphones by pressing and holding the power and volume down buttons for about 10 seconds.
    • Clean the Ear Cushions: Sometimes, sound quality and ANC performance are impacted by dirty or obstructed ear cushions. Gently clean them to ensure there are no obstructions.

    7. Maximize Your ANC Experience

    To get the most out of ANC on your Beats Studio Pro, follow these best practices:

    • Wear the Headphones Correctly: Ensure a snug fit with the earcups fully covering your ears, as this will enhance the effectiveness of noise cancelling.
    • Use ANC in Noisy Environments: ANC shines in environments with consistent background noise, like planes, trains, or busy offices. Experiment with using ANC in these settings to see just how much background noise it can cut out.
    • Take Breaks: While ANC is fantastic for immersive listening, using it continuously can cause ear fatigue. Taking brief breaks helps maintain audio clarity and comfort over longer listening sessions.

    Final Thoughts: Enjoy Uninterrupted Sound with Beats Studio Pro Noise Cancelling

    Activating noise cancelling on the Beats Studio Pro can significantly elevate your audio experience, creating an oasis of sound by blocking out distractions. With simple controls and the option to manage ANC settings on both Android and iOS, you can enjoy a fully immersive listening experience whether you’re in a bustling city or a quiet room. Follow these steps, and get ready to enjoy audio in its purest form, free from the noise of the world around you.

    Also Check:

  • How to Pair Beats Studio Pro: A Step-by-Step Guide for Seamless Connectivity

    How to Pair Beats Studio Pro: A Step-by-Step Guide for Seamless Connectivity

    Pairing your Beats Studio Pro headphones is a simple yet essential process to ensure the best audio experience across all your devices. Whether you’re connecting to an iPhone, Android phone, Mac, Windows PC, or another device, here’s everything you need to know to get your Beats Studio Pro paired and ready to go.

    How to Pair Beats Studio Pro


    Step 1: Charge Your Beats Studio Pro

    Before pairing, make sure your Beats Studio Pro headphones have enough charge. This step ensures that your headphones won’t shut down mid-setup, giving you a smooth pairing experience.

    • How to Check Battery: Power on your headphones and look for the LED indicators. A full charge is ideal, but a partially charged battery should suffice for initial pairing.

    Step 2: Put Your Beats Studio Pro into Pairing Mode

    To pair your Beats Studio Pro with any device, you’ll need to put the headphones into pairing mode.

    1. Power On: Press and hold the power button on your Beats Studio Pro until the LED starts blinking.
    2. Enter Pairing Mode: The LED light will flash, indicating that your Beats Studio Pro is now in pairing mode and ready to connect.

    Step 3: Pairing Beats Studio Pro with an iPhone or iPad

    Apple users benefit from seamless pairing, thanks to the Beats Studio Pro’s compatibility with the Apple ecosystem.

    1. Unlock your iPhone or iPad and ensure Bluetooth is enabled (Settings > Bluetooth).
    2. Bring your Beats Studio Pro close to your iPhone/iPad. A prompt should appear automatically on the screen.
    3. Tap “Connect” on the prompt.
    4. Once connected, you’ll see a confirmation screen showing the battery status of your Beats Studio Pro.

    Tip: If the prompt doesn’t appear, you can manually connect via Settings > Bluetooth and selecting “Beats Studio Pro” from the list of available devices.


    Step 4: Pairing Beats Studio Pro with an Android Device

    Pairing with Android is easy, and you can also download the Beats app from the Google Play Store to enhance the experience.

    1. Open the Settings on your Android device, then navigate to Bluetooth.
    2. Make sure Bluetooth is enabled.
    3. Select “Pair New Device”.
    4. Your Beats Studio Pro should appear in the list. Tap “Beats Studio Pro” to connect.

    If you use the Beats app, simply follow the on-screen instructions after opening the app, which will guide you through the pairing process and allow you to adjust additional settings.


    Step 5: Pairing Beats Studio Pro with a Mac

    To connect your Beats Studio Pro with a Mac computer, you’ll go through the Bluetooth settings in macOS.

    1. Open System Preferences by clicking on the Apple logo at the top left corner of your screen.
    2. Select Bluetooth and ensure it’s turned on.
    3. With your Beats Studio Pro in pairing mode, it should appear in the list of devices. Click on “Beats Studio Pro.”
    4. When prompted, select Connect.

    Troubleshooting Tip: If your Beats Studio Pro doesn’t appear, try turning Bluetooth off and back on again, and ensure your headphones are in pairing mode.


    Step 6: Pairing Beats Studio Pro with a Windows PC

    Connecting your Beats Studio Pro to a Windows PC is straightforward with the Bluetooth settings in Windows.

    1. Open the Start Menu and go to Settings.
    2. Select Devices, then Bluetooth & Other Devices.
    3. Toggle Bluetooth on if it’s not already enabled, then click on Add Bluetooth or Other Device.
    4. Choose Bluetooth from the options.
    5. With your Beats Studio Pro in pairing mode, select it from the list of available devices, and follow any additional prompts to connect.

    Step 7: Pairing with Additional Devices

    The Beats Studio Pro can connect to multiple devices but will prioritize the last device it was actively paired with. To connect to a new device:

    1. Repeat the pairing process for each device.
    2. If switching frequently, it can help to disconnect from one device before connecting to another for a quicker switch.

    Managing and Switching Connections

    With multipoint Bluetooth, the Beats Studio Pro can switch between devices more smoothly. Here’s how to manage it:

    • On an iPhone or iPad: Go to Control Center, tap on the audio output selector, and choose your Beats Studio Pro from the list.
    • On Android: Access the Bluetooth menu under Settings and select Beats Studio Pro to make them the active audio device.
    • On Mac and Windows: Go to Sound Settings or Bluetooth Settings, depending on the device, and make sure Beats Studio Pro is selected as your primary output.

    Troubleshooting Pairing Issues

    If you’re having trouble pairing your Beats Studio Pro with any device, here are a few tips to try:

    • Restart your headphones by powering them off and on again.
    • Forget the device on your smartphone or computer’s Bluetooth settings, then re-pair.
    • Reset your Beats Studio Pro by pressing and holding the power and volume-down buttons until the LED flashes.

    Final Thoughts: Enjoying Your Beats Studio Pro

    Now that your Beats Studio Pro is successfully paired, you’re ready to enjoy high-quality sound across all your devices. Remember to take advantage of features like the Beats app on Android for extra customization and the easy switching on Apple devices.

    Also Check: