Blog

  • Roku Error 014.40 and How to Fix It

    Roku Error 014.40 and How to Fix It

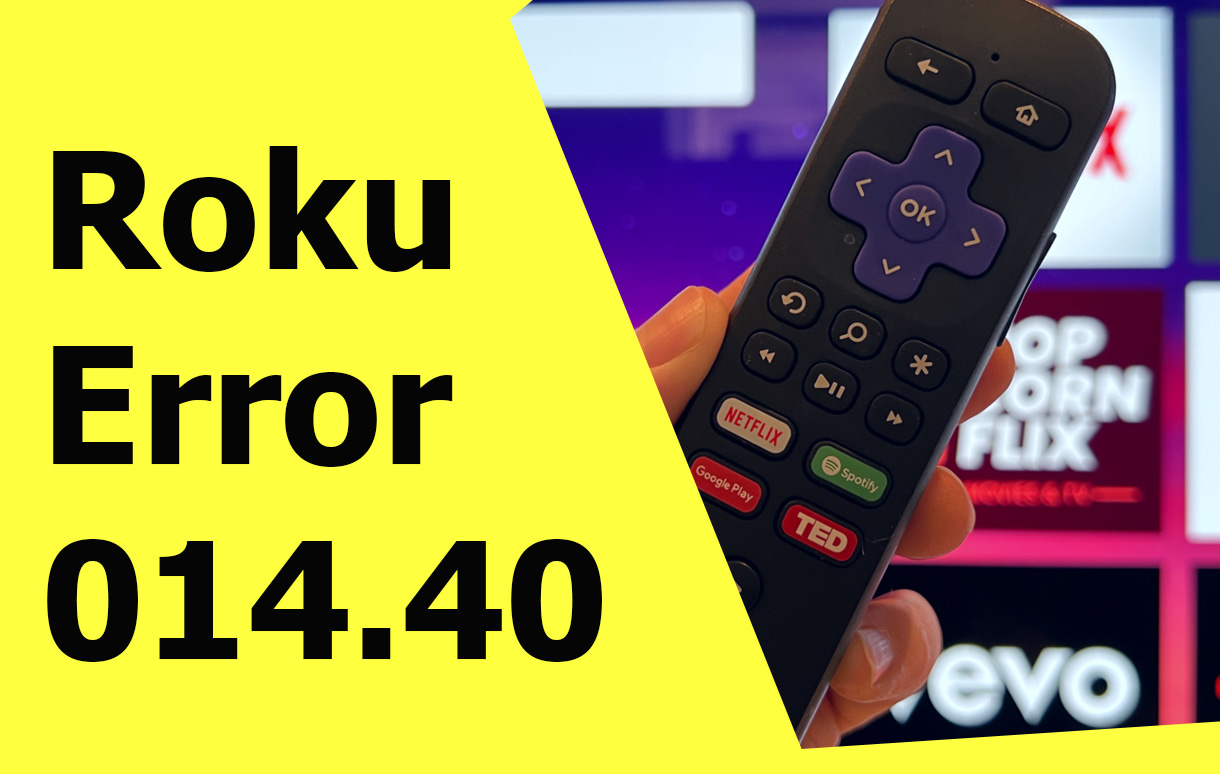
    For avid Roku users, encountering technical glitches can be a frustrating hurdle, especially when you’re ready to dive into your favorite content. Among the most perplexing issues is the dreaded Roku Error 014.40.

    Roku Error 014.40 and How to Fix It

    This error typically signals a connectivity issue between your Roku device and the Wi-Fi network, leaving you stuck on a troubleshooting screen rather than enjoying your streaming services. But fear not—this article delves into the details of what causes Roku Error 014.40 and, more importantly, how you can fix it.

    What is Roku Error 014.40?

    Roku Error 014.40 occurs when your Roku device fails to establish a stable connection with your home Wi-Fi network. This problem often arises during initial setup, after resetting the device, or when there are changes to your network configuration. Although primarily linked to connectivity, other factors—like outdated software or interference from nearby devices—can also play a role.

    When this error appears, you’ll likely see a notification prompting you to check your network settings. However, the root cause might not always be straightforward, necessitating a more comprehensive approach to troubleshooting.

    Possible Causes of Roku Error 014.40 Examples
    Incorrect Wi-Fi password Input errors during setup or forgotten credentials
    Weak signal strength Roku device positioned too far from the router
    Network configuration conflicts IP address clashes or incompatible settings
    Software bugs or outdated firmware Older Roku versions unable to handle certain protocols
    Interference from other devices Microwave ovens, Bluetooth devices, or overlapping Wi-Fi signals

    Identifying the Problem

    Before jumping into solutions, it’s important to pinpoint the exact cause of the error. Start by checking if other devices connected to the same Wi-Fi network are functioning correctly. If they are, the problem is likely isolated to the Roku device. If not, you may need to troubleshoot your router or internet connection first.

    Another useful diagnostic step involves switching your Roku device to a different Wi-Fi network temporarily. If it connects successfully, the issue might be with your primary network’s settings or signal.

    Fixing Roku Error 014.40

    Check Your Wi-Fi Credentials

    One of the most common culprits behind Error 014.40 is incorrect Wi-Fi credentials. Ensure that the password you’ve entered is accurate. Roku devices are case-sensitive, so double-check for any typos, especially when dealing with complex passwords.

    Optimize Router Placement

    Signal strength plays a crucial role in maintaining a stable connection. If your router is positioned far from your Roku device, consider moving them closer. Alternatively, investing in a Wi-Fi extender can significantly boost signal strength in larger homes.

    Restart Your Devices

    Often, a simple restart can resolve connectivity issues. Restart both your Roku device and router. Unplug them from their power sources, wait for about 30 seconds, and plug them back in. This process refreshes the network and clears temporary glitches.

    Update Firmware and Software

    Outdated firmware can lead to compatibility issues, causing errors like 014.40. Navigate to the system settings on your Roku device and check for software updates. If an update is available, install it and reboot the device.

    Adjust Network Settings

    Sometimes, network configurations such as firewalls or parental controls can block Roku devices from connecting. Access your router’s settings via a web browser and ensure that the necessary ports are open for streaming services. Additionally, ensure that your router’s firmware is up to date.

    For advanced users, switching from a 5GHz to a 2.4GHz Wi-Fi band can also improve compatibility, as some older Roku devices may struggle with higher frequency bands.

    Factory Reset as a Last Resort

    If all else fails, performing a factory reset might be your best option. While this will erase all your personalized settings and installed apps, it provides a clean slate for resolving persistent errors. To initiate a factory reset, go to the System menu on your Roku device, select Reset, and follow the on-screen instructions.

    Additional Tips

    For users in areas with high signal interference, switching to a wired connection using an Ethernet cable can bypass Wi-Fi-related complications altogether. While this may not be feasible for every setup, it ensures a stable and uninterrupted connection.

    Moreover, if your internet service provider (ISP) enforces specific network protocols, contacting their support team can clarify compatibility issues. They may assist in reconfiguring your network for optimal Roku performance.

    Why Roku Remains a Top Choice Despite Connectivity Issues

    While technical hiccups like Error 014.40 can be frustrating, they are far outweighed by Roku’s user-friendly interface, diverse content library, and affordability. The troubleshooting process might seem daunting at first, but with patience and persistence, most users find a solution that restores their streaming experience.

    In comparison to other streaming platforms, Roku’s flexibility in supporting multiple services—from Netflix and Hulu to niche apps like Plex and Spotify—solidifies its reputation as a leader in the streaming industry. It’s this versatility that keeps users returning, even when faced with occasional challenges like connectivity errors.

    Final Thoughts

    Roku Error 014.40 is a reminder that even the most advanced devices can encounter occasional setbacks. The key to resolving such issues lies in a systematic approach—understanding the problem, experimenting with potential fixes, and seeking professional help if necessary. With the right strategies, you can overcome this error and get back to enjoying your favorite shows and movies in no time.

    Whether you’re a long-time Roku fan or a first-time user, remember that technical glitches are just a small bump in the road. With its robust feature set and reliable performance, Roku continues to be a top-tier choice for streaming enthusiasts.

    Also Check:

  • Roku Error 004 and How to Fix It

    Roku Error 004 and How to Fix It

    Streaming with Roku has revolutionized how we enjoy content, offering convenience and an extensive library of channels. However, like all technology, Roku isn’t immune to technical hiccups. One such issue that users often encounter is Roku Error 004.

    Roku Error 004 and How to Fix It

    This error typically occurs when the Roku device fails to download or apply a software update, leaving users unable to access the latest features or content. If you’ve come across this error, rest assured—it’s a solvable problem with a few troubleshooting steps.

    What is Roku Error 004?

    Roku devices are designed to update their software periodically to ensure optimal performance and access to the latest features. However, Error 004 signals a failure in this process, usually due to connectivity issues or server-related problems. This error can be frustrating, especially if it interrupts your streaming plans, but understanding its root causes can help you fix it efficiently.

    The error often stems from a network disruption, insufficient bandwidth, or an issue with Roku’s servers. Additionally, outdated firmware or router settings can exacerbate the problem. Identifying the specific cause is the first step toward resolving it.

    Diagnosing the Issue

    When Error 004 appears on your Roku device, the on-screen message often provides a hint about the underlying issue. Begin by checking your internet connection. If other devices in your home can connect to the internet without issues, the problem may lie with your Roku device or its interaction with your router.

    Next, ensure that your Roku device has a stable connection to your Wi-Fi network. Weak signals or frequent dropouts can prevent the device from downloading updates. Moving your Roku closer to the router or eliminating physical obstructions can help improve connectivity.

    Fixing Roku Error 004

    Fixing this error involves addressing both potential network and device-specific issues. Start by restarting your Roku device and router. This simple step often resolves temporary glitches and clears up connection problems. Unplug both devices, wait a few seconds, and plug them back in. Once they restart, attempt the update process again.

    If the problem persists, verify your network settings. Log into your router’s admin panel and ensure that it’s not blocking Roku’s update servers. Firewalls or parental control settings can inadvertently restrict access. Additionally, check that your router firmware is up to date, as outdated software can cause compatibility issues.

    Another potential solution is to switch to a wired Ethernet connection if your Roku model supports it. Ethernet connections provide a more stable and faster connection compared to Wi-Fi, reducing the likelihood of interruptions during the update process.

    Advanced Troubleshooting Techniques

    For more stubborn cases of Error 004, you may need to delve into advanced troubleshooting. Manually resetting your Roku device to its factory settings can sometimes resolve persistent software issues. To do this, navigate to the settings menu, select “System,” and choose “Advanced System Settings.” Follow the prompts to reset the device and set it up again from scratch.

    If the issue continues, you can attempt to update your Roku device via an alternative network. Connect your Roku to a different Wi-Fi network, such as a mobile hotspot, and see if the update process succeeds. This step can help determine whether your primary network is the source of the problem.

    Occasionally, Roku’s servers may experience temporary outages or high traffic, preventing successful updates. If none of the above solutions work, check Roku’s support page or social media channels for any announcements regarding server issues. In such cases, waiting for Roku to resolve the problem on their end may be the only solution.

    Preventing Future Errors

    To minimize the likelihood of encountering Error 004 in the future, consider the following best practices:

    Tip Explanation
    Maintain a Strong Network Connection Ensure your Roku device has a stable and fast internet connection.
    Keep Router Firmware Updated Regularly update your router to avoid compatibility issues.
    Position the Router Optimally Place your router in a central location to minimize signal interference.
    Regularly Restart Devices Periodic reboots of your router and Roku can clear temporary glitches.

    The Bigger Picture: Roku’s Reliability

    While Roku Error 004 can be inconvenient, it’s important to remember that such errors are relatively rare and usually easy to resolve. Roku remains a leading choice for streaming enthusiasts due to its user-friendly interface, affordability, and vast content library. Its ability to deliver a seamless streaming experience far outweighs occasional technical issues.

    If you’re still unable to fix Error 004 after trying the above solutions, reaching out to Roku’s customer support is the next step. They can provide tailored assistance and help you get back to streaming without further interruptions.

    Conclusion

    Roku Error 004, though frustrating, is a fixable issue that typically arises from network or software-related problems. By following the troubleshooting steps outlined above, you can resolve the error and ensure your device stays updated with the latest software. Whether it’s restarting your device, checking your network, or resetting to factory settings, these solutions can help you overcome the hurdle and continue enjoying the unparalleled convenience Roku provides.

    Also Check:

  • Roku Error 016 and How to Fix It

    Roku Error 016 and How to Fix It

    If you’re a Roku user, you’ve likely come to appreciate its intuitive interface and expansive streaming capabilities. However, no technology is immune to hiccups, and Roku devices occasionally throw errors. One such issue is Error 016—a frustrating notification that can disrupt your viewing experience. If you’ve encountered this error, don’t worry. Here’s a comprehensive guide to understanding what causes Roku Error 016 and how to fix it effectively.

    Roku Error 016 and How to Fix It


    What is Roku Error 016?

    Roku Error 016 typically occurs when the device struggles to establish or maintain an internet connection. Since Roku relies heavily on stable internet connectivity to stream content, any disruption can halt your streaming session, leaving you staring at an error message instead of your favorite show or movie.

    The error message often reads: “Unable to connect to the internet. Please check your network settings or try again later.” While the phrasing may vary slightly, the underlying cause remains the same—a connectivity problem.

    Common Causes of Roku Error 016

    Before diving into fixes, it’s essential to identify the potential causes. The error might stem from:

    • Weak Wi-Fi Signal: Physical obstacles, distance, or interference can weaken your Wi-Fi signal.
    • Router Issues: A malfunctioning router or outdated firmware can disrupt the connection.
    • Internet Service Problems: Temporary outages or low bandwidth from your internet service provider (ISP) may cause interruptions.
    • Roku Device Settings: Misconfigured network settings on your Roku can lead to connectivity issues.
    • Software Bugs: Occasionally, a software glitch or outdated Roku firmware can trigger the error.

    How to Diagnose the Problem

    Understanding the specific cause of Error 016 is the first step toward resolving it. Begin by answering the following questions:

    • Is your internet connection working for other devices?
    • Are other Roku devices or apps on the same network experiencing similar issues?
    • Is your Roku device positioned too far from the router?
    • Has your router been recently updated or rebooted?

    By identifying patterns, you can narrow down the issue to a specific source, whether it’s your Roku device, the network, or external factors.

    Step-by-Step Fixes for Roku Error 016

    Check Your Internet Connection

    Ensure your internet connection is active and stable. Test other devices on the same Wi-Fi network to verify whether they’re experiencing similar problems. If all devices are affected, it’s likely an ISP-related issue, and you should contact your provider.

    Reboot Your Roku Device and Router

    Rebooting can often resolve minor glitches:

    1. Restart Your Roku: Navigate to Settings > System > System Restart. Alternatively, unplug the device, wait 30 seconds, and plug it back in.
    2. Reboot Your Router: Power off your router, wait about a minute, and turn it back on. Once the router restarts, check if your Roku reconnects automatically.

    Reconnect to the Wi-Fi Network

    If rebooting doesn’t work, reconnect your Roku to the Wi-Fi network:

    1. Go to Settings > Network > Set Up Connection.
    2. Choose “Wireless” and select your network from the list.
    3. Enter your Wi-Fi password carefully and ensure it’s correct.

    Optimize Wi-Fi Signal Strength

    If a weak signal is the culprit, improving your Wi-Fi setup can help:

    • Reposition Your Router: Place your router in a central location, away from walls and interference sources like microwaves or cordless phones.
    • Use a Wi-Fi Extender: If your Roku is far from the router, a Wi-Fi extender can boost the signal.
    • Switch to a Wired Connection: If possible, use an Ethernet cable for a direct and more stable connection.

    Update Roku Firmware

    Outdated software can lead to connectivity errors. Check for updates by navigating to Settings > System > System Update. If an update is available, install it and restart your device.

    Perform a Factory Reset

    As a last resort, you can perform a factory reset. Be aware that this will erase all your settings and require you to set up the device from scratch:

    1. Go to Settings > System > Advanced System Settings > Factory Reset.
    2. Follow the on-screen instructions and reconfigure your Roku.

    Comparing Troubleshooting Methods

    Method Effectiveness Difficulty Time Required
    Rebooting Devices High Easy 5 Minutes
    Reconnecting Wi-Fi High Easy 10 Minutes
    Signal Optimization Medium Moderate 15-30 Minutes
    Firmware Updates High Easy 10 Minutes
    Factory Reset Very High Difficult 30+ Minutes

    Preventing Roku Error 016 in the Future

    To avoid encountering Error 016 again, follow these preventative measures:

    • Regular Router Maintenance: Periodically reboot your router and update its firmware.
    • Monitor Network Usage: Avoid overloading your network with multiple high-bandwidth activities simultaneously.
    • Keep Roku Updated: Regularly check for software updates to ensure your Roku device has the latest features and bug fixes.
    • Position Your Devices Strategically: Ensure your Roku device and router are positioned for optimal signal strength.

    Final Thoughts

    Roku Error 016 can be an annoyance, but it’s far from insurmountable. With a systematic approach to diagnosing and resolving the issue, you can restore your streaming experience in no time. Whether it’s a simple reboot, a network adjustment, or a factory reset, the solutions outlined above provide a clear path to fixing this connectivity hiccup. By maintaining your network and device proactively, you’ll minimize the chances of future disruptions and enjoy seamless streaming on your Roku device.

    Also Check:

  • Roku Error 009 and How to Fix It

    Roku Error 009 and How to Fix It

    Streaming devices have become an integral part of our entertainment setups, and Roku leads the pack with its intuitive interface and robust platform. However, like any technology, Roku devices are not immune to technical glitches. Among the most common issues users encounter is Roku Error 009.

    Roku Error 009 and How to Fix It

    This error often leaves users puzzled and disconnected from their streaming services. But what does Error 009 mean, and how can you fix it? Let’s break it down step by step.

    What is Roku Error 009?

    Roku Error 009 typically appears when your Roku device successfully connects to a Wi-Fi network but cannot establish a connection to the internet. It’s a unique situation where the device recognizes your home network yet struggles to communicate beyond it. This issue interrupts access to streaming apps like Netflix, Hulu, or Disney+, making it impossible to enjoy your favorite shows and movies.

    The error message usually reads: “Cannot connect to the internet. Please check your network connection.”

    The causes can range from simple network misconfigurations to more complex problems involving your internet service provider (ISP). Understanding these causes is key to resolving the issue.

    Potential Causes of Roku Error 009 Description
    Weak or unstable Wi-Fi signal The Roku device is far from the router or facing physical obstructions.
    Router or modem issues Outdated firmware, improper settings, or temporary glitches in the router.
    ISP-related problems Temporary outages, throttling, or DNS server issues on the ISP’s side.
    Roku software issues Outdated Roku firmware or a bug in the current software version.
    Incorrect network settings Static IP conflicts or custom DNS configurations causing connectivity problems.

    Diagnosing the Problem

    The first step in troubleshooting Roku Error 009 is to identify the exact cause. Begin by testing your internet connection on another device, such as a smartphone or laptop, to see if it’s working correctly. If the internet is functioning, the issue likely lies with your Roku device or its settings. Conversely, if other devices also fail to connect, you may need to address the problem with your router or ISP.

    Fixing Roku Error 009

    Restart Your Roku and Network Equipment

    A simple restart is often all it takes to resolve connectivity issues. Unplug your Roku device, router, and modem from their power sources, wait for about 30 seconds, and plug them back in. Allow the router and modem to establish a stable connection before turning on your Roku device.

    Improve Wi-Fi Signal Strength

    If your Roku device is situated far from the router or obstructed by walls and other physical barriers, signal strength may be compromised. Relocating the router closer to the Roku device or using a Wi-Fi extender can improve connectivity.

    Check Network Settings on Roku

    Navigate to the Settings menu on your Roku device, then select Network and Check Connection. This built-in diagnostic tool provides detailed insights into the status of your network and internet connection. If any issues are detected, it will guide you with basic troubleshooting steps.

    Update Your Router Firmware

    An outdated router firmware can sometimes cause connectivity issues. Log into your router’s settings via a web browser (usually accessible through an IP address like 192.168.1.1) and check for firmware updates. Many modern routers have an automatic update option, making this process straightforward.

    Switch DNS Servers

    DNS issues can also trigger Roku Error 009. If your ISP’s DNS servers are experiencing problems, switching to a public DNS service like Google DNS (8.8.8.8 and 8.8.4.4) or Cloudflare (1.1.1.1) can help. Access your router’s settings and manually configure these DNS addresses.

    Factory Reset as a Last Resort

    If all else fails, performing a factory reset on your Roku device might resolve persistent errors. Be aware that this will erase all settings and installed apps, so use it as a last resort. You can initiate a factory reset through the System menu in the Settings or by pressing the reset button on the Roku device.

    How Roku Error 009 Differs from Other Errors

    Unlike errors related to direct Wi-Fi connectivity, such as Roku Error 014.40, Error 009 is more nuanced as it isolates the issue to the internet side of the connection. This makes the troubleshooting process slightly different, focusing more on the router, ISP, and DNS configurations rather than the Wi-Fi password or signal.

    Preventing Roku Error 009 in the Future

    To minimize the chances of encountering Roku Error 009 again, consider the following tips:

    • Keep your Roku device and router firmware updated.
    • Regularly restart your router and modem to clear temporary glitches.
    • Avoid overloading your network with too many connected devices.
    • Position your router centrally in your home for optimal signal distribution.
    • Monitor your ISP for outages or service disruptions.

    Why Roku Remains a Reliable Choice

    Despite occasional hiccups like Error 009, Roku remains one of the most reliable streaming platforms available. Its extensive app library, affordability, and ease of use make it a favorite among cord-cutters. While technical errors can be frustrating, they are often easily resolved with a bit of troubleshooting.

    Conclusion

    Roku Error 009 might seem daunting at first, but understanding its causes and following the steps outlined above can help you resolve it quickly. Whether it’s tweaking your network settings, updating firmware, or simply restarting your devices, most users can fix this issue without needing professional assistance.

    The key is patience and a systematic approach to troubleshooting. Once resolved, you can return to uninterrupted streaming, enjoying all the content Roku has to offer. If the problem persists, don’t hesitate to reach out to Roku’s customer support or your ISP for additional help. After all, the ultimate goal is to keep your streaming experience smooth, seamless, and enjoyable.

    Also Check:

  • Roku Error 014.50 and How to Fix It

    Roku Error 014.50 and How to Fix It

    When streaming devices like Roku promise seamless entertainment, encountering errors can be frustrating, especially ones like Roku Error 014.50. This error primarily relates to network connectivity issues, specifically your Roku’s inability to establish a stable connection with the Wi-Fi network. If you’ve come across this issue, you’re not alone—it’s a common problem that can often be resolved with a few simple steps.

    Roku Error 014.50 and How to Fix It

    Error 014.50 tends to pop up during initial setup or after a network change, such as switching routers or updating Wi-Fi credentials. Understanding the root causes of this error can save you time and effort, allowing you to return to streaming your favorite content without delay.

    What Causes Roku Error 014.50?

    At its core, Roku Error 014.50 indicates that your Roku device is struggling to connect to your wireless network. This can happen for several reasons, ranging from incorrect Wi-Fi passwords to more complex issues like signal interference or router settings. Here’s a breakdown of the typical causes:

    Cause Explanation
    Incorrect Wi-Fi Credentials Entering an incorrect password prevents Roku from authenticating your network.
    Weak Signal Strength Physical obstructions or distance between the router and Roku can weaken the signal.
    Router Configuration Security protocols, firewalls, or outdated firmware might block the connection.
    ISP Issues Temporary outages or DNS problems can disrupt internet connectivity.
    Roku Software Bugs Outdated firmware or software glitches may contribute to the issue.

    Diagnosing Roku Error 014.50

    The first step to resolving any error is diagnosing the problem. Begin by checking your network’s status on another device. Can your smartphone or laptop connect to the same Wi-Fi network without issues? If not, the problem might lie with your internet service provider or router settings rather than Roku itself.

    If other devices are working fine, focus your troubleshooting efforts on the Roku device. Attempt to reconnect it to the network and observe the error message details for clues.

    Fixing Roku Error 014.50

    One of the simplest solutions to this problem is verifying your Wi-Fi credentials. It’s surprisingly easy to enter the wrong password, especially with the Roku on-screen keyboard. Re-enter the password carefully, ensuring you’ve chosen the correct wireless network.

    If the credentials are correct, consider the strength of your Wi-Fi signal. Weak signals can cause intermittent connectivity issues, leading to Error 014.50. Relocating your Roku closer to the router or using a Wi-Fi extender can help improve the signal. Additionally, try restarting your router and Roku device. This step often clears temporary glitches that may be blocking connectivity.

    Sometimes, the issue lies in your router’s security settings. Access the router’s admin panel via a web browser and ensure that it’s not set to block new devices. You can also temporarily disable firewalls or security protocols to test if these settings are causing the issue. If this resolves the problem, reconfigure your settings to allow the Roku device without compromising security.

    Advanced Troubleshooting

    For persistent errors, more advanced troubleshooting may be required. Updating your Roku’s firmware can resolve compatibility issues with your network. Navigate to the settings menu on your Roku, select “System Update,” and follow the prompts to ensure your device is running the latest software version.

    Resetting your network settings on Roku can also be an effective solution. This action clears stored Wi-Fi credentials and forces the device to perform a fresh connection setup. To reset the network settings, go to “Settings,” then “System,” and choose “Advanced System Settings.”

    If none of these solutions work, perform a factory reset on your Roku device. This action will erase all settings and installed apps, returning the device to its out-of-the-box state. After resetting, set up your Roku from scratch and reconnect to the Wi-Fi network.

    Preventing Roku Error 014.50 in the Future

    To avoid encountering this error in the future, consider implementing the following best practices:

    • Position your router centrally in your home to maximize signal strength.
    • Regularly update both your Roku device and router firmware.
    • Use a strong, unique Wi-Fi password to prevent unauthorized access while ensuring it’s easy to enter correctly.
    • Limit the number of connected devices to avoid network congestion.

    Why Roku Remains a Top Choice

    While errors like 014.50 can be inconvenient, they don’t detract from Roku’s overall reliability as a streaming platform. Its user-friendly interface, affordability, and vast library of apps make it a popular choice among users worldwide. Additionally, most errors can be resolved with straightforward troubleshooting steps, requiring no professional assistance.

    Conclusion

    Roku Error 014.50 is a network-related issue that can often be resolved with simple fixes, such as checking Wi-Fi credentials, improving signal strength, or restarting your router. By understanding the root causes and following the steps outlined above, you can quickly overcome this error and return to enjoying uninterrupted streaming.

    If the problem persists despite your efforts, reaching out to Roku’s customer support or your ISP may be necessary. Technical issues are a part of the streaming experience, but with a bit of patience and persistence, they can be easily managed. After resolving the issue, Roku continues to deliver a seamless and enjoyable streaming experience for users of all levels.

    Also Check:

  • 7 Best Business Laptops with Fingerprint Security

    7 Best Business Laptops with Fingerprint Security

    A secure and reliable business laptop is crucial in today’s fast-paced world. With the increasing number of cyber threats, laptops with fingerprint security offer an extra layer of protection, ensuring that only you can access your data.

    Best Business Laptops with Fingerprint Security
    Best Business Laptops with Fingerprint Security

    If you’re looking for the best options, we’ve rounded up 7 business laptops equipped with fingerprint security to meet your professional needs.

    Why Choose Laptops with Fingerprint Security for Your Business?

    Fingerprint security adds a layer of biometric protection, making it much harder for unauthorized individuals to access your laptop.

    Unlike passwords, which can be guessed or stolen, your fingerprint is unique. This ensures that your data stays safe even if your laptop is lost or stolen. For business professionals dealing with sensitive information, this feature is a must-have.

    Key Features to Look for in a Business Laptop with Fingerprint Security

    When searching for a business laptop with fingerprint security, keep these important features in mind:

    • Speed and Performance: A good business laptop should handle multitasking with ease. Look for models with the latest processors and at least 8GB of RAM.
    • Portability: Lightweight laptops are ideal for professionals who travel often.
    • Battery Life: A laptop with long battery life ensures uninterrupted work.
    • Durability: Business laptops should be built to last, with strong materials and good warranty coverage.
    • Security Features: Besides fingerprint scanners, look for features like encryption and webcam shutters for maximum protection.

    Best Business Laptops with Fingerprint Security

    1. Apple MacBook Pro 14 (M1 Chip)

    The Apple MacBook Pro 14 stands out as a top contender for business professionals. Its powerful M1 chip ensures outstanding performance, while the Touch ID fingerprint sensor adds reliable security. With a stunning Retina display, long battery life of up to 17 hours, and exceptional build quality, this laptop is perfect for multitasking, presentations, and video calls.

    Key Features:

    M1 Pro chip for seamless performance

    14-inch Liquid Retina XDR display

    Touch ID fingerprint sensor

    Up to 17 hours of battery life

    Buy at Amazon

    1.  Dell XPS 13

    The Dell XPS 13 is a sleek and portable laptop designed for professionals on the go. It comes with a built-in fingerprint reader integrated into the power button for easy access. The device features a near-borderless InfinityEdge display and robust performance powered by Intel Core i7 processors.

    Key Features:

    • Intel Core i5/i7 processors
    • 4-inch FHD+ or UHD+ InfinityEdge display
    • Fingerprint sensor integrated into the power button
    • Long battery life (up to 12 hours)

    Buy at Amazon

    1. Lenovo ThinkPad X1 Carbon Gen 11

    Lenovo’s ThinkPad series has long been a favorite among professionals, and the X1 Carbon Gen 11 continues that legacy. With fingerprint security through the match-on-sensor fingerprint reader, this laptop prioritizes safety and performance. It’s lightweight, durable, and equipped with excellent keyboard ergonomics.

    Key Features:

    Intel Core i5/i7 processors

    14-inch WUXGA display (optional 4K)

    Fingerprint reader for added security

    Military-grade durability

    Buy at Amazon

    1. HP Spectre x360 14

    The HP Spectre x360 14 is a 2-in-1 convertible laptop ideal for business professionals who value flexibility and security. Its fingerprint scanner is conveniently located for quick and secure login. Intel’s latest processors power the laptop and offers a bright, vivid OLED display.

    Key Features:

    Intel Core i7 processor

    13.5-inch OLED touchscreen display

    Fingerprint sensor for secure access

    360-degree hinge design

    Buy at Amazon

    1. Microsoft Surface Laptop 5

    The Microsoft Surface Laptop 5 combines sleek design with security features. It includes Windows Hello fingerprint security for fast login and reliable protection. The laptop delivers solid performance, a sharp PixelSense touchscreen, and all-day battery life.

    Key Features:

    Intel Core i5/i7 processors

    13.5-inch or 15-inch PixelSense touchscreen

    Windows Hello fingerprint security

    Lightweight and portable design

    Buy at Amazon

    1. Asus ZenBook Flip 14

    For those who need versatility and power, the Asus ZenBook Flip 14 is a fantastic option. This convertible laptop comes with a responsive fingerprint sensor and a 360-degree hinge for flexible use. Its sleek design and powerful hardware make it a great business companion.

    Key Features:

    AMD Ryzen 7 or Intel Core i7 processor

    14-inch Full HD touchscreen

    Fingerprint scanner for enhanced security

    Ultra-slim and lightweight build

    Buy at Amazon

    1. Acer Swift 3

    The Acer Swift 3 is a budget-friendly business laptop that doesn’t compromise on security. It features a built-in fingerprint reader for fast and secure logins, along with solid performance for handling work tasks. Its lightweight design and long battery life make it perfect for travel.

    Key Features:

    AMD Ryzen 7 or Intel Core i5/i7 processor

    14-inch Full HD display

    Fingerprint reader for security

    Up to 12 hours of battery life

    Buy at Amazon

    Why Fingerprint Security Matters for Business Laptops

    Fingerprint security is a quick and effective way to protect sensitive data. It ensures that only authorized individuals can access the laptop, reducing the risk of data breaches and unauthorized use. For business professionals, this added layer of security is essential for peace of mind.

    Fingerprint Security vs. Other Biometric Features in Laptops

    Fingerprint security is not the only biometric option. Other features include:

    • Face Recognition: Requires the user’s face to unlock the laptop.
    • Iris Scanning: Uses the unique patterns in your eyes for authentication.
    • While these options are secure, fingerprint scanners are often faster and more reliable in different lighting conditions.

    Tips for Choosing the Right Business Laptop with Fingerprint Security

    Determine your budget and choose a laptop that meets your financial limits.

    Decide if you need additional features like a touchscreen or 2-in-1 design.

    Research battery life, performance, and durability before making a purchase.

    Read reviews to ensure the fingerprint scanner is fast and accurate.

    Compare warranties and support options from different brands.

    FAQs

    What are the advantages of fingerprint security in laptops?

    Fingerprint security provides a faster and more secure way to access your laptop, protecting sensitive data from unauthorized users.

    Are laptops with fingerprint security safe for business use?

    Yes, they are highly secure and an excellent choice for protecting confidential business information.

    Which brands offer the best fingerprint-secure laptops for professionals?

    Dell, HP, Lenovo, Apple, and ASUS are among the top brands offering reliable fingerprint security features.

    Conclusion

    Choosing a business laptop with fingerprint security is a smart decision for protecting your professional data. Whether you prefer the powerful Apple MacBook Pro, the flexible HP Spectre x360, or the budget-friendly Acer Swift 3, each laptop on this list offers excellent performance and reliable security features. Find the one that suits your needs, and enjoy a seamless, secure work experience.

    CHECK THESE OUT:

    Best Laptop Stand for Desk: Top Picks for Comfort and Productivity

    Best Laptop with CD Drive: Why Choose a Laptop with a CD Drive?

    Explore the Best Laptops for Graphic Design with Top Performance and Stunning Visuals to Bring Your Creative Ideas to Life

    Find the Best Laptops for Music Production to Elevate Your Sound Effortlessly

  • I Tried the Sonos One SL with Bluetooth Compatibility and Found It Surprisingly Versatile

    I Tried the Sonos One SL with Bluetooth Compatibility and Found It Surprisingly Versatile

    When it comes to audio, Sonos is a brand synonymous with premium sound quality and seamless multi-room capabilities. The Sonos One SL, often viewed as the slightly stripped-down sibling of the Sonos One, has made waves for its minimalist design and outstanding audio performance. But what if we added Bluetooth compatibility to the equation?

    Sonos One SL Bluetooth

    While the Sonos One SL doesn’t officially support traditional Bluetooth pairing, there are ways to bridge that gap—and it opens up an entirely new world of versatility. After exploring the Sonos One SL with a Bluetooth workaround, I found myself pleasantly surprised by its adaptability.

    Here’s an in-depth review of my experience, along with everything you need to know about the Sonos One SL and its potential Bluetooth capabilities.


    First Impressions: Design and Build Quality

    Right out of the box, the Sonos One SL exudes the premium quality we’ve come to expect from Sonos. It boasts a sleek, compact form factor that seamlessly integrates into any living space. Whether you’re placing it on a bookshelf, countertop, or nightstand, its understated elegance ensures it blends in without drawing attention.

    The speaker comes in two classic finishes: matte black and matte white. Its durable build feels substantial, and it’s clear this device is designed to last. The absence of physical buttons adds to its minimalist appeal, with a responsive touch panel on top for controls like volume adjustment, play/pause, and track skipping.


    Audio Performance: Punching Above Its Weight

    Sonos has always been renowned for its audio quality, and the One SL doesn’t disappoint. Despite its compact size, this speaker delivers rich, room-filling sound with impressive clarity and depth.

    • Bass: The low-end is punchy yet controlled, providing a satisfying thump that doesn’t overpower other frequencies.
    • Midrange: Vocals and instruments are crisp and natural, making it ideal for a wide range of genres.
    • Highs: The treble is clean and well-defined, adding a layer of sparkle without harshness.

    For a single-speaker setup, the stereo separation is impressive, thanks to Sonos’s advanced tuning. Pairing it with another Sonos One SL or a Sonos One unlocks a true stereo experience, elevating the soundstage to new heights.


    The Bluetooth Conundrum: What’s the Catch?

    One of the most common misconceptions about the Sonos One SL is that it has Bluetooth functionality. Officially, the One SL connects to devices via Wi-Fi, relying on the Sonos app or AirPlay 2 for audio streaming.

    However, with the right tools, you can introduce Bluetooth into the mix:

    1. Bluetooth Transmitters: Using a high-quality Bluetooth transmitter, you can connect the Sonos One SL to any Bluetooth-enabled device. The transmitter plugs into your device’s headphone jack or audio output port, converting the signal into a Bluetooth-compatible format.
    2. Adapters with Multi-Device Pairing: Some adapters allow pairing with multiple devices, letting you switch between Bluetooth and Wi-Fi effortlessly.

    Although this isn’t as seamless as built-in Bluetooth, the workaround works surprisingly well for casual use.


    How Bluetooth Expands Its Use Cases

    Once I set up the Bluetooth transmitter, I discovered several new ways to enjoy the Sonos One SL.

    1. Portability: While the Sonos One SL isn’t designed to be portable, adding Bluetooth made it easier to move the speaker to areas where Wi-Fi was unreliable or unavailable, such as my backyard or garage.
    2. Device Compatibility: Bluetooth opened up connectivity to older devices that don’t support AirPlay 2 or the Sonos app, such as older MP3 players and laptops.
    3. Guest-Friendly Streaming: When hosting guests, allowing them to connect via Bluetooth was much more straightforward than asking them to download the Sonos app or connect to my Wi-Fi network.

    Smart Features: What the One SL Lacks (and Why It Doesn’t Matter)

    The Sonos One SL is marketed as the “non-smart” version of the Sonos One. It doesn’t have built-in voice assistants like Alexa or Google Assistant. While this might seem like a downside, it has its advantages:

    • Privacy Concerns: For those wary of always-on microphones, the One SL provides peace of mind without compromising on audio quality.
    • Cost-Effectiveness: Without the smart assistant, the One SL is slightly more affordable, making it an attractive option for those who prioritize sound over smart features.

    If you still want voice control, pairing the One SL with a separate Alexa or Google Assistant device is always an option.


    Sonos Ecosystem Integration: A Seamless Experience

    The One SL shines brightest when integrated into the broader Sonos ecosystem. Whether you have multiple Sonos speakers or are just starting with one, the ability to group and control speakers through the Sonos app is a game-changer.

    • Multi-Room Audio: Syncing multiple speakers to play the same track or different music in each room creates a fully immersive audio experience.
    • Trueplay Tuning: Using your iPhone, the Sonos app customizes the speaker’s sound profile based on the acoustics of your room. This feature significantly enhances audio quality, ensuring optimal performance no matter where you place the speaker.
    • Streaming Services: The app integrates with nearly every music streaming platform, from Spotify and Apple Music to lesser-known services.

    Comparing Wi-Fi and Bluetooth Performance

    After using both Wi-Fi and Bluetooth with the Sonos One SL, I noticed some key differences:

    • Audio Quality: Wi-Fi streaming provided superior audio quality, with no compression or latency issues. Bluetooth, while convenient, occasionally introduced minor delays and slight quality degradation.
    • Range: Wi-Fi’s range was significantly greater, allowing me to control the speaker from anywhere in my home. Bluetooth, on the other hand, was limited to about 30 feet.
    • Stability: Wi-Fi connections were rock-solid, while Bluetooth occasionally experienced drops if there were too many obstructions.

    Is the Sonos One SL Worth It with Bluetooth?

    After my experiment, I can confidently say that the Sonos One SL is a versatile speaker, even without native Bluetooth support. Its exceptional audio performance, minimalist design, and seamless integration into the Sonos ecosystem make it a standout choice for anyone seeking high-quality sound.

    Adding Bluetooth via a transmitter expands its use cases, making it even more flexible for different scenarios. While this setup isn’t ideal for everyone, it worked surprisingly well for my needs.


    Conclusion

    The Sonos One SL has earned its place as one of the most reliable and high-performing compact speakers on the market. While the lack of native Bluetooth might be a dealbreaker for some, it’s a minor inconvenience in the grand scheme of things.

    For those who prioritize sound quality, build durability, and integration with a robust audio ecosystem, the Sonos One SL is a no-brainer. And with a simple Bluetooth workaround, it becomes an even more versatile addition to any home.

    If you’re considering investing in a speaker that balances functionality and exceptional audio performance, the Sonos One SL deserves a spot at the top of your list.

  • Roku is Not Connecting to Wifi: Why and How You Can Fix It

    Roku is Not Connecting to Wifi: Why and How You Can Fix It

    Streaming has revolutionized how we consume content, and Roku has been at the forefront of this transformation. With its vast library of channels and user-friendly interface, Roku is a favorite for millions. However, like any tech device, it’s not immune to occasional hiccups. One of the most common issues users face is Roku not connecting to Wi-Fi. While frustrating, this problem is almost always solvable with a bit of troubleshooting.

    Roku is Not Connecting to Wifi: Why and How You Can Fix It

    When your Roku refuses to connect to Wi-Fi, it’s more than just a technical glitch. It can disrupt movie nights, binge-watching sessions, or even your ability to access live TV. The good news is that this issue typically doesn’t require advanced technical skills to resolve. Let’s delve into why this problem occurs and, more importantly, how to fix it.

    Why Roku May Fail to Connect to Wi-Fi

    Wi-Fi connectivity issues with Roku can stem from several factors, ranging from network problems to device-related glitches. Here are some common culprits:

    1. Weak Signal Strength

    If your Roku is far from your router, it may struggle to maintain a stable connection. Walls, furniture, and other obstacles can further weaken the signal.

    2. Network Congestion

    Too many devices connected to your Wi-Fi network can cause interference, leading to connectivity issues.

    3. Software Bugs or Outdated Firmware

    Like all devices, Roku relies on regular updates to fix bugs and improve performance. Outdated software can sometimes cause connectivity issues.

    4. Router Issues

    Problems with your router, such as incorrect settings or outdated firmware, can also disrupt your Roku’s connection.

    5. Hardware Problems

    While rare, hardware malfunctions—either in the Roku device or the router—can also cause connectivity issues.

    Troubleshooting Steps

    Step 1: Check Your Internet Connection

    Before diving into Roku-specific fixes, ensure your internet is working correctly. Test other devices like your smartphone or laptop to see if they can connect to Wi-Fi. If all devices are experiencing issues, the problem likely lies with your internet service provider (ISP) or router.

    Step 2: Restart Roku and Your Router

    A simple restart can work wonders for resolving connectivity problems. Power off your Roku and unplug your router for about five minutes. Then, reconnect everything and try again.

    Step 3: Verify Your Wi-Fi Credentials

    If your Wi-Fi network name (SSID) or password has changed recently, you’ll need to update these details on your Roku. Go to the settings menu, select “Network,” and follow the prompts to reconnect.

    Step 4: Check Signal Strength

    Roku has a built-in feature to check signal strength. Navigate to the “Network” section in the settings menu and select “Check Connection.” This will give you a signal strength reading. If it’s weak, consider moving your router closer to your Roku or using a Wi-Fi extender.

    Common Error Messages and What They Mean

    When Roku fails to connect, you might encounter error messages. Understanding these can help you diagnose the problem faster.

    Error Message Possible Cause Solution
    “Unable to Connect to Network” Incorrect password or weak signal Re-enter credentials, move closer to router
    “Not Connected to Internet” Internet service disruption Check ISP status, restart router
    “Low Signal Strength” Router too far from Roku Use a Wi-Fi extender or reposition devices

    Advanced Fixes

    Update Your Roku Software

    Outdated firmware can often cause connectivity issues. If your Roku is still functioning enough to access settings, check for updates manually by navigating to “Settings > System > System Update.”

    Factory Reset

    As a last resort, consider performing a factory reset. This will erase all customizations and return your Roku to its original settings. Go to “Settings > System > Advanced System Settings > Factory Reset.”

    Preventing Future Wi-Fi Issues

    To avoid future connectivity problems, ensure your Roku and router are in optimal locations with minimal interference. Regularly update your Roku software and router firmware to benefit from the latest performance enhancements.

    Additionally, investing in a dual-band router can help manage network congestion, particularly if you have multiple devices connected.

    When to Call for Help

    If you’ve tried all the troubleshooting steps and your Roku still won’t connect, it might be time to contact Roku support or your ISP. Persistent issues could indicate a hardware problem that requires professional assistance.

    Conclusion

    Wi-Fi issues can be incredibly frustrating, especially when they interrupt your streaming experience. But with a bit of patience and the right approach, you can quickly get your Roku back online. From checking your internet connection to updating your device, the solutions are straightforward and effective.

    Roku has revolutionized how we watch TV, and ensuring it works seamlessly is worth the effort. The next time you encounter a Wi-Fi connectivity issue, remember that you can fix it—and now, you know exactly how to do it.

    Also Check:

  • Roku Says Not Connected: Why and How to Fix It

    Roku Says Not Connected: Why and How to Fix It

    Streaming has become an essential part of our daily lives, and Roku has positioned itself as one of the leading platforms for on-demand entertainment. With a plethora of streaming options, an easy-to-use interface, and a reputation for reliability, Roku devices have become a household staple. However, nothing disrupts a relaxing evening of streaming like seeing the dreaded message: “Not Connected.”

    Roku Says Not Connected

    This notification can leave you frustrated and scrambling for answers, but rest assured, it’s a problem with solutions. The “Not Connected” message on Roku can arise from various reasons, including network issues, incorrect settings, or even device malfunctions. Understanding the cause is the first step toward resolving it, and this article will guide you through every aspect of fixing this issue and ensuring a smoother streaming experience in the future.

    What Does “Not Connected” Mean?

    When Roku displays “Not Connected,” it signifies that the device is not currently connected to the internet. Without an active connection, Roku cannot access streaming services, download updates, or provide a seamless user experience. This disconnection doesn’t necessarily mean your internet is down; it often points to a communication problem between your Roku device and your Wi-Fi network.

    There are a variety of reasons why this happens, from interference in your home network to outdated firmware or router issues. Each of these possibilities requires a different troubleshooting approach.

    Common Reasons Roku Says “Not Connected”

    The “Not Connected” error isn’t as random as it seems. Here’s a breakdown of the most common causes:

    1. Weak Wi-Fi Signal

    If your Roku is positioned far from the router, the signal strength may be insufficient to maintain a stable connection. Objects like walls, furniture, or electronic devices can interfere with signal quality.

    2. Network Configuration Issues

    Incorrect network settings, such as entering the wrong password or selecting the wrong Wi-Fi network, can cause your Roku to lose connectivity.

    3. Overcrowded Network

    In homes with multiple devices connected to the same network, bandwidth can become strained, leading to intermittent connectivity issues for devices like Roku.

    4. Software and Firmware Problems

    Both the Roku device and your router rely on regular updates to function optimally. If either is running outdated software, compatibility issues may arise.

    5. ISP or Router Downtime

    Sometimes, the problem isn’t with Roku at all. Internet service provider outages or router malfunctions can result in connectivity problems.

    Troubleshooting the Problem

    Understanding the root of the issue is only half the battle; fixing it is where the challenge begins. Below, we’ll explore detailed steps to address the “Not Connected” message and get your Roku back online.

    Step 1: Checking Your Network Connection

    The first step is to ensure your internet connection is active. Test your Wi-Fi on other devices such as a smartphone or laptop. If these devices are also struggling to connect, the problem lies with your internet service or router.

    If other devices are working fine, move on to verifying the connection specifically for your Roku. Use the “Check Connection” option in the Roku settings menu. This feature will test your signal strength and confirm whether the device is detecting your network.

    Step 2: Restarting Devices

    Sometimes, a simple restart can resolve the issue. Begin by restarting your Roku device. Navigate to “Settings,” then “System,” and select “System Restart.”

    For your router, unplug it from the power source, wait about five minutes, and then plug it back in. Once both devices are restarted, attempt to reconnect your Roku to Wi-Fi.

    Step 3: Updating Software

    Outdated firmware can cause compatibility issues, leading to connection problems. To check for updates on your Roku device, navigate to “Settings > System > System Update.” Ensure your router’s firmware is also up-to-date by logging into its admin panel (consult your router’s manual for specific instructions).

    Advanced Fixes

    If the basic troubleshooting steps don’t resolve the issue, it’s time to explore more advanced solutions.

    Factory Resetting Your Roku

    A factory reset should be used as a last resort, but it’s highly effective for resolving persistent issues. Keep in mind that this will erase all settings and data on your Roku, requiring you to set it up from scratch. To perform a factory reset, go to “Settings > System > Advanced System Settings > Factory Reset.”

    Optimizing Your Network

    Position your router in a central location to ensure even signal distribution throughout your home. If this isn’t feasible, consider investing in a Wi-Fi extender to boost signal strength.

    Additionally, upgrading to a dual-band or tri-band router can help manage network traffic, especially in homes with multiple devices.

    Switching to a Wired Connection

    For a more stable and reliable connection, consider using an Ethernet cable to connect your Roku directly to your router. While this isn’t an option for all Roku devices, it eliminates the variability of Wi-Fi signals.

    Error Messages and What They Mean

    When facing connectivity issues, Roku may display specific error codes or messages. Understanding these can help streamline the troubleshooting process.

    Error Code/Message Cause Solution
    009: Cannot Connect to Internet Weak signal or incorrect credentials Re-enter Wi-Fi password, check signal strength
    014: Network Not Found Router or ISP issues Restart router, verify network status
    “Unable to Connect” Outdated firmware or interference Update firmware, reduce interference

    Avoiding Future Connectivity Problems

    To minimize the chances of encountering the “Not Connected” message again, consider implementing these tips:

    • Regularly update both your Roku and router firmware.
    • Place your router in a central, elevated location for optimal signal distribution.
    • Reduce network congestion by disconnecting devices that aren’t in use.
    • Periodically check for ISP outages in your area to stay informed.

    When to Seek Help

    If all else fails, it may be time to contact Roku support or your internet service provider. Persistent issues could indicate a hardware problem that requires professional assistance.

    Final Thought

    The “Not Connected” error can be a frustrating roadblock to your streaming experience, but it’s rarely insurmountable. By identifying the cause and following the appropriate troubleshooting steps, you can quickly get your Roku back online.

    In the world of streaming, a seamless connection is key to enjoying your favorite shows and movies. Whether it’s a simple Wi-Fi password update or a full factory reset, the solutions are within reach. Now that you know why Roku says “Not Connected” and how to fix it, you’re better prepared to handle any connectivity issues that come your way.

    Also Check:

  • You Can Watch Live TV on Roku and This is How

    You Can Watch Live TV on Roku and This is How

    Roku has long been a favorite for cord-cutters looking to replace traditional cable subscriptions with streaming services. But did you know that Roku also allows you to watch live TV? Whether it’s breaking news, sports, or your favorite network shows airing in real-time, Roku’s live TV options make it possible to enjoy the traditional TV experience alongside on-demand streaming. Here’s an in-depth guide on how you can watch live TV on Roku and everything you need to know about getting started.

    You Can Watch Live TV on Roku and This is How


    How You Can Watch Live TV on Roku

    Roku’s ecosystem supports various live TV options, ranging from free channels to paid subscriptions. It’s designed to replicate and enhance the experience of traditional television while leveraging the convenience and flexibility of streaming technology. The platform integrates live TV seamlessly through the Roku Channel, dedicated live TV apps, and even external hardware like antennas and cable boxes.

    The core benefit of Roku’s live TV capabilities is the variety. Users can access content through free services like The Roku Channel, subscription-based apps like Hulu + Live TV, and even integrate local channels via an HDTV antenna. All of this is made possible with a user-friendly interface and universal search capabilities, ensuring that live TV becomes just as accessible as your favorite on-demand shows.

    Free Live TV Options on Roku

    Roku offers an impressive array of free live TV channels accessible directly through The Roku Channel. This hub includes over 350 live streaming options covering categories such as news, sports, entertainment, and children’s programming. Examples include ABC News Live, WeatherNation, and channels dedicated to niche interests like food, travel, and DIY.

    One standout feature is Roku’s live TV guide, which mimics the familiar grid-style layout of cable TV guides. This interface allows you to browse through channels, check program schedules, and jump into a live stream seamlessly. The free offerings cater to users who want to keep costs low while still enjoying a robust live TV lineup.

    Subscription-Based Live TV Services on Roku

    If you’re looking for a more comprehensive live TV experience, Roku supports a wide range of subscription-based services. These apps provide access to popular cable channels, local networks, and premium content. Here are some of the most notable options:

    • Hulu + Live TV: This service combines Hulu’s vast on-demand library with live TV channels, including ABC, NBC, CBS, and ESPN. It’s perfect for users who want a one-stop shop for both live and on-demand content.
    • YouTube TV: Known for its user-friendly interface and unlimited DVR storage, YouTube TV offers access to over 85 live channels, including sports networks like ESPN and Fox Sports.
    • Sling TV: Sling provides customizable packages, allowing users to choose channels based on their interests. It’s one of the most flexible live TV options available on Roku.
    • fuboTV: Catering specifically to sports fans, fuboTV includes live streams of major sports leagues alongside entertainment and news channels.
    • Philo: Focused on affordability, Philo offers a curated selection of entertainment and lifestyle channels without breaking the bank.

    Watching Local Channels on Roku

    For viewers who want access to local news, weather, and sports, Roku has several solutions. The easiest method is to use a live TV app that includes local channels, such as Hulu + Live TV or YouTube TV. Alternatively, you can integrate an HDTV antenna with your Roku device using a compatible tuner like the Tablo OTA DVR or the Roku Smart Soundbar with built-in TV tuners.

    These solutions allow you to stream live broadcasts from local stations, ensuring you don’t miss out on regional content. Some apps, like NewsON and Haystack News, also aggregate local news streams, making it easy to stay updated on events in your area.

    External Hardware for Live TV on Roku

    If you’re transitioning from traditional cable, Roku supports external hardware integration for live TV. Devices like cable boxes or satellite receivers can be connected to your TV and used alongside your Roku device. This setup is ideal for users who still rely on traditional broadcast services but want to enjoy Roku’s streaming capabilities.

    Additionally, DVR solutions like TiVo and Plex allow you to record live TV content and watch it later through your Roku device. This feature is especially useful for those who want to time-shift their viewing schedules.

    Comparing Live TV Options: Free vs. Paid

    Feature Free Live TV (e.g., Roku Channel) Subscription-Based Live TV (e.g., Hulu + Live TV)
    Cost Free Starts at $35/month
    Channel Variety Limited Comprehensive
    Local Channels Limited Available
    DVR Functionality Not Available Included
    Premium Channels Not Available Add-ons Available

    Setting Up Live TV on Roku

    Getting started with live TV on Roku is straightforward. Begin by connecting your Roku device to your TV and ensuring it’s connected to the internet. From there, explore the Roku Channel Store to download the necessary live TV apps. For antenna integration, connect your HDTV antenna to a compatible tuner and follow the on-screen setup instructions.

    Roku’s interface makes it easy to switch between apps and live TV channels, ensuring a seamless experience. The platform’s search functionality also allows you to look up specific shows or channels, providing a unified browsing experience across all your live TV options.

    Final Thoughts

    Roku has redefined what it means to watch live TV, offering a diverse range of options that cater to every type of viewer. Whether you’re a cord-cutter looking for free live streams, a sports enthusiast subscribing to fuboTV, or someone seeking local news through an antenna, Roku delivers a flexible and comprehensive live TV solution.

    The combination of affordability, ease of use, and variety makes Roku a top choice for anyone looking to enhance their television experience. By exploring the live TV features and experimenting with different apps and hardware setups, you can create a personalized viewing experience that meets all your needs. Live TV on Roku isn’t just an alternative to cable; it’s a step forward into the future of television.

    Also Check:

    Is Chromecast with Google TV Worth It? Everything You Need to Know

    Black Friday 2024: The Best Smart Home Device Deals to Watch For

    Roku Wireless Speakers Manual: A Beginner’s Guide to Superior Sound

    Will Roku Work on a Non Smart TV: Everything You Need to Know

    2024’s Most Popular Streaming Platforms: What to Watch and Why