Voice commands have become a game-changer in the world of streaming and smart home technology. With Google TV’s voice commands, users can seamlessly navigate their streaming devices, control smart home gadgets, and access a wealth of information—all with the power of their voice.

This article dives into the capabilities, benefits, and tips for using voice commands on Google TV effectively.
Key Takeaway
| Feature | Details |
|---|---|
| Ease of Use | Hands-free control via Google Assistant |
| Device Compatibility | Works with Google TV and Chromecast with Google TV |
| Supported Commands | Navigation, content search, smart home control, and more |
| Language Options | Supports multiple languages worldwide |
| Smart Home Integration | Sync with lights, thermostats, cameras, and more |
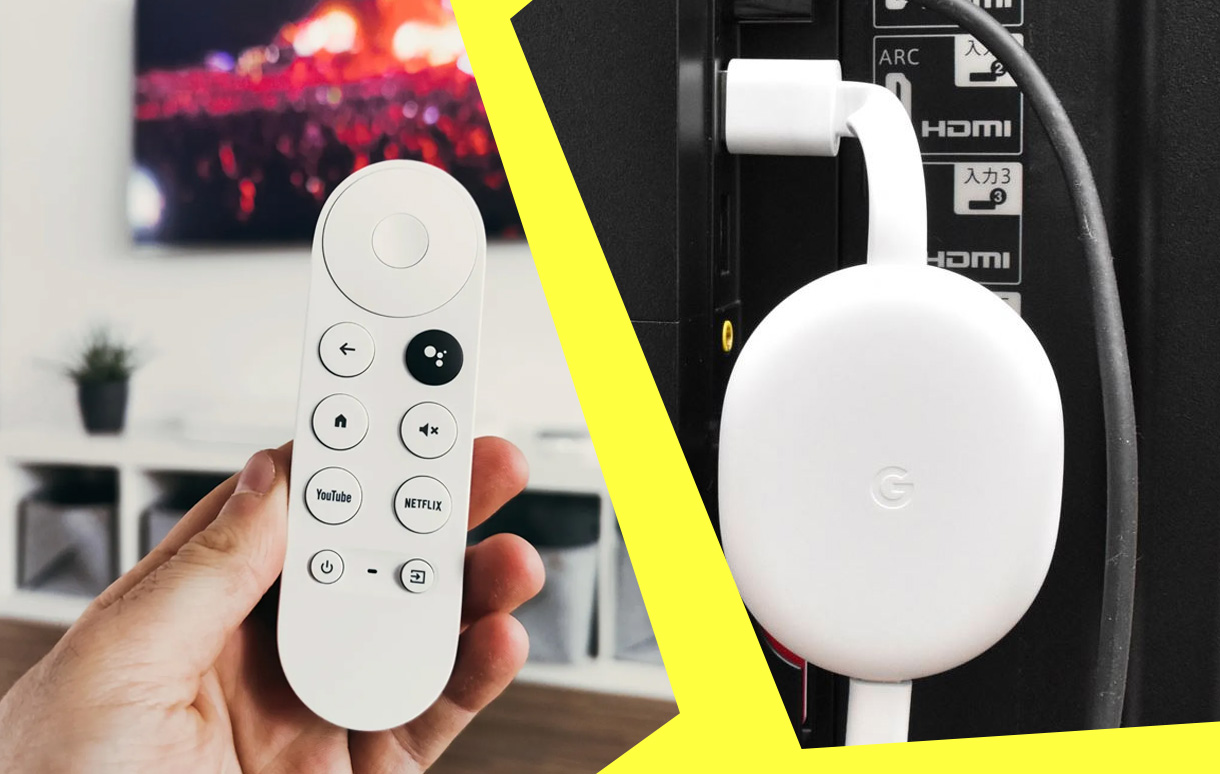
Google TV Voice Commands
Google TV transforms the way you interact with your streaming setup, offering a hands-free experience through Google Assistant. By simply pressing the microphone button on your remote or using a connected smart speaker, you can perform tasks such as:
- Searching for content across multiple platforms like Netflix, YouTube, and Disney+.
- Adjusting playback settings, such as volume or subtitles.
- Controlling smart home devices like lights or thermostats.
- Accessing real-time information such as weather updates or sports scores.
This feature is particularly beneficial for elderly users or those with limited mobility, making technology accessible to everyone.
How to Activate Voice Commands on Google TV
Using voice commands on Google TV is simple. Here’s a step-by-step guide:
- Set Up Google Assistant:
- During your initial Google TV setup, you’ll be prompted to enable Google Assistant.
- Log in with your Google account and grant necessary permissions.
- Use the Microphone Button on the Remote:
- Locate the microphone button, usually marked with a small mic icon.
- Hold it down while speaking your command.
- Connect to Smart Speakers:
- Pair your Google TV with a Google Nest or other compatible smart speaker for hands-free control.
- Use commands like “Hey Google, play Stranger Things on Netflix.”
- Customize Settings:
- Go to Settings > Google Assistant to adjust preferences such as voice recognition and language options.
Common Voice Commands for Google TV
Content Navigation
Google TV’s voice commands simplify finding your favorite shows and movies. Popular commands include:
- “Search for action movies.”
- “Play The Office on Peacock.”
- “Find movies directed by Christopher Nolan.”
Playback Controls
Control playback without reaching for the remote:
- “Pause.”
- “Turn on subtitles.”
- “Skip forward 10 minutes.”
Smart Home Integration
Connect Google TV to your smart home ecosystem for comprehensive control:
- “Dim the living room lights.”
- “Set the thermostat to 72 degrees.”
- “Show the front door camera on my TV.”
General Information
Ask Google Assistant for updates or information:
- “What’s the weather today?”
- “Show me the latest news.”
- “How’s the traffic to work?”
Benefits of Using Voice Commands on Google TV
Voice commands offer numerous benefits, including:
- Hands-Free Convenience: Control your entertainment without lifting a finger.
- Speed and Efficiency: Skip manual searches and navigate directly to content.
- Accessibility: Designed for users of all abilities, making technology more inclusive.
- Multi-Device Control: Manage your streaming and smart home devices in one ecosystem.
According to a study by Juniper Research, voice-activated device use grew by 32% in 2023, demonstrating the rising popularity of this feature.
Limitations and How to Overcome Them
Limitations:
- Accent or Language Recognition Issues: Voice commands may not always understand regional accents.
- Limited Offline Capabilities: Requires an active internet connection to function.
- Device Compatibility: Some features depend on having compatible smart devices.
Solutions:
- Customize Voice Training: Use the voice match feature to improve accuracy.
- Upgrade Hardware: Invest in smart speakers or devices for better integration.
- Regular Updates: Keep your Google TV software updated for new features and improvements.
Comparison of Google TV Voice Commands with Competitors
| Feature | Google TV | Amazon Fire TV | Apple TV |
|---|---|---|---|
| Voice Assistant | Google Assistant | Alexa | Siri |
| Smart Home Support | Advanced | Advanced | Moderate |
| Content Search | Extensive | Extensive | Limited to Apple apps |
| Ease of Use | Intuitive | Slightly complex | Intuitive |
Tips for Mastering Google TV Voice Commands
- Be Specific: Use detailed commands like “Play romantic comedies from the 1990s.”
- Leverage Smart Home Features: Sync smart gadgets to expand functionality.
- Customize Settings: Adjust preferences for better accuracy.
- Use Multi-Language Support: Set up multiple languages for multilingual households.
Conclusion
Google TV’s voice commands elevate the streaming experience, offering unparalleled convenience and functionality. Whether you’re searching for movies, controlling playback, or managing your smart home, Google Assistant empowers you to interact with technology effortlessly. With a little customization and practice, you’ll unlock the full potential of this powerful feature. Embrace the future of entertainment with Google TV voice commands.
Also Check:
- How to Set Up Google TV Profiles: A Step-by-Step Guide
- How to Sideload Apps on Google TV
- Google Chromecast Ethernet Adapter: Fixing an Unstable Chromecast Wi-Fi Connection or Network Congestion and Buffering
- How to Cast YouTube TV to Chromecast Like a Pro
- Sonos One SL Review: This Compact Sonos Speaker Outshines the Competition