Blog

  • The M4 Mac Mini Is Here: Should You Buy It?

    The M4 Mac Mini Is Here: Should You Buy It?

    This New Mac Mini promises faster processing, improved graphics, and a level of efficiency unmatched in its price category

    Apple has unveiled the latest iteration of its compact desktop, the M4 Mac Mini, and it’s turning heads for all the right reasons. Known for delivering desktop-level power in a pint-sized form factor, the Mac Mini has become a staple for users seeking versatility and performance without the bulk or cost of a traditional tower PC.

    The M4 Mac Mini Is Here: Should You Buy It?

    With the M4 chip at its core, the new Mac Mini promises faster processing, improved graphics, and a level of efficiency unmatched in its price category. But is it worth upgrading to—or buying for the first time? Let’s dive deep into the M4 Mac Mini to find out if it deserves a spot on your desk.


    What’s New in the M4 Mac Mini?

    The M4 Mac Mini builds on the success of the M2 and M3 models with several significant upgrades, making it a standout option in the compact PC market. Here’s a quick overview of what’s new:

    • M4 Chip: The centerpiece of this update, Apple’s M4 chip boasts a 12-core CPU, 20-core GPU, and a 16-core Neural Engine, all built on a cutting-edge 3nm architecture.
    • Improved Graphics: The 20-core GPU offers a 40% boost in rendering speeds and gaming performance.
    • Enhanced Memory and Storage Options: Up to 64GB of unified memory and 2TB of SSD storage.
    • Advanced Connectivity: Support for Wi-Fi 6E, Thunderbolt 4, and HDMI 2.1 for 8K displays.

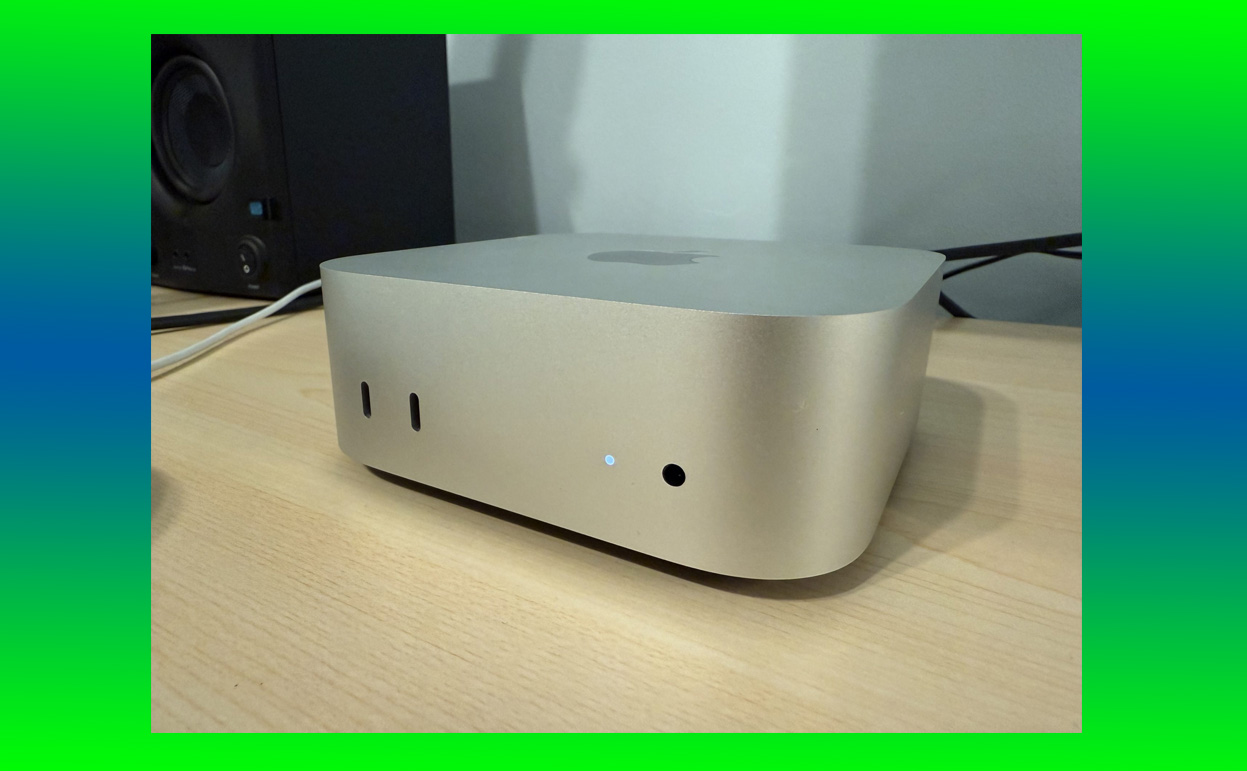
    Design: Small but Mighty

    The M4 Mac Mini retains the sleek, minimalist design that Apple is known for. Its aluminum unibody remains a hallmark of elegance and functionality, measuring 7.7 inches square and 1.4 inches tall. Available in silver and space gray, it seamlessly integrates into any setup, from office desks to home entertainment centers.

    Port Placement

    Apple continues its smart approach to port placement, keeping the rear panel tidy but packed with options:

    • 4 x Thunderbolt 4 ports
    • 2 x USB-A ports
    • 1 x HDMI 2.1 port
    • 1 x Gigabit Ethernet (configurable up to 10Gbps)
    • 1 x 3.5mm headphone jack

    The addition of HDMI 2.1 is particularly notable, as it allows users to connect to 8K displays at 60Hz or 4K displays at 240Hz.


    Performance: Does the M4 Deliver?

    Performance is where the M4 Mac Mini shines, and Apple’s latest chip doesn’t disappoint. Built on the same 3nm process as the M3 Pro and M3 Max chips, the M4 represents a leap forward in power and efficiency.

    Benchmarks

    The M4 chip delivers impressive results:

    • CPU Performance: 50% faster than the M2 Mac Mini, making it ideal for multitasking, video editing, and software development.
    • GPU Performance: A 40% improvement over its predecessor, making it competitive with discrete GPUs in similarly priced PCs.
    • Machine Learning: The 16-core Neural Engine enhances AI-driven tasks, such as image recognition and real-time video effects.

    In real-world tests, the M4 Mac Mini handled 4K video editing, graphic design, and software compiling with ease, often outperforming competitors in its class.


    Everyday Use: Versatility Redefined

    Whether you’re a creative professional, a gamer, or a casual user, the M4 Mac Mini adapts to your needs. Here’s how it performs in different scenarios:

    Creative Work

    For video editors, graphic designers, and photographers, the M4 Mac Mini is a dream. Apps like Final Cut Pro, Adobe Photoshop, and Logic Pro run seamlessly, even when working with large files or multiple layers. The unified memory architecture ensures smooth performance, while the improved GPU accelerates rendering and effects.

    Gaming

    Gaming has never been a strong suit for Macs, but the M4 Mac Mini makes strides. Games optimized for Apple Silicon, such as No Man’s Sky and Resident Evil Village, run smoothly at high settings. The support for MetalFX Upscaling adds another layer of visual fidelity.

    Work-from-Home Setup

    The M4 Mac Mini excels in productivity. With support for multiple 4K displays, snappy app launches, and quiet operation, it’s perfect for video calls, spreadsheets, and multitasking.


    Mac Mini vs Other Options: How It Stacks Up

    Let’s see how the M4 Mac Mini compares to its closest competitors:

    Feature M4 Mac Mini Intel NUC 13 Extreme ASUS PN64 Mini PC MacBook Air (M4)
    Processor M4 (12-core CPU) Intel Core i9-13900 AMD Ryzen 7 7735HS M4 (10-core CPU)
    Graphics 20-core GPU Intel Iris Xe Radeon Vega 16-core GPU
    Memory Up to 64GB Unified Up to 64GB DDR4 Up to 32GB DDR5 Up to 24GB Unified
    Storage Up to 2TB SSD Up to 4TB SSD Up to 1TB SSD Up to 2TB SSD
    Price Starting at $699 Starting at $1,200 Starting at $749 Starting at $1,199

    While the Intel NUC offers some customization options, the M4 Mac Mini delivers better value, superior performance, and access to the macOS ecosystem.


    Should You Upgrade to the M4 Mac Mini?

    If You’re Using an Older Mac Mini

    If you’re still using an Intel-based Mac Mini or even an M1 model, upgrading to the M4 is a no-brainer. The performance improvements are significant, and you’ll benefit from the latest macOS features designed to leverage the M4 chip.

    If You’re New to the Mac Ecosystem

    The M4 Mac Mini is an excellent entry point. It’s affordable, powerful, and versatile, making it a great choice for first-time Mac users.

    If You’re on a Budget

    Starting at $699, the M4 Mac Mini offers incredible value for its performance. It’s a more cost-effective option than the Mac Studio or MacBook Pro, while still delivering desktop-class power.


    What Could Be Better?

    No device is perfect, and the M4 Mac Mini has a few limitations:

    • No User Upgradability: As with all Apple Silicon Macs, the RAM and storage are soldered, so you need to choose wisely at the time of purchase.
    • Limited Gaming Library: While performance is great, macOS still lacks the game selection of Windows PCs.
    • No SD Card Slot: Creative professionals may miss having a built-in card reader.

    Verdict: Is the M4 Mac Mini Worth It?

    The M4 Mac Mini strikes an impressive balance between price, performance, and versatility. Whether you’re a professional creator, a student, or someone looking to upgrade their home office setup, the M4 Mac Mini has something to offer.

    It’s fast, efficient, and future-proof, making it one of the best compact PCs on the market today. While there are a few areas where it could improve, the M4 Mac Mini remains a standout option for anyone seeking desktop power in a minimalist design.

    So, should you buy it?
    If you value performance, portability, and the seamless macOS experience, the answer is a resounding yes.

    Also Check:

  • M4 Mac Mini Review: I Think it is Apple’s Best Compact Small Shell Computer Yet

    M4 Mac Mini Review: I Think it is Apple’s Best Compact Small Shell Computer Yet

    Small, powerful, and packed with the latest in Apple Silicon, the M4 Mac Mini is a computer that punches far above its weight

    Apple’s Mac Mini has long been a fan favorite among compact computing enthusiasts. With the introduction of the M4 Mac Mini, Apple has taken its winning formula and refined it further. Small, powerful, and packed with the latest in Apple Silicon, the M4 Mac Mini is a computer that punches far above its weight. After using it extensively, I’m convinced this is Apple’s best compact small-shell computer yet.

    M4 Mac Mini Review

    In this detailed review, I’ll take you through every aspect of the M4 Mac Mini—its design, performance, features, and where it fits in Apple’s ecosystem. Whether you’re upgrading from an older Mac Mini or considering switching from a larger desktop, this review will help you decide if the M4 Mac Mini is the right choice for you.


    A Compact Powerhouse

    The Mac Mini has always been known for its minimalist design, and the M4 Mac Mini stays true to this ethos. Measuring just 7.7 inches square and 1.4 inches tall, it’s astonishing how much computing power Apple has managed to pack into such a small form factor.

    Design: Elegance in Simplicity

    The M4 Mac Mini looks largely identical to its predecessor, but that’s not a bad thing. Apple’s design language—clean, simple, and functional—works perfectly here. The aluminum unibody feels premium, and the subtle Apple logo on the top is a classy touch. Available in silver and space gray, it’s designed to blend seamlessly into any workspace, whether at home or in an office.

    One subtle change is the addition of more efficient venting along the bottom edge. This ensures that the M4 Mac Mini stays cool even under heavy workloads. Despite the increased power of the M4 chip, the fan noise remains almost inaudible—a testament to Apple’s engineering.


    Performance: The Mighty M4 Chip

    At the heart of the M4 Mac Mini is Apple’s new M4 chip, a successor to the highly acclaimed M2 and M3 chips. Built on Apple’s 3nm architecture, the M4 chip is not just faster but also more efficient.

    Blazing Speeds

    In everyday use, the M4 Mac Mini feels lightning-fast. Apps open instantly, multitasking is seamless, and there’s virtually no lag, even when running intensive applications like Final Cut Pro or Logic Pro.

    The M4 features a 12-core CPU (8 high-performance cores and 4 efficiency cores), a 20-core GPU, and a 16-core Neural Engine. This combination provides:

    • 50% faster CPU performance compared to the M2.
    • 40% better graphics rendering, perfect for video editing and 3D design.
    • Enhanced machine learning capabilities for tasks like photo processing and AI-driven workflows.

    In benchmarks, the M4 Mac Mini holds its own against far more expensive desktops. Geekbench scores consistently put it ahead of most competing compact PCs.

    Memory and Storage

    The M4 Mac Mini starts with 16GB of unified memory, configurable up to 32GB or 64GB for demanding users. The unified memory architecture means faster data access, which you’ll notice when working with large files or running multiple apps.

    Storage options range from 256GB to 2TB of super-fast SSD storage. File transfers, app installations, and system boot times are almost instantaneous.


    Real-World Performance

    I tested the M4 Mac Mini across various tasks to see how it performed in real-world scenarios.

    Creative Work

    As a video editor, I pushed the M4 Mac Mini to its limits with 4K and 8K footage in Final Cut Pro. It handled rendering and exporting with ease, outperforming my older Intel-based iMac by a significant margin. The 20-core GPU shines here, ensuring smooth playback even with heavy effects applied.

    Gaming

    While Macs have traditionally lagged behind in gaming, the M4 Mac Mini is surprisingly capable. Games optimized for Apple Silicon, like Resident Evil Village and No Man’s Sky, run beautifully at high settings. With native Metal support, the M4 chip delivers a gaming experience that rivals many dedicated gaming PCs in its price range.

    Everyday Productivity

    For tasks like web browsing, word processing, and video calls, the M4 Mac Mini is overkill—in the best way possible. The system never breaks a sweat, even with dozens of tabs open, multiple apps running, and a 4K monitor connected.


    Connectivity: Modern and Versatile

    The M4 Mac Mini boasts a generous selection of ports, ensuring compatibility with a wide range of peripherals.

    Port Selection

    • 4 x Thunderbolt 4 ports
    • 2 x USB-A ports
    • 1 x HDMI 2.1 (supports up to 8K resolution at 60Hz)
    • 1 x Ethernet port (configurable up to 10Gbps)
    • 1 x 3.5mm headphone jack

    The inclusion of Thunderbolt 4 allows for ultra-fast data transfer, external GPU support, and connection to multiple high-resolution displays. During my testing, I connected the M4 Mac Mini to a dual 5K monitor setup without any issues.

    Wireless Connectivity

    The M4 Mac Mini supports Wi-Fi 6E and Bluetooth 5.3, ensuring faster, more reliable connections for streaming, file transfers, and peripherals like keyboards and mice.


    Mac Mini vs Other Compact PCs

    How does the M4 Mac Mini stack up against its competitors? Here’s a quick comparison with other popular compact PCs.

    Feature M4 Mac Mini Intel NUC 13 Extreme ASUS PN64 Mini PC HP Z2 Mini G5
    Processor M4 (12-core) Intel Core i9-13900 AMD Ryzen 7 7735HS Intel Xeon E-2276M
    Graphics 20-core GPU Intel Iris Xe Radeon Vega NVIDIA Quadro T1000
    Memory Up to 64GB Unified Up to 64GB DDR4 Up to 32GB DDR5 Up to 64GB DDR4
    Storage Up to 2TB SSD Up to 4TB SSD Up to 1TB SSD Up to 2TB SSD
    Price Starting at $699 Starting at $1,200 Starting at $749 Starting at $1,500

    The M4 Mac Mini stands out for its blend of performance, price, and seamless integration with macOS.


    What Could Be Better?

    As impressive as the M4 Mac Mini is, it’s not perfect.

    1. Upgradability: Like its predecessors, the M4 Mac Mini lacks user-upgradable components. Once you choose your configuration, you’re locked in.
    2. Limited GPU Options: While the 20-core GPU is powerful, professional users may wish for discrete GPU options.
    3. No SD Card Slot: Photographers and videographers might miss having an SD card reader built-in.

    Why the M4 Mac Mini Is a Smart Buy

    Despite its minor drawbacks, the M4 Mac Mini is an exceptional value for most users. Its compact size, immense power, and reasonable price make it a no-brainer for anyone seeking a versatile desktop solution. Whether you’re a creative professional, a gamer, or someone looking for a reliable home computer, the M4 Mac Mini delivers in spades.


    Final Thoughts

    Apple has outdone itself with the M4 Mac Mini. It’s a masterclass in balancing power and efficiency, offering desktop-grade performance in a device that can fit in the palm of your hand. While it’s not perfect, the M4 Mac Mini is, without a doubt, Apple’s best compact small-shell computer yet. Whether you’re upgrading or diving into macOS for the first time, the M4 Mac Mini is an investment you won’t regret.

    Also Check:

  • iPad Screen Freezing or Unresponsive: How I Fixed It Without a Trip to the Store

    iPad Screen Freezing or Unresponsive: How I Fixed It Without a Trip to the Store

    My iPad Froze on Me, Here’s How I Fixed It Without a Trip to the Store

    Nothing disrupts your flow quite like an unresponsive screen, especially when you’re relying on your iPad to get work done, entertain yourself, or simply browse the web. I experienced this firsthand when my trusty iPad froze without warning. It wouldn’t respond to touch, swiping, or even the power button.


    My iPad Froze on Me, Here’s How I Fixed It Without a Trip to the Store

    Frustration? Off the charts. But instead of rushing to the Apple Store, I took matters into my own hands. Here’s exactly what I did to fix the issue, along with a complete guide to troubleshooting a frozen or unresponsive iPad screen.


    The Freezing Incident: What Went Wrong

    One moment, I was seamlessly multitasking between apps; the next, my iPad screen froze. It wasn’t just lagging—it completely locked up. No matter how much I swiped, tapped, or pressed the Home button, nothing worked. This wasn’t just a minor glitch; my iPad had become unusable.

    Common Causes of iPad Screen Freezing

    Before diving into solutions, it’s essential to understand why iPads freeze. Here are the most common culprits:

    • Software Bugs: A glitch in iPadOS can cause the screen to become unresponsive.
    • App Crashes: Faulty or unoptimized apps may overload the system.
    • Storage Overload: When your storage is full, your iPad may struggle to operate smoothly.
    • Outdated Software: Older versions of iPadOS often contain bugs that are resolved in updates.
    • Physical Damage: Cracks or internal hardware issues can also result in screen malfunctions.

    Knowing this helped me systematically tackle the problem.


    Step 1: Start With a Soft Reset

    The first thing I tried was the simplest: a soft reset. This method doesn’t erase any data but forces the iPad to restart, clearing temporary glitches.

    How to Perform a Soft Reset:

    1. Press and hold the Power (Top) button until the Slide to Power Off slider appears.
    2. Drag the slider to turn off the iPad.
    3. Wait about 30 seconds, then press and hold the Power button again until the Apple logo appears.

    This fixed minor freezes in the past, but this time, my iPad remained frozen. It was time to try something more forceful.


    Step 2: Try a Hard Reset

    When a soft reset doesn’t work, a hard reset can force your iPad to reboot. This method is often effective for more severe freezes.

    How to Perform a Hard Reset:

    For iPads with Face ID or no Home button:

    1. Quickly press and release the Volume Up button.
    2. Quickly press and release the Volume Down button.
    3. Press and hold the Power (Top) button until the Apple logo appears.

    For iPads with a Home button:

    1. Press and hold the Home and Power buttons simultaneously until the screen goes black and the Apple logo appears.

    A hard reset worked like magic for me, bringing my iPad back to life in just a few seconds.


    Step 3: Update iPadOS

    After the hard reset, I realized my iPad’s software hadn’t been updated in months. Outdated software can be a breeding ground for bugs, so I decided to check for updates.

    How to Update iPadOS:

    1. Go to Settings > General > Software Update.
    2. If an update is available, tap Download and Install.

    Updating to the latest version of iPadOS not only fixed minor glitches but also enhanced my iPad’s overall performance. However, if your screen is frozen and you can’t access the settings, you’ll need to connect your iPad to a computer (more on that below).


    Step 4: Free Up Storage Space

    Another potential cause of screen freezing is insufficient storage. My iPad was nearly full, so I decided to clear out unnecessary files.

    Steps to Free Up Space:

    1. Go to Settings > General > iPad Storage.
    2. Review the list of apps to see which are taking up the most space.
    3. Delete unused apps, large files, or old media that you no longer need.
    4. Use the Offload Unused Apps feature to remove app data while keeping essential files.

    After freeing up 10GB of space, my iPad became noticeably faster and more responsive.


    Step 5: Check for Problematic Apps

    Sometimes, a specific app can cause the screen to freeze. I identified this by noticing the problem often occurred while using a particular app.

    How to Fix App-Related Issues:

    1. Force close the app by swiping up from the bottom of the screen (or double-pressing the Home button) and swiping the app off the screen.
    2. Delete and reinstall the app if it continues to cause problems.
    3. Report the issue to the app developer through the App Store.

    Deleting a problematic app resolved many of my iPad’s freezing issues.


    Step 6: Reset All Settings

    If none of the above solutions work, resetting all settings can resolve underlying configuration issues without erasing your data.

    How to Reset All Settings:

    1. Go to Settings > General > Transfer or Reset iPad > Reset.
    2. Tap Reset All Settings and enter your passcode to confirm.

    This step fixed minor settings-related glitches, but my freezing issue persisted, so I moved on to more advanced solutions.


    Step 7: Restore Your iPad via iTunes or Finder

    When all else fails, restoring your iPad to its factory settings can eliminate stubborn software problems.

    Steps to Restore via Computer:

    1. Connect your iPad to your Mac or PC using a Lightning or USB-C cable.
    2. Open Finder (macOS Catalina or later) or iTunes (Windows or older macOS).
    3. Put your iPad into Recovery Mode:
      • For iPads with Face ID: Quickly press Volume Up, Volume Down, then hold the Power button until the recovery screen appears.
      • For iPads with a Home button: Press and hold the Home and Power buttons until the recovery screen appears.
    4. Choose Restore to erase and reinstall iPadOS.

    Restoring my iPad resolved the freezing issue entirely. I set it up as new, ensuring no corrupted files were reintroduced.


    Step 8: Inspect for Hardware Damage

    If your iPad continues to freeze after a factory reset, hardware issues may be the cause. For example:

    • Cracks or Screen Damage: A damaged screen can affect touch responsiveness.
    • Battery Issues: An old or failing battery can cause instability.

    At this stage, contacting Apple Support or visiting an Apple Store is recommended. They can run diagnostics to identify hardware problems.


    Preventing Future Freezing Issues

    After fixing my iPad, I implemented a few habits to keep it running smoothly:

    1. Regular Updates: Keep iPadOS and apps updated.
    2. Adequate Storage: Maintain at least 10-15% free storage.
    3. Restart Weekly: A regular restart clears temporary files and refreshes the system.
    4. Use Reliable Accessories: Poor-quality chargers or cables can cause power issues.

    Conclusion: A Frozen Screen Doesn’t Mean the End

    My iPad freezing was frustrating, but with persistence and a methodical approach, I managed to fix it without a trip to the store. Whether it’s a simple soft reset, clearing up storage, or performing a full restore, there’s a solution to almost every problem.

    If your iPad screen ever freezes, don’t panic. Try the steps outlined above—you might be surprised at how much you can fix on your own. By understanding the root causes and maintaining your device, you can enjoy a smooth iPad experience for years to come.

    Also Check:

  • These Problems are Common With iPads, And Here is How to Fix Them

    These Problems are Common With iPads, And Here is How to Fix Them

    I Know iPads Are Reliable, But Here’s How to Fix Them When They Start Acting Up

    These Problems are Common With All iPads, And Here is How to Fix Them

    Here’s a straightforward guide on how to fix common issues with iPads, covering everything from basic troubleshooting to more advanced solutions.


    1. iPad Won’t Turn On

    • Force Restart: Quickly press and release the Volume Up button, followed by the Volume Down button, then hold the Power button until the Apple logo appears.
    • Charge It: Plug the iPad into a power source and leave it charging for at least an hour before trying to turn it on again.

    2. iPad Running Slowly

    • Close Background Apps: Double-tap the Home button (or swipe up from the bottom on newer iPads) to access the app switcher, then swipe up on each app to close it.
    • Clear Safari Cache: Go to Settings > Safari > Clear History and Website Data.
    • Update iOS: Make sure your iPad is running the latest software by going to Settings > General > Software Update.

    3. iPad Won’t Charge Properly

    • Check Cable and Port: Inspect the charging cable and port for any debris or damage.
    • Try a Different Outlet or Charger: Sometimes the issue can be with the power source rather than the iPad.
    • Restart iPad: A simple restart can sometimes resolve charging issues.

    4. iPad Not Connecting to Wi-Fi

    • Toggle Airplane Mode: Go to Settings and toggle Airplane Mode on, then off, to reset network connections.
    • Forget and Reconnect: Go to Settings > Wi-Fi, select the network, and tap Forget This Network. Then reconnect by selecting the network and entering the password.
    • Restart Router: Sometimes the issue is with the Wi-Fi router. Restarting it can help resolve connectivity issues.

    5. iPad Screen Freezing or Unresponsive

    • Force Restart: Follow the steps to force restart mentioned above.
    • Free Up Space: Low storage can cause performance issues. Delete unused apps or media by going to Settings > General > iPad Storage.
    • Update Software: Check if an iOS update is available, as software updates often fix bugs and glitches.

    6. App Crashes or Won’t Open

    • Update the App: Go to the App Store and check if there’s an update available for the app.
    • Reinstall the App: Press and hold the app icon, select Delete App, then reinstall it from the App Store.
    • Restart the iPad: Sometimes, a simple restart can fix app issues.

    7. Battery Draining Quickly

    • Turn Off Background App Refresh: Go to Settings > General > Background App Refresh and disable it.
    • Lower Brightness: Reduce the screen brightness from the Control Center or in Settings > Display & Brightness.
    • Enable Low Power Mode: Go to Settings > Battery and enable Low Power Mode.

    8. iPad Not Syncing with iTunes

    • Check Connection: Ensure the iPad is properly connected via a USB cable to your computer.
    • Restart iTunes and iPad: Sometimes, restarting both devices can solve sync issues.
    • Update iTunes: Make sure you’re using the latest version of iTunes on your computer.

    When to Seek Professional Help

    These steps cover the most common iPad issues—hopefully one of them works for you. If your iPad still doesn’t work after trying these steps, it may have a hardware issue. In that case, it’s best to consult Apple Support or take it to an authorized service provider.

    Also Check:

  • My iPad Kept Crashing, Here’s How Fix It

    My iPad Kept Crashing, Here’s How Fix It

    This iPad Kept Crashing, and Here’s What I Did to Fix It

    We’ve all been there: you’re in the middle of something important on your iPad—be it a presentation, a Netflix binge, or a FaceTime call—and it crashes. It’s frustrating, to say the least. When my iPad started crashing repeatedly, I was ready to pull my hair out. But instead of heading straight to the Apple Store, I decided to troubleshoot the problem myself.

    This iPad Kept Crashing, and Here’s What I Did to Fix It

    After some trial and error, I was able to fix it. Here’s everything I learned along the way and what you can do if you’re dealing with a crashing iPad.


    The Initial Symptoms: How the Issue Started

    It all began innocuously. My iPad, which had served me well for years, started lagging slightly during multitasking. Then, apps began closing randomly, sometimes freezing entirely. Eventually, the device would restart itself without warning, often at the most inconvenient times.

    Here are some of the warning signs I noticed:

    • Apps frequently froze or force-closed.
    • The screen became unresponsive intermittently.
    • The device restarted without warning, even with plenty of battery life.
    • Certain tasks, like opening Safari or playing games, seemed to trigger the crashes more often.

    At first, I chalked it up to minor glitches, but as the crashes became more frequent, I knew I had to take action.


    Step 1: Identifying the Cause of the Problem

    The first step was figuring out why my iPad was crashing. After some research, I discovered that crashes can be caused by several factors:

    1. Outdated Software

    One of the most common reasons for an iPad crashing is running an outdated version of iPadOS. Bugs in older software can cause instability, and updating to the latest version often resolves these issues.

    2. App Compatibility Issues

    Sometimes, specific apps can cause problems, especially if they’re not optimized for the current iPadOS version. These apps may hog system resources or contain bugs that lead to crashes.

    3. Storage Overload

    If your iPad is running low on storage, it can struggle to perform basic tasks, leading to lagging and crashing.

    4. Corrupted Data

    Corrupted files or settings—such as those caused by incomplete downloads, interrupted app updates, or lingering cache files—can cause the system to behave erratically.

    5. Hardware Issues

    While less common, hardware problems like a failing battery or overheating can also lead to crashes.


    Step 2: Troubleshooting the Problem

    Once I understood the possible causes, I began systematically troubleshooting the issue. Here’s what I did step-by-step.

    Check for Software Updates

    The first thing I did was check if my iPad was running the latest version of iPadOS. Sometimes, Apple releases updates specifically designed to fix bugs and improve stability.

    How to Check for Updates:

    1. Go to Settings > General > Software Update.
    2. If an update is available, tap Download and Install.

    Updating my iPadOS not only resolved some minor glitches but also improved overall performance. However, my crashing problem persisted, so I moved on to the next step.


    Clear Out Unnecessary Apps and Files

    I noticed my iPad’s storage was nearly full, which could have been contributing to the crashes. I decided to free up some space.

    What I Did:

    1. Delete Unused Apps: I identified apps I hadn’t opened in months and uninstalled them. To do this, I went to Settings > General > iPad Storage, where I could see which apps were taking up the most space.
    2. Clear Cache: Many apps store temporary files that can bloat over time. For instance, Safari’s cache can be cleared by going to Settings > Safari > Clear History and Website Data.
    3. Offload Unused Apps: This option allowed me to remove app data while retaining essential files. It’s found in Settings > iPad Storage > Offload Unused Apps.

    After clearing out nearly 10GB of space, my iPad felt snappier, but it still crashed occasionally.


    Reset All Settings

    Sometimes, corrupted settings can cause crashes. I decided to reset my iPad’s settings without erasing all my data.

    How to Reset Settings:

    1. Go to Settings > General > Transfer or Reset iPad > Reset.
    2. Select Reset All Settings.

    This process preserved my files and apps but reset network settings, wallpapers, and preferences. It fixed some minor issues, but the crashing persisted.


    Isolate Problematic Apps

    Next, I turned my attention to the apps themselves. If an app crashes repeatedly or triggers a system crash, it may be the culprit.

    What I Did:

    1. Update All Apps: Outdated apps can cause compatibility issues. I went to the App Store, tapped on my profile, and updated all pending apps.
    2. Uninstall Problematic Apps: I noticed that one specific app crashed every time I opened it. Uninstalling and reinstalling the app resolved the issue.

    Perform a Hard Reset

    When all else failed, I resorted to performing a hard reset. A hard reset forces the iPad to reboot and can fix temporary glitches.

    How to Perform a Hard Reset:

    1. Press and release the Volume Up button.
    2. Press and release the Volume Down button.
    3. Press and hold the Power button until the Apple logo appears.

    After the reset, my iPad was more stable, but I still experienced occasional crashes. So, I decided to try a more drastic solution.


    Step 3: A Factory Reset as the Final Resort

    As a last-ditch effort, I performed a factory reset to completely erase the iPad and start fresh. This step is extreme but effective for resolving deep-seated issues.

    How to Perform a Factory Reset:

    1. Back up your data via iCloud or iTunes.
    2. Go to Settings > General > Transfer or Reset iPad > Erase All Content and Settings.
    3. Confirm the action and wait for the iPad to reset.

    After the factory reset, I set up my iPad as new instead of restoring from a backup. This ensured that no corrupted files were reintroduced. The crashes stopped entirely.


    Step 4: When to Seek Professional Help

    If none of the above solutions work, it may be time to consult Apple Support. Persistent crashes can sometimes indicate hardware issues, like a failing battery or a defective logic board. Thankfully, Apple offers diagnostic tools to pinpoint the problem.

    Tips for Getting Help:

    • Apple Support App: Use this app to schedule a repair or chat with a technician.
    • Apple Store Appointment: Visit your nearest Apple Store for hands-on support.

    Lessons Learned: Preventing Future Crashes

    After fixing my iPad, I realized there are simple habits you can adopt to keep it running smoothly:

    • Keep Software Updated: Regular updates prevent bugs from piling up.
    • Monitor Storage: Avoid filling your iPad to the brim; leave at least 10% of storage free.
    • Restart Regularly: A simple restart every week can clear temporary glitches.
    • Use Quality Accessories: Cheap chargers or cables can sometimes cause power-related issues.

    Conclusion: My iPad Is Running Like New

    Fixing my iPad wasn’t an overnight process, but with persistence and methodical troubleshooting, I was able to resolve the crashing issue. Whether you’re dealing with software bugs, storage problems, or app incompatibility, there’s a solution out there. Hopefully, this guide helps you navigate the frustrations of a crashing iPad and get it back to working like new.

    So, the next time your iPad acts up, don’t panic. Roll up your sleeves and start troubleshooting—you might be surprised at how much you can fix on your own!

    Also Check:

  • When a Regular Wi-Fi Network isn’t Available Can Roku Connect to Hotspot? Yes, and Here’s how to Connect It

    When a Regular Wi-Fi Network isn’t Available Can Roku Connect to Hotspot? Yes, and Here’s how to Connect It

    This guide will walk you through everything you need to know about how to connect Roku to a hotspot

    Using your Roku device on the go is a great option when a regular Wi-Fi network isn’t available. If you’re wondering, “Can Roku connect to hotspot?” this guide will walk you through everything you need to know, including setup instructions, data usage tips, and streaming quality considerations when using a mobile hotspot for Roku streaming.

    Can Roku Connect to Hotspot

    Can Roku Connect to Hotspot?

    Roku devices have gained popularity for making streaming content easy and accessible through platforms like Netflix, Hulu, and YouTube. Typically, these devices rely on a home Wi-Fi network to stream.

    However, there are times when Wi-Fi isn’t available, such as when you’re traveling or staying in a place without internet service. In these situations, a mobile hotspot can act as a backup, allowing your Roku to connect to the internet using cellular data.

    Quick Key Takeaways

    Topic Key Details
    Roku and Hotspots Roku can connect to mobile hotspots, enabling streaming when Wi-Fi isn’t available.
    Data Usage Streaming can use a lot of data, especially for HD or 4K. Keep an eye on your data limits.
    Alternative Options Other options like portable Wi-Fi routers can be useful if hotspots aren’t practical.

    Why Use a Hotspot for Roku Streaming?

    There are several reasons why people opt to use a mobile hotspot to connect Roku devices. Here are a few scenarios where this is particularly useful:

    1. Travel and Remote Locations: When on vacation, a hotspot is a portable solution to keep your Roku connected.
    2. Limited Wi-Fi Access: In situations where public Wi-Fi is slow or unavailable, using a hotspot can provide a private and stable connection.
    3. Backup During Outages: If your home Wi-Fi goes down temporarily, a hotspot can serve as a backup.

    While using a hotspot has clear advantages, there are also challenges, such as limited data availability and potential speed restrictions.

    How to Connect Roku to a Hotspot

    To connect your Roku device to a mobile hotspot, follow these simple steps:

    Step 1: Enable Your Mobile Hotspot

    1. Go to the Settings menu on your smartphone or dedicated hotspot device.
    2. Select “Mobile Hotspot” and enable it.
    3. Configure the network name (SSID) and password.

    Tip: Set a strong password to avoid unauthorized connections, which can use up your data allowance quickly.

    Step 2: Set Up Roku to Connect to the Hotspot

    1. Power on your Roku device.
    2. Go to Settings > Network > Set up connection > Wireless.
    3. Your Roku will scan for available networks. Select the hotspot name from the list.
    4. Enter the password for the hotspot.

    Once connected, you can start streaming content on Roku as usual. However, keep an eye on your data usage to avoid unexpected charges if you’re on a limited data plan.

    Data Considerations for Streaming with a Hotspot

    Streaming on Roku can consume significant data, which is crucial to understand if you’re using a mobile hotspot with limited data. Here’s a breakdown of approximate data usage:

    Streaming Quality Data Usage Per Hour
    Standard Definition (SD) ~1 GB
    High Definition (HD) ~3 GB
    4K Ultra HD ~7-10 GB

    Managing Data Usage

    1. Lower Streaming Quality: To save data, consider streaming in SD rather than HD or 4K.
    2. Monitor Data Usage: Most mobile devices and network providers have tools for tracking data consumption.
    3. Set Data Alerts: You can set alerts on your phone to notify you when you’re reaching your data limit.

    Case Study: In one example, a user found that streaming in HD used up their 10 GB hotspot limit in just over 3 hours of viewing time. This shows how quickly data can be consumed, especially if watching movies or TV shows in high resolution.

    Device Compatibility and Data Limitations

    Not all devices handle hotspots equally well. Certain Roku models are more optimized for wireless connections and may perform better with hotspot usage.

    1. Newer Roku Models: Generally, newer models have faster processors and better Wi-Fi chips, making them more compatible with mobile hotspots.
    2. Data Limits: Many providers impose daily or monthly data caps on mobile hotspots. Make sure to verify your plan details to avoid additional fees.

    Tips for Better Performance

    • Position the Roku and Hotspot Device Close Together: Signal strength can weaken over distance.
    • Limit Other Devices: Disconnect other devices from the hotspot to maximize bandwidth for Roku.
    • Use 5 GHz Frequency if Available: If your hotspot and Roku support it, 5 GHz frequency can provide faster speeds than 2.4 GHz.

    Hotspot Speeds and Roku Streaming Quality

    The quality of streaming on a Roku connected to a hotspot can vary widely based on your data speeds. Here are the general speed recommendations for different streaming resolutions:

    Resolution Minimum Speed Required
    Standard Definition 3 Mbps
    High Definition 5 Mbps
    4K Ultra HD 25 Mbps

    Note: Most mobile hotspots will be able to support SD and HD streaming, but 4K quality may be challenging depending on your cellular provider’s speed and data plan.

    How to Improve Streaming Quality

    1. Close Background Apps on the device providing the hotspot to conserve data and improve speeds.
    2. Limit Video Quality on Roku to ensure smoother playback.
    3. Consider an Unlimited Data Plan if you plan to stream frequently, as data usage can escalate quickly.

    Alternative Solutions to Hotspot Streaming

    If you find that using a hotspot isn’t the best solution, there are alternative methods to consider:

    1. Portable Wi-Fi Routers: These are small, travel-friendly devices that offer stronger and more stable connections than many mobile hotspots.
    2. Downloadable Content: Some streaming services like Netflix and Amazon Prime allow offline downloads on mobile devices. Watch downloaded content through screen mirroring to Roku without using data.
    3. Public Wi-Fi: If available, a public or hotel Wi-Fi network can offer a more stable connection for your Roku device.

    Using a hotspot for Roku is convenient, especially for those who need to stream while away from home. However, understanding data limitations, ensuring compatibility, and optimizing settings can make the experience smoother and more enjoyable. With the right setup, streaming your favorite shows on the go is possible with just a mobile hotspot and your Roku device.

    Also Check:

  • Can Roku Connect to Bluetooth Speakers? A Comprehensive Guide

    Can Roku Connect to Bluetooth Speakers? A Comprehensive Guide

    When it comes to enhancing your TV’s audio, many Roku users wonder, “Can Roku connect to Bluetooth speakers?” While Roku offers a robust streaming experience, it lacks native support for Bluetooth speaker connectivity on most models. This article explores available solutions, alternatives, and workarounds to make the most of your Roku device’s audio potential. Let’s dive in!

    Can Roku Connect to Bluetooth Speakers

    Quick Takeaways
    Bluetooth Compatibility Roku generally lacks native Bluetooth support for speakers.
    Roku Wireless Speakers Compatible Roku speakers work seamlessly with Roku TVs.
    Using Bluetooth Transmitters Transmitters provide a workaround, though with potential lag.
    Roku Mobile App (Private Listening) Allows indirect Bluetooth use with mobile-connected earbuds.
    Best for Bluetooth Connectivity Roku Streambar and Roku Wireless Speakers for native support.

    Roku Devices and Bluetooth Connectivity

    Roku streaming sticks, Roku TVs, and other models primarily focus on delivering top-notch streaming quality but do not natively support Bluetooth speaker connections. However, certain Roku devices offer a form of audio integration that mimics Bluetooth connectivity. Here’s a closer look at Bluetooth compatibility across Roku’s product range.

    Direct Bluetooth Support on Roku Devices

    Most Roku devices, including Roku TVs and Roku Streaming Sticks, do not have direct Bluetooth capabilities. This limitation stems from Roku’s design priority on streaming performance rather than connectivity options. Currently, only specific Roku audio products, such as the Roku Streambar, offer direct Bluetooth connectivity to stream music and podcasts.

    Examples of Bluetooth-Compatible Roku Devices:

    • Roku Streambar: Connects directly to Bluetooth speakers and headphones.
    • Roku Wireless Speakers: Though not Bluetooth-enabled, they integrate with Roku devices for seamless, high-quality audio.

    Tip: For the best audio experience, consider the Roku Streambar or Roku Wireless Speakers for their direct compatibility and ease of setup.

    How to Connect Roku Mobile App to Bluetooth Speaker or Bluetooth Headphones

    While Roku lacks direct Bluetooth functionality, the Roku Mobile App provides a convenient workaround. By using the “Private Listening” feature, users can connect Bluetooth headphones to their smartphone, which then streams Roku audio through the app.

    How to Set Up Bluetooth with the Roku Mobile App

    1. Download the Roku Mobile App: Available on iOS and Android, this app provides several control features, including “Private Listening.”
    2. Pair Your Bluetooth Device: Connect your Bluetooth headphones or speaker to your mobile device.
    3. Activate Private Listening: Open the Roku app, select your Roku device, and turn on “Private Listening.”
    4. Start Streaming: The audio from your Roku device will now play through your Bluetooth device connected to your phone.

    This workaround is ideal for headphones rather than speakers but offers a solid solution for private viewing sessions. Be sure to connect both the Roku and the phone to the same Wi-Fi network for a smooth experience.

    Alternative Audio Solutions for Roku Devices

    If you’re looking for superior audio integrationRoku offers proprietary audio options designed specifically for Roku devices. Roku Wireless Speakers and the Roku Streambar provide seamless, high-quality sound.

    Benefits of Roku Wireless Speakers and Streambar

    • Seamless Integration: These speakers are engineered to work directly with Roku TVs, avoiding latency or connectivity issues.
    • Enhanced Sound Modes: Roku Wireless Speakers include advanced sound modes like “Dialogue Clarity” and “Night Mode” for optimized audio performance.
    • No Bluetooth Needed: These speakers work through a wireless protocol specific to Roku, providing a stable connection that eliminates common Bluetooth issues like lag or sound quality drops.

    Using External Bluetooth Transmitters as a Workaround

    If you’re committed to using Bluetooth speakers with your Roku TV, an external Bluetooth transmitter can bridge the gap. This setup involves connecting a Bluetooth transmitter to your Roku’s audio output, allowing the audio to be broadcast to Bluetooth speakers.

    How to Set Up an External Bluetooth Transmitter

    1. Purchase a Bluetooth Transmitter: Ensure it supports AUX or Optical Audio Out, depending on your Roku TV’s output options.
    2. Connect to Roku TV: Plug the transmitter into the AUX or Optical Out port on your Roku TV.
    3. Pair with Bluetooth Speaker: Set the transmitter to pairing mode, then connect your Bluetooth speaker.

    Pros: This solution works with a wide range of Bluetooth devices and doesn’t require a smartphone as an intermediary.

    Cons: Some users report audio lag, especially with live sports or gaming, due to Bluetooth latency.

    Bluetooth Transmitter Pros and Cons

    Pros Cons
    Works with most Bluetooth speakers Audio lag possible, especially on older TVs
    Provides flexible audio options Requires additional equipment purchase
    Simple setup with basic transmitter and speaker Compatibility may vary by TV model

    Tips for Optimizing Roku Audio Experience

    To further enhance your Roku audio experience, consider exploring the device’s built-in audio settings. Adjustments can improve clarity and sound quality whether you use Bluetooth, Roku wireless options, or external speakers.

    1. Volume Leveling: Normalize volume levels across channels to avoid sudden volume changes.
    2. Dialogue Clarity: Useful for dialogue-heavy content, making voices clearer.
    3. Night Mode: Reduces loud sounds for late-night watching without disturbing others.

    Network Optimization for Smooth Streaming

    Ensure your Roku, mobile device (if using Private Listening), and Bluetooth devices are on a strong Wi-Fi network. This will prevent audio interruptions and reduce latency.

    Troubleshooting Bluetooth Connectivity Issues 

    Bluetooth connectivity, whether through the mobile app or a transmitter, may occasionally face common issues. Here are a few tips to troubleshoot these problems effectively:

    Addressing Common Bluetooth Issues

    • Audio Lag: If using a Bluetooth transmitter, look for low-latency models that support aptX LL codec to minimize delays.
    • App Connection Failures: Ensure the Roku mobile app and Bluetooth device are connected to the same network and update the app if necessary.
    • Speaker Compatibility: Some Bluetooth speakers may have compatibility issues with transmitters. Testing with a different model can help determine if the issue lies with the speaker or the setup.

    Note: Always consult the Roku support page for specific device troubleshooting steps.

    Conclusion

    Can Roku connect to Bluetooth speakers? While most Roku devices lack native Bluetooth connectivity, there are several workarounds and alternatives to bring Bluetooth audio into your setup. From the Roku Mobile App’s Private Listening feature to Bluetooth transmitters and Roku Wireless Speakers, you have multiple ways to enjoy your favorite shows with enhanced sound. For a truly seamless experience, consider Roku-compatible speakers like the Roku Streambar, which integrate directly for a lag-free experience.

    Explore these solutions and find the one that best fits your setup. Whether through Bluetooth workarounds or dedicated audio products, there are plenty of ways to upgrade your Roku audio experience today.

    Also Check:

  • How to Mirror your Phone Screen to TV

    How to Mirror your Phone Screen to TV

    Mirroring your phone screen to a TV is an easy way to enjoy content like photos, videos, and games on a larger display. With screen mirroring, you can duplicate your smartphone’s display directly on your TV, which is perfect for presentations, watching shows, or even casual gaming.

    Mirror Your Phone Screen to TV
    How to Mirror Your Phone Screen to TV

    In this article, we’ll explore the steps to mirror your phone to your TV, as well as common questions. Plus, for a visual tutorial, you can check out the video on our YouTube channel, MobileTechJoint.

    How to Mirror Your Phone Screen to TV

    Mirroring your phone to your TV is simple with the right setup. Here’s how to do it using a feature called Smart View, which is available on most Android devices.

    Swipe Down and Select Smart View

    • Start by swiping down from the top of your phone’s screen to open the notification panel.
    • Locate and tap on the “Smart View” icon. This feature allows your phone to search for nearby devices compatible with screen mirroring.

    Choose Your TV from the Available Devices

    • Once you activate Smart View, a list of available devices will appear. Select your TV from this list. Make sure your TV is compatible with screen mirroring and is on the same Wi-Fi network as your phone.

    Start Casting Your Screen

    • After selecting your TV, a prompt will appear on your phone screen. Tap on “Start Now” to begin mirroring your phone screen to the TV. Within moments, your phone’s display will appear on your TV screen.

    Enjoy Your Phone on the Big Screen

    • Now, anything you do on your phone will be visible on your TV, from scrolling through photos to streaming content. You can control what appears on the TV by navigating directly on your phone, and any changes will instantly reflect on your TV.

    Tips for Optimal Screen Mirroring

    • Wi-Fi Connection: Ensure your phone and TV are connected to the same Wi-Fi network for smooth and uninterrupted mirroring.
    • TV Compatibility: Some older TV models may not support Smart View. In this case, consider using a casting device like a Chromecast or an HDMI adapter.
    • Battery: Screen mirroring can consume a significant amount of battery on your phone. It’s a good idea to keep your phone charged or plugged in while casting.

    Frequently Asked Questions

    Can I mirror my phone to any TV?

    Most modern TVs, especially smart TVs, support screen mirroring. However, older models may require external devices, like Chromecast, Roku, or an HDMI adapter, to work with screen mirroring.

    Do I need Wi-Fi to mirror my phone screen to a TV?

    Yes, both your phone and TV typically need to be on the same Wi-Fi network. For devices using Chromecast or Roku, Wi-Fi is essential. Some devices, however, offer direct mirroring through Wi-Fi Direct or Bluetooth, though this is less common.

    How do I disconnect screen mirroring?

    To stop mirroring, open the Smart View menu on your phone and tap “Disconnect” or “Stop Mirroring.” You can also swipe down the notification bar and disable the mirroring feature from there.

    What if I don’t see my TV on the list of devices?

    Ensure your TV is powered on and connected to the same Wi-Fi network as your phone. Restarting your TV or reconnecting to Wi-Fi on your phone may help. Also, check that your TV has screen mirroring enabled.

    Can I mirror my iPhone to a non-Apple TV?

    Yes, but the process may vary. Many TVs have apps that support iOS mirroring, like AirScreen. Alternatively, you can use an Apple TV device to mirror directly from your iPhone.

    CHECK THESE OUT:

  • How to Use Android Phone as a TV Remote

    How to Use Android Phone as a TV Remote

    Whether you’ve misplaced your TV remote or want to streamline your devices, setting up your Android phone to control your TV is straightforward. This article covers all the steps on How to Use Android Phone as a TV Remote, including an instructional video from MobileTechJoint for added help.

    How to Use Android Phone as a TV Remote
    How to Use Android Phone as a TV Remote

    How to Use Android Phone as a TV Remote

    Using your Android phone as a remote control is a common option for people looking for easy methods to operate their TVs. This method allows you to access various features, switch channels, and control volume without needing your physical remote. Below is the step-by-step tutorial:

    Step 1: (Download a Remote-Control App from Google Play Store)

    • Start by opening the Google Play Store on your Android device. Search for “TV remote control app,” and you’ll find many options. Some popular apps include “Android TV Remote Control,” “Google Home,” or specific manufacturer apps like Samsung Smart View or LG ThinQ for branded TVs. Select a trusted app that matches your TV brand or a universal one compatible with multiple TV models.

    Step 2: (Open and Access the Remote-Control App)

    • After downloading the app, open it on your Android phone. You may need to allow certain permissions, such as access to Wi-Fi or Bluetooth, to enable the app to communicate with your TV. Accept these permissions to proceed.

    Step 3: (Connect the App to Your TV)

    • Most remote-control apps require both your TV and Android phone to be connected to the same Wi-Fi network. Ensure your TV’s Wi-Fi is enabled, then select your TV from the list of available devices displayed in the app. Some TVs may also allow Bluetooth connections if Wi-Fi is unavailable.

    Step 4: (Enter the Code from Your TV)

    • Once connected, a code may appear on your TV screen. Enter this code in the app to confirm the pairing. This step enhances security and ensures that only your device can control your TV. If your app doesn’t display a code, refer to the app’s instructions, as it may automatically pair with compatible TVs on the same network.

    Step 5: (Use Your Phone as Your TV Remote)

    • Once the setup is complete, you can start using your Android phone as your TV remote. The app’s interface usually includes options for controlling volume, channels, input sources, and playback settings.
    • Volume Control: Increase or decrease the TV’s volume directly from your phone.
    • Channel Navigation: Switch between channels with the touch of a button.
    • Input Source: Change between HDMI, AV, or other input sources if available.
    • Playback Controls: Pause, play, rewind, and fast-forward if watching videos on streaming platforms.

    Watch the Tutorial Video on YouTube

    For a visual step-by-step demonstration, visit the MobileTechJoint YouTube channel and watch the instructional video on how to set up your Android phone as a TV remote. This tutorial covers everything from downloading the app to the finished part.

    Frequently Asked Questions

    Can I use my Android phone as a remote for any TV?

    Yes, many remote-control apps work universally. However, some apps work best with specific brands. Check app details to see if your TV model is supported.

    Do I need Wi-Fi to use my phone as a remote?

    Most apps require both devices to be on the same Wi-Fi network. Some apps may offer Bluetooth or IR (infrared) functionality, but this depends on your phone’s capabilities.

    Can I control a smart TV with my Android phone?

    Yes, smart TVs generally work very well with remote-control apps. Simply download a compatible app for your smart TV brand or a universal app.

    What if my TV doesn’t appear on the list of devices?

    Ensure both your phone and TV are connected to the same Wi-Fi network. Restarting your router, TV, or phone can sometimes help, or check if your TV settings allow remote connections.

    Can I control multiple TVs with the same app?

    Most apps allow you to switch between different devices, so if you have multiple TVs connected to the same network, you can select the TV you want to control.

    CHECK THESE OUT:

  • Innovative Smart Home Gadgets for 2025

    Innovative Smart Home Gadgets for 2025

    In 2025, smart home gadgets will be more advanced than ever, transforming the way we live, work, and play at home.

    Innovative Smart Home Gadgets for 2025
    Innovative Smart Home Gadgets for 2025

    With innovative devices designed to save time, boost energy efficiency, and provide enhanced security, these gadgets offer convenience and peace of mind.

    From AI-powered assistants to health-monitoring devices, there’s a smart gadget to fit every need. Let’s explore the top smart home gadgets for 2025 that can help make your home more functional and futuristic.

    Top Smart Home Gadgets to Watch in 2025

    Each year brings exciting advancements in home tech, and 2025 is no exception. Below are the must-have smart home gadgets that will not only simplify your lifestyle but also increase your home’s value and efficiency.

    1. Smart Security Systems for Enhanced Home Safety

    Security is a top priority for homeowners, and smart security systems will become more advanced in 2024.

    Key features of smart security gadgets include AI-powered facial recognition, real-time monitoring, and integration with smart assistants.

    Gadgets like smart doorbell cameras and intelligent locks offer enhanced security and allow homeowners to monitor their properties from anywhere. Example devices: Ring Video Doorbell Pro 3, Google Nest Cam IQ

    SHOP NOW

    1. Energy-Efficient Smart Appliances to Save on Bills

    As energy prices rise, energy-efficient smart appliances are essential for homeowners looking to cut down on utility bills.

    Smart appliances, like smart thermostats and smart refrigerators, learn your routines and adjust accordingly to save energy.

    These devices also allow you to monitor and control usage from your smartphone, making it easy to reduce waste and save money. Example devices: Ecobee Smart Thermostat, Samsung Smart Refrigerator.

    SHOP NOW

    1. AI-Powered Assistants for Seamless Home Automation

    AI-powered home assistants have become central to many homes, providing an all-in-one solution for managing devices, answering questions, and offering entertainment.

    Gadgets like Amazon Alexa and Google Assistant use natural language processing to communicate effectively and can integrate with nearly every smart device in your home.

    These assistants provide a hands-free experience, allowing you to control your entire smart home with just your voice. Example devices: Amazon Echo 5th Gen, Google Nest Hub Max

    SHOP NOW

    1. Advanced Smart Lighting Solutions for Customized Ambiance

    Smart lighting has grown beyond simple remote control and now includes adaptive lighting that automatically adjusts based on the time of day and your routine.

    With smart lighting systems, you can customize the color, and brightness, and even set schedules for each room, making it ideal for creating the perfect atmosphere.

    Most smart lighting options are energy-efficient, which means you save on electricity bills too. Example devices: Philips Hue Smart Lights, LIFX Smart LED Bulbs.

    SHOP NOW

    1. Health Monitoring Gadgets for a Healthier Lifestyle

    For those looking to monitor and maintain their health at home, smart health gadgets are game changers.

    These gadgets track metrics like heart rate, sleep patterns, and air quality, providing valuable insights for a healthier lifestyle.

    Devices such as smart air purifiers and sleep monitors help to improve indoor air quality and ensure restful sleep. Example devices: Withings Sleep Analyzer, Dyson Pure Cool Air Purifier

    SHOP NOW

    1. Kitchen Gadgets Making Meal Prep Easier and Faster

    Smart kitchen gadgets save time and reduce hassle in meal preparation. Devices like smart ovens, which can be controlled remotely, and smart coffee makers that start brewing when you wake up, are perfect for those with a busy lifestyle.

    Many of these gadgets come with recipe suggestions, and step-by-step cooking guidance, and can be controlled via smartphone apps. Example devices: Anova Precision Cooker, Instant Pot Smart WiFi.

    SHOP NOW

    1. Smart Entertainment Devices to Upgrade Your Leisure Time

    Entertainment is an essential part of the home experience, and smart entertainment gadgets are at the forefront of this trend.

    From voice-activated streaming devices to immersive smart speakers, these gadgets deliver high-quality entertainment with minimal effort.

    Whether you’re streaming your favourite series or listening to music, smart entertainment devices enhance the experience with voice controls and seamless integration. Example devices: Roku Ultra, Sonos Move Speaker.

    SHOP NOW

    1. Smart Climate Control Systems for Year-Round Comfort

    Maintaining a comfortable temperature year-round is now easier with smart climate control systems.

    Devices like smart air conditioners and smart humidifiers allow you to control your home’s climate remotely, ensuring optimal comfort and energy efficiency.

    These devices adapt to outdoor weather conditions, saving energy by automatically adjusting settings. Example devices: Dyson Hot + Cool, LG Smart Portable AC.

    SHOP NOW

    The Benefits of Integrating Smart Home Gadgets in 2025

    As smart home technology advances, more homeowners are experiencing the benefits of an automated home.

    Smart gadgets save time, reduce energy costs, and enhance home security. Plus, they can make daily tasks easier and free up time for activities you enjoy.

    With the vast range of devices available, anyone can find smart home gadgets that suit their needs and lifestyle.

    How to Choose the Right Smart Home Gadgets for Your Needs

    Choosing the right smart home gadgets depends on your needs and budget. Here are a few tips:

    • Define your goals: Whether it’s energy saving, security, or convenience, knowing your main goals helps in selecting the best devices.
    • Check compatibility: Make sure the devices are compatible with each other and with any existing systems, like Alexa or Google Assistant.
    • Research brands and reviews: Read user reviews to ensure you’re choosing reliable and effective gadgets.

    Conclusion

    Smart home gadgets in 2025 offer more than just convenience—they provide security, health benefits, and energy savings. With these gadgets, homeowners can enjoy an enhanced living experience while contributing to a more sustainable future.

    Start exploring smart home technology today and discover how these innovative devices can transform your life for the better.

    Related Content:

    iPads Generation and What it Contributed to the iPad’s legacy: A Generation-by-Generation Journey Since…

    Airpods Max vs Bose Quietcomfort Ultra: Which Wins on Comfort and Best Sound Quality?

    FAQs

    What Are the Top Smart Home Gadgets In 2024?

    The top smart home gadgets in 2024 include smart security systems, energy-efficient appliances, AI-powered home assistants, advanced smart lighting, and climate control systems. These gadgets enhance convenience, safety, and efficiency at home.

    How Do Smart Home Gadgets Save Energy?

    Smart home gadgets, like thermostats and lights, use sensors and learning algorithms to adjust usage based on occupancy and habits, reducing unnecessary energy consumption and lowering utility bills.

    Which Smart Home Devices Improve Home Security?

    Devices like smart cameras, doorbells, and intelligent locks improve security by allowing remote monitoring, real-time alerts, and advanced features such as facial recognition and motion detection.

    How Do I Choose the Best Smart Home Gadgets?

    Consider your main goals (security, energy savings, or convenience), check compatibility with existing systems (like Alexa or Google Assistant), and read reviews for quality and reliability before purchasing.