Blog

  • How to Connect Alexa to Your Android Phone: Here’s the Step-by-Step Guide

    How to Connect Alexa to Your Android Phone: Here’s the Step-by-Step Guide

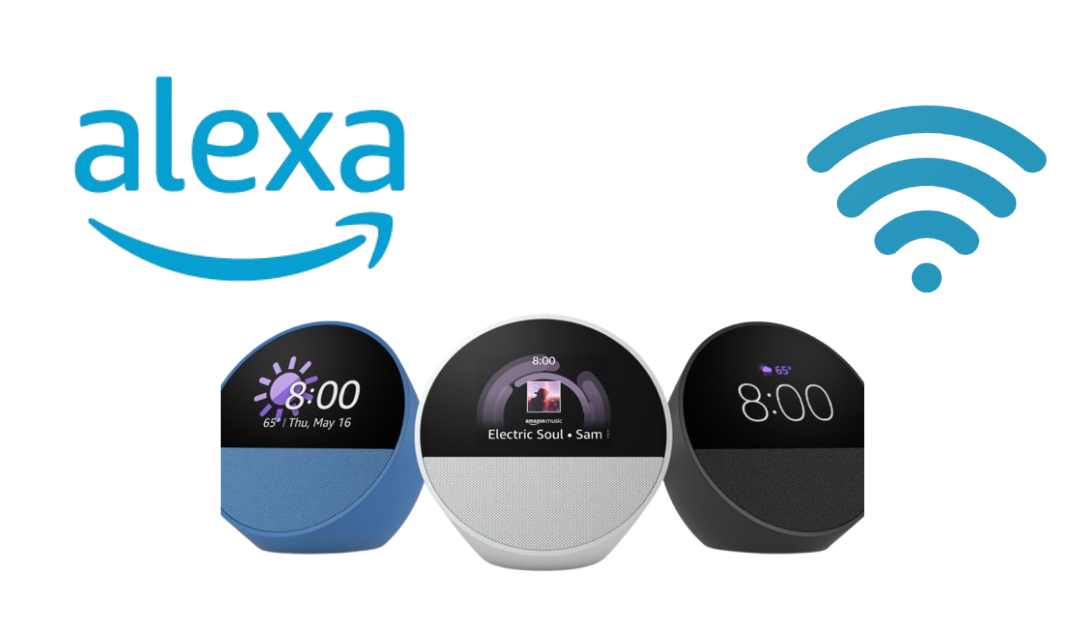
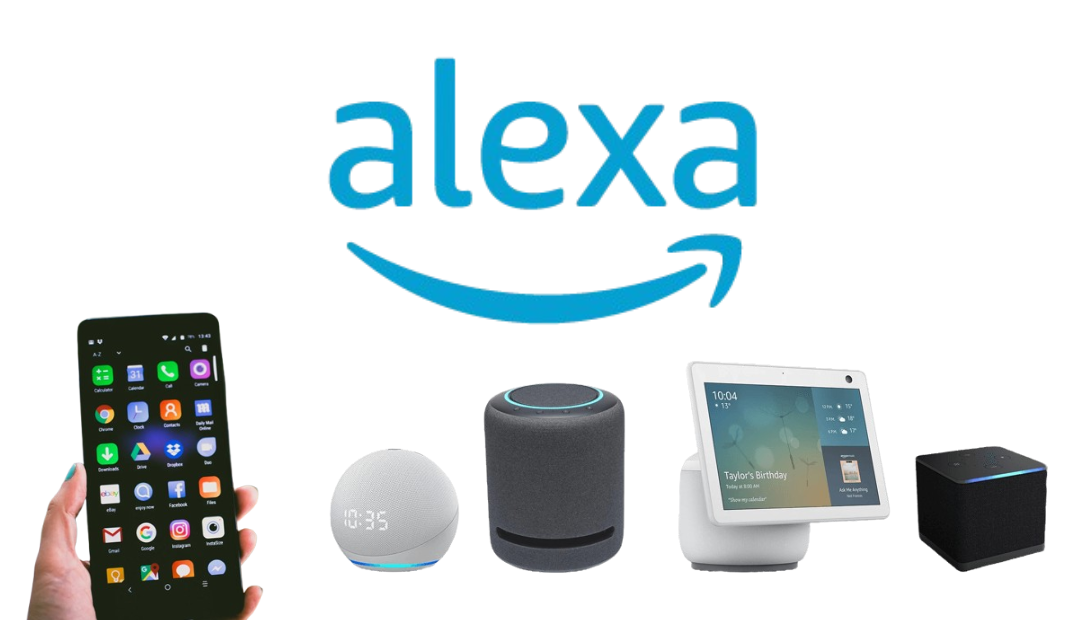
    If you’re looking to connect Alexa to your Android phone, you’re in for a treat! Alexa can do so much more than just answer questions. When linked to your phone, Alexa becomes a powerful assistant, helping you with everything from controlling smart devices to playing music and setting reminders.

    How to connect Alexa to Android Phone

    In this guide, I’ll take you through the process of how to connect Alexa to your Android phone, and I promise you—it’s a lot simpler than you might think. Let’s dive into this straightforward, step-by-step process that’ll get Alexa up and running on your Android device quickly.

    How to Connect Alexa to Android Phone

    Now let’s walk through the steps of connecting Alexa to an Android Phone and get you up and running:

    Step 1: Download the Amazon Alexa App

    First things first: You’ll need to download the Amazon Alexa app from the Google Play Store. It’s the key to connecting Alexa to your phone and managing all the features Alexa has to offer.

    Here’s how you can do it:

    • Open the Google Play Store: On your Android phone, go to the Play Store.
    • Search for “Amazon Alexa”: In the search bar, type in “Amazon Alexa” and press enter.
    • Install the App: Once you find the Alexa app, tap Install. The app will begin downloading.
    • Open the App: After installation, tap Open to launch the app and get started.

    The Alexa app is central to the entire experience. It allows you to set up, control, and personalize Alexa’s settings and routines.

    Step 2: Sign Into Your Amazon Account

    Once the app is installed, the next step is to sign in to your Amazon account. If you have an Amazon account, this part will be easy. If not, you can create one quickly within the app.

    Here’s what you need to do:

    • Launch the Alexa App: Open the Alexa app that you just downloaded.
    • Sign In with Amazon Account: Tap the Sign In button. You’ll be prompted to enter your Amazon email and password.
    • Two-Factor Authentication (If Set Up): If you have two-factor authentication enabled for your Amazon account, a verification code will be sent to your phone or email. Enter the code when prompted.
    • Welcome Screen: After signing in, you’ll see the Alexa welcome screen.

    Signing into your Amazon account is the foundation for syncing Alexa with all your personal preferences, smart devices, and connected accounts.

    Step 3: Set Up Alexa on Your Android Phone

    Now that you’re signed in, it’s time to set Alexa up on your phone. This step will let you interact with Alexa and access features like hands-free voice control.

    Follow these steps to enable Alexa:

    • Open the Alexa App: With the app open, tap the menu icon in the upper-left corner (three horizontal lines).
    • Go to Settings: From the menu, tap Settings.
    • Enable Alexa on Your Phone: Under the Alexa Preferences section, select Alexa on this Phone or Alexa Hands-Free (depending on your Android version).
    • Follow On-Screen Prompts: The app will guide you through the setup process. It will ask you to allow permission to use your microphone, location, etc. Be sure to grant these permissions for full functionality.

    Enabling Alexa on your phone is crucial to activating voice commands and hands-free control. Without this step, you won’t be able to interact with Alexa using your voice.

    Step 4: Pair Alexa with Bluetooth (Optional)

    If you’d like to use your Android phone to play music through your Alexa-enabled device, or just need to connect your phone’s audio, pairing Alexa with Bluetooth is the way to go.

    Here’s how to do it:

    • Enable Bluetooth on Your Phone: Go to Settings on your Android phone and make sure Bluetooth is turned on.
    • Activate Pairing Mode on Alexa: On your Alexa device (like an Echo), say, “Alexa, pair my phone.” Alexa will then go into pairing mode.
    • Connect Your Phone: On your phone, you should now see your Alexa device in the list of available Bluetooth devices. Select your Alexa device from the list.
    • Confirm the Connection: The Alexa app will confirm that the devices are connected. Now, any audio you play on your Android phone will stream through Alexa.

    Pairing Alexa with Bluetooth opens up a world of possibilities, including playing music from your phone, making calls, or even listening to podcasts or audiobooks hands-free.

    Step 5: Sync Your Phone’s Contacts and Calendar (Optional)

    If you want to take things a step further, syncing your Android phone’s contacts and calendar with Alexa can make Alexa even more helpful.

    To sync your contacts and calendar:

    • Go to Settings in the Alexa App: Open the Alexa app, and tap the menu icon (three lines) in the upper-left corner.
    • Select Calendar & Contacts: In the settings menu, tap on Calendar & Email or Contacts (depending on your preferences).
    • Grant Permissions: Allow the Alexa app to access your calendar and contacts. If you use Google Calendar or Google Contacts on your Android phone, you can easily link these accounts with Alexa.
    • Confirm the Link: Follow the prompts to ensure everything is synced and set up.

    Syncing these allows you to use voice commands for things like scheduling meetings, calling contacts, and getting reminders about your day. It can save you time and make Alexa even more of an assistant.

    Step 6: Personalize Alexa’s Voice and Preferences

    Now that Alexa is connected and set up on your Android phone, you can tweak its settings to make it more personalized for your needs. Alexa offers a variety of customization options, from changing her voice to setting up routines.

    To personalize Alexa:

    • Go to the Settings Menu in the Alexa App: Tap on the menu icon and choose Settings.
    • Change Alexa’s Voice: Under Alexa Preferences, you’ll find the option to modify Alexa’s voice. You can change her language, tone, or even select a new accent if you want.
    • Set Up Routines: Tap on Routines to create custom actions for Alexa. For example, you can set Alexa to play your favorite playlist every morning or turn off the lights at bedtime.

    Customizing Alexa’s settings allows you to create a truly unique experience. You can make sure Alexa’s voice and actions align with your preferences, whether it’s changing the way she responds or automating daily tasks.

    Troubleshooting Alexa Connectivity Issues

    If you experience any issues while connecting Alexa to your Android phone, here are a few troubleshooting tips to help you out:

    • Check Wi-Fi Connection: Ensure that both your phone and Alexa device are connected to the same Wi-Fi network. If they’re on different networks, they won’t communicate properly.
    • Reboot the Devices: Sometimes a quick restart can fix connectivity issues. Restart both your Android phone and your Alexa device.
    • Bluetooth Connection Not Working: If Bluetooth isn’t working, turn off Bluetooth on both devices, wait a few seconds, and then turn it back on.
    • Update the App: Check the Google Play Store for any available updates for the Alexa app. An outdated app might cause compatibility issues.

    It’s normal to encounter small issues when setting up new devices. With these troubleshooting steps, you can solve most problems quickly and get back to enjoying Alexa’s features.

    Conclusion

    Connecting Alexa to your Android phone opens up a whole new world of possibilities. Whether you’re asking Alexa for weather updates, setting reminders, or using her to control smart home devices, Alexa makes life easier and more convenient.

    By following these easy-to-follow steps, you can ensure that Alexa is fully integrated into your daily routine. Don’t be afraid to explore all the features Alexa has to offer, from voice commands to personalized routines. You’ll be amazed at how much more you can do with your Android phone once Alexa is set up.

  • Best Smartphone Photography Accessories for Stunning Shots

    Best Smartphone Photography Accessories for Stunning Shots

    Enhance your smartphone photography with the right accessories from mobile tech. Smartphone cameras have come a long way, giving everyone the power to capture high-quality photos right from their pocket.

    Best Smartphone Photography Accessories
    Best Smartphone Photography Accessories

    While smartphone cameras are impressive, adding the right accessories can make a huge difference in the quality of your shots.

    Whether you’re a budding photographer, a social media creator, or just love taking photos, these smartphone photography accessories will help you achieve stunning results.

    Why Smartphone Photography Accessories Matter

    Accessories allow you to expand the capabilities of your smartphone camera. From capturing wider angles to ensuring better lighting and stabilizing shots, these add-ons can transform your photography experience.

    Let’s explore the top 10 must-have smartphone photography accessories that can take your shots from good to great.

    Top 10 Must-Have Accessories for Smartphone Photography

    Lens Attachments: Capture More with Different Perspectives

    One of the easiest ways to add versatility to your smartphone camera is by using lens attachments. Popular types include wide-angle, macro, and telephoto lenses, each of which allows you to capture a different style of photo:

    Wide-angle lenses let you fit more of a scene into your frame, perfect for landscapes.

    Macro lenses allow you to take highly detailed close-ups of small subjects like flowers or insects.

    Telephoto lenses bring distant subjects closer, making them ideal for wildlife or events.

    Brands like Moment and Olloclip offer high-quality, easy-to-use lens attachments compatible with most smartphones.

    PLACE ORDER NOW

    Lighting Accessories: Improve Your Low-Light Photography

    Lighting is key to capturing great photos, especially in low-light conditions. Portable LED lights are a convenient way to ensure proper lighting for your shots.

    Ring lights and mini-LED panels are especially useful for portraits and close-up photography.

    Adjustable LED lights like the Lume Cube provide a range of brightness levels, giving you the flexibility to capture well-lit photos in any situation.

    PLACE ORDER NOW

    Stabilizers and Tripods: Get Steady Shots Every Time

    A tripod or stabilizer is essential for taking stable photos and videos, especially if you’re shooting in low light or creating time-lapse videos.

    Tripods like the Joby GorillaPod, which has flexible legs, allow you to position your phone on various surfaces.

    For smooth video footage, a handheld stabilizer or gimbal, like the DJI Osmo Mobile, keeps your shots steady even as you move.

    PLACE ORDER NOW

    Smartphone Mounts and Holders: Perfect Your Angle

    A sturdy smartphone mount or holder helps you frame your shots perfectly. These accessories are great for setting up your phone for hands-free shooting or vlogging.

    Magnetic mounts and adjustable holders are especially useful for quickly changing angles without constantly handling your phone.

    Many mounts also come with remote control features, allowing you to snap photos or start recording from a distance.

    PLACE ORDER NOW

    Editing Tools and Apps: Enhance Your Photos Like a Pro

    While not a physical accessory, photo editing apps are essential for improving post-capture shots.

    Apps like Lightroom, Snapseed, and VSCO offer advanced editing tools to adjust brightness, color balance, and contrast, helping you bring out the best in your photos.

    Many editing apps are user-friendly, making it easy for beginners to create professional-quality images.

    PLACE ORDER NOW

    Portable Power Banks: Keep Your Phone Charged On the Go

    Smartphone photography, especially when using features like video recording or external lighting, can drain your battery quickly.

    A high-capacity power bank is a must for extended shooting sessions, ensuring your phone stays powered up wherever you go.

    Look for power banks with fast-charging capabilities, such as the Anker PowerCore, to minimize downtime.

    PLACE ORDER NOW

    Protective Gear: Keep Your Smartphone Safe While Shooting

    Accidents happen, and protecting your smartphone is essential if you’re out in nature or on busy streets. Invest in a rugged case, such as those from OtterBox or LifeProof, to prevent damage from drops and impacts.

    You might also consider a screen protector to avoid scratches, especially if you’re using accessories like mounts that involve handling your phone often.

    PLACE ORDER NOW

    External Microphones: Enhance Audio for Videos

    If you’re into vlogging or capturing video content, an external microphone can significantly improve audio quality. While smartphones have built-in mics, they often pick up a lot of background noise.

    External mics like the Rode VideoMic Me are compact and plug directly into your smartphone, providing clear, focused audio for your videos.

    PLACE ORDER NOW

    Remote Shutter Controls: Capture Photos from a Distance

    A remote shutter control is ideal for taking group shots, selfies, or long-exposure photos without touching your phone.

    Bluetooth remote shutters let you trigger the camera from a distance, reducing any shake or blurriness caused by tapping your phone.

    Compact and easy to use, remote shutters make it convenient to capture shots without needing to handle your smartphone.

    PLACE ORDER NOW

    Portable Backdrops and Reflectors: Enhance Composition and Lighting

    For those focused on product photography or portraits, portable backdrops and reflectors are valuable additions.

    Backdrops let you control the background, while reflectors help balance and soften natural light, reducing harsh shadows.

    This setup is especially useful for content creators and bloggers who need a consistent look in their shots. Brands like Neewer offer foldable, lightweight options that are easy to carry and set up.

    PLACE ORDER NOW

    Tips for Choosing the Right Smartphone Photography Accessories

    Choosing the right accessories depends on your photography goals. Here are a few tips:

    • Assess Your Needs: If you love close-up shots, go for a macro lens. If you’re into videos, invest in a gimbal and microphone.
    • Look for Compatibility: Ensure the accessory you’re buying is compatible with your smartphone model.
    • Quality over Quantity: Invest in high-quality accessories, as they’ll likely provide better results and last longer.
    • Check Reviews: Read reviews to get an idea of an accessory’s performance, durability, and ease of use.

    Conclusion

    Investing in the right smartphone photography accessories can transform your photos and videos, making them look more professional and polished. Whether it’s improving stability, lighting, or angles, each accessory brings something valuable to the table. Try out these accessories and start capturing stunning shots that truly stand out!

    Related article:

    Best Earbuds for Working Out: These Earbuds Have Been Perfect for Every Workout I’ve…

    How to Use Ulanzi Tripod

    FAQs

    Do lens attachments work on all smartphones?

    Lens attachments are typically universal, but check compatibility with your specific model, as some lenses are optimized for certain brands.

    Are smartphone tripods necessary for photography?

    While not required, tripods greatly improve stability, especially in low-light settings or when capturing time-lapse shots.

    Can smartphone LED lights replace natural lighting?

    LED lights can enhance photos in low-light situations, but they’re best used as a supplement to natural light rather than a full replacement.

  • How to Connect Alexa to WiFi Using the App

    How to Connect Alexa to WiFi Using the App

    Connecting your Alexa device to WiFi using the app may sound intimidating at first, but once I walked through the steps, I realized how easy it really is. Whether you’re setting up a new Echo Dot, Echo Show, or any other Alexa-enabled device, Amazon’s Alexa app is built to guide you through the process.

    How to Connect Alexa to WiFi with the App

    In this article, I’ll share the entire experience of how to connect Alexa to WiFi with the app. Let’s make sure you have all the information you need to connect your Alexa device smoothly, no matter your technical skill level.

    Why Alexa Needs WiFi to Work

    First, it’s essential to understand that your Alexa device, like most smart devices, relies on WiFi for all its core functions. When connected to WiFi, Alexa can answer questions, play music, control smart home devices, provide updates on the weather, and much more.

    Essentially, Alexa acts as your virtual assistant, connecting to the internet to pull information and communicate with other connected devices. Without a stable WiFi connection, Alexa is severely limited.

    It won’t be able to interact with smart home devices or respond to complex questions, making WiFi the backbone of Alexa’s functionality.


    What You Need Before You Start

    To get started, you’ll need a few things to ensure a smooth setup:

    • Amazon Alexa App: Available for free on the App Store (for iOS) and Google Play Store (for Android). Download the app on your smartphone or tablet.
    • Amazon Account: You’ll need an Amazon account to log into the Alexa app. If you don’t have one, set up an account through the Amazon website or directly within the app.
    • WiFi Network: Ensure that you have a stable WiFi network with a strong signal, and make sure you know your WiFi network’s name (SSID) and password.
    • Alexa Device: Make sure your Alexa device is plugged into a power outlet and ready for setup.

    How to Connect Alexa to WiFi with the App

    Below, I’ll break down each step in detail, so you can connect your Alexa to WiFi without any issues. Let’s get into it:


    Step 1: Open the Alexa App and Log In

    • Launch the App: Start by opening the Alexa app on your smartphone or tablet. If you’re not already logged in, the app will prompt you to sign in with your Amazon account.
    • Log In to Your Account: Enter your Amazon account credentials. If you’re setting up Alexa for the first time, this is when you’ll also be asked to agree to any relevant terms and permissions that Amazon may require.
    • Enable Permissions: The Alexa app will likely request access to certain permissions, such as location and Bluetooth. Granting these permissions allows Alexa to function more effectively, especially during setup.

    Signing in with your Amazon account links your Alexa device to your Amazon account, which allows you to access personalized features like shopping lists, reminders, and more across multiple Alexa devices.


    Step 2: Plug in Your Alexa Device and Enter Setup Mode

    • Power Up Your Device: Plug your Alexa device into a power outlet. After a few moments, the device will automatically enter setup mode. You’ll know it’s ready when you see an orange ring or light on the Alexa device (this color may vary by model).
    • Manually Enter Setup Mode (If Needed): If your Alexa device doesn’t show the orange ring, press and hold the Action button (a button with a dot) on the device for around five seconds. This should prompt it to enter setup mode.
    • Wait for Confirmation: Keep an eye on the Alexa app; it will automatically detect your device if it’s in setup mode.

    Entering setup mode allows your Alexa device to search for available networks and pair with the Alexa app. The orange light is a clear indicator that your device is ready for pairing.


    Step 3: Use the Alexa App to Begin Setup

    • Navigate to Device Settings: In the Alexa app, look at the bottom of the screen, where you’ll see a Devices icon (it looks like a house). Tap this icon to enter the device management area.
    • Add a New Device: Within the Devices tab, you’ll see an option to add a new device. Select Add Device if this is your first Alexa device. Then choose Amazon Echo from the list, and finally, select the specific model, such as Echo Dot.
    • Choose Your Device: If this isn’t your first time setting up Alexa, you may see your device already listed. In that case, select Change WiFi Network or Update WiFi next to the device name to proceed.

    This step is crucial because it initiates the WiFi setup process within the app, linking the app and your Alexa device to the WiFi network you’re about to select.


    Step 4: Select Your WiFi Network

    • Scan for Available Networks: Once you select your device, the Alexa app will start scanning for available WiFi networks nearby. It should automatically list the networks within range of the Alexa device.
    • Choose the Correct Network: From the list, select the network you want your Alexa device to connect to. If you have multiple networks, choose the one with the strongest and most reliable connection, as a weak signal may impact Alexa’s performance.
    • Enter Your WiFi Password: After selecting your network, you’ll need to enter your WiFi password. Double-check that the password is correct, as an incorrect entry will prevent Alexa from connecting.
    • Confirm the Connection: Press Connect to proceed. The app will attempt to connect the Alexa device to your WiFi network.

    Choosing the correct WiFi network and entering the password accurately ensures that Alexa can maintain a strong, stable connection to perform its tasks effectively.


    Step 5: Wait for Alexa to Connect and Confirm Success

    • Connection Confirmation: After a few moments, Alexa should successfully connect to the WiFi network. You’ll see a confirmation message in the Alexa app once the connection is established.
    • Alexa’s Audio Confirmation: The Alexa device will also announce that it’s online and ready, giving you both visual and audio confirmations of a successful setup.
    • Test the Connection: To make sure everything is working smoothly, try asking Alexa a simple question or command, such as “Alexa, what’s the weather today?” This will confirm that Alexa is fully connected and operational.

    Completing this step ensures that Alexa is fully set up on your network, ready to interact with your commands, control smart home devices, and provide other services.


    Troubleshooting Common Connection Issues

    Even with detailed steps, connectivity issues can sometimes arise. Here are a few common problems and simple fixes:

    • Double-Check Your WiFi Password: If Alexa can’t connect, an incorrect password is often the culprit. Make sure you’re entering the correct password, including capital letters or special characters if any.
    • Move Alexa Closer to the Router: If the Alexa device is too far from the router, it may struggle to connect. Moving it closer during setup can improve signal strength.
    • Restart Your Router: Sometimes, simply rebooting your router can resolve connectivity issues. Unplug it for about 10 seconds, then plug it back in and wait for it to restart.
    • Reset Alexa: As a last resort, resetting your Alexa device to factory settings and following the setup steps again can often resolve persistent issues.

    Knowing these quick fixes can save you time and hassle, especially when unexpected connectivity problems arise.


    What Alexa Can Do Once It’s Connected to WiFi

    Now that Alexa is connected, you can explore a range of features that make Alexa such a versatile assistant:

    • Music and Entertainment: Alexa can stream music from various platforms like Amazon Music, Spotify, and Apple Music. You can also ask for podcasts, audiobooks, and more.
    • Smart Home Control: If you have compatible smart devices, you can use Alexa to control lights, locks, thermostats, and cameras, all with simple voice commands.
    • Information and Updates: From weather forecasts to news updates, Alexa can provide useful information on demand. Just ask, and Alexa will pull data from the internet to keep you informed.
    • Productivity Tools: Set reminders, create shopping lists, add to-do lists, and more. Alexa can help you stay organized with ease.
    • Shopping with Amazon: Alexa can help you shop on Amazon, placing orders or adding items to your cart. It’s a hands-free way to shop that’s especially helpful for frequently purchased items.

    Why These Features Matter: Alexa’s connection to WiFi turns it into an all-in-one assistant capable of helping with daily tasks, managing entertainment, and enhancing productivity.


    Conclusion

    Once I went through these steps, I realized that Amazon has designed the Alexa setup process to be as user-friendly as possible. By following the instructions on the Alexa app, you can quickly connect your Echo Dot to WiFi and start exploring the range of features Alexa has to offer.

    Whether you’re new to Alexa or simply need a refresher, setting up WiFi through the app is an easy, guided experience that doesn’t require much technical knowledge. With your Alexa device online, you’ll have a virtual assistant ready to simplify your daily life and keep you connected.

    Also Check:

  • How to Use Bluetooth with Roku Devices: Everything You Need to Know

    How to Use Bluetooth with Roku Devices: Everything You Need to Know

    As streaming grows in popularity, many users are seeking to enhance their home entertainment setups with Bluetooth connectivity. If you own a Roku device and want to know how to integrate Bluetooth capabilities for a personalized audio experience, you’re in the right place. While Roku devices don’t natively support Bluetooth across all models, there are creative solutions and compatible accessories to achieve wireless audio.

    How to Use Bluetooth with Roku Devices

    In this guide, we’ll explore how to use Bluetooth with Roku devices, covering workarounds, the best options for seamless connectivity, and helpful tips to improve your Roku experience.

    Key Takeaways
    Roku doesn’t directly support Bluetooth on most devices, but you can enable wireless audio using the Roku mobile app’s Private Listening feature.
    Roku Streambar and Roku Wireless Speakers are exceptions, offering Bluetooth compatibility for paired devices.
    Bluetooth transmitters provide an alternative solution for users wanting to connect any Roku model with Bluetooth-enabled audio.

    Can You Use Bluetooth with Roku Devices?

    Unlike some smart TVs and other streaming devices, Roku devices generally lack native Bluetooth functionality. This means you can’t directly connect Bluetooth headphones or speakers to most Roku models. However, Roku offers Private Listening, a feature that allows wireless audio through the Roku mobile app.

    Which Roku Models Are Compatible?

    The Roku Streaming Stick, Roku Express, and most standard Roku TVs don’t include Bluetooth, so they rely on Private Listening for wireless audio. However, models like the Roku Streambar and Roku TV Wireless Speakers offer Bluetooth compatibility and can directly pair with Bluetooth devices, allowing users to listen wirelessly without needing the app.

    Tip: Always check your Roku model’s compatibility before purchasing accessories to ensure they meet your Bluetooth needs.

    How to Enable Bluetooth with the Roku Mobile App

    The Roku mobile app offers a convenient workaround for Bluetooth audio. With the app, you can enable Private Listening, streaming sound directly to your mobile device, which then relays audio to connected Bluetooth headphones.

    Here’s how to activate Private Listening on the Roku mobile app:

    1. Download and open the Roku app on your iOS or Android device.
    2. Connect to the same Wi-Fi network as your Roku device.
    3. Tap the Remote icon in the app and ensure it’s linked to your Roku device.
    4. Tap the headphone icon in the app to activate Private Listening.
    5. Pair your Bluetooth headphones to your phone to enjoy wireless audio.

    Using this method, audio from your Roku device will stream to your headphones via the app. However, users sometimes experience slight audio delays, particularly with Bluetooth headphones.

    Using Roku’s Private Listening Feature

    Private Listening is a popular feature on Roku, enabling users to listen to audio privately on their mobile devices. By connecting headphones to your smartphone through the Roku app, you can access this feature easily.

    Benefits and Drawbacks of Private Listening

    • Benefits:
      • Supports up to four devices simultaneously, allowing multiple users to enjoy private listening.
      • Great for users who share living spaces and need a quiet viewing option.
      • Provides better sound quality than TV speakers, particularly when using high-quality headphones.
    • Drawbacks:
      • Audio lag can occur, which is noticeable in action-heavy content.
      • Battery drain on mobile devices if used for long durations.

    Private Listening offers an affordable solution for Bluetooth audio, though minor drawbacks like lag can affect the viewing experience.

    Bluetooth Compatible Roku Accessories

    Several Bluetooth-compatible accessories enhance the Roku experience for users wanting wireless sound. Devices such as the Roku Streambar and Roku TV Wireless Speakers bring high-quality sound with Bluetooth options that make Roku devices feel like a true multimedia center.

    Roku Streambar: A Bluetooth-Ready Sound Solution

    The Roku Streambar combines high-quality sound with streaming functionality and supports Bluetooth, allowing users to connect mobile devices directly to it for a better audio experience. Here’s how to activate Bluetooth on the Roku Streambar:

    1. Press the Home button on the Roku remote.
    2. Go to Settings > Remotes & Devices > Pair Bluetooth Device.
    3. Select Bluetooth mode and pair your mobile device.

    The Streambar delivers crisp audio quality with easy Bluetooth integration. It’s ideal for users who want seamless sound without additional devices.

    Roku Wireless Speakers

    The Roku TV Wireless Speakers provide another way to add Bluetooth sound to your Roku setup. When paired with a compatible Roku TV, these speakers enable enhanced sound quality and Bluetooth connectivity, allowing users to enjoy both streaming audio and external Bluetooth devices.

    Did you know? Bluetooth-compatible Roku devices like the Streambar and Wireless Speakers are among the few Roku options for native Bluetooth sound.

    Using Bluetooth Transmitters with Roku

    For Roku devices lacking Bluetooth capabilities, Bluetooth transmitters offer an alternative solution. These transmitters connect to the TV’s audio output port, allowing Bluetooth headphones or speakers to receive audio wirelessly.

    Choosing the Right Bluetooth Transmitter

    When selecting a Bluetooth transmitter, consider factors like latency and multi-device support. Here are some popular options:

    • AptX Low Latency Transmitters: Minimize lag, making them ideal for action-packed content.
    • Dual-Device Support Transmitters: Some transmitters let two devices connect simultaneously.

    Transmitters provide an affordable, straightforward solution for Roku users who want Bluetooth audio without needing a new Roku device.

    Comparison Table Private Listening Roku Streambar Bluetooth Transmitter
    Bluetooth Headphone Compatibility ✅ (via mobile device) ✅ (direct connection)
    Audio Delay Possible Minimal Varies (depends on transmitter)
    Additional Cost No additional cost (with app) $100+ $20–$50
    Best For Quiet listening Enhanced sound, direct streaming Universal Bluetooth solution

    Common Issues and Troubleshooting Tips

    Connecting Bluetooth devices to Roku can sometimes be tricky, especially when using third-party transmitters or mobile apps. Here are some common issues and troubleshooting tips:

    1. Audio Delay: Bluetooth headphones may experience lag. Try wired headphones for faster audio sync or look for transmitters with low-latency settings.
    2. Connection Drops: Bluetooth devices may disconnect occasionally. Update your Roku firmware and Bluetooth device drivers for the best performance.
    3. App Unresponsiveness: If the Roku app stops working, reinstall it or ensure both devices are connected to the same Wi-Fi network.

    FAQ: Common Questions about Bluetooth on Roku

    1. Can I connect AirPods to Roku?
      • Yes, by using the Private Listening feature on the Roku mobile app.
    2. Does Roku Express have Bluetooth?
      • No, Roku Express doesn’t support Bluetooth, but Private Listening works with a connected smartphone.
    3. Is audio quality good on the Streambar?
      • Yes, the Streambar provides impressive sound quality and works well as a Bluetooth speaker.

    Final Thoughts

    While Roku doesn’t natively support Bluetooth on most devices, users have several options for integrating Bluetooth audio. Whether you use the Roku mobile appBluetooth-compatible Roku accessories, or a Bluetooth transmitter, there are multiple ways to bring a personalized, wireless audio experience to your Roku setup.

    Consider your budget, desired sound quality, and Roku model when choosing the best method for Bluetooth integration. With the right setup, you can enhance your viewing experience and enjoy Roku with the flexibility and convenience of Bluetooth audio.

    Also Check:

  • Can Roku Connect to Bluetooth? Your Complete Guide

    Can Roku Connect to Bluetooth? Your Complete Guide

    Roku devices are some of the most popular streaming gadgets available today, providing an easy way to watch thousands of channels and apps. However, as more people seek personalized audio experiences, a frequent question arises: can Roku connect to Bluetooth devices?

    Can Roku Connect to Bluetooth

    Whether it’s for using Bluetooth headphones, speakers, or other gadgets, this guide will explore everything you need to know about Roku’s Bluetooth capabilities, supported models, workarounds, and tips for the best audio connection possible.

    Key Takeaways
    Roku does not have native Bluetooth connectivity for most streaming devices, but you can connect Bluetooth devices using the Roku mobile app and Private Listening feature.
    Roku TV and Roku Streambar have special Bluetooth-compatible accessories, allowing for enhanced sound connections.
    Third-party transmitters are a viable alternative for direct Bluetooth streaming.
    Roku’s Private Listening mode supports up to four devices, great for sharing audio with friends.

    Can Roku Connect to Bluetooth?

    Roku devices offer a range of features, but direct Bluetooth connectivity is not a standard feature on most Roku models. While you can’t connect Bluetooth headphones or speakers directly to Roku, there are several workarounds and compatible devices that make Bluetooth audio possible.

    Bluetooth Compatibility in Roku Devices

    Understanding Roku’s compatibility with Bluetooth involves knowing the different types of Roku models and their connection abilities.

    • Roku Streaming Stick & Roku Express: These models do not support Bluetooth, making it necessary to use the Roku mobile app or a Bluetooth transmitter for Bluetooth audio.
    • Roku TVs: While most Roku TVs do not offer native Bluetooth, they allow connectivity via the Roku app’s Private Listening feature. Some high-end Roku TVs, like TCL Roku TV models, can work with compatible soundbars for audio enhancement.
    • Roku Streambar: This model uniquely offers Bluetooth capabilities, allowing users to stream audio directly from mobile devices to the Streambar itself.

    Note: Bluetooth capabilities vary significantly across different Roku models. Checking specific device features can save time when planning Bluetooth connectivity.

    How to Enable Bluetooth on Roku

    Although Roku doesn’t natively support Bluetooth, you can still enjoy wireless audio through the Roku mobile app. This app is available on both iOS and Android, and using it involves a few easy steps:

    1. Download the Roku mobile app from the Apple App Store or Google Play Store.
    2. Open the app and connect to the same Wi-Fi network as your Roku device.
    3. Tap on the Remote icon, and ensure the app is connected to your Roku.
    4. Enable Private Listening by tapping the headphone icon in the app.
    5. Connect your Bluetooth headphones to your mobile device.

    Using this method, the app streams audio from your Roku directly to your phone, which then sends it to your Bluetooth headphones. However, this can introduce minor latency issues, so watching action-heavy shows may result in slight audio delays.

    Using Roku Private Listening Feature

    One of Roku’s most versatile features is Private Listening, which allows users to listen to content through their mobile device. Private Listening is available on all Roku devices via the Roku mobile app and supports wired and Bluetooth headphones connected to your phone.

    Benefits and Limitations of Private Listening

    • Benefits:
      • It supports up to four devices simultaneously.
      • It provides personalized audio without disturbing others.
      • Ideal for shared spaces, like apartments or families with different viewing preferences.
    • Limitations:
      • Bluetooth-enabled listening only works through the mobile device, not directly with Roku.
      • Possible audio delay with Bluetooth headphones, especially during fast-paced content.

    For users sharing audio with multiple people, Private Listening can be a great solution for enabling everyone to enjoy content without disturbing others.

    Bluetooth Compatible Roku Accessories

    Certain Roku accessories offer Bluetooth-like capabilities. These devices include the Roku Streambar and Roku TV Wireless Speakers, which create a better home theater experience by adding Bluetooth-enabled audio features.

    Roku Streambar

    The Roku Streambar not only enhances sound quality for Roku TVs but also acts as a Bluetooth speaker. Here’s how to use it for Bluetooth streaming:

    1. Ensure your Roku Streambar is connected to a power source and paired with your Roku TV.
    2. Activate Bluetooth mode by pressing the Home button on your Roku remote.
    3. Navigate to Settings > Remotes & devices > Pair Bluetooth device.
    4. Pair your mobile device to the Roku Streambar.

    Tip: The Roku Streambar offers high-quality audio output and doubles as a Bluetooth speaker, making it versatile for various uses.

    Roku TV Wireless Speakers

    If you have a Roku TV, the Roku TV Wireless Speakers provide a way to enhance your audio experience and add Bluetooth audio streaming capabilities for paired devices.

    Alternatives for Connecting Bluetooth Devices to Roku TVs

    When Bluetooth isn’t directly available, users can consider Bluetooth transmitters as a workaround. These transmitters plug into the Roku TV’s audio output and allow Bluetooth headphones to connect for wireless audio.

    Bluetooth Transmitter Options:

    AptX Low Latency Transmitters: Reduce lag for synchronized audio and video.

    Dual-Device Support: Some transmitters allow two Bluetooth devices to pair simultaneously.

    While transmitters provide a workaround, they may add some audio delay, especially during fast-paced shows or movies.

    Troubleshooting Bluetooth Connection Issues

    Common issues arise when attempting to use Bluetooth on Roku, often due to connectivity or compatibility challenges. Here are a few tips to overcome common problems:

    • Audio Lag: If you notice lag, use wired headphones or a low-latency Bluetooth transmitter.
    • Connection Drops: Check for firmware updates on your Roku device and Bluetooth headphones.
    • App Issues: If the Roku app is unresponsive, try reinstalling it or ensuring both devices are connected to the same Wi-Fi network.

    FAQs on Roku and Bluetooth

    Here are some frequently asked questions regarding Roku and Bluetooth compatibility:

    Can I connect AirPods to Roku?

    Yes, via the Roku mobile app’s Private Listening feature on a compatible mobile device.

    Do all Roku TVs support Bluetooth?

    Not directly, but some models work with Roku’s Wireless Speakers for Bluetooth-enabled sound.

    Is Bluetooth available on Roku Express?

    No, but you can use the Private Listening feature in the Roku mobile app.

    Conclusion

    While Roku doesn’t natively support Bluetooth for most devices, there are several ways to enable Bluetooth-like experiences. Using the Roku app’s Private Listening feature is an easy workaround for Bluetooth headphones, and Bluetooth transmitters can also help bridge the gap for non-compatible devices. For those invested in the Roku ecosystem, accessories like the Roku Streambar and Roku TV Wireless Speakers offer seamless Bluetooth audio options.

    If you’re looking to enjoy Bluetooth on Roku, consider using these tips and accessories to achieve an enhanced audio experience that meets your needs.

    Also Check:


  • AirPod Max Connected But No Sound, How to Fix It

    AirPod Max Connected But No Sound, How to Fix It

    This Guide Covers 10 Ways to Fix this issue So you Can Enjoy Seamless Audio from your AirPods Max

    Apple’s AirPods Max are some of the most advanced headphones on the market, known for their high-quality sound, noise cancellation, and design. However, like any tech device, they aren’t immune to occasional issues, and one of the most frustrating is the “connected but no sound” problem.

    AirPod Max Connected But No Sound, How to Fix It

    This issue can disrupt your music, movie, or work experience, leaving you with a silent set of headphones, despite being paired successfully. In this guide, we’ll walk you through detailed steps and techniques to troubleshoot and resolve this issue so you can enjoy seamless audio from your AirPods Max.


    Fix 1: Checking the Basics

    1.1 Confirm Device Volume and Settings

    Sometimes, the simplest fix is the most effective. Begin by checking the basics:

    • Check the Volume on Your Device: Start by ensuring the volume on your device (iPhone, iPad, Mac, etc.) isn’t muted or set too low.
    • Toggle Volume Controls on AirPods Max: Use the Digital Crown on the right ear cup to adjust the volume. Sometimes, resetting the volume directly on the AirPods Max can re-establish audio output.
    • Confirm Playback Device Selection: If multiple Bluetooth devices are connected to your device, your AirPods Max may not be selected as the active audio output. Open the Control Center (or Sound Settings on Mac) and select AirPods Max as the current output device.

    Taking these preliminary steps ensures that you’re covering the basic settings before moving on to more in-depth solutions.


    Fix 2: Reconnect Your AirPods Max

    2.1 Disconnect and Reconnect via Bluetooth

    When the AirPods Max connect without sound, it could be due to a temporary Bluetooth connectivity error. Here’s how to refresh the Bluetooth connection:

    1. Open Bluetooth Settings: Go to your device’s Bluetooth settings and locate AirPods Max in the list of connected devices.
    2. Disconnect and Reconnect: Tap to disconnect your AirPods Max, wait a few seconds, and then reconnect them.
    3. Restart Bluetooth: If the above doesn’t work, try turning Bluetooth off on your device entirely, waiting for 5–10 seconds, and then turning it back on. Then, reconnect the AirPods Max.

    This process helps re-establish a fresh connection and can often resolve sound issues.


    Fix 3: Soft Reset Your AirPods Max

    If reconnecting doesn’t resolve the issue, a soft reset may be the next step.

    3.1 How to Perform a Soft Reset on AirPods Max

    Performing a soft reset can help fix minor software glitches without affecting your settings:

    1. Locate the Digital Crown and Noise Control Button: These are the two main buttons on your AirPods Max.
    2. Press and Hold Both Buttons: Hold down the Digital Crown and Noise Control button simultaneously for 10 seconds.
    3. Release When You See the LED Flash Amber: The amber flash indicates the soft reset has been performed.

    This simple reset can help refresh the AirPods Max without erasing paired device settings.


    Fix 4: Check Audio Settings on the Connected Device

    Sometimes, audio settings on your device may interfere with sound output on AirPods Max.

    4.1 Check Audio Balance

    Most devices have an audio balance setting that controls left-to-right sound distribution. An unbalanced setting could make one ear sound quieter or produce no sound.

    • On iOS: Go to Settings > Accessibility > Audio/Visual and adjust the “Balance” slider to the middle position.
    • On Mac: Go to System Preferences > Sound > Output, select AirPods Max, and ensure the balance is centered.

    4.2 Turn Off Mono Audio

    If Mono Audio is enabled, it could impact how sound is transmitted to the AirPods Max. You can find this setting in Accessibility settings on iOS and macOS. Ensure Mono Audio is disabled for stereo sound quality.


    Fix 5: Reset Network Settings (iPhone/iPad)

    Sometimes, connectivity issues can stem from network or Bluetooth settings. Resetting network settings can help resolve this.

    5.1 How to Reset Network Settings

    1. Go to Settings: On your iPhone or iPad, open Settings > General.
    2. Reset Network Settings: Choose Reset > Reset Network Settings. Note that this will remove all Wi-Fi passwords and Bluetooth pairings, so be prepared to reconnect.

    This process can remove any Bluetooth errors that may be causing the sound issue.


    Fix 6: Update Firmware and Device Software

    Ensuring your device and AirPods Max are running on the latest software is crucial.

    6.1 Check for Device Software Updates

    • On iOS: Go to Settings > General > Software Update.
    • On Mac: Open System Preferences > Software Update.

    6.2 Update AirPods Max Firmware

    Firmware updates are automatically pushed to AirPods Max when they’re connected to an Apple device with an internet connection. You can verify the firmware version by going to Settings > Bluetooth on your device, tapping the “i” next to your AirPods Max, and checking the firmware version.


    Fix 7: Perform a Factory Reset on AirPods Max

    If none of the previous steps work, a factory reset might be necessary. This will completely erase all settings and restore your AirPods Max to factory condition.

    7.1 How to Perform a Factory Reset

    1. Unpair the AirPods Max: Go to Bluetooth settings on your device, find the AirPods Max, and select “Forget This Device.”
    2. Press and Hold the Buttons: Press and hold the Digital Crown and Noise Control button for 15 seconds until the LED flashes white.
    3. Reconnect: After the reset, you’ll need to reconnect the AirPods Max to your device.

    A factory reset is typically the last step, as it removes all personalized settings and pairings.


    Fix 8: Test AirPods Max with Another Device

    If you’re still facing sound issues, it’s a good idea to try connecting your AirPods Max to another device to rule out any device-specific issues.

    8.1 Pair with an Alternative Device

    1. Put AirPods Max into Pairing Mode: Hold down the Noise Control button until the LED flashes white.
    2. Pair with a Different Device: Open Bluetooth settings on a different device and select AirPods Max.

    If your AirPods Max work with another device, the issue might lie with the original device’s Bluetooth or audio settings.


    Fix 9: Clean and Inspect the AirPods Max

    Physical blockages can sometimes interfere with sound output.

    9.1 Clean the Ear Cushions and Mesh

    Dust or debris can gather in the ear cushions and mesh, potentially obstructing sound.

    • Use a Soft, Dry Cloth: Gently wipe the ear cushions and headband.
    • Inspect for Debris: Ensure there’s no lint or particles blocking the speaker mesh.

    A gentle cleaning can often restore audio clarity.


    Fix 10: Advanced Troubleshooting Tips

    If you’ve tried all the above methods and still experience issues, here are a few advanced tips.

    10.1 Reset All Settings on iPhone or iPad

    1. Navigate to Settings > General > Reset > Reset All Settings.
    2. Confirm: This resets all settings, like Wi-Fi passwords and wallpaper, without erasing data.

    10.2 Check for App-Specific Audio Settings

    Some apps have in-app audio settings. Open the app you’re using and confirm its settings aren’t interfering with your AirPods Max audio.


    Fix 11: When to Seek Professional Help

    If your AirPods Max continue to have issues, you may need assistance from Apple Support.

    11.1 Contact Apple Support

    Apple Support offers diagnostics and repair options for more complex hardware issues.

    11.2 AppleCare Coverage

    If your AirPods Max are covered by AppleCare, you may be eligible for free repairs or replacement.


    Conclusion: Getting Your AirPods Max Back to Perfect Sound

    While “connected but no sound” issues can be frustrating, these troubleshooting steps offer reliable ways to restore sound to your AirPods Max. From checking basic settings to performing a factory reset, these methods cover everything you need to know to troubleshoot and fix this common issue.

    With these steps, your AirPods Max should be back to providing the immersive sound experience they’re known for, saving you the hassle of a Genius Bar visit.

    Also Check:

  • Here’s How I Use Nikon Camera Control Pro 2 to Its Full Potential

    Here’s How I Use Nikon Camera Control Pro 2 to Its Full Potential

    Nikon’s Camera Control Pro 2 software is a powerful tool designed for photographers who want full control over their Nikon DSLR or mirrorless cameras directly from their computers. Connecting your camera to a laptop or desktop allows you to remotely adjust camera settings, preview images, and even control advanced features like time-lapse, long exposures, and focus stacking.

    Here's How I Use Nikon Camera Control Pro 2 to Its Full Potential
    Here’s How I Use Nikon Camera Control Pro 2 to Its Full Potential

    If you’re looking to get the most out of your Nikon camera and capture professional-grade photos without constantly touching the camera, Camera Control Pro 2 is a fantastic investment.

    This article will walk you through how I use Nikon Camera Control Pro 2 to its fullest potential. We’ll go over the software’s main features, setup tips, shooting techniques, and practical uses so you can harness its capabilities, even if you’re new to tethered shooting.

     Nikon Camera Control Pro 2

    Nikon Camera Control Pro 2 is software that allows you to operate Nikon DSLR and mirrorless cameras remotely via a computer. Once connected, you can adjust camera settings like aperture, shutter speed, ISO, and white balance right from the computer. You can also review images, capture videos, and control many advanced functions without having to touch the camera.

    This remote-control capability is especially valuable in scenarios where touching the camera might cause vibration or shake, such as macro photography, astrophotography, studio shoots, and time-lapse sequences.

    Why Use Nikon Camera Control Pro 2?

    There are several advantages to using Camera Control Pro 2:

    • Eliminate Camera Shake: Since you’re controlling the camera remotely, you reduce the risk of vibrations that can blur images, especially with longer exposures.
    • Preview and Adjust Settings Quickly: View images in real time and make adjustments on the go.
    • Greater Control for Creative Projects: Features like focus stacking, time-lapse, and live view make it perfect for creative photography styles.

    Setting Up Nikon Camera Control Pro 2

    To start using Camera Control Pro 2, you’ll need a Nikon-compatible camera, a USB or wireless connection, and a computer that meets the software requirements.

    Step-by-Step Setup Guide

    • Install Camera Control Pro 2: Download and install the software from Nikon’s official website. You’ll need to purchase a license, which will come with an activation code.
    • Connect Your Camera: Use a USB cable to connect your camera to the computer, or if your camera supports wireless connections, set up a Wi-Fi or Bluetooth connection.
    • Launch the Software: Open Camera Control Pro 2 on your computer. The software should automatically detect your camera.
    • Configure Camera Settings: You’ll see a control panel with different settings options, including exposure, focus, white balance, and more. Adjust these according to your needs.

    Exploring Key Features of Camera Control Pro 2

    Camera Control Pro 2 offers many powerful features. Let’s go through some of the key ones and how I use them to maximize results.

    Remote Control of Exposure Settings

    With the software, you can change settings like shutter speed, aperture, ISO, and white balance directly from your computer. This is useful in controlled environments, such as studio settings, where you might need to tweak settings between shots without moving back and forth between the computer and the camera.

    Live View Mode

    The live view mode allows you to see what your camera sees in real time on your computer screen. Here’s how I use it:

    • Composition and Framing: Live view is perfect for precisely framing shots, especially with macro or product photography.
    • Manual Focusing: By zooming into the live view, you can focus manually with greater accuracy. This is helpful for still life or portraits where details matter.

    Focus Stacking for Depth of Field Control

    Focus stacking is a technique that combines multiple images taken at different focus points to achieve a greater depth of field. Here’s how it works in Camera Control Pro 2:

    • Setting Focus Points: With Camera Control Pro 2, you can set different focus points for each shot.
    • Combining Shots: Once you have the images, you can use software like Photoshop or Helicon Focus to merge them into one image with maximum sharpness across the frame.

    Interval Timer for Time-Lapse Photography

    Camera Control Pro 2 comes with a built-in interval timer, which is fantastic for creating time-lapse sequences. You can set intervals between shots and the total number of frames, allowing you to create smooth time-lapse videos. Here’s how I set it up:

    • Set Interval Time: Choose the time interval between each shot (e.g., 10 seconds).
    • Select Number of Shots: Decide how many frames you need for your time-lapse.
    • Start the Sequence: Once you start the timer, the camera will capture images at the set interval until the sequence is complete.

    Long Exposure Mode

    Long exposures are useful for capturing low-light scenes, light trails, or even star trails. With Camera Control Pro 2, you can keep the shutter open as long as needed without touching the camera. I often use this for astrophotography or night landscapes, as the software lets you:

    • Set Precise Shutter Speed: Choose long shutter speeds or use Bulb mode.
    • Reduce Noise: By controlling everything remotely, you can take multiple long exposures for stacking, which helps reduce noise in low-light images.

    Advanced Techniques with Camera Control Pro 2

    High Dynamic Range (HDR) Photography

    Camera Control Pro 2 allows you to shoot HDR images by capturing multiple shots with different exposures. By adjusting exposure settings on each shot, you can blend these images later for a final shot with improved dynamic range.

    • Capture Multiple Exposures: Change the shutter speed or aperture to capture images at different brightness levels.
    • Merge in Post-Processing: Use software like Lightroom or Photoshop to merge the images into an HDR composite.

    Bracketing for Exposure and White Balance

    Bracketing allows you to take multiple photos with different exposures or white balances. This is useful for tricky lighting conditions, like sunsets or indoor environments with mixed light sources.

    Portrait and Macro Photography

    Camera Control Pro 2 is also highly beneficial for portrait and macro photographers. By having the computer control the camera, you can fine-tune every detail:

    • Macro Focus: Precise focus adjustments are crucial in macro photography, where the depth of field is extremely shallow.
    • Consistent Lighting: Adjust settings without moving the camera to avoid changes in the lighting.

    Practical Applications of Nikon Camera Control Pro 2

    Studio Photography

    In a studio setting, you often want consistent, repeatable shots. Camera Control Pro 2 allows you to do just that by controlling settings from a computer screen.

    Nature and Wildlife Photography

    If you’re photographing wildlife and need to maintain a safe distance, the remote control feature is invaluable. Set up the camera in position and control it from a distance without scaring away animals.

    Event Photography

    For events, you can set up the camera in a discreet location and capture images remotely. This is useful for time-lapses of the event or getting candid shots without having to stand behind the camera.

    Tips to Maximize Nikon Camera Control Pro 2

    To get the most out of Nikon Camera Control Pro 2, here are some tips I’ve found useful:

    • Use a Tripod: Since you’re working remotely, a stable setup prevents any unwanted movement.
    • Experiment with Different Settings: Try different exposure settings, especially with HDR and bracketing, to capture diverse shots.
    • Optimize Live View Settings: Adjust live view resolution to suit your computer’s capabilities.
    • Use External Power: When capturing long time-lapse or extended shots, connect the camera to an external power source.

    Conclusion

    Nikon Camera Control Pro 2 is a powerful tool that can elevate your photography experience by providing unmatched control and convenience. Whether you’re shooting in a controlled studio environment, capturing dynamic wildlife shots, or creating unique time-lapse sequences, this software gives you the flexibility and precision you need.

    With features like live view, remote control, focus stacking, and time-lapse capabilities, you can unlock your Nikon camera’s full potential without needing to physically adjust the camera for every shot. Investing in Camera Control Pro 2 is a decision that can greatly expand your creative options and enhance the quality of your photography work.

    CHECK THESE OUT:

    Wondering What Sony Camera Shoots 8K? Check This Out.

    5 Reasons the Sony Camera for Live Streaming is Perfect

    Here’s How to Update Sony Camera Firmware Before You Regret It

    Why I’ll Always Choose a Sony Camera Flip Screen Over a Traditional Viewfinder.

    Why Settle for Basic Cameras? Discover Which Fujifilm Camera Have IBIS

  • What the iPad 10th Generation Gets Right—and What the iPad 11th Generation Might Bring to the Table

    What the iPad 10th Generation Gets Right—and What the iPad 11th Generation Might Bring to the Table

    The iPad 10th generation is Apple’s latest entry-level iPad, designed to balance affordability and functionality while bringing some of the innovations seen in higher-end models to a broader audience. It’s a device aimed at students, professionals, and casual users alike. With upgraded internals, a fresh design, and new features, the 10th-gen iPad has elevated itself in a crowded tablet market.

    What the iPad 10th Generation Gets Right—and What the iPad 11th Generation Might Bring to the Table

    But with every iteration, there are always some missed opportunities and features that could make the experience even better. This article will dive deep into what the iPad 10th generation gets right—and speculate on improvements we might see in the anticipated 11th generation.


    1. Design and Display: What the iPad 10th Generation Gets Right

    The design of the 10th-generation iPad aligns closely with the more recent iPad Air models. The switch to a more modern aesthetic has brought several benefits.

    Sleek, Modern Design

    With slim bezels and a nearly edge-to-edge display, the 10th-generation iPad has a sleek, modern look that feels current and premium. Apple replaced the old Home button with a Touch ID button on the side, freeing up more screen space while maintaining a secure, convenient unlocking method.

    • Strengths: Aesthetic appeal and improved screen real estate.
    • Potential Improvements: While the design is appealing, an OLED display would provide deeper blacks and more vivid colors—something that would enhance media consumption and creativity apps. The 11th-gen iPad could adopt OLED, especially since the Pro line is already equipped with mini-LED technology.

    Display Quality and Size

    The 10.9-inch Liquid Retina display on the 10th-gen iPad offers good color accuracy, sharpness, and brightness for most users. It’s a step up from the previous generation’s 10.2-inch screen, providing more room for multitasking and an immersive viewing experience.

    • Potential Improvements: Despite the quality of the LCD, users might hope for a ProMotion 120Hz refresh rate in the 11th generation for smoother scrolling and responsiveness—especially appealing for artists and gamers. A higher resolution and HDR support could also elevate media viewing.

    2. Processing Power and Performance

    The 10th-generation iPad is powered by Apple’s A14 Bionic chip, providing smooth performance for daily tasks, light gaming, and multitasking. It’s a capable chip for an entry-level iPad, ensuring the device can handle most apps without issue.

    What Works Well with A14 Bionic

    The A14 provides ample processing power for students and professionals working with productivity tools, such as Microsoft Office or Google Suite. It also enables smooth video streaming, photo editing, and some light video editing, making it a versatile tool for various tasks.

    • Potential Improvements: While the A14 Bionic chip performs well, the 11th-generation iPad could benefit from the newer A16 chip or even the M1 chip, delivering a significant performance boost that would make it more future-proof. This would also enable better app compatibility and improve the iPad’s ability to handle multitasking demands in the upcoming iPadOS versions.

    3. Software Compatibility: iPadOS and Longevity

    The 10th-gen iPad runs on iPadOS 16, which brings several new features, including enhanced multitasking capabilities, improved widget customization, and a refined Files app. The iPad’s adaptability to these upgrades is crucial, especially with the versatility of iPadOS’s new tools.

    iPadOS 16 Enhancements

    The 10th-gen iPad shines with iPadOS 16, taking advantage of features like Stage Manager for efficient multitasking, improved collaboration features, and SharePlay for group media viewing. The device handles these tasks well for an entry-level model, making it suitable for work, school, and family use.

    • What Could Be Better: The 11th-generation iPad could include features that make it even more compatible with future iPadOS updates. For instance, a stronger processor would allow the device to better handle memory-intensive features, like multiple app instances and external monitor support, which are currently restricted to higher-end iPads.

    4. Battery Life and Charging

    The battery life on the 10th-generation iPad is commendable, lasting around 10 hours with typical usage, which is great for a day’s work or leisure. The transition to USB-C charging has made it more versatile, allowing users to charge with the same cables they use for other modern Apple devices.

    USB-C and Versatile Charging

    USB-C opens up options for accessories and faster data transfer, a move welcomed by many users. It also helps in reducing cable clutter, especially for users with other Apple products.

    • Potential Improvements: One area for enhancement could be faster charging. The 11th-generation iPad could benefit from a power delivery that supports 30W or more for quicker top-ups, making it convenient for on-the-go users. Improvements in battery technology might also increase screen time without adding bulk.

    5. Camera Quality: Front and Rear Lenses

    While the iPad isn’t a primary device for photography, the camera setup is still important for video calls, document scanning, and augmented reality applications.

    Improvements with the 10th-Gen Camera

    The 10th-gen iPad includes a 12MP rear camera and a 12MP ultra-wide front camera, making it suitable for FaceTime calls and online meetings. The Center Stage feature enhances video calls by automatically adjusting the frame to keep you in focus, which works well for both personal and professional calls.

    • What Could Be Better: A stronger rear camera with better low-light capabilities could improve photo and video quality. Upgraded stabilization, as well as improvements to the ultra-wide front lens, could further enhance video calls, especially in dimly lit environments. Perhaps Apple could even consider adding LiDAR support in the 11th generation for improved AR experiences.

    6. Accessories and Compatibility

    Apple offers a range of accessories compatible with the 10th-gen iPad, including the Apple Pencil (1st generation) and various third-party keyboards. These add-ons help transform the iPad into a versatile device for students, professionals, and creatives.

    Pencil Compatibility and Third-Party Support

    The 10th-gen iPad’s compatibility with the Apple Pencil 1 is a useful addition, though it does require a USB-C to Lightning adapter, which can be inconvenient.

    • Potential Improvements: The 11th-gen iPad could be more appealing if it supported the 2nd-generation Apple Pencil, which offers features like wireless charging and a more intuitive design. Improved support for third-party accessories, such as broader compatibility with external keyboards and USB-C hubs, could make the iPad even more adaptable.

    7. Audio and Speakers

    Audio quality is often overlooked in tablets, but for users who stream content or make frequent video calls, it’s essential.

    Impressive Sound on the 10th Generation

    The 10th-gen iPad features stereo speakers that offer clear and robust audio, enough to enjoy music, movies, and even some light gaming.

    • Room for Improvement: The 11th-gen iPad could take audio quality to the next level by adding more speakers, as seen in the iPad Pro models, which provide a fuller and more immersive sound experience. Enhanced spatial audio support could also enhance video and music playback.

    8. Price and Value for Money

    At an entry-level price, the 10th-gen iPad offers a lot of value. However, as the line evolves, Apple has an opportunity to balance features and pricing even more strategically.

    Affordability and Performance

    The 10th-gen iPad hits a sweet spot between price and performance, offering premium design elements at an accessible cost. It’s a suitable device for those who want reliable performance without needing the advanced features of the iPad Pro.

    • Potential Price Adjustments: As Apple considers upgrades for the 11th generation, it will be crucial to keep pricing competitive to appeal to entry-level users. If Apple decides to introduce enhancements such as better display technology or processor upgrades, they might do well to offer multiple configurations at various price points to suit a broader range of customers.

    What the iPad 11th Generation Might Bring to the Table

    Looking ahead, the 11th-generation iPad could introduce some features that are currently limited to higher-end models. Here’s a summary of what could make the 11th-gen iPad a more versatile, future-proof device:

    1. Improved Display with Higher Refresh Rates and OLED Options
    2. More Powerful Processor, Perhaps the A16 Bionic or M1 Chip
    3. Upgraded Camera with Enhanced Low-Light Performance
    4. Compatibility with 2nd-Gen Apple Pencil
    5. Faster Charging and Longer Battery Life

    Conclusion

    The iPad 10th generation is a solid device with a fresh design, strong performance, and versatile usage options, making it a popular choice among users who don’t require the power of the Pro models. Yet, as with any device, there are areas where it could improve. The 11th generation could address some of these pain points by adding more advanced features like an OLED screen, faster charging, and enhanced accessory compatibility.

    For now, the 10th-gen iPad is a valuable tool for education, work, and entertainment—providing a reliable and user-friendly experience for a broad audience. But for those keeping an eye on the future, the 11th-gen iPad holds exciting potential, promising to bring even more functionality to the entry-level iPad lineup.

    Also Check:

  • Fix iPads: Common Problems with iPads and How to Fix them Yourself in Minutes

    Fix iPads: Common Problems with iPads and How to Fix them Yourself in Minutes

    Apple’s iPads are known for their reliability and ease of use, but even the best devices can run into trouble. From slowdowns and connectivity issues to battery problems and software bugs, there’s a wide range of issues that iPad users encounter. Fortunately, many of these problems can be fixed without needing to visit a repair center or seek professional help.

    Fix iPads

    This guide will take you through common iPad problems and show you how to fix them yourself in minutes.


    1. How to Diagnose Common iPad Issues

    The first step to fixing an iPad problem is figuring out what’s wrong. In this section, we’ll explore a checklist for diagnosing your device’s issue so that you can apply the right fix.

    • Step 1: Observe the Problem – Take note of any specific behaviors. For instance, is the screen freezing only in certain apps? Does the battery drain rapidly even on low brightness?
    • Step 2: Check for Updates – iPadOS updates can fix a lot of common bugs, so start by going to Settings > General > Software Update to see if a new update is available.
    • Step 3: Reboot the Device – Rebooting often solves minor glitches. Press and hold the Power button until the slider appears, then slide to turn off.
    • Step 4: Review Device Storage – Check your iPad’s storage to see if it’s nearly full, as lack of storage can cause sluggish performance. Go to Settings > General > iPad Storage.

    2. Fixing Performance Issues and Freezing

    One of the most common complaints from iPad users is sluggish performance. Here’s how you can fix it:

    Clear Cache and Data

    Clearing the cache can improve speed, especially if you use Safari or other web-based apps frequently.

    • For Safari: Go to Settings > Safari > Clear History and Website Data.
    • For App Cache: Open each app that allows cache clearing individually, or delete and reinstall the app if necessary.

    Delete Unnecessary Apps and Files

    Unused apps take up valuable storage space. You can delete apps by pressing and holding the app icon on your home screen, then selecting Remove App.

    Disable Background App Refresh

    Turning off background app refresh can also enhance performance.

    • Go to Settings > General > Background App Refresh and switch it off for apps that don’t need it.

    3. Resolving Battery Drain Problems

    If your iPad’s battery life has taken a nosedive, try these troubleshooting tips:

    Lower Screen Brightness

    Display brightness is a major factor in battery life.

    • Go to Settings > Display & Brightness and reduce brightness to a comfortable level.

    Disable Location Services

    Location services can also drain your battery. Turn it off for apps that don’t need location data.

    • Go to Settings > Privacy > Location Services and disable unnecessary options.

    Check Battery Usage by App

    Look at which apps consume the most power. To view detailed battery usage, go to Settings > Battery.

    • Pro Tip: If an app is using excessive battery, try updating or reinstalling it.

    Enable Low Power Mode

    Low Power Mode isn’t officially on iPads, but similar practices can conserve battery life, such as lowering brightness, reducing usage of power-hungry apps, and minimizing screen time.


    4. Wi-Fi and Bluetooth Connectivity Issues

    Wi-Fi or Bluetooth issues can be frustrating but are usually easy to fix.

    Restart Wi-Fi Router and iPad

    Sometimes, a simple router reset can solve Wi-Fi connectivity issues. Also, try turning Wi-Fi off and on in Settings > Wi-Fi.

    Forget and Reconnect to the Network

    For persistent issues, go to Settings > Wi-Fi, tap the (i) icon next to your network, and choose Forget This Network, then reconnect by entering the password again.

    Reset Network Settings

    If issues persist, reset your iPad’s network settings. Go to Settings > General > Reset > Reset Network Settings. Note that this will remove all saved Wi-Fi passwords.


    5. Fixing Charging Issues

    If your iPad isn’t charging properly, follow these steps to troubleshoot.

    Check the Charging Cable and Adapter

    Inspect the cable and adapter for any visible damage, as this is often the culprit. If you suspect the charger, try another cable or adapter to rule out hardware issues.

    Clean the Charging Port

    Dirt and debris can collect in the charging port, preventing the cable from making proper contact.

    • Use a soft brush or a can of compressed air to clean the port carefully.

    Update to the Latest iPadOS

    In some cases, software issues can prevent charging. Make sure your iPad is updated by going to Settings > General > Software Update.


    6. iPad Screen Issues: Flickering, Touch Unresponsiveness, and Screen Stuck

    Whether it’s a flickering display or an unresponsive screen, here’s how to resolve screen issues on your iPad.

    Restart the iPad

    A quick restart often resolves screen issues.

    Force Restart

    If a normal restart doesn’t work, try a force restart by pressing the Power button and either of the volume buttons until the Apple logo appears.

    Check for Physical Damage

    Inspect your iPad’s screen for any cracks or dents that may be causing touch sensitivity issues.

    Adjust Display Settings

    Sometimes, adjusting display settings can fix flickering.

    • Go to Settings > Display & Brightness > True Tone and toggle this off if you experience flickering.

    7. Sound and Audio Problems

    If your iPad has sound issues, try these solutions:

    Check Volume Settings

    Make sure the volume isn’t muted. You can adjust this via the Control Center or volume buttons.

    Clean the Speakers

    Dust and lint can get into the speakers and affect sound quality. Carefully clean the speaker grills with a soft brush.

    Check Bluetooth Settings

    If audio is playing through a connected Bluetooth device, disconnect it by going to Settings > Bluetooth and turning it off.

    Test with Different Apps

    Sometimes, audio issues are app-specific. Test with another app to see if the sound works there.


    8. Camera Issues: Fixing Blurry Photos, Freezing, and App Problems

    If the camera on your iPad isn’t working, try the following steps:

    Clean the Camera Lens

    Wipe the lens with a microfiber cloth to remove any smudges or debris.

    Restart the iPad

    A restart can often resolve minor camera glitches.

    Check for Updates

    Make sure your apps and iPadOS are up to date, as new updates can fix camera-related issues.


    9. App Crashes and Freezing Issues

    When an app crashes repeatedly, here’s what you can do:

    Close and Reopen the App

    Double-tap the Home button (or swipe up from the bottom on iPads without a Home button) to view open apps, then swipe the problematic app up to close it.

    Delete and Reinstall the App

    Deleting and reinstalling an app can often fix bugs and restore stability.


    10. Software Updates: Best Practices and Troubleshooting Update Issues

    Keeping your iPad updated is essential, but updates can sometimes fail or cause new issues. Here’s how to manage them effectively:

    Check Your Storage

    Lack of storage can prevent updates from completing. Go to Settings > General > iPad Storage to see if you need to free up space.

    Connect to a Stable Wi-Fi Network

    Make sure you have a strong Wi-Fi connection to avoid update interruptions.


    11. Resetting Your iPad: When and How to Do It

    When all else fails, a reset may be the best option. Here’s how to reset without losing your data:

    Soft Reset

    Go to Settings > General > Reset > Reset All Settings. This won’t delete your data but will reset settings.

    Hard Reset

    If you need a fresh start, choose Erase All Content and Settings, but make sure to back up your data first.


    12. Troubleshooting Hardware-Related Issues

    Some iPad problems stem from hardware issues rather than software. Here are some signs of hardware damage and what you can do.

    Battery Health

    Check battery health via third-party apps or have it tested at an Apple Store if you experience extreme battery drain.

    Screen Damage

    Screen replacements are best handled by a professional if the display is cracked or unresponsive.

    Charging Port Issues

    If your iPad isn’t charging and you’ve ruled out the cable, the port itself may need repair.


    Conclusion: A Toolkit to Troubleshoot iPad

    iPads are robust devices, but issues can arise that disrupt the user experience. With this guide, you now have a toolkit to troubleshoot and fix many common iPad problems, saving time and money on professional repairs. Whether it’s improving performance, fixing connectivity issues, or troubleshooting app crashes, these solutions should help you get your iPad back in top shape in just a few minutes.

    Take control of your device, and you’ll find that fixing iPad issues isn’t as challenging as it seems. With a few simple steps, you can keep your iPad running smoothly and enjoy all its benefits without a trip to the repair shop.

    Also Check:

  • Top PS5 Pro Enhanced Games and How They Compare to the Original PS5

    Top PS5 Pro Enhanced Games and How They Compare to the Original PS5

    The PS5 Pro has created a significant buzz in the gaming community, promising substantial upgrades over the original PS5. One of the most exciting aspects is the PS5 Pro Enhanced Games library, which features titles optimized to harness the console’s advanced hardware.

    PS5 Pro game library
    Top PS5 Pro Enhanced Games and How They Compare to the Original PS5

    In this comprehensive article, we’ll explore what makes the PS5 Pro Game Library stand out, highlight key enhanced games, and delve into a comparison of how they perform against the original PS5.

    Understanding the PS5 Pro Game Library

    The PS5 Pro is built to deliver an extraordinary gaming experience, equipped with superior hardware that includes a powerful GPU, enhanced memory, and a faster SSD. This upgraded architecture allows for visually stunning graphics and smoother gameplay, particularly in demanding titles. Many games are optimized specifically for the PS5 Pro, unlocking capabilities that weren’t achievable on the original PS5.

    Key Takeaway Table: PS5 vs. PS5 Pro

    Feature PS5 PS5 Pro
    GPU 10.28 TFLOPs 12.96 TFLOPs
    Memory 16 GB GDDR6 16 GB GDDR6
    Storage 825 GB SSD 1 TB SSD
    Maximum Resolution 4K @ 60 FPS 4K @ 120 FPS
    Ray Tracing Support Yes Yes

    This table clearly showcases the performance improvements and capabilities that position the PS5 Pro as a top-tier gaming console.

    Enhanced Games for PS5 Pro

    Several notable titles have received significant enhancements for the PS5 Pro, fully utilizing its advanced hardware. Here are some standout examples:

    1. Ratchet & Clank: Rift Apart

    This action-adventure game exemplifies the power of the PS5 Pro through its lightning-fast load times and improved frame rates. Players can enjoy vibrant worlds with stunning detail, and the seamless transitions between dimensions create an immersive experience that is hard to match. According to Insomniac Games, the development team utilized the console’s SSD to enable almost instant loading of various game environments, which is a hallmark of the PS5 Pro’s capabilities.

    2. Resident Evil Village

    This survival horror game showcases enhancements that significantly improve performance on the PS5 Pro. Players experience higher frame rates and graphical fidelity, leading to a smoother and more immersive gameplay experience. The detailed environments, combined with the upgraded visual effects, heighten the game’s tension and atmosphere, drawing players into its dark narrative.

    3. Gran Turismo 7

    Racing enthusiasts will find that Gran Turismo 7 fully leverages the PS5 Pro’s capabilities, offering enhanced graphics, improved physics, and more realistic driving mechanics. The game features both Performance and Fidelity modes, allowing players to choose between a higher frame rate or enhanced visuals. This flexibility ensures that gamers can tailor their experience based on their preferences.

    4. Horizon Forbidden West

    Horizon Forbidden West is another flagship title that shines on the PS5 Pro. The lush open world and intricate details have been optimized to provide breathtaking visuals and smooth gameplay. With the PS5 Pro, players can explore its expansive landscapes with enhanced visual effects and richer textures, making each encounter feel truly immersive.

    Performance Modes Explained

    The PS5 Pro offers two primary modes for enhanced games: Performance Pro and Fidelity Pro.

    Performance Pro Mode

    In this mode, the focus is on achieving higher frame rates, ensuring smoother gameplay. This is especially crucial in fast-paced action or competitive games where every millisecond matters. For instance, first-person shooters like Call of Duty benefit from this mode, allowing players to react quickly and efficiently.

    Fidelity Pro Mode

    Conversely, the Fidelity Pro Mode emphasizes achieving the highest visual quality. Many games run at 4K resolution with enhanced graphical details, appealing to players who value aesthetics over frame rate. Titles like Final Fantasy XVI are expected to benefit significantly from this mode, delivering stunning visual effects that are sure to captivate players.

    Backward Compatibility and Boost Mode

    One of the significant advantages of the PS5 Pro is its ability to play a vast array of PS4 games. The Backward Compatibility feature ensures that gamers can access their existing library without losing any progress or quality.

    Game Boost Benefits

    The PS5 Pro Game Boost enhances older PS4 titles with several improvements:

    • Faster load times: Load screens are significantly reduced, allowing players to jump into the action more quickly.
    • Improved frame rates: Many PS4 games experience enhanced performance on the PS5 Pro, providing a smoother experience.
    • Enhanced resolutions: Some games are upscaled to 4K, enhancing their visual appeal on modern displays.

    Popular titles benefiting from Game Boost include:

    • The Last of Us Part II: With improved frame rates and load times, players can fully immerse themselves in the gripping narrative without interruptions.
    • Ghost of Tsushima: Enhanced visuals make the stunning landscapes of Tsushima even more breathtaking, showcasing the capabilities of the PS5 Pro.

    Exclusive Titles Optimized for PS5 Pro

    Several games have been developed specifically with the PS5 Pro in mind, ensuring players can fully experience the enhanced features of the console:

    1. The Last of Us Part II Remastered

    This highly anticipated remaster showcases updated graphics and enhanced gameplay mechanics. The improvements make it one of the must-play titles on the PS5 Pro, providing both new players and returning fans with a fresh experience.

    2. Marvel’s Spider-Man 2

    Scheduled for release in late 2024, this game promises to deliver stunning graphics and innovative gameplay tailored for the PS5 Pro. With its engaging story and expansive open world, fans of the franchise eagerly await its arrival.

    3. Final Fantasy XVI

    This latest installment in the iconic series is set to leverage the PS5 Pro’s enhanced features, offering players breathtaking visuals and a deep narrative. With a focus on storytelling and character development, it stands to be one of the premier titles for the console.

    Comparing Performance Across Different Game Modes

    The PS5 Pro provides various performance modes that significantly impact gameplay. Below is a comparison table highlighting the differences between Performance Mode and Fidelity Mode:

    Mode Frame Rate Resolution Visual Quality
    Performance Mode Up to 120 FPS 1080p to 4K High
    Fidelity Mode 30 to 60 FPS 4K Ultra High

    This flexibility allows players to customize their gaming experience, ensuring that whether they prioritize frame rate or visual fidelity, they get the best possible experience.

    Frequently Asked Questions About PS5 Pro Enhanced Games

    Can all PS5 games run on PS5 Pro?
    Yes, all PS5 games are compatible with the PS5 Pro, and many have been optimized for the enhanced features, ensuring players can enjoy their favorite titles with improved performance.

    What is the difference between PS5 Pro Game Boost and standard game modes?
    Game Boost enhances performance for older PS4 titles, improving graphics, frame rates, and load times, thereby providing a better overall experience than on the original PS4.

    How can you tell if a game is PS5 Pro enhanced?
    Most game packaging or descriptions on the PlayStation Store will indicate if a game has specific enhancements for the PS5 Pro, making it easy for players to identify which titles offer the best experience.

    Expert Insights and Case Studies

    Industry experts are optimistic about the potential of the PS5 Pro and its enhanced game library. “The PS5 Pro represents a significant step forward in console technology, allowing developers to create games that are not only visually stunning but also more immersive,” says gaming analyst Richard Bailey. This sentiment is echoed by many in the gaming community who have noted the impressive leaps in both graphics and gameplay experiences.

    Case Study: The Impact of Hardware on Game Development

    A notable case study is the development of Ratchet & Clank: Rift Apart. The team at Insomniac Games utilized the PS5 Pro’s SSD to create gameplay that features instant load times between different dimensions. This innovation allowed for gameplay mechanics that were previously unachievable, emphasizing how the hardware can directly influence game design and player experience.

    The Future of the PS5 Pro Game Library

    The future looks promising for the PS5 Pro Game Library, with numerous titles set to release that will take full advantage of its enhanced features. Upcoming games like Final Fantasy XVI and Marvel’s Spider-Man 2 are expected to deliver breathtaking graphics and improved gameplay experiences tailored for the PS5 Pro. These anticipated releases further solidify the console’s position as a leader in the gaming industry.

    As technology continues to evolve, gaming consoles like the PS5 Pro are setting new standards. The integration of ray tracing and AI-enhanced graphics are trends that will likely define the future of gaming. With the PS5 Pro already supporting these features, gamers can expect even more immersive experiences in the years to come.

    Conclusion

    The PS5 Pro Game Library is a testament to the evolution of console gaming, offering players an unparalleled experience through enhanced titles and backward compatibility. With its superior graphics, faster load times, and a growing selection of optimized games, the PS5 Pro stands out as a powerful console for casual and hardcore gamers alike. As more titles are released, the benefits of upgrading to the PS5 Pro become increasingly evident, making it a worthy investment for any gaming enthusiast.

    The PS5 Pro’s enhanced capabilities not only improve existing titles but also pave the way for innovative game design and storytelling. Whether you’re a

    Check These Out Also: