Blog

  • Try This Simple Trick to Learn How to Connect Your Alexa Echo Dot to WiFi Instantly

    Try This Simple Trick to Learn How to Connect Your Alexa Echo Dot to WiFi Instantly

    Connecting your Alexa Echo Dot to WiFi is essential to make the most of its smart capabilities, from streaming music to managing smart home devices and answering questions.
    How to Connect Alexa Echo Dot to WiFi

    If you’re setting up an Echo Dot for the first time, or simply reconnecting it to a new WiFi network, this article will provide the steps on how to connect your Alexa Echo Dot to WiFi. Following these steps can make the process smooth and quick.

    Why WiFi is Essential for Alexa Echo Dot

    Without WiFi, the Alexa Echo Dot won’t be able to access the cloud-based Alexa service, which powers its voice recognition, smart home controls, and entertainment features. Once connected to WiFi, Alexa can provide you with real-time information, like weather updates, calendar reminders, and much more.

    Having a strong WiFi connection ensures that you can enjoy Alexa’s full suite of capabilities without interruptions.

    How to Connect Alexa Echo Dot to WiFi

    Here’s a comprehensive guide on how to connect Alexa Echo Dot to WiFi to get you connected in no time.

    Getting Started with Alexa: What You Need

    Before diving into the steps, make sure you have:

    • A compatible smartphone or tablet
    • The Amazon Alexa app (available on iOS and Android)
    • Your Echo Dot plugged into a power source
    • Your WiFi network’s name and password handy

    Step 1: Open the Amazon Alexa App

    If you haven’t installed the Amazon Alexa app, download it from the App Store (iOS) or Google Play (Android). Open the app and log in with your Amazon account. This app is the command center for setting up and managing Alexa-enabled devices, so having it readily accessible makes managing Alexa’s features much easier.

    Step 2: Power Up Your Echo Dot

    Connect your Echo Dot to a power outlet using the provided adapter. After plugging it in, wait for the ring light to turn orange. The orange light signals that the device is ready for setup. If it doesn’t show the orange light, press and hold the “Action” button (with a dot symbol) for about 15 seconds until it begins to glow orange.

    Step 3: Add a Device in the Alexa App

    In the Alexa app, navigate to the “Devices” tab at the bottom of the screen. Tap on the “+” icon in the top-right corner and select “Add Device.” From the list of device types, select “Amazon Echo,” then choose “Echo Dot.” The app will guide you through the setup process, starting with connecting the Echo Dot to WiFi.

    Step 4: Connect to WiFi

    Once you’ve selected your Echo Dot, the app will prompt you to connect it to a WiFi network. Select your network from the list of available networks, and enter your WiFi password when prompted.

    The app will display a confirmation message once your Echo Dot has successfully connected to WiFi. This connection is necessary for Alexa to process requests and access the cloud.

    If you’re changing networks or reconnecting, make sure your Echo Dot is disconnected from any previous network. To do this, you may need to reset your device by holding down the “Action” button for about 15 seconds until the light turns orange again, which prepares it for a new WiFi setup.

    Step 5: Test Your Connection

    Once connected, try asking Alexa a simple question like, “Alexa, what’s the weather?” This verifies that Alexa is online and able to respond. If Alexa answers, you’re good to go! If not, check the Alexa app for any troubleshooting messages and ensure that your WiFi signal is strong and stable.

    Troubleshooting Tips

    • Ensure Strong WiFi Signal: Alexa requires a stable internet connection. If your device is too far from the router, the signal might be weak. Consider moving your Echo Dot closer to the router or using a WiFi extender.
    • Update the Alexa App: Outdated app versions may have bugs that prevent proper device setup. Ensure your Alexa app is updated to the latest version.
    • Check for WiFi Issues: If Alexa is having trouble connecting, try restarting your router. Alternatively, you can try switching to another network, if available, to see if the issue persists.
    • Factory Reset (if needed): If all else fails, reset your Echo Dot to its factory settings by holding the “Action” button for 15 seconds. Then repeat the setup process.

    Frequently Asked Questions

    Can I connect my Alexa to public WiFi networks?

    Public WiFi networks often require additional authentication, which Alexa doesn’t support. It’s best to use a secure, private network for your Echo Dot.

    Why won’t my Echo Dot connect to WiFi even after following all the steps?

    If you’re still facing connectivity issues, check that your router’s settings support 2.4 GHz or 5 GHz frequencies, as Alexa works with both. You may also need to ensure there are no firewall or security settings blocking Alexa’s access.

    Do I have to use the Alexa app every time I reconnect to WiFi?

    Yes, any time you need to set up a new WiFi connection, you’ll use the Alexa app to guide the Echo Dot through the process.

    Conclusion

    Connecting your Alexa Echo Dot to WiFi is easy with the steps above. A stable WiFi connection ensures that Alexa can help you with tasks, control your smart devices, and provide the latest information instantly.

    ALSO CHECK:

    Can Alexa Make Phone Calls: Here’s How I Discovered That Alexa Can Make Phone…

    Amazon Echo Show 8 1st Gen Review: This Versatile Smart Display Has Everything You…

    Here’s What Alexa Emergency Assist Does and How to Set It Up
     

  • Amazon Secretly Made Alexa More Accessible: Here’s How to Connect Alexa to Bluetooth Without the App

    Amazon Secretly Made Alexa More Accessible: Here’s How to Connect Alexa to Bluetooth Without the App

    Amazon’s Alexa has revolutionized smart home technology, providing hands-free convenience for controlling devices, streaming music, and getting real-time information. One of the standout features is Alexa’s ability to connect via Bluetooth, allowing users to pair it with speakers, headphones, or even car audio systems.

    How to Connect Alexa Bluetooth Without Using the App

    While connecting Alexa to Bluetooth previously required using the Alexa app, Amazon has now made it possible to do this without the app—making Alexa more accessible and versatile. Here’s a detailed, step-by-step guide on how to connect Alexa to a Bluetooth device without needing the app, along with troubleshooting tips and answers to common questions.


    Why Connect Alexa via Bluetooth?

    Though Alexa has built-in speakers, connecting it to a Bluetooth speaker can significantly improve the sound quality, especially if you’re streaming music, audiobooks, or podcasts. Bluetooth connectivity also opens up new ways to use Alexa, from connecting it to portable speakers to bring outdoors to linking it with car audio systems for hands-free, on-the-go access.

    With Amazon’s recent update, you can make these connections without the app—a boon for those who may have temporary connectivity issues, lack a smartphone or prefer a straightforward setup.


    How to Connect Alexa to Bluetooth Without Using the App

    Connecting Alexa to Bluetooth without the app is now a simple process, but each step is important to ensure a successful connection. Follow these detailed instructions to pair Alexa with your Bluetooth device:

    Step 1: Put the Bluetooth Device in Pairing Mode

    First, you’ll need to ensure that the Bluetooth speaker or device you want to connect is set to pairing mode, making it discoverable to nearby devices like Alexa. This step varies slightly based on the type and brand of Bluetooth device you’re using.

    • For most speakers: Press and hold the Bluetooth button until you hear a tone or see a blinking light. The blinking light (or sound) typically indicates that the device is in pairing mode.
    • For headphones: Often, you’ll need to press and hold the power button or a designated Bluetooth button. Look for the light to start blinking, which means the device is now discoverable.
    • In cars with Bluetooth: Use your car’s infotainment system to put it in Bluetooth pairing mode. This usually involves navigating through the system’s settings and selecting the Bluetooth or connectivity option.

    This step is essential, as Alexa will only detect devices that are actively in pairing mode. If you’re not sure how to enable pairing mode, check the device’s user manual.

    Step 2: Activate Pairing Mode on Alexa

    Once your Bluetooth device is ready, you can initiate pairing on Alexa. Here’s how:

    • Ensure Alexa is active: Say “Alexa,” followed by a command, to make sure the device is ready to respond.
    • Use the voice command to pair: Simply say, “Alexa, connect to Bluetooth.” This command will prompt Alexa to start searching for nearby Bluetooth devices that are currently in pairing mode.

    Alexa will remain in pairing mode for a short time while searching for available devices. Make sure your Bluetooth speaker or headphones stay in pairing mode until Alexa completes the connection.

    Step 3: Listen for Alexa’s Response

    After a few moments, Alexa will respond with either a confirmation of a successful connection or additional prompts:

    • Successful connection: Alexa will say something like, “Now connected to [Device Name].” This means Alexa is now paired and ready to use with your Bluetooth device.
    • Multiple devices detected: If there are multiple Bluetooth devices nearby, Alexa may ask, “Do you want to connect to [Device Name]?” or ask for additional clarification. In this case, respond with the name of the device you’d like to connect.

    Once Alexa announces the connection, you’re ready to start using your Bluetooth device with Alexa. Any music, podcasts, or other audio played through Alexa will now output through your connected Bluetooth device.

    Step 4: Testing the Connection

    Before you start using your new setup, it’s a good idea to test the connection to ensure everything is working smoothly:

    • Play a test sound: You can say, “Alexa, play a song” or “Alexa, play [music or podcast of choice].” Listen to ensure the sound is coming from the Bluetooth speaker or headphones rather than Alexa’s built-in speaker.
    • Adjust the volume: Use voice commands to adjust the volume by saying “Alexa, volume up” or “Alexa, volume down.” Confirm that these commands adjust the volume on the connected Bluetooth device.

    Testing the connection ensures that you’ll have a smooth experience using Alexa with your Bluetooth device.

    Step 5: Reconnecting in the Future

    Once Alexa has successfully connected to a Bluetooth device, it will remember this connection for future use. To reconnect:

    • Use a simple voice command: Whenever you want to use the Bluetooth device again, just say, “Alexa, connect to Bluetooth.” Alexa will automatically reconnect to the most recently connected Bluetooth device.
    • If multiple devices are connected: If Alexa has been previously paired with multiple Bluetooth devices, you may need to specify the device name by saying, “Alexa, connect to [Device Name].”

    This feature simplifies the process, allowing you to reconnect without repeating the full setup each time.


    Benefits of Connecting Alexa to Bluetooth Without the App

    Amazon’s new approach to Bluetooth pairing without the app offers several advantages:

    • Speed and Convenience: Skipping the app makes the setup faster and allows you to connect with just a few voice commands.
    • Accessible for All Users: This is especially helpful for users who may not have access to a smartphone or who prefer a simpler setup.
    • Better Audio Options: Connecting Alexa to an external speaker provides more powerful audio output for enjoying music, podcasts, and more.

    Troubleshooting Tips: Resolving Bluetooth Issues with Alexa

    If you experience problems when connecting Alexa to a Bluetooth device, try these troubleshooting tips to resolve common issues:

    • Ensure Devices Are Close Together: The Bluetooth range is limited, so keep Alexa and your Bluetooth device within a reasonable distance—ideally, within 10-30 feet.
    • Disconnect Other Bluetooth Connections: If your Bluetooth speaker or device is connected to another device (like a phone or laptop), disconnect it before attempting to pair it with Alexa.
    • Restart Both Devices: Power off Alexa and the Bluetooth device, then power them back on before attempting to reconnect.
    • Reset Bluetooth Connections on Alexa: If you’re still having trouble, say, “Alexa, forget all connected devices.” This command will remove all previous Bluetooth connections, allowing you to start fresh with a new pairing.

    Frequently Asked Questions (FAQs)

    Can I connect Alexa to multiple Bluetooth devices without the app?

    Yes, you can pair Alexa with multiple Bluetooth devices without the app, but only one device can be actively connected at a time. You’ll need to specify which device to connect to if multiple devices are available.

    Does this method work on all Alexa-enabled devices?

    Most Echo devices with Bluetooth functionality support app-free pairing, including the Echo Dot, Echo Show, and Echo Plus. However, check the specific features of your device model to confirm.

    Will Alexa automatically reconnect to the last used Bluetooth device?

    Yes, after the initial pairing, Alexa will remember the device and reconnect automatically when you say, “Alexa, connect to Bluetooth.”

    How far can Alexa be from the Bluetooth device?

    Generally, Bluetooth devices need to be within 30 feet of each other. Walls and other obstacles can reduce the range, so try to keep devices close for the best experience.

    Can I disconnect the Bluetooth device without using the app?

    Yes, to disconnect, simply say, “Alexa, disconnect Bluetooth,” and Alexa will stop streaming to the device.


    Final Thoughts

    Amazon’s new Bluetooth pairing method for Alexa makes connecting to external devices easier and more flexible. Whether you’re enhancing your home audio setup or connecting on the go, this option allows for app-free pairing in just a few steps.

    By making Alexa more accessible and versatile, Amazon has opened up new possibilities for everyone to enjoy a seamless, high-quality audio experience with ease. Give it a try and explore the enhanced convenience of Alexa’s expanded connectivity options.

    CHECK OUT:

    Here’s How to Connect Alexa to Your Phone via Bluetooth in Just a Few…

    Don’t Make These 7 Mistakes when Setting up your Alexa Echo Dot

    How to Perfectly Put Alexa in Pairing Mode Using This Simple Guide


  • Newer Alexa Devices Are Smarter with Bluetooth: Here’s How to Connect Your Alexa to Any Bluetooth Speaker

    Newer Alexa Devices Are Smarter with Bluetooth: Here’s How to Connect Your Alexa to Any Bluetooth Speaker

    In recent years, Amazon’s Alexa-enabled devices have become incredibly versatile, evolving from simple voice assistants to full-on entertainment hubs. If you own a Bluetooth speaker, you might be missing out on one of Alexa’s most useful features: the ability to connect to external speakers and give your audio a serious upgrade.

    How to connect Alexa to Bluetooth speaker

    With just a few steps, you can elevate the sound quality of your Alexa device to fill your entire room with crisp, high-quality audio. Let’s dive into exactly how to connect your Alexa device to any Bluetooth speaker and get the most out of your setup.

    Why Connect Alexa to a Bluetooth Speaker?

    While Alexa devices like the Echo and Echo Dot have built-in speakers, these are generally designed for everyday use, and the audio quality is decent but not exceptional. Here are a few reasons why connecting Alexa to a Bluetooth speaker is a smart idea:

    • Enhanced Sound Quality: With a dedicated Bluetooth speaker, you’ll enjoy richer sound, deeper bass, and a more immersive audio experience.
    • Greater Volume and Coverage: Bluetooth speakers are generally louder than Alexa’s built-in speakers, making them perfect for filling larger spaces.
    • Flexible Placement: By using a Bluetooth speaker, you’re free to place the Alexa device and the speaker in separate areas, optimizing sound and voice response wherever you need it.

    Getting Started: What You’ll Need

    Before you start, here’s what you’ll need:

    • An Alexa device with Bluetooth capabilities (such as Echo Dot, Echo, or Echo Show).
    • A Bluetooth speaker that’s ready to pair.
    • The Amazon Alexa app installed on your phone or tablet.

    How to Connect Alexa to a Bluetooth Speaker

    Now that you’re set up, here’s a simple guide on how to connect your Alexa device to a Bluetooth speaker:

    Place Both Devices in Pairing Mode

    • Turn on your Bluetooth speaker and make sure it’s in pairing mode. Most Bluetooth speakers have a button or indicator that confirms it’s ready to pair. Check the speaker’s manual if you’re not sure.
    • Open the Alexa app on your smartphone or tablet.

    Access Device Settings in the Alexa App

    • In the Alexa app, tap on the “Devices” tab at the bottom right of the screen.
    • Select “Echo & Alexa” to see a list of all your Alexa-enabled devices.
    • Tap on the Alexa device you want to connect to your Bluetooth speaker.

    Connect Alexa to Bluetooth Speaker

    • Within your device’s settings, find and select “Bluetooth Devices.”
    • Tap on “Pair a New Device” to make your Alexa search for available Bluetooth devices.
    • When your Bluetooth speaker appears in the list, select it to initiate the connection.

    Alexa will announce that the connection has been made, and any audio played through your Alexa device should now come through your Bluetooth speaker.

    Test the Connection

    To ensure that the connection was successful:

    • Ask Alexa to play music or another type of audio.
    • Confirm that the sound is coming from your Bluetooth speaker instead of the Alexa device itself.

    If the sound quality is great and everything seems in order, then you’re all set! You can enjoy a higher-quality audio experience for music, podcasts, or any other Alexa-enabled content.

    Reconnecting and Disconnecting from Your Bluetooth Speaker

    One of the perks of pairing Alexa with a Bluetooth speaker is the seamless reconnection. Here’s how to make sure you’re using it properly:

    • Automatic Reconnection: Alexa will attempt to automatically reconnect to the last paired Bluetooth speaker whenever both devices are on and within range.
    • Disconnecting: If you want Alexa to stop using the Bluetooth speaker, simply say, “Alexa, disconnect.” Alexa will then revert to using its internal speaker.
    • Manually Reconnecting: To reconnect to your Bluetooth speaker, say, “Alexa, connect to Bluetooth.” Alexa will automatically search for the last paired device and connect.

    Troubleshooting Common Issues

    Although pairing is generally straightforward, here are a few troubleshooting tips if things don’t go as planned:

    • Bluetooth Device Not Found: If Alexa can’t find your Bluetooth speaker, double-check that the speaker is in pairing mode and within range of the Alexa device.
    • Intermittent Connection: Bluetooth connection can be affected by range and obstructions. Ensure that your Alexa device and Bluetooth speaker are within 30 feet of each other for the best performance.
    • Audio Delay or Sync Issues: In some cases, Bluetooth speakers may have a slight delay in audio playback. This can usually be improved by disconnecting and reconnecting the speaker or choosing a higher-quality speaker if needed.
    • Unpairing: If you want to remove a Bluetooth device from Alexa’s memory entirely, go to the “Bluetooth Devices” section in the Alexa app, tap on the device in question, and select “Forget Device.”

    Benefits of Using Alexa with a Bluetooth Speaker

    Connecting Alexa to a Bluetooth speaker can truly transform your listening experience. Here are some of the major advantages:

    • Better Sound for Music: If you’re an avid music lover, a quality Bluetooth speaker will enhance Alexa’s capabilities, bringing more depth and richness to every track.
    • Improved Sound Clarity for Voice Commands: A good Bluetooth speaker can improve Alexa’s clarity, especially if you’re in a larger space or a noisy environment.
    • Enhanced Versatility: Bluetooth speakers are portable, so you can easily move your audio setup from room to room, making Alexa a more adaptable assistant.

    Alexa-Compatible Bluetooth Speakers to Consider

    If you’re considering an upgrade, here are a few Alexa-compatible Bluetooth speakers known for excellent sound quality and seamless pairing:

    • Bose SoundLink Revolve+: Known for 360-degree sound and robust bass, this speaker provides great sound in every direction.
    • Ultimate Ears BOOM 3: This speaker is portable, waterproof, and delivers impressive audio quality, perfect for pairing with Alexa.
    • JBL Flip 5: Offering high-quality sound in a compact size, the JBL Flip 5 is an excellent choice for users looking for portability and audio performance.

    Final Thoughts

    Using Alexa with a Bluetooth speaker is a game-changer, making it easier than ever to enjoy enhanced sound quality without investing in a brand-new smart speaker system. By following these steps, you can quickly set up Alexa with any Bluetooth speaker, giving you the freedom to experience Alexa’s voice commands, music, and more with enhanced audio.

    So go ahead and experiment! Try connecting your Alexa device to your favorite Bluetooth speaker and experience the difference. Whether for streaming music, hearing Alexa’s responses more clearly, or filling your home with high-quality sound, the combination of Alexa and Bluetooth is an unbeatable upgrade.

    ALSO CHECK:

    Tribit StormBox Pro Review: 360-Degree Sound and 24 Hours of Battery ideal for Anyone…

    How Alexa Guard Mode Can Enhance Home Security and Keep You Informed While You’re…

    Alexa Emergency Assist Setup: Here’s How It Can Be Customized for Quick Help


  • Best Cheap Camera with Wi-Fi for Beginners and Amateurs

    Best Cheap Camera with Wi-Fi for Beginners and Amateurs

    This article provides an in-depth exploration of some of the Best Cheap Camera with Wi-Fi. We’ll discuss the essential features you should consider when shopping for a camera, including image quality, ease of use, connectivity options, and additional functionalities that enhance your photography experience.

    Best Cheap Camera with Wi-Fi for Beginners and Amateurs
    Best Cheap Camera with Wi-Fi

    Best Cheap Camera with Wi-Fi

    WiFi-enabled cameras let you quickly transfer photos to your smartphone, tablet, or computer, and some even allow you to control the camera remotely. While there are many high-end options with these features, there are also several budget-friendly cameras with WiFi that deliver excellent quality without breaking the bank.

    Why Choose a WiFi-Enabled Camera?

    WiFi-enabled cameras are perfect for photographers who want a quick and seamless way to upload and share their photos without needing to connect the camera to a computer. Here are some key benefits:

    • Easy Sharing and Transfer: With WiFi, you can transfer photos directly to your phone or computer, making it easier to post on social media or save on cloud storage.
    • Remote Control: Some WiFi cameras allow remote control using a smartphone app. This feature can help you capture shots without touching the camera, reducing shake and ensuring sharper images.
    • Firmware Updates: Cameras with WiFi can receive updates that improve functionality or add new features, extending the life and utility of the camera.
    • Cloud Storage and Backups: WiFi-enabled cameras may support direct uploading to cloud storage services, giving you a convenient way to back up photos and save memory space.

    Features to Consider in an Affordable WiFi Camera

    When searching for a budget camera with WiFi, keep these features in mind:

    • Image Quality: Look for a camera with at least a 12MP resolution to ensure clear, detailed images.
    • Battery Life: WiFi features can drain a camera’s battery quickly, so consider cameras with good battery life or replaceable batteries.
    • Lens Quality: For point-and-shoot cameras, optical zoom (3x or higher) is ideal, while interchangeable lens options add flexibility to mirrorless cameras.
    • App Compatibility: Many cameras come with dedicated apps that let you transfer photos or control the camera remotely. Make sure the app is compatible with your smartphone and is easy to use.
    • Video Quality: If you plan to record videos, check that the camera can shoot in Full HD (1080p) or even 4K if available within budget.

    Top Affordable Cameras with WiFi in 2024

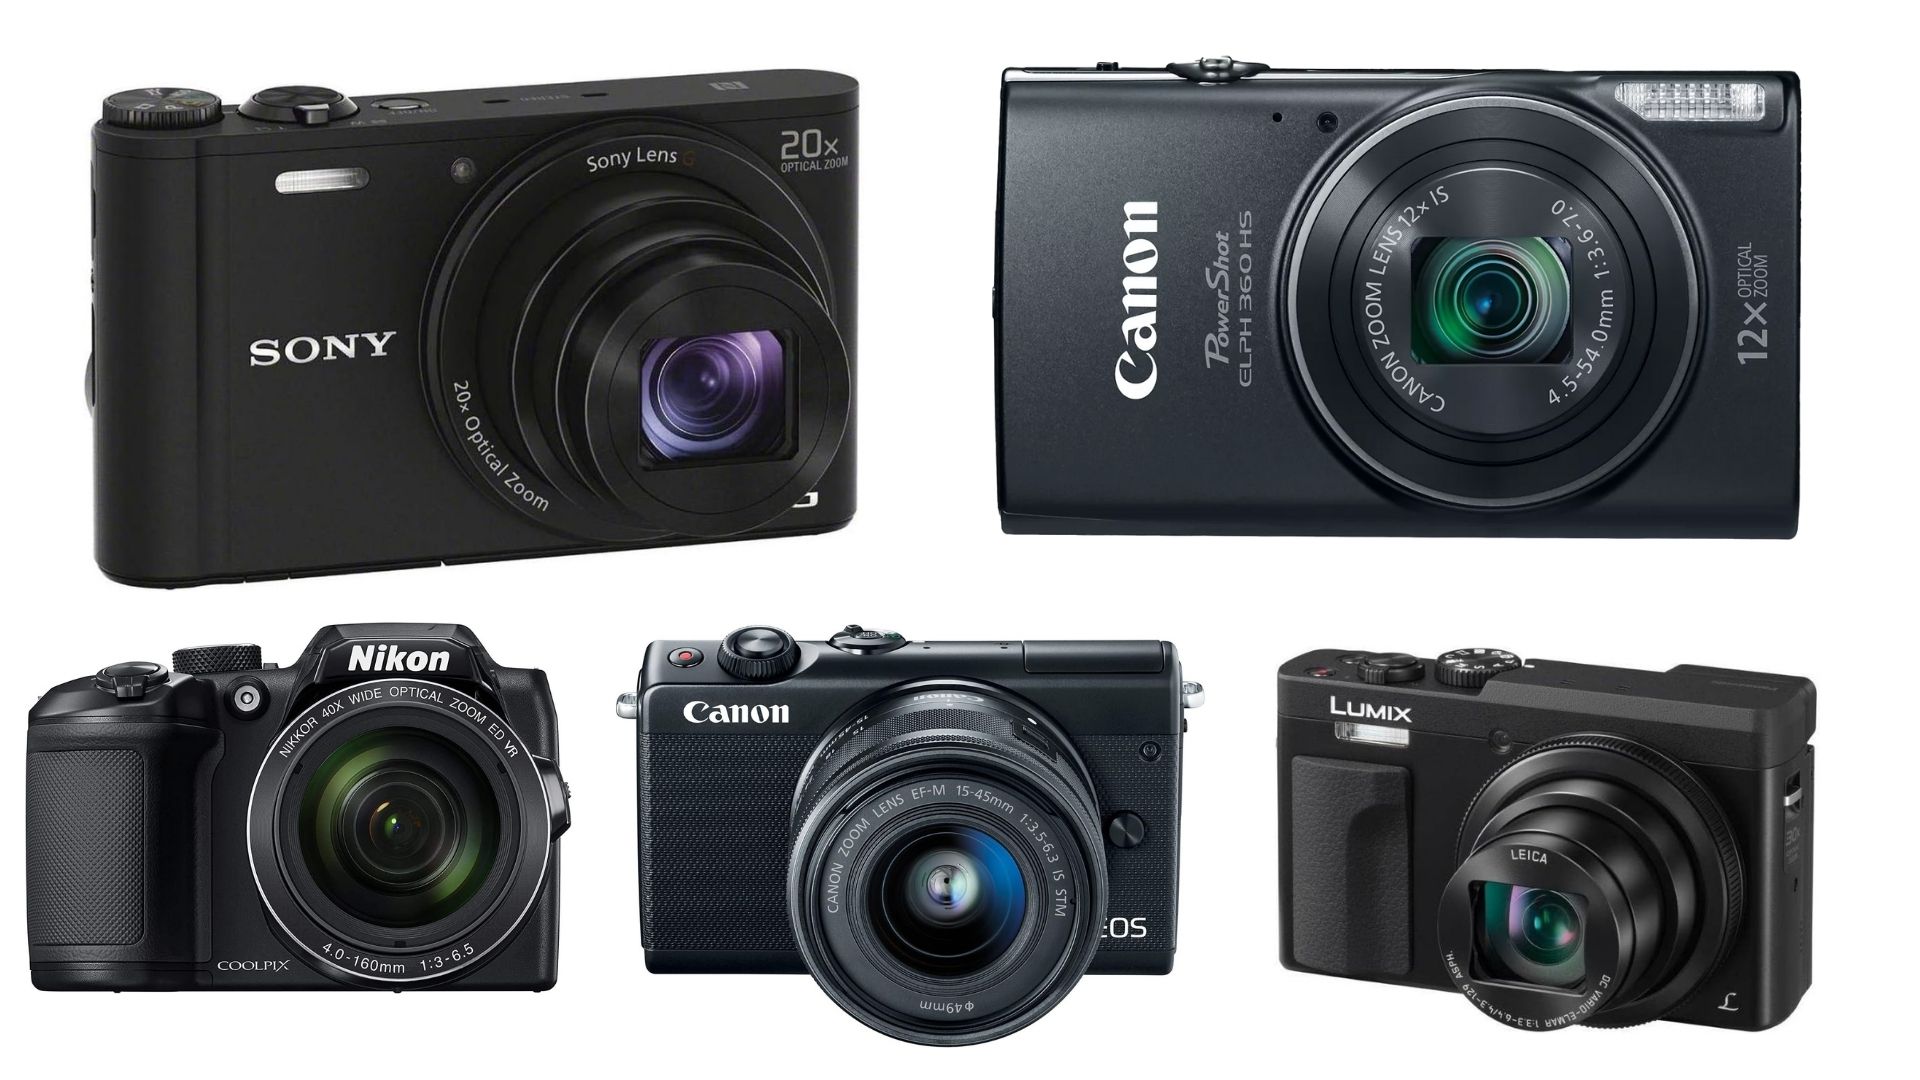
    Here’s a list of some of the best affordable cameras with WiFi, including compact, mirrorless, and action cameras. Each one provides good image quality and reliable performance at a budget-friendly price.

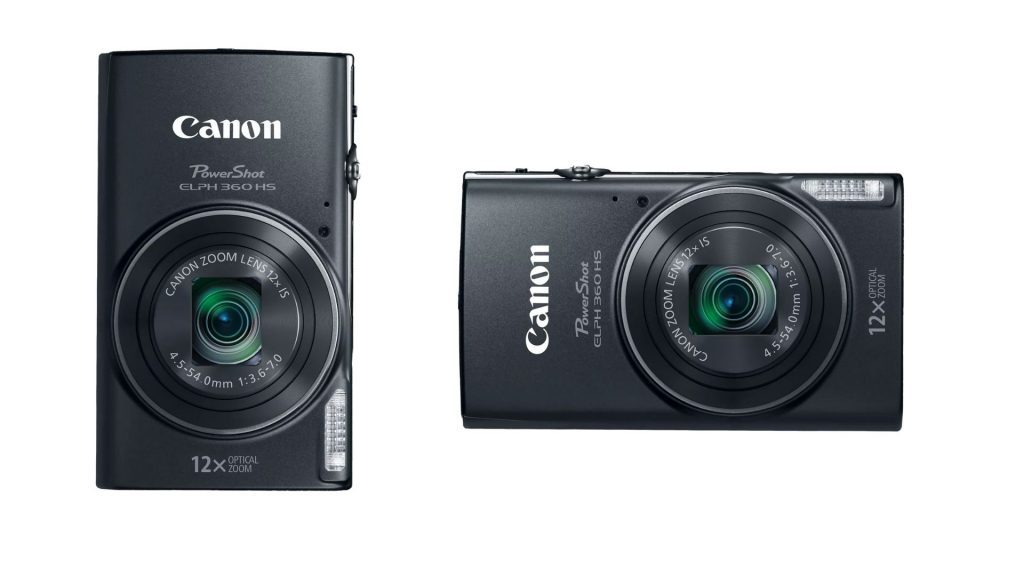
    Canon PowerShot ELPH 360 HS

    Canon PowerShot ELPH 360 HS
    Canon PowerShot ELPH 360 HS

    The Canon PowerShot ELPH 360 HS is a compact camera that’s easy to carry and use, making it perfect for beginners or hobbyists.

    • Resolution: 20.2MP
    • Zoom: 12x optical zoom
    • Video: Full HD 1080p
    • WiFi and NFC: Easy sharing and connectivity
    • Price: Approximately $200

    Why Choose It?
    The PowerShot ELPH 360 HS offers an impressive 20.2MP resolution, delivering sharp images with vivid colors. Its 12x zoom allows you to capture subjects up close, even from a distance, and the Full HD video recording capability is ideal for capturing high-quality videos. With WiFi and NFC, you can quickly transfer photos to your phone or social media.

    CLICK HERE TO SHOP THIS PRODUCT

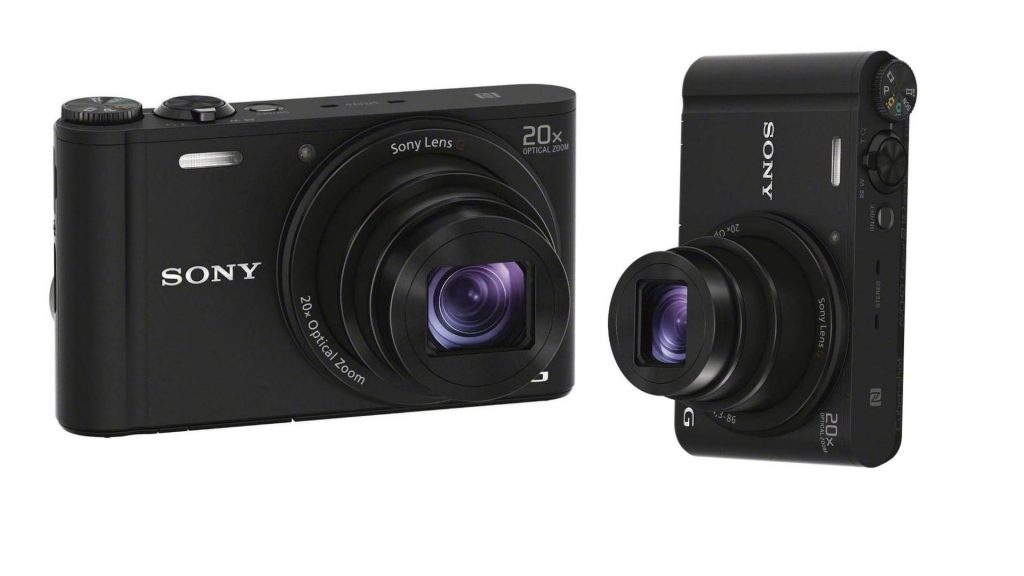
    Sony DSC-WX350

    Sony DSC-WX350
    Sony DSC-WX350

    The Sony DSC-WX350 is a small but powerful camera that provides excellent image quality and WiFi capability for easy sharing.

    • Resolution: 18.2MP
    • Zoom: 20x optical zoom
    • Video: Full HD 1080p
    • WiFi: Supports remote control and photo transfer
    • Price: Around $250

    Why Choose It?
    This Sony model is packed with features for its price, including an 18.2MP sensor that performs well in low light and a 20x zoom for detailed shots. The camera’s WiFi capability makes it easy to transfer images to your smartphone or control the camera remotely.

    CLICK HERE TO SHOP FROM AMAZON

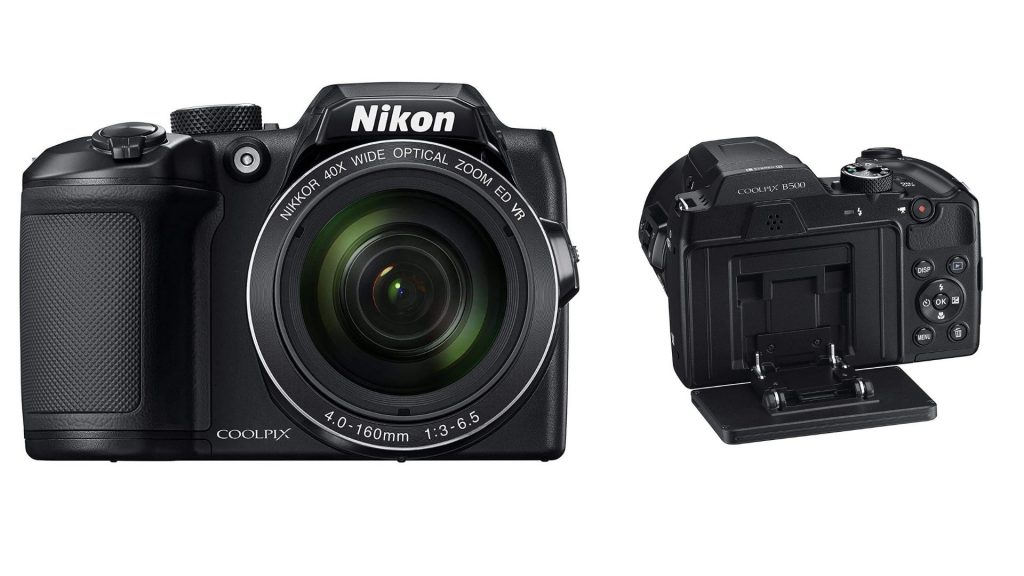
    Nikon COOLPIX B500

    Nikon COOLPIX B500
    Nikon COOLPIX B500

    The Nikon COOLPIX B500 is a bridge camera, making it ideal for photographers who want something between a compact camera and a DSLR.

    • Resolution: 16MP
    • Zoom: 40x optical zoom
    • Video: Full HD 1080p
    • WiFi and Bluetooth: Quick sharing and easy connection
    • Price: Around $300

    Why Choose It?
    The COOLPIX B500 is known for its impressive 40x zoom, allowing you to capture faraway subjects with ease. Despite its low price, it offers built-in WiFi and Bluetooth, so you can share photos or control the camera from your phone. It’s a great option for beginners who want a powerful zoom without the complexity of a DSLR.

    CLICK HERE TO SHOP NOW

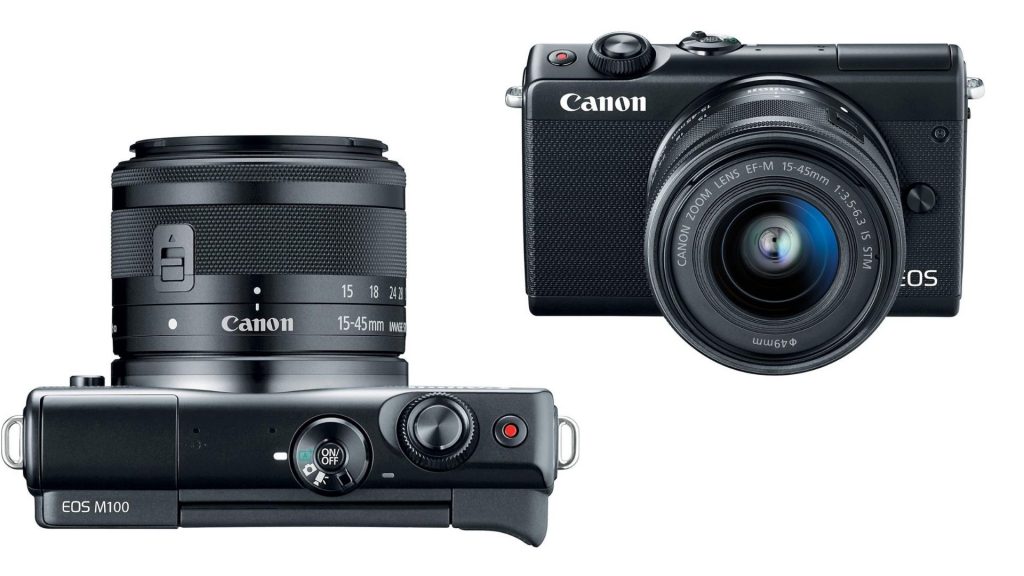
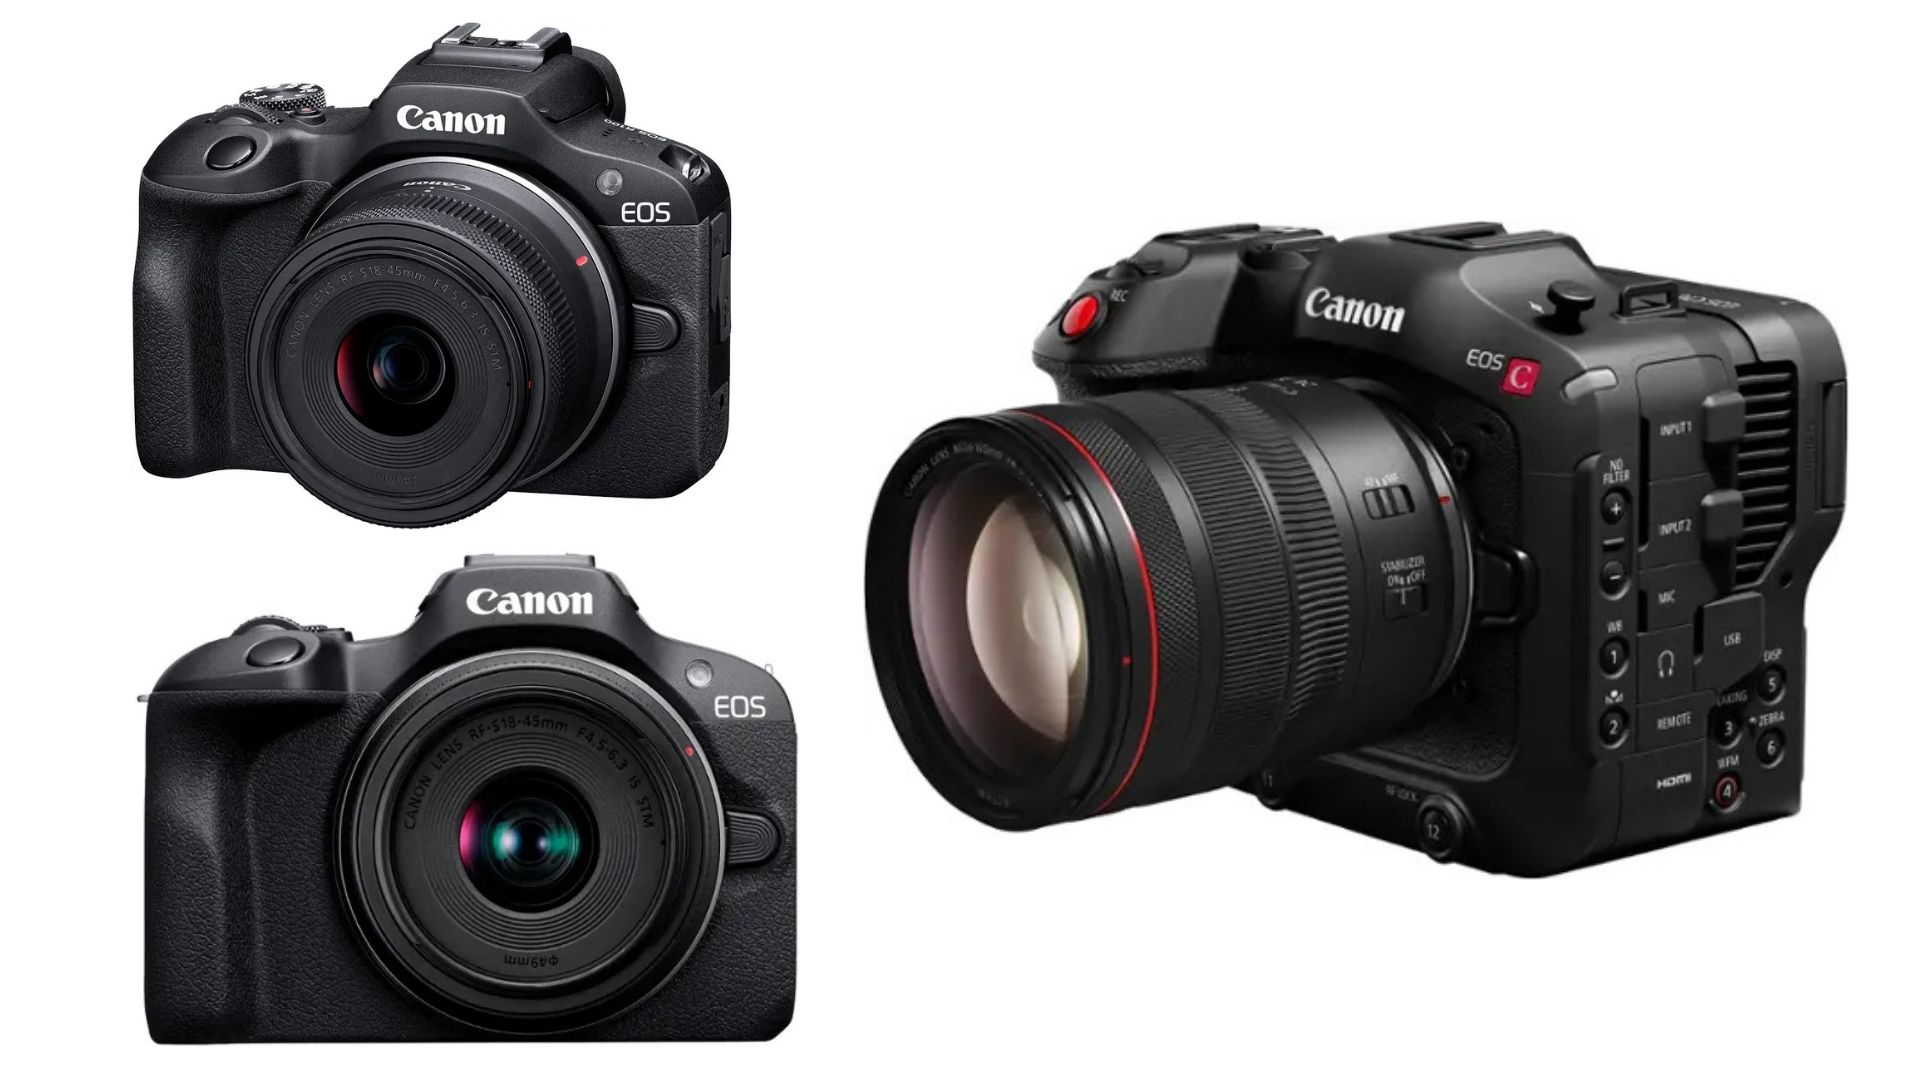
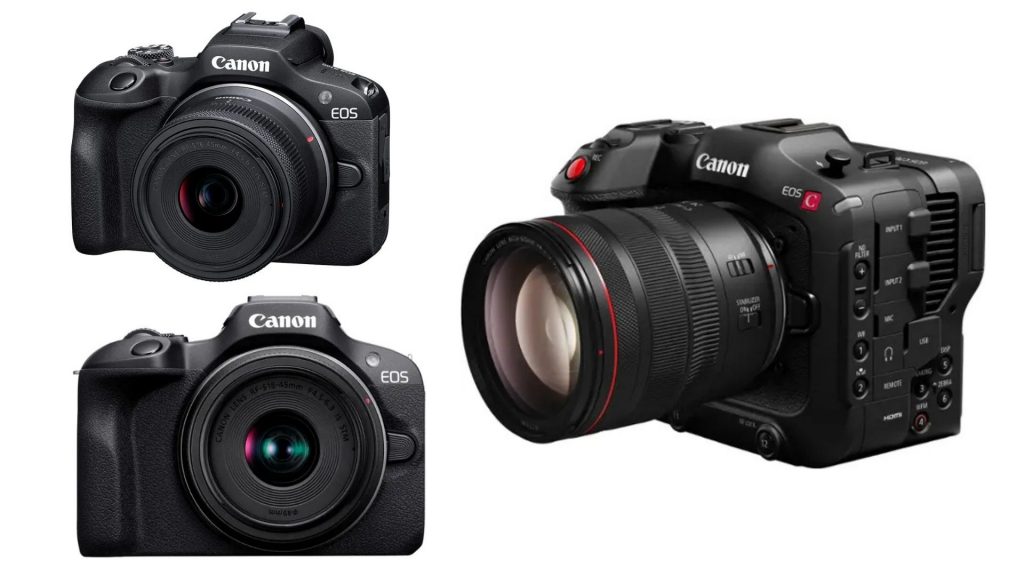
    Canon EOS M100

    Canon EOS M100
    Canon EOS M100

    The Canon EOS M100 is an entry-level mirrorless camera that offers the flexibility of interchangeable lenses along with WiFi and Bluetooth connectivity.

    • Resolution: 24.2MP
    • Lens: Interchangeable
    • Video: Full HD 1080p
    • WiFi and Bluetooth: Remote control and sharing
    • Price: Around $400 (with kit lens)

    Why Choose It?
    If you’re looking for more control over your photography, the EOS M100 offers excellent image quality and the ability to change lenses. It’s compact and easy to use, and the WiFi and Bluetooth features make sharing images a breeze. It’s a step up from compact cameras, making it ideal for those who want to grow their photography skills.

    CLICK HERE TO SHOP FROM AMAZON

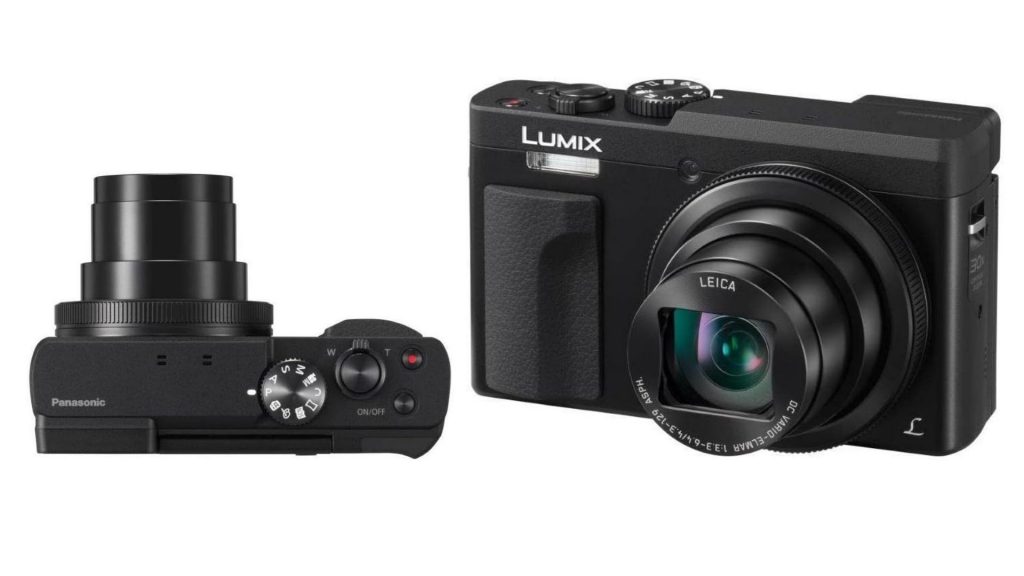
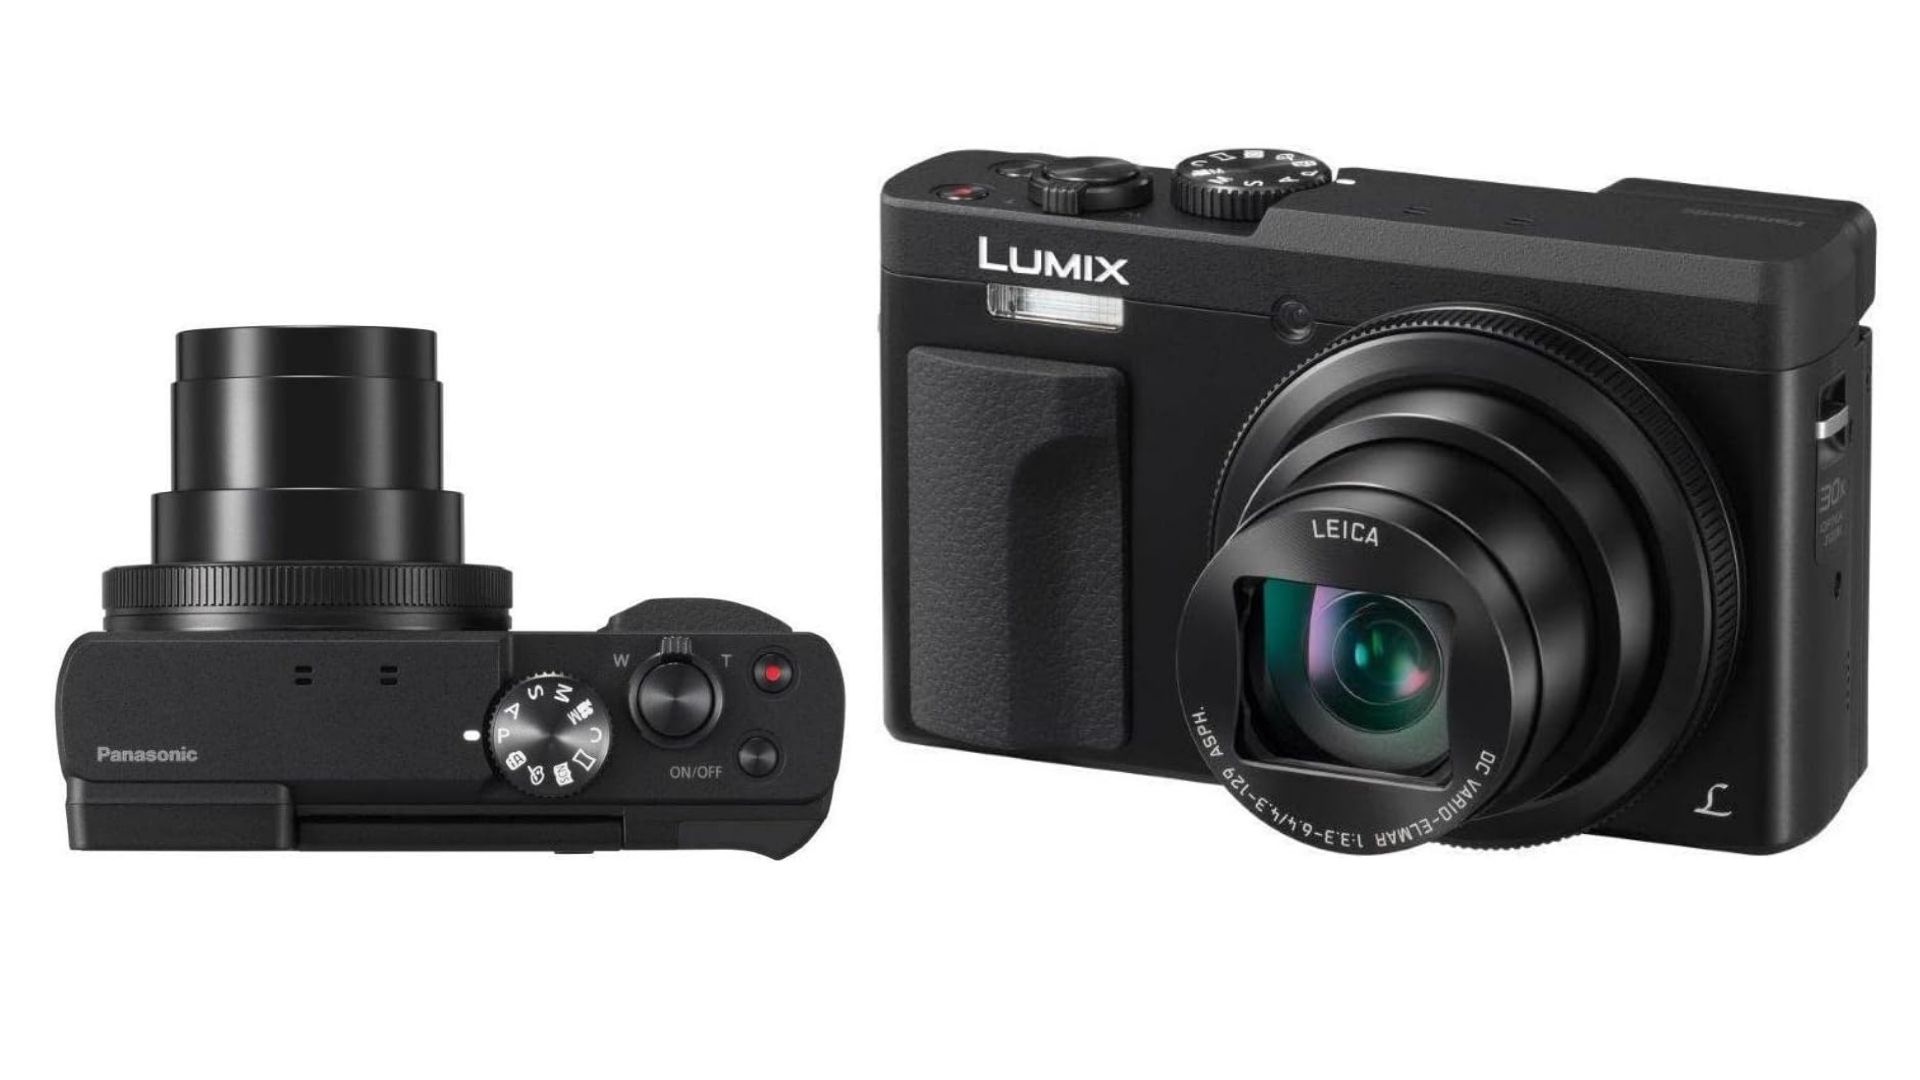
    Panasonic Lumix ZS70

    Panasonic Lumix ZS70
    Panasonic Lumix ZS70

    The Panasonic Lumix ZS70 is a compact travel camera with WiFi that delivers a lot of features for its price.

    • Resolution: 20.3MP
    • Zoom: 30x optical zoom
    • Video: 4K
    • WiFi: Supports quick sharing and remote control
    • Price: Around $300

    Why Choose It?
    The ZS70’s 30x zoom and 4K video capability make it a versatile choice for travelers. With WiFi, you can share your adventures easily, and the camera’s high-resolution sensor ensures clear images even when zoomed in.

    CLICK HERE TO SHOP FROM AMAZON

    How to Choose the Best Cheap WiFi Camera for You

    With so many great affordable options, it’s essential to know what you need before choosing a camera. Here are some tips to help you select the right one:

    Assess Your Photography Goals

    Are you interested in travel photography, vlogging, or just capturing everyday moments? If you plan to shoot landscapes or travel photos, a camera with a high zoom range, like the Nikon COOLPIX B500, might be ideal. For vlogging, the Canon EOS M100 offers excellent image quality and the flexibility to change lenses.

    Consider Size and Portability

    For photographers who are always on the go, a compact, lightweight camera is best. The Canon PowerShot ELPH 360 HS and the Sony DSC-WX350 are perfect for slipping into a bag or pocket without taking up too much space.

    Look for App Compatibility

    Make sure the camera you choose works well with a smartphone app for easy photo transfers and remote control. Canon, Nikon, Sony, and Panasonic all offer apps that allow you to control the camera remotely, download photos, and adjust settings from your phone.

    Think About Battery Life

    WiFi can drain battery power quickly, so check how long the camera lasts on a single charge, especially if you plan to use the WiFi features frequently. It may also be beneficial to invest in a camera with a replaceable battery or carry a spare.

    Don’t Overlook Video Quality

    If you plan to record videos, look for a camera that offers at least Full HD (1080p) resolution, or even 4K if possible. Video quality is essential if you plan to share your footage on social media or YouTube.

    Additional Tips for Getting the Most Out of Your WiFi Camera

    Here are some practical tips to maximize the use of your WiFi-enabled camera:

    • Update the Firmware: Regularly updating your camera’s firmware can help improve performance and ensure compatibility with new features or apps.
    • Optimize Storage: Set your camera to transfer photos to cloud storage, freeing up memory for more shots, especially during longer outings.
    • Use Remote Features Wisely: Using the remote-control feature can help reduce blur and improve image sharpness, especially for night photography or macro shots.
    • Invest in Extra Storage: WiFi transfers can take up memory, so consider using a high-capacity memory card to ensure you have enough space for all your photos and videos.

    Conclusion

    WiFi-enabled cameras offer incredible convenience, allowing you to transfer images instantly, control the camera remotely, and even back up photos to the cloud. Whether you’re a beginner, a traveler, or a casual photographer, many affordable options deliver impressive image quality and easy connectivity.

    From the compact and budget-friendly Canon PowerShot ELPH 360 HS to the versatile Panasonic Lumix ZS70, each camera on this list provides valuable features for an affordable price.

    Selecting the Best Cheap Camera with Wi-Fi depends on your unique needs, but with the information in this guide, you can make an informed choice and start capturing and sharing moments with ease. Enjoy your photography journey with the added convenience that WiFi brings to the table!

    CHECK THESE OUT:

    Here’s Why You Should Consider Buying a Sony Camera Without Rolling Shutter

    Why I’ll Always Choose a Sony Camera Flip Screen Over a Traditional Viewfinder.

    Why Settle for Basic Cameras? Discover Which Fujifilm Camera Have IBIS

    Discover the Weather Sealed Fujifilm Cameras for All Conditions

  • Everything You Need to Know About the Panasonic Lumix ZS70

    Everything You Need to Know About the Panasonic Lumix ZS70

    The Panasonic Lumix ZS70 is a versatile and compact camera that packs a lot of features into a small, travel-friendly package. Whether you’re a beginner photographer or a travel enthusiast looking for a lightweight option, the ZS70 offers a solid mix of convenience, image quality, and zoom capabilities.

    Everything You Need to Know About the Panasonic Lumix ZS70
    Panasonic Lumix ZS70

    This guide covers everything you need to know about the Panasonic Lumix ZS70, including its design, key features, image quality, performance, and best uses.

    Overview of the Panasonic Lumix ZS70

    The Panasonic Lumix ZS70, also known as the Panasonic TZ90 in some regions, is part of the popular Lumix ZS series, known for high-performance travel cameras with powerful zoom capabilities. Introduced in 2017, the ZS70 was designed to meet the needs of photographers who want more than just a simple point-and-shoot camera, with features like a 30x optical zoom, a high-resolution electronic viewfinder, and 4K video recording.

    The ZS70 is compact and lightweight, making it an ideal travel camera that can fit easily into a bag or even a pocket. It offers advanced features typically found in larger cameras, making it a popular choice for both beginners and more experienced photographers who want a portable solution without sacrificing too much in terms of performance and image quality.

    Key Features of the Panasonic Lumix ZS70

         30x Optical Zoom Lens

    • The ZS70 features a 24-720mm (35mm equivalent) Leica DC Vario-Elmar lens, providing a 30x optical zoom.
    • This range allows you to capture wide landscapes as well as zoom in on distant subjects with ease.

    20.3-Megapixel Sensor

    • The camera has a 20.3MP high-sensitivity MOS sensor, which delivers sharp and detailed images, especially in good lighting conditions.
    • This sensor allows for high-resolution shots that retain quality even when cropped.

    4K Video Recording and Photo Mode

    • The ZS70 supports 4K UHD video recording at 30 frames per second (fps), making it a great choice for video enthusiasts.
    • The 4K Photo Mode allows you to capture a series of frames in 4K resolution and choose the best shot, perfect for capturing fast-moving subjects.

    5-Axis Hybrid Optical Image Stabilization

    • To help reduce blur from camera shake, the ZS70 includes a 5-axis hybrid optical image stabilizer.
    • This is especially helpful when shooting at longer focal lengths or in low-light conditions.

    High-Resolution Electronic Viewfinder (EVF)

    • The camera has a built-in 0.2-inch 1.166-million-dot electronic viewfinder, which is useful for composing shots in bright sunlight.
    • The EVF also has an eye sensor that automatically switches between the viewfinder and LCD.

    3-Inch Tilting Touchscreen LCD

    • The ZS70 features a 3-inch, 1.04-million-dot LCD screen that tilts 180 degrees, making it perfect for selfies or vlogging.
    • The touchscreen makes it easy to navigate menus, adjust settings, and tap-to-focus.

    Built-In WiFi

    • The camera includes built-in WiFi, allowing for quick transfer of photos and videos to your smartphone or tablet.
    • You can also control the camera remotely via the Panasonic Image App, which is great for group photos or capturing shots from a distance.

    Focus Stacking and Post-Focus Mode

    • The ZS70 includes Panasonic’s Focus Stacking and Post Focus modes, allowing you to adjust focus points after taking a shot or combine multiple focus points for increased depth of field.

    Design and Build Quality

    The Panasonic Lumix ZS70 has a sleek, compact design that is ideal for travel and everyday use. Weighing around 322 grams (including battery and memory card), it’s lightweight yet durable, with a sturdy grip that makes it comfortable to hold, even for extended periods. The camera’s metal body feels robust and solid, offering durability without adding unnecessary weight.

    Its compact size makes it pocketable, and the design includes easy-to-access buttons and controls, a must for quick adjustments while shooting on the go. The tilting touchscreen and electronic viewfinder add to the ZS70’s flexibility, letting you frame shots in a variety of conditions.

    Image Quality

    Daylight and Outdoor Shooting

    The ZS70’s 20.3MP sensor performs well in daylight and outdoor conditions, capturing sharp, vibrant images. Colors are generally accurate and lively, making this camera great for capturing natural landscapes, cityscapes, and travel photos. The 30x zoom lens maintains good quality across the zoom range, although images at the highest zoom level may show slight softening.

    Low-Light Performance

    In low-light conditions, the ZS70’s performance is decent, though it’s best suited to well-lit environments. With a maximum ISO of 6400, it can handle moderate low-light scenarios, but noise becomes noticeable at higher ISO levels. Using the built-in flash or keeping the ISO lower helps maintain image quality in dimmer settings.

    Zoom Capability

    The standout feature of the ZS70 is its 30x optical zoom, allowing you to capture distant details with ease. Even at the extended zoom range, the camera’s image stabilization works well to reduce blur from camera shake, though a tripod or stable surface is beneficial for the sharpest results.

    Video Quality

    The Panasonic Lumix ZS70’s 4K video recording capabilities make it a solid choice for vloggers and videographers. The camera captures 4K UHD video at 30fps, producing detailed footage with accurate colors. The 5-axis image stabilization helps reduce shake, making handheld shooting smoother.

    For those interested in 1080p Full HD, the ZS70 also supports recording at up to 60fps. This setting provides a balance between file size and video quality, especially if you don’t need the highest resolution.

    Battery Life and Storage

    The Lumix ZS70 uses a rechargeable lithium-ion battery that provides around 380 shots per charge, which is fairly standard for compact cameras with similar features. However, using WiFi, the electronic viewfinder or 4K video can reduce battery life, so carrying a spare battery is recommended if you plan to shoot extensively.

    The camera uses SD, SDHC, or SDXC memory cards, with high-speed cards recommended for 4K video recording.

    Special Shooting Modes

    The ZS70 includes several unique shooting modes that make photography more creative and fun. Here are some of the standouts:

    • 4K Photo Mode: Capture frames in rapid succession at 30fps, allowing you to select the best frame from a fast-action shot. This mode is ideal for sports, wildlife, or any scenario where you want to capture fast movements.
    • Focus Stacking: This feature combines multiple images with different focus points, creating a final image with a broader depth of field. It’s perfect for close-up shots where you want both foreground and background in sharp focus.
    • Post Focus Mode: The Post Focus feature allows you to change the focus point of an image after you’ve taken it, giving you flexibility if you want to adjust where the viewer’s attention is drawn.
    • Creative Control and Filters: The ZS70 has several creative filters and effects that let you add artistic flair to your photos without post-processing software.

    Who Is the Panasonic Lumix ZS70 For?

    The Panasonic Lumix ZS70 is ideal for:

    • Travel Photographers: Its compact size, powerful zoom, and high-quality image capabilities make it an excellent choice for travel enthusiasts.
    • Beginners and Enthusiasts: The ZS70 offers enough features to satisfy advanced users but is straightforward enough for beginners to navigate.
    • Vloggers and Video Enthusiasts: With 4K video, image stabilization, and a tilting screen, it’s a solid choice for those who want to capture quality video content on the go.

    Pros and Cons of the Panasonic Lumix ZS70

    Pros

    • Compact and Lightweight: Easy to carry and perfect for travel.
    • 30x Optical Zoom: Versatile zoom range for capturing a wide variety of subjects.
    • 4K Video and 4K Photo Mode: High-quality video recording and unique photo features.
    • Touchscreen and EVF: Flexible shooting options for different lighting conditions.
    • Built-In WiFi: Easy sharing and remote control via a smartphone app.

    Cons

    • Limited Low-Light Performance: Performs best in well-lit conditions; low-light performance can be challenging.
    • No External Mic Port: Limits audio quality for serious videographers.
    • Small Sensor: While the sensor performs well for a compact camera, it doesn’t match the low-light and depth capabilities of larger sensors.

    Frequently Asked Questions

    Does the Panasonic Lumix ZS70 support the RAW format?

    Yes, the ZS70 supports RAW format, which is ideal for those who want more control in post-processing.

    Can the ZS70 be used for professional photography?

    While the ZS70 is not designed as a professional camera, it is suitable for high-quality travel, every day, and social media photography.

    How does the ZS70 perform for macro photography?

    The ZS70 has a close-focus distance of 3cm in macro mode, which allows you to capture detailed close-up shots.

    Conclusion

    The Panasonic Lumix ZS70 is an excellent compact camera with powerful zoom and plenty of useful features for both stills and video. Its combination of a 30x zoom lens, 4K video, built-in WiFi, and travel-friendly design makes it an attractive option for travelers, vloggers, and anyone who values portability.

    While it has some limitations in low light and lacks certain professional features, the ZS70 remains a solid choice for those looking to capture great photos and videos on the go without the bulk of a larger camera system.

    CHECK THESE OUT:

    Why the Canon Camera G7x is the Ultimate Camera for Content Creators

    The Real Reason Behind Your Nikon Camera Not Focusing

    Discover the Weather Sealed Fujifilm Cameras for All Conditions

    Here’s Why You Should Consider Buying a Sony Camera Without Rolling Shutter

  • 7 Reasons to Choose a Canon Camera with Wi-Fi and Bluetooth Over a DSLR

    7 Reasons to Choose a Canon Camera with Wi-Fi and Bluetooth Over a DSLR

    Canon camera with Wi-Fi and Bluetooth features are quickly becoming popular, especially among those who want a mix of convenience and high-quality images. In recent years, technological advancements have made it possible to do much more with cameras than simply taking great photos.

    7 Reasons to Choose a <yoastmark class=

    Canon Camera with Wi-Fi and Bluetooth

     Canon offers a range of cameras equipped with Wifi and Bluetooth for easy connectivity and sharing. These features make it easier than ever to capture, transfer, and share moments instantly. This article will explore seven key reasons why a Canon camera with Wi-Fi and Bluetooth might be the perfect choice over a traditional DSLR.

    Instant Sharing and File Transfer

    One of the standout benefits of having a Canon camera with Wi-Fi and Bluetooth is the ability to transfer files instantly. Unlike traditional DSLRs, where you need to manually connect your camera to a computer or insert an SD card to access photos, Canon’s Wi-Fi and Bluetooth-equipped cameras let you transfer files on the go.

    • Wi-Fi: With Wi-Fi capability, you can connect your Canon camera directly to your smartphone, tablet, or laptop. This allows you to move your photos and videos quickly, making them ready for posting on social media or editing without delay.
    • Bluetooth: Bluetooth is an excellent option for low-energy, constant connections. It’s especially useful for remote control functions, allowing you to use your smartphone as a remote shutter release. Additionally, Bluetooth connections help save battery life while still providing a steady link between devices.

    This instant-sharing ability is invaluable for photographers who rely on rapid photo-sharing, such as social media influencers, journalists, or event photographers.

    Remote Control and Shooting Flexibility

    Canon cameras with Bluetooth and Wi-Fi allow you to use your smartphone as a remote control. This means you can set up your camera in one spot and control it from a distance, making it perfect for group shots, self-portraits, or wildlife photography where you need to avoid disturbing your subject.

    • Remote Shutter Release: With Bluetooth, you can trigger the shutter from your smartphone without physically touching the camera, ensuring minimal movement and blur.
    • Live View on Smartphone: Some models with Wi-Fi allow you to see a live preview on your phone, letting you frame and adjust shots even when you aren’t directly behind the camera.
    • Manual Adjustments: Certain Canon apps enable you to change settings like ISO, shutter speed, and aperture remotely, giving you almost complete control from afar.

    These features can be game-changers for photographers who want creative flexibility without being tethered to their cameras.

    Seamless Integration with Canon Apps

    Canon’s Camera Connect app is designed to work with their Wi-Fi and Bluetooth cameras, making it easy to sync, edit, and share photos and videos directly from your phone. This app adds much value to Canon’s Wi-Fi and Bluetooth-enabled cameras, transforming them into more powerful tools than traditional DSLRs.

    • Easy Downloads: You can instantly download photos to your smartphone or tablet and share them or store them in your photo library.
    • Easy Updates: Firmware updates can be applied through the app, ensuring your camera is always equipped with the latest features and improvements.
    • Automatic GPS Tagging: If your phone has GPS enabled, some Canon apps can sync this information to your photos, providing location data without needing a built-in GPS module on the camera.

    With Canon’s dedicated apps, you get a smooth experience that not only enhances camera functions but also gives you more control over your photography workflow.

    Cloud Storage and Backup Options

    Canon cameras with Wi-Fi provide the option to back up photos directly to cloud storage platforms, giving photographers extra security and peace of mind. This is a significant advantage over traditional DSLRs that don’t have Wi-Fi, as it saves the hassle of manually backing up files later.

    • Automatic Backup: Certain Canon cameras support cloud services where images can be backed up automatically whenever WiFi is available. This means you don’t have to worry about losing photos if something happens to your camera.
    • Easy Access from Any Device: Once your photos are stored in the cloud, they can be accessed from any device, such as a laptop or tablet, without needing physical storage devices or adapters.
    • Space Saving: Offloading files to the cloud helps free up space on your camera’s memory card, which is especially useful if you’re shooting large files or videos.

    For photographers who travel frequently or are often on the go, the cloud backup feature adds convenience and a layer of security that traditional DSLRs lack.

    Compact, Lightweight Design

    Canon’s WiFi and Bluetooth cameras are generally more compact and lightweight compared to traditional DSLRs. Many of these models, including mirrorless cameras, are designed with portability in mind.

    • Better for Travel: Lightweight and compact cameras are ideal for travel photographers or anyone who doesn’t want the bulk of a DSLR. They can easily fit in smaller bags and don’t add much weight to your luggage.
    • Less Strain on the Hands: For long photoshoots or events, a lighter camera is less tiring to handle. Canon’s WiFi and Bluetooth cameras often have ergonomic designs that reduce hand strain and make them comfortable to use.
    • Discreet Shooting: Smaller cameras draw less attention, making them perfect for street photography or settings where you want to capture candid moments without standing out.

    Compact design combined with smart connectivity features makes these cameras an ideal choice for photographers looking for convenience without sacrificing quality.

    Enhanced Battery Efficiency

    One of the challenges of using DSLRs is that they tend to consume a lot of battery, especially with extensive use of features like continuous shooting and video recording. Canon’s WiFi and Bluetooth-enabled cameras are optimized for better battery efficiency.

    • Low-Energy Bluetooth Connection: Unlike WiFi, which can drain the battery faster, Bluetooth requires less power, allowing for prolonged use of remote functions.
    • Selective Connectivity: You can choose when to enable or disable WiFi and Bluetooth, ensuring you use these features only when needed and conserve battery otherwise.
    • Battery-Saving Mode: Many Canon models come with advanced battery-saving settings, such as sleep mode, to reduce power usage when the camera isn’t actively in use.

    These energy-efficient options give you more flexibility during long shoots, ensuring you don’t have to worry as much about charging or carrying extra batteries.

    More Budget-Friendly Options

    Canon’s WiFi and Bluetooth-enabled cameras are generally more affordable than high-end DSLRs, particularly mirrorless models that have WiFi and Bluetooth as standard features.

    • Lower Initial Investment: Compared to traditional DSLRs, many of Canon’s WiFi and Bluetooth-equipped cameras offer similar image quality and features at a more affordable price.
    • Cost Savings on Accessories: Since many of these models have smaller bodies, you won’t need as many expensive accessories like heavy-duty tripods or large camera bags.
    • Affordable Lenses: Canon’s lens ecosystem includes many budget-friendly options that are compatible with these cameras, helping you to keep costs down while expanding your photography skills.

    For beginners or photographers on a budget, Canon’s WiFi and Bluetooth cameras provide a great balance of performance and price, offering an affordable way to access high-quality features.

    Frequently Asked Questions

    Are Canon WiFi and Bluetooth cameras only for beginners?

    No, Canon WiFi and Bluetooth cameras cater to various skill levels, from beginners to professionals. While many entry-level models have these features, they’re also included in advanced cameras.

    Can I still use a Canon WiFi and Bluetooth camera without internet access?

    Yes, WiFi and Bluetooth features are optional. You can use these cameras offline and only enable connectivity when needed for file transfers, remote control, or other functions.

    Does using WiFi and Bluetooth drain the battery quickly?

    WiFi can consume more power, while Bluetooth is generally battery-friendly. You can manage battery life by turning off these features when not in use.

    Are Canon WiFi and Bluetooth cameras compatible with other devices?

    Canon’s Camera Connect app is compatible with both iOS and Android devices, making it easy to connect to most smartphones and tablets.

    Can I use Canon’s Camera Connect app with any Canon camera?

    The Camera Connect app is only compatible with Canon models that have WiFi or Bluetooth capabilities. Make sure your model supports it before purchasing.

    Conclusion

    Canon Camera with Wi-Fi and Bluetooth provide a modern alternative to traditional DSLRs, offering conveniences such as instant file transfer, remote control, and cloud storage options. These features, combined with their compact design and budget-friendly options, make them a fantastic choice for photographers looking for flexibility, ease of use, and innovative connectivity.

    Whether you’re a beginner or a seasoned photographer, choosing a Canon Camera with Wi-Fi and Bluetooth capabilities can streamline your workflow and help you capture high-quality images with ease.

     CHECK THESE OUT:

    This Is Why You Need a Sony Camera with Global Shutter

    Wondering What Sony Camera Shoots 8K? Check This Out.

    5 Reasons the Sony Camera for Live Streaming is Perfect

    Here’s How to Update Sony Camera Firmware Before You Regret It

  • Why I Still Prefer My Canon Camera with 4K Video Recording Over Smartphones

    Why I Still Prefer My Canon Camera with 4K Video Recording Over Smartphones

    Smartphones have advanced significantly in the fields of photography and videography, and are frequently regarded as one-stop shops for preserving life’s most significant events. Because of this, a lot of people question if standalone cameras like my Canon camera that records 4K video are still useful.

    Why I Still Prefer My Canon Camera with 4K Video Recording Over Smartphones
    Canon Camera with 4K Video Recording

    While smartphones are undeniably convenient, I still prefer my Canon camera for various reasons. My Canon camera offers features that outperform even the most advanced smartphones, particularly when it comes to 4K video recording. Let me explain why I choose to stick with my Canon camera, despite owning a high-end smartphone.

    Why My Canon Camera Outshines Smartphones

    The ongoing debate between cameras and smartphones boils down to convenience versus quality. Smartphones are incredibly easy to carry, and they come with an array of apps that allow quick editing and sharing. However, in terms of sheer performance and versatility, my Canon camera with 4K video recording outshines any smartphone.

    First and foremost, cameras like my Canon are designed specifically for photography and videography. This means they are built to offer superior image quality, better lenses, and more advanced video-capturing capabilities. Smartphones, on the other hand, prioritize versatility, which often means they sacrifice video and image quality to fit in other functions.

    Another key point is the manual control that comes with my Canon camera. Unlike smartphones that mostly rely on automatic settings, a Canon camera allows me to manually adjust settings like aperture, shutter speed, ISO, and white balance, giving me total control over my shot. This level of control is indispensable when creating professional-quality videos, as it allows me to tweak every little detail to get the desired effect.

    4K Recording on My Canon Camera

    One of the standout features of my Canon camera is its 4K video recording. While many smartphones now offer 4K recording, the quality isn’t the same. 4K video on a smartphone may look great on the phone’s small screen, but when played back on larger displays, the shortcomings become apparent. Video footage from a Canon camera holds up much better on larger screens and maintains its crispness, detail, and clarity.

    The Canon camera’s larger sensor size is a key factor in this superior video quality. A larger sensor can capture more light, which results in clearer, brighter, and more detailed footage, especially in low-light conditions. Smartphones, due to their compact size, have much smaller sensors, limiting their ability to perform as well in challenging lighting environments.

    The 4K recording on my Canon camera also offers a higher bit rate compared to most smartphones. This translates to higher-quality footage because more data is being captured. This is especially noticeable when filming scenes with a lot of movement or detail, like landscapes or action shots.

    The difference in bit rate and detail becomes clear during the editing process. Canon’s 4K footage offers much more flexibility in post-production, allowing me to make adjustments without sacrificing quality.

    Canon Camera vs. Smartphone Video Recording

    When comparing video recording capabilities, there are several areas where my Canon camera outshines a smartphone. One of the major differences is in lens options. While smartphones have a fixed lens, my Canon camera allows me to swap out lenses depending on what I’m shooting. If I need a wide-angle shot, a macro close-up, or a telephoto view, I can easily switch to the appropriate lens, giving me versatility that no smartphone can match.

    Additionally, Canon cameras typically offer better autofocus systems. My Canon camera’s autofocus is faster, more accurate, and can handle a wider variety of shooting conditions than the autofocus found in smartphones. This makes a huge difference when shooting videos that require precise focus, such as interviews or moving subjects. The ability to maintain sharp focus throughout a shot is something that smartphones often struggle with, especially in low-light or complex environments.

    Another area where my Canon camera excels is in stabilization. While many smartphones now come with built-in stabilization features, the optical stabilization in Canon cameras is far superior. This results in smoother, more professional-looking footage, even when shooting handheld or on the move. For anyone serious about videography, smooth footage is essential, and Canon’s optical image stabilization is a big reason I stick with my camera over my smartphone.

    Sticking with My Canon Camera

    There’s no denying that smartphones are convenient. They’re compact, always on hand, and make it easy to capture spur-of-the-moment videos. But when I’m working on a video project where quality is a priority, I always turn to my Canon camera. The difference in quality is simply too significant to overlook, especially when the goal is to create professional content.

    Battery life is another area where my Canon camera beats smartphones. While my phone’s battery drains quickly when shooting 4K video, my Canon camera is built to handle long video sessions without running out of juice. With spare batteries on hand, I can film for hours without interruption, something that’s just not possible with a smartphone.

    The ergonomics of my Canon camera are also superior to a smartphone. Holding a smartphone for extended periods while filming can get uncomfortable. Cameras like my Canon are designed to be held comfortably for long shooting sessions. The grip, button placement, and overall build make the experience much more pleasant, allowing me to focus on getting the perfect shot rather than worrying about my hand cramping.

    Finally, my Canon camera’s durability makes it a better choice for outdoor shoots or projects in less-than-ideal conditions. Many Canon cameras are weather-sealed and built to withstand dust, moisture, and rough handling. In contrast, most smartphones are delicate and can be damaged easily if dropped or exposed to the elements. When I’m filming outdoors or in unpredictable weather, I trust my Canon camera to get the job done.

    Why 4K Video on My Canon Camera Beats Smartphone Alternatives

    The rise of smartphones has made 4K video more accessible, but my Canon camera is still the superior choice for serious videography. It captures higher-quality footage with more detail, and color, and performs better in low light. It records 4K video at a higher bit rate, preserving more detail and reducing compression artifacts.

    Additionally, it allows for the use of external microphones, making audio just as professional as the video. The footage is easier to work with during post-production, and the overall versatility of the camera makes it suitable for various projects.

    Conclusion

    Smartphones have undoubtedly transformed the way we capture video, making it more accessible and convenient. However, when it comes to professional-grade video recording, my Canon camera with 4K video recording is still my go-to choice.

    The superior image quality, manual controls, better lenses, and advanced features make it the perfect tool for creating high-quality content. While smartphones have their place in casual shooting, for serious projects where quality matters, I’ll always prefer my Canon camera.

    Whether it’s the higher bit rate, superior autofocus, or the flexibility to swap lenses, my Canon camera consistently delivers the results I’m looking for. In the end, investing in a dedicated camera like my Canon is the best way to ensure you’re getting the best possible footage, and for that reason, I’ll continue to choose my Canon over any smartphone.

    CHECK THESE OUT:

    Wondering What Sony Camera Shoots 8K? Check This Out.

    5 Reasons the Sony Camera for Live Streaming is Perfect

    Here’s How to Update Sony Camera Firmware Before You Regret It

    Here’s Why You Should Consider Buying a Sony Camera Without Rolling Shutter

    Discover the Weather Sealed Fujifilm Cameras for All Conditions

  • Best Beats Workout Headphones: These Beats Headphones Delivered Both Sound and Comfort Through Every Set

    Best Beats Workout Headphones: These Beats Headphones Delivered Both Sound and Comfort Through Every Set

    When it comes to workout headphones, most people think of small, discreet earbuds that stay out of the way. But there’s a growing audience that wants more immersive sound, better noise isolation, and deeper bass. That’s where Beats workout over-ear headphones come in. Over-ear headphones from Beats have long been a favorite for music lovers thanks to their bold sound and sleek designs. But can they stand up to the demands of a tough workout?

    Best Beats Workout Headphones


    After putting Beats over-ear headphones to the test through countless hours of cardio, weightlifting, and high-intensity interval training (HIIT), I found that they don’t just deliver on sound but also bring the comfort and durability needed for workouts. Here’s how these Beats headphones stacked up when it came to powering through every set and rep.


    Why Over-Ear Headphones for Workouts?

    Over-ear headphones might not seem like the obvious choice for workouts, but they come with unique advantages that smaller earbuds can’t quite match. Here’s why they’re worth considering for those intense training sessions:

    1. Immersive Sound: Over-ear headphones offer fuller sound quality with better bass response and clarity. This can make your workout experience more engaging and motivate you to push harder.
    2. Noise Isolation: Many gyms have background noise, from music to clanking weights to chatter. Over-ear headphones, especially those with noise cancellation, can help create a more focused, distraction-free workout environment.
    3. Comfort and Fit: Well-designed over-ear headphones are built with comfortable padding that makes them suitable for longer wear. They don’t dig into your ears or fall out like some earbuds might during high-movement exercises.

    With these benefits in mind, let’s dive into the specifics of how Beats over-ear headphones measure up as a workout companion.


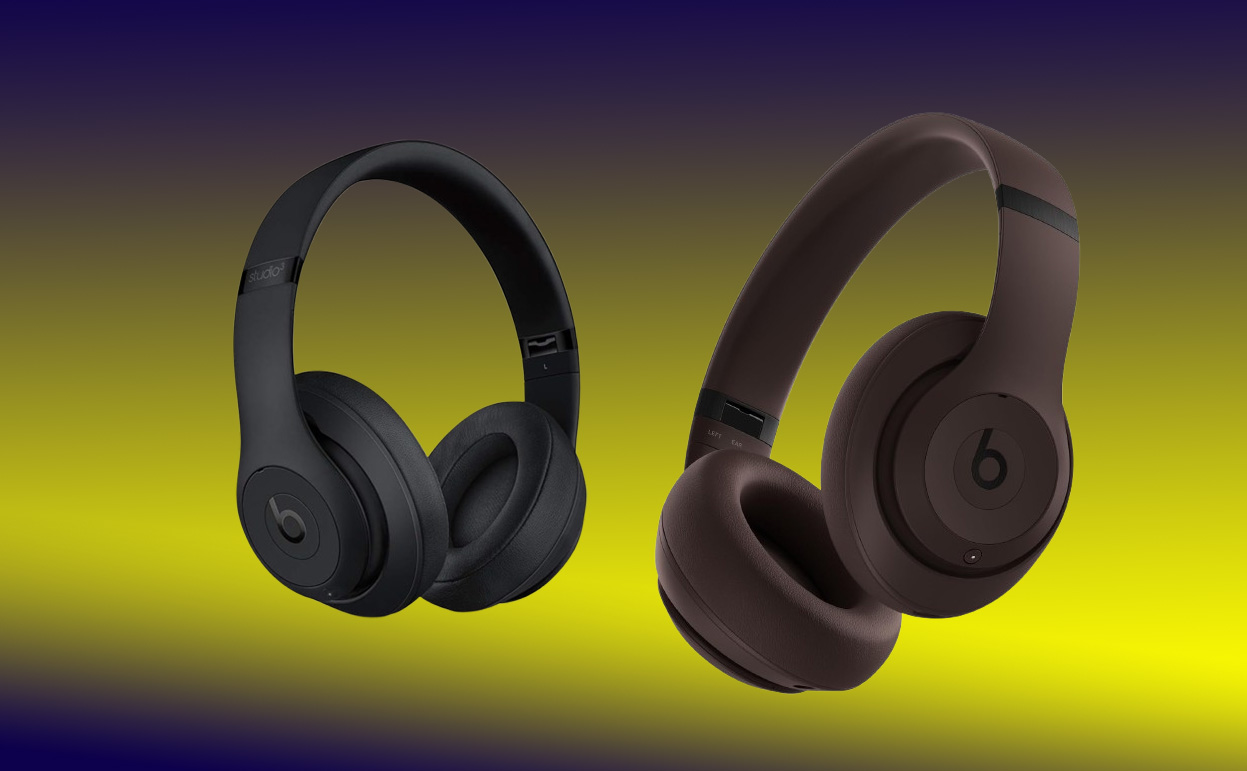
    Beats Studio3 Wireless: A Strong Choice for Noise Cancellation and Sound Quality

    One of the most popular over-ear headphones in the Beats lineup is the Beats Studio3 Wireless. Known for their active noise-canceling (ANC) capabilities, they’re designed to create an immersive audio experience. Here’s a breakdown of how they performed during various workouts.

    Key Features

    1. Pure Adaptive Noise Canceling (Pure ANC)
      • The standout feature of the Studio3 is its Pure ANC, which continuously adjusts to block external noise. During my workouts, this feature was invaluable. In a busy gym setting, I was able to drown out distracting background noises and focus on my music and my routine.
    2. Powerful Sound Signature
      • Beats headphones are known for their bass-heavy sound, which is perfect for motivating workout tracks. With the Studio3, each beat felt powerful and energizing, especially in genres like hip-hop and EDM. The sound profile made a noticeable difference during high-intensity cardio, where the bass gave me an extra push.
    3. Long Battery Life
      • With up to 22 hours of playback with ANC on (and up to 40 hours with it off), these headphones easily lasted through several workouts without needing a recharge. The fast-fuel feature also provided up to 3 hours of playback from a quick 10-minute charge, which came in handy if I forgot to charge them before hitting the gym.
    4. Comfortable Ear Cushions
      • The Studio3’s ear cups are soft and comfortable, with enough padding to prevent soreness even after long sessions. I didn’t experience any pressure buildup or discomfort around my ears, even after intense workout sessions.

    Sound Quality: Bass-Driven Motivation

    When it comes to sound, the Studio3 excels in delivering the iconic Beats bass punch, which makes your music feel intense and alive. This is particularly great for workout playlists that rely on strong beats. However, the sound isn’t just about the bass—the Studio3 maintains clarity in mids and highs, so vocals and instruments are crisp and clear.


    Beats Solo Pro: Compact, Noise-Canceling Power for the Gym

    The Beats Solo Pro are a more compact option compared to the Studio3, but they still pack a punch in terms of performance. While not as large as the Studio3, they are still over-ear (or rather, on-ear) headphones and share many of the same features that make them great for workouts.

    Key Features

    1. Active Noise Canceling (ANC)
      • Like the Studio3, the Solo Pro also features ANC, although it’s slightly less powerful than the Pure ANC found in the Studio3. However, it still effectively blocks out background noise, creating a more focused workout environment.
    2. Transparency Mode
      • Transparency mode is an interesting feature that lets in ambient sound when you need it, which can be useful for outdoor workouts or when you want to stay aware of your surroundings in the gym.
    3. Ergonomic Fit
      • Despite their compact design, the Solo Pro are comfortable and snug. The headband is adjustable, and the ear cups are cushioned, providing a secure fit that doesn’t slip during vigorous activity. They’re smaller than the Studio3, making them easier to store in a gym bag.
    4. Battery Life
      • The Solo Pro offers up to 22 hours of listening time with ANC on and up to 40 hours without ANC. Just like the Studio3, they also feature the Fast Fuel option, giving you up to 3 hours of playback from a quick 10-minute charge.

    Sound Quality: Punchy and Balanced

    The Solo Pro’s sound profile is balanced yet powerful, which makes them suitable for a wide range of music genres. The bass is present, but not overwhelming, so you’ll still get good clarity in vocals and mid-range instruments. This balance made them versatile for different types of workouts, from intense cardio to more relaxed weightlifting sessions.


    Workout Performance: Studio3 vs. Solo Pro

    1. Cardio and HIIT Workouts

    • Both models performed admirably during cardio sessions, but the Studio3 had the edge in sound isolation due to its Pure ANC. The extra bass kick of the Studio3 also felt more motivating during high-energy exercises, while the Solo Pro was slightly more comfortable for long-duration wear.

    2. Weightlifting and Strength Training

    • During weightlifting, both the Studio3 and Solo Pro provided stable, comfortable fits. I appreciated the Studio3’s deep bass during these slower, rhythmic movements. However, the Solo Pro’s Transparency mode was particularly useful when I wanted to stay aware of my surroundings while lifting.

    3. Yoga and Stretching

    • For lower-intensity activities, both models worked well. However, the Studio3’s extra padding made them more comfortable for extended wear during stretching and cool-down routines. The Solo Pro, on the other hand, felt lighter and less obtrusive.

    Final Verdict: Which Beats Headphones Are Best for Workouts?

    Choosing between the Beats Studio3 and Beats Solo Pro for workouts depends on your preferences and workout style. Here’s a quick breakdown:

    • If you prefer immersive sound and full noise cancellation, the Beats Studio3 are your best bet. They excel in noisy gym settings and bring powerful bass, enhancing your workout playlist.
    • If you prioritize portability and situational awareness, the Beats Solo Pro might be the better choice. They’re smaller and feature Transparency mode, which is useful for outdoor or group workouts.

    Pros and Cons of Beats Over-Ear Headphones for Workouts

    Pros:

    • Powerful Sound Quality: Beats headphones deliver strong bass and clear mids, which can help keep you motivated.
    • Noise Cancellation Options: Both models offer noise cancellation, letting you block out distractions in the gym.
    • Comfortable Fit: With cushioned ear cups and adjustable headbands, they’re comfortable enough for long sessions.
    • Stylish Design: Beats headphones have a sleek, modern look that transitions well from the gym to casual wear.

    Cons:

    • Not Sweat-Resistant: Neither model is specifically designed for heavy sweating, so they may not be ideal for extremely sweaty workouts.
    • Bulky for Some Users: Over-ear headphones can be bulky compared to earbuds, and not everyone will find them suitable for workouts.
    • Premium Price: Beats headphones are an investment, so they may not be for everyone.

    Final Thoughts

    After putting these Beats headphones to the test, it’s clear that they have a place in the world of workout audio gear. Their signature sound, comfortable fit, and effective noise cancellation make them a viable option for those who prefer over-ear headphones. Whether you choose the Beats Studio3 for its immersive sound or the Beats Solo Pro for its portability and versatility, you’ll be getting a pair of headphones that’s as stylish as it is functional.

    If you’re ready to take your workouts up a notch, investing in a pair of Beats over-ear headphones could be the motivation boost you’ve been looking for.

    Also Check:

  • Bose Workout Headphones: I Put These Bose Workout Headphones to the Test, and They Didn’t Disappoint

    Bose Workout Headphones: I Put These Bose Workout Headphones to the Test, and They Didn’t Disappoint

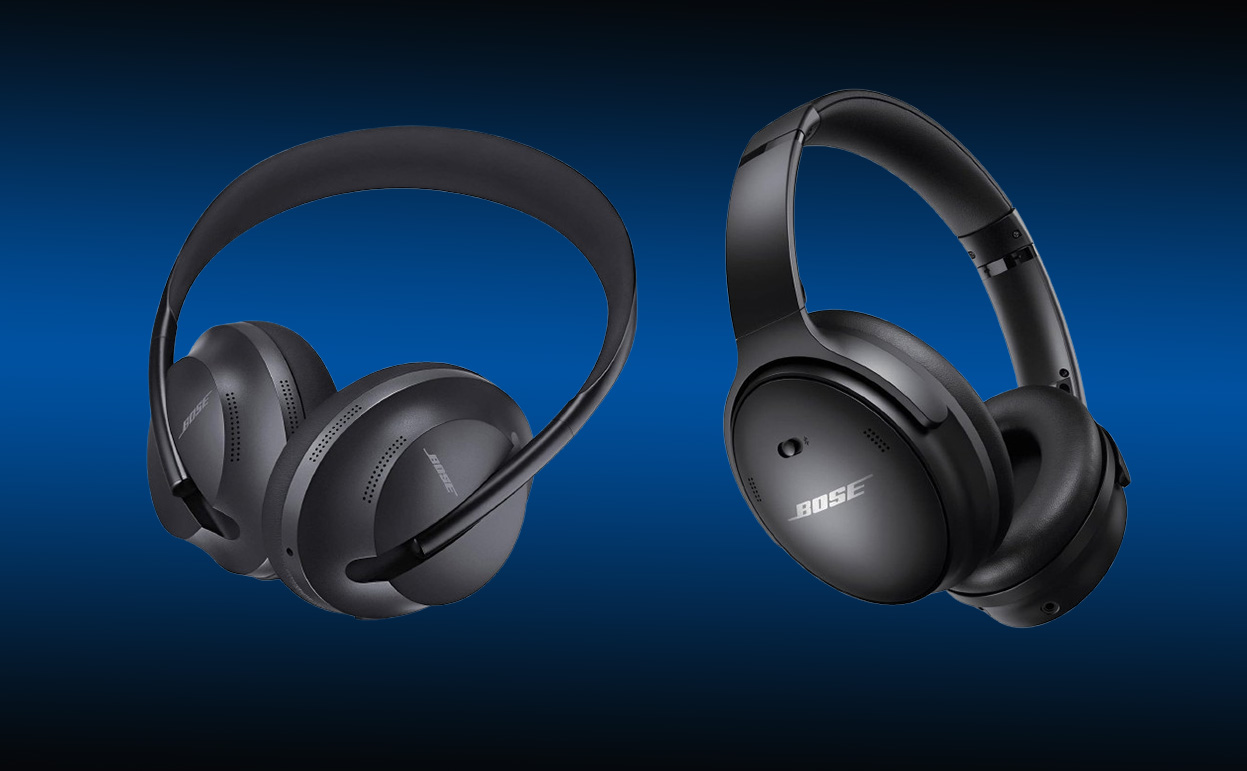
    Bose has been a trusted name in audio for years, known for its groundbreaking noise-canceling technology and unmatched audio quality. But can their over-ear headphones hold up when you’re working out? This question inspired me to take a deeper dive into the Bose Noise Cancelling Headphones 700 and Bose QuietComfort 45 models.

    Bose Workout Headphones

    Here’s a breakdown of how these headphones stack up when used in a fitness-focused setting, along with why they may just be worth the investment for anyone serious about sound quality in the gym.


    Why Bose for Workout Headphones?

    While Bose might not be the first brand that comes to mind for gym headphones—thanks to the rise of true wireless earbuds from brands like Beats and Sony—Bose over-ear models bring unique advantages that can actually enhance the workout experience. Here’s why:

    • Noise Cancellation Expertise: Bose is a leader in noise-canceling technology, making these headphones perfect for cutting out distractions in noisy environments like gyms.
    • Enhanced Sound Quality: The larger drivers in over-ear headphones provide richer, deeper sound and powerful bass—a motivating factor during high-energy activities.
    • Exceptional Comfort: With padded ear cushions and lightweight designs, Bose headphones ensure long-term comfort that’s perfect for extended use.

    With these points in mind, let’s jump into each model and explore the specifics.


    Model Comparison: Bose Noise Cancelling Headphones 700 vs. Bose QuietComfort 45

    1. Bose Noise Cancelling Headphones 700

    These headphones are packed with advanced features, making them one of the most versatile options on the market.

    • Adjustable Noise Cancellation: With 11 different ANC levels, you can choose just how much of the outside world you want to block out. In a gym setting, this means you can cut out just enough noise to stay aware of your surroundings or fully immerse yourself in your workout.
    • Touch Controls: The 700’s ear cups have touch-sensitive panels, which let you control playback and adjust volume with simple swipes and taps. This feature is perfect during a workout, as you can make quick adjustments without fiddling with your phone.
    • Battery Life: With up to 20 hours of continuous playback, these headphones can last through several workouts on a single charge. The quick-charge option gives you 3.5 hours of playtime in just 15 minutes, so you’re never caught off guard without battery life.
    • Design: The slim, streamlined design of the 700s makes them a stylish choice. They don’t feel bulky and are surprisingly lightweight for over-ear headphones.
    • Sound Quality: The audio is clear, crisp, and perfectly balanced. These headphones deliver deep bass without overwhelming the mids and highs, which is ideal if you enjoy listening to bass-heavy tracks that energize your workout. Even at high volumes, there’s minimal distortion, so the sound remains enjoyable whether you’re lifting weights or jogging.

    2. Bose QuietComfort 45

    As a slightly more affordable alternative to the 700, the QuietComfort 45 still delivers the same comfort and sound quality that Bose is famous for, with some distinct features.

    • Noise Cancellation Modes: Instead of multiple ANC levels, the QC 45 offers two modes: Quiet (for maximum noise cancellation) and Aware (for ambient awareness). The Aware mode is particularly useful for outdoor workouts where you may need to hear traffic or other environmental sounds.
    • Classic Design and Comfort: The QuietComfort series is known for its pillow-like ear cushions and lightweight headband. The QC 45 is ideal for long-duration wear, providing all-day comfort without the usual pressure around the ears.
    • Battery Life: It has an impressive battery life of up to 24 hours, with a quick-charge feature that gives you 3 hours of playtime from just a 15-minute charge.
    • Audio Quality: Bose has slightly refined the sound profile on the QC 45 compared to older QuietComfort models. You get a natural and balanced sound, with powerful bass and crisp vocals. This balanced sound profile keeps you focused and energized, whether you’re doing cardio or strength training.

    Workout Performance and Product Highlights

    1. Noise Cancellation for Focused Workouts

    The Bose Noise Cancelling Headphones 700 and QC 45 are equipped with some of the best noise-canceling technology available today, which can be a game-changer during workouts. In a noisy gym, the 700’s customizable ANC allows you to completely block out distractions or, with a few adjustments, allow in some ambient sounds. This versatility makes them perfect for all workout environments, from busy gyms to quieter yoga studios.

    With the QC 45, the single Quiet mode offers instant noise cancellation, while the Aware mode allows for a seamless transition back to your surroundings—ideal for outdoor workouts when you need to be cautious of cars and people around you.

    2. Stability During Cardio and Strength Workouts

    Although over-ear headphones can be bulky, both Bose models stay surprisingly stable during physical activities. During cardio sessions, I found that the snug fit of the QC 45 made them particularly comfortable, even when moving through exercises like running or HIIT. The 700s, with their slim headband and lightweight design, didn’t weigh me down, and I appreciated how they stayed securely in place without constant adjustment.

    Neither model is explicitly sweat-resistant, but they handled light to moderate sweating during exercise well. Bose’s durable design and materials seem to withstand a typical workout session, but it’s best to avoid excessive moisture to ensure longevity.

    3. Comfort for Extended Workouts

    One of the biggest advantages of using Bose over-ear headphones is the level of comfort. The plush ear cushions and soft headband make both the 700 and QC 45 models ideal for long listening sessions. Even after an hour or more in the gym, I didn’t experience the usual ear fatigue that often comes with over-ear headphones.

    The memory foam cushions conform nicely to the shape of your head, distributing pressure evenly and reducing strain. This design allows you to focus on your workout without constantly adjusting the headphones or feeling the need to take breaks.

    4. Intuitive Controls for On-the-Go Adjustments

    The 700’s touch controls are a standout feature. With a quick tap or swipe, you can change songs, adjust the volume, or pause the music. This feature comes in handy during workouts when you don’t want to fiddle with your phone. The QC 45, while lacking touch controls, has convenient physical buttons that are easy to use and well-placed, allowing for quick adjustments without interrupting your exercise flow.

    5. Battery Life for Multiple Workouts

    Both the Noise Cancelling Headphones 700 and QuietComfort 45 offer impressive battery life. With up to 20 hours for the 700 and 24 hours for the QC 45, you can rely on them for multiple workout sessions without needing a recharge. Plus, their quick-charge feature ensures you’re not left without music when you need it the most.


    Final Verdict: Are Bose Over-Ear Workout Headphones Worth It?

    After testing the Bose Noise Cancelling Headphones 700 and QuietComfort 45 in various workout scenarios, it’s clear that they are exceptional options for anyone who prioritizes sound quality, comfort, and effective noise cancellation during exercise. Here’s the breakdown:

    • For Indoor Workouts: Both models excel in a gym environment, where noise cancellation and immersive sound can make all the difference in staying focused and motivated.
    • For Outdoor Workouts: The QC 45’s Aware mode and the 700’s adjustable ANC settings allow you to maintain situational awareness when needed.
    • Sound Quality: Bose’s sound engineering is as impressive as ever, delivering crisp highs, balanced mids, and a punchy bass that keeps you moving.
    • Comfort and Fit: If comfort is a priority, the over-ear cushions on these models make them more comfortable than many alternatives on the market, even after long periods.

    If you’re looking for workout headphones with top-notch sound, unmatched comfort, and reliable noise cancellation, the Bose Noise Cancelling Headphones 700 and QuietComfort 45 are well worth considering. While they may not be sweat-proof, their durability, excellent battery life, and stable fit make them strong contenders for those who want a premium workout experience without compromising on audio quality.

    Also Check:

    SYLVOX 22 Inch Smart TV Review: Smart Features and Built-In DVD for Travelers

    Is the VIZIO D Series 24 Inch TV Worth It? Here’s What Stands Out

    Samsung 43 Inch TV Series Review: Stunning Picture Quality Meets Smart Design

    The New Samsung 4K TV That Brings Impressive Features to the Table

    How to Perform a Soft or Factory Reset on Roku Speakers

  • SYLVOX 22 Inch Smart TV Review: Smart Features and Built-In DVD for Travelers

    SYLVOX 22 Inch Smart TV Review: Smart Features and Built-In DVD for Travelers

    The SYLVOX 22 Inch Series 12V Smart TV brings entertainment where few screens dare to go, from rocky shores to rolling waves, this TV is specifically engineered for life on the move. Complete with a built-in DVD player, Android 11.0, and triple-layer marine protection, it’s a gadget that doesn’t just survive rough conditions – it thrives in them. This TV promises to be a trusty companion whether you’re docked at the marina, parked in an RV, or deep in the countryside.

    SYLVOX 22 Inch Smart TV

    Click Here to Buy Now at Amazon


    Unrivaled Design

    With a slim, frameless design that melds functionality with elegance, the SYLVOX 22″ is deceptively sleek for such a rugged device. Beneath its surface, however, lies a system built for survival. The circuit boards are triple-coated for resistance to moisture, corrosion, and salt spray – essentially an invisible armor. From fishing boats to campervans, this TV goes where most screens wouldn’t dare, standing tough against the elements.

    The frameless screen doesn’t just look great – it maximizes every inch of display. At 22 inches, it’s compact but immersive, offering an ideal balance for both small spaces and big adventures.

    Picture & Sound

    Equipped with a full HD 1080p LED display, the SYLVOX 22″ doesn’t skimp on visuals. You get vibrant colors and sharp contrasts even when you’re watching from an angle, thanks to its 178° viewing range. It’s like having a mini-theater tucked right into your RV or boat cabin. Whether you’re streaming a sunset documentary to match your horizon or revisiting classics on DVD, it delivers crystal-clear, true-to-life visuals.

    Audio-wise, the built-in speakers are tuned to cut through background noise. While they’re not quite studio quality, they’re plenty for confined spaces like a cabin or vehicle. If you crave a little more oomph, Bluetooth connectivity lets you pair with an external speaker or sound system for fuller sound.

    Smarts and Streaming, Anywhere You Go

    What makes the SYLVOX 22 Inch Smart TV even more of a standout is its Android 11.0 system, which comes loaded with access to the Google Play Store and over 700,000 streaming options. This isn’t just a TV; it’s a streaming powerhouse that brings the full Android TV experience to your travels. With Google Assistant voice command built right into the remote, finding a show is as simple as asking – perfect when you want to keep hands-free while cooking in your RV kitchen or setting up camp.

    And with built-in Chromecast, you’re just a tap away from sharing photos, videos, or music from your phone. From road trips to open water, the Chromecast option is a delightful addition, letting you relive moments on the big screen without a complicated setup.

    DVD Player: Nostalgia Meets Utility

    In a world where physical media feels almost ancient, SYLVOX keeps the spirit alive with a built-in DVD player. It’s easy to overlook this feature, but out in remote areas, where WiFi may be unreliable, the ability to play a physical DVD can be a lifesaver. The integrated DVD player is sleek, takes up no extra space, and operates without a hitch – bringing the nostalgia of DVDs back without adding bulk. It’s a small touch that turns this TV into a versatile entertainment solution for off-grid adventurers.

    Built for All Terrains: Versatile Power Options and Connections

    No matter where you’re setting up camp, this TV adapts. With support for both DC 12V and AC 100-240V, you can power up whether you’re on the road, in a cabin, or docked at the shore. The included car charger and AC adapter mean it’s ready to go right out of the box, with minimal fuss.

    Connectivity is equally flexible, with options including Bluetooth, WiFi, USB, HDMI, and RF. This wealth of ports allows you to hook up gaming consoles, streaming devices, or speakers for a fully custom entertainment setup, regardless of your location. This adaptability makes it a versatile choice for all your gadgets, from a GoPro to an outdoor speaker.

    Performance in Real Adventures: Does It Hold Up?

    The SYLVOX 22 Inch Smart TV isn’t just for show – it’s designed to function flawlessly in tough conditions. Taking it out on a boating trip, it handled moisture and movement with ease. Back on land, it also proved equally capable in the RV. The Android OS ran smoothly for most streaming needs, though if you’re running heavy apps or multiple programs, expect slight lag here and there.

    Still, it’s highly responsive for a 22” TV in this niche market. The remote, equipped with a Google Assistant button, lets you control everything with just your voice, which is a big plus if you’re out on a hike and want to start something streaming as you return.

    Pros and Cons

    Pros

    • Marine-Grade Durability: Resistant to moisture, corrosion, and salt spray – a true fit for coastal or marine settings.
    • Full Android 11.0 System: Stream, browse, and download apps like you would on a larger smart TV.
    • DVD Player Convenience: Built-in for offline entertainment, especially valuable when off the grid.
    • Flexible Power Compatibility: Dual 12V DC and 100-240V AC options allow it to fit into various setups.
    • Diverse Connectivity: HDMI, USB, Bluetooth, WiFi, and more ensure you can connect just about anything.

    Cons

    • Minor Lag with Heavy Apps: The Android OS handles well but may slow with multiple heavy applications.
    • Modest Audio Quality: Built-in speakers are fair, but an external speaker can enhance sound quality.

    Conclusion

    For the adventurous souls who refuse to leave entertainment behind, the SYLVOX 22″ Marine Series TV is an all-around gem. It’s compact, tough, and rich with features that make it the ideal companion for life on the road or water. With an Android-powered smart interface, Google Assistant, and a trusty built-in DVD player, it’s a device that balances the old with the new, delivering both nostalgia and modern convenience in one package.

    Also Check