Blog

  • How to Turn off Reduce Motion on iPhone

    How to Turn off Reduce Motion on iPhone

    The Reduce Motion feature on the iPhone is designed to minimize the animations and visual effects within the iOS interface. While it can be helpful for those who are sensitive to motion effects or want a faster user experience, some users find it unnecessary or prefer the fluid animations of the default settings.

    How to Turn Off Raise to Wake on iPhone
    Turn Off Raise to Wake on iPhone

    If you’re looking to disable this feature, this article will explain how to turn off Reduce Motion on iPhone in a clear, step-by-step manner. We’ll also answer some frequently asked questions about this feature and provide a link to a video tutorial created by MobileTechJoint, where you can watch the entire process in action.

    What Is Reduce Motion on iPhone?

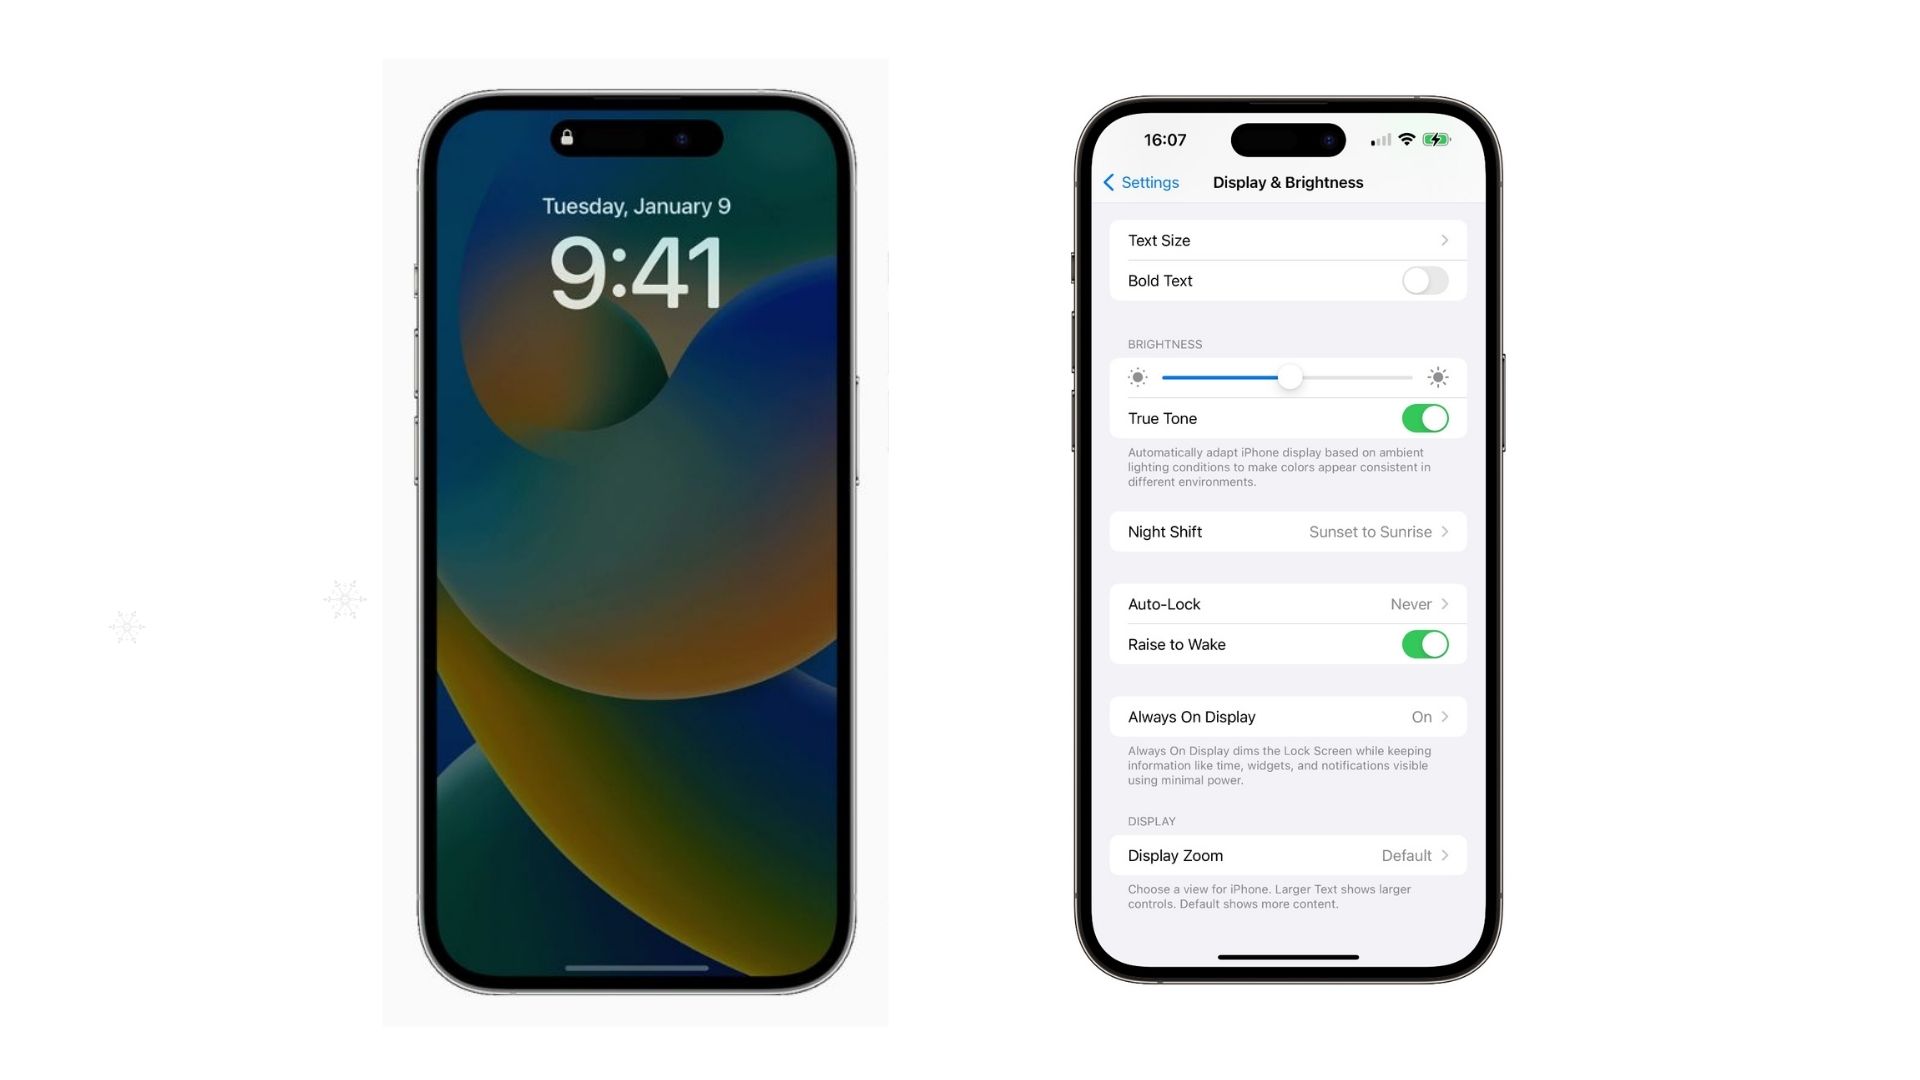
    Reduce Motion is an accessibility feature introduced by Apple that limits motion effects on your iPhone. It reduces the parallax effect (where the wallpaper moves slightly as you tilt the device) and other animations like app transitions and screen effects. While these changes can make your device feel snappier, they also affect how certain visual elements like iMessage effects or app opening animations appear.

    Why Turn Off Reduce Motion?

    You might want to turn off Reduce Motion for several reasons:

    • Enjoy iOS Animations: iPhone animations, such as app zooming or swipe effects, are visually appealing and part of Apple’s design philosophy.
    • Experience Full Features: Some features, like iMessage screen effects (e.g., balloons and fireworks), are only available when Reduce Motion is disabled.
    • Aesthetic Preference: The absence of motion effects can feel bland to some users who prefer the dynamic visual appeal of the default settings.

    How to Turn off Reduce Motion on iPhone

    Here’s how you can disable Reduce Motion on your iPhone in just a few simple steps:

    • Unlock Your iPhone: Ensure your device is unlocked and ready to access the settings.
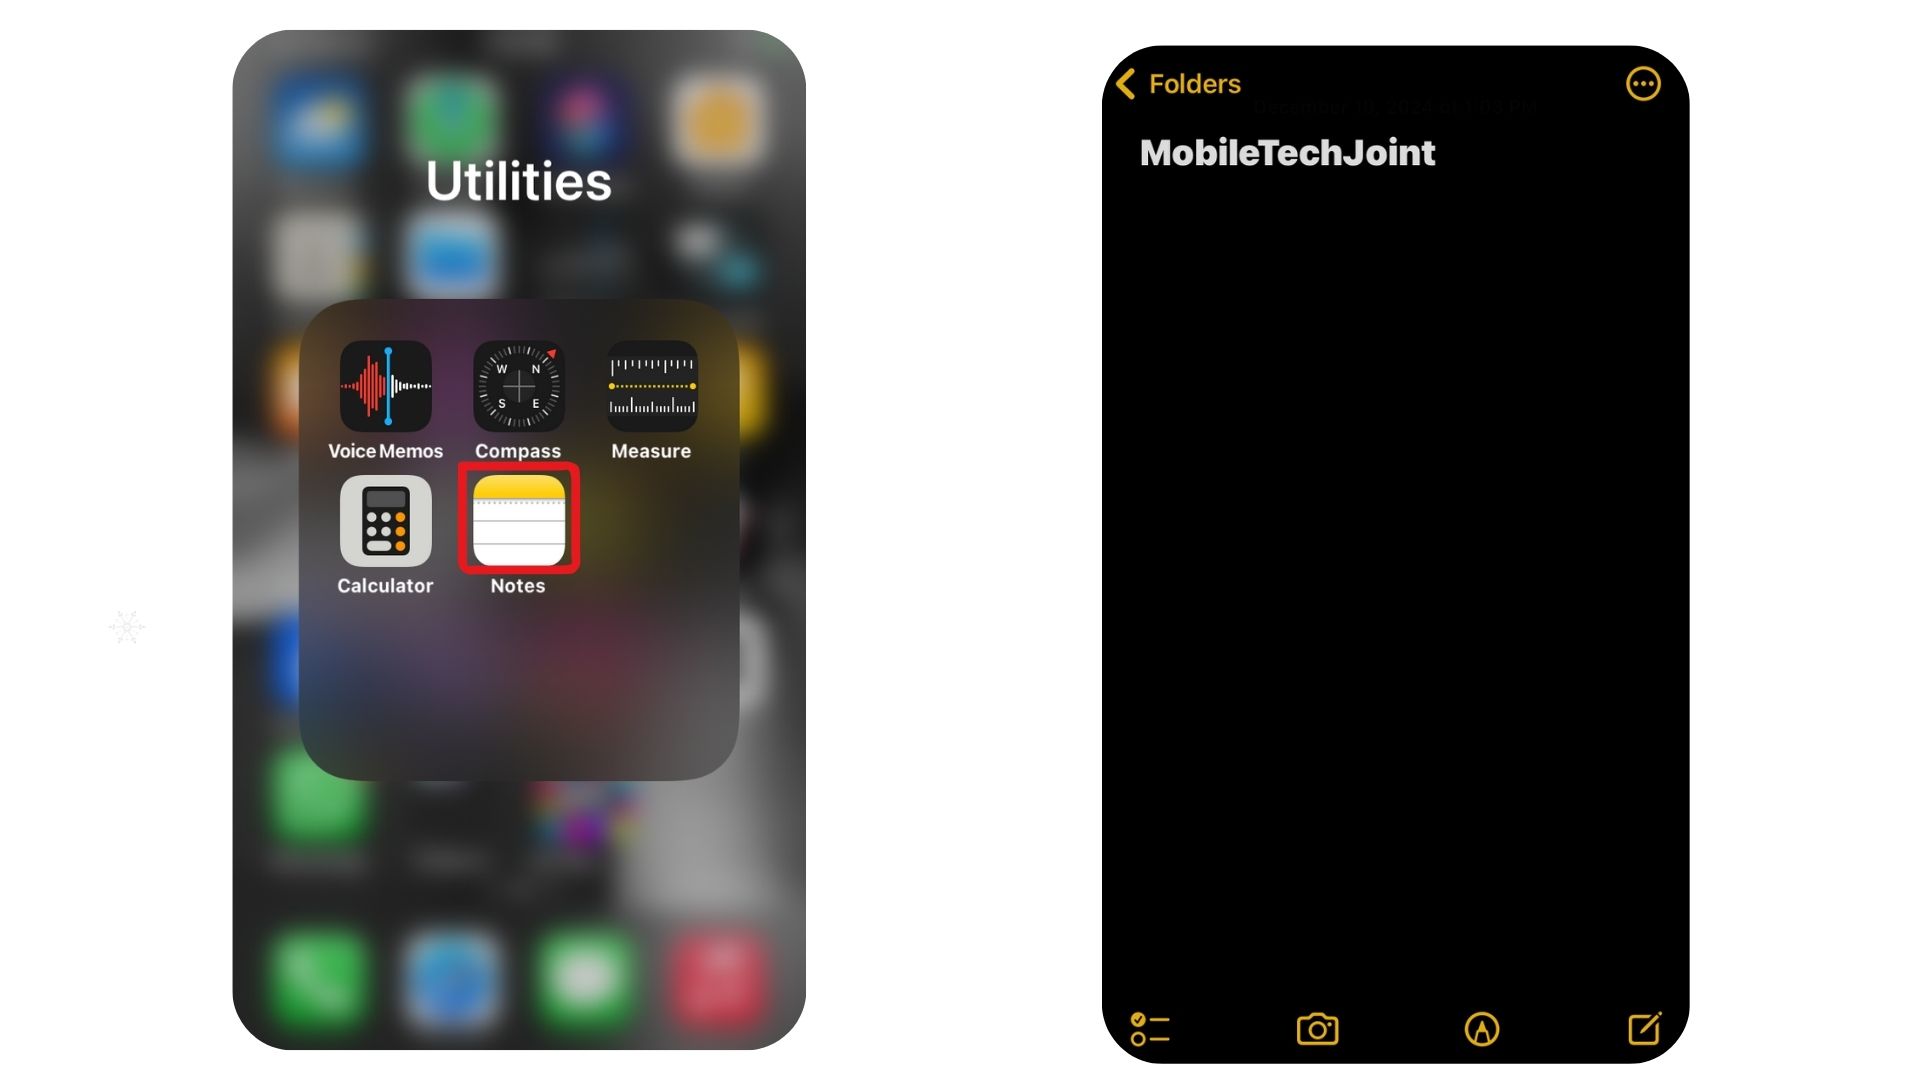
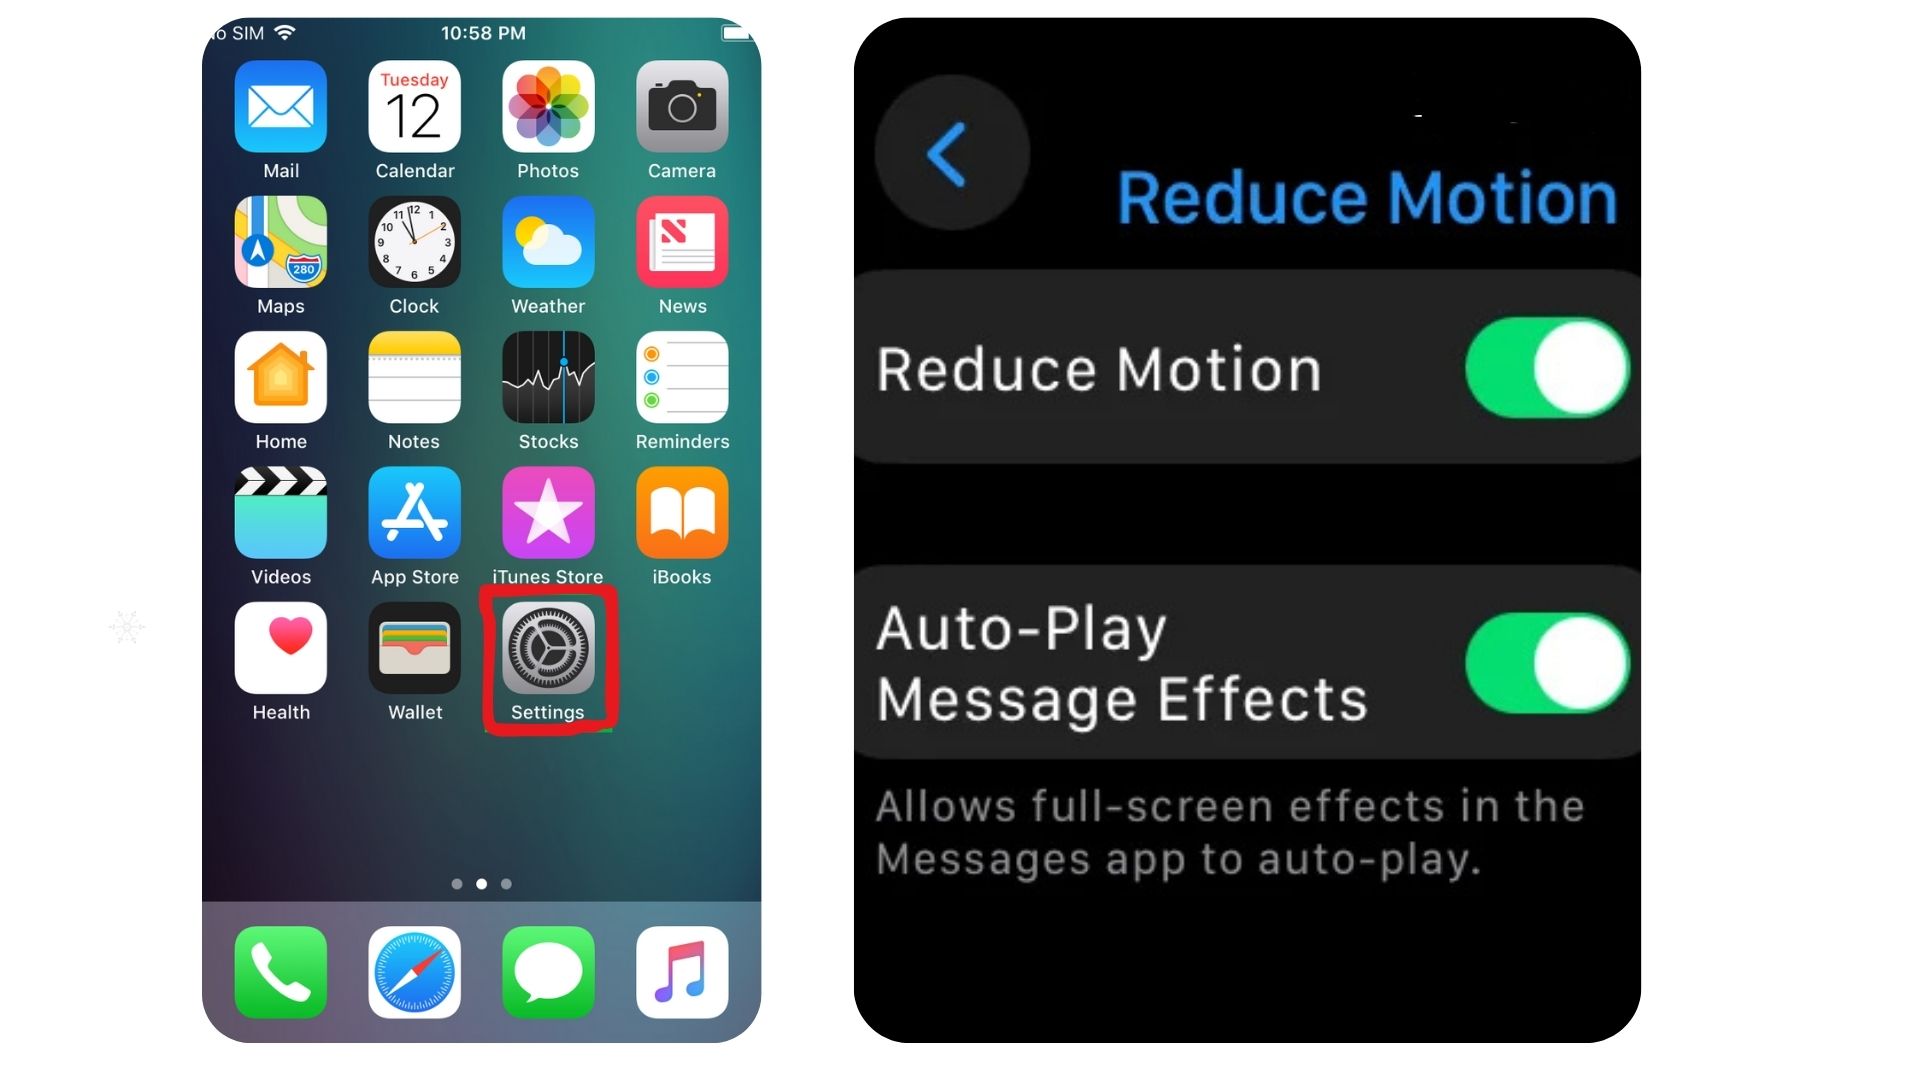
    • Open the Settings app: Locate the Settings app on your home screen. It’s represented by a gear-shaped icon.
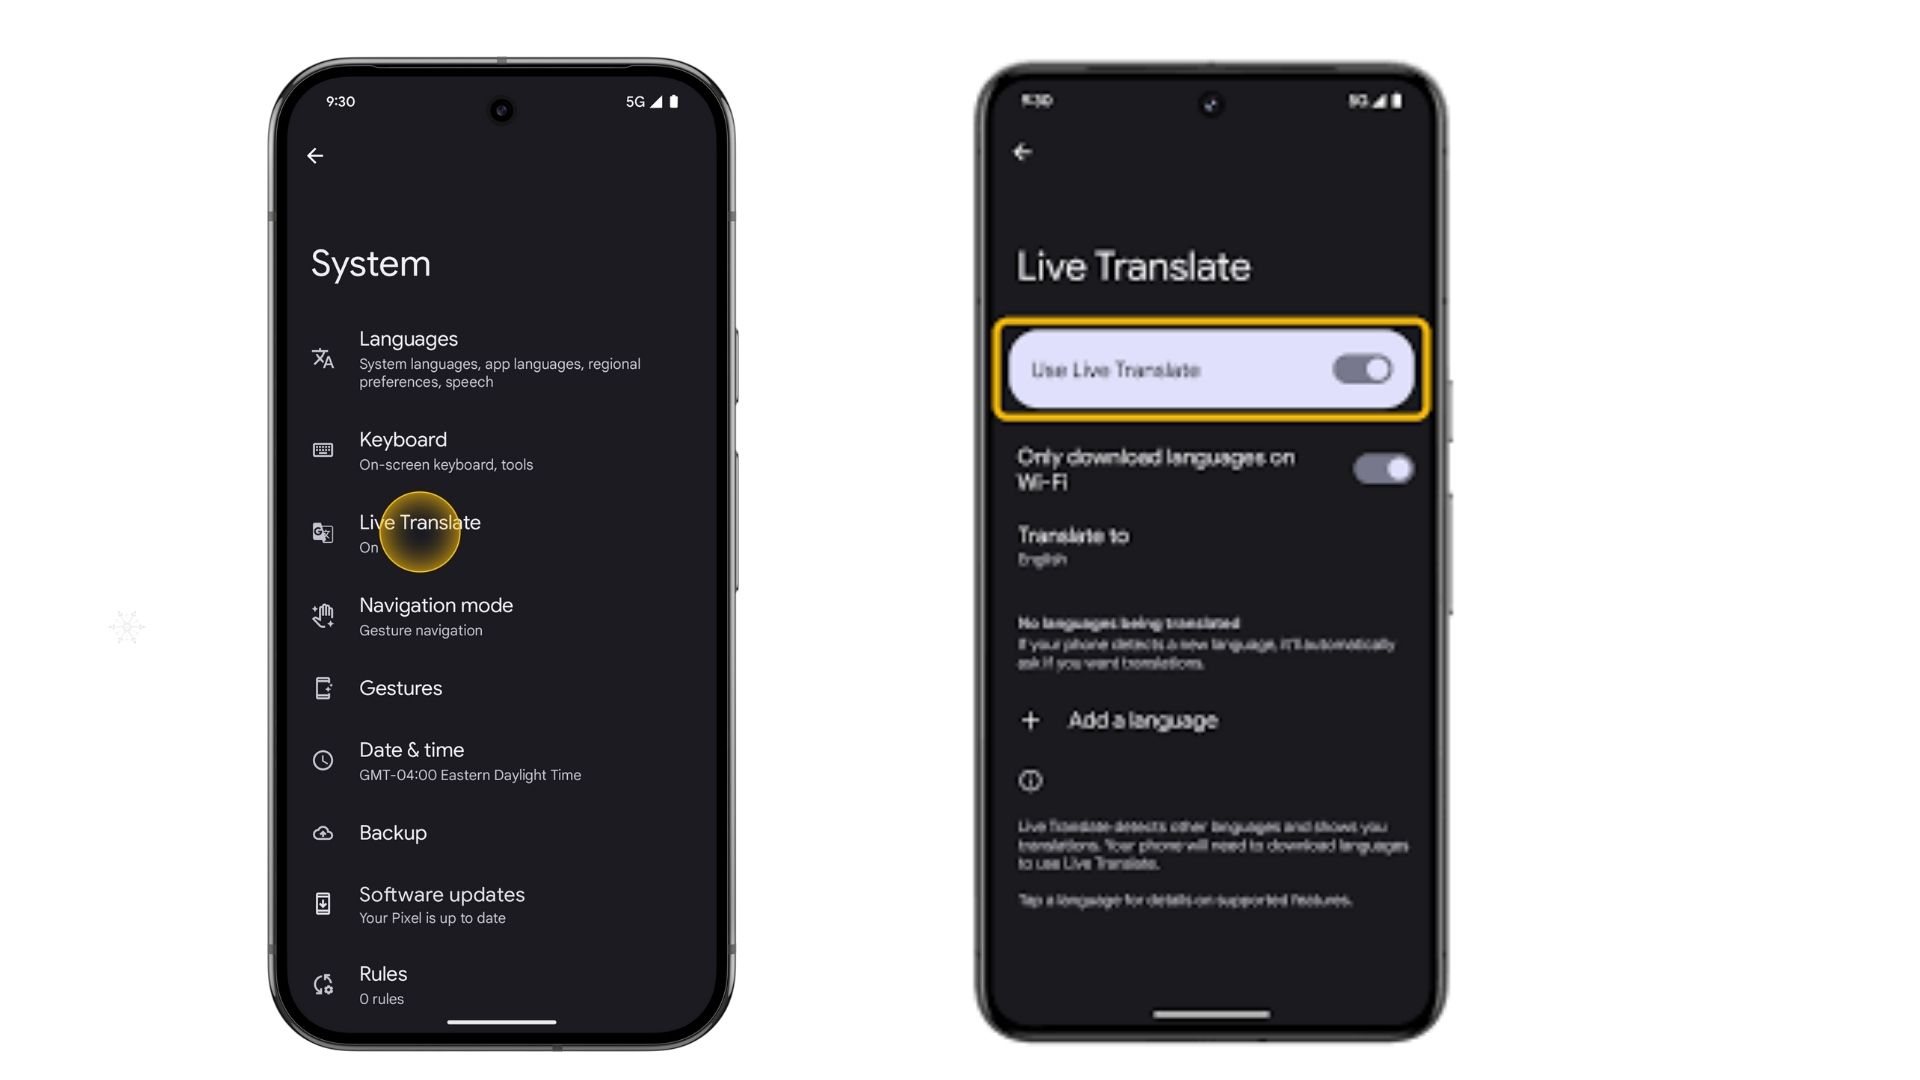
    • Navigate to Accessibility Settings: In the Settings menu, scroll down and tap on Accessibility. This section contains tools and options to customize your iPhone experience.
    • Tap on Motion: Within the Accessibility menu, find and select Motion. This subsection includes all settings related to motion effects on your device.
    • Toggle Off Reduce Motion: Locate the Reduce Motion option. If the toggle is green (enabled), tap it to turn it off. The switch should now be gray, indicating that Reduce Motion is disabled.
    • Test the Setting: To confirm the change, return to your home screen and observe the animations. You should notice the default zooming and parallax effects.

    Benefits of Disabling Reduce Motion

    Disabling Reduce Motion offers several benefits for iPhone users:

    • Enhanced Visual Appeal: You will immerse yourself in the complete range of captivating iOS animations and seamless transitions that bring the interface to life, enhancing user interaction and visual appeal.
    • Improved iMessage Effects: Enjoy animated screen effects like confetti, lasers, and fireworks in your iMessage conversations.
    • Aesthetic Consistency: Your device will experience a noticeable boost in vibrancy and harmony with the authentic design, enhancing its overall aesthetic and functionality.

    When to Keep Reduce Motion Enabled

    While turning off Reduce Motion restores the default animations, there are cases where keeping it enabled might be beneficial:

    • Motion Sensitivity: Users sensitive to motion or prone to nausea may find the parallax and animation effects uncomfortable.
    • Battery Optimization: Reduce Motion may help conserve battery life slightly by minimizing graphical processing.
    • Faster Navigation: The simplified transitions can make your device feel snappier, especially on older models.

    How to Troubleshoot Common Issues

    If you encounter issues when toggling Reduce Motion, consider these tips:

    • Restart Your iPhone: Sometimes, changes may not take effect immediately. Restarting your device can help.
    • Update iOS: Ensure your device is running the latest version of iOS, as older versions may have bugs affecting settings.
    • Reset Settings: If the problem continues despite your efforts, try resetting your accessibility settings. You can do this by following these steps: Open the Settings app on your iPhone, then scroll down and tap on General. From there, look for the option labeled “Transfer or Reset iPhone.” Once you select that, you will find the option to “Reset.” Finally, choose “Reset All Settings” to restore your accessibility preferences to their default state. This should help resolve any lingering issues.

    Frequently Asked Questions

    What Happens When I Turn Off Reduce Motion?

    When you turn off Reduce Motion, the default iOS animations, transitions, and motion effects (like parallax wallpaper) are restored.

    Does Turning Off Reduce Motion Affect Battery Life?

    Disabling Reduce Motion may slightly impact battery life due to the additional processing required for animations. However, the difference is usually negligible.

    Will iMessage Effects Work if I Keep Reduce Motion Enabled?

    If Reduce Motion is enabled, iMessage effects like balloons or fireworks will not display automatically. You’ll need to turn off Reduce Motion to enjoy these features fully.

    Which iPhones Support Reduce Motion?

    Reduce Motion is available on all iPhone models running iOS 7 or later. This includes iPhone 5s and newer devices.

    Can I customize the Reduce Motion Settings?

    Yes, within the Motion menu, you can customize certain elements, like enabling Auto-Play Message Effects, without disabling Reduce Motion entirely.

    What Is the Parallax Effect?

    The parallax effect makes your iPhone wallpaper appear to move slightly as you tilt the device, creating a 3D illusion. This effect is disabled when Reduce Motion is turned on.

    Does reduced motion improve device performance?

    Enabling Reduce Motion can make your iPhone feel faster because the system skips some animations. However, the difference is mainly perceptual and doesn’t significantly impact performance.

    Can I Re-enable Reduce Motion Later?

    Absolutely! If you decide you prefer reduced motion effects, you can easily re-enable the setting by following the same steps and toggling it back on.

    Conclusion

    Turning off Reduce Motion on an iPhone is a straightforward process that enhances the visual appeal and full functionality of your device. Whether you prefer the dynamic animations of iOS or want to experience the full range of iMessage effects, disabling Reduce Motion can elevate your iPhone experience.

    For a step-by-step visual guide, don’t forget to visit MobileTechJoint’s YouTube channel with the link below. Their tutorial is designed to make the process even easier for users of all levels. If this guide helped you, feel free to share it with others who might benefit from it!

    YOUTUBE LINK: https://www.youtube.com/shorts/Bc5x4W7TiPg

    MORE RELATED CONTENT:

    6 Ways to Cast From Phone to TV Without Hassle

    How to Turn On or Off Location on iPhone

    Does your iPhone stop charging at 80, here’s how to fix it!

    Hide Apps on iPhone | How to Hide Apps on iPhone

  • How to Turn Off Raise to Wake on iPhone

    How to Turn Off Raise to Wake on iPhone

    The “Raise to Wake” feature on iPhones is convenient for many users, allowing the screen to light up whenever you lift your device automatically. However, this feature isn’t for everyone. If you’re someone who finds it unnecessary, distracting, or a drain on battery life, you may want to turn it off.

    How to Turn Off Raise to Wake on iPhone
    How to Turn Off Raise to Wake on iPhone

    In this article, we’ll guide you through how to turn off Raise to Wake on iPhone in simple, straightforward steps. Additionally, we’ll provide answers to common questions about this feature and link you to a helpful video tutorial by MobileTechJoint for visual guidance.

    What Is Raise to Wake on iPhone?

    Raise to Wake is a feature introduced with iOS 10 that automatically wakes your iPhone’s screen when you pick up the device. This eliminates the need to press the power or home button to view your notifications or check the time. While it’s a handy feature for many, some users find it unnecessary or annoying, especially if the screen lights up too often during casual movements.

    Why Turn Off Raise to Wake?

    There are several reasons why you might want to disable this feature:

    • Battery Life: If your iPhone’s screen wakes up frequently, it can slightly reduce battery life over time.
    • Accidental Activation: The screen may light up unintentionally when you move your phone in your bag, pocket, or even during physical activity.
    • Privacy Concerns: Notifications and other sensitive information may become visible when the screen lights up, even if you didn’t intend to check your phone.

    Whatever your reason, disabling Raise to Wake is easy and can be reversed at any time.

    How to Turn Off Raise to Wake on iPhone

    Here’s how you can disable Raise to Wake on your iPhone:

    • Unlock Your iPhone: Start by unlocking your device. This step ensures you can access the settings.
    • Open the Settings App: Locate the Settings app on your home screen. It’s the icon that looks like a gear.
    • Scroll Down and Tap on Display & Brightness: In the Settings menu, scroll down until you see Display & Brightness, and tap on it. This section contains options related to your screen’s appearance and functionality.
    • Find the Raise to Wake Option: Within the Display & Brightness menu, scroll down to find the Raise to Wake toggle.
    • Turn Off the Toggle: Tap the toggle switch next to Raise to Wake. When the switch is gray or in the “off” position, the feature is disabled.
    • Test the Setting: Put your iPhone to sleep and pick it up. The screen should no longer light up automatically.

    Can I re-enable Raise to Wake? 

    Absolutely! You can easily reactivate the Raise to Wake feature whenever you choose by following the same steps you used to turn it off. To do this, go to the Settings app on your device and navigate to the Display & Brightness section. Once there, look for the option labeled “Raise to Wake.” Simply toggle the switch to the “on” position and the feature will be successfully reactivated.

    This will allow your device’s screen to turn on automatically whenever you lift it, making it more convenient to check notifications and time without having to press any buttons.

    Frequently Asked Questions

    Does Turning Off Raise to Wake Save Battery Life?

    While the feature doesn’t consume a lot of battery, disabling it can marginally extend your battery life, especially if your screen wakes up frequently throughout the day.

    Will My Notifications Still Appear if I Turn Off Raise to Wake?

    Yes, your notifications will still appear. However, you’ll need to press the power or home button to wake your screen and view them.

    Which iPhone Models Support Raise to Wake?

    Raise to Wake is available on iPhones with iOS 10 or later, starting with the iPhone 6s and newer models.

    Can I Use Raise to Wake Along with Face ID?

    Yes, Raise to Wake works seamlessly with Face ID. If you disable the feature, you’ll need to wake the screen manually to use Face ID.

    What Happens if I Accidentally Turn Off Raise to Wake?

    You can easily turn the feature back on by following the same steps outlined above.

    Is There an Alternative to Raise to Wake?

    If you disable Raise to Wake, you can still use the side or home button to wake your device. Additionally, some users enable the Tap to Wake feature (found under Accessibility settings), which lets you wake the screen by tapping it.

    Does Turning Off Raise to Wake Affect My Alarms?

    No, disabling Raise to Wake won’t affect your alarms. Your device will still alert you at the set time, regardless of this setting.

    Can I customize Raise to Wake Settings?

    Unfortunately, Raise to Wake is a simple on/off feature. There are no options to customize how or when it activates.

    Conclusion

    Turning off Raise to Wake on your iPhone is a quick and straightforward process that can improve your device’s usability, save battery life, and give you more control over when your screen lights up. Whether you’re a casual user or someone who uses your iPhone extensively, managing this feature can enhance your experience.

    For a step-by-step video tutorial, don’t forget to check out MobileTechJoint’s YouTube channel with the link below. If you found this article helpful, share it with friends or family who might be looking for a similar solution!

    YOUTUBE LINK: https://www.youtube.com/shorts/2UQivZXgItI

    MORE RELATED CONTENT:

    How to use your iPhone Notes App Effectively

    Does your iPhone stop charging at 80, here’s how to fix it!

    Hide Apps on iPhone | How to Hide Apps on iPhone

    6 Ways to Cast From Phone to TV Without Hassle

  • Are AirPods Max Pro That Good? Here’s Why They Just Might Be the Best Noise Canceling Headphones Yet

    Are AirPods Max Pro That Good? Here’s Why They Just Might Be the Best Noise Canceling Headphones Yet

    When Apple introduced the AirPods Max, it redefined what premium over-ear headphones could offer, especially with noise-canceling capabilities. But if rumors about the AirPods Max Pro are true, these could easily surpass their predecessor and claim the title of the best noise-canceling headphones on the market. Let’s dive into why the AirPods Max Pro might just be Apple’s ultimate answer to immersive sound and noise isolation.

    Are AirPods Max Pro That Good? Here’s Why They Just Might Be the Best Noise-Canceling Headphones Yet

    Revolutionary Noise-Canceling Technology

    One of the defining features of the AirPods Max is its Active Noise Cancellation (ANC), but the Max Pro is speculated to bring this feature to an entirely new level. Apple’s current ANC technology already blocks out a wide range of ambient sounds—from the hum of an airplane engine to the chatter of a busy café. However, with the Max Pro, rumors suggest an adaptive noise-canceling feature that can automatically adjust the strength of noise cancellation based on the environment. This would allow users to move from quiet spaces to noisy environments seamlessly without needing to manually tweak settings, making it a perfect companion for both commuters and office workers.

    Moreover, the AirPods Max Pro could introduce even more sophisticated algorithms, possibly with more microphones or sensors to fine-tune noise isolation. In our experience, the AirPods Max already excel in their ability to block distractions, but the Max Pro may raise the bar, potentially becoming the gold standard in noise-canceling headphones.

    Sound Quality That Rivals High-End Audiophile Headphones

    Apple is known for its meticulous attention to sound quality, and with the AirPods Max Pro, users could experience a leap in audio clarity and richness. The Max Pro is rumored to feature upgraded drivers, which could provide better bass response, clearer mids, and more precise highs. These improvements could lead to a more well-rounded and immersive listening experience, whether you’re blasting bass-heavy tracks or indulging in classical music. The addition of Personalized Spatial Audio may also tailor sound to the user’s ears, making it feel like you’re sitting in the middle of a concert hall or fully enveloped in a movie’s soundscape.

    Apple’s Spatial Audio with dynamic head tracking is already a standout feature, and with the Max Pro, this experience could be enhanced. Whether you’re watching a movie or playing a game, the sound will seemingly move around you, making content consumption more immersive. These enhancements could make the AirPods Max Pro the best choice for audiophiles looking for high-quality sound and immersive experiences.

    Comfortable for Extended Listening Sessions

    The AirPods Max have received praise for their premium design and build quality, but they are also known to be a bit on the heavier side. With the Max Pro, Apple could address this by making the headphones lighter without compromising on durability. It’s possible we’ll see lighter materials like carbon fiber or refined aluminum, which could reduce pressure on the head and ears during long listening sessions.

    The current memory foam ear cushions on the AirPods Max are incredibly comfortable, but the Max Pro might introduce improved cushioning or a more breathable fabric to make extended use even more enjoyable. For users who wear their headphones for hours at a time—whether for work, travel, or gaming—comfort is a crucial factor, and the Max Pro could easily outshine its competitors in this area.

    AI Integration and Smart Features

    Apple’s integration of AI into its products has been expanding, and the AirPods Max Pro might bring smart features to the next level. One possible feature could be AI-powered adaptive sound, which would automatically adjust equalizer settings based on what you’re listening to, whether it’s a podcast, a phone call, or music. This real-time audio adjustment would ensure that the sound is always optimized for the content, providing an even better experience than manual sound tuning.

    Additionally, the AirPods Max Pro could feature more advanced AI-driven noise-canceling algorithms, allowing them to learn from your preferences and environment to block out the right amount of noise at the right time. For example, it might enhance noise canceling while you’re commuting but adjust to allow more ambient sound during a workout in a park. Combined with Siri’s enhanced capabilities, users could enjoy a more hands-free and intuitive experience.

    Battery Life and Charging Capabilities

    Battery life is always a key consideration, especially for users who rely on headphones for travel or long workdays. The AirPods Max Pro are rumored to have longer battery life, potentially offering more than the 20 hours provided by the current AirPods Max. Apple might also introduce fast charging technology, giving users hours of playback time after just a few minutes of charging.

    Additionally, the Max Pro could support more advanced battery-saving features like automatic power-down when not in use or better management of Always-On display and Spatial Audio features. For users who need headphones that can last through long flights or marathon workdays, these battery upgrades would make the Max Pro a worthy investment.

    Seamless Integration with the Apple Ecosystem

    One of the major advantages of any Apple product is its seamless integration with the Apple ecosystem. With the AirPods Max Pro, this integration will likely be taken a step further. Expect improved device switching, allowing users to effortlessly move between their iPhone, iPad, and Mac without needing to manually connect or disconnect. The Max Pro could also include enhanced Find My integration, making it easier to locate misplaced headphones.

    For users deeply invested in the Apple ecosystem, the Max Pro would provide the ultimate convenience, working harmoniously with other Apple devices for a truly seamless experience. This tight integration could be a significant factor in why the AirPods Max Pro might be the best option for many Apple users.

    Conclusion: Why the AirPods Max Pro Could Be the Best Yet

    The AirPods Max Pro are shaping up to be Apple’s most advanced headphones yet, offering improved noise cancellation, audio quality, and smart features. With potential upgrades in comfort, AI integration, and battery life, they have the potential to become the benchmark for premium noise-canceling headphones. If Apple delivers on the rumored features, the AirPods Max Pro might not only surpass their predecessor but could also dominate the high-end headphone market.

    For those looking for the ultimate combination of luxury, performance, and smart features, the AirPods Max Pro could be the headphones to watch out for. Whether you’re an audiophile, a frequent traveler, or just someone who wants the best noise-canceling experience, these headphones might just be worth the wait—and every penny.

    Also Check:

  • How to Turn on Background App Refresh when Greyed Out on Your iPad

    How to Turn on Background App Refresh when Greyed Out on Your iPad

    Learning how to turn on Background App Refresh when greyed out on your iPad is crucial for restoring app functionality and enhancing your device’s performance. Background App Refresh is a handy feature on your iPad that allows apps to update their content in the background, ensuring they stay current without needing to open them manually.

    How to Turn on Background App Refresh when Greyed Out on Your iPad
    How to Turn on Background App Refresh

    However, you might encounter a situation where the Background App Refresh option is greyed out, making it impossible to enable. In this article, we’ll explore why this issue occurs, how to fix it and provide answers to frequently asked questions to ensure a seamless experience.

    What Is Background App Refresh and Why Is It Important?

    Background App Refresh allows apps to fetch new data and updates while running in the background. Here’s why it’s important:

    • Convenience: Stay updated with fresh content in apps like email, news, and social media without manual refresh.
    • Multitasking: Improve app functionality while using other features on your iPad.
    • Time-saving: Automatically sync updates and notifications.

    When Background App Refresh is greyed out, apps lose this functionality, leading to delays in notifications or outdated content.

    Why Is Background App Refresh Greyed Out on Your iPad?

    Before diving into solutions, it’s important to understand the common reasons why Background App Refresh might be unavailable:

    • Low Power Mode Enabled
      Low Power Mode disables Background App Refresh to conserve battery.
    • Restrictions in Settings
      Screen time or parental controls may restrict changes to Background App Refresh.
    • System-Level Settings
      Some settings, such as Wi-Fi-only restrictions, can disable the feature.
    • Device Performance Optimization
      If your iPad is low on storage or running too many processes, Background App Refresh might be disabled automatically.

    How to Turn on Background App Refresh when Greyed Out 

    Check and Disable Low Power Mode

    Low Power Mode is the most common reason for Background App Refresh being greyed out.

    • Open the Settings app.
    • Go to Battery.
    • Check if Low Power Mode is toggled on. If it is, turn it off.

    Once Low Power Mode is off, return to the Background App Refresh settings to see if the option is now available.

    Adjust Screen Time or Parental Controls

    Restrictions in Screen Time settings can prevent you from changing Background App Refresh.

    • Go to Settings > Screen Time.
    • Tap Content & Privacy Restrictions.
    • Select Background App Activities and ensure it’s set to Allow.

    If Screen Time is password-protected, you’ll need the passcode to make changes.

    Enable Background App Refresh in System Settings

    Ensure Background App Refresh is turned on at the system level.

    • Open Settings > General.
    • Tap Background App Refresh.
    • Select Wi-Fi & Mobile Data or Wi-Fi Only based on your preference.

    If the entire option is greyed out, proceed to the other solutions below.

    Restart Your iPad

    Sometimes, a simple restart can resolve system glitches.

    • Hold the Power button until the slider appears.
    • Drag the slider to turn off your iPad.
    • Wait a few seconds, then hold the Power button again to restart.

    Free Up Storage Space

    If your iPad is low on storage, Background App Refresh may be disabled to optimize performance.

    • Go to Settings > General > iPad Storage.
    • Review the list of apps and delete any unused ones.
    • Clear cache or unnecessary files to free up space.

    Reset All Settings

    Resetting all settings can fix any misconfigurations affecting Background App Refresh.

    • Open Settings > General.
    • Scroll down and tap Transfer or Reset iPad > Reset > Reset All Settings.

    This won’t delete your data but will reset preferences like Wi-Fi passwords and system settings.

    Update Your iPad Software

    Outdated iOS versions can cause features like Background App Refresh to malfunction.

    • Open Settings > General > Software Update.
    • If an update is available, tap Download and Install.

    Updating to the latest iOS version often resolves bugs and improves performance.

    Contact Apple Support

    If none of the above solutions work, there may be a hardware or software issue specific to your device. Reach out to Apple Support or visit an Apple Store for assistance.

    Frequently Asked Questions

    What is Background App Refresh?

    Background App Refresh allows apps to update content in the background, providing real-time updates and notifications.

    Why is Background App Refresh greyed out on my iPad?

    Common reasons include low power mode, screen time restrictions, or insufficient storage.

    Can I enable Background App Refresh for specific apps only?

    Yes, go to Settings > General > Background App Refresh and toggle the switch for individual apps.

    Does Background App Refresh drain the battery?

    Yes, it uses some battery power, but disabling it entirely may affect app performance and notifications.

    Can I use Background App Refresh without Wi-Fi?

    Yes, by selecting the Wi-Fi & Mobile Data option under Background App Refresh settings.

    Will resetting all settings delete my data?

    No, resetting settings only restores system preferences to default and does not affect personal data.

    Is Background App Refresh necessary for all apps?

    No, some apps, like games, don’t require Background App Refresh to function properly.

    Conclusion

    Understanding how to turn on Background App Refresh when greyed out on your iPad ensures your apps function optimally and stay updated. By following the steps outlined in this article, you can troubleshoot and resolve the issue quickly.

    For additional support, watch the MobileTechJoint video tutorial and subscribe to their YouTube channel for more iPad tips and tricks. With these solutions, your iPad will be running smoothly in no time!

    YOUTUBE LINK:

    MORE RELATED CONTENT:

    Why the iPad Air Stands Out as One of the Best Value Tablet of 2024

    iPad Air: I Didn’t Realize How Perfect the iPad Air Was for Everyday Use Until I Tried It

    Why the iPad Pro is Currently a Gold Standard for Tablets

    I Thought the iPad Pro Was Overhyped Until I Tested Its Apple Pencil Features

  • Is Apple Gearing Up for an AirPods Max Pro Release? Here’s Everything We Know So Far, Rumors, New Features, Potential Pricing and Release Date

    Is Apple Gearing Up for an AirPods Max Pro Release? Here’s Everything We Know So Far, Rumors, New Features, Potential Pricing and Release Date

    The potential release of the AirPods Max Pro has sparked plenty of excitement among audiophiles and Apple enthusiasts. If the rumors hold true, this new iteration could bring substantial upgrades to Apple’s already premium over-ear headphones. Here’s a look at what we might expect from the AirPods Max Pro based on speculation and leaks.

    Is Apple Gearing Up for an AirPods Max Pro Release? Here's Everything We Know So Far, Rumors, New Features, Potential Pricing and Release Date

    Design and Comfort Upgrades

    Apple is renowned for its attention to detail in design, and the AirPods Max Pro may push that to new heights. The current AirPods Max are already known for their luxury feel, crafted from materials like anodized aluminum and memory foam ear cushions. With the Pro version, we could see an even sleeker and more lightweight design. Rumors suggest that Apple may reduce the weight of the AirPods Max Pro, making them more comfortable for extended wear, while maintaining or improving the current plush ear cushions.

    Enhanced Audio Quality

    The AirPods Max have been lauded for their impressive sound quality, but the Max Pro could take this further. Apple might introduce improved drivers for deeper bass, clearer mids, and crisper highs, potentially incorporating a more advanced Spatial Audio experience. Apple’s continued investment in sound technology could also see the inclusion of Hi-Fi audio capabilities, making the Max Pro perfect for audiophiles who crave flawless sound reproduction.

    Advanced Noise Cancellation

    The AirPods Max feature Active Noise Cancellation (ANC), but the AirPods Max Pro may elevate this function to the next level. The rumored Pro model is expected to offer adaptive noise cancellation, which could adjust to various environments in real time, providing a more seamless experience. For instance, the Max Pro may be able to automatically balance noise-canceling intensity based on your surroundings, whether you’re in a busy airport or a quiet office.

    AI-Driven Features

    One of the most exciting potential additions to the AirPods Max Pro is the incorporation of AI technology. Apple has been integrating more AI features across its devices, and the Max Pro could follow suit with personalized audio adjustments. Through advanced AI, the headphones may be able to tailor the sound based on your hearing profile or the type of audio content you’re listening to, ensuring a custom listening experience.

    Improved Battery Life

    Battery life is always a key concern with high-end wireless headphones, and the AirPods Max Pro are rumored to come with extended battery life. The current AirPods Max provide up to 20 hours of playback, but the Max Pro may offer longer listening times, possibly closer to 30 hours. Additionally, rapid charging features could be enhanced, allowing users to quickly get back to their music after just a few minutes of charging.

    Better Integration with Apple Ecosystem

    Apple is known for creating products that work seamlessly within its ecosystem, and the AirPods Max Pro will likely continue this trend. The Pro model could feature faster switching between devices, improved Siri functionality, and perhaps even better Find My integration to help you locate your headphones easily. There’s also speculation about even deeper integration with Apple Music, especially with lossless and Hi-Res audio capabilities.

    Potential Pricing and Release Date

    One area that remains uncertain is the price point. The current AirPods Max come with a hefty price tag, and the Pro version could be even more expensive, possibly pushing beyond the $549 mark. However, Apple may introduce additional features or performance upgrades that justify the cost for those seeking the ultimate audio experience.

    As for the release date, Apple tends to follow a two-to-three-year refresh cycle for its high-end products, and given the popularity of the AirPods Max, a Pro version might debut as early as late 2024 or early 2025.

    Conclusion

    The potential release of the AirPods Max Pro is already generating buzz in the tech community, and for good reason. With anticipated upgrades in design, sound quality, noise cancellation, and AI features, the AirPods Max Pro could set a new benchmark for over-ear wireless headphones. While details remain speculative, one thing is clear: if Apple does launch a Pro version of its popular headphones, it’s likely to become a must-have for music lovers and Apple devotees alike.

    Also Check:

  • How to use your iPhone Notes App Effectively

    How to use your iPhone Notes App Effectively

    The iPhone Notes app is an incredibly versatile tool that can help you stay organized, brainstorm ideas, and even collaborate on projects. Learning how to use your iPhone Notes app effectively can save you time and make managing your daily tasks much easier.

    How to Use Your iPhone Notes App Effectively
    iPhone Notes App

    In this article, we’ll explore the features of the Notes app, tips for optimizing its use, and answers to frequently asked questions. By the end, you’ll be ready to leverage Notes for everything from jotting down quick ideas to managing detailed plans.

    Why Use the Notes App on Your iPhone?

    The Notes app is pre-installed on every iPhone, making it a convenient and powerful tool for personal and professional use. Here are some reasons to use it:

    • Accessibility: Always at your fingertips and syncs across Apple devices with iCloud.
    • Organization: Easily sort notes into folders and tags for better categorization.
    • Rich Features: Includes text formatting, checklists, image insertion, and more.
    • Collaboration: Share notes and collaborate in real-time with others.

    By understanding these features, you can maximize productivity and make the most out of this free app.

    How to Use Your iPhone Notes App Effectively

    Setting Up the App

    • Open the Notes app on your iPhone.
    • Sign in to your iCloud account if you haven’t already.
    • Enable iCloud Sync for Notes under Settings then Apple ID then iCloud and finally tap on Notes.

    Creating a New Note

    • Open the Notes app.
    • Tap the Create Note button (a square with a pencil).
    • Start typing your note.

    Saving Your Notes

    Notes are saved automatically, so you never have to worry about losing your work.

    Key Features of the Notes App

    Organizing Notes with Folders and Tags

    • Creating Folders: Tap Folders on the Notes home screen, then tap New Folder.
    • Using Tags: Add hashtags (e.g., #Work, #Ideas) within a note to make them easier to find.
    • Moving Notes to Folders: swipe left on a note, tap Folder, and select the destination.

    Using Checklists

    Create to-do lists or shopping lists by tapping the checklist icon while writing a note.

    • Mark tasks as completed by tapping the circle next to each item.

    Adding Images, Links, and Sketches

    • Insert Images: Tap the camera icon to add photos or scan documents.
    • Sketching: Use the pen icon to draw or annotate directly in a note.
    • Hyperlinks: Paste URLs, which automatically become clickable.

    Collaboration and Sharing

    • Share notes with others via the Share button.
    • Collaborate in real-time by inviting others to edit a shared note.

    Locking Notes for Privacy

    • Lock sensitive notes by swiping left and tapping the Lock icon.
    • Use Face ID, Touch ID, or a password to secure them.

    Advanced Tips for Using the Notes App Effectively

    Search Smarter

    The search bar in the Notes app allows you to find notes quickly. Search by:

    • Keywords in the text.
    • Tags (e.g., #Travel).
    • Attachments like photos or sketches.

    Pin Important Notes

    Keep frequently used notes at the top of your list:

    • Swipe right on a note and tap the Pin icon.

    Use Siri for Quick Notes

    Activate Siri and say, “Take a note,” followed by the content you want to save.

    Sort Notes by Date or Title

    Organize your notes chronologically or alphabetically:

    • Go to Settings > Notes > Sort Notes By.

    Scan and Save Documents

    Turn your iPhone into a scanner:

    • Tap the camera icon > Scan Documents > Follow the on-screen instructions.

    Create Subfolders

    Organize your folders with subfolders for better categorization.

    • Open a folder, tap New Folder, and assign it as a subfolder.

    Frequently Asked Questions

    Can I sync my Notes with other Apple devices?

    Yes, as long as iCloud is enabled, your notes will sync across your iPhone, iPad, and Mac.

    Is it possible to recover deleted notes?

    Deleted notes are moved to the Recently Deleted folder and stay there for 30 days before being permanently deleted.

    How do I share a note with someone who doesn’t have an iPhone?

    You can share notes as PDFs or via email by tapping the Share button.

    Can I organize notes by priority?

    While there’s no priority setting, you can pin important notes or use tags to differentiate them.

    Are locked notes completely secure?

    Locked notes are encrypted and can only be accessed with your Face ID, Touch ID, or password.

    What’s the maximum number of notes I can create?

    There’s no official limit, but it depends on your iCloud storage availability.

    Can I use Notes offline?

    Yes, notes can be created and edited offline. However, syncing requires an internet connection.

    Conclusion

    Mastering the iPhone Notes app can greatly enhance your productivity and organization. By following the steps in this article, you’ll be able to utilize its features effectively, from creating simple notes to collaborating on detailed projects.

    For more tips and a video walkthrough, don’t forget to check out MobileTechJoint on YouTube with the link below. With these tools at your disposal, managing your ideas and tasks has never been easier. Happy note-taking!

    YOUTUBE LINK:

    MORE RELATED CONTENT:

    Discover iPhone 16’s Best Hidden Features: A Game Changer

    How to Edit Text on iPhone

    10 Best Cases for iPhone Xs in 2024

    iPhone SE: Apple’s Budget Phone That Doesn’t Feel Budget at All

  • How to Run Google Pixel Latest Update

    How to Run Google Pixel Latest Update

    Keeping your Google Pixel phone updated ensures you’re enjoying the best features, enhanced security, and improved performance. Running the Google Pixel latest update is straightforward, and this article will walk you through every step in simple terms. By the end of this article, you’ll have all the tools and knowledge needed to update your Google Pixel without hassle. Let’s get started!

    How to Run Google Pixel Latest Update
    Google Pixel Latest Update

    Why Updating Your Google Pixel Is Important

    Updates from Google bring new features, security patches, and bug fixes to your Pixel device. These updates often include:

    • Enhanced Security: Protect your device from vulnerabilities.
    • Better Performance: Optimize your Pixel for speed and efficiency.
    • New Features: Enjoy the latest Android functionalities.

    Running the latest Google Pixel update ensures your phone stays current, secure, and functional.

    Before You Begin: Prepare Your Device

    Before starting the update process, follow these preparatory steps to ensure a smooth experience:

    Backup Your Data

    Although updating doesn’t usually delete your data, it’s better to be safe. Backup your photos, contacts, and apps to Google Drive.

    • Open the Settings app.
    • Tap Google > Backup > Backup Now.

    Charge Your Phone

    Ensure your device has at least 50% battery life. Ideally, plug it into a power source.

    Connect to Wi-Fi

    Updates can be large files, so use a stable Wi-Fi connection to avoid interruptions.

    How to Run Google Pixel Latest Update

    Running the update is straightforward. Here’s a step-by-step breakdown:

    Download the Update

    • Follow the steps above to check for updates.
    • If an update is available, tap Download. The process may take several minutes depending on your internet speed.

    Install the Update

    • Once downloaded, your phone will prompt you to install the update.
    • Tap Install Now.
    • Your Pixel will restart during the installation process.

    Verify the Update

    • After your device reboots, go back to System Update under Settings to confirm the update was successful.

    How to Check for Updates on Your Google Pixel

    Google Pixel updates typically arrive automatically, but you can manually check for updates if you haven’t received a notification.

    Steps to Check for Updates:

    • Open the Settings app on your Pixel phone.
    • Scroll down and tap System.
    • Select System Update.
    • Tap Check for Update.

    If an update is available, your phone will display the option to download and install it.

    Troubleshooting Common Update Issues

    While Google has streamlined the update process, you might encounter a few hiccups. Here’s how to address them:

    Update Not Showing

    • Make sure your device is connected to Wi-Fi.
    • Restart your Pixel and check again.

    Not Enough Storage

    • Free up space by deleting unused apps and large files or clearing the cache.
    • Go to Settings and select Storage to manage files.

    Update Fails During Installation

    • Ensure your phone has enough battery life or is plugged in.
    • Restart your device and attempt the installation again.

    How to Enable Automatic Updates

    To avoid manually checking for updates, enable automatic updates on your Google Pixel.

    Steps to Enable Automatic Updates:

    • Go to Settings.
    • Tap System > System Update.
    • Toggle Automatic System Updates to the “On” position.

    Your Pixel will automatically download and install updates when connected to Wi-Fi and charging.

    What’s New in the Latest Google Pixel Update?

    Google regularly releases updates with exciting features. Here’s what’s typically included:

    • Feature Drops: Exclusive Pixel features such as new camera modes or enhanced Google Assistant capabilities.
    • Security Patches: Monthly updates to protect your phone from security threats.
    • Performance Enhancements: Improvements in app loading times, battery efficiency, and system stability.

    To find detailed release notes for the latest update, visit the official Google Pixel Support Page.

    Frequently Asked Questions

    How often does Google release updates for Pixel phones?

    Google releases monthly security updates and major updates once a year. Feature drops are also released quarterly.

    Can I update my Pixel without Wi-Fi?

    Yes, but it’s not recommended as updates can be large, and using mobile data may incur charges.

    What happens if my phone dies during an update?

    If your phone turns off during an update, it might result in incomplete installation. Charge your phone and restart the update process.

    Do I lose data after updating my Pixel?

    No, updates do not erase your data. However, backing up your files is always a good practice.

    How long does a Google Pixel update take?

    The update process usually takes 10–30 minutes, depending on the size of the update and your internet speed.

    Can older Pixel models receive the latest updates?

    Google typically supports Pixel devices for at least three years from their release date. Check the support schedule for your model.

    Final Thoughts

    Running the latest Google Pixel update is crucial for maintaining your phone’s performance, security, and features. With this article and the MobileTechJoint YouTube tutorial, you have everything you need to complete the process confidently.

    Keep your Pixel updated and enjoy the best that Google has to offer! For more tech guides, tips, and tricks, bookmark this page and subscribe to the MobileTechJoint YouTube channel.

    YOUTUBE LINK:


    MORE RELATED CONTENT:

    How to Enable Google Live Translate on Pixel Phone

    I Tried the Google Pixelbook, and Its Display Is a Game-Changer for Creative Work

    Google Pixelbook: The Google Laptop That’s So Intuitive, It Practically Adapts to You

    Best Google Pixel 8 & 9 Phone Cases to Shop This Holiday

  • How to Enable Google Live Translate on Pixel Phone

    Currently, when people communicate in a variety of languages, Google Live Translate on Pixel phones has emerged as a game-changer. This innovative feature allows users to translate conversations, texts, and even live media instantly, making it a must-have tool for travelers, professionals, and anyone keen on breaking language barriers.

    How to Enable Google Live Translate on Pixel Phone
    Google Live Translate

    Whether you’re in a foreign country or chatting with a non-native speaker, Live Translate ensures seamless communication This article will walk you through how to Enable Google Live Translate on Pixel phones, explain its functionality, and answer common questions to help you maximize this remarkable tool.

    What is Google Live Translate?

    Google Live Translate is a feature exclusively available on Pixel phones (starting with Pixel 6) that enables real-time translation of spoken language, on-screen text, and media playback. Unlike traditional translation apps, Live Translate works offline for most tasks, ensuring accessibility even in areas without internet connectivity.

    Amazing Features of Google Live Translate

    • Real-Time Conversation Translation: Enables smooth communication in over 40 languages.
    • Media Translation: Transcribes and translates audio from videos or podcasts directly on your device.
    • Text Translation: Instantly translates text on your screen, such as web pages, apps, or documents.
    • Offline Mode: Allows you to use the feature without requiring an internet connection.
    • User-Friendly Integration: Works seamlessly across apps like Google Translate, Chrome, and Google Lens.

    How to Enable Google Live Translate on Pixel Phones

    Follow these steps to set up Google Live Translate on your Pixel device:

    Ensure Your Phone Supports Live Translate

    Google Live Translate is available on Pixel 6, Pixel 6 Pro, Pixel 7, and later models. Ensure your device is updated to the latest version of Android to access all features.

    Access the Live Translate Settings

    • Open the Settings app on your Pixel phone.
    • Scroll down and tap System.
    • Select Live Translate from the options.

    Turn On Live Translate

    Toggle the switch to enable Live Translate. You may be prompted to download language packs for offline translation.

    Download Languages

    • Tap Add a Language to download the languages you’ll need for translation.
    • Select your preferred language pair (e.g., English to Spanish).
    • Once downloaded, these languages will be available offline.

    Using Google Live Translate in Conversations

    One of the most powerful features of Live Translate is its ability to facilitate real-time conversations. Here’s how you can use it:

    Step-by-Step Guide

    • Open the Google Translate app or access Live Translate from the notification bar (if enabled).
    • Select the Conversation Mode icon.
    • Choose the languages you want to translate between (e.g., English and French).
    • Speak into your device, and it will instantly display and speak the translated text.
    • Hand the phone to the other person to allow them to respond in their language, which will then be translated for you.

    This feature is perfect for casual chats, business meetings, or navigating new countries.

    Translating Media with Live Translate

    Pixel’s Live Translate can even transcribe and translate audio from videos, podcasts, or voice notes:

    • Play the media you want to translate.
    • Tap the Live Caption option in the volume controls.
    • Enable Translate Captions from the settings.
    • The feature will display live subtitles translated into your chosen language.

    This is particularly useful for consuming foreign-language content or understanding speech in a noisy environment.

    Translating On-Screen Text

    Whether you’re reading a foreign website or translating text within an app, Live Translate makes it easy:

    • Activate Tap to Translate from the Google Translate app settings.
    • Highlight the text you want to translate.
    • A pop-up window will display the translation in your selected language.

    Tips for Optimizing Live Translate

    • Use a Clear Voice: Ensure you speak slowly and clearly for better translation accuracy.
    • Download the necessary languages: Pre-download language packs before traveling to ensure offline access.
    • Keep Your Phone Updated: Regular updates often improve functionality and add new features.
    • Leverage Media Translation: Use Live Captions and Translate to enjoy foreign-language videos without missing a word.

    Frequently Asked Questions

    Which Pixel phones support Live Translate?

    Google Live Translate is available on Pixel 6, Pixel 6 Pro, Pixel 7, Pixel 7 Pro, and newer models.

    Do I need an internet connection to use Live Translate?

    No, Live Translate works offline for most features. However, downloading new language packs requires an internet connection.

    How many languages does Live Translate support?

    Live Translate supports over 40 languages, including Spanish, French, Japanese, Korean, and Hindi. The list is continually updated as Google adds new languages.

    Can Live Translate translate video calls?

    Currently, Live Translate does not support live transcription of video calls. However, you can use the conversation mode for in-person chats or enable subtitles for media playback.

    Is Live Translate free?

    Yes, Google Live Translate is completely free to use on compatible Pixel devices.

    How accurate is Live Translate?

    The accuracy of Live Translate depends on factors such as the clarity of speech and complexity of the text. For most standard conversations and media, the translations are highly reliable.

    Final Thoughts

    Google Live Translate on Pixel phones is a powerful tool that simplifies multilingual communication. Its integration with everyday activities, such as texting, video watching, and conversations, makes it invaluable for both casual and professional use. With features like offline translation and real-time transcription, Pixel users can bridge language gaps effortlessly.

    For a more detailed tutorial, including visual instructions, visit the MobileTechJoint YouTube channel with the link below and become a pro at using Live Translate.

    YouTube link: https://www.youtube.com/shorts/YLg3mPTY4Ak

    By following the steps in this guide, you’ll unlock the full potential of Google Live Translate on your Pixel phone and make language barriers a thing of the past.

    MORE RELATED CONTENTS:

    Best Google Pixel 8 & 9 Phone Cases to Shop This Holiday

    How to Use Maps on Google Pixel Watch

    Google Pixel Buds Pro 2 Design and Comfort

    Google Pixel Watch 3 Review: The Smartwatch to Beat?

  • How to Use the Measure App on iPhone

    How to Use the Measure App on iPhone

    The Measure app on iPhone is an incredibly useful tool that transforms your device into a virtual tape measure. With just a few taps, you can measure objects, dimensions, and spaces with impressive accuracy.

    How to Use the Measure App on iPhone
    Measure App on iPhone

    Designed for convenience, the Measure app uses augmented reality (AR) to calculate measurements in real time, making it perfect for DIY projects, home renovations, or simply satisfying your curiosity about the size of an object.

    If you’re unsure how to use this feature, don’t worry; we’ll walk you through it step-by-step. For those who prefer visual learning, you can also check out a comprehensive video tutorial on the MobileTechJoint YouTube channel.

    This guide will explain how to use the Measure app on iPhone, highlight its features, and address frequently asked questions, ensuring you become a pro at using this versatile app.

    What is the Measure App on iPhone?

    The Measure app, introduced with iOS 12, leverages your iPhone’s camera and augmented reality (AR) technology to provide accurate measurements. It’s like having a digital tape measure in your pocket. With the app, you can measure straight lines, calculate the dimensions of objects, and even detect levels to ensure surfaces are flat.

    Amazing features of the Measure App

    • Quick Measurements: Measure objects and spaces with a simple tap.
    • Automatic Detection: Recognizes rectangular objects and calculates dimensions automatically.
    • Built-In Level: Ensures surfaces are perfectly horizontal or vertical.
    • Measurement History: Saves snapshots with dimensions for future reference.
    • Precision Tools: offers an adjustable start and end point for accuracy.

    How to Use the Measure App on iPhone

    Follow these simple steps to start using the Measure app effectively:

    Check Compatibility

    The Measure app is available on iPhones running iOS 12 or later, with ARKit-compatible models. This includes the iPhone SE (2nd generation), the iPhone 8, and newer devices.

    Open the Measure App

    • Locate the Measure app on your iPhone (it’s pre-installed on iOS devices).
    • If you can’t find it, search for “Measure” in the Spotlight search or download it from the App Store.

    Calibrate Your Device

    When you open the app for the first time, it may prompt you to move your iPhone around in a circular motion. This process helps the app map your surroundings accurately.

    Start Measuring

    First step: Measure a Straight Line

    • Point your iPhone’s camera at the object or space you want to measure.
    • A white dot (the “measurement point”) will appear on the screen.
    • Align the dot with the starting point of the measurement. Tap the + button to set the first point.
    • Move your device along the object to the endpoint and tap + again to complete the measurement.
    • The app will display the measurement on the screen.

    Second Step: Measure Rectangular Objects

    • When you point the camera at a rectangular object, such as a table or book, the app will automatically detect its edges.
    • Tap the + button to confirm, and the app will display the dimensions (length, width, and area) on the screen.

    Third step: Use the Level Tool

    • Swipe left on the Measure app screen to access the Level tool.
    • Place your iPhone flat on a surface to check if it’s level. The screen will turn green and display “0°” when the surface is perfectly flat.

    Tips for Accurate Measurements

    • Ensure Good Lighting: Use the Measure app in well-lit environments for better visibility and accuracy.
    • Hold Steady: Keep your phone steady when marking points to avoid errors.
    • Measure Flat Objects: While the app is powerful, it works best with flat, solid surfaces.
    • Check Calibration: If measurements seem off, recalibrate by moving your phone in a circular motion.

    Common Applications of the Measure App

    • Home Renovations: Quickly measure furniture, wall spaces, or rooms.
    • DIY Projects: Calculate the dimensions of materials before cutting or assembling.
    • Shopping: Ensure items will fit in a specific space before purchasing.
    • Leveling Furniture: Use the built-in level to adjust furniture or shelves.
    • Creative Projects: Measure art supplies or create symmetrical designs.

    Troubleshooting Common Issues

    • Measurement Point Not Appearing: Ensure the area is well-lit and move your phone to recalibrate.
    • Inaccurate Measurements: Recalibrate by following the on-screen prompts and avoid tilting your phone excessively.
    • App Crashes or Freezes: Close and reopen the app, or restart your iPhone if the problem persists.

    Frequently Asked Questions 

    Is the Measure app accurate?

    The Measure app is reasonably accurate for general purposes, but it may not replace a physical tape measure for precision tasks.

    What iPhone models support the Measure app?

    The Measure app is available on iPhone models from iPhone SE (2nd generation), iPhone 8, and later models.

    Can I save measurements for later?

    Yes, you can take a screenshot of your measurement and save it for future reference. The app also overlays dimensions directly on the image.

    Do I need an internet connection to use the Measure app?

    No, the Measure app works offline as it relies on your iPhone’s AR capabilities.

    Can I measure curved objects?

    The Measure app is primarily designed for straight lines and flat surfaces. It may not accurately measure curved or irregularly shaped objects.

    How do I improve accuracy?

    Use the app in good lighting, keep your phone steady, and ensure the object is well-defined for better results.

    Is the Measure app free?

    Yes, the Measure app is completely free and comes pre-installed on compatible iPhones.

    Final Thoughts

    The Measure app on iPhone is a practical and user-friendly tool that makes measuring objects and spaces incredibly convenient. Whether you’re working on a home project, shopping for furniture, or simply curious about dimensions, this app is a valuable addition to your toolkit. While it may not replace professional measuring tools for high-precision tasks, it’s an excellent choice for everyday use.

    Remember to watch the video tutorial on MobileTechJoint’s YouTube channel with the link below for a step-by-step demonstration.

    By combining this article with the video tutorial, you’ll master the Measure app in no time. Now that you know how to use the Measure app, try it out for your next project and experience the power of AR technology at your fingertips!

    MORE RELATED CONTENT:

    How to Use Stop Watch on iPhone 15 Pro

    Hide Apps on iPhone | How to Hide Apps on iPhone

    Mirroring iPhone to Chromecast: A Comprehensive Guide

    How to Turn On or Off Location on iPhone

  • Does your iPhone stop charging at 80, here’s how to fix it!

    Does your iPhone stop charging at 80, here’s how to fix it!

    If you’ve noticed your iPhone stop charging at 80%, don’t worry; it’s a common issue, and there’s a good reason behind it. Apple has built-in mechanisms to protect your battery’s lifespan, which can cause your device to pause charging before it reaches 100%. In this article, we’ll explain why this happens and guide you through the steps to fix it.

    Does your iPhone stop charging at 80, here’s how to fix it!
    iPhone stops charging at 80

    Why Does Your iPhone Stop Charging at 80%?

    The primary reason your iPhone stops charging at 80% is optimized battery charging, a feature introduced in iOS 13. This feature is designed to extend your battery’s health by reducing the time your battery spends at a high charge level. Here’s why:

    • Heat Management: Charging generates heat, and keeping a battery at high charge levels for extended periods can degrade its lifespan.
    • Battery Chemistry: Lithium-ion batteries, like the one in your iPhone, age faster when held at 100% for too long.

    When Optimized Battery Charging is enabled, your iPhone learns your charging routine. It pauses charging at 80% and waits to finish charging until just before you typically unplug it.

    How to Fix Your iPhone Stopping at 80% Charging

    If you need your iPhone to charge past 80%, you can disable optimized battery charging or address other potential issues. Follow these steps:

    Disable Optimized Battery Charging

    • Open the Settings app on your iPhone.
    • Scroll down and select Battery.
    • Tap Battery Health & Charging.
    • Toggle off optimized battery charging.

    Once disabled, your iPhone will charge past 80% without pausing. However, remember that this could slightly reduce your battery’s overall lifespan over time.

    Check for High Temperatures

    • iPhones stop charging temporarily if the battery overheats to protect it from damage.
    • Ensure your phone is in a cool, ventilated space while charging.
    • Avoid using thick cases that trap heat or charging under direct sunlight.

    Update Your iOS

    • Apple frequently releases updates to improve battery management.
    • Go to Settings > General > Software Update and install the latest version of iOS.

    Try a Different Charger or Cable

    • A faulty charger or cable can disrupt the charging process.
    • Use a certified Apple charger and Lightning cable, or a high-quality third-party accessory with MFi (Made for iPhone) certification.

    Reset Your iPhone’s Settings

    If the problem persists, resetting your iPhone’s settings might help:

    • Navigate to Settings > General > Transfer or Reset iPhone > Reset.
    • Select Reset All Settings.
    • This won’t erase your data but will reset preferences, including Wi-Fi passwords and display settings.

    Perform a Battery Health Check

    • Go to Settings > Battery > Battery Health & Charging.
    • Check the maximum capacity percentage. If it’s significantly below 80%, your battery may need replacement.
    • Visit an Apple Store or authorized service provider for a battery diagnostic.

    Additional Tips to Keep Your iPhone Battery Healthy

    • Avoid extreme temperatures: Extreme cold or heat can damage your battery. Keep your iPhone within Apple’s recommended temperature range of 32°F to 95°F (0°C to 35°C).
    • Charge Smartly: Try not to let your battery level drop below 20% frequently, and avoid keeping it at 100% for long periods.
    • Use Optimized Battery Charging: It’s a handy feature for maintaining long-term battery health, especially if you follow a predictable charging schedule.

    Frequently Asked Questions

    Why does optimized battery charging stop at 80%?

    Optimized Battery Charging pauses at 80% to prevent overheating and reduce battery aging caused by staying at high charge levels for too long.

    Should I turn off Optimized Battery Charging?

    If you need your phone to charge to 100% immediately, you can temporarily disable it. However, keeping it enabled is better for your battery’s long-term health.

    What happens if my iPhone overheats while charging?

    Your iPhone will stop charging or slow down the process to prevent battery damage. Ensure your device is in a cool, well-ventilated area.

    Can I speed up the charging process?

    Use a fast charger (20W or higher) with an iPhone that supports fast charging. Keep the Optimized battery charging off if you’re in a hurry to reach 100%.

    How do I know if my iPhone battery needs replacing?

    Check battery health under Settings. If the maximum capacity is below 80% or you frequently experience charging issues, it’s time for a replacement.

    Conclusion

    When your iPhone stop charging at 80%, it’s usually a result of Optimized Battery Charging, a smart feature designed to extend your battery’s life. While this is helpful in most cases, you can disable it or troubleshoot other potential causes if necessary.

    Use the tips and solutions provided in this article to ensure your device charges efficiently and stays in good health. For a complete visual demonstration, head over to MobileTechJoint’s YouTube channel and watch the helpful tutorial.

    By following these steps, you can fix the issue and keep enjoying your iPhone without interruptions.

    YOUTUBE LINK:

    MORE RELATED CONTENT:

    10 Best Cases for iPhone Xs in 2024

    iPhone SE: Apple’s Budget Phone That Doesn’t Feel Budget at All

    Best Selfie Sticks for iPhone: Top 10 Picks for 2024

    Discover iPhone 16’s Best Hidden Features: A Game Changer