Blog

  • Which Canon Camera has the Highest Megapixels

    Which Canon Camera has the Highest Megapixels

    For Canon enthusiasts, the question often arises: which Canon camera has the highest megapixels? In this article, we’ll explore this in detail, covering Canon’s highest megapixel offerings and why they are important for certain types of photography.

    Which Canon Camera has the Highest Megapixels


    When choosing a camera, especially for professional photographers or those who prioritize image quality, one of the most important factors to consider is the megapixel count. Megapixels determine the resolution of the images a camera can capture, which impacts clarity and the level of detail.

    Which Canon Camera has the Highest Megapixels

    Canon EOS 5DS R

    The Canon EOS 5DS R is currently Canon’s highest-megapixel DSLR camera. Its 50.6 MP full-frame CMOS sensor is designed to capture incredible detail, making it an ideal choice for landscape photography, studio shoots, and large-format printing.

    Why Choose the Canon EOS 5DS R?

    • With 50.6 megapixels, this camera produces high-resolution images perfect for enlargements and commercial work.
    • The ‘R’ version of the 5DS cancels the effect of the low-pass filter, which enhances sharpness and resolution, making your images even crisper.
    • The large sensor improves image quality, dynamic range, and low-light performance compared to smaller sensors.

    However, this camera may not be the best choice for everyone. Its high megapixel count means file sizes are large, requiring substantial storage space and processing power. It’s also more specialized for professional use, particularly in controlled environments where the lighting can be fine-tuned.

    What Are Megapixels, and Why Do They Matter?

    A megapixel (MP) refers to one million pixels, which are tiny dots that make up an image. The higher the megapixel count, the more detailed an image can be.

    For instance, a 50MP camera can capture more detail than a 20MP camera, which is particularly useful for large prints or detailed landscape photography.

    However, while more megapixels can provide better image detail, they are not the only factor that affects image quality. Sensor size, lens quality, and lighting also play significant roles in producing sharp and vibrant images.

    Why Megapixels Matter (But Aren’t Everything)

    While it’s tempting to believe that the highest megapixel camera is always the best, it’s important to understand that more megapixels don’t necessarily mean better overall image quality. Other factors, such as sensor size, lens quality, and post-processing, are crucial in determining the final image quality.

    • Sensor Size: Full-frame sensors generally offer better low-light performance and dynamic range than smaller sensors like APS-C.
    • Lens Quality: A high megapixel count can only achieve its full potential with a good lens. Investing in high-quality glass is just as important as having a high-resolution camera.
    • Post-processing: Higher megapixel images often require more powerful computers and software to process efficiently.

    How Does the Canon EOS R5 Compare to the 5DS?

    The Canon EOS R5, while offering fewer megapixels at 45 MP, has a broader range of features that make it more versatile compared to the 5DS.

    • 45 MP Full-Frame CMOS Sensor: Although it doesn’t match the 50.6 MP sensor of the 5DS, the EOS R5 still provides high-quality images suitable for professionals, and it’s more balanced for both stills and video.
    • 8K Video Recording: One of the R5’s standout features is its ability to shoot 8K video, a feature the 5DS does not offer.
    • In-Body Image Stabilization (IBIS): The EOS R5 has 5-axis image stabilization, which helps reduce camera shake when shooting handheld. This feature is missing in the 5DS.
    • High-Speed Shooting: The EOS R5 can shoot up to 12 frames per second (fps) using the mechanical shutter and 20 fps using the electronic shutter. In comparison, the 5DS is slower, focusing more on high-resolution stills rather than speed.
    • Advanced Autofocus: The R5 offers Dual Pixel CMOS AF II, with 1,053 AF points covering the entire frame, compared to the 61-point system in the 5DS.
    • Mirrorless Design: The EOS R5 is part of Canon’s mirrorless lineup, making it lighter and more compact compared to the bulkier DSLR design of the 5DS.

    While the Canon EOS 5DS is designed for photographers who require maximum resolution, the EOS R5 offers a more well-rounded experience, with high-resolution stills, exceptional video quality, and advanced features like in-body stabilization and faster performance.

    Conclusion

    When deciding which Canon camera offers the highest megapixels, the Canon EOS 5DS R is the clear winner with its 50.6 MP full-frame sensor, making it the best choice for photographers who need the maximum possible detail in their images. However, other options like the Canon EOS R5 provide a balanced mix of resolution and advanced features, making it a more versatile choice for those who also shoot video or require fast continuous shooting.

    Ultimately, the decision depends on your specific photography needs. Whether you prioritize resolution, speed, or versatility, Canon offers a wide range of cameras to suit every type of photographer.

    CHECK THESE OUT:
  • How to Transfer Photos from Canon Camera to Phone

    How to Transfer Photos from Canon Camera to Phone

    Today, capturing beautiful moments has become easier than ever, thanks to high-quality cameras like Canon. Whether you’re a professional photographer or a casual hobbyist, transferring your photos to your phone is essential for sharing on social media, backing up, or editing on the go. Fortunately, moving pictures from your Canon camera to your phone doesn’t have to be complicated.

    How to Transfer Photos from Canon Camera to Phone

    This article will teach you step-by-step procedures on how to transfer photos from a Canon camera to your phone. This process can be done wirelessly, with a cable, or using an SD card reader, depending on your camera model and phone preferences.

    How to Transfer Photos from Canon Camera to Phone

    There are several ways to transfer photos from a Canon camera to your phone. The best method depends on your camera model and what tools you have available. Below are the most common and efficient methods:

    Using Canon Camera Connect App (Wireless Method)

    • Download the Canon Camera Connect App from the App Store or Google Play.
    • Turn on Wi-Fi/Bluetooth on your Canon camera in the settings menu.
    • Open the app and pair your camera with your phone.
    • Browse photos on your phone and transfer the ones you want by clicking “Import.”

     USB Cable (Wired Method)

    • Use a USB cable to connect your Canon camera to your phone (you might need an adapter).
    • Turn on the camera, and your phone will recognize it as an external storage device.
    • Open your phone’s file manager, go to the DCIM folder, and transfer the photos you want.

     SD Card Reader

    • Turn off your Canon camera and remove the SD card.
    • Insert the SD card into a card reader compatible with your phone (via USB-C or Lightning).
    • Access the SD card on your phone through the file manager, then copy and paste the desired photos.

    Using Cloud Services

    • Transfer your photos to your computer first.
    • Upload them to a cloud service (Google Drive, Dropbox, iCloud).
    • Access and download the photos to your phone using the cloud app.

    Which Method is Best?

    • Wireless Transfer: Convenient and fast for quick sharing.
    • USB Cable: Reliable and doesn’t need internet access.
    • SD Card Reader: Best for large batches of photos.
    • Cloud Services: Good for backup and access from any device.

    Why Transferring Photos to Your Phone Matters

    Now that we’ve gone through the “how-to” part, let’s talk about why transferring your photos to your phone is important. For many, it’s about convenience. You may want to share photos instantly on social media platforms, use editing apps available on your phone, or simply have access to your pictures wherever you are.

    Transferring photos to your phone allows for easy and immediate access to your photography work, ensuring that your favorite moments are never out of reach.

    What’s the Best Method for You?

    The best method to transfer photos from your Canon camera to your phone depends on your camera model and personal preferences. If you have a newer Canon camera with Wi-Fi or Bluetooth capabilities, the Camera Connect app is the easiest and most convenient option. If you prefer a more straightforward approach, using a USB cable or SD card reader is equally effective.

    Tips for a Smooth Transfer

    • Ensure Your Camera’s Firmware is Up-to-Date: Updating your Canon camera’s firmware can help avoid any issues with connectivity.
    • Check Compatibility: Make sure your phone supports the transfer method you’re using, whether it’s via Wi-Fi, cable, or SD card reader.
    • Use Cloud Backup for Safety: Even after transferring your photos to your phone, consider backing them up on a cloud service to prevent accidental loss.

    Conclusion

    Transferring photos from your Canon camera to your phone has never been easier, thanks to modern technology and a variety of transfer methods. Whether you opt for wireless transfer via the Canon Camera Connect app, a reliable USB cable, an SD card reader, or cloud services, each method has its advantages.

    Choose the one that best fits your needs, and you’ll be able to enjoy your photography on your phone in no time. Remember, having quick access to your photos allows you to edit, share, and enjoy your moments on the go. I’m certain you can now confidently transfer your Canon photos to your phone and get the most out of your photography experience.

    CHECK THESE OUT:

  • Why Your Canon Camera Says ‘Busy’ and How to Quickly Fix It

    Why Your Canon Camera Says ‘Busy’ and How to Quickly Fix It

    If you’re a Canon camera user, you’ve probably seen the “Busy” message pop up on your screen at some point, stopping you from taking the perfect shot. It can be frustrating, especially when you don’t know why it’s happening or how to resolve it.

    Why Your Canon Camera Says 'Busy' and How to Quickly Fix It

    This issue is fairly common, but the good news is that it can often be fixed quickly once you understand what’s going on. In this article, we’ll explore why your Canon camera says “Busy” and how to address the problem step by step.

    What Does the “Busy” Message Mean?

    When your Canon camera says “Busy,” it’s essentially telling you that it’s occupied and can’t take any more photos or perform other tasks until it finishes what it’s doing. This can happen for several reasons, but it usually means your camera is processing data, saving images, or communicating with accessories like a flash. The camera is temporarily unable to perform new tasks because its system is busy completing other actions.

    Common Causes of the “Busy” Message

    Buffer Overload

    One of the most common reasons your camera says “Busy” is because the buffer is full. The buffer is a temporary storage area where your camera holds photos before writing them to the memory card. If you’re taking a lot of pictures in quick succession—especially in burst mode—or shooting high-resolution photos, the buffer fills up. Once it’s full, the camera has to finish writing the data to the memory card before it can take more shots.

    Solution: Wait a few seconds for the buffer to clear. To prevent this from happening in the future, try shooting fewer continuous shots or reducing your image resolution. Additionally, upgrading to a faster memory card will help the camera process and store photos quicker.

    Slow Memory Card

    The speed of your memory card is another big factor. If you’re using a slow card, your camera will take longer to write data to it, which can cause the “Busy” message to appear frequently. This is especially true if you’re shooting in RAW format or high-resolution JPEGs, as these file types are larger and take longer to save.

    Solution: Invest in a high-speed memory card. Look for a card with a higher write speed, like a UHS-I or UHS-II card, which allows your camera to transfer data more quickly and reduces the chances of seeing the “Busy” message.

    External Flash Issues

    If you’re using an external flash, it could also be the culprit behind the “Busy” message. When the flash isn’t fully charged or there’s a communication error between the camera and the flash, the camera will display “Busy” while it waits for the flash to get ready.

    Solution: Make sure your external flash is fully charged and correctly attached. If your flash takes too long to recharge between shots, consider upgrading to a flash with a faster recharge time.

    File Transfers in Progress

    If you’re transferring photos from your camera to a computer via USB, the “Busy” message may appear because the camera is occupied with the data transfer. During this time, the camera is temporarily unavailable for shooting as it completes the file transfer.

    Solution: Wait for the transfer to finish before trying to take more photos. For faster transfers, consider using a memory card reader instead of transferring files directly from the camera.

    Autofocus Delays

    Sometimes, the camera may display the “Busy” message due to autofocus issues. If the camera is struggling to lock focus—perhaps because of low light or fast-moving subjects—it may temporarily freeze while it attempts to adjust the focus.

    Solution: Try switching to manual focus to bypass autofocus delays. Improving lighting conditions or using an autofocus assist beam can also help your camera lock focus more quickly, reducing the chances of seeing the “Busy” message.

    How to Prevent the “Busy” Message

    While understanding the common causes is helpful, there are a few preventive measures you can take to reduce the chances of your camera displaying the “Busy” message in the future.

    Use a High-Speed Memory Card

    As we mentioned earlier, one of the most effective ways to prevent the “Busy” message is by using a fast memory card. The faster your camera can write to the card, the quicker it will clear the buffer and be ready for more shots. When choosing a memory card, look for one with high write speeds (expressed in MB/s). UHS-I and UHS-II cards are ideal for faster performance.

    Limit Continuous Shooting

    If you frequently shoot in burst mode, the buffer can fill up quickly, especially when shooting in RAW format or high-resolution JPEGs. To avoid this, try limiting how often you use burst mode. If you don’t need the extra detail of RAW files, consider switching to JPEG format, which takes up less space and processes faster.

    Keep Your Firmware Updated

    Canon frequently releases firmware updates to improve camera performance and fix bugs. Regularly check for updates on Canon’s official website to ensure your camera is running the latest version. Firmware updates can sometimes optimize how the camera handles data, reducing the frequency of the “Busy” message.

    Give Your Camera Time to Cool Down

    Overheating can also cause performance issues, including the “Busy” message. If you’re shooting for long periods, especially in hot weather, your camera may slow down to prevent damage from overheating. If this happens, give your camera a break to cool down before continuing.

    Turn Off Unnecessary Features

    Certain camera features, like image stabilization and high ISO noise reduction, require additional processing power. If you’re not using these features, consider turning them off to free up your camera’s resources and prevent the “Busy” message from appearing.

    What to Do If the Problem Persists

    If you’ve tried all the fixes above and your camera still frequently shows the “Busy” message, it might indicate a more serious issue.

    Reset Your Camera Settings

    Sometimes, resetting your camera to its factory settings can resolve software glitches that might be causing the “Busy” message to appear frequently. Just be sure to back up any important settings or custom configurations before performing a reset.

    Check for Hardware Problems

    If resetting the camera doesn’t fix the issue, there could be a hardware problem that needs attention. This could involve the memory card slot, the battery, or even the internal circuits of the camera. In this case, it’s best to contact Canon’s customer support or take your camera to an authorized repair center for a thorough inspection.

    Use Different Lenses or Accessories

    Sometimes, the issue could be with a lens or external accessory. Try swapping out lenses or removing accessories like an external flash to see if the problem persists. If the camera works fine without these accessories, the problem might lie with the attachment rather than the camera itself.

    Final Thoughts

    The “Busy” message on your Canon camera can be a minor inconvenience, but understanding why it happens and how to quickly fix it can make a big difference. Most of the time, this message is related to temporary data processing delays, a slow memory card, or external device issues like an uncharged flash. With a few adjustments such as using a faster memory card, reducing burst shooting, or performing regular firmware updates you can minimize the chances of running into this issue.

    By staying proactive and knowing how to troubleshoot on the go, you’ll spend less time waiting for your camera and more time capturing amazing photos!

    CHECK THESE OUT:

  • Which Canon Camera is Best for Beginners

    Which Canon Camera is Best for Beginners

    when choosing the right camera as a beginner can be overwhelming, especially with so many options in the market. Canon is a leading brand in the camera industry and it offers several models that are ideal for beginners. These cameras are user-friendly, affordable, and packed with amazing features that will help you learn how to grow as a photographer.

    Which Canon Camera is Best for Beginners

    In today’s article, we’ll break down the best Canon cameras for beginners like you, highlighting their key features, and why they are ideal for someone just starting in photography.

    Why choose the Canon Camera

    Before diving into specific models, let’s look at why Canon cameras are a great choice for beginners:

    • User-friendly design: canon cameras are known for their easy-to-use interface. This makes it simple for beginners to navigate settings and start shooting right away.
    • Wide range of lenses and accessories: Canon offers a variety of lenses and accessories, allowing you to expand your photography skills as you progress.
    • Great image quality: Even Canon’s entry-level camera delivers excellent image quality, ensuring your photos look sharp and professional.
    • Affordability: canon provides a wide range of cameras at different price points, so you can find your budget.

    Top Canon Cameras for Beginners

    When choosing the right camera as a beginner, can be overwhelming due to the numerous options available. Canon offers several models ideal for beginners that are user-friendly, affordable, and packed with features.

    Canon cameras are known for their easy-to-use interface, wide range of lenses and accessories, great image quality, and affordability. Here are some of the top Canon cameras for beginners:

    Canon EOS Rebel T7 (EOS 2000D)

    The Canon EOS Rebel T7, also known as the EOS 2000D outside the U.S., is one of the best beginner DSLR cameras on the market. It offers a great balance between simplicity, performance, and price.

       Key Features:

    • 1 MP APS-C Sensor
    • Built-in Wi-Fi and NFC
    • Full HD 1080p Video Recording
    • 0-inch LCD Screen

    This Canon camera is affordable and great for beginners. It has a simple interface with a simple interface that is easy to understand and control. However, you need to know that this camera does not have 4K video recording.

    Canon EOS M50 Mark II

    The Canon EOS M50 Mark II is a mirrorless camera that combines ease of use with modern features, making it a top choice for beginner photographers who also want to create content for social media or YouTube.

      Key Features:

    • 1 MP APS-C CMOS Sensor
    • 4K Video Recording
    • Dual Pixel Autofocus
    • Vari-angle Touchscreen
    • Wi-Fi and Bluetooth

    This camera is lightweight and compact designed which is great for both photography and videography. It has a fast and accurate autofocus system but a limited battery life.

    Canon EOS Rebel SL3 (EOS 250D)

    The Canon EOS Rebel SL3, also known as the EOS 250D, is one of the smallest and lightest DSLR cameras in Canon’s lineup. It’s designed for beginners who want something portable without sacrificing image quality.

       Key Features:

    • 1 MP APS-C Sensor
    • 4K Video Recording
    • Dual Pixel Autofocus
    • Guided User Interface
    • Vari-angle Touchscreen

    This camera is lightweight and compact for a DSLR with excellent image quality. It has a friendly interface with a helpful guide mode. One of the setbacks of this camera is that it has a limited number of focus points and some limitations in 4k video mode.

    Canon PowerShot G7 X Mark III

    For beginners who want a compact, point-and-shoot camera with advanced features, the Canon PowerShot G7 X Mark III is an excellent option. It’s popular among vloggers and content creators due to its size and video capabilities.

    Key Features:

    • 1MP 1.0 Type sensor
    • 4K Video Recording
    • Built-in ND Filter
    • Wi-Fi and Bluetooth Connectivity
    • Live Streaming

    This camera is pocket-sized but packed with powerful features and it’s perfect for both stills and videos. One of its amazing features is its impressive low-light performance for a compact camera. Now before you decide to settle for this one, I’d like to let you know that it has a fixed lens limits flexibility, and no viewfinder.

    What to Consider When Choosing a Camera

    Budget

    As a beginner, it’s important to choose a camera that fits within your budget. While full-frame cameras like the Canon EOS RP offer amazing image quality, they come at a higher price. On the other hand, cameras like the Rebel T7 or M50 Mark II provide excellent value for money.

    Camera Type (DSLR vs. Mirrorless vs. Compact)

    • DSLRs like the Rebel T7 and Rebel SL3 are great for those who want to explore manual settings and lenses.
    • Mirrorless cameras like the EOS M50 Mark II and EOS RP are more compact and offer modern features like 4K video and fast autofocus.
    • Compact cameras like the PowerShot G7 X Mark III are perfect for portability and simplicity.

    Photography vs. Videography

    If you plan to shoot a lot of videos, look for a camera with good video features, such as 4K recording and fast autofocus. The EOS M50 Mark II and PowerShot G7 X Mark III are both great for beginners interested in videography.

    Lens Compatibility

    One of the advantages of choosing a Canon DSLR or mirrorless camera is the wide variety of lenses available. As you grow in photography, you can expand your kit with lenses that suit your style, whether that’s portrait, landscape, or macro photography.

    Conclusion

    Choosing the right Canon camera as a beginner comes down to your specific needs and preferences. If you’re on a tight budget, the Canon EOS Rebel T7 offers great value and solid performance. For those who want a more modern, mirrorless camera with excellent video capabilities, the Canon EOS M50 Mark II is a great choice.

    If portability and video are important, the Canon PowerShot G7 X Mark III stands out. For beginners looking to invest in a full-frame camera, the Canon EOS RP offers top-tier quality at a relatively affordable price.

    No matter which camera you choose, Canon offers a wide range of options to help you get started on your photography journey. we’ve come to the end of this article, and I hope you find this piece informative and helpful.  Do well to leave your thoughts in the comments section, Thanks for reading.

    CHECK THESE OUT:

  • Which Canon Camera is Good for Vlogging

    Which Canon Camera is Good for Vlogging

    Vlogging has become a very popular way for content creators to share their lives, ideas, and experiences with the world. As a result, having the right camera can make a huge difference in the quality of your content. If you’re just getting into vlogging or looking to upgrade your equipment, canon offers a wide range of cameras that cater to vloggers of all levels.

    Which Canon Camera is Good for Vlogging

    This article will explore some of the best Canon cameras for vlogging and explain why they are perfect for creating engaging videos.

    Why Canon Is a Great Choice for Vlogging

    When it comes to vlogging, Canon cameras are a favorite for several reasons. First, they offer outstanding video quality. Canon cameras deliver crisp, clear videos in full HD or even 4K, which helps your content stand out.

    Next, their reliable autofocus ensures you stay in focus while you move around. This is important when you are recording yourself and need to make sure your face remains sharp and clear.

    Additionally, Canon cameras are often lightweight and portable, making them perfect for vloggers who need to record on the go. Many Canon models also come with a flip-out screen, allowing you to see yourself while recording, making framing your shots easier.

    Finally, ease of use is a key advantage. Canon cameras have intuitive menus and settings, so you don’t have to be a tech expert to create high-quality videos.

    Which Canon camera is good for vlogging

    Canon EOS M50 Mark II (Perfect for Versatile Vlogging)

    The Canon EOS M50 Mark II is often hailed as one of the best cameras for vlogging, and it’s easy to see why. This camera combines a variety of features that make it perfect for content creators. It can shoot in 4K resolution, giving your videos a professional look, and even though the 4K mode has a slight crop, the image quality is still top-notch.

    The M50 Mark II is a great choice because it balances high-quality video with ease of use. The autofocus, flip-out screen, and portability make it a go-to for vloggers who want professional results without being weighed down by complex equipment.

    Canon PowerShot G7 X Mark III (Compact Powerhouse for On-the-Go Vlogging)

    The Canon PowerShot G7 X Mark III is a popular choice for vloggers who prioritize portability. It’s compact enough to carry in your pocket, making it ideal for travel or vlogging on the go. Despite its small size, this camera packs a punch with 4K video capabilities and a 20.1 MP sensor, ensuring high-quality footage every time.

    The Canon PowerShot G7 X Mark III is the perfect option for vloggers who need a camera that is portable yet powerful. The combination of 4K recording, no-crop video, and excellent low-light performance makes it a great choice for vloggers who want high-quality content without carrying bulky gear.

    Canon EOS R50 (A Step Up for Quality Vlogging)

    If you’re looking for a camera that offers more advanced features, the Canon EOS R50 is an excellent choice. This mirrorless camera delivers high-end video quality with a 24.2 MP sensor and 4K video capabilities. Unlike some cameras that crop when recording in 4K, the EOS R50 lets you record 4K video without cropping, giving you the full frame to work with.

    The EOS R50 is ideal for vloggers who want professional-level video quality without the bulk of a DSLR. Its ability to record uncropped 4K video, combined with its advanced autofocus system, makes it a great option for creators who want the highest quality video and sound.

    Canon EOS Rebel SL3 (EOS 250D)

    For vloggers who prefer using a DSLR but don’t want the bulk that often comes with it, the Canon EOS Rebel SL3 (also known as the EOS 250D) is an excellent option. It is the world’s lightest DSLR with a vari-angle screen, making it easier to handle for long-form vlogging sessions.

    This camera delivers 4K video quality with a 24.1 MP sensor, ensuring sharp and vibrant footage. The Dual Pixel Autofocus keeps your subject in focus, whether you’re filming yourself or capturing action shots. It also features a long battery life, which is perfect for vloggers who record for extended periods without needing to recharge.

    The Canon EOS Rebel SL3 offers the best of both worlds: the high-quality video and image performance of a DSLR with the portability and ease of use needed for vlogging. If you’re looking for a reliable, lightweight DSLR for creating long-form vlogs or tutorials, this camera is a solid choice.

    Canon EOS RP (Affordable Full-Frame Quality for Serious Vloggers)

    The Canon EOS RP is a great option for vloggers who want full-frame quality without breaking the bank. Full-frame sensors are known for capturing more light, which results in better video quality, especially in low-light situations. The 26.2 MP full-frame sensor of the EOS RP provides stunning video and photo quality that will make your vlogs look professional.

    The Canon EOS RP is perfect for vloggers who want the superior image quality of a full-frame camera without the hefty price tag. It’s a great option for those looking to step up their video production and achieve a more professional look.

    What to Look for in a Vlogging Camera

    Now that we’ve mentioned Which Canon Camera is Good for Vlogging, let’s go ahead and explore what to look for. When choosing a Canon camera for vlogging, here are some key features to consider:

    • Video Quality: High resolution (Full HD or 4K) ensures your vlogs look sharp and professional.
    • Autofocus: Fast and reliable autofocus is important for keeping your face in focus as you move around.
    • Flip-Out Screen: A vari-angle or tilting screen allows you to see yourself while recording, ensuring your shot is framed correctly.
    • Portability: Compact cameras are great for vloggers who are always on the go.
    • External Mic Input: Good audio is just as important as video quality, so being able to use an external microphone can greatly improve your vlogs.
    • Battery Life: Long battery life is crucial for vloggers who film long sessions without breaks.

    Conclusion

    When it comes to vlogging, Canon offers a wide range of cameras that can suit different styles and needs. Whether you need a compact camera like the Canon PowerShot G7 X Mark III or something more advanced like the Canon EOS R50, there’s a Canon camera for every vlogger.

    Focus on what’s most important for your content whether it’s portability, video quality, or ease of use, and pick the camera that fits your needs. Whichever Canon camera you choose, having the right gear will help you create engaging, high-quality vlogs that your audience will love!

    We hope with this piece you now know Which Canon Camera is Good for Vlogging.

    CHECK THESE OUT:

  • How to Turn on Airpod Max without Case

    How to Turn on Airpod Max without Case

    AirPods Max doesn’t have a traditional power button, making the process of turning them on slightly different from other headphones. Here’s a detailed guide on how to use your AirPods Max without their case and ensure they’re functioning properly.

    How to Turn on Airpod Max without Case

    How to Turn on AirPods Max Without the Case

    Unlike most wireless headphones, the AirPods Max doesn’t have a power button. Instead, the headphones manage power automatically. They are designed to enter a low-power mode when placed in their Smart Case.

    However, if you don’t have the case with you, there are still ways to ensure your AirPods Max are active and ready to use.

    Step 1: Take Them Out of Standby Mode

    Your AirPods Max will automatically go into standby mode after a period of inactivity if they aren’t placed in their case. If you want to use them without the case, simply pick them up and place them on your head. The built-in sensors will detect motion and adjust accordingly. As soon as you put them on, the headphones will activate and connect to your device.

    If the headphones were recently used, the wake-up process should happen almost instantly when you put them back on.

    Step 2: Manual Connection (Without the Case)

    If the automatic connection doesn’t happen or you’re using them for the first time without the case, you can connect them manually:

    1. Open Bluetooth settings on your iPhone or other device.
    2. Find “AirPods Max” in the list of available devices.
    3. Tap to connect.

    The AirPods Max will immediately turn on once they start the Bluetooth pairing process.

    Step 3: Ensure Enough Battery Life

    If you plan to use the AirPods Max without their case, make sure they have sufficient battery life. You can check the remaining battery by going to the Control Center on your paired iPhone and locating the battery widget. If the battery is low, use the provided Lightning to USB-C cable to charge your headphones.

    Step 4: Using Siri to Control

    To make things easier without constantly relying on the case, you can enable Siri. Just say “Hey Siri” to control volume, play music, or check battery life without needing to take out your phone. This can make it simpler to manage the AirPods Max while using them without the case.

    Step 5: Place in Idle Mode When Not in Use

    Even though there’s no power button, the AirPods Max will automatically enter an ultra-low-power mode if left idle for an extended period. If you don’t have the Smart Case, make sure to place them in a safe location where they can remain undisturbed to conserve battery.

    Final Thoughts

    Turning on the AirPods Max without their case is straightforward thanks to their automatic power management. Simply placing them on your head should activate them, but always ensure you have sufficient battery and are familiar with the Bluetooth connection settings. While the Smart Case is helpful for maintaining battery efficiency, your AirPods Max can still function perfectly without it.

    Also Check:

  • LG 55 Inch OLED EVO TV Review: A Smart TV with Stunning Visuals

    LG 55 Inch OLED EVO TV Review: A Smart TV with Stunning Visuals

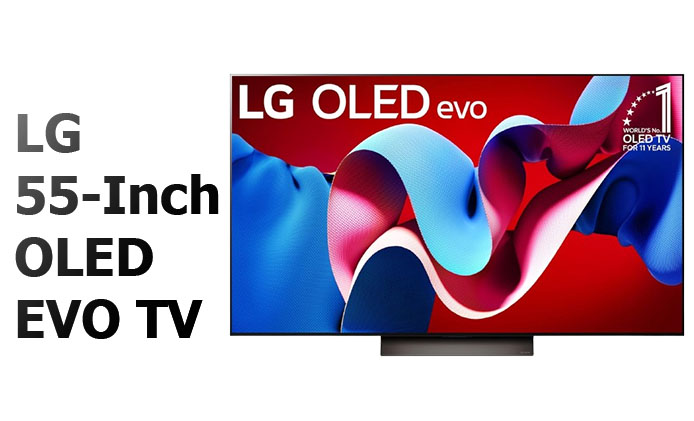
    The LG 55 Inch OLED EVO TV is easily one of the most impressive TVs I’ve tested this year. Right out of the box, it offers a sleek, modern design, and the display quality is jaw-dropping. The 4K OLED panel with over 8 million self-lit pixels creates deep, rich blacks and vibrant colors that are second to none. The visual clarity is outstanding whether you’re streaming movies or playing the latest games.

    LG 55-Inch OLED EVO TV

    Picture Quality

    At the heart of this TV is LG’s OLED technology, which uses over 8 million self-lit pixels to create deep blacks and vibrant colors. The Brightness Booster adds an extra layer of brilliance, enhancing individual pixels for crisp, radiant images. Whether you’re watching an action-packed blockbuster or a quiet, dark scene, the picture remains consistently clear and detailed.

    Adding to the immersive experience are Dolby Vision and Dolby Atmos, which elevate both visual and audio quality. The Filmmaker Mode ensures that movies look exactly how directors intended, with no extra filters or unnatural enhancements.

    Performance

    The a9 AI Processor Gen7 is the brains behind the display, using advanced algorithms to upscale content and deliver smooth, vivid visuals. It doesn’t matter if you’re watching live sports, movies, or even older content—the AI upscaling does a fantastic job of improving picture quality across the board.

    For gamers, the 144 Hz refresh rate and 0.1ms response time make the C4 Series a dream. Paired with NVIDIA G-Sync, AMD FreeSync Premium, and VRR (Variable Refresh Rate), this TV ensures that fast-paced games run without stutter or screen tearing. The Game Dashboard and Game Optimizer give you control over your settings, making sure you get the best gaming performance possible.

    Smart Features

    With Alexa built-in, controlling the TV is as simple as speaking. I found the voice control feature responsive and convenient, especially for adjusting volume, changing inputs, or starting apps like Disney Plus or Netflix. LG’s webOS interface continues to be one of the best in the market, offering quick navigation and a wide range of apps. What I love most is the webOS Re program, which guarantees feature updates for five years. It’s a reassuring addition that makes this investment future-proof.

    Design and Connectivity

    This TV looks just as good off as it does on. The slim, minimalist design makes it a stylish addition to any living room. With four HDMI 2.1 inputs, you can easily connect your gaming consoles, sound bars, and other devices without hassle. It also supports Bluetooth, Wi-Fi, and Ethernet, ensuring smooth connectivity for all your smart devices.

    Conclusion

    At around $1,300, the LG 55 Inch OLED evo C4 offers a stunning combination of superior picture quality, gaming performance, and smart TV features. Whether you’re a movie buff, a gamer, or just looking for a premium TV, this TV stands tall as one of the best 55-inch options on the market today.

    Also Check


  • TCL 75 Inch 4K Smart TV Review: 6 Smart Features That Make it a Bargain at $599.99

    TCL 75 Inch 4K Smart TV Review: 6 Smart Features That Make it a Bargain at $599.99

    Are you looking to elevate your home entertainment setup, the TCL 75 4K Smart TV might be just what you need. Here’s why this TV deserves your attention.
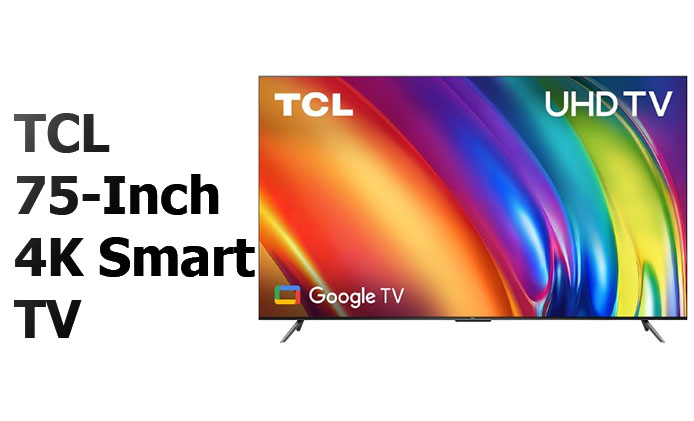
    TCL 75-Inch 4K Smart TV

    Stunning 4K Clarity and QLED Brilliance

    The TCL 75 inch 4K Smart TV brings a visual feast to your living room with its 4K Ultra HD resolution. That’s four times the detail of Full HD, making every scene sharp and vibrant. Thanks to Quantum Dot Technology, the QLED display produces rich, accurate colors that truly bring your favorite movies and shows to life. With High Brightness+ LED backlight, expect brighter images even in well-lit rooms.

    Advanced HDR for Superior Picture Quality

    This model is packed with HDR PRO+ technology, supporting Dolby Vision, HDR10+, HDR10, and HLG. These formats enhance contrast and color accuracy, ensuring you catch every detail, from the darkest shadows to the brightest highlights. Whether you’re watching a dark thriller or a colorful action movie, the picture quality remains top-notch.

    Fire TV Integration for Ultimate Convenience

    The TCL 75 Inch 4K Smart TV integrates seamlessly with Fire TV, putting all your entertainment options in one place. Stream over 1 million movies and TV episodes, or access live TV and video games with ease. The intuitive interface and voice remote make navigation simple and straightforward. You can even control the TV with Alexa, thanks to built-in voice control.

    Exceptional Motion Clarity and Gaming Performance

    For gamers, this TV offers a Motion Rate 240 with MEMC Frame Insertion. This combination reduces motion blur, making fast-paced scenes look smooth and clear. Game Accelerator 120 and Auto Game Mode (ALLM) ensure a responsive gaming experience with minimal lag, keeping you ahead of the competition.

    Immersive Dolby Atmos Audio

    Sound quality is just as impressive as the visuals. Dolby Atmos provides advanced spatial audio processing, enhancing the depth and clarity of sound in movies, TV shows, and games. Enhanced Dialogue Mode further improves speech clarity, ensuring you never miss a word.

    Convenient Features and Connectivity

    The TCL 75 Inch 4K Smart TV doesn’t just excel in picture and sound. It comes with useful features like a sleep timer, game mode, and wide color enhancer. Connectivity options include Bluetooth, Wi-Fi, USB, and HDMI, giving you plenty of ways to connect your devices.

    Conclusion

    For $599.99, With its impressive 4K resolution, vibrant QLED display, advanced HDR, and top-notch audio, the TCL 75 Inch Class Q65 QLED 4K Smart TV is a standout choice for anyone looking to enhance their home entertainment experience. It combines high-quality visuals and sound with convenient features, making it a great addition to any living room.

    Also Check


  • Insignia 32 Inch F20 Smart HD Fire TV: Affordable Full HD Performance with Smart Features

    Insignia 32 Inch F20 Smart HD Fire TV: Affordable Full HD Performance with Smart Features

    Are you looking for a reliable, affordable TV with smart features? The Insignia 32 Inch F20 Smart HD Fire TV might just be your perfect match, This model offers solid performance with its vibrant resolution and intuitive smart functions. Here’s why this model stands out.

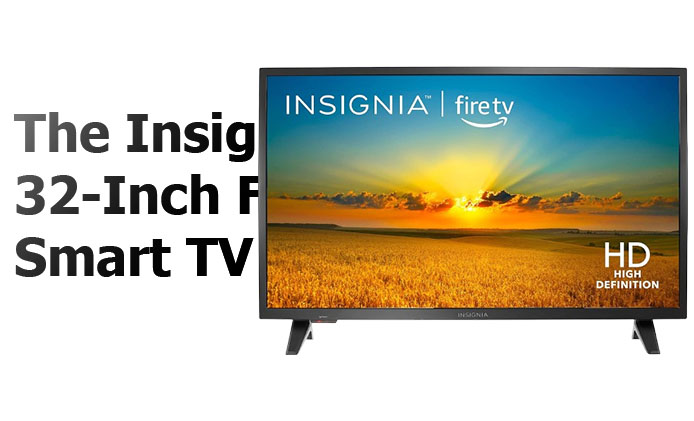
    The Insignia 32-Inch F20 Smart HD Fire TV

    Picture Quality and Features

    The Insignia F20 offers a 720p HD resolution, ensuring your favorite movies and shows come to life with crisp, clear detail. For a 32-inch screen, this resolution strikes a great balance between quality and affordability.

    One of the standout features is the Alexa Voice Remote. With this, controlling your TV is as simple as talking to your assistant. Just press and hold the voice button, and you can search for content, switch inputs, or control playback—all without lifting a finger. This voice control extends to finding shows, launching apps, and even managing smart home devices.

    Fire TV Experience Built-In

    The Insignia F20 is powered by Fire TV, giving you access to over 1 million streaming movies and TV episodes. From Netflix and Prime Video to Hulu and HBO Max, the TV integrates seamlessly with popular streaming services. This means you can dive into your favorite content with minimal hassle.

    Apple AirPlay Support

    Apple users will appreciate the built-in AirPlay support, which allows you to effortlessly share videos, photos, and music from your Apple device directly to your TV. This feature makes it easy to enjoy content from your iPhone or iPad on a larger screen.

    Enhanced Connectivity

    The TV features HDMI ARC, which simplifies your audio setup. By sending audio directly from the HDMI jack to a compatible soundbar or AV receiver, you can enjoy enhanced sound quality without needing an extra cable.

    Dimensions and Design

    With a compact size of 32 inches, the Insignia F20 fits comfortably into most living spaces. Its slim profile and sleek design make it a stylish addition to any room. It comes with a stand, but you also have the option to mount it on the wall if that suits your setup better.

    Conclusion

    The Insignia 32 Inch F20 HD Fire TV offers a blend of high-definition quality, intuitive voice control, and extensive streaming options. Whether you’re upgrading your TV experience or simply looking for an affordable smart TV, this model delivers impressive features at a great price.

    Also Check


  • Hands-On with the Honor Magic V3: Here’s What Surprised Me

    Hands-On with the Honor Magic V3: Here’s What Surprised Me

    Foldable phones are having a moment in the tech world, and the Honor Magic V3 is the latest contender in this evolving landscape. When I first laid hands on this device, I was instantly struck by its design and overall feel. I had high expectations going in, but what I discovered over the course of my time with it was a mix of pleasant surprises and a few trade-offs.

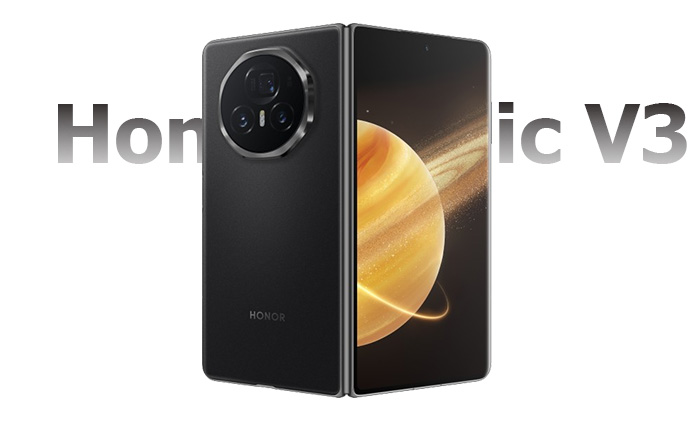
    Hands-On with the Honor Magic V3

    Here’s a deep dive into the Honor Magic V3, covering everything from the design to camera performance, and what it’s like to use a foldable phone in everyday life.

    Key Takeaway Pros Cons
    First impressions Sleek, ultra-thin design Durability concerns due to slimness
    Performance Powerful Snapdragon 8 Gen 2 chipset Minor software glitches
    Camera Excellent low-light performance Limited zoom quality


    Design and Build Quality: A Game Changer?

    One of the standout features of the Honor Magic V3 is its remarkably slim profile. When folded, it measures just 10.1 mm, which is a significant improvement compared to bulkier foldables like the Samsung Galaxy Fold series. The sleek aluminum frame and glass front not only give it a premium feel but also make it one of the most compact foldable devices on the market.

    From a usability standpoint, this thinness makes it more comfortable to hold and use as a regular smartphone when folded. However, the slim design raises questions about durability, which brings me to the next point.

    Durability Concerns: Is the Thinness a Trade-Off?

    While the ultra-thin design is undoubtedly impressive, I couldn’t help but worry about its durability. Foldable phones, by nature, come with mechanical complexity, especially in the hinge. The Magic V3’s hinge mechanism feels solid, but there’s always that lingering concern—how many folds can it take before the hinge starts showing signs of wear?

    According to Honor, the Magic V3 is rated for over 200,000 folds, which should last most users a couple of years, but only time will tell how it fares with heavy daily use. The thin design also means there’s less room for reinforcement, making the device more susceptible to damage if dropped. For those who prioritize durability over aesthetics, this might be something to consider.

    Design Facts Honor Magic V3 Samsung Galaxy Z Fold 5
    Folded Thickness 10.1 mm 13.4 mm
    Weight 262 g 263 g
    Hinge Durability 200,000 folds 200,000 folds


    Display: How Does It Stack Up?

    The Honor Magic V3 boasts a 6.45-inch external display, making it quite usable as a regular smartphone when folded. The OLED panel offers a 120Hz refresh rate, which makes navigating and scrolling buttery smooth. The colors are vibrant, and with a brightness of up to 1200 nits, I had no trouble using the external display even under direct sunlight.

    Unfolded Experience: Stunning or Subpar?

    Unfolding the Magic V3 reveals a 7.92-inch internal OLED display, and this is where the phone truly shines. The larger screen is perfect for multitasking, watching videos, or gaming. The 90Hz refresh rate on the internal display provides a slightly less fluid experience compared to the outer screen, but it’s still impressive for a foldable device.

    One thing that surprised me was how seamless the display felt once unfolded. There is a visible crease where the phone folds, but it’s hardly noticeable during everyday use. Whether I was binge-watching a series or working with multiple apps, the larger screen made everything more immersive.

    Display Features External Display Internal Display
    Size 6.45 inches 7.92 inches
    Refresh Rate 120Hz 90Hz
    Max Brightness 1200 nits 1000 nits


    Performance: Does It Live Up to the Hype?

    Powered by the Qualcomm Snapdragon 8 Gen 2 chipset, the Honor Magic V3 is no slouch when it comes to performance. With up to 12GB of RAM and 512GB of storage, the device handled everything I threw at it, from demanding games to heavy multitasking. Apps launched quickly, and switching between them was a breeze.

    Gaming and Multitasking

    One of my favorite use cases for the Magic V3 was gaming. I tested it with Genshin Impact and Call of Duty Mobile, and the performance was smooth, even on the highest settings. The phone didn’t overheat, which was a pleasant surprise given its slim design.

    Multitasking was another area where the Magic V3 excelled. The large unfolded screen allowed me to run two apps side by side without feeling cramped. Whether I was browsing the web while watching a video or chatting on one app while working on another, the experience was seamless.

    Performance Benchmark Honor Magic V3
    Geekbench 5 Single-Core 1250
    Geekbench 5 Multi-Core 4350


    All-Day Battery or Charging Anxiety?

    The Honor Magic V3 packs a 5000 mAh battery, and during my hands-on experience, it comfortably lasted a full day with moderate use. I spent a lot of time using the larger internal screen for streaming and multitasking, and while that consumed more battery, I still managed to end the day with around 15% remaining.

    Charging Speed: Faster Than Competitors?

    Charging the Magic V3 is fast thanks to its 66W wired charging. It took about 45 minutes to go from 0 to 100%, which is impressive. This is definitely faster than many other foldables currently on the market.

    MagicOS 7.2: A Seamless Experience?

    Running on MagicOS 7.2, the Honor Magic V3 offers a highly customized Android experience. The interface is clean and modern, but I did encounter some occasional bugs, particularly with app scaling on the larger internal display. Most apps ran fine, but a few had issues transitioning between the external and internal screens.

    Fold-Specific Features

    Honor has clearly optimized the software for foldable functionality. Features like split-screen multitasking and drag-and-drop between apps work beautifully. However, there were still a few apps that didn’t fully take advantage of the larger screen, a common issue among foldable phones.

    Triple Camera Setup

    The Honor Magic V3 comes equipped with a 50 MP main camera, a 20 MP telephoto lens, and a 12 MP ultra-wide lens. The camera performance is solid, especially in low-light conditions, where the Night Mode really shines. The ultra-wide camera produces vibrant and sharp images, though I found the telephoto lens lacking in quality compared to other flagships.

    Real-World Camera Tests

    In real-world tests, I was impressed by the color accuracy and dynamic range of the photos. The portrait mode also delivered excellent results, with a natural-looking background blur. Video recording at 4K 60fps was smooth, and the built-in stabilization worked well even when shooting handheld.

    Final Thoughts: Should You Buy the Honor Magic V3?

    After spending a month with the Honor Magic V3, I can confidently say that it’s one of the most compelling foldable devices on the market. The thin design, stunning display, and strong performance make it a serious contender for anyone considering a foldable phone. However, the durability concerns and occasional software bugs are worth noting.

    Also Check: