Blog

  • GoPro Hero 13: My Hands-On Review After Real-World Testing

    GoPro Hero 13: My Hands-On Review After Real-World Testing

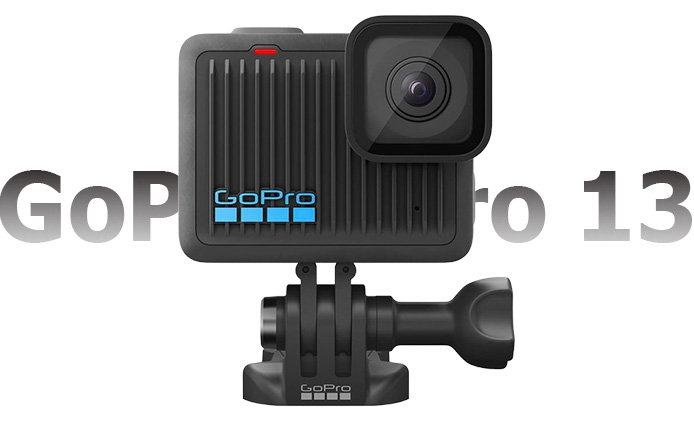
    When the GoPro Hero 13 hit the market, I knew I had to get my hands on it. After using it extensively for a month in a variety of scenarios—everything from action-packed adventures to everyday life—I’m excited to share my experience with the latest GoPro model. In this in-depth review, I’ll break down the performance, features, and where this camera excels (and where it falls short).

    GoPro Hero 13: My Hands-On Review After Real-World Testing

    Whether you’re a casual content creator or a professional videographer, this review will give you everything you need to know about the GoPro Hero 13.

    Key Takeaways

    Feature My Verdict
    Video Quality Outstanding 8K video, sharp and fluid footage.
    Battery Life Improved but still room for optimization.
    Stabilization HyperSmooth 6.0 sets a new industry standard.
    User Interface Intuitive, but there’s a slight learning curve for new users.
    Low-Light Performance Much better, but could still be improved.
    Price Premium, but justifiable for professionals.

    First Impressions of the GoPro Hero 13

    From the moment I unboxed the GoPro Hero 13, it was clear that GoPro had upped the ante. The sleek, robust design feels durable in hand, and the new ultra-tough chassis is designed for action. The standout on the spec sheet is the 8K resolution—a first for the series—paired with HyperSmooth 6.0 stabilization.

    This model also has upgraded low-light performance, something I was keen to test. The camera feels lighter than the previous model but has a sturdier build, making it an excellent companion for those tough, rugged conditions that GoPro is known for.

    What’s in the Box?

    • GoPro Hero 13 Camera
    • Rechargeable Battery
    • USB-C Charging Cable
    • Mounting Accessories
    • Instruction Manual

    The package includes all the essentials for quick setup, with mounts that are compatible with most gear.

    Design and Build Quality

    One of the first things I noticed was the rugged yet compact design. The GoPro Hero 13 feels incredibly solid with an enhanced weatherproofing feature, capable of withstanding submersion up to 40 meters without a case.

    The rear 2.8-inch touchscreen has been improved, with quicker response times, while the front-facing screen makes it easier to vlog or shoot selfies. It’s incredibly durable and now offers better shock resistance thanks to GoPro’s latest body design. While the layout is largely familiar, GoPro has made several subtle improvements that make a difference in real-world use.

    Key Design Features:

    • Ultra-tough chassis: Built to handle extreme conditions.
    • Larger touchscreen: For more intuitive control.
    • Dual displays: Ideal for both recording and monitoring.

    Video and Photo Performance

    This is where the GoPro Hero 13 truly shines. The 8K resolution at 60fps is a game-changer. The level of detail is astonishing, whether you’re filming a mountain bike descent or a peaceful sunset.

    8K Video Resolution

    The 8K video quality is crisp and vibrant, with 60 frames per second offering ultra-smooth motion capture. Compared to the GoPro Hero 12, the color accuracy and sharpness have taken a notable leap. I found that this is especially noticeable in fast-paced environments where every frame counts, like sports or wildlife photography.

    Key Video Specs:

    • 8K at 60fps: Smooth, lifelike video in high motion settings.
    • 4K at 120fps: Perfect for slow-motion shots without losing quality.
    • HDR support: Enhanced color depth and dynamic range.

    HyperSmooth 6.0 Stabilization

    GoPro’s HyperSmooth 6.0 stabilization technology is another major highlight. While I was filming a snowboarding session, the footage remained incredibly stable despite rapid, jarring movements. Whether you’re running, biking, or surfing, HyperSmooth 6.0 keeps your footage rock steady.

    Photo Quality

    As for stills, the 23MP sensor delivers impressive shots. The new AI-enhanced photo mode automatically adjusts the settings based on the environment, making it perfect for snapping high-quality images without fiddling with manual controls.

    Battery Life and Charging

    Battery life is one area where GoPro has made strides, though there’s still room for improvement. The Hero 13 packs a 1720mAh battery, which provides around 2 hours of continuous shooting in 4K. For 8K footage, this drops to about 1 hour 30 minutes, which is expected given the high power consumption.

    Battery Life Breakdown:

    • 8K recording: ~1.5 hours
    • 4K recording: ~2 hours
    • 1080p recording: ~3 hours

    Fast charging is another plus. I found that in about 90 minutes, the battery was fully charged using a standard USB-C fast charger. However, if you’re planning to record long sessions, it’s a good idea to have spare batteries on hand.

    Audio Quality

    Audio quality in action cameras often feels like an afterthought, but the GoPro Hero 13 delivers crisp, clear audio thanks to its dual-mic setup. The wind noise reduction has also been improved significantly. Whether I was filming in windy conditions or during fast-paced action, the sound quality remained impressively clear.

    Key Audio Features:

    • Dual microphone setup for better audio capture.
    • Improved wind noise reduction for clear audio in outdoor conditions.

    Usability and Interface

    The interface of the GoPro Hero 13 is intuitive, but I did notice a slight learning curve for users who are new to GoPro’s ecosystem. The touchscreen is responsive, but navigating through the vast array of settings can feel overwhelming at first.

    For seasoned GoPro users, however, the interface is streamlined and customizable, allowing you to set shortcuts for your most-used modes.

    Noteworthy Usability Features:

    • Voice commands: Activate certain functions hands-free, perfect for when you’re in action.
    • Quik app integration: Seamless pairing with the Quik app for quick editing and sharing.

    Final Verdict: Is the GoPro Hero 13 Worth It?

    After using the GoPro Hero 13 for a month, I’m convinced that it’s one of the best action cameras currently available, especially for professionals and serious enthusiasts. The 8K resolution, HyperSmooth 6.0 stabilization, and improved low-light capabilities make it stand out from the competition. However, it does come at a premium price point, and for casual users, some of the advanced features might be overkill.

    Pros:

    • 8K video and HDR for stunning visuals.
    • HyperSmooth 6.0 for unbeatable stabilization.
    • Solid build quality and enhanced weatherproofing.

    Cons:

    • Battery life could be better, especially in 8K.
    • Slight learning curve for new users.
    • Premium price tag.

    If you’re someone who needs top-tier video quality and is willing to invest in the best technology, the GoPro Hero 13 is a fantastic option. For those looking for a simpler, more budget-friendly camera, the GoPro Hero 12 or even the Hero 11 might still meet your needs without the higher cost.

    Also Check:

  • Samsung 40 Inch LED Smart TV: Affordable Full HD Performance with Smart Features

    Samsung 40 Inch LED Smart TV: Affordable Full HD Performance with Smart Features

    Are you looking for a reliable, affordable TV with smart features? The Samsung 40 inch LED Smart TV could be exactly what you need. This model offers solid performance with its vibrant 1080p resolution, intuitive smart functions, Google Assistant, and seamless Alexa integration.

    Samsung 40-Inch LED Smart TV

    Picture Quality and Features

    For a 40 inch screen, 1080p Full HD resolution offers vibrant visuals that bring movies and shows to life. The addition of PurColor technology means colors pop without looking unnatural, making your viewing experience more immersive. Whether you’re binge-watching your favorite series or catching the latest blockbuster, the Micro Dimming Pro technology helps enhance contrast by analyzing each section of the screen. This makes the darker scenes appear richer and more detailed.

    While 4K is becoming the standard, this TV’s 1080p resolution is more than adequate for most users, especially in smaller spaces where ultra-high resolution may not be as noticeable.

    Smart Features and Connectivity

    One of the standout features of this TV is its smart capabilities. It’s equipped with built-in Alexa, so you can control your TV hands-free or with a simple press of the remote’s voice button. Whether it’s asking Alexa to play music, check the weather, or adjust your smart home devices, the integration is smooth and convenient.

    Additionally, it’s compatible with Google Assistant, so if you’re more of a Google Home user, this TV will fit right into your setup. You can quickly access streaming apps like Hulu and adjust settings using voice commands, making your entertainment experience smoother.

    Design and Usability

    The design is slim and minimalist, with dimensions of 36.3” x 20.9” x 2.9” without the stand, so it won’t dominate your room. It’s VESA wall-mount compatible, and for those preferring a stand, the included mini wall mount and standard stand give you flexible placement options.

    At around $235, this TV is an excellent option for budget-conscious buyers who don’t want to sacrifice quality. You also get Samsung’s Eco Sensor feature, which adjusts the brightness of the screen based on the room’s lighting, helping save energy over time.

    Conclusion

    At just around $235, the Samsung 40 inch Class LED Smart FHD TV is a fantastic deal for anyone in the market for a budget-friendly TV with solid features. Its Full HD resolution, smart capabilities, and compatibility with voice assistants make it a versatile option. While it may not have the advanced picture quality of more expensive models, for the price, you’re getting an excellent balance of performance and functionality.

    Also Check


  • My First Month with the DJI Neo: The Good, the Bad, and Everything In-Between

    My First Month with the DJI Neo: The Good, the Bad, and Everything In-Between

    After a month of using the DJI Neo, I have formed a clear understanding of its strengths and weaknesses. In this article, I’ll walk you through everything I’ve experienced, from the good that impressed me to the bad that left me wanting more.

    My First Month with the DJI Neo: The Good, the Bad, and Everything In-Between

    Whether you’re a content creator or a casual drone flyer, I hope this hands-on review gives you insights into whether the DJI Neo is the right drone for you.

    Key Takeaways:

    • The 4K camera and stabilization features make this drone a great choice for capturing high-quality footage.
    • Ease of use and pre-programmed modes make it accessible for beginners and casual users.
    • Portability makes it a travel-friendly option.
    • Consider the battery life and range limitations when planning longer or urban flights.

    DJI Neo hands-on: Why the DJI Neo Stood Out 

    The DJI Neo is marketed as an innovative, compact drone designed for both beginners and experienced drone enthusiasts. Known for its advanced camera, easy handling, and impressive flight range, this drone promised to take my content creation game to the next level. But like any new tech gadget, it’s always important to see how it fares in real-world usage. Here’s my breakdown after spending a full month with it.

    The Good: What Makes the DJI Neo Shine

    1. Camera Quality

    The DJI Neo’s camera is perhaps one of the most impressive features of the drone. With 4K video resolution and 48 MP still images, the drone’s image-capturing abilities stand out. In my experience, the Neo delivered stunning, crisp shots that rivaled high-end cameras.

    • Color Accuracy: The Neo captures vibrant colors, and the built-in HDR (High Dynamic Range) adds a new level of depth to each frame. Whether shooting during sunrise or sunset, the exposure settings auto-adjusted seamlessly, creating cinematic results.
    • Advanced Stabilization: Another standout is the gimbal stabilization. Even in slightly windy conditions, the footage remained smooth with minimal jitter.

    2. Ease of Use

    One of the reasons I gravitated towards the DJI Neo is the emphasis on ease of use. While some drones can be intimidating for newcomers, the Neo’s simple interface and intuitive controls made flying a breeze after a couple of test flights.

    • Pre-programmed Flight Modes: I loved the Neo’s quick shot modes like “Circle” and “Rocket,” which automate the flight paths, making it easier to capture cinematic footage without extensive drone-flying experience.
    • Smart Features: Features like Return to Home (RTH) and Obstacle Avoidance further enhance usability. The obstacle avoidance sensors did a great job, keeping me out of trouble during tricky flight conditions.

    3. Compact and Portable

    Portability is one of the biggest selling points of the DJI Neo. With a lightweight design and foldable arms, I found it incredibly easy to take with me on hikes, travels, and spontaneous adventures.

    • Lightweight Design: Weighing less than 250 grams, it doesn’t even require registration in some regions (like the US). That’s a huge perk for casual flyers like me who don’t want the hassle of filing paperwork.
    • Compact Size: It easily fits into a backpack without taking up much room, making it an ideal companion for travel bloggers or anyone who needs a portable drone on the go.

    The Bad: Where the DJI Neo Fell Short

    1. Battery Life

    While the DJI Neo’s battery life is advertised at 30 minutes, I found that in real-world conditions—especially with wind or constant video recording—it lasted closer to 22-25 minutes per charge. This could be a slight disappointment if you’re planning extended shooting sessions.

    • Solution: Investing in an extra battery is highly recommended. Having a backup allowed me to swap out and keep flying without any downtime.

    2. Limited Range in Urban Areas

    The flight range for the DJI Neo is solid, especially in open areas, but I noticed that in urban environments, the range was slightly restricted due to interference. Obstacles like tall buildings and trees occasionally disrupted the signal, forcing me to fly at closer distances than I would have preferred.

    3. Learning Curve

    Though the drone is user-friendly, there is still a learning curve for beginners. I had to spend a few hours practicing take-offs, landings, and mastering the controls, especially in manual modes.

    • Pro Tip: If you’re new to drones, I’d recommend starting in beginner mode, which limits speed and flight altitude, providing a safer learning environment.

    Performance Breakdown: How the DJI Neo Compares to Other Drones

    Here’s how the DJI Neo performed in comparison to other drones I’ve used:

    Feature DJI Neo DJI Mini 3 Pro Skydio 2+
    Camera 4K, 48MP 4K, 60FPS 12MP
    Flight Range 10km 12km 7km
    Battery Life 25-30 minutes 34 minutes 24 minutes
    Portability Super compact Compact Medium
    Price Affordable Mid-range Expensive


    My Verdict After One Month with the DJI Neo

    After a month of testing, the DJI Neo impressed me with its camera quality, ease of use, and portability. It offers fantastic value for creators on a budget or those looking for a portable, high-quality drone. However, the battery life and urban range limitations are something to consider.

    If you’re a travel enthusiast or content creator looking for a compact drone that delivers great footage, the DJI Neo could be a perfect fit. Just make sure to have a backup battery handy and avoid flying in dense urban areas where signal interference might become an issue.

    In conclusion, My First Month with the DJI Neo: The Good, the Bad, and Everything In-Between gave me an in-depth understanding of how well this drone performs, and I would recommend it to anyone in the market for a lightweight, versatile drone.

    Also Check:

  • Here’s What I Learned After Using the Hisense E6N Smart TV for a Month

    Here’s What I Learned After Using the Hisense E6N Smart TV for a Month

    Smart TVs have become an essential part of modern homes, offering not just traditional TV viewing but also smart features that blend streaming, gaming, and more. One model that has caught the attention of many is the Hisense E6N Smart TV. After a month of using this TV, I’m sharing my experience and insights to help you decide whether it’s the right fit for your home.

    Here’s What I Learned After Using the Hisense E6N Smart TV for a Month

    Hisense E6N Smart TV Review

    In this article, we will dive into the key features, picture quality, performance, sound, and overall value of the Hisense E6N Smart TV. Along the way, I’ll highlight my personal experience, what worked well, and areas where it might fall short. Let’s get into it!

    Key Takeaways

    Feature Rating (out of 5)
    Picture Quality 4.5
    Sound Quality 3.5
    Smart Platform 4.0
    Gaming Performance 4.0
    Overall Value 4.5


    Key Features of the Hisense E6N Smart TV

    The Hisense E6N Smart TV is packed with features aimed at enhancing the viewing experience. Here’s a breakdown of its key specifications and what you can expect from each:

    1. 4K UHD Resolution

    One of the most impressive aspects of the Hisense E6N is its 4K UHD resolution, providing a sharp and detailed picture quality. The difference between standard HD and 4K is noticeable, especially when watching high-resolution content like Netflix or Disney+. The 3840 x 2160 pixel count offers four times the resolution of Full HD, delivering greater clarity and texture.

    2. HDR Support

    With High Dynamic Range (HDR) support, colors appear more vibrant, and the contrast between light and dark areas is much more pronounced. This feature is especially noticeable when watching visually stunning movies or series. The E6N supports HDR10 and HLG (Hybrid Log-Gamma), which improves color depth and enhances the dynamic range in supported content.

    3. VIDAA U5 Smart Platform

    The Hisense E6N comes with the VIDAA U5 operating system, which is intuitive and easy to navigate. It provides access to a wide range of apps such as Netflix, YouTube, Amazon Prime, and more. What I appreciated most is the fast response and minimal lag when switching between apps. Additionally, it has customizable home screen settings, making it user-friendly.

    Picture Quality: Is 4K Really That Good?

    After a month of watching various content on the Hisense E6N Smart TV, I found the 4K resolution and HDR to significantly enhance the viewing experience. Here’s what stood out:

    Vibrancy and Clarity

    The TV’s 4K resolution ensures that even minute details in images are crisp and clear. When I streamed 4K content, the difference in quality was night and day compared to older Full HD models. Nature documentaries, high-action movies, and even animated films looked stunning.

    HDR Performance

    The HDR support is another game changer. While watching shows like Stranger Things and The Mandalorian, I noticed the deeper blacks and brighter highlights. The contrast between shadows and bright areas was impressive, especially in scenes with low lighting or stark contrasts. However, I did notice that the TV struggled slightly with extremely dark scenes, as they sometimes appeared slightly washed out.

    Performance and User Experience

    When it comes to everyday usage, the Hisense E6N Smart TV delivered consistent performance. Let’s break down how it handled common tasks and how the interface worked over time.

    Operating System and Speed

    The VIDAA U5 platform was a pleasant surprise. It’s lightweight and quick to load apps, unlike some other smart TVs that tend to lag. Over the month, I didn’t encounter any significant slowdowns, and switching between streaming services or inputs was seamless. There’s minimal bloatware, which is a big plus, allowing me to focus on the essential apps I use regularly.

    Gaming Performance

    While I didn’t use this TV extensively for gaming, I did hook up a PlayStation 5 for a few sessions. The Hisense E6N managed to handle 4K gaming well, with no noticeable input lag or screen tearing. If you’re a casual gamer or someone who uses a console for entertainment, this TV should suffice for non-competitive gaming.

    Connectivity and Ports

    The E6N has all the necessary ports, including HDMI 2.1, which is vital for connecting gaming consoles or 4K Blu-ray players. The Wi-Fi connection remained stable throughout the month, even when streaming high-definition content. I appreciated the Bluetooth connectivity, which allowed me to pair my soundbar without extra wires cluttering the space.

    Sound Quality: Does It Match the Picture?

    Sound is often overlooked when reviewing TVs, but it plays a critical role in the overall experience. The Hisense E6N Smart TV comes equipped with Dolby Audio and DTS Virtual:X, and here’s how it performed:

    Clarity and Volume

    The sound quality was sufficient for everyday viewing, with clear dialogue and decent bass. However, for an immersive movie experience, I did feel the need to connect an external sound system. Without one, the TV’s built-in speakers can feel somewhat lacking in depth, especially in action-heavy scenes.

    Audio Enhancements

    DTS Virtual:X did a good job of simulating surround sound, which is ideal if you don’t have external speakers. However, don’t expect it to replace a full-fledged home theater system.

    Value for Money: Is It Worth It?

    The biggest question when purchasing a smart TV is whether it offers value for money. The Hisense E6N stands out in the mid-range category, offering several premium features at an affordable price.

    Pricing and Competition

    Compared to other brands in the same price range, such as TCL or Samsung, the Hisense E6N holds its own. It offers 4K resolution, HDR, and a decent smart platform for a competitive price. It’s an excellent choice for those who want high-end features without paying premium prices.

    Pros and Cons List

    Here’s a quick overview of the pros and cons:

    Pros:

    • Excellent 4K resolution
    • Vibrant HDR support
    • Smooth and responsive VIDAA U5 platform
    • Competitive Pricing
    • Good gaming performance

    Cons:

    • Built-in speakers could be better
    • Struggles with extremely dark scenes in HDR mode
    • Limited app selection compared to Android TVs

    Final Thoughts: Would I Recommend the Hisense E6N Smart TV?

    Here’s what I learned after using the Hisense E6N Smart TV for a month: It’s a solid performer for its price. With 4K UHD, HDR, and a responsive smart platform, it’s hard to beat the value it offers in the mid-range segment. While it may not match the audio and deep black levels of higher-end models, it’s more than capable of delivering an excellent viewing experience, especially for the price-conscious consumer.

    If you’re looking for a budget-friendly 4K TV with a well-rounded feature set, the Hisense E6N Smart TV is a strong contender worth considering.

    Would I recommend it? Yes, especially if you’re looking for a feature-rich TV at a reasonable price.

    Also Check:

  • How to Jailbreak Amazon Fire Stick: Step-by-Step Guide

    How to Jailbreak Amazon Fire Stick: Step-by-Step Guide

    The Amazon Fire Stick has become a popular streaming device for its affordability and ease of use. However, many users find themselves wanting more from their Fire Stick, which is where jailbreaking comes in. Jailbreaking your Amazon Fire Stick opens up a world of possibilities, allowing you to access a vast array of content beyond what’s available in the Amazon App Store. This comprehensive guide will walk you through the process of how to jailbreak the Amazon Fire Stick, exploring the benefits, risks, and step-by-step instructions to unlock your device’s full potential.

    How to Jailbreak Amazon Fire Stick


    Key Takeaways

    Aspect Details
    Purpose Unlock access to third-party apps and content
    Legality Legal, but streaming copyrighted content isn’t
    Main Method Using Downloader app to install Kodi
    Alternative Method Using ES File Explorer (paid option)
    Essential Add-ons Kodi, Cinema APK, Cyberflix TV
    Safety Measure Always use a VPN (e.g., ExpressVPN)
    Performance Boost Consider using Real-Debrid service

    What is Fire Stick Jailbreaking?

    Jailbreaking an Amazon Fire Stick is the process of removing the manufacturer’s restrictions to install third-party applications not available in the official Amazon App Store. It’s important to note that jailbreaking a Fire Stick is not the same as rooting an Android device or jailbreaking an iPhone. The process doesn’t involve modifying the Fire Stick’s operating system; instead, it simply allows the installation of apps from unknown sources.

    Benefits of Jailbreaking Your Fire Stick

    1. Access to a wider range of streaming apps
    2. Ability to install Kodi and its numerous add-ons
    3. Free access to movies, TV shows, live TV, and sports content
    4. Customization options for your Fire Stick interface
    5. Potential cost savings on streaming subscriptions

    While jailbreaking your Fire Stick is legal, it’s crucial to understand the potential legal implications of streaming copyrighted content. This guide is for educational purposes only, and we strongly advise users to stream only content that is in the public domain or for which they have proper rights.

    “Jailbreaking your Fire Stick doesn’t give you the right to access copyrighted content without permission. Always ensure you’re streaming legally.” – Digital Rights Expert

    Preparing to Jailbreak Your Amazon Fire Stick

    Before diving into the jailbreaking process, it’s essential to gather the necessary materials and understand the risks involved. Here’s what you’ll need:

    1. Amazon Fire Stick device (any model)
    2. TV with an HDMI port
    3. Stable internet connection
    4. Amazon account

    Understanding Risks and Precautions

    While jailbreaking your Fire Stick can enhance your streaming experience, it’s not without risks. Some potential issues include:

    • Voiding your device warranty
    • Increased vulnerability to malware
    • Potential for unstable performance

    To mitigate these risks, always download apps from reputable sources and use a VPN to protect your privacy and security.

    Enabling Necessary Settings on Fire Stick

    Before you can jailbreak your Amazon Fire Stick, you need to enable certain settings:

    1. Navigate to Settings > My Fire TV > Developer Options
    2. Enable “Apps from Unknown Sources”
    3. (Optional) Enable “ADB Debugging”

    How to Jailbreak Amazon Fire Stick: Step-by-Step Guide

    Now that you’ve prepared your Fire Stick, let’s dive into the jailbreaking process. We’ll cover two methods: using the Downloader app (the preferred method) and using ES File Explorer (an alternative method).

    Method 1: Using Downloader App

    The Downloader app is the most straightforward way to jailbreak your Amazon Fire Stick. Here’s how to do it:

    1. Install Downloader:
      • From the Fire Stick home screen, go to the search function and type “Downloader”
      • Select and install the Downloader app
    2. Configure Downloader:
      • Open the Downloader app
      • Allow it to access your device’s files when prompted
    3. Download and Install Kodi:
      • In the Downloader app, enter the following URL: firesticktricks.com/kapk
      • Wait for the Kodi APK to download
      • Click “Install” when prompted
      • Once installed, click “Open” to launch Kodi

    Congratulations! You’ve now jailbroken your Amazon Fire Stick using the Downloader method.

    Method 2: Using ES File Explorer (Alternative Method)

    If the Downloader app isn’t available in your region, you can use ES File Explorer as an alternative. However, note that this method now requires a paid subscription:

    1. Install ES File Explorer:
      • Search for “ES File Explorer” in the Amazon App Store
      • Download and install the app
    2. Download and Install Kodi:
      • Open ES File Explorer and select the “Downloader” option
      • Enter the URL: https://www.firesticktricks.com/kapk
      • Download the Kodi APK file
      • Once downloaded, click “Open file” and then “Install”

    Setting Up Kodi on Your Jailbroken Fire Stick

    Now that you’ve installed Kodi, it’s time to set it up and install some popular add-ons to enhance your streaming experience.

    Kodi Interface Overview

    Kodi’s interface may seem overwhelming at first, but it’s quite intuitive once you get used to it. The main menu includes sections for Movies, TV Shows, Music, and Add-ons. To get the most out of Kodi, you’ll want to install some add-ons.

    Here are some of the most popular Kodi add-ons and how to install them:

    1. The Crew:
      • Go to Settings > File Manager > Add Source
      • Enter https://team-crew.github.io as the source URL
      • Name it “crew”
      • Return to the home screen, go to Add-ons > Install from zip file
      • Select “crew” and install the repository
      • Then go to Install from repository > The Crew > Video add-ons
      • Install The Crew add-on
    2. Shadow:
      • Follow a similar process, using the URL https://shadow.deeptho.me/
    3. Asgard:
      • Use the URL https://asgardrepo.github.io/

    Installing Kodi Builds (Optional)

    Kodi builds can provide a pre-configured setup with multiple add-ons and a custom interface. Here’s how to install the popular Crew Wizard Build:

    1. Install The Crew repository as described above
    2. Go to Program add-ons and install The Crew Wizard
    3. Run the wizard and select your preferred build

    Installing Additional Jailbreak Apps

    While Kodi is powerful, there are other great apps you can install on your jailbroken Fire Stick for an even better streaming experience.

    Cinema APK

    Cinema APK is a popular app for streaming movies and TV shows:

    1. Open Downloader and enter firesticktricks.com/cinema
    2. Download and install the APK
    3. Open Cinema APK and start exploring content

    Cyberflix TV

    Cyberflix TV is another excellent option for on-demand content:

    1. In Downloader, enter firesticktricks.com/cf
    2. Install the APK and open the app

    Live TV and Sports Apps

    For live TV and sports, consider installing apps like Live NetTV or HD Streamz using similar methods as above.

    Enhancing Your Jailbroken Fire Stick

    To get the most out of your jailbroken Amazon Fire Stick, consider these additional enhancements:

    Installing a VPN for Privacy and Security

    A VPN is crucial for protecting your privacy when using a jailbroken Fire Stick. ExpressVPN is highly recommended:

    1. Search for ExpressVPN in the Amazon App Store
    2. Install and open the app
    3. Sign in and connect to a server

    Using Real-Debrid for Improved Streaming Quality

    Real-Debrid is a premium link generator that can significantly improve your streaming quality:

    1. Sign up for a Real-Debrid account on their website
    2. In Kodi or other streaming apps, look for Real-Debrid integration in the settings
    3. Authorize your account using the provided code

    Installing Aptoide TV for Additional Apps

    Aptoide TV is an alternative app store with many apps not available on the Amazon App Store:

    1. In Downloader, enter firesticktricks.com/store
    2. Install and open Aptoide TV
    3. Browse and install additional apps

    Best Practices and Tips

    To keep your jailbroken Fire Stick running smoothly:

    • Regularly update your apps and add-ons
    • Clear cache and unnecessary files to free up space
    • Use a VPN consistently for privacy and security
    • Be cautious about the sources of your content and apps

    Conclusion

    Jailbreaking your Amazon Fire Stick opens up a world of streaming possibilities, but it’s important to use this power responsibly. Always respect copyright laws and use a VPN to protect your privacy. With the right setup and precautions, your jailbroken Fire Stick can provide endless entertainment at your fingertips.

    Remember, the world of streaming is constantly evolving, so stay informed about the latest apps, add-ons, and best practices to make the most of your jailbroken Amazon Fire Stick.

    Also Check:

  • The Raycon Fitness Headphones: Delivering Incredible Sound and Comfort

    The Raycon Fitness Headphones: Delivering Incredible Sound and Comfort

    If you’re in the market for over-ear headphones that combine comfort, advanced features, and great sound quality without breaking the bank, the Raycon Fitness Headphones should be at the top of your list. Priced at just $89.99 (a 25% discount off the original $119.99), these headphones pack a punch with features that make them a standout choice in the sub-$100 category.

    The Raycon Fitness Headphones

    Design and Comfort

    Raycon has nailed it with the design of these headphones. Available in sleek black, they come with three quick-swap ear cushions, ensuring a fit so comfortable you’ll forget you’re wearing them. The cushions are not only breathable but also quick-drying, making them perfect for long listening sessions, whether you’re at the gym or just relaxing at home.

    Sound Quality and Features

    The Raycon Fitness Headphones offer an immersive audio experience, thanks to their Active Noise Cancellation (ANC) feature. ANC effectively tunes out external distractions, allowing you to focus on your music or podcast. When you need to stay aware of your surroundings, simply switch to Awareness Mode—it’s a great balance between isolation and environmental awareness.

    Convenience at Your Fingertips

    These headphones are more than just about sound. With voice command compatibility (Siri and Google Assistant), you can control your music, make calls, or send messages without ever needing to reach for your phone. The built-in microphone system is another highlight, featuring five microphones that ensure your voice comes through crystal clear on calls.

    Multipoint Connection

    One of the standout features is the multipoint connection, allowing you to connect to two devices simultaneously. Whether you’re toggling between your laptop for work calls and your smartphone for music, Raycon makes it seamless and efficient.

    Durability and Battery Life

    Built for an active lifestyle, these headphones come with IPX4 water resistance, meaning they can handle sweat and light rain without any issues. Plus, with a whopping 45 hours of battery life, they’ll last through even the longest workouts or travel days.

    Conclusion

    For under $90, the Raycon Fitness Headphones offer a blend of comfort, functionality, and audio performance that’s hard to beat. Whether you’re working out, working from home, or just unwinding, these headphones provide everything you need in a sleek, well-designed package. If you’re looking for quality wireless over-ear headphones without the premium price tag, Raycon has delivered exactly that.

    Also Check:

  • I Tried These New Noise-Cancelling Headphones—Now I’m Tempted to Buy Another Pair

    I Tried These New Noise-Cancelling Headphones—Now I’m Tempted to Buy Another Pair

    When it comes to noise-cancelling headphones, finding the perfect balance of sound quality, comfort, and value can feel like a daunting task. I took on the challenge and tested six pairs that have been making waves recently, and here’s what I discovered.

    I Tried These New Noise-Cancelling Headphones—Now I’m Tempted to Buy Another Pair

    Falebare Wireless Bluetooth Headphones

    Price: $49.99 (38% off, with an additional 45% coupon)

    The Falebare Wireless Bluetooth Headphones surprised me with their impressive 80-hour playtime with ANC off and 60 hours with ANC on—perfect for long trips. The premium ANC technology effectively blocks out surrounding noise, making them ideal for environments with constant background noise. With ultra-soft memory foam ear cups and an adjustable headband, they offer a comfortable fit for extended wear. The BT 5.3 technology ensures stable and quick connectivity, whether you’re using them wired or wireless, thanks to the 40mm drivers that deliver superior sound quality.

    BERIBES Bluetooth Headphones

    Price: $26.99 (25% off)

    For those looking for a budget-friendly option without compromising on quality, the BERIBES Bluetooth Headphones stand out. They offer a solid 65 hours of playtime and feature 6 EQ music modes, allowing you to tailor the sound to different genres. The lightweight design and soft memory protein earmuffs provide all-day comfort, while Bluetooth 5.3 ensures a quick pairing and stable connection, even with dual-device support. These headphones are perfect for audiophiles who want versatile sound options at a great price.

    KVIDIO Bluetooth Headphones

    Price: $26.99 (7% off)

    KVIDIO Bluetooth Headphones are another excellent choice for everyday use, especially for students and travelers. With a battery life of up to 65 hours and quick charging capabilities, you’ll never have to worry about running out of juice. The 40mm drivers and noise isolation technology offer a stereo sound experience that’s clear and immersive. The soft memory-protein foam earmuffs and lightweight build ensure comfort during long listening sessions. They’re also widely compatible with both Bluetooth and 3.5mm plug cables.

    Cleer Audio Enduro ANC Headphones

    Price: $99.99 (23% off)

    If you’re looking for a premium experience, the Cleer Audio Enduro ANC Headphones might be just what you need. With a 60-hour battery life and quick charging for 3 hours of use, they’re built for long-lasting performance. The advanced ANC technology provides immersive sound, blocking out unwanted noise effectively. These headphones also feature multipoint connection, allowing you to seamlessly switch between two Bluetooth devices. With Qualcomm cVc microphones, they offer crystal-clear call quality, making them ideal for professionals who need a reliable and immersive audio experience.

    T-fun NC50 Hybrid ANC Headphones

    Price: $49.99 (17% off)

    The T-fun NC50 Hybrid ANC Headphones bring a unique combination of active noise cancellation with passive isolation. The hybrid ANC ensures that you’re fully immersed in your music, while the transparency mode allows you to stay aware of your surroundings when needed. The headphones come with smart app control, allowing you to customize the sound profile via the T-fun app. Additionally, the low-latency game mode is perfect for gamers, video conferences, and watching TV. If you’re into gaming or need customizable audio, these headphones are a fantastic choice.

    Avantree Aria 3 ANC Headphones

    Price: $69.99 (13% off)

    Rounding out the list, the Avantree Aria 3 ANC Headphones are designed to block out unwanted noise with their active noise cancellation technology. The 40mm drivers deliver supreme sound with a wide range and deep bass. With up to 55 hours of battery life, they offer extended playtime, ideal for long workdays or travel. The dual connectivity feature allows you to connect two devices simultaneously, which is great for multitaskers who switch between their phone and computer frequently. These headphones are ideal for users seeking high-clarity audio and long battery life.

    Final Thoughts

    Each of these noise-cancelling headphones offers a unique set of features, catering to different needs and preferences. Whether you’re looking for long battery life, superior sound quality, or advanced noise-cancelling technology, there’s something for everyone. Choose the pair that best matches your requirements and budget, and you’ll be set for a quiet, immersive listening experience.

    Also Check:

  • The AirPods Max 2 is here, But is it the Headphone you Really Want?

    The AirPods Max 2 is here, But is it the Headphone you Really Want?

    Apple’s AirPods Max 2 has been creating a buzz as the next step forward in premium over-ear headphones. After multiple rounds of testing, it’s clear that Apple has invested heavily in refining an already stellar design with several key improvements. But is it the best noise-canceling headphone available? Here’s what we found after putting the AirPods Max 2 through its paces.

    The AirPods Max 2 is here, But is it the Headphone you Really Want?

    AirPods Max 2: Is It the Headphone You Want?

    The AirPods Max 2 has sparked plenty of excitement in the audio world, but is it the headphone you’ve been waiting for? We took these premium headphones for a spin, testing their sound quality, design, comfort, and features. Here’s what we discovered.

    Design and Comfort: Premium Aesthetic with Enhanced Comfort

    Apple has always been known for its attention to detail, and the AirPods Max 2 are no exception. The aluminum ear cups, stainless-steel frame, and breathable mesh canopy continue to provide that luxurious feel, but with some subtle upgrades.

    This version boasts a lighter frame and redesigned memory foam ear cups for improved comfort during long listening sessions. The weight is still noticeable, but it’s been fine-tuned for better balance.

    Audio Performance: Top-Tier Sound Quality

    Sound quality remains the star of the show. Apple has upgraded its drivers and integrated a new custom-built H2 chip, which significantly boosts the sound processing capabilities. The AirPods Max 2 delivers a rich, full-bodied sound with deep bass, crystal-clear highs, and well-balanced mids.

    Whether you’re listening to classical symphonies or bass-heavy tracks, the sound is immersive, detailed, and refined.

    One standout feature is the Personalized Spatial Audio. Apple continues to innovate here, with improved head-tracking technology that creates a surround-sound effect, whether you’re watching a movie or listening to music. This makes for an ultra-immersive experience, especially when paired with Dolby Atmos content.

    Noise Cancellation: Impressive Performance in All Settings

    Active Noise Cancellation (ANC) has been revamped with the AirPods Max 2. Using upgraded microphones and advanced computational algorithms, the headphones are highly effective in blocking out environmental noise.

    Whether you’re on a plane or in a noisy office, the ANC does an exceptional job of canceling external sounds, making your audio experience truly uninterrupted.

    For those moments when you need to stay alert, the Transparency Mode lets in just enough ambient sound to keep you aware of your surroundings without removing the headphones.

    Battery Life: Longer Usage Time with Fast Charging

    Battery life has always been a key feature for over-ear headphones, and Apple has made sure the AirPods Max 2 holds its own in this regard.

    You’ll get around 24 hours of playback time with both ANC and spatial audio enabled, which is an improvement over the previous model. And thanks to fast charging, you can get 1.5 hours of use from just a 10-minute charge.

    Connectivity: Seamless Across Devices

    As with other Apple products, the AirPods Max 2 excels in device connectivity. Pairing with Apple devices is effortless, thanks to the H2 chip, and switching between devices linked to the same iCloud account is seamless. Whether you’re moving between your iPhone, iPad, or MacBook, the transition is smooth.

    The headphones also support Bluetooth 5.3, making them compatible with non-Apple devices, though some premium features like Spatial Audio are reserved for Apple’s ecosystem.

    Conclusion: Is It Worth the Upgrade?

    The AirPods Max 2 impresses in every department, from design and comfort to sound quality and noise cancellation. The introduction of enhanced spatial audio, longer battery life, and improved comfort makes this an attractive upgrade, especially for those embedded in the Apple ecosystem.

    However, with a premium price tag still attached, this upgrade might be best suited for audiophiles and Apple fans looking for the ultimate listening experience.

    Also Check:

  • The iPhone 16 Pro is Here—But Should You Upgrade?

    The iPhone 16 Pro is Here—But Should You Upgrade?

    Apple’s iPhone 16 Pro has arrived, packed with impressive features that make it a standout in the smartphone market. But the big question remains: Is it worth upgrading from your current iPhone? Let’s break down what’s new and whether it justifies the leap.
    The iPhone 16 Pro is Here—But Should You Upgrade?

    Design: Subtle Refinements with a Premium Feel

    The iPhone 16 Pro brings subtle yet notable changes to its design. Apple has retained the sleek, minimalist aesthetic that fans love but introduced a new titanium frame. This not only adds durability but also makes the phone lighter, making it feel premium and sturdy in hand. The 6.9-inch Super Retina XDR OLED display also offers more screen real estate with thinner bezels, enhancing the viewing experience without making the phone overly bulky.

    For users who value a modern, lightweight device with a refined look, this design upgrade might be a reason to consider switching. However, for those already using an iPhone 15 Pro, the design changes may not feel drastic enough to justify the upgrade.

    Display: A Visual Delight

    The display of the iPhone 16 Pro is one of its biggest highlights. With up to 2050 nits of brightness, the screen is incredibly vibrant and easy to read, even in bright sunlight. The ProMotion technology returns with 120Hz refresh rate, ensuring smooth scrolling and gameplay, which makes the display feel fast and responsive. HDR content is stunning, with enhanced contrast and more vivid colors.

    While the display upgrade is significant, it’s more of an incremental improvement over the iPhone 15 Pro. If you’re already satisfied with your current display, this might not be enough to persuade you to upgrade.

    A18 Pro Chip: Unrivaled Power and Speed

    The iPhone 16 Pro is powered by the latest A18 Pro chip, built on a 3nm architecture, offering a massive leap in performance and efficiency. Multitasking is seamless, and demanding apps, including mobile gaming and video editing, run without a hitch. The AI-enhanced processing also brings smarter camera features and faster on-device tasks, making everyday actions feel snappier.

    If you rely on your phone for high-performance tasks or plan to use new AI-driven features, the A18 Pro could be the game-changer. However, casual users who mainly browse social media or stream videos may not notice the performance leap in daily use.

    Camera System: Professional-Grade Photography

    Apple has upgraded the camera system significantly. The 48MP main sensor delivers sharper, more detailed photos, while the 5x optical zoom offers even greater flexibility for photography, especially for those who love taking close-ups or long-distance shots. Night photography also sees improvements, with advanced low-light performance that captures more detail in dark environments.

    For avid photographers, these camera upgrades could be a strong reason to upgrade. If you take a lot of photos and videos, the new features in the iPhone 16 Pro will likely enhance your experience. But if you’re content with the current camera performance on your iPhone 15 or older models, these changes might feel incremental.

    Battery Life: Incremental Improvements

    Apple promises up to 24 hours of battery life with moderate use, thanks to the efficiency of the A18 Pro chip. While this is an improvement over previous models, the difference is marginal. For power users who rely on their phone throughout the day, the faster-charging capabilities (50% charge in just 30 minutes) might be more enticing than the slightly extended battery life.

    However, if battery performance on your current iPhone is already sufficient, this might not be a compelling reason to upgrade.

    iOS 18: Enhanced Software Features

    The iPhone 16 Pro ships with iOS 18, which introduces several new features, such as widgets on the home screen, enhanced privacy tools, and deeper AI integration. The new operating system feels more intuitive, with greater personalization options and improved functionality.

    Yet, most of these features are backward-compatible with older models, meaning you won’t miss out on iOS 18’s best elements even if you don’t upgrade to the iPhone 16 Pro.

    Should You Upgrade?

    The iPhone 16 Pro brings several enticing upgrades, from the robust A18 Pro chip to camera enhancements and a gorgeous display. If you’re a power user or a photography enthusiast, these features could make a tangible difference in your everyday experience. However, for casual users with an iPhone 14 or 15 Pro, the improvements might not feel revolutionary enough to justify the upgrade.

    Ultimately, it comes down to your specific needs. If cutting-edge performance, professional-grade photography, and a sleeker design are must-haves for you, the iPhone 16 Pro is worth the investment. If you’re content with your current device and don’t require the latest and greatest, you might want to hold off until the next significant leap in innovation.

    Also Check:

  • Everything the iPhone 16 Improves, and Where It Falls Short

    Everything the iPhone 16 Improves, and Where It Falls Short

    The iPhone 16 is Apple’s latest flagship, bringing several impressive upgrades, but not without a few shortcomings. Let’s dive into what it gets right and where it still lags.

    Everything the iPhone 16 Improves, and Where It Falls Short


    Design and Display: Sleeker, Brighter, and Bigger

    Apple has subtly refined the design with the iPhone 16, offering a larger 6.9-inch Super Retina XDR OLED display. The screen-to-body ratio is even better, making the phone look modern and immersive. The Ceramic Shield glass remains, but the body is now encased in a titanium frame for enhanced durability. With up to 2050 nits of brightness, the iPhone 16 Pro models shine even under direct sunlight, making outdoor use more practical.

    However, despite these refinements, some may argue that the design changes are minor and don’t represent a revolutionary leap. While the titanium frame is stronger and lighter, it’s not something that drastically changes the everyday user experience.

    Performance: A18 Pro Chip Powering the Future

    One of the standout improvements is the new A18 Pro chip, which delivers faster speeds and more efficient energy consumption. The 3nm architecture allows the iPhone 16 to handle complex tasks like gaming, video editing, and AI-powered processes with ease. Multitasking is smoother than ever, and the phone runs significantly cooler even under heavy usage.

    That said, while the A18 chip is undoubtedly powerful, many users will not notice the drastic differences in day-to-day tasks compared to its predecessor, the A17. The improvements are there, but mostly in demanding applications, making it feel like a premium upgrade only for power users.

    Camera System: Enhanced Features, Familiar Setup

    Apple has significantly improved the camera on the iPhone 16 series. The 48MP triple-lens setup now includes advanced telephoto zoom with 5x optical zoom, making it easier to take clear, detailed shots from a distance. The low-light capabilities have also been enhanced, with Night Mode now sharper and more natural.

    However, some users may feel that the overall camera experience hasn’t evolved as dramatically as expected. While the improvements are appreciated, those coming from the iPhone 14 or 15 may not notice an immediate, massive difference in everyday photography.

    Battery Life: Good, but Not Game-Changing

    Apple has extended the battery life on the iPhone 16, offering up to 24 hours of regular use, thanks to the more efficient A18 chip. The fast-charging feature allows you to charge up to 50% in 30 minutes, which remains a convenient addition.

    But despite the more efficient processor, the battery capacity hasn’t seen a huge upgrade. Heavy users may still need to charge by the end of the day, especially with extensive use of high-performance apps, video recording, or gaming.

    iOS 18: Smarter and More Intuitive

    The iPhone 16 comes preloaded with iOS 18, which introduces several new features. From enhanced widgets and better privacy tools to AI-driven suggestions, the software feels smarter and more personalized than ever before. Apple’s continued push toward privacy and security makes iOS 18 one of the safest operating systems available.

    Where iOS 18 falls short is that many of its new features—such as widget enhancements or privacy updates—are available on previous iPhones too. While iOS 18 feels polished, it’s not exclusive enough to make a huge difference for iPhone 16 users versus those on older models.

    Colors: Aesthetic Appeal with Fresh Choices

    The iPhone 16 lineup introduces new, elegant color options, including Black Titanium, White Titanium, Natural Titanium, and Blue Titanium. These colors offer a polished, premium feel that aligns with Apple’s signature design ethos.

    While these new shades are stunning, the color options are fairly muted compared to some Android competitors, which offer a broader range of bold, eye-catching colors.

    Conclusion: Is the iPhone 16 Worth the Upgrade?

    The iPhone 16 brings meaningful upgrades in design, performance, and photography while maintaining Apple’s reputation for durability and elegance. The A18 Pro chip ensures future-proofing, while the enhanced camera features and iOS 18 offer a better overall user experience. However, those with recent models like the iPhone 15 may find the improvements less transformative than expected, making this an essential buy mostly for those upgrading from older phones.

    In summary, the iPhone 16 is an impressive, refined device, but it may feel like more of a luxury for power users than a must-have for everyone.

    Also Check: