Author: Martin Goodnews

  • Casper Hybrid Pillow with Snow Technology

    Casper Hybrid Pillow with Snow Technology

    The Casper Hybrid Pillow with Snow Technology is a revolutionary product designed to enhance your sleep experience.

    Pillow

    Combining innovative cooling features with exceptional support and comfort, this pillow promises to be a game-changer for hot and cold sleepers.

    In this comprehensive review, we’ll dive into the design, materials, performance, and overall value of the Casper Hybrid Pillow to help you determine if it’s the right addition to your bedroom. So read through it and follow the procedures outlined carefully.

    Key Takeaways

    • Innovative Cooling Technology: The pillow features Casper’s patented Snow Technology, including AirScape foam and HeatDelete Bands.
    • Comfort and Support: Suitable for various sleep positions, with a mid-loft design for optimal neck and head alignment.
    • User Feedback: Highly rated for its cooling effect and support, though some users find it too thick.
    • Value for Money: Competitively priced for its features, with options to save by purchasing multiple pillows.

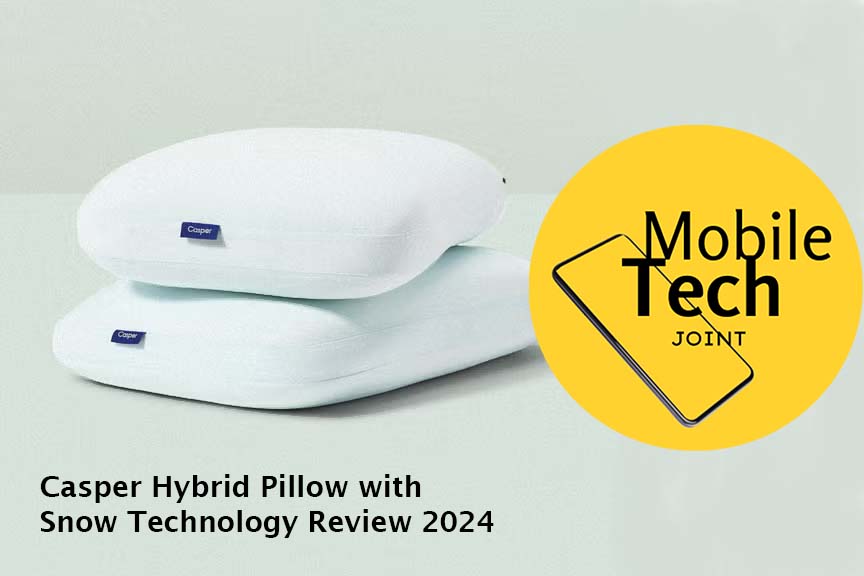
    Casper Hybrid Pillow with Snow Technology Review 2024

    This Pillow showcases a thoughtful design that marries the benefits of foam and fiber for an unparalleled sleep experience.

    This hybrid construction consists of a layer of AirScape foam for breathability, paired with HeatDelete Bands to ensure consistent cooling throughout the night. The outer CoolTouch cover adds to the cooling effect, making the pillow feel as though it has been chilled.

    Detailed Design Features

    • AirScape Foam: Enhances breathability and airflow, reducing heat retention.
    • HeatDelete Bands: Actively remove excess heat, maintaining a cooler sleep surface.
    • CoolTouch Cover: A pale blue cover that feels cool to the touch, adding to the overall cooling effect.
    • Mid-Loft Shape and 2-Inch Gusset: Provides balanced support for different sleep positions.

    Available in Standard (18” x 26”) and King (18” x 34”) sizes, the Casper Hybrid Pillow offers options to fit various bed sizes and personal preferences.

    Comfort and Support

    When it comes to comfort and support, the Casper Hybrid Pillow with Snow Technology excels in catering to different sleep positions. Whether you’re a side, back, or stomach sleeper, this pillow provides the right amount of support to ensure proper neck and head alignment.

    Comfort Levels for Different Sleep Positions

    • Side Sleepers: The mid-loft design helps keep the spine aligned, reducing pressure on the neck and shoulders.
    • Back Sleepers: Offers firm yet comfortable support, preventing the head from sinking too deep.
    • Stomach Sleepers: Although some might find it too thick, the pillow’s softness accommodates a more comfortable sleep posture.

    The dense foam core prevents clumping, so you won’t need to fluff the pillow back up during the night or in the morning. This consistency in shape and support contributes significantly to a restful sleep.

    Cooling Technology

    One of the standout features of the Casper Hybrid Pillow is its Snow Technology. This advanced cooling system ensures that the pillow stays cool to the touch all night, making it an excellent choice for hot sleepers.

    How Snow Technology Works

    • AirScape Foam: Enhances airflow, allowing heat to escape rather than being trapped.
    • HeatDelete Bands: Strategically placed to absorb and dissipate excess heat.
    • CoolTouch Cover: Adds an immediate cool feeling when you lie down, enhancing initial comfort.

    Reviewers have noted that even in warm environments, the pillow’s cooling technology effectively prevents night sweats and maintains a comfortable temperature throughout the night.

    Ease of Use and Maintenance

    Setting up the Casper Hybrid Pillow is straightforward. It arrives rolled up in an airtight plastic wrapping, and once freed, it quickly expands to its full shape. Despite its density and weight, the pillow remains soft and comfortable.

    Maintenance Tips

    • Durability: The pillow retains its shape well over time without the need for regular fluffing.
    • Washable Cover: The removable cover is machine washable, making it easy to keep the pillow clean and fresh.

    This ease of use and maintenance adds to the pillow’s appeal, particularly for those who value convenience and long-lasting quality.

    Performance in Different Sleep Conditions

    The Casper Hybrid Pillow with Snow Technology performs admirably across a range of sleep conditions. Its temperature regulation capabilities are particularly noteworthy, making it suitable for both warm and cool environments.

    Performance Highlights

    • Temperature Regulation: Maintains a consistent, cool temperature throughout the night.
    • Support and Comfort: Provides balanced support for various sleep positions, reducing neck and shoulder pain.
    • Firmness and Loft: Offers a perfect blend of firmness and softness, catering to a wide range of sleepers.

    Compared to other pillows on the market, the Casper Hybrid Pillow stands out for its innovative cooling features and robust support.

    User Reviews and Feedback

    Customer feedback is crucial in evaluating the real-world performance of any product. The Casper Hybrid Pillow with Snow Technology has received high ratings on both Amazon and Casper’s website.

    Summary of User Reviews

    • Positive Comments: Many users praise the pillow for its cooling effect, comfort, and support. Comments such as “stays cool all night” and “provides great neck support” are common.
    • Common Complaints: Some users find the pillow too thick or firm, particularly for stomach sleepers.

    Overall Rating: The pillow scores highly for its innovative features and comfort, despite some minor concerns about its loft.

    Price and Value

    The Casper Hybrid Pillow with Snow Technology is priced at $149 for a queen size. While this might seem steep, the pillow’s unique features and benefits justify the investment.

    Price Comparison

    Pillow Price Key Features
    Casper Hybrid Pillow $149 Snow Technology, CoolTouch Cover, AirScape Foam
    Purple Harmony Pillow $159 GelFlex Grid, Talalay Latex, Moisture-Wicking Cover
    Pluto Pillow $110 Customizable Design, Memory Foam, Cooling Cover

    Value for Money

    • Discounts: Buying two pillows offers a 10% discount, making it a more attractive purchase.
    • Longevity: The durable design ensures long-term use, providing good value over time.

    Given its advanced cooling technology and support features, the Casper Hybrid Pillow offers excellent value for money.

    Comparison with Alternatives

    To give you a better perspective, here’s a brief comparison of the Casper Hybrid Pillow with its competitors:

    Purple Harmony Pillow

    • Features: GelFlex Grid and Talalay Latex for cooling and support.
    • Price: Higher at $159.
    • Suitability: Excellent for those needing a more resilient pillow with responsive support.

    Pluto Pillow

    • Features: Customizable design and memory foam.
    • Price: Lower at $110.
    • Suitability: Ideal for those looking for a personalized pillow experience.

    While each pillow has its unique advantages, the Casper Hybrid Pillow stands out for its comprehensive cooling technology and balanced support.

    Recommendation

    If you prioritize cooling technology and consistent support, the Casper Hybrid Pillow is an excellent addition to your sleep setup. Whether you’re a side, back, or even a stomach sleeper, this pillow offers the comfort and support you need for a better night’s rest.

    Conclusion

    In conclusion, the Casper Hybrid Pillow with Snow Technology is a top-tier choice for anyone seeking a cool, comfortable, and supportive pillow.

    Its innovative design, featuring AirScape foam, HeatDelete Bands, and a CoolTouch cover, ensures a restful night’s sleep free from overheating. Though it comes at a premium price, the pillow’s long-lasting quality and advanced features make it a worthwhile investment.

    ALSO CHECK:

  • Galaxy Watch 7 and Ultra Review: Redefining Health Tracking

    Galaxy Watch 7 and Ultra Review: Redefining Health Tracking

    Samsung has once again raised the bar with its latest offerings, the Galaxy Watch 7 and Galaxy Watch Ultra.

    Galaxy Watch

    These new smartwatches bring a host of innovative features, particularly in health tracking and AI-powered insights.

    This comprehensive review will dive deep into what makes these devices stand out in the crowded smartwatch market. Therefore, read through carefully for more insights.

    Key Takeaways:

    • The Galaxy Watch 7 and Ultra both feature Samsung’s new BioActive sensor for improved health tracking
    • AI-powered wellness features provide detailed insights and personalized recommendations
    • Sleep tracking capabilities are significantly enhanced, including FDA-approved sleep apnea detection
    • The Galaxy Watch Ultra offers a more rugged design and extended battery life
    • Both watches run on the latest Wear OS 5 with Samsung’s One UI Watch 6 skin
    • While impressive, some features are exclusive to Galaxy smartphone users

    Design and Build Quality

    Here are some of its basic design and build quality:

    Galaxy Watch 7

    The Galaxy Watch 7 maintains the familiar circular design of its predecessors, available in 40mm and 44mm sizes. It comes in three colors: Green, Silver, and Cream. The watch features:

    • A high-resolution AMOLED touchscreen
    • Two physical buttons on the right side
    • 5 ATM water resistance and IP68 rating
    • Aluminum case construction

    Galaxy Watch Ultra

    The Galaxy Watch Ultra takes a bolder approach with its design:

    • Larger 47mm case size
    • Titanium construction for increased durability
    • 10 ATM water resistance
    • Brighter display (3,000 nits maximum brightness)
    • Additional “Quick button” for enhanced functionality

    While the Ultra’s size may be overwhelming for some users, its rugged build makes it ideal for outdoor enthusiasts and those with more active lifestyles.

    Health and Fitness Tracking

    Both the Galaxy Watch 7 and Ultra shine when it comes to health and fitness tracking, thanks to the new BioActive sensor and AI-powered features.

    BioActive Sensor

    The upgraded BioActive sensor combines:

    • PPG heart rate monitor
    • ECG (electrocardiogram)
    • Blood oxygen (SpO2) sensor
    • Bioelectric impedance analysis (BIA) for body composition

    This all-in-one approach allows for more comprehensive health monitoring without the need for multiple sensors.

    AI-Powered Wellness Features

    Samsung has leveraged artificial intelligence to provide more meaningful insights from the collected data:

    1. Energy Score: Similar to Garmin’s Body Battery or Fitbit’s Readiness Score, this daily metric takes into account sleep quality and recent physical activity.
    2. Sleep Insights: Detailed analysis of sleep patterns, including:
    • Time spent in different sleep stages
    • Blood oxygen levels
    • Skin temperature
    • Snoring detection
    • Body movement
    • Heart rate and respiratory rate
    1. AGEs Index: A unique feature that tracks Advanced Glycation End Products, which can indicate metabolic health and biological aging.
    2. FDA-Approved Sleep Apnea Detection: After two nights of tracking, the watch can detect signs of moderate to severe sleep apnea and recommend further medical analysis if necessary.

    Fitness Tracking

    Both watches offer comprehensive workout tracking capabilities:

    • Built-in GPS with dual-frequency support for improved accuracy
    • Automatic workout detection for common activities
    • Support for over 90 different workout types
    • Real-time heart rate monitoring and zone tracking

    The Galaxy Watch Ultra adds some additional features for more serious athletes:

    • Multisport workout tracking (e.g., triathlons)
    • Race mode for competing against previous times
    • FTP (Functional Threshold Power) test for cycling (requires a separate power meter)

    Software and Performance

    These are the major software and performance:

    Wear OS 5 and One UI Watch 6

    The Galaxy Watch 7 and Ultra are the first smartwatches to launch with Wear OS 5, Google’s latest wearable operating system.

    Samsung overlays this with their One UI Watch 6 skin, providing a familiar experience for Galaxy smartphone users.

    Key software features include:

    • Access to Google Play Store for third-party apps
    • Samsung Pay and Google Wallet support
    • Bixby voice assistant
    • Smartphone notifications and quick replies

    Exynos W1000 Processor

    Both watches are powered by Samsung’s new Exynos W1000 processor, built on a 3nm process. This chip offers:

    • 3x faster CPU performance compared to the previous generation
    • 30% improved power efficiency

    In real-world use, this translates to smoother performance when navigating the interface, launching apps, and using more demanding features.

    Storage and Connectivity

    • 32GB of internal storage (double that of the Galaxy Watch 6)
    • Bluetooth 5.3
    • Wi-Fi (2.4GHz + 5GHz)
    • NFC
    • Optional LTE connectivity

    Battery Life and Charging

    Battery life remains a challenge for feature-packed smartwatches, and the Galaxy Watch 7 and Ultra are no exception:

    Galaxy Watch 7

    • 40mm: 300 mAh battery
    • 44mm: 425 mAh battery
    • Typical usage: ~24 hours with always-on display
    • Power saving mode: Up to 40 hours

    Galaxy Watch Ultra

    • 590 mAh battery
    • Typical usage: 45-47 hours with always-on display
    • Power saving mode: Up to 60 hours (claimed)

    Both watches support fast charging, taking approximately two hours for a full charge.

    Pricing and Availability

    The Galaxy Watch 7 and Ultra are available for pre-order as of July 10, 2024, with general availability starting July 24.

    Model Size Price LTE Option
    Galaxy Watch 7 40mm $299 +$50
    Galaxy Watch 7 44mm $329 +$50
    Galaxy Watch Ultra 47mm $649 Included

    Pros and Cons

    Here are the major pros and cons of the Galaxy Watch 7 and Watch Ultra:

    Galaxy Watch 7 Pros:

    • Comprehensive health tracking features
    • AI-powered wellness insights
    • Familiar and comfortable design
    • More affordable than the Ultra

    Cons:

    • Limited battery life
    • Some features require a Galaxy smartphone

    Galaxy Watch Ultra Pros:

    • Rugged titanium construction
    • Extended battery life
    • Brighter display
    • Additional sports features

    Cons:

    • Bulky design may not suit all wrists
    • Higher price point
    • Limited band options at launch

    Conclusion:

    The Samsung Galaxy Watch 7 and Galaxy Watch Ultra represent significant steps forward in health tracking capabilities for Android smartwatches.

    For most users, the Galaxy Watch 7 offers an excellent balance of features and affordability. Its comprehensive health tracking, including FDA-approved sleep apnea detection, makes it a compelling choice for those focused on wellness.

    However, for those already in the Samsung ecosystem or considering making the switch, the Galaxy Watch 7 and Ultra offer some of the most advanced health tracking features available in a smartwatch today.

    ALSO CHECK:

  • Wacom Intuos Tablet – Tips for Using Your Wacom Intuos

    Wacom Intuos Tablet – Tips for Using Your Wacom Intuos

    The Wacom Intuos Tablet is a digital drawing tablet designed to bring your creative visions to life.

    WACOM

    Whether you’re an aspiring artist, a graphic designer, or simply someone looking to add a touch of creativity to your digital life, Intuos offers a seamless and intuitive experience.

    Therefore, continue reading this blog for more enlightenment on the Wacom Intuos Tablet. So, read through carefully.

    What is a Wacom Intuos Tablet?

    A Wacom Intuos Tablet is a digital drawing pad that connects to your preferred computer. It replaces a traditional mouse or touchpad, providing a more natural and precise way to interact with your device.

    Equipped with a pressure-sensitive pen, the Intuos allows you to draw, sketch, and edit with incredible accuracy and control.

    Benefits of Using a Wacom Intuos

    Here are some of its benefits:

    Precision and Control: The Intuos’ pressure-sensitive pen offers unparalleled accuracy and control, allowing you to create intricate details and subtle nuances in your artwork.

    Natural Feel: The pen-on-tablet experience closely mimics traditional drawing and sketching, making it feel like a natural extension of your hand.

    Ergonomics: Using Wacom Intuos can help reduce hand and wrist strain compared to traditional input devices.

    Versatility: The Intuos is suitable for a wide range of creative applications, from digital painting and illustration to graphic design and photo editing.

    Software Compatibility: The Intuos works seamlessly with popular creative software, ensuring compatibility and smooth workflow.

    Why You Need a Wacom Intuos

    If you’re passionate about art, design, or digital creation, a Wacom Intuos is an essential tool. It empowers you to:

    Express Your Creativity: Unleash your imagination and bring your artistic visions to life with precision and detail.

    Enhance Your Workflow: Streamline your creative process by replacing a mouse with a more intuitive input device.

    Improve Your Skills: The natural feel of the Intuos helps you develop your drawing and digital art skills.

    Explore New Possibilities: Discover new creative avenues and expand your artistic repertoire.

    Achieve Professional Results: Create high-quality artwork and designs that stand out from the crowd.

    Key Features of Wacom Intuos

    Pressure Sensitivity: The pen accurately responds to varying pressure levels, allowing for dynamic line widths and shading.

    Customizable ExpressKeys: Shortcuts can be assigned to frequently used commands for faster workflow.

    Multi-Touch Functionality: Some models offer multi-touch gestures for navigation and zooming.

    Compact Design: The Intuos is portable and easy to store.

    Included Software: Many Intuos models come bundled with creative software to get you started.

    Choosing the Right Wacom Intuos

    Wacom offers a range of Intuos models to suit different needs and budgets. Consider the following factors when choosing:

    Size: Choose a tablet that fits your workspace and preferred working style.

    Pen Pressure Levels: Higher pressure sensitivity offers greater control and nuance.

    ExpressKeys: The number of customizable buttons can impact workflow efficiency.

    Included Software: Some models come with software bundles that may be valuable to you.

    Tips for Using Your Wacom Intuos

    Experiment with Pen Pressure: Explore how different pressure levels affect your artwork.

    Customize ExpressKeys: Assign shortcuts to your most frequently used commands.

    Try Different Pen Angles: Experiment with pen tilt to create various effects.

    Calibrate Your Tablet: Ensure accurate pen input by calibrating your tablet regularly.

    Practice Regularly: Consistent use will help you develop your skills and improve your workflow.

    Conclusion

    The Wacom Intuos is a game-changer for artists, designers, and creative individuals. Its combination of precision, control, and natural feel empowers you to bring your ideas to life with stunning results.

    By understanding the benefits and features of Intuos, you can choose the perfect model to suit your needs and embark on a creative journey.

    Also Check: 11 Best Android Tablets in 2024: The Ultimate Buyer’s Guide

    What is the Difference Between a Wacom Intuos and a Wacom Cintiq?

    While both are digital drawing tablets produced by Wacom, there’s a key distinction. A Wacom Intuos is a pen tablet where you draw on a separate surface and view the results on your computer screen.

    A Wacom Cintiq, on the other hand, is a pen display where you draw directly on the screen itself, providing a more immersive drawing experience.

    Is a Wacom Intuos Suitable for Beginners?

    Absolutely! Wacom Intuos is an excellent choice for beginners. Its user-friendly interface, pressure sensitivity, and often included software make it easy to learn and master digital art.

    Many models come at affordable price points, making it a great starting point for aspiring artists.

    Can I Use a Wacom Intuos for Photo Editing?

    Yes, you can use a Wacom Intuos for photo editing. The precision and control offered by the pen are invaluable for tasks like retouching, masking, and color correction.

    Many professional photo editing software applications offer optimized support for Wacom tablets, enhancing your workflow.

    For more insights on this article, check out these video tips across our social platforms:

    On Instagram

    On TikTok

  • Ulanzi MA09 – Cellphone Selfie Stick

    Ulanzi MA09 – Cellphone Selfie Stick

    It is more than just a selfie stick, it’s a compact, multifunctional tool designed to elevate your photography and videography game. Combining a selfie stick, tripod, and Bluetooth remote control into one convenient package, the MA09 offers exceptional versatility for capturing stunning shots.

    Ulanzi

    Its tripod mode provides stability for group photos, time-lapse videos, and live streaming, and the selfie stick mode extends your reach for self-portraits and wide-angle shots.

    Whether you’re a content creator or simply someone who loves capturing memories, the Ulanzi MA09 is a must-have accessory to enhance your photography and videography skills. However, continue reading this blog for more insight on this valuable tool.

    Key Features of the Ulanzi MA09

    Here are the major key features of this Cellphone Selfie stick:

    Tripod and Selfie Stick: Easily convert between tripod and selfie stick modes to suit your shooting needs.

    Bluetooth Remote: Capture photos and videos wirelessly from a distance, ensuring perfect timing and composition.

    360-Degree Rotation: The adjustable ball head allows you to find the perfect angle for your shots.

    Compact and Portable: Easily fits in your bag for on-the-go adventures.

    Durable Construction: Built to withstand everyday use.

    You would want to consider this device, just knowing its key features.

    Perfect for Content Creators

    Whether you’re a travel blogger, vlogger, or simply an enthusiast who loves capturing memories, the Ulanzi MA09 is a valuable asset. Its tripod mode provides stability for capturing group photos, time-lapse videos, and live streaming.

    As a selfie stick, it extends your reach, allowing you to capture stunning self-portraits and wide-angle shots. The Bluetooth remote ensures you’re always in control, eliminating the need for awkward arm extensions.

    Versatility and Convenience

    One of the standout features of the MA09 is its versatility. It’s compatible with a wide range of smartphones, making it a suitable choice for most users. The compact design and lightweight construction make it easy to carry around, ensuring you’re always ready to capture that perfect moment.

    Conclusion

    The Ulanzi MA09 is a must-have accessory for anyone looking to enhance their photography and videography skills. Its combination of features, affordability, and portability make it a standout choice in the crowded market of selfie sticks and tripods.

    Also Check: How to Use Ulanzi Tripod: Mastering Your Shots

    How Does the Ulanzi MA09 Compare to Other Selfie Sticks?

    It boasts a sturdy construction that sets it apart from many competitors. Its materials feel premium, and it has shown resilience to everyday wear and tear. Users often commend its durability, especially when compared to cheaper alternatives. However, like any product, excessive force can damage it.

    How Effective is the Ulanzi MA09 Bluetooth Remote Control?

    The Bluetooth remote generally offers a satisfactory range for users. It connects reliably and quickly, allowing for convenient photo and video capture. While there might be occasional disconnections in crowded areas with heavy Bluetooth interference, these instances are relatively rare.

    How Stable is the Ulanzi MA09 Tripod Mode?

    The tripod mode provides adequate stability for most shooting conditions. It’s perfect for capturing group photos, time-lapses, and even short video clips.

    What is the Battery Life of the Ulanzi MA09 Bluetooth Remote?

    The battery life of the Bluetooth remote is generally sufficient for a day of casual use. Most users report being able to capture numerous photos and videos without needing to recharge. However, heavy usage, especially with frequent button presses, can drain the battery faster.

    How Does the Ulanzi MA09 Perform for Capturing?

    The Ulanzi MA09 excels at capturing group photos thanks to its extendable length and stable tripod mode from different tests. Users often praise its ability to fit multiple people in the frame. For selfies, the adjustable angle and Bluetooth remote make it a convenient choice.

    For more insights on this article, check out these video tips across our social platforms:

    On Instagram

    On TikTok

  • 10 Things You Can Do with a Wacom Tablet

    10 Things You Can Do with a Wacom Tablet

    Digital artists and creative professionals worldwide rely on Wacom tablets to bring their artistic visions to life.

    10 Things with Wacom

    However, this article will enlighten you on 10 things you can do with a Wacom Tablet to unleash its full potential.

    These versatile tools can revolutionize your creative workflow from graphic design to photo retouching, animation, and beyond. Whether you’re a seasoned digital artist or a newcomer to the world of graphics, there’s something for everyone in this comprehensive guide.

    What is a Wacom Tablet

    A Wacom tablet is a digital drawing pad that allows users to input information into a computer using a stylus. Similar to drawing on paper, users can create images, and sketches, or manipulate digital content directly on the tablet’s surface.

    These tablets are widely used by artists, designers, and other creative professionals due to their precision, pressure sensitivity, and natural feel. Wacom is a leading brand in this technology, offering a range of tablets to suit different needs and budgets.

    10 Things You Can Do with a Wacom Tablet

    Here are the various things you can do with a Wacom tablet:

    • Artistic Pursuits

    These are what the Wacom Tablets are mostly made for. They can be used for drawing, sketching, painting, or creating illustrations.

    • Graphic Designs

    Designers love Wacom tablets for their ability to create intricate designs with ease. Whether it’s logo design, web graphics, or user interface design, a Wacom tablet provides the control and precision needed for pixel-perfect work.

    • Photo Editing

    While you can edit photos with a mouse, a Wacom tablet offers a more intuitive and natural experience. Retouching, masking, and color correction become effortless with the precision of a pen.

    • 3D Sculpting and Animation

    Wacom Tablets can also be used in creating 3D Sculptures and Animations. So, animators you need this tool for a better workflow.

    • Handwritten Notes

    You can also use the Wacom tablets to take handwritten notes on your personal computers.

    • Marking Up Documents

    The Wacom tablets can also be used in marking up documents such as PDFs and contracts.

    • Online Learning

    This important tool (Wacom tablet) can be used in online learning, you can use it to take notes during lectures, draw diagrams and illustrations, and even participate in interactive exercises.

    • Mind Mapping

    It allows you to brainstorm and visually organize your thoughts freely. You can use it for mind mapping to better understand complex topics, and project plans or generate creative ideas.

    • Video Editing

    While not as common as other applications for video editing, the Wacom tablet is the best tool for video editors,

    • As a Computer Mouse

    While not its primary function, the Wacom tablets can also be work as a standard computer mouse. It can help navigate your computer screen and perform basic tasks.

    NOTE: The key to maximizing your Wacom tablet’s potential is to explore different software and techniques. Experiment with different pen pressures, tilt, and customization options to find what works best for you. With practice, you’ll discover a world of creative possibilities.

    Conclusion

    After exploring the various functionalities of a Wacom tablet, it is evident that this tool can greatly enhance creativity and productivity across various tasks. From digital art creation to photo editing, 3D modeling, and beyond, the Wacom tablet offers a wide range of possibilities for professionals and enthusiasts alike.

    Its intuitive design and pressure-sensitive pen provide a natural and seamless experience, making it a valuable asset for anyone looking to elevate their digital workflow.

    Whether you’re an artist, designer, photographer, or simply someone looking to improve your digital capabilities, the Wacom tablet opens up a world of creative opportunities.

    Also check – 11 Best Android Tablets in 2024: The Ultimate Buyer’s Guide

    What is the Difference Between a Wacom Tablet and a Drawing Monitor?

    A Wacom tablet is a digital drawing pad that connects to your computer, while a drawing monitor is a standalone display with a built-in tablet function. Both offer digital drawing capabilities, but drawing monitors provide a more immersive experience as you draw directly on the screen.

    Do I Need Special Software to Use a Wacom tablet?

    While not strictly necessary, specialized software can enhance your Wacom tablet experience. Many popular graphic design, illustration, and photo editing software programs offer optimized support for Wacom tablets.

    How Do I Choose the Right Wacom?

    The best Wacom tablet depends on your needs and budget. Consider tablet size, pen pressure sensitivity, and whether you prefer a tablet or a drawing monitor.

    Beginners might opt for a smaller, more affordable model, while professionals may prefer a larger tablet with advanced features.

    Can I Use a Wacom Tablet for Left-handed Users?

    Yes, most Wacom tablets support left-handed use. You can often customize button layouts and pen settings to accommodate left-handed preferences.

    How Do I Care for my Wacom Tablet and Pen?

    To maintain optimal performance, keep your Wacom tablet clean and avoid exposing it to extreme temperatures. Use the provided cleaning cloth to gently wipe the tablet surface. For the pen, replace worn-out nibs regularly to ensure accurate input.

    For more insights on this article, check out these video tips across our social platforms:

    On Instagram

    On TikTok

  • How to use Apple Siri to Find your Passwords

    How to use Apple Siri to Find your Passwords

    Many users rely on Siri, Apple’s virtual assistant, to streamline their digital lives. However, Siri doesn’t directly function as a password manager. But could provide your preferred passwords that you might have forgotten to you.

    Use Apple Siri to Find your Passwords

    This guide will enlighten you on how to use Apple Siri to Find your Passwords, alongside Siri, can effectively secure and manage your passwords across your devices. However, read and follow the procedures carefully.

    About the Apple Siri Password Manager Feature

    While the title About the Apple Siri Password Manager Feature might suggest a built-in Siri password manager, Apple’s method is a bit different.


    Apple prioritizes user security and offers robust password management solutions within its ecosystem. Here’s what you should know:

    • iCloud Keychain

    When enabled, this secure keychain stores your website logins, app passwords, and credit card information across your Apple devices (iPhone, iPad, Mac). Once you log in to a website or app on one device, iCloud Keychain can autofill your credentials on other Apple devices.

    • Strong Password Generation

    When creating accounts on your Apple devices, Safari or the app might suggest strong, unique passwords. You can choose to have these passwords saved securely in your iCloud Keychain.

    • Automatic Security Updates

    Apple devices receive regular software updates that often include security patches. These updates help ensure your passwords and data remain protected.

    In essence, Apple offers a secure password management system integrated within its ecosystem, but Siri acts more as a helper to access those features rather than a direct password manager itself.

    How to Use Siri to Access Passwords

    While Siri itself can’t reveal your passwords directly unless you verify your preferred ID, you can use it to navigate to your password settings to access them securely:

    • Activate Siri

    Use the wake word “Hey Siri” or press and hold the side button on your iPhone/iPad or the designated key combination on your Mac.

    • Request Access to Passwords

    Phrase your request to Siri in a way that prompts it to open the password settings. You can try something like “Show me my passwords” or “Open password settings.”

    • Authenticate Yourself

    For security reasons, Siri won’t reveal your passwords directly.  You’ll need to use your device’s passcode, Face ID, or Touch ID to unlock your password section.

    • Access and Manage Passwords

    Once authenticated, you’ll be directed to the iCloud Keychain settings where you can view, edit, or delete your saved passwords.

    Important Note: It’s crucial to enable two-factor authentication (2FA) on your accounts whenever possible for an extra layer of security beyond your password. Follow the procedures carefully for positive outcomes.

    Related: How to use Apple Siri for Text Messaging

    Benefits of Using Siri as Password Manager

    Siri itself doesn’t function as a password manager. However, Apple offers a secure password management system that integrates with Siri for convenient access. Here are the key benefits of using Apple’s password management system:

    • Enhanced Security

    iCloud Keychain stores your passwords with strong encryption, adding a layer of protection.

    • Seamless Autofill

    Once you log in to a website or app on one Apple device, iCloud Keychain can automatically fill in your credentials on other Apple devices, saving you time and effort.

    • Integrated Password Suggestions

    Safari and apps on Apple devices often suggest strong, unique passwords when you create accounts. These passwords can be securely saved in the iCloud Keychain.

    • Improved Convenience

    Siri can assist you in accessing your password settings through voice commands. While Siri won’t reveal passwords directly (for security reasons), it can help you navigate to the appropriate section where you can securely view or manage them using your device’s passcode, Face ID, or Touch ID.

    • Automatic Security Updates

    Apple devices receive regular software updates that often include security patches, helping to ensure your passwords and data remain protected within the iCloud Keychain.

    While Siri doesn’t directly manage passwords, it can be a helpful tool for interacting with Apple’s robust password management system. This system offers a secure and convenient way to store and access your login credentials across your Apple devices.

    Conclusion

    By understanding how Apple safeguards your passwords and utilizing Siri to access them securely, you can leverage built-in functionalities to manage your login credentials effectively.

    Remember, a strong password strategy is essential. Consider using Apple’s suggested strong passwords, enabling 2FA whenever possible, and exploring third-party password manager apps for extended features if needed.

    Check This Out Also: How to use Apple Siri to Find your Passwords

    Can Siri Directly Reveal My Passwords?

    No, Siri prioritizes security and cannot directly access or reveal your passwords. To view or manage your passwords stored in iCloud Keychain, you’ll need to use your device’s passcode, Face ID, or Touch ID for authentication.

    How Can Siri Help with Password Management on Apple Devices?

    While Siri can’t manage passwords itself, it can be a helpful assistant. You can use voice commands like “Hey Siri, show me my passwords” to prompt Siri to open your password settings in iCloud Keychain.

    Remember, you’ll still need to use your device’s secure authentication to access the actual passwords.

    Is Apple’s Password Management System Secure?

    Yes, Apple’s iCloud Keychain utilizes strong encryption to safeguard your passwords. Additionally, automatic security updates on Apple devices help ensure the system remains protected against potential vulnerabilities.

    Should I Use a Third-Party Password Manager with Apple Devices?

    Apple’s built-in password management system is robust and secure for many users. However, you might consider third-party password manager apps if you need features like:

    • Storing non-Apple logins (websites used outside the Apple ecosystem).
    • Securely sharing passwords with trusted individuals or family members.
    • Data breach monitoring to alert you if your login credentials are compromised in a security leak.

    What if I Forget my iCloud Keychain Password?

    If you forget the password associated with your Apple ID, which is also used to access the iCloud Keychain, you can reset it using Apple’s account recovery process.

    This process typically involves verifying your identity through a trusted phone number or email address. It’s important to keep this recovery information up-to-date to ensure you can access your passwords if needed.

    For more insights on this article, check out these video tips across our social platforms:

  • How to use Apple Siri for Text Messaging

    How to use Apple Siri for Text Messaging

    Are you looking for a convenient and effective way to send text messages on your Apple device without holding your phone? Then look no further than Apple’s Siri virtual assistant.

    Use Siri for Text Messaging

    This article will enlighten you on how to use Apple Siri for text messaging on your iPhone, iPad, or Apple Watch.

    From activating Siri to utilizing advanced features and understanding the benefits, continue reading and follow through the process step by step. Let’s dive in and discover how Siri can simplify your texting experience.

    How to use Apple Siri for Text Messaging

    Here are step-by-step guides you can use to utilize text messaging seamlessly, follow through the process carefully for positive results:

    Activating Siri

    iPhone/iPad:  There are two ways to activate Siri:

    Press and hold the side button (on iPhone X and later models) or the Home button (on older iPhones and iPads).

    Or navigate to the Settings app on your iPhone, scroll down select Siri & Search, and turn on the following settings: Listen for “Siri”, or “Hey Siri”.

    Apple Watch:  Press and hold the Digital Crown on your Apple Watch.

    Composing a Text Message

    Once Siri is active, use natural language to initiate a text message. Here are some examples:

    If Siri is active, say “Hey Siri.”

    “Text Wilson, ‘On my way!’”

    “Send a message to Vannessa saying, ‘Can we chat later tonight?’”

    “Tell Arthur I’ll be there in 20 minutes.”

    Siri will confirm the recipient and ask you to dictate your message. Speak clearly and naturally for accurate transcription.

    Siri will then read back the message for confirmation. You can say Yes to send or edit the message if needed.

    Advanced Features

    These are some advanced features you need to know on using Apple Siri for Text Messaging:

    • Specifying Recipients

    You can include multiple recipients in your request. For example, “Text Olivia and Michael, ‘Let’s meet for lunch.’” Siri will prompt you to clarify the message for each recipient if necessary.

    • Using Emojis

    Siri can understand basic emoji descriptions. Try saying “Text Mom, ‘Using the Happy Birthday! Emoji’”

    • Punctuation and Special Characters

    Siri can usually handle basic punctuation like commas and periods. However, it’s best to be clear when dictating special characters or symbols to avoid misinterpretations.

    Additional Considerations

    Take NOTE of these, if you would want to send accurate and correct messages using Siri:

    • Network Connection

    Sending text messages requires a cellular data connection or Wi-Fi access.

    • Safety While Driving

    Avoid using Siri for texting while driving. It’s safer to use hands-free options or wait until you’re parked.

    • Accuracy

    While Siri is generally accurate, it’s always a good idea to double-check the message before sending it, especially for names and complex phrases.

    Related: How to use Apple Siri to Check your Emails

    Benefits of Texting with Siri

    Juggling tasks and staying connected can be tough. But with Siri, your Apple virtual assistant, sending text messages becomes a breeze. Here are 5 key benefits of using Siri for texting on your iPhone, iPad, or Apple Watch:

    • Effortless Convenience

    Siri shines in situations where using your phone is inconvenient. Imagine cooking dinner – you can dictate a quick text to your partner with a simple voice command like “Hey Siri, text John ‘Be home in 15 minutes.’” This keeps you connected without interrupting the flow of your activity.

    • Hands-Free Communication

    Multitasking gets a boost with Siri. Need to send a text while driving (safely with a passenger controlling the phone, of course)? Siri allows you to compose and send messages using voice commands, keeping your eyes on the road and your hands on the wheel.

    • Speed Up Your Texting

    Dictating a message can often be much faster than manually typing, especially for longer texts. No more hunting for keys or correcting typos, just speak your message and let Siri handle the rest.

    • Accessibility for Everyone

    Siri is a valuable tool for users with visual impairments or dexterity limitations. Voice commands empower everyone to send and receive text messages independently, fostering inclusivity and connection.

    • Enhanced Safety

    By keeping your eyes on the road and hands on the wheel while composing texts, Siri can contribute to safer driving practices. However, it’s crucial to prioritize safety – never attempt to text and drive yourself.

    So next time you need to send a text, consider using Siri. It’s a convenient, fast, and accessible way to stay connected with friends, family, and colleagues – all with the power of your voice. Just remember to use it responsibly, especially when driving!

    Conclusion

    Siri can be a powerful tool for sending and managing text messages on your Apple devices. By using voice commands, you can streamline your communication and stay connected with ease.

    Remember to prioritize safety while driving and double-check messages for accuracy before sending. So, unleash the power of Siri and experience a more convenient way to text!

    Can Siri Reply to Text Messages?

    Unfortunately, Siri cannot directly reply to incoming text messages at this time. However, Siri assists you compose a message, and then lets you confirm it before sending it to the preferred contact.

    Can Siri Send Texts to People Who Don’t Use iPhones?

    Yes! As long as the recipient has a phone number that can receive SMS/MMS messages, you can use Siri to send them a text message regardless of their phone type.

    Are there Any Security Concerns when Using Siri for Texting?

    It’s important to be aware of your surroundings when using Siri for texting.  While Siri doesn’t store your messages, anyone within proximity might be able to hear your voice commands and the content of your message. It’s best to avoid sending sensitive information through Siri in public spaces.

    For more insights on this article, check out these video tips across our social platforms:

  • How to use Apple Siri to Check your Emails

    How to use Apple Siri to Check your Emails

    Are you looking to maximize the use of Siri for email management on your Apple devices? While Siri may not directly access the content of your emails due to privacy and security concerns, there are various ways to leverage Siri and the built-in Mail features to stay informed and efficiently manage your inbox.

    Use Siri to Check your Emails

    In this guide, you will be enlightened on use Apple Siri to check your emails and then provide alternative strategies and tips to help streamline your email experience on iPhone, iPad, and Mac.

    Whether it’s utilizing Siri shortcuts or dictating text messages, there are methods to make the most out of Siri’s assistance for email-related tasks. So read and follow the steps outlined in this blog carefully.

    How to Utilize Siri to Check your Emails

    While Siri can’t directly display your emails due to privacy restrictions, but can only reveal your emails and not the contents in them. There are a couple of ways you can use Siri to access your inbox on Apple devices:

    Launch the Mail App with Siri

    The most straightforward approach is to ask Siri to open the Mail app. Here are some natural language phrases you can use:

    • Hey Siri, open Mail
    • Hey Siri, launch the Mail App
    • Hey Siri, show me my Email (While Siri won’t display emails directly, this might be a more intuitive way to prompt Siri to open the Mail app)
    • Once Siri launches the Mail app, you’ll have full access to your inbox and can view, manage, and compose emails.

    Create a Siri Shortcut (iOS only)

    For a more customized approach (available only on iPhones and iPads), you can create a Siri Shortcut that opens your Mail app filtered to show specific emails. Here’s a general idea:

    • Open the Shortcuts app on your iPhone or iPad.
    • Tap the Create Shortcut
    • Search for Mail and select the Open Mail
    • Tap on the Mail action and choose how you want to filter your inbox (e.g., unread emails, flagged emails).
    • Tap the three dots in the top right corner and give your shortcut a name like Check Important Emails.

    Now, you can activate this shortcut with a voice command like Hey Siri, Check Important Emails, which will directly launch the Mail app filtered according to your preferences.

    Remember: Siri can’t access the content of your emails, but these methods allow you to access your inbox quickly and then manage your emails using the built-in Mail app.

    Alternative Strategies for Checking Emails with Siri

    Below you can find alternative strategies that you could use for checking emails with the Apple Siri. Here are a few approaches:

    Ask Siri to Open the Mail App

    Simply say Hey Siri, open Mail or Hey Siri, launch Mail. This will directly launch the Mail app, allowing you to view your inbox and manage your emails.

    Dictate a Text Message to Your Email Contact

    Siri excels at dictation. You can use voice commands like Hey Siri, send a text message to Sarah at [a specific email]” This allows you to quickly send a message without needing to open the Mail app or switch between apps.

    Related: How to Setup Siri on iPhone 14 Plus

    Benefits of Using Siri to Check Your Emails

    While Siri’s privacy restrictions prevent it from directly displaying your emails, it can still be a valuable tool for managing your inbox on Apple devices (iPhone, iPad, Mac). Here are 5 key benefits to consider:

    • Enhanced Convenience and Speed

    Using voice commands like “Hey Siri, open Mail” is significantly faster and more convenient than manually launching the Mail app, especially if you’re using your Apple Watch or have your phone out of reach.

    No more fumbling for your device or navigating through menus – a simple voice command gets you to your inbox instantly.

    • Hands-free Access for Busy Moments

    Siri shines when your hands are full or when using your device might be inconvenient. Imagine cooking dinner – you can ask Siri “Hey Siri, any important emails?” to receive a quick update without needing to touch your phone. This allows you to stay informed and manage your inbox even when multitasking.

    • Increased Focus and Reduced Distractions

    Instead of getting sucked into the vortex of your phone once you open the Mail app, using Siri for basic email management can help you stay focused on your current task.

    A quick voice command to check for urgent emails allows you to address them swiftly and get back to what you were doing.

    • Partial Automation with Siri Shortcuts

    For iPhone and iPad users, Siri Shortcuts offers a level of automation for specific email tasks. Create a shortcut named “Review Flagged Emails” that opens your inbox filtered to show only unread emails flagged as important.

    This streamlines your workflow and saves you time spent navigating through the Mail app.

    • Improved Accessibility

    For users with dexterity limitations or visual impairments, Siri’s voice-activated features offer a valuable alternative to manual interaction with the Mail app.

    Being able to manage emails through voice commands empowers users to stay connected and manage their inboxes independently.

    Even though Siri can’t directly read your emails, it offers significant advantages for managing your inbox on Apple devices. Consider how these benefits can improve your workflow, increase convenience, and enhance accessibility for a more streamlined email experience.

    Conclusion

    By understanding Siri’s limitations and utilizing alternative strategies like Mail app features and Siri Shortcuts (on iOS), you can stay informed about your emails and manage your inbox efficiently.

    Remember, Siri can still be a helpful assistant in launching the Mail app or sending quick messages. Embrace the combination of Siri’s capabilities and the Mail app’s functionalities to optimize your email management on Apple devices.

    Can Siri Directly Read my Emails?

    No, due to privacy restrictions, Siri cannot access the content of your emails. This means you can’t ask Siri to read your emails aloud or search for specific information within them.

    What Can Siri Do to Help me with Emails?

    While Siri can’t directly access emails, it can still be a helpful assistant. Here are some ways Siri can assist you:

    Launch the Mail app: Use voice commands like “Hey Siri, open Mail” or “Hey Siri, show me my email” to quickly access your inbox.

    Create Siri Shortcuts (iOS only): Set up custom shortcuts to perform specific actions within the Mail app. Imagine saying “Hey Siri, check flagged emails” to filter your inbox for important messages.

    Are there Other Ways to stay informed about my emails without Siri?

    Absolutely! The Mail app itself offers features to keep you notified:

    Enable email notifications: Receive alerts on your lock screen or notification center for new emails.

    Activate Mail badges: See a number displayed on the Mail app icon indicating unread emails.

    Utilize Focus Modes (iOS/iPadOS): Create email-specific Focus Modes to minimize distractions while allowing important email notifications to come through.

    For more insights on this article, check out these video tips across our social platforms:

  • How to Setup an Alarm on Google Pixel Watch

    How to Setup an Alarm on Google Pixel Watch

    The Google Pixel Watch is like your companion, keeping you informed and organized. But sometimes, you might need a gentle reminder or a wake-up call.  This is where alarms come in.

    Alarm

    The Pixel Watch allows you to set up various alarms to stay on top of your schedule and ensure you never miss an important event.

    Whether it’s that early morning meeting, a medication reminder, or a well-deserved break in the afternoon, the Pixel Watch’s alarm app is there to keep you on top of it.

    This guide will walk you through the process of setting up alarms on your Google Pixel Watch, helping you manage your time effectively.

    Why You Need to Set Up Alarms on Google Pixel Watch

    Setting up alarms on your Google Pixel Watch is a game-changer for users’ mornings and overall well-being. With alarms on your wrist, you can easily set, adjust, or snooze them with a tap or swipe, no need to search for your phone in a sleepy daze.

    Plus, the Pixel Watch integrates seamlessly with your phone’s alarms, so you can manage them all from either device. Set multiple labeled alarms for different needs, or choose a gentle vibration for a silent wake-up that won’t disturb other people.

    The Pixel Watch can also work with some apps to analyze your sleep patterns and suggest personalized alarm times based on your sleep cycles.

    Ultimately, the Pixel Watch offers a convenient, flexible, and potentially sleep-enhancing way to manage your time and wake up feeling refreshed.

    How to Set Up an Alarm on Google Pixel Watch

    Setting up an alarm on your Google Pixel Watch is a straightforward process. Here are the steps to take to go about it.

    • First, wake your watch up, then press the crown button which is located by the side of your Pixel Watch and acts as the primary physical navigation key, it will take you to the app list.
    • After that, scroll down through the app list, look for an option labeled Alarm, then click on it.
    • Next, click on the Add alarm, which is represented as a plus sign (+).
    • Once you’ve set the time and customized the settings (by clicking on the settings icon), tap the Save button which is represented as a good tick, to confirm and activate your new alarm.

    Bonus Tip: You can also set alarms using Google Assistant on your Pixel Watch. Simply press and hold the crown button to activate the Assistant and say a command like Set an alarm for 7:00 AM or Wake me up in 30 minutes.

    Related: How to Enable Night Shift on iPhone 15 Pro

    Benefits of Setting Up Alarms on Google Pixel Watch

    There are several advantages to using alarms on your Pixel Watch:

    • Improved Time Management

    Setting alarms helps you stay organized and adhere to your schedule, ensuring you don’t miss important events or deadlines.

    • Enhanced Punctuality

    Relying on your watch’s discreet vibration or chosen alarm sound can help you wake up or be reminded of appointments on time, preventing tardiness.

    • Peace of Mind

    Setting alarms for tasks or reminders can provide peace of mind, knowing you won’t forget important details or obligations.

    • Convenient Reminders

    Alarms can be used for various purposes beyond waking up. Set reminders for medication, meetings, or even short breaks throughout the day to stay on top of your well-being and productivity.

    Conclusion

    The Pixel Watch alarm routine can boost your time management skills, ensure punctuality, and provide reminders throughout the day.

    The ability to customize alarm sounds, snooze functions, and vibration options allows you to tailor the experience to your preferences.

    Whether you need a powerful wake-up call, a discreet notification for an important meeting, or a friendly nudge to take a break, the Pixel Watch’s alarm app is a versatile tool at your disposal.

    Can I Set Recurring Alarms on my Google Pixel Watch?

    Absolutely! The Pixel Watch’s alarm app allows you to set recurring alarms. This means you can create alarms that repeat on specific days of the week. When setting an alarm, choose “Repeat” and select the days for the alarm to recur.

    Can I Adjust the Snooze Duration on my Pixel Watch Alarm?

    The default snooze duration on your Pixel Watch alarm might be 9 minutes. However, you can customize this duration to better suit your preferences.

    While setting the alarm or through the alarm settings menu, choose a shorter or longer snooze time depending on needs.

    Can I Use Music as an Alarm Sound on my Google Pixel Watch?

    Yes, you can set a song from your downloaded music library as your alarm sound on the Pixel Watch.

    Standard music files need conversion to a specific format (AAC) suitable for ringtones using iTunes on your computer before transferring to your Watch.

    What Happens if my Pixel Watch Battery Dies While an Alarm is Set?

    If your Pixel Watch runs out of battery before an alarm is set to go off, the alarm won’t sound. To ensure you don’t miss alarms, maintain a sufficient battery level on your Pixel Watch.


    For more insights on this article, check out these video tips across our social platforms:

  • How to Enable Night Shift on iPhone 15 Pro

    How to Enable Night Shift on iPhone 15 Pro

    Staring at bright screens before bed can disrupt your sleep cycle and leave you feeling groggy in the morning.

    Night Shift

    The iPhone 15 Pro comes equipped with a helpful feature called Night Shift, designed to solve this very issue.

    Night Shift adjusts the color temperature of your iPhone’s display towards warmer tones, reducing the emission of blue light, the hormone that regulates sleep.

    This guide will explain what Night Shift is, how to enable it on your iPhone 15 Pro, and explore the benefits it offers for a more restful night’s sleep and overall well-being. So read and follow through the procedures outlined in it carefully.

    About Night Shift on iPhone 15 Pro

    Night Shift tackles blue light by adjusting the display’s color temperature. It reduces blue light, known to suppress melatonin, the sleep hormone as stated above. With warmer tones, your iPhone becomes less stimulating for your eyes, potentially easing you into sleep.

    The Night Shift is customizable. Schedule it to activate automatically in the evening and deactivate in the morning. You can also adjust the warmth intensity for a personalized experience.

    Beyond sleep, Night Shift may minimize eye strain from extended evening screen time. This is helpful for reading ebooks or browsing before bed.

    Night Shift on iPhone 15 Pro is a valuable tool for evening users. By adjusting color temperature and reducing blue light, it can contribute to better sleep, reduced eye strain, and a more comfortable nighttime phone experience.

    How to Enable Night Shift on iPhone 15 Pro

    Enabling Night Shift on your iPhone 15 Pro is a simple process. Here are the required steps you need to take to enable it successfully.

    • First, open your Settings app, located on your iPhone’s home screen.
    • Then, scroll down and look for the option Display & Brightness. And click on it.
    • After that, scroll down and look for the Night Shift tab and toggle the switch next to it, to turn it on. The switch will turn green when the Night Shift is enabled.

    Follow the steps carefully for positive results.

    Related: How to Clear Reminder on iPhone 15 Pro

    Benefits of Enabling Night Shift on iPhone 15 Pro

    Enabling Night Shift on your iPhone 15 Pro offers a multitude of benefits, particularly for those who struggle with sleep:

    Improved Sleep Quality: Reducing blue light exposure before bed can help regulate your sleep cycle, promoting deeper and more restful sleep.

    Reduced Eye Strain: Warmer display tones can be easier on the eyes, especially in low-light environments, potentially reducing eye strain and fatigue.

    Enhanced Relaxation: The warm color temperature of the Night Shift can create a more calming and relaxing atmosphere before bed, promoting a smoother transition into sleep.

    Potential Health Benefits: Studies suggest that reducing blue light exposure at night might have broader health benefits, such as lowering the risk of certain eye conditions and improving overall well-being.

    Conclusion

    By enabling Night Shift on your iPhone 15 Pro, you can significantly improve your sleep quality and overall well-being.

    The ability to adjust the color temperature and schedule activation makes Night Shift a customizable and convenient feature.

    So, take advantage of this built-in tool, embrace the warm tones before bed, and experience a more restful night’s sleep. Don’t hesitate to experiment with the settings and find the perfect Night Shift configuration that works best for you.

    Does Night Shift on iPhone 15 Pro Block Blue Light?

    Night Shift on iPhone 15 Pro doesn’t eliminate blue light emission from the display. However, it significantly reduces the amount of blue light by shifting the color temperature towards warmer tones like reds and oranges.

    Can I Adjust the Night Shift Effect on the iPhone 15 Pro?

    Absolutely! Night Shift offers customization options. You can adjust the intensity of the color temperature shift to achieve your desired level of warmth on the display.

    This allows you to personalize the Night Shift experience and find the level that feels most comfortable for your eyes.

    How Can I Schedule Night Shift Activation on my iPhone 15 Pro?

    Night Shift on iPhone 15 Pro goes beyond just a manual on/off switch. You can set a custom schedule for the Night Shift to automatically activate at a specific time each evening and deactivate in the morning.

    This ensures you benefit from the warmer tones during your desired sleep hours without needing to manually turn it on and off every night.

    Will Night Shift Affect the Display on the Screen on iPhone 15 Pro?

    Night Shift does alter the color temperature of your iPhone 15 Pro’s display, making colors appear warmer. This can slightly affect the accuracy of color reproduction, especially for tasks requiring precise color fidelity.


    For more insights on this article, check out these video tips across our social platforms: