Category: More

  • Unleash the Ultimate Cleaning Power: iRobot Roomba j9+ Review

    Unleash the Ultimate Cleaning Power: iRobot Roomba j9+ Review

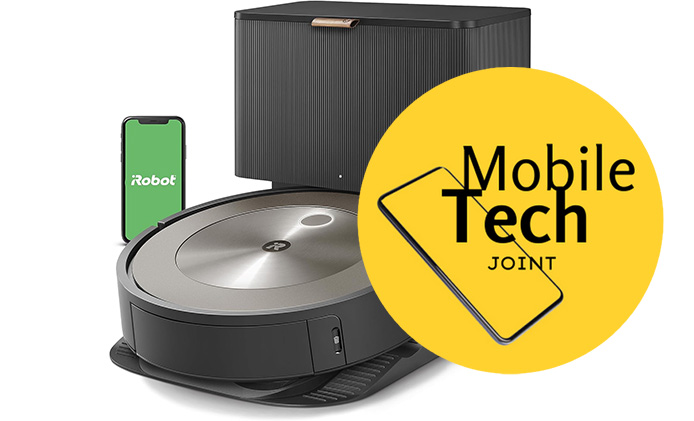
    The iRobot Roomba j9+ is a revolutionary vacuum cleaner that promises to redefine the way you approach household cleaning. With its advanced features, powerful suction, and intelligent navigation, this robotic marvel aims to take the hassle out of keeping your floors spotless. In this comprehensive review, we’ll dive deep into the j9+’s capabilities, design, and performance, helping you determine if it’s the ultimate cleaning solution for your home.

    iRobot Roomba j9+ Review


    SHOP NOW


    Key Takeaways:

    • Advanced camera-based navigation for efficient room mapping and obstacle avoidance
    • Powerful triple cleaning system with specialized brushes and suction for deep cleanin
    • Self-emptying Clean Base for up to 60 days of hands-free operation
    • Intelligent dirt detection technology for targeted cleaning in high-traffic areas
    • Seamless integration with smart home assistants like Alexa and Google Assistant

    iRobot Roomba j9+ Review

    Finding time for household chores can be a constant struggle. The iRobot Roomba j9+ aims to alleviate this burden by offering a hands-free, automated cleaning experience that promises to revolutionize the way you maintain a clean living space. With its cutting-edge technology, advanced navigation system, and self-emptying capabilities, this robot vacuum cleaner is designed to deliver thorough cleaning with minimal effort on your part.

    Unboxing and Setup

    The iRobot Roomba j9+ arrives in a sleek package, containing the robotic vacuum itself, the self-emptying Clean Base, disposable bags, and a comprehensive instruction manual. Setting up the device is a breeze, thanks to the intuitive app that guides you through the process. Once connected, the vacuum can map your home’s layout, allowing you to customize cleaning schedules and preferences.

    Design and Build Quality

    Crafted with premium materials and a sleek, minimalist aesthetic, the j9+ exudes quality and durability. Its low-profile design allows it to seamlessly navigate under furniture, ensuring no area is left untouched. The vacuum’s sturdy build and well-thought-out engineering make it a reliable cleaning companion for years to come.

    Powerful Cleaning Performance

    At the heart of the iRobot Roomba j9+ lies a potent triple cleaning system that combines two multi-surface rubber brushes and a high-efficiency filter to capture even the smallest particles. The vacuum’s precision cleaning capabilities ensure that it efficiently cleans along edges, corners, and other hard-to-reach areas, leaving no spot untouched.

    One of the standout features of the j9+ is its self-adjusting cleaning head, which automatically adapts to different floor types, ensuring optimal cleaning performance on carpets, hardwood, and tile surfaces.

    Advanced Navigation and Mapping

    Powered by advanced camera-based navigation technology, the iRobot Roomba j9+ intelligently maps your home, creating a detailed layout that allows it to clean methodically and efficiently. This feature also enables you to set virtual boundaries or no-go zones, ensuring the vacuum avoids areas you prefer it to stay away from.

    Moreover, the j9+ seamlessly integrates with popular smart home assistants like Amazon Alexa and Google Assistant, allowing you to control and schedule cleaning sessions using voice commands for added convenience.

    Efficient Dirt Detection

    The j9+ is equipped with iRobot’s patented Dirt Detect technology, which uses an array of sensors to identify areas with higher concentrations of dirt and debris. This intelligent system automatically adjusts the vacuum’s cleaning intensity, ensuring that high-traffic areas receive more thorough attention, while less soiled areas are cleaned more efficiently.

    Self-Emptying Clean Base

    One of the most impressive features of the iRobot Roomba j9+ is its self-emptying Clean Base. This innovative system automatically disposes of the collected dirt and debris into a disposable bag, eliminating the need for manual emptying. With a capacity of up to 60 days (based on typical use), the Clean Base offers a truly hands-free cleaning experience, making maintenance a breeze.

    Battery Life and Runtime

    Powered by a long-lasting lithium-ion battery, the j9+ delivers impressive runtime on a single charge. Depending on the cleaning mode and floor type, it can run for up to 90 minutes before automatically returning to its base for recharging. If the vacuum runs out of battery during a cleaning session, it will automatically resume where it left off once recharged, ensuring complete coverage of your home.

    App Control and Voice Commands

    The iRobot Roomba j9+ is designed with convenience in mind, offering seamless control through the intuitive iRobot app. This user-friendly interface allows you to schedule cleaning sessions, monitor performance, and customize settings to suit your preferences. Additionally, the vacuum’s integration with voice assistants like Amazon Alexa and Google Assistant enables hands-free control, letting you start, stop, or pause cleaning with simple voice commands.

    Pros:

    • Advanced camera-based navigation for efficient room mapping
    • Powerful triple cleaning system for thorough cleaning
    • Self-emptying Clean Base for up to 60 days of hands-free operation
    • Intelligent dirt detection technology for targeted cleaning
    • Seamless integration with smart home assistants
    • Long-lasting battery life and automatic recharging

    Cons:

    • Higher price point compared to basic robot vacuums
    • Occasional navigation errors or missed spots in complex layouts
    • Replacement bags for the Clean Base can add to ongoing costs

    Pricing and Value Comparison

    The iRobot Roomba j9+ is priced at $999.00. Additionally, there’s the Roomba Combo j9+ option priced at $1,399.00 which includes the vacuum and an auto-empty dock.

    While the Roomba j9+ carries a premium price tag, its advanced features and high-performance capabilities make it a worthwhile investment for busy households seeking a truly hands-free cleaning solution. When compared to other high-end robot vacuums, the j9+ stands out with its self-emptying capabilities, intelligent navigation, and powerful cleaning performance, offering exceptional value for its price point.

    How to Buy

    The iRobot Roomba j9+ offers top-of-the-line automated cleaning. Purchase it conveniently on Amazon through this affiliate link. Enjoy competitive pricing, fast shipping, and flexible payment options. Click here to buy the Roomba j9+ and support this website.

    View Deal


    Conclusion

    The iRobot Roomba j9+ is a game-changing robotic vacuum cleaner that delivers on its promise of automated, efficient, and thorough cleaning. With its advanced features, such as camera-based navigation, self-emptying capabilities, and intelligent dirt detection, this vacuum takes the hassle out of maintaining a clean home.

    While it may come with a higher price tag, the j9+ offers unparalleled convenience and performance, making it an excellent investment for busy households seeking a reliable, hands-free cleaning solution.

    Also Check:

  • Loewe Stellar OLED TV Hands-On Review: The Perfect Fusion of Art and Technology

    Loewe Stellar OLED TV Hands-On Review: The Perfect Fusion of Art and Technology

    The Loewe Stellar OLED TV stands out as one of the most visually striking and technologically advanced televisions on the market today. As an interior design masterpiece and a high-performance OLED TV, it combines luxury with cutting-edge technology. In this comprehensive Loewe Stellar OLED TV hands-on review, we delve into the unique design elements, top-tier features, and overall performance to help you determine if this is the right choice for your home entertainment setup.

    Loewe Stellar OLED TV Hands-On Review

    SHOP NOW


    Key Takeaways:

    • The Loewe Stellar OLED TV is a premium product with a price tag to match.
    • It features a unique design with a concrete back and brushed aluminum frame.
    • Includes cutting-edge features like ambient lighting and a built-in soundbar.
    • Offers excellent picture quality with LG’s open-cell MLA OLED panels.
    • Designed and assembled in Europe, providing a distinct advantage in craftsmanship and build quality.

    Unveiling the Loewe Stellar OLED TV

    The Loewe Stellar OLED TV is not just another television; it’s a statement piece that demands attention even before you switch it on. With a price starting at £3299/€3299 for the 42-inch model, this TV is significantly more expensive than comparable models from brands like LG. The Loewe Stellar aims to justify this premium with exceptional design and unparalleled features.

    Design & Build Quality

    When it comes to design, the Loewe Stellar OLED TV is in a league of its own. The rear cabinet of the TV is made from a thin layer of concrete, giving each unit a unique pattern. This material choice not only adds to the aesthetic appeal but also enhances the durability of the TV. The concrete is housed within a brushed aluminum frame, exuding a modern, industrial look that stands out in any living room.

    The build quality is impeccable, with every detail meticulously crafted. The Loewe signature label subtly protrudes from the right side, adding a touch of elegance. The X-shaped stand is made of matching metal and is designed to elevate the screen, ensuring that the TV looks stunning from every angle.

    Cutting-Edge Features

    This OLED TV is packed with features that set it apart from the competition. It includes four HDMI 2.1 ports, supporting variable refresh rates and 144Hz from compatible sources, ensuring future-proof connectivity for gaming consoles and other devices.

    One of the standout features is the built-in soundbar, which delivers up to 200W of sound power. The front-firing speakers provide excellent vocal clarity, making it a superior choice for watching movies and TV shows. Additionally, the TV includes a triple tuner (aerial, cable, and satellite), which can save shows to an integrated SSD, eliminating the need for a separate PVR box.

    Another innovative feature is the ambient lighting, dubbed Magic Light. This lighting system illuminates the area beneath the TV, creating a welcoming atmosphere when you turn on the TV and acting as bias lighting while you watch.

    User Experience

    Navigating through the Loewe Stellar OLED TV’s interface is a breeze, thanks to its responsive smart TV software. Although Loewe hasn’t disclosed the exact details, the interface bears a strong resemblance to Samsung’s Tizen OS, ensuring that ex-Samsung users will find it familiar.

    The remote control is slim and user-friendly, featuring shortcut buttons for Netflix, Prime Video, and Disney+. The TV’s interface is intuitive, with all the necessary catch-up and on-demand services readily available.

    Picture & Audio Quality

    The picture quality of the Loewe Stellar OLED TV is nothing short of spectacular. Using LG’s latest open-cell MLA OLED panels, the TV delivers vibrant colors, deep blacks, and impressive brightness levels. The inclusion of HDR10+, Dolby Vision, and HLG support ensures a top-tier viewing experience for all types of content.

    The built-in soundbar enhances the audio experience, providing clear and immersive sound. While we couldn’t fully test the audio performance during the hands-on session, the initial impressions were promising, especially in terms of vocal clarity and sound distribution.

    Hands-On Experience

    During our hands-on session, the Loewe Stellar OLED TV impressed with its sharpness and vibrant colors. The viewing angles were excellent, and the build quality was evident in every aspect of the TV. The ambient lighting feature added a unique touch, enhancing the overall viewing experience.

    Pricing & Availability

    The Loewe Stellar OLED TV is available in various sizes, starting from 42 inches up to a colossal 97 inches. The prices range from £3299/€3299 for the 42-inch model to £4299/€4299 for the 55-inch model. While this is significantly higher than other OLED TVs, the unique design and premium features may justify the cost for those seeking a luxurious home entertainment setup.

    View Deal


    How to Buy the Loewe Stellar OLED TV 

    If you’ve decided that the Loewe Stellar OLED TV is the perfect addition to your home, you can purchase it using our affiliate link. Here’s how:

    1. Click on our affiliate link to visit the official product page.
    2. Select your preferred screen size and configuration.
    3. Add the product to your cart.
    4. Proceed to checkout and complete the purchase.
    5. Enjoy your new Loewe Stellar OLED TV.

    By using our affiliate link, you help support our site and allow us to continue providing detailed reviews and recommendations.

    Conclusion

    The Loewe Stellar OLED TV is a remarkable piece of technology that combines stunning design with high-end performance. While it comes with a hefty price tag, the unique features, exceptional build quality, and superior picture and audio performance make it a worthy investment for those seeking the best in home entertainment.

    In summary, the Loewe Stellar OLED TV is a blend of art and technology, offering a viewing experience that is as aesthetically pleasing as it is immersive. If design, innovation, and performance are your top priorities, this TV deserves a place on your shopping list.

    Remember to use our affiliate link to make your purchase and support our continued efforts to bring you the best tech reviews and insights.

    Also Check:

  • Pico 4 Review: The Ultimate Standalone VR Experience

    Pico 4 Review: The Ultimate Standalone VR Experience

    The virtual reality market is constantly evolving, with new and improved headsets vying for consumer attention. Among the latest contenders is the Pico 4 All-in-One VR Headset, a product of ByteDance, which aims to rival the Meta Quest 2.

    Pico 4 Review

    SHOP NOW


    Key Takeaways:

    • Ease of Setup: Simple unboxing and initial setup process.
    • Comfortable Design: Well-distributed weight and accommodating for glasses wearers.
    • High-Resolution Display: Offers 4320 x 2160 resolution (2160 x 2160 per eye) with a wide field of view.
    • Adequate Audio: Built-in sound is decent, but external options can enhance the experience.
    • Robust Tracking: Inside-out tracking with highly functional motion controllers.
    • Varied Software: Reasonable game and application library, though not as extensive as competitors.
    • PCVR Compatibility: Seamless connection to PC for enhanced VR experiences.

    Pico 4 Review: The Ultimate Standalone VR Experience

    In this comprehensive review, we will explore the Pico 4’s capabilities, covering everything from its unboxing and setup to its design, comfort, display, audio, tracking, software, and PCVR functionality. If you’re in the market for a new VR headset, this detailed analysis will help you determine if the Pico 4 is the right choice for you.

    Unboxing and Setup

    When you first receive the Pico 4, the packaging includes the headset, two motion controllers, and a charger. Setting up the Pico 4 is straightforward and user-friendly. Begin by placing the headset on your head and tightening it to fit comfortably. The device guides you through mapping out your play area and creating an account. The setup process is intuitive and quick, allowing you to dive into Pico’s virtual world almost immediately.

    Additional accessories in the package include a nose flap for blocking light and a glasses spacer for users who wear glasses. The glasses spacer attaches magnetically, making it easy to install and remove. The nose flap, while a bit trickier to attach, ultimately fits securely after a few tries. The headset’s design also allows for easy adjustments, with a back that flips up to help you fit it snugly onto your face.

    Comfort and Design

    Comfort is a critical factor for any VR headset, and the Pico 4 excels in this area. The headset features foam padding at both the front and back, ensuring it doesn’t feel too tight during extended gaming sessions. The weight distribution is notably effective, thanks to the battery being built into the back of the headstrap, which helps prevent the front-heavy feeling common in many other headsets.

    For users who wear glasses, the Pico 4 is particularly accommodating. The glasses spacer allows for a comfortable fit, although it might feel slightly tight for some. Importantly, the glasses do not touch the lenses, which is a significant improvement over several other VR headsets. The overall design makes the headset easy to put on and take off, with a secure fit that stays in place even during active gameplay.

    Display and Vision

    One of the standout features of the Pico 4 is its high-resolution display. The headset offers a resolution of 4320 x 2160 pixels (2160 x 2160 per eye), providing an incredibly sharp and detailed visual experience. The field of view is 105 degrees, which enhances the sense of immersion.

    The Pico 4 uses pancake lenses, which are known for reducing glare compared to other lens types. The size of the “sweet spot,” or the area where the display is clear, is quite large, making it easy to find a comfortable viewing position. The colors are vibrant and the contrast is good, although the LCD display means you won’t get the true blacks that OLED screens provide. The refresh rate is capped at 90Hz, which is adequate for most users, although some high-end headsets offer up to 120Hz.

    A notable feature is the adjustable interpupillary distance (IPD), which can be finely tuned by the millimeter. This physical adjustment ensures a personalized fit for different users. The color passthrough feature is another advantage, although objects appear larger than they are in reality.

    Audio and Microphone

    The integrated audio system of the Pico 4 is decent, providing clear sound that suffices for most applications. While it doesn’t match the quality of high-end headphones or the Valve Index, it’s acceptable for casual gaming. The absence of a phono port might be a downside for some, but a USB-C to phono adapter is a viable workaround, and Bluetooth provides a convenient, wireless option.

    The microphone quality is adequate for casual online gaming, but serious streamers or competitive players might prefer an external solution for better clarity.

    Tracking and Controllers

    The Pico 4 features inside-out tracking via cameras on the headset, which accurately track the motion controllers. This setup works well within the camera’s view, and losing tracking has been a rare occurrence. The controllers themselves are comfortable and have a layout similar to the Meta Quest 2 controllers, making them intuitive for users switching from another headset. An added convenience is the screenshot button on the controllers, a handy feature for content creators.

    Check This Out: Sony PlayStation VR 2 Review: A Generational Leap in VR Gaming

    The controllers use AA batteries, with a cleverly designed compartment that makes battery replacement straightforward. This design, along with the loop sensor on the controllers, ensures they remain functional and easy to use.

    Software and Store

    While the Pico 4 has a reasonably wide selection of games and applications in its store, it falls short when compared to the Meta Quest 2’s extensive library. Notable absences, such as Beat Saber, highlight this gap. However, exclusive content like the upcoming Just Dance VR provides unique experiences for Pico 4 users.

    The absence of a web store that can be accessed outside the headset or phone app is a minor inconvenience but not uncommon in VR ecosystems.

    PCVR Capabilities

    The Pico 4 can be connected to a PC for PCVR games using a USB 3.0 to USB-C cable or wirelessly via a WiFi router. While a dedicated dongle is planned, it hasn’t been released yet. The wireless connection works surprisingly well, with the free Streaming Assistant software providing a straightforward setup process. Despite occasional lag, the performance is generally smooth, making it suitable for most games, except those requiring precise timing, like rhythm games.

    Watch this video for more insight.

    Read: How to Answer Phone Calls on Google Pixel Watch

    New VR users should be aware that some older games might have compatibility issues with inside-out tracking or non-standard controller mappings, but these challenges are not unique to the Pico 4 and affect many VR headsets.

    Purchasing Information

    For those interested in buying the Pico 4, it’s available on Amazon. Click our Amazon Affiliate link to purchase your own Pico 4 VR headset and start your virtual reality journey today.

    Buy now on Amazon: SHOP NOW

    Conclusion

    In the end, the Pico 4 is an excellent virtual reality headset that offers impressive technology at a competitive price. Its comfortable design, sharp display, and effective weight distribution make it a strong contender in the VR market. Although it falls short in terms of game library compared to the Meta Quest 2, it still offers a wide range of applications and unique content.

    As technology continues to evolve, the Pico 4 stands out as a solid choice for both new and experienced VR users.

    For more insights on this article, check out these video tips across our social platforms:

  • Sony PlayStation VR 2 Review: A Generational Leap in VR Gaming

    Sony PlayStation VR 2 Review: A Generational Leap in VR Gaming

    The long-awaited Sony PlayStation VR 2 has finally arrived, promising to take virtual reality gaming to new heights. As the successor to the groundbreaking original PlayStation VR, this next-generation headset boasts a plethora of innovative features and cutting-edge technology that aim to elevate the VR experience like never before.

    Sony PlayStation VR 2 Review

    SHOP NOW


    In this comprehensive review, we’ll delve into the intricacies of the PlayStation VR 2, exploring its design, performance, and overall value proposition.

    Key Takeaways:

    • Lightweight and comfortable design for extended play sessions
    • Stunning 4K HDR OLED displays with eye-tracking technology
    • Innovative Sense controllers with haptic feedback and adaptive triggers
    • Easy setup and user-friendly interface
    • Limited game library at launch, but highly anticipated titles on the horizon

    Sony PlayStation VR 2 Review

    Virtual reality has been a rapidly evolving frontier in the gaming industry, captivating players with its ability to transport them into immersive digital worlds. Sony, a pioneer in this realm, has once again raised the bar with the release of the PlayStation VR 2. This cutting-edge headset not only delivers breathtaking visuals but also introduces game-changing features that redefine what it means to be truly immersed in a virtual environment

    Impressive Design and Comfort Improvements:

    One of the standout aspects of the PlayStation VR 2 is its exceptional design and comfort. Sony has taken a significant leap forward from its predecessor, crafting a headset that is not only visually appealing but also remarkably comfortable to wear for extended periods.

    Weighing in at a mere 560 grams, the PlayStation VR 2 is noticeably lighter than its predecessor, reducing the strain on the user’s neck and shoulders. Furthermore, Sony has engineered the headset to distribute its weight evenly around the user’s head, ensuring a comfortable and balanced fit.

    The headset features an adjustable visor and headband, allowing users to fine-tune the fit to their individual preferences. The accordion-style light shield effectively blocks out external light, further enhancing the immersive experience. Sony has also streamlined the setup process, requiring only a single tethered cable to connect the headset to the PlayStation 5 console, eliminating the hassle of multiple cables and external components.

    Next-Gen VR Display and Visuals:

    At the heart of the PlayStation VR 2 lies a cutting-edge display that promises to transport users into breathtakingly realistic virtual worlds. The headset boasts two OLED displays, each with a staggering 2000×2040 resolution per eye, delivering a combined 4K HDR image. This level of visual fidelity is further enhanced by a wider 110-degree field of view, allowing users to take in more of their virtual surroundings.

    One of the most innovative features of the PlayStation VR 2 is its implementation of foveated rendering. Powered by eye-tracking technology, the headset intelligently allocates more processing power to the areas where the user is directly looking, while reducing the detail in peripheral areas. This not only enhances the overall visual experience but also optimizes performance, ensuring a smooth and responsive gameplay experience.

    While the visuals are undoubtedly impressive, some users have reported instances of blurriness when quickly turning their heads or during fast-paced action sequences. This issue is not uncommon in VR headsets and can be mitigated by properly adjusting the headset’s positioning and interpupillary distance (IPD) settings.

    Innovative Eye and Hand Tracking:

    The PlayStation VR 2 takes immersion to new heights with its innovative eye and hand tracking capabilities. The built-in eye-tracking system not only enables foveated rendering but also allows for unique interactions with virtual characters and environments.

    In games like the highly anticipated “Horizon Call of the Mountain,” characters can react to the user’s gaze, adding an unprecedented level of realism and believability to in-game interactions. If the user locks eyes with a character for too long, they may become visibly uncomfortable, breaking eye contact and shifting their gaze elsewhere. This level of detail truly blurs the line between the virtual and the real.

    Moreover, the PlayStation VR 2’s Sense controllers feature finger touch detection, enabling the headset to mirror the user’s hand movements within the virtual world. Whether it’s making a fist, giving a thumbs-up, or pointing with an index finger, the controllers accurately translate these gestures, further enhancing the sense of presence and immersion.

    Excellent New Sense Controllers:

    Speaking of the Sense controllers, Sony has taken a page from the DualSense controller’s design, incorporating adaptive triggers and haptic feedback technology. These innovative features elevate the tactile experience, allowing users to feel the resistance and vibrations of in-game actions, such as drawing a bowstring or gripping a rock face.

    The controllers’ ergonomic design and lightweight construction ensure a comfortable grip, even during extended gameplay sessions. Additionally, the tracking rings surrounding the controllers enable precise motion tracking, ensuring that every movement is accurately translated into the virtual world.

    Easy Setup and User-Friendly Design:

    One of the standout features of the PlayStation VR 2 is its user-friendly design and setup process. Unlike its predecessor, which required multiple cables and external components, the PlayStation VR 2 streamlines the setup with a single cable connection to the PlayStation 5 console.

    Once connected, users can navigate the familiar PlayStation 5 interface using either the Sense controllers or the innovative eye-tracking system. The headset even automatically streams the user’s view to the connected TV, allowing others to observe and share in the experience without the need for additional configurations.

    Killer App: Horizon Call of the Mountain:

    While the PlayStation VR 2 boasts an impressive hardware lineup, its true potential is realized in the games themselves. One standout title that showcases the capabilities of the new headset is “Horizon Call of the Mountain,” a flagship VR game built from the ground up for the PlayStation VR 2.

    Developed by Guerrilla Games and set in the breathtaking world of the Horizon franchise, “Call of the Mountain” immerses players in a stunning virtual environment teeming with robotic dinosaurs and expansive landscapes. From scaling towering rock faces to engaging in intense combat sequences, the game’s mechanics are expertly tailored to the PlayStation VR 2’s capabilities.

    The game’s visuals are nothing short of stunning, with intricate details and vibrant colors that truly pop on the headset’s 4K HDR OLED displays. Moreover, the implementation of the Sense controllers’ haptic feedback and adaptive triggers adds an unparalleled level of realism to actions like gripping a ledge or drawing a bowstring.

    Game Library is Currently Limited: While “Horizon Call of the Mountain” serves as a compelling showcase for the PlayStation VR 2’s capabilities, the headset’s game library at launch is somewhat limited. Many of the available titles are ports of older VR games from other platforms, with only a handful of new releases optimized for the hardware’s unique features.

    Additionally, the PlayStation VR 2 is not backwards compatible with games from the original PlayStation VR library, which may disappoint players who have amassed a sizable collection of titles. While some developers have pledged to provide free updates for existing games, the lack of full backwards compatibility is a notable drawback.

    Is the PlayStation VR 2 Worth the High Cost?

    With its cutting-edge technology and innovative features, the PlayStation VR 2 undoubtedly represents a significant investment for gamers. Priced at a hefty $550, the headset comes with a premium price tag, and that’s before factoring in the cost of a PlayStation 5 console, which is required to power the VR experience.

    However, for those willing to make the investment, the PlayStation VR 2 offers an unparalleled VR gaming experience that truly pushes the boundaries of what’s possible. From the stunning visuals and immersive audio to the intuitive controls and innovative eye-tracking capabilities, Sony has crafted a headset that represents a generational leap in the world of virtual reality.

    Read: How to Setup an Alarm on Google Pixel Watch

    Ultimately, the value proposition of the PlayStation VR 2 will depend on the continued support and development of compelling, optimized games that fully utilize the hardware’s unique features. While the launch lineup is somewhat limited, the potential for future growth and innovation is undeniable, and Sony has a proven track record of delivering exceptional gaming experiences.

    How to Get the PlayStation VR 2

    The PlayStation VR 2 is available to purchase from major retailers like Amazon, Best Buy, GameStop, and directly from PlayStation. However, one of the most convenient options is to buy it on Amazon due to fast shipping and excellent customer service.

    Buy now on Amazon: SHOP NOW

    The PlayStation VR2 headset retails for $549.99 on Amazon. There are a few bundle options available as well if you need to pick up games or accessories like controller charging stations at the same time.

    Whether you’re an avid PlayStation gamer adding the latest VR technology, or just getting started with virtual reality gaming, the PSVR 2 offers an incredible experience. With Amazon’s wide availability and trusted shopping experience, it’s a great way to secure your new headset.

    Don’t forget to use the affiliate link provided to support this blog when you make your purchase! Let me know if you have any other questions.

    Conclusion

    The Sony PlayStation VR 2 is a remarkable achievement in virtual reality gaming, offering a truly immersive and visually stunning experience. With its cutting-edge display technology, innovative eye and hand tracking capabilities, and exceptional Sense controllers, the headset sets a new standard for VR gaming.

    While the initial game library may be limited, and the overall cost of entry is substantial, the PlayStation VR 2 represents a significant step forward in the evolution of virtual reality. For gamers willing to invest in this groundbreaking technology, the rewards are immense, offering an unparalleled level of immersion and a glimpse into the future of interactive entertainment.

    Follow Us on

    Instagram

    TikTok

  • How to Use PANO Camera on iPhone 14 Plus

    How to Use PANO Camera on iPhone 14 Plus

    The iPhone 14 Plus boasts an impressive camera system, and the PANO camera mode unlocks a new world of creative possibilities.  Imagine capturing a breathtaking panoramic vista of a mountain range, a bustling city skyline, or a group of friends gathered for a celebration.

    How to Use PANO Camera on iPhone 14 Plus
    How to Use PANO Camera on iPhone 14 Plus

    The PANO camera mode on your iPhone 14 Plus allows you to stitch together multiple photos seamlessly, creating a stunning wide-angle image that transcends the limitations of a single frame.

    This guide will equip you with the knowledge to master the PANO camera on your iPhone 14 Plus.  We’ll explore its functionalities, highlight the benefits it offers, reasons why you might want to utilize this unique camera mode to capture unforgettable moments.

    About PANO Camera on iPhone 14 Plus

    The PANO camera mode on your iPhone 14 Plus allows you to capture panoramic photos by stitching together multiple images taken in sequence.  Here’s a breakdown of what it offers

    • Wide-Angle Views: Capture expansive landscapes, group photos, or architectural wonders that wouldn’t fit within a single frame using the regular camera mode.
    • Seamless Stitching: The iPhone’s processing power automatically stitches together the individual photos you capture in PANO mode, creating a smooth and continuous panoramic image.
    • Simple to Use: The PANO camera mode is intuitive and easy to use, requiring minimal technical knowledge.

    Important Note:  For optimal results when using PANO mode, ensure you hold your iPhone 14 Plus steady and follow the on-screen guide as you capture the panorama.

    How to Use PANO Camera on iPhone 14 Plus

    Below is the step-by-step process on how to use the Pano camera on your iPhone 14 Plus.

    • First, launch your Camera App, by Tapping on the Camera app icon on your home screen.
    • Swipe to PANO Mode: Swipe the shooting mode options at the bottom of the screen until you reach “PANO.” The PANO option will be displayed with a circular icon.
    • Choose Your Starting Point: Decide on the direction in which you want to capture your panorama. The arrow on the screen will indicate the direction the panorama will be stitched together.
    • Capture Your PANO: Hold your iPhone 14 Plus steady and align the white arrow with the yellow starting point that appears on the screen. Press the shutter button and slowly pan your iPhone in the direction of the arrow, keeping the arrow aligned with the yellow line on the screen. The camera will automatically capture multiple images as you pan.
    • Optional: You can also tap anywhere on the screen to capture a photo and then manually pan to continue the panorama.
    • Complete the PANO: Once you’ve captured the entire scene you want to include in your panorama, a black box will fill the screen, indicating the capture is complete.

    Benefits of PANO Camera on iPhone 14 Plus

    There are several advantages to using the PANO camera mode on your iPhone 14 Plus:

    • Capture Expansive Scenes: Capture breathtaking landscapes, cityscapes, or group photos that wouldn’t fit within a single frame of the regular camera mode.
    • Enhanced Creativity: The PANO camera mode opens doors for creative photography, allowing you to capture unique perspectives and add a sense of immersion to your photos.
    • Easy to Use: The intuitive interface and automatic stitching make capturing panoramic photos effortless, even for casual photographers.
    • Share-Worthy Images: The wide-angle views and immersive nature of panoramic photos make them perfect for sharing on social media or printing as stunning keepsakes.

    Conclusion

    The PANO camera mode on your iPhone 14 Plus is a powerful tool that expands your photographic capabilities.  By following the simple steps outlined above, you can capture stunning panoramic photos that showcase the world in a whole new light.  Whether you’re a photographer or simply someone who wants to capture unforgettable memories in a unique way, the PANO camera mode is definitely worth exploring.

    So, the next time you encounter a breathtaking vista, a bustling cityscape, or a group of loved ones gathered together, reach for your iPhone 14 Plus and unleash the power of panoramic photography!

    Check This Out: How to See Wi-Fi Password on iPhone 14 Plus

    Frequently Asked Questions (FAQs)

    What happens if I move my iPhone too quickly while capturing a PANO?

    If you move your iPhone too quickly while capturing a PANO, the individual photos might not stitch together seamlessly, resulting in a blurry or distorted final image.  Focus on smooth and slow panning for optimal results.

    Can I edit PANO photos after capturing them?

    Yes!  Once you capture a PANO photo, you can edit it like any other photo in your camera roll.  You can adjust exposure, crop the image, or even apply filters to enhance its look.

    Does using PANO mode drain my iPhone 14 Plus battery?

    The impact on battery life is minimal.  Capturing panoramic photos requires slightly more processing power, compared to regular photos, but the overall drain is negligible.

    Can I use the PANO camera mode in portrait orientation?

    While the PANO mode on iPhone 14 Plus is primarily designed for landscape panoramas, you can technically capture vertical panoramas by rotating your phone to portrait orientation.  However, keep in mind that the resulting image might not be as wide-angle as a landscape panorama.

    For more insights on this article, check out these video tips across our social platforms:

    On Instagram

    On TikTok

  • How to Switch Wallpapers on iPhone 14 Plus

    How to Switch Wallpapers on iPhone 14 Plus

    Your iPhone 14 Plus is more than just a communication tool but is an extension of your personality.  The wallpaper you choose for your home and lock screens significantly reflects your style and preferences.  Whether you favor stunning landscapes, captivating artwork, or a touch of minimalism, customizing your wallpaper allows you to personalize your iPhone experience.

    How to Switch Wallpapers on iPhone 14 Plus
    How to Switch Wallpapers on iPhone 14 Plus

    The background image you choose for your home and lock screens can significantly impact how you interact with your phone and how it reflects your personality.

    This guide will equip you with the knowledge to switch wallpapers on your iPhone 14 Plus effortlessly, explore the available options, highlight the benefits of personalization, and uncover why you might want to switch things up.

    Why Switch Wallpapers on iPhone 14 Plus?

    Refreshing your iPhone 14 Plus wallpaper with something new offers a surprising array of benefits. It lets you personalize your phone, like putting a custom cover on your digital world. A new wallpaper, especially an astronomy-themed one, can breathe new life into your phone and make it feel fresh again.

    You can even match the wallpaper to the season or your mood, opting for calming nebulas or vibrant space scenes. Special occasions become even more memorable with a themed wallpaper, like a Milky Way image after a night of stargazing. Ultimately, switching wallpapers helps combat boredom and keeps your phone visually interesting, sparking conversations and reflecting your unique style.

    Check This Out: How to Enable Night Shift on iPhone 15 Pro

    How to Switch Wallpapers on iPhone 14 Plus

    Switching wallpapers on your iPhone 14 Plus is a quick and straightforward process, and below are the steps to take.

    • First, wake your iPhone to access your lock screen, then Long-press on any blank area on the lock Screen.
    • Then swipe left to select any of the iPhone’s inbuilt wallpaper or wipe to the right, to add a new wallpaper of your choice.
    • Within the wallpaper selection menu, you’ll see various options based on where the wallpaper originates. This option leads you to Apple’s built-in wallpaper library.
    • Depending on the wallpaper you choose, you might have additional customization options:
    • Once you’ve chosen your wallpaper and made any customizations, just tap on “Set” in the wallpaper.

    Benefits of Switching Wallpapers on iPhone 14 Plus

    There are several advantages to switching wallpapers on your iPhone 14 Plus.

    • Personalization: A custom wallpaper allows you to express your personality and style on your device. Choose an image that resonates with you, whether it’s a cherished photo, a motivational quote, or a breathtaking landscape.
    • Improved Aesthetics: The right wallpaper can enhance the visual appeal of your iPhone. A well-chosen image can set the tone for your entire device experience.
    • Mood Booster: Studies suggest that certain colors and imagery can positively impact mood. Choose a wallpaper that evokes positive emotions and inspires you throughout the day.
    • Increased Focus: A minimalist wallpaper with clean lines can help minimize distractions and improve your focus while using your phone.

    Conclusion

    The ability to switch wallpapers on your iPhone 14 Plus empowers you to personalize your device and enhance your user experience.  Whether you’re seeking to express your style, improve the phone’s aesthetics, or simply add a touch of novelty, switching wallpapers offers a multitude of benefits.

    So, go ahead, explore the diverse options available, and personalize your iPhone 14 Plus to reflect your unique personality and preferences.  Remember, your phone is an extension of you, and your wallpaper can be the perfect way to make a statement!

    Check This Out: Sennheiser HD 620S Review: Open-Back Sound in a Closed-Back Design

    Frequently Asked Questions (FAQs)

    Can I set different wallpapers for my Lock Screen and Home Screen?

    Absolutely!  During the final step of setting your wallpaper, you’ll be prompted to choose whether you want to set the image for your Lock Screen, Home Screen, or both.  This allows you to personalize each screen independently.

    Will switching wallpapers drain my iPhone 14 Plus battery?

    The impact on battery life is minimal.  Both built-in wallpapers and static custom images use minimal resources.  However, Live Photos used as lock screen wallpapers might consume slightly more battery due to the animation element.

    Can I set a video as my wallpaper on iPhone 14 Plus?

    Unfortunately, iPhones don’t currently support setting videos as wallpapers.  However, you can utilize Live Photos, which capture a brief moment of movement along with a still image.

    What if I accidentally deleted a wallpaper I liked?

    Unfortunately, there’s no built-in way to retrieve deleted wallpapers on iPhone.  However, if the wallpaper was part of Apple’s built-in collection, you can simply browse the same category again and try to locate it.  For custom images, you might be able to recover them from a recent photo backup, depending on your settings.

    For more insights on this article, check out these video tips across our social platforms:

  • How to Use Astronomy Wallpaper on iPhone 14 Plus

    How to Use Astronomy Wallpaper on iPhone 14 Plus

    The iPhone 14 Plus is a powerhouse that, keeps you informed and fuels your productivity. But what if your phone could offer a glimpse of a built-in Astronomy wallpaper option, where you can transform your lock screen into a mesmerizing celestial display?  Imagine unlocking your phone to be greeted by a stunning, high-resolution image.

    How to Use Astronomy Wallpaper on iPhone 14 Plus

    The Astronomy wallpaper isn’t just about aesthetics, it’s a dynamic and ever-evolving window that offers a unique way to personalize your iPhone 14 Plus and elevate your mobile experience, right at your fingertips.

    This guide will delve into using the Astronomy wallpaper on your iPhone 14 Plus. We’ll explore the steps involved, highlight the benefits it offers, and explain why it might be the perfect choice for anyone who wants to add a touch of wonder and inspiration to their everyday interactions with their phone.

    About Astronomy Wallpaper on iPhone 14 Plus

    Spruce up your iPhone 14 Plus with a mesmerizing astronomy wallpaper! Apple offers built-in options like Earth and the Solar System, but you can venture further. Explore free astronomy image collections in Photos or Safari, or browse paid wallpaper apps for unique space-themed designs. Remember to choose a high-resolution image to avoid blurriness, and consider how the style and colors will fit your phone’s overall look. Setting your new wallpaper is a breeze. With a captivating cosmic scene on your lock screen, your iPhone 14 Plus becomes a constant reminder of the universe’s beauty.

    Check This Out: How to Use Stop Watch on Google Pixel Watch

    How to Use Astronomy Wallpaper on iPhone 14 Plus

    Setting the Astronomy wallpaper on your iPhone 14 Plus is a straightforward process, and below are the steps to take.

    • First, wake your iPhone to access your lock screen.
    • Next, Long-press on any blank area of the lock screen.
    • Then swipe left to add a new wallpaper, which is represented with a plus sign at the middle.
    • After that, look for the option labeled “Astronomy”, by swiping through the different wallpaper categories.
    • Then you’ll see various Astronomy wallpapers featuring the Earth, the Moon, and the Solar System. Tap on the one that you prefer. Also, you might be able to customize the wallpaper options. You might be asked to allow access to your location.
    • Once you’ve chosen your wallpaper and any desired customizations, tap on “Add” at the top right corner. You’ll then be prompted to choose whether you want to set the wallpaper for your Lock Screen, Home Screen, or both.

    Benefits of Using Astronomy Wallpaper on iPhone 14 Plus

    There are several advantages to using Astronomy wallpaper on your iPhone 14 Plus.

    • Aesthetic Appeal: Transform your lock screen into a visually captivating display of celestial bodies, adding a touch of wonder and inspiration to your everyday interactions with your phone.
    • Personalized Touch: With various styles and customization options, you can personalize the Astronomy wallpaper to reflect your preferences.
    • Dynamic Updates: The dynamic updates add a unique element, allowing you to see the Moon’s phase change or the planets’ positions shift over time, offering a glimpse into the ever-evolving cosmos.
    • Conversation Starter: This unique wallpaper can spark conversations, allowing you to share your interest in astronomy with others.
    • Appreciation for Nature: The Astronomy wallpaper can inspire a sense of appreciation for the beauty and vastness of the universe.

    Conclusion

    The Astronomy wallpaper on iPhone 14 Plus is more than just a decorative element; it’s a window to the cosmos. By transforming your lock screen into a celestial display, you can personalize your device, spark conversations, and even gain a subtle educational edge.  Whether you’re a space enthusiast or simply appreciate a touch of wonder, the Astronomy wallpaper offers a unique and dynamic way to enhance your iPhone 14 Plus experience.  So, why not reach for the stars and set a celestial scene on your lock screen today?

    Check This Out: How to Enable Battery Saver on Google Pixel Watch

    Frequently Asked Questions (FAQs)

    Can I use a custom space image as my Astronomy wallpaper?

    Unfortunately, the Astronomy wallpaper utilizes pre-set celestial views provided by Apple.  There is currently no way to set a custom space image as your Astronomy wallpaper.  However, you can explore the vast library of space-themed wallpapers available online and set them as static wallpapers on your iPhone.

    Does using the Astronomy wallpaper drain my iPhone battery life?

    The impact on battery life is minimal. While the Astronomy wallpaper features dynamic updates, these updates are optimized for efficiency.  However, if you’re concerned about battery life, you can monitor your usage and consider switching to a static wallpaper if needed.

    Can I see the current date and time on my lock screen with the Astronomy wallpaper?

    Yes, you can!  Even with the Astronomy wallpaper set, your iPhone will still display the current date and time on your lock screen, usually positioned subtly near the bottom of the display.

    For more insights on this article, check out these video tips across our social platforms:

  • How to Use Stop Watch on Google Pixel Watch

    How to Use Stop Watch on Google Pixel Watch

    The Google Pixel Watch is not just a stylish accessory, but a powerful tool for optimizing your day-to-day life. Whether you’re a fitness enthusiast meticulously tracking your workout intervals, a culinary mastermind perfecting your recipe, or simply someone who values punctuality, the Pixel Watch has something to offer.  Often overlooked, but equally valuable, is the built-in stopwatch, a feature that transcends the boundaries of the gym and seamlessly integrates into various aspects of your life.

    How to Use Stop Watch on Google Pixel Watch
    How to Use Stop Watch on Google Pixel Watch

    it offers instant access to elapsed time, allowing you to stay focused on your workout and achieve your goals. The Pixel Watch’s stopwatch can be your partner in the kitchen, ensuring your culinary creations achieve perfect timing.

    This guide will walk you through the world of the Pixel Watch’s stopwatch, exploring its functionalities, highlighting its benefits, and explaining why it might be the perfect timing tool for various situations.  With the Pixel Watch on your wrist, mastering time becomes effortless, allowing you to conquer your kitchen, crush your workouts, and achieve peak performance in all aspects of your life.

    Why Use the Stopwatch on Google Pixel Watch

    The stopwatch on your Google Pixel Watch is a game-changer for tracking time on the go. With a tap or swipe on your wrist, you can access and control the stopwatch, leaving your phone in your pocket or bag. This is perfect for workouts, sports activities, or even keeping track of cooking times. No more blurry phone screens or awkward angles, the Pixel Watch keeps the stopwatch display clear and readily visible on your wrist. Plus, you can multitask seamlessly, and control the stopwatch while using your phone for other things.

    The Google Pixel Watch can also, record lap times during your workout, giving you valuable data to analyze your performance. Even cooler, some models allow background stopwatch tracking, so the timer keeps running uninterrupted even if you switch to another app on your watch.

    The Pixel Watch stopwatch also promotes focus and reduces distractions. With a dedicated timer on your wrist, you can stay engaged in your activity without checking your phone for the time or getting sidetracked by notifications. Plus, it encourages you to put your phone down, minimizing screen time and phone dependence, especially during activities where your phone might not be ideal.

    How to Use Stop Watch on Google Pixel Watch

    Using the stopwatch on your Pixel Watch is a simple step to follow. Here’s how to do it:

    • First, wake your watch up, then press the crown button which is located by the side of your Pixel Watch.
    • Next, you will see the list of your apps list, then scroll down and look for an option labeled “Stop watch” and click on it. It might resemble a stopwatch symbol or a digital display showing 00:00:00.
    • Tap on the stopwatch icon to launch the app. You’ll see a large “Start” button on the screen. Tap it to begin timing.


    Benefits of Using the Stopwatch on Google Pixel Watch

    The Pixel Watch’s stopwatch offers several advantages:

    • Convenience on Your Wrist: Having a stopwatch readily available on your wrist eliminates the need to fumble for your phone or rely on inaccurate analog timers.
    • Precise Lap Timing: The lap functionality allows you to track individual segments within your activity, providing valuable insights into your performance or progress.
    • Always On Display Compatibility: With the “Always On Display” feature enabled, you can keep an eye on the elapsed time even when the watch face is dimmed, offering a quick and convenient way to monitor your timer.
    • Seamless Integration: The stopwatch seamlessly integrates with your Pixel Watch’s health and fitness features. You can use it alongside other apps like heart rate monitoring to create a holistic view of your workout performance.

    Check This Out: How to Adjust Wrist Orientation on Google Pixel Watch

    Conclusion

    The Google Pixel Watch’s stopwatch is a simple yet valuable tool. By understanding how to use it and leveraging its benefits, you can elevate your workouts, enhance your cooking precision, or simply track any activity that requires precise timing. Remember, the Pixel Watch empowers you to stay connected, informed, and active, and the built-in stopwatch is another tool to help you master your moment

    Frequently Asked Questions (FAQs)

    Does the Pixel Watch stopwatch offer lap functionality?

    Absolutely! The Pixel Watch’s stopwatch goes beyond simple timing.  During activities like interval training or competition, you can tap the lap button to capture individual segment times.  This allows you to track your performance across different parts of your workout and gain valuable insights into your progress.

    Can I see the stopwatch timer even when the Pixel Watch display is off?

    Yes, but with a caveat. If you have the “Always on Display” feature enabled (an optional setting), you can see the elapsed time displayed on your watch face even when the display is dimmed.

    Is there a dedicated stopwatch tile for the Pixel Watch face?

    Currently, the Pixel Watch doesn’t offer a dedicated stopwatch tile that you can directly access from the watch face. However, the stopwatch app is readily accessible through the app list on your watch.

    Can I use the Pixel stopwatch alongside other fitness features?

    Absolutely!  The stopwatch seamlessly integrates with the Pixel Watch’s health and fitness features. You can use it alongside apps like heart rate monitoring to create a holistic view of your workout performance.

    For more insights on this article, check out these video tips across our social platforms:

  • How to Access Messages on Google Pixel Watch

    How to Access Messages on Google Pixel Watch

    The Google Pixel Watch isn’t just a stylish accessory, but a powerful extension of your smartphone, keeping you connected, informed, and on top of your busy life.  One of the most convenient features is accessing and managing your text messages directly from your wrist. No more scrambling for your phone, staying connected with friends, family, and colleagues is just a tap away.

    How to Access Messages on Google Pixel Watch
    How to Access Messages on Google Pixel Watch

    This guide will delve into accessing messages on your Pixel Watch, outlining the steps involved, exploring the benefits, and explaining why it might be the perfect solution for quick and convenient communication.

    Why Access Messages on Google Pixel Watch?

    While traditional methods of accessing messages through your phone remain available, the Pixel Watch offers several unique advantages.

    • Instant Access: Checking messages on your wrist is quicker and simpler than accessing your phone.
    • Discreet Communication: The Pixel Watch is a more subtle way to manage messages, particularly when discretion is key.
    • Reduced Phone Dependence: By managing messages on your watch, you can reduce your reliance on your phone, minimizing distractions and allowing you to be more present in the moment

    Check This Out: How to Access Keyboard Settings on iPhone 14 Plus

    How to Access Messages on Google Pixel Watch

    Accessing messages on your Pixel Watch is a straightforward process, and below are the steps to take to successfully access your messages.

    • First, Locate the small power button on the side of your Pixel Watch and press it once to activate the display.
    • Next, swipe up or down on the watch face to access the app list. It displays all the available apps installed on your watch.
    • Then, Look for the “Messages” icon within the app list. It might resemble an SMS envelope symbol or the familiar messaging app icon from your phone.
    • After that, click on the “Messages” icon to launch the app. You will then see the list of your recent message threads displayed.
    • Tap on a specific thread to view the conversation history. Here you can see the sender’s name, the message content, and any previous messages exchanged within the thread.

    Benefits of Accessing Messages on Google Pixel Watch

    There are several advantages to accessing messages on your Pixel Watch.

    • Convenience at Your Wrist: No more fumbling for your phone! The ability to view and respond to messages directly from your watch offers unparalleled convenience, especially when you’re on the go or multitasking.
    • Staying Connected: Stay on top of your communication with friends, family, and colleagues without interrupting your activities. A glance at your wrist lets you know if you have any important messages that require immediate attention.
    • Discreet Communication: In situations where pulling out your phone might be inconvenient, the Pixel Watch allows for discreet communication. You can quickly check and respond to messages without accessing your phone.
    • Quick Replies (Optional): If your Pixel Watch supports quick replies, you can send short pre-written responses or use voice dictation for faster communication. This is ideal for situations when a lengthy response isn’t necessary.

    Conclusion

    The Google Pixel Watch empowers you to stay connected and manage your communication seamlessly from your wrist.  By understanding how to access messages and leveraging the benefits they offer, you can enhance your productivity, improve communication flow, and stay connected throughout your busy day.

    Remember, the Pixel Watch is an extension of your smartphone, and with features like message access, it allows you to stay informed and connected while maintaining a healthy balance with technology.

    Frequently Asked Questions (FAQ)

    Can I compose new messages directly on my Google Pixel Watch?

    Currently, the Pixel Watch doesn’t support composing new messages. However, you can still view, read, and respond to existing message threads using quick replies or voice dictation (depending on your settings).

    What happens if my phone’s battery dies while I’m wearing my Pixel Watch?

    Unfortunately, if your phone’s battery dies, you won’t be able to receive new messages on your Pixel Watch. However, you can still view and respond to any messages already synced to your watch before your phone dies.

    Is there a way to delete message threads from my Pixel Watch?

    Currently, the Pixel Watch doesn’t offer a direct way to delete message threads. However, deleting a thread on your phone will automatically sync and remove it from your watch as well.

    For more insights on this article, check out these video tips across our social platforms:

  • How to Enable Battery Saver on Google Pixel Watch

    How to Enable Battery Saver on Google Pixel Watch

    The Google Pixel Watch is a lifeline to information, connection, and an active lifestyle. The Pixel Watch has a hidden champion in its arsenal, Battery Saver.  This ingenious feature is more than just a dimmer switch, it’s a strategic tool for extending your watch’s battery life and ensuring it stays by your side throughout your adventures.

    How to Enable Battery Saver on Google Pixel Watch
    How to Enable Battery Saver on Google Pixel Watch

    Whether you’re a fitness enthusiast pushing your limits outdoors, busy professional juggling meetings, or simply someone who values staying connected, Battery Saver can become your secret weapon for conquering low battery anxiety.

    This guide will delve into the world of Battery Saver on your Pixel Watch. We’ll explore its functionalities, highlight the benefits it offers, and explain why it might be the perfect solution for maximizing your watch’s battery life in various situations

    Why Enable Battery Saver on Google Pixel Watch?

    With the Google Pixel Watch’s reliable battery, there are times when Battery Saver can be a lifesaver.  Planning a long day trip without easy access to a charger, enable Battery Saver beforehand to extend your watch’s usability and stay connected throughout the day.

    Running low on battery, battery Saver can significantly stretch your remaining power, ensuring your watch keeps functioning for essential features like timekeeping and notifications until you can recharge it.

    Check This Out: How to Answer Phone Calls on Google Pixel Watch

    How to Enable Battery Saver on Google Pixel Watch

    Enabling Battery Saver on your Pixel Watch is a quick and easy process, and below are the steps to take to successfully enable Battery Saver on your Google Pixel Watch.

    • First, wake your watch and swipe down from the top of your watch face to access the Quick Settings menu.
    • Then, Locate the Battery Saver Icon within the Quick Settings menu. It might resemble a battery symbol with a minus sign inside, and click on it
    • After that, simply tap on the battery icon to activate Battery Saver mode. You’ll see a confirmation message on your watch screen to successfully enable Battery Saver.

    Conclusion

    By understanding how to enable Battery Saver and leveraging its benefits, you can optimize your Pixel Watch’s performance. Remember, Battery Saver is a valuable tool that empowers you to manage your watch’s battery life effectively, ensuring you stay connected and informed throughout your day.

    Frequently Asked Questions (FAQs)

    Does enabling Battery Saver on my Pixel Watch affect how I use it?

    Battery Saver might slightly impact your user experience. Background app refresh might be reduced, and the “Always on Display” feature (optional setting) might be disabled. However, essential functionalities like receiving notifications, and tracking basic health metrics remain accessible.

    Can I schedule Battery Saver to turn on automatically on my Pixel Watch?

    Unfortunately, the Pixel Watch doesn’t offer the option to schedule automatic Battery Saver activation.  However, you can easily enable and disable it manually through the Quick Settings menu or the Settings app on your watch.

    What happens if I enable Battery Saver while my Pixel Watch is charging?

    There’s no harm in enabling Battery Saver even while your Pixel Watch is charging. Battery Saver functions independently of the charging process. Once the watch is fully charged, Battery Saver will remain active until you manually deactivate it.

    Will using Battery Saver on my Pixel Watch damage the battery?

    No, using Battery Saver will not damage your Pixel Watch’s battery.  In fact, it can help to prolong the overall lifespan of the battery by reducing strain during periods of heavy use. Battery Saver is a safe and recommended tool for optimizing your watch’s battery performance.

    For more insights on this article, check out these video tips across our social platforms

    Check This Out: Huawei Watch Fit 3 Review: The Stylish Squareness of Stellar Battery Life